general safety rules for power tools - Door Hardware & Hinges
general safety rules for power tools - Door Hardware & Hinges
general safety rules for power tools - Door Hardware & Hinges

Create successful ePaper yourself
Turn your PDF publications into a flip-book with our unique Google optimized e-Paper software.
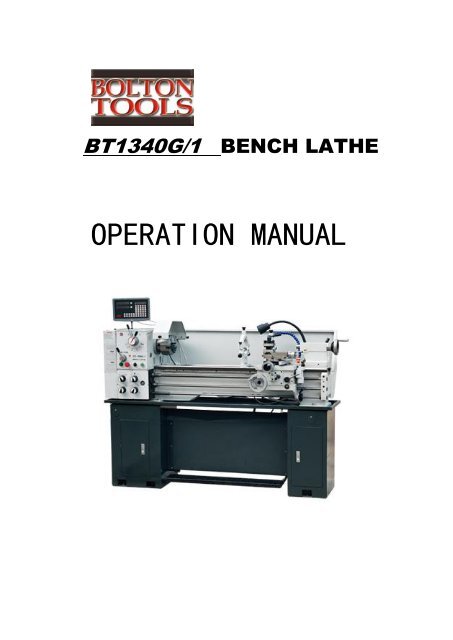
BT1340G/1 BENCH LATHE<br />
OPERATION MANUAL
1. GENERAL SAFETY RULES FOR POWER TOOLS<br />
DO NOT ATTEMPT TO OPERATE UNTIL YOU HAVE READ THOROUGHLY AND UNDERSTAND<br />
COMPLETELY ALL INSTRUCTIONS, RULES, ETC. CONTAINED IN THIS MANUAL FAILURE<br />
TO COMPLY CAN RESULT IN ACCIDENTS INVOLVING FIRE, ELECTRIC SHOCK OR<br />
SERIOUS PERSONAL INJURY. MAINTAIN OWNERS MANUAL AND REVIEW FREQUENTLY<br />
FOR CONTINUING SAFE OPERATION, AND INSTRUCTING POSSIBLE THIRD-PARTY<br />
USER.<br />
READ ALL INSTRUCTIONS<br />
1.1 KNOW YOUR POWER TOOL<br />
For your own <strong>safety</strong>, read the owner’s manual carefully. Learn its application and<br />
limitations as well as the specific potential hazards peculiar to this tool.<br />
1.2 GUARD AGAINST ELECTRICAL SHOCK BY PREVENTING BODY<br />
CONTACT WITH GROUNDED SURFACES.<br />
For example: Pipes, radiators, ranges, refrigerator enclosures.<br />
KEEP GUARDS IN PLACE AND IN WORKING ORDER .<br />
REMOVE ADJUSTING KEYS AND WRENCHES<br />
Form habit of checking to see that keys and adjusting wrenches are removed<br />
from tool be<strong>for</strong>e turning on tool.<br />
KEEP WORK AREA CLEAN.<br />
Cluttered areas and benches invite accidents.<br />
DON’T USE IN DANGEROUS ENVIRONMENT.<br />
Don’t use <strong>power</strong> <strong>tools</strong> in damp or wet locations, or expose them to rain. Keep<br />
work area well illuminated.<br />
KEEP CHILDREN AWAY.<br />
All visitors should be kept a safe distance from work area.<br />
MAKE WORKSHOP KID PROOF.<br />
With padlocks, master switch, or by removing starter keys.<br />
DON’T FORCE TOOL.<br />
It will do the job better and be safer at the rate <strong>for</strong> which it was designed.<br />
USE RIGHT TOOL<br />
Don’t <strong>for</strong>ce tool or attachment to do a job <strong>for</strong> which it was not designed.<br />
1
1.2.9 WEAR PROPER APPAREL<br />
No loose clothing. Gloves, neckties, rings bracelets, or jewelry to get caught in<br />
moving parts. Nonslip footwear is recommended . Wear protective hair covering to<br />
contain ling hair.<br />
1.2.10 ALWAYS USE SAFETY GLASSES<br />
Also use face or dust mask if cutting operation is dusty. Everyday eyeglasses only<br />
have impact – resistant lenses. They are not <strong>safety</strong> glasses.<br />
1.2.11 SECURE WORK<br />
Use clamps or a vise to hold work when practical. It’s safer than using your hand<br />
and frees both hands to operate tool.<br />
1.2.12 DON’T OVERREACH<br />
Keep your proper footing and balance at all times.<br />
1.2.13 MAINTAIN TOOLS IN TOP CONDITION<br />
Keep <strong>tools</strong> sharp and clean <strong>for</strong> best and safest per<strong>for</strong>mance. Follow instructions<br />
<strong>for</strong> lubricating and changing accessories.<br />
1.2.14 DISCONNECT TOOLS FROM POWER SOURCE<br />
Be<strong>for</strong>e servicing and when changing accessories such as blades , bits cutters or<br />
when mounting and re-mounting motor .<br />
1.2.15 AVOID ACCIDENTAL STARTING<br />
Make sure switch is in “OFF” position be<strong>for</strong>e plugging in cord .<br />
1.2.16 USE RECOMMENDED ACCESSORIES<br />
Consult the owner’s manual <strong>for</strong> recommended accessories. Use of improper<br />
accessories may be hazardous.<br />
1.2.17 NEVER STAND ON TOOL<br />
Serious injury could occur if the tool is tipped or if the cutting tool is<br />
unintentionally contacted.<br />
1.2.18 CHECK DAMAGED PARTS<br />
Be<strong>for</strong>e further use of the tool , a guard or other part that is damaged should be<br />
carefully checked to ensure that it will operate properly and per<strong>for</strong>m its intended<br />
function. check <strong>for</strong> alignment of moving parts , binding of moving parts , breakage of<br />
parts , mounting , and any other conditions that may affect its operation . A guard or<br />
other part that is damaged should be properly repaired or replaced.<br />
1.2.19 DIRECTION OF FEED<br />
2
Feed work into a blade or cutter against the direction of rotation of the blade or<br />
cutter only .<br />
1.2.20 NEVER LEAVE TOOL RUNNING UNATTENDED. TURN POWER OFF.<br />
Don’t Leave tool until it comes to a complete stop.<br />
The operation of any <strong>power</strong> tool can result in <strong>for</strong>eign objects being thrown into<br />
the eyes, which can result in severe eye damage . Always wear <strong>safety</strong> glasses or eye<br />
shields be<strong>for</strong>e using your Lathe . We recommend wide vision <strong>safety</strong> mask <strong>for</strong> use<br />
over spectacles , or standard <strong>safety</strong> glasses .<br />
2.SAFETY RULES FOR LATHES<br />
Safety is a combination of operator common sense and alertness at all times<br />
when Lathe is being used . Study these <strong>safety</strong> <strong>rules</strong> and <strong>general</strong> <strong>safety</strong> <strong>rules</strong> be<strong>for</strong>e<br />
operating and retain <strong>for</strong> future use .<br />
2.1 Wear eye protection .<br />
2.2 Never attempt any operation or adjustment if proceedure is not understood .<br />
2.3 Keep fingers away from revolving parts and cutting <strong>tools</strong> while in operation .<br />
2.4 Never <strong>for</strong>ce cutting action .<br />
2.5 Never per<strong>for</strong>m an abnormal or little used operation without study and use of<br />
adequate blocks , jigs stops , fixtures ect .<br />
2.6 Use of shop manual such as “ Machinery’s Handbook ” or similar is<br />
recommended <strong>for</strong> cutting speeds feeds and operation detail .<br />
2.7 Do not remove drive cover while machine is in operation . Make sure it is always<br />
closed .<br />
2.8 Always romove chuck key , even when machine is not in operation .<br />
2.9 Do not attempt to adjust or remove <strong>tools</strong> when in operation .<br />
2.10 Always keep cutters sharp .<br />
2.12 Never use in an explosive atmosphere or where a spark could ignite a fire.<br />
2.13 Always use identical replacement parts when servicing.<br />
3
DO ALLOW FAMILIARILY (GAINED FROM FREQUENT USE OF YOUR LATHE) TO BECOME<br />
COMMONPLACE. A CARELESS FRACTION OF A SECOND CAN ALLOW FOR SEVERE INJURY.<br />
3.MACHINE SPECIFICATION<br />
Bench lathes are especially suitable <strong>for</strong> machining workshops, tool rooms and<br />
repairing workshops to machine shafts spindles, sleeves and disc workpieces of<br />
middle or small types. They can also be used to cut imperial, diameter and module<br />
threads. And with compact construction and reasonable composition, they can cut<br />
very well. They are easy and reliable to operate, convenient to repair, high in<br />
efficiency, and low noise. Hardened with supersonic frequency heat-treatment. The<br />
bed sliding and the gears are wear-resisting. The apron have both the left hand and<br />
right hand type . Their construction is the same . It is optional.<br />
Overall measurement:<br />
4
TECHNICAL DATA<br />
Capacity Dimension<br />
Swing Over Bed ------------------------------------------------- ----12.99"(330mm)<br />
Over Cross Slide ------------------------------ ------ --- ------7.68"(195mm)<br />
Through Gap -------------------------------------------------18.74" (476mm)<br />
Distance Between Centers------------------------------------------39-1/3"(1000mm )<br />
Bed Width --------------------------------------------------------7-3/8"(187mm )<br />
Length ----------------------------------------------------65-1/3"( 1658mm )<br />
Height ---------------------------------------------------11-13/32"( 290mm )<br />
Main Motor ------------------------------------------------------- --------------------2HP<br />
Headstock<br />
Spindle Bore ---------------------------------------------------------------1-1/4"(38mm)<br />
Nose --------------------------------------------------- D 1-4" ASA std.( ISO )<br />
Taper in nose-------------------------------------------------------------M.T..5<br />
Number Of Spindle Speeds------------------------------------------------------------8<br />
Range Of Spindle Speeds -----------------------------------------------70-2000 r.p.m<br />
Carriage & toolpost<br />
Cross slide Width ------------------------------------------------------4-5/8"(118mm)<br />
Travel -----------------------------------------------------6-5/16"(160mm)<br />
Toolpost Width ---------------------------------------------------------------3"(76mm)<br />
Travel ------------------------------------------------------2-11/16"(68mm)<br />
Leadscrew Diameter ----------------------------------------------------7/8" ( 22mm )<br />
Thread -------------------------------------------------8T.P.I. or 3mm pitch<br />
Diameter Of Feed rod ----------------------------------------------------3/4"(19mm)<br />
Max. section Of Cutting Tool -----------------------5/8"5/8"(16mm 16mm)<br />
Threads & Feeds<br />
Threads<br />
Imperial pitches --------------------------------------- 40 Nos. 4-112 T.P.I.<br />
Metric pitches ------------------------------------------23Nos. 0.25-11mm<br />
Longitudinal Feeds Imperial ------------------------- 0.002-0.0548"/rev<br />
Metric -------------------------- 0.091-2.553mm/rev<br />
Cross feeds Imperial --------------------------------- 0.00055 -0.015"/rev<br />
5
Metric --------------------------------- 0.025-0.69 mm/rev<br />
Tailstock Quill Diameter ---------------------------------------1-1/4" (32mm)<br />
Travel -------------------------------------------------3-3/4"(95mm)<br />
Taper -----------------------------------------------------------M.T.3<br />
Weights (NW/GW) -------------------------------------------------------869lb/1089lb<br />
(With machine stand) -------------------------------------------------------------1309lb<br />
Packing size (LWH)----------------------------- -----------75.59"*29.92"*29.92"<br />
4.UNLOADING<br />
Unpack the wooden case first and use the bed clamping plates and eyebolts to<br />
sling the lathe. Position the saddle and tailstock along with the bed to keep the<br />
balance. Make sure not to hit the leadscrew, spindle or other long rods and handwheel,<br />
when the machine is unloaded.<br />
4.1Cleaning<br />
Be<strong>for</strong>e operation and controls. Remove the anticorrosion coating from all<br />
uncovered machine parts, Use white spirit or kerosene (paraffin). Do not use lacquer<br />
thinner or other caustic solvents. Oil all bright machined surfaces immediately with<br />
lubricating oil after cleaning. Use heavy oil or grease on the change gears.<br />
4.2 Setting up the machine<br />
Locate the machine on a solid foundation, (A concrete floor is the best <strong>for</strong> the<br />
machine), allowing sufficient area <strong>for</strong> easy work and maintenance. The machine may<br />
be used when it is free standing, but <strong>for</strong> maximum per<strong>for</strong>mance it should be bolted<br />
down with four M12 foundation bolts. Use an engineers precision level on the<br />
bedways to make further adjustment <strong>for</strong> level conditions.<br />
4.3 Electrical supply<br />
Power should be supplied through a separate isolator, the input wires are<br />
connected to main terminals at the back of the headstock. Check that the operating<br />
voltage and frequency given on the type plate corresponds to the local mains voltage<br />
and frequency. Connect fuse between the <strong>power</strong> source and switch, earth with<br />
machine.<br />
Main motor rotation must be clockwise, viewed from the pulley end (spindle must<br />
be anti – clock wise by looking from tailstock end ) . In case that the motor is running<br />
in a wrong direction, interchange any two of the three phase lines.<br />
6
Electrical wiring diagram<br />
3 phases<br />
Single phase<br />
7
SIGN NAME TYPE<br />
M Motor 3 phase Y90L-4<br />
Single phase YC100L-4<br />
KM AC magnetic contactor LC1-D129 (3 phase0<br />
LC1-D259(single phase)<br />
KA1 Relay CA2-DN22<br />
TC Trans<strong>for</strong>mer JBK3-63<br />
SA1 Power switch HZ5B-10/2D009<br />
SB1 Emergency stop button LA25-01ZS<br />
SB2 Job button LA25-10<br />
HL Power indicator light AD11-30/20<br />
5.LUBRICATION SYSTEM<br />
(A) Head stock<br />
Ensure that the head stock is filled to the level of the relevant oil sight glass with<br />
Tellus 32 of Shell oil.<br />
For exchanging the oil in headstock , remove all oil by taking off the drain plug ,<br />
which is fitted at the bottom left hand end of the head stock , accessible after removal<br />
of the end cover and the change gears with swing frame . Open the headstock cover<br />
to fill the oil, check oil level weekly and change the oil 3 months after first use , then<br />
change it once a year .<br />
(B)Quick change gearbox<br />
The bearings and gears should be oiled daily from the top . Remove the cover to<br />
expose the filling nipples.<br />
(C)Apron<br />
Ensure that the apron is filled to the correct level of the oil sight glass with<br />
Tellus 32 of shell oil .<br />
Check the oil level weekly and first oil change after 3 months use , farther oil<br />
change once a year .<br />
For exchanging the oil in apron , drain away all oil by taking off the drain plug ,<br />
which is fitted on the bottom of the apron .<br />
8
Fill the oil by taking off the inlet cap, which is fitted at the top on the right hand<br />
side of the apron .<br />
(D) Change gears<br />
Lubricate the change gears with thick machine oil or grease once a month .<br />
(E) Other portions<br />
There are oil inlets on input shaft bracket of gearboxs , handwheel bracket of<br />
apron , feed rod bracket of carriage , saddle , cross slide , toolpost, thread dial<br />
indicator , tailstock and the bracket which holds the leadscrew & feed rod . handing<br />
oil is required from time to time . Lubricate the apron worm & worm gear, half nut &<br />
leadscrew twice a month . Apply a light oil film to the bed ways and all other blank<br />
parts such as tailstock quill, feed rod etc . once a day .<br />
Lubrication diagram<br />
9
Lubrication table<br />
No. Lubrication Number of<br />
parts lubricating points<br />
Oil Date of<br />
filling oil<br />
Date of<br />
changing oil<br />
1 Input shaft of 1 32# Once a day<br />
gearbox<br />
2 Gearbox 1 32# First change<br />
3 Headstock 1 32#<br />
after 3 months,<br />
4 Apron 1 32#<br />
then,once a year<br />
5 Carriage 5 32# Once a day<br />
6 Tool post 3 32# Once a day<br />
7 Thread dial 1 32# Once a day<br />
indicator<br />
8 Leadscrew 2 32# Once a day<br />
Feed rod<br />
9 Tailstock 3 32# Once a day<br />
10 Support seat 2 32# Once a day<br />
Operation symbols <strong>for</strong> operation<br />
Electrical<br />
(Danger)<br />
Diametral pitch<br />
thread<br />
Coolant<br />
Module pitch<br />
thread<br />
Imperial thread<br />
Half nut opened<br />
Metric thread<br />
Half nut closed<br />
6.WORKING WITH MACHINE<br />
Right-hand thread<br />
and longitudinal<br />
feed toward the<br />
Headstock side<br />
Cross feed engaged<br />
(upward)<br />
All feeds disengaged<br />
(central)<br />
Longitudinal feed<br />
Engaged (downward)<br />
Left-hand thread<br />
and longitudinal<br />
feed toward the<br />
tailstock side<br />
Feeding (left<br />
figure)<br />
Threading (right<br />
figure)<br />
10
Operation diagram<br />
1.Forward/reverse switch 2.Handle 3.Feed direction selector<br />
4.Four steps speed selector<br />
5.Low/high speed selector 6.Knob component<br />
7.Steady rest 8.Longitudinal traverse hand wheel 9.cross traverse hand wheel<br />
10.Follow rest 11.Toolpost handle 12.Toolpost traverse handle<br />
13.Tailstock quill clamping lever 14.Tailstock quill traverse hand wheel<br />
15.Tailstock set-over screw 16.Thread dial indicator 17.Controlling lever<br />
18.Machine stand 19.Thread cutting engagement lever 20.Feed axis selector<br />
21.Controlling rod 22.Feed rod 23.Lead screw<br />
11
6.1SPINDLE SPEED CONTROL (refer to operation diagram)<br />
A. Identification be<strong>for</strong>e operation<br />
(1) Ensure that lubrication has been carried out in accordance with the lubrication<br />
charts.<br />
(2) When rotating the spindle, it is mechanized to the gear box and apron. Check<br />
that the <strong>for</strong>ward / reverse switch (No. 1) or the knob component(No.6)( when<br />
it is mounted by option ) is in the Stop position ; the feed axis selector (No.20)<br />
and the thread cutting engagement lever (No.19) are in diseneaged position .<br />
Under the circumstances, both the longitudinal traverse hand wheel (No.8) and<br />
the cross traverse hand wheel (No.9) can be easily operated by hand .<br />
B. Rotation of spindle<br />
Rotation of spindle is selected by the <strong>for</strong>ward / reverse switch(No.1) .<br />
C. Speeds of spindle change<br />
The speeds of spindle are changed by means of HIGH / LOW speed selector<br />
(No.5) and four steps speed selector (No.4) . The spindle’s speed chart shows 4 steps<br />
speeds in both high and low speed position. We can choose a proper revolution by<br />
operating the speed selector according to the spindle’s speed chart . When the speed<br />
selector (No.5) is in the high position , we can get four speeds referring to the high<br />
speed portion of the graph .<br />
Transference of the spindle speeds should be made after the spindle rotation is<br />
completely stopped.<br />
(Engagement of the drive gears may be assisted by manually turning the chuck)<br />
D. Running in<br />
Alternatively a running – in procedure should be adopted as follow ;<br />
Make a low feed rate selection and run the machine light<br />
For 3 hours at 460 r .p .m<br />
Then <strong>for</strong> 2 hours at 755 r .p .m<br />
Then <strong>for</strong> 1 hour at 1250 r .p .m<br />
12
6.2 SPINDLE NOSE (CAM LOCK D1-4”)<br />
MOUNTING OF CHUCKS, FACEPLATES AND OTHER SPINDLE MOUNTED<br />
ATTACHMENTS<br />
Ensure that the location faces on both nose and attachment are scrupulously cleaned.<br />
Check that all the cams are in the release position (fig . 1)<br />
Mount the attachment on to the spindle nose and lock each cam by turning it<br />
clockwise using the key provided.<br />
A reference line R1 (fig .1) should be scribed on each chuck or faceplate to coincide<br />
with the reference line R on the spindle nose. assists subsequent re-mounting .<br />
NOTE : For correct locking conditions each cam must tighten with its index line<br />
between the two vee marks on the nose (Fig .2)<br />
DO NOT INTER CHANGE CHUCKS OR OTHEY SPINDLE MOUNTING ITDMS<br />
BETWEEN LATHES WITHOUT GHECKING EACH CAM FOR<br />
CORRECT LOCKING TO ADJUST CAM LOCK STUDS<br />
Remove Lockscrew (B)<br />
Turn Stud (A) one full turn in or out as required<br />
Refit and tighten leadscrew (B) (fig . 3)<br />
Note : A datum ring (C ) is marked on each stud as a guide to the original or initial<br />
setting .<br />
6.3 FEED AND THREAD SELECTION (refer to operation diagram)<br />
All feeds and threads are given on the feed and thread tables, fitted on the front<br />
of the end cover, by setting the feed selector handle.<br />
(A) Hand feed operation<br />
The movement of carriage is made by the longitudinal feed hand wheel(No.8),<br />
cross slide by the cross feed hand wheel(No.9) and tool post by the tool post feed<br />
13
handle (No.12) The carriage is anchored by turning the carriage lock in clockwise<br />
direction.<br />
(B) Replacement of change gears.<br />
Open the end cover firstly, Then loose both the hexagon nut of the clamping bolt<br />
and the clamping screw of the swing frame to exchange the transmission shaft gear<br />
with another gear. And the change of driven gear is made by loosening the 120T and<br />
127T gear shaft clamping nut . it is necessary <strong>for</strong> suitable backlash to intermediate the<br />
gears in both cases .<br />
(C) Automatic feed operation and feed change.<br />
Firstly, operate the feed direction selector(No.3) at the headstock . Next, select a<br />
value of feed, set the positions of 4 handles according to the feed chart. then, the feed<br />
axis selector (No.20) is pushed out and operated upward , a longitudinal feed can be<br />
obtained . On the contrary, if the selector (No.20) is pushed in and operated<br />
downward, across feed will be obtained .<br />
Feed direction can be changed by feed direction selector (No.3) at the headstock .<br />
32 kinds of feed speeds each in longitudinal and cross feed are obtained by feed /<br />
thread selector (No.2). *<br />
*ATTENTION: To avoid rotation of<br />
the<br />
lead screw, the handle must point to the<br />
black dot when feeding.<br />
(D) Thread cutting operation<br />
Thread cutting is realized by operating 4<br />
handles(No.2) according to the thread chart, and operating the thread cutting<br />
engagement lever (No. 19) downward . It should be engaged with leadscrew in order<br />
to obtain the longitudinal travel of carriage, namely the thread cutting feed .<br />
Direction of thread cutting is controlled by feed direction selector (No.3) at the<br />
headstock . The thread pitch can be selected by the position of 4 handles(No.2).<br />
(1) Feed table<br />
a. Longitudinal and cross feed table in imperial lead screw .<br />
14
. Longitudinal and cross feed table in metric lead screw.<br />
(2) Thread table<br />
a. Thread table <strong>for</strong> imperial lead screw.<br />
15
. Thread table <strong>for</strong> metric lead screw.<br />
16
(E)Threading dial indicator<br />
Threading dial indicator (No.16) is installed on the right hand side of apron. The<br />
indicator is used <strong>for</strong> thread cutting to engage with lead screw . To cut threads on the<br />
chart, close the lead screw nut at the appointed line of the dial according to the<br />
indicator chart, Ensure the appropriate dial line coincide exactly with fixed point each<br />
pass .<br />
For minimum wear the thread dial indicator should be disengaged, swinging the<br />
17
gear of mesh with the lead screw tightly when out in use.<br />
a. IMPERIAL THREADS ON IMPERIAL LEADSCREW MACHINES OR<br />
METRIC THREADS ON METEIC LEADSCREW MACHINES<br />
For these threads it is recommended that the thread dial indicator be used this<br />
allows the half nut of lead screw to be engaged at the end of each thread cutting pass,<br />
provided that are reengaged in accordance with the indicator table mounted on the<br />
left hand side of the apron .<br />
b. IMPERIAL THREADS ON METRIC LEADSCREW MACHINES OR METRIC<br />
THREADS ON IMPERIAL LEADSCREW MACHINES AND DIAMETRAL<br />
PITCH, MODULE PITCH THREADS ON IMPERIAL OR METRIC<br />
LEADSCREW MACHINES<br />
For these threads the half nut is kept engaged throughout the cutting of any one<br />
thread. This involves reversing the whole drive by means of the spindle <strong>for</strong>ward<br />
/reverse switch (No. 3 ) at each end of the thread cutting pass while at the same time<br />
relieving or increasing the cut as required .<br />
7.LATHE ALIGNMENT<br />
When the lathe is installed and ready <strong>for</strong> use , it is recommened to check the<br />
machine alignment be<strong>for</strong>e starting work .<br />
Aligment and leveling should be checked regularly to ensure continued<br />
accuracy.<br />
(A) Headstock<br />
If headstock appears that the alignment is not correct any more , proceed as<br />
fallows :<br />
Take a steel bar with a diameter of appr.50mm and a length of appr.200mm.<br />
Span it in the chuck without using the center.<br />
Then cut off a chip over a length of 150mm and measure the difference in A and<br />
B . To correct a possible difference, loosen the screws (E,F) clamping the heastock on<br />
the bed . Adjust the headstock with set screws (C,D) . Tighten all screws and repeat<br />
the above procedure until all measurings tally. The lathe will be cutting correctly.<br />
18
C D E F<br />
(B) Saddle strip<br />
Wear on the rear saddle gib strip (A)<br />
may be accommodated by adjustment<br />
of the socket head set screws .<br />
A<br />
The procedure <strong>for</strong> adjustment is<br />
to first release the hexagon nuts (B) B<br />
and turn the socket head set screws(C) slightly<br />
in clockwise and then reclamp the hexagon nuts, C<br />
Care should be taken to avoid over adjustment 45 0 turn at the socket head set<br />
screw approximately 0.125mm (0.05") taken up in the gib.<br />
(C) Cross slide<br />
A<br />
Wear on the taper gib strip(B) may be adjusted B<br />
<strong>for</strong> by clockwise rotation of the slotted head screw(A)<br />
on the front of the cross slide . The procedure is<br />
to first slacken the similar screw at the rear end,<br />
retighten this after adjustment to clamp the gib in its new position.<br />
(D) Toolpost<br />
It is the same procedure as cross slide .<br />
(E) Cross slide nut<br />
Provision is made <strong>for</strong> the elimination<br />
of back lash in the cross slide nut .<br />
the procedure <strong>for</strong> adjustment being as follows .<br />
Take off the anti-dust plate which is mounted on the rear face of saddle groove ,<br />
turn the cross traverse handle by clockwise to move the cross feed nut until it reaches<br />
19
the end edge of the feed rod . Turn the socket head cap screw in a clockwise direction<br />
as require. Care should be taken to avoid over adjustment ; every 45 0 turn at the<br />
socket head cap screw represents approximately 0.125mm (0.05") taken up of back<br />
lash .<br />
(F) Cross slide and toolpost<br />
Toolpost is carried on a rotatable swivel table fitted as standard onto the cross<br />
slide, and the top of cross slide is graduated both - 45 0 ~ 0 and 0 ~ 45 0 <strong>for</strong> accurate<br />
indexing of swivel table.<br />
Handle dials are graduated in Imperial or Metric division to suit the operating<br />
feed screw and nut fitted.<br />
(G) Tailstock<br />
Tailstock can be set over <strong>for</strong> the production of shallow tapers or <strong>for</strong> realignment<br />
by means of the tailstock set – over screw which are mounted in each slide of the<br />
tailstock body, a similar but location screw is fitted in the rear face of the body .<br />
Set – over adjustment is made as follows :<br />
Unclamp the tailstock by operating<br />
the clamp lever downward .<br />
Slacken the rear location screw .<br />
Then alternatively slacken one set – over screw<br />
and tighten the other until the required setting is achieved .<br />
Tighten the rear location screw and the set – over screw which is slackened<br />
be<strong>for</strong>e, and reclamp the tailstock.<br />
The quill of tailstock is locked by operating the quill clamping lever.<br />
8.PREVENTIVE MAINTENANCE<br />
8.1 DAILY INSPECTION<br />
In principle the daily. Inspection of lathe is carried out on basis of each shift.<br />
The inspection work according to the following item 1.1<br />
1.1 Check be<strong>for</strong>e starting the motor.<br />
1) Clean-up of machine: dust, chips and other articles should be removed from<br />
sliding surface of machine to make the rotating or sliding parts per<strong>for</strong>ming<br />
easy and smoothly. All other static parts be often also cleaned to avoid the<br />
corrosion.<br />
2) Greasing and oiling : regular oiling should be done every day (see<br />
20
lubrication plan sheet) to keep the machine properly lubricated.<br />
3) Check all the running parts not too tight, or loose. Bearing of headstock,<br />
longitudinal and cross feed, tool holders etc would be exmined and adjusted<br />
by hand or proper fitness.<br />
4) Check the sensitivity & reliability of all manual control levers: To try the<br />
speed change rate function of headstock feeds and apron in gear box and<br />
inspect their starting, stopping and <strong>for</strong>ward & reverse action whether they<br />
are sensitive and reliable or not.<br />
5) Fixture and fig of headstock, tailstock and tool holder tight clamping<br />
between tailstock and bed surface, close running fit of spindle in tailstock,<br />
clamp bolts of tool holder, and figs on headstock.<br />
8.2 Check after starting the machine.<br />
1) To check electrical control system: Try to put “on” and “off” button and<br />
examine the sensitiveness of starting, stopping and pilot lamp strictly.<br />
2) The sensitivity and reliability of mechanical control device: control levers <strong>for</strong><br />
<strong>for</strong>ward and reverse main spindle, automatic feeds and threads change should<br />
be sensitive and reliable. Automatic control devices <strong>for</strong> longitudinal and cross<br />
feed, gear change, threads change, carriage, and spindle direction change<br />
should be accurate also.<br />
3) Limitation of noise and vibration: when starting max. speed of headstock<br />
spindle on no loading basis, check the noise and vibration whether they are<br />
over specified limit or not.<br />
4) Coolant system: check the quantity of coolant oil and start the oil pump <strong>for</strong><br />
inspecting its function and leakage.<br />
5) Lubricating system.<br />
Examine all lubricating system carefully and ensure all flowing line without<br />
obstacles.<br />
8.3 Caution during operation:<br />
1) Temperature of bearing.<br />
Tough the main bearing by hand and feel the temperature is normally or not.<br />
2) Temperature of motor:<br />
21
To feel the temperature of motor bearing at the case of full load.<br />
3) Noise and vibration:<br />
If you find the noise and vibration of the machine are abnormal or irregular. Stop<br />
the machine immediately <strong>for</strong> inspection and adjustment.<br />
4) Quality of products:<br />
If you discover the quality of products is out of limit, stop the machine at once<br />
<strong>for</strong> finding the causes of defects.<br />
5) Safety affairs:<br />
a. Must stop operation when you leave the machine.<br />
b. When changing main spindle speed or feeding speed stop running first.<br />
c. All <strong>tools</strong> and products are strictly not allowed to be left on sliding surface<br />
of bed.<br />
8.4 Check after operation<br />
1) Cleaning and collection of all <strong>tools</strong>:<br />
All <strong>tools</strong> should be kept clean first then put back to original position.<br />
2) Proper position of tailstock, carriage & tool holder:<br />
Tailstock, carriage & tool holder should be placed to proper position:<br />
3) Clean-up machine:<br />
All of the oily matters, chips etc, on the machine should be removed<br />
completely and put a thin lubricating oil on the sliding surface of machine<br />
to prevent the corrosion.<br />
8.4.1WEEKLY INSPECTION<br />
1) Lubricating system:<br />
Clean-up the whole lubricating system and replenish with fresh lubricating<br />
oil.<br />
2) Cooling system:<br />
Clean-up the whole cooling system and replenish with new cooling fluid.<br />
3) Transmission system:<br />
Check the damage of rubber V-belt and readjust the tensile strength of<br />
V-belt.<br />
8.4.2MONTHLY INSPECTION:<br />
1) Dismantle and clean all the dust, chips and <strong>for</strong>eign matter from moving<br />
parts.<br />
22
2) Electrical system: Carefully examine the connection of all electrical<br />
wires, terminals and switches, which occasionally have been damaged<br />
by chips or others.<br />
8.4.3SEMI-YEARLY INSPECTION:<br />
1) Change oil in gear box:<br />
Remove the used oil from gear box of headstock, feed and replenish with<br />
fresh oil.<br />
2) Check the wear and tear of all gears in gears and packing:<br />
Inspect the damage of all gears in various box. Spindle and bearings,<br />
and packing. Repair or replace it if necessary.<br />
3) Check the clearance fit of complicated feed mechanism:<br />
Check the clearance fit between feeding screw lever and nut and main<br />
screw spindle and nut whether they are right or not.<br />
4) The stability of machine body:<br />
Tighten up the foundation bolts of machine body to the ground and make<br />
the body stable.<br />
8.4.5YEARLY INSPECTION:<br />
1) Positioning and leveling:<br />
According to the inspection regulation, recheck the positioning and<br />
leveling after once year service.<br />
2) Inspection <strong>for</strong> accuracy:<br />
According to the regulation, inspection work <strong>for</strong> accuracy should be rechecked,<br />
if the accuracy is over specified limit, the adjustment or alignment will be done<br />
accordingly.<br />
3) Bearing inspection:<br />
Reexamine the insulating materials and clearance fit & lubrication of all<br />
bearings.<br />
4) Inspection <strong>for</strong> appearance:<br />
a. If paint is peeled off, repaint it with the same color.<br />
b. Check the exposed parts whether they have been damaged, corroded, or<br />
de<strong>for</strong>med, repair or replace them if necessary.<br />
23
9.TROUBLE SHOOTING<br />
TROUBLE PROBABLE CAUSES REMEDY<br />
Overheat<br />
headstock<br />
bearing<br />
of<br />
Oil leakage from<br />
gear box.<br />
Excess noise of<br />
vibration of<br />
machine<br />
1.Oil level in headstock is<br />
too low or too high.<br />
2.Quality and viscosity of oil<br />
is wrong.<br />
3.Oil is too dirty<br />
4.Oil hole in bearing<br />
obstructed by dirt.<br />
5.Bearing obstructed by dirt<br />
6.Badly worn bearing.<br />
7.Bearing in its not improper<br />
position.<br />
8.Bent or sprung main<br />
spindle.<br />
9.Too much end thrust.<br />
Check the oil level and<br />
replenish or discharge<br />
the oil to the proper<br />
level.<br />
Replace the oil with<br />
recommended one.<br />
Replace oil.<br />
Remove the dirt from<br />
the oil hole.<br />
Clean the bearing and<br />
renew it.<br />
Replace bearing.<br />
Dismantle and<br />
reassemble it.<br />
Replace main spindle.<br />
Adjust thrust nut.<br />
10.Plug of drain not tightly. Remove, recement<br />
threat; replace and<br />
tighten.<br />
11.Headstock cracking. Repaired special<br />
welding.<br />
12.Leakage from overflow<br />
headstock cover.<br />
13.Leakage from overflow<br />
spindle bearing house.<br />
14.Badly worn bearing.<br />
15.badly worn gear.<br />
16.Bent or sprung shaft.<br />
17.Lose of foundation bolts.<br />
Tighten cover screw or<br />
replace gasket.<br />
Replace oil ring.<br />
Replace bearing.<br />
Replace gear.<br />
Replace shaft.<br />
Tight foundation bolts.<br />
24
Chatter<br />
Bending when<br />
long workpiece<br />
cutting<br />
Accuracy of<br />
product fails.<br />
Uneasy to hold<br />
gear change<br />
lever.<br />
18.Clamp of workpiece in<br />
from loose status.<br />
19.Spindle bearing thrust too<br />
loose.<br />
20.Headstock is not tight<br />
with bedway.<br />
21.Excess clearance between<br />
carriage<br />
22.Excess clearance in cross<br />
or compound slide.<br />
23.Cutting angle of cutting<br />
tool is not correct.<br />
24.Edge of cutting tool has<br />
been worn-out.<br />
25.Weak of tool shank and<br />
too long <strong>for</strong> extension.<br />
26.Tool fixed to holder not<br />
tight enough.<br />
27.Unbalances of workpiece<br />
or chuck when high speed<br />
revolution.<br />
28.Front point of cutting tool<br />
not in correct position.<br />
29.Feed value too large.<br />
30.Workpiece too thin or too<br />
long.<br />
31.Accuracy fails in<br />
machining.<br />
32.Set spring broken or too<br />
weak.<br />
Tighten clamp.<br />
Adjust bearing thrust.<br />
Tighten headstock<br />
screw.<br />
Adjust carriage back<br />
clamp.<br />
Adjust carriage back<br />
clamp.<br />
Regrind <strong>tools</strong> to cutting<br />
angles.<br />
Regrind cutting tool.<br />
Replace with rigid <strong>tools</strong><br />
or reset the <strong>tools</strong>.<br />
Tighten tool again.<br />
Balance or reduce<br />
spindle speed<br />
revolution.<br />
Reset cutting tool.<br />
Reduce feed value size.<br />
Use follow rest and<br />
adjust position of tool.<br />
Check the accuracy of<br />
correlation between<br />
products and machine.<br />
Adjust adjusting screw<br />
or replace the spring.<br />
25
Misalliance of<br />
chuck with main<br />
spindle.<br />
Uneasy to cut the<br />
thread<br />
Tailstock is<br />
uneasy to clamp<br />
with bed stably.<br />
33.Incorrect position of cam. Adjust cam and lock in<br />
proper position.<br />
34.Excessive clearance of<br />
lead screw in axial direction.<br />
35.Excessive clearance<br />
between saddle or cross slide<br />
or cross slide and tool post<br />
slide.<br />
36.Worn thread or nut in<br />
cross slide or tool post slide.<br />
37.Excessive clearance of<br />
handwheel.<br />
38.Clamp handle lever too<br />
long or too short.<br />
Adjust the thrust nut of<br />
the lead screw holder.<br />
Adjust slide gib to<br />
proper position.<br />
Adjust or replace it.<br />
Adjust the set bushing of<br />
handwheel.<br />
Adjust the adjusting nut<br />
of clamp block.<br />
26
Bed Assembly<br />
Index No. Part No. Description Size Qty<br />
1 GB/T70 Hex Socket Cap Screw M10×40 4<br />
2 GB/T41 Hex Nut M8 2<br />
3 GB/T881 Pin 8×75 2<br />
4 CZ1340G-01-015 Gap 1<br />
5 GB/T77 Set Screw M10×16 1<br />
6 CZ1340G-07-028 Bed 1<br />
7 GB/T5780 Hex Cap Bolt M12×50 6<br />
8 CZ1340G-01-016 Rack 1<br />
9 GB/T117 Pin 5×25 6<br />
10 GB/T70 Hex Socket Cap Screw M6×20 8<br />
11 CZ1340G-01-017 Rack 2<br />
12 CZ1340G-07-058 Bracket 1<br />
13 CZ1340G-01-024 Plug 1<br />
14 CZ1340G-01-024 Plug 1<br />
15 CZ1340G-01-024 Plug 1<br />
16 GB/T70 Hex Socket Cap Screw M8×55 2<br />
17 GB/T117 Pin 6×70 2<br />
18 GB/T1155 Oil Ball 8 2<br />
19 GB/T70 Hex Socket Cap Screw M6×16 2<br />
20 GB/T119 Pin 8×25 1<br />
21 CZ1340G-01-025 Handle 1<br />
22 CZ1340G-01-030 Collar 1<br />
23 CZ1340G-01-028 Key 1<br />
24 CZ1340G-01-029 Brake Ring 1<br />
25 GB/T2089 Spring 1×6×25 3<br />
26 CZ1340G-07-057 Bracket 1<br />
27 GB/T6172 Hex Nut M8 2<br />
28 GB/T79 Screw M8×28 2<br />
29 GB/T879 Pin 3×16 1<br />
30 CZ1340G-01-026 Handle 1<br />
31 JB/T7271.5 Knob AM10×50 1<br />
32 CZ1340G-01-018 Lead screw 1<br />
33 CZ1340G-01-019 Feed Rod 1<br />
34 CZ1340G-01-020 Shaft 1<br />
35 CZ1340G-01-021 Collar 1<br />
36 GB/T78 Set Screw M6×10 1<br />
37 CZ1340G-01-006 Pulley 1<br />
38 GB/T77 Screw 1<br />
39 GB/T1096 Key 8×40 1<br />
40 GB/T5780 Hex Cap Bolt M8×25 4<br />
41 GB/T97 Washer 10 4<br />
42 Motor 2HP(1.5KW) 1<br />
43 GB/T5780 Hex Cap Bolt M10×35 3<br />
44 GB/T96 Washer 10 3<br />
28
Index No. Part No. Description Size Qty<br />
45 CZ1340G-01-005 Motor Mounting Plate 1<br />
46 CZ1340G-02-001 Lock Nut 2<br />
47 CZ1340G-00-005 Cover 1<br />
48 CZ1340G-02-002 Screw 1<br />
49 CZ1340G-02-002 Screw 1<br />
29
Headstock Assembly<br />
Index No. Part No. Description Size Qty.<br />
1 GB/T70 Screw M6×16 6<br />
2 CZ1340G-02-009 Screw 1<br />
3 CZ1340G-02T01-001 Cover 1<br />
4 CZ1340G-02-008 Gasket 1<br />
5 GB/T77 Screw M6×8 5<br />
6 CZ1340G-02-031 Plug 1<br />
7 GB/T7757.2 O-Ring 41.3×3.1 1<br />
8 GB/T276 Bearing 6204/P6 3<br />
9 CZ1340G-02-030 Gear Shaft 1<br />
10 GB/T1096 Key 6×56 2<br />
11 CZ1340G-02-032 Gear 53T 1<br />
12 CZ1340G-02-029 Gear 34T 1<br />
13 CZ1340G-02-028 Gear 26T 1<br />
14 CZ1340G-02-027 Collar 1<br />
15 CZ1340G-02-067 Gear 43T 1<br />
16 CZ1340G-02-065 Gear 51T 1<br />
17 CZ1340G-02-066 Washer 1<br />
18 CZ1340G-02-064 Gasket 1<br />
19 CZ1340G-02-063 Rear Cover 1<br />
20 GB/T70 Screw M4×12 3<br />
21 CZ1340G-02-026 Plug 1<br />
22 GB/T7757.2 Bearing 34.7×3.1 1<br />
23 GB/T276 Bearing 6203/P6 1<br />
24 GB/T1096 Key 6×120 1<br />
25 CZ1340G-02-025 Shaft 1<br />
26 GB/T1096 Key 5×20 1<br />
27 GB/T894.1 C-Clip 35 1<br />
28 CZ1340G-02-022 Gear 38T 1<br />
29 CZ1340G-02-021 Gear 46T 1<br />
30 CZ1340G-02-019 Gear 29T 1<br />
31 GB/T1096 Key 5×50 1<br />
32 CZ1340G-02-018 Gear 21T 1<br />
33 CZ1340G-02T01-004 Main Casting 1<br />
34 GB/T41 Hex Nut M8 2<br />
35 GB/T5781 Screw M8×50 2<br />
36 CZ1340G-02-010 Oil Pipe 2<br />
37 GB/T9877.1 Oil Seal B20408B 1<br />
38 CZ1340G-02-017 Gasket 1<br />
39 CZ1340G-02-016 Cover 1<br />
40 GB/T70 Screw M6×16 3<br />
41 GB/T1171.1 V-Belt A787 2<br />
42 CZ1340G-02-015 Pulley 1<br />
43 CZ1340G-02-013 Washer 1<br />
44 GB/T70 Screw M8×20 1<br />
31
Index No. Part No. Description Size Qty.<br />
45 GB/T70 Screw M6×25 4<br />
46 CZ1340G-02-011 Front Cover 1<br />
47 CZ1340G-02-012 Gasket 1<br />
48 GB/T279 Bearing 30212/P5 1<br />
49 Gb/T894.1 C-Clip 72 1<br />
50 CZ1340G-02-036 Gear 74T 1<br />
51 CZ1340G-02-033 Gear 37T 1<br />
52 GB/T1096 Key 8×18 1<br />
53 CZ1340G-02-037 Gear 37T 1<br />
54 GB/T894.1 C-Clip 50 1<br />
55 GB/T297 Bearing 30210/P5 1<br />
56 CZ1340G-02-062 Collar 1<br />
57 CZ1340G-02-005 Gasket 1<br />
58 CZ1340G-02-004 Rear Cover 1<br />
59 GB/T70 Screw M6×25 3<br />
60 CZ1340G-02-002 Screw 1<br />
61 GB/T810 Lock Nut M50 2<br />
62 CZ1340G-02-001 Lock Nut 1<br />
63 CZ1340G-02-003 Spindle 1<br />
64 GB/T1096 Key 8×90 1<br />
65 GB/T1096 Key 6×40 1<br />
66 CZ1340G-02-034 Cam 3<br />
67 CZ1340G-02-035 Pin 3<br />
68 GB/T2089 Spring 0.6×3×10 3<br />
69 GB/T70 Screw M8×20 3<br />
70 JB/T7941.1 Oil Sight A20 1<br />
71 GB/T70 Screw M10×40 4<br />
72 GB/T97.1 Washer 10 4<br />
73 GB/T93 Washer 10 4<br />
74 GB/T77 Screw M12×12 1<br />
75 GB/T894.1 C-Clip 20 3<br />
76 GB/T893.1 C-Clip 42 2<br />
77 CZ1340G-02-059 Gear 30T<br />
78 GB/T276 Bearing 16004/P6 2<br />
79 GB/T7757.2 O-Ring 19.8×2.65 1<br />
80 CZ1340G-02-061 Shaft 1<br />
81 CZ1340G-02-045 Gear 37T 1<br />
82 CZ1340G-02-051 Washer 1<br />
83 CZ1340G-02-055 Collar 2<br />
84 GB/T7757.2 O-Ring 26.3×3.1 1<br />
85 CZ1340G-02-053 Gasket 1<br />
86 CZ1340G-02-052 Collar 1<br />
87 GB/T70 Screw M5×16 3<br />
88 GB/T1096 Key 6×50 1<br />
89 CZ1340G-02-054 Shaft 1<br />
32
Index No. Part No. Description Size Qty.<br />
90 GB/T879 Pin 3×10 1<br />
91 GB/T1096 Key ×18 1<br />
92 GB/T7757.2 O-Ring 13.8×3.1 1<br />
93 CZ1340G-02-056 Washer 1<br />
94 GB/T10708.3 Oil Seal 24×32×5 1<br />
95 CZ1340G-02-057 Gear 40T 1<br />
96 GB/T97.1 Washer 12 1<br />
97 GB/T41 Nut M12 1<br />
98 CZ1340G-02-024 Shift Lever 1<br />
99 GB/T7757.2 O-Ring 11.8×1.8 2<br />
100 CZ1340G-02-020 Shift Fort 1<br />
101 GB/T879 Pin 5×32 2<br />
102 CZ1340G-02-023 Shaft 1<br />
103 CZ1340G-02-040 Gear 51T 1<br />
33
Inlaid Block Assembly<br />
Index No. Part No. Description Size Qty.<br />
1 CZ1340G-02-046 Handle Body 1<br />
2 GB/T308 Steel Ball 5 1<br />
3 GB/T2089 Spring 0.6×3×18 1<br />
4 GB/T77 Screw M6×8 1<br />
5 GB/T71 Screw M6×12 1<br />
6 CZ1340G-02-068 Handle 1<br />
7 JB/T7271.5 Lever Sleeve BM8×40 3<br />
8 CZ1340G-02-044 Handle Block 1<br />
9 CZ1340G-02-043 Handle Body 1<br />
10 GB/T308 Steel Ball 6 2<br />
11 GB/T2089 Spring 0.9×4×20 1<br />
12 GB/T77 Screw M8×10 1<br />
13 CZ1340G-02-058 Handle 1<br />
14 GB/T77 Screw M8×8 1<br />
15 GB/T2089 Spring 0.9×4×7 1<br />
16 CZ1340G-02-060 Handle 1<br />
17 GB/T70 Screw M6×20 2<br />
18 CZ1340G-02-042 Hub 1<br />
19 GB/T894.1 C-Clip 30 1<br />
20 GB/T818 Screw M4×6 6<br />
21 CZ1340G-02T01-006 Name Plate 1<br />
22 CZ1340G-02T01-005 Inlaid Block 1<br />
23 GB/T7757.2 O-Ring 25.7×2.65 1<br />
24 GB/T1096 Key 5×16 2<br />
25 CZ1340G-02T01-002 Revolving Sleeve 1<br />
26 GB/T7757.2 O-Ring 13.8×1.8 1<br />
27 CZ1340G-02T01-003 Gear Shaft 1<br />
28 CZ1340G-02T01-008 Block 1<br />
29 GB/T819 Screw M4×12 1<br />
30 CZ1340G-02-038 Shift Fork 1<br />
31 CZ1340G-02-049 Shift Fork 1<br />
32 GB/T879 Spring Pin 4×18 1<br />
33 CZ1340G-02-050 Shaft Housing 1<br />
34 CZ1340G-02T01-007 Shaft 1<br />
35 GB/T7757.2 O-Ring 7×1.8 1<br />
36 GB/T7757.2 O-Ring 16×2.65 1<br />
37 CZ1340G-02-047 Shift Hub 1<br />
38 GB/T819 Screw M4×8 2<br />
39 GB/T70-85 Screw M10×40 4<br />
31
Gearbox Assembly<br />
Index No. Part No. Description Size Qty.<br />
3 GB/T70 Screw M6×16 1<br />
4 CZ1340G-03-007 Shaft Cover 1<br />
5 CZ1340G-07-008 Gear(30T,54T,56T,57T, 60T,63T,66T,69T,7 9<br />
8T)<br />
6 CZ1340G-07-013 Shaft 1<br />
7 GB/T1096 Key 5×18 1<br />
8 GB/T1096 Key 5×45 1<br />
9 GB/T894 C-Clip 20 5<br />
10 GB/T276 Bearing 6004 2<br />
11 CZ1340G-07-018 Gasket 1<br />
12 CZ1340G-07-021 Cover 1<br />
13 GB/T70 Screw M5×12 18<br />
14 CZ1340G-07-022 Shaft 1<br />
15 GB/T117 Pin 3×32 2<br />
16 GB/T70 Screw M6×20 3<br />
17 CZ1340G-07-009 Cover 1<br />
18 GB/T1155 Oil Ball 6 1<br />
19 CZ1340G-07-010 Gasket 1<br />
20 GB/T276 Bearing 6203 1<br />
21 CZ1340G-07-012 Cover 1<br />
22 GB/T894 C-Clip 16 2<br />
23 CZ1340G-07-011 Gear 24T,16T 1<br />
24 GB/T276 Bearing 6202 9<br />
25 CZ1340G-07-001 Casting 1<br />
26 GB/T879 Pin 5×20 2<br />
27 GB/T70 Screw M8×65 2<br />
28 CZ1340G-07-049 Collar 3<br />
29 CM1224C-03-034 Oil Cover 1<br />
30 GB/T894 C-Clip 26 2<br />
31 CZ1340G-07-053 Gear 24T 2<br />
32 CZ1340G-07-052 Gear 28T 2<br />
33 CZ1340G-07-051 Gear 2<br />
34 GB/T1096 Key 4×22 2<br />
35 CZ1340G-07-005 Cover 3<br />
36 CZ1340G-07-004 Gasket 3<br />
37 CZ1340G-07-015 Shaft 1<br />
38 GB/T1096 Key 4×55 1<br />
39 CZ1340G-07-006 Gear 24T 1<br />
40 CZ1340G-07-007 Gear 16T 1<br />
41 CZ1340G-07-014 Gear 32T 1<br />
42 GB/T77 Screw M5×16 2<br />
43 CZ1340G-07-059 Cover 1<br />
44 CZ1340G-07-047 Gear 32T 1<br />
45 CZ1340G-07-045 Gasket 1<br />
46 CZ1340G-07-044 Cover 1<br />
47 CZ1340G-07-002 Gear 16T 1<br />
33
Gearbox Assembly<br />
Index No. Part No. Description Size Qty.<br />
48 CZ1340G-07-003 Shaft 1<br />
49 GB/T70 Screw M10×16 1<br />
50 GB/T3452.1 O-Ring 9.5×1.8 5<br />
51 D97-4-20 Locking Connector of Tube 1<br />
47 CZ1340G-07-002 Gear 16T 1<br />
48 CZ1340G-07-003 Shaft 1<br />
49 GB/T70 Screw M10×16 1<br />
50 GB/T3452.1 O-Ring 9.5×1.8 5<br />
51 D97-4-20 Locking Connector of Tube 1<br />
52 GB/T70 Screw M8×25 2<br />
53 GB/T117 Pin 6×25 2<br />
54 GB/T9877.1 Oil Seal 28×40×7 1<br />
55 GB/T1096 Key 5×20 1<br />
56 CZ1340G-07-043 Shaft 1<br />
57 CZ1340G-07-056 Gear 32T 1<br />
58 CZ1340G-07-055 Cover 1<br />
59 CZ1340G-07-054 Gear 30T 1<br />
60 CZ1340G-07-016 Gear 28T 1<br />
61 CZ1340G-07-027 Shaft 2<br />
62 GB/T41 Nut M5 4<br />
63 GB/T75 Screw M5×16 4<br />
64 CZ1340G-07-024 Slip Fitting 1<br />
65 CZ1340G-07-026 Rack 1<br />
66 CZ1340G-07-023 Slip Fitting 1<br />
67 CZ1340G-07-029 Slip Fitting 2<br />
68 CZ1340G-07-025 Rack 1<br />
69 CZ1340G-07-030 Rack 1<br />
70 CZ1340G-07-037 Gear Shaft 4<br />
71 CZ1340G-07-034 Rack 1<br />
72 CZ1340G-07-033 Gasket 1<br />
73 GB/T77 Screw M6×10 4<br />
74 CZ1340G-07-038 Engaging Arm 1<br />
75 GB/T65 Screw M4×55 2<br />
76 LXW5-11G2 Switch 2<br />
77 CZ1340G-07-048 Lid 1<br />
78 CZ1340G-07-017 Gear 30T 1<br />
79 CZ1340G-07-019 Cover 1<br />
80 CZ1340G-07-050 Shaft 1<br />
81 GB/T1096 Key 4×145 1<br />
82 CZ1340G-07-020 Gear 16T 1<br />
83 CZ1340G-07-046 Shaft 1<br />
84 GB/T117 Pin 3×25 1<br />
85 CZ1340G-07-039 Cover 1<br />
86 GB/T70 Screw M5×25 8<br />
87 GB/T3452.1 O-Ring 6.9*1.8 4<br />
88 CZ1340G-07-035 Washer 4<br />
89 GB/T879 Pin 4×40 4<br />
34
Index No. Part No. Description Size Qty.<br />
90 GB/T879 Pin 4×25 2<br />
91 GB/T1160.1 Oil Sight Glass 20 1<br />
92 CZ1340G-07-036 Handle Body 4<br />
93 GB/T308 Steel Ball 6.5 4<br />
94 GB/T2089 Spring 1×5×20 4<br />
95 GB/T77 Screw M8×10 4<br />
96 CZ1340G-07-041 Panel 4<br />
35
Apron Assembly<br />
Index NO. Part NO. Description Size Qty<br />
1 GB/T5780 Screw M6*10 1<br />
2 CZ1340G-04-030 Washer 1<br />
3 CZ1340G-04-016 Gear 22T 1<br />
4 GB/T1096 Key 5*12 1<br />
5 CZ1340G-04-015 Shaft 1<br />
6 GB/T3452.1 O-Ring 20*2.4 1<br />
7 CZ1340G-04-013 Gear 40T 1<br />
8 GB/T879 Pin 5H30 1<br />
9 CZ1340G-04-004 Gear Shaft 13T 1<br />
10 GB/T879 Pin 5*30 1<br />
11 CZ1340G-04-005 Gear 60T 1<br />
12 CZ1340G-04-047 Bracket 1<br />
13 GB/T70 Screw M6*16 1<br />
14 CZ1340G-04-001 Apron box 1<br />
15 GB/T3452.1 O-Ring 12*2.4 1<br />
16 GB/T5781 Screw M12*25 1<br />
17 CZ1340G-04-029 Cover 1<br />
18 CZ1340G-04-002 Gear Shaft 14T 1<br />
19 GB/T1096 Key A5*18 1<br />
20 JB/T7940.4 Oil Ball 8 1<br />
21 CZ1340G-04-003 Dial seat 1<br />
22 GB/T70 Screw M6*25 3<br />
23 GB/T78 Screw M5*6 1<br />
24 CZ1340G-04-048 Dial 1<br />
25 CZ1340G-04-045 Hand wheel 1<br />
26 CZ1340G-04-046 Washer 1<br />
27 GB/T70 Screw M6*16 1<br />
28 CZ1340G-04-043 Screw 1<br />
29 CZ1340G-04-044 Handle 1<br />
30 GB/T4141.14 Handle M8*16 1<br />
31 CZ1340G-04-009 Handle rod 1<br />
32 CZ1340G-04-008 Shift lever 1<br />
33 GB/T70 Screw M625 3<br />
34 CZ1340G-04-007 Box 1<br />
35 GB/T308 Steal Ball 5 2<br />
36 GB/T1239.2-89 Spring 0.8*4*20 2<br />
37 GB/T77 Screw M6*6 2<br />
38 CZ1340G-04-022 Cover 1<br />
39 GB/T70 Screw M6*12 4<br />
40 GB/T879 Spring Pin 5*20 2<br />
41 CZ1340G-04-006 Cover 1<br />
42 CZ1340G-04-028 Gear 63T 1<br />
43 GB/T119 Pin B8*25 3<br />
44 CZ1340G-04-024 Bushing 1<br />
45 GB/T119 Pin A3*25 1<br />
46 CZ1340G-04-027 Gear 40T 1<br />
37
Index NO. Part NO. Description Size Qty<br />
47 GB/T77 Screw M5*12 2<br />
48 CZ1340G-04-023 Gear 30T 1<br />
49 JB/T7941.1 Oil Sight 12 1<br />
50 CZ1340G-04-041 Oil Plug 1<br />
51 CZ1340G-04-033 Bushing 1<br />
52 CZ1340G-04-026 Shaft 1<br />
53 GB/T70 Screw M5*12 2<br />
54 CZ1340G-04-012 Shaft 1<br />
55 CZ1340G-04-011 Gear 18T 1<br />
56 CZ1340G-04-010 Washer 1<br />
57 GB/T70 Screw M6*10 1<br />
58 GB/T83 Screw M5*5 1<br />
59 GB/T77 Screw M6*10 1<br />
60 CZ1340G-04-034 Bar 1<br />
61 CZ1340G-04-018 Half Nut 1<br />
62 GB/T5781 Bolt M6*12 2<br />
63 GB/T79 Screw M6*35 2<br />
64 GB/T6170 Nut M6 2<br />
65 GB/T5781 Screw M5*16 3<br />
66 CZ1340G-04-019 Nut seat 1<br />
67 GB/T6170 Nut M5 3<br />
68 GB/T77 Screw M5*16 3<br />
69 CZ1340G-04-021 Gib 1<br />
70 GB/T119 Pin 6*12 2<br />
71 CZ1340G-04-017 Shaft 1<br />
72 CZ1340G-04-020 Handle Seat 1<br />
73 CZ1340G-04-042 Handle Rod 1<br />
74 GB/T4141.14 Knob M8*40 1<br />
75 GB/T6170 Nut M8 1<br />
76 GB/T93 Washer 8 1<br />
77 CZ1340G-04-035 Bushing 1<br />
78 CZ1340G-04-036 Gear 1<br />
79 CZ1340G-04-037 Bushing 1<br />
80 CZ1340G-04-040 Bushing 1<br />
81 CZ1340G-04-039 Theading dial body 1<br />
82 GB/T70-85 Screw M8*50 1<br />
83 CZ1340G-04-038 Theading dial shaft 1<br />
84 GB/T827-86 Rivet 3*8 1<br />
85 JB/T7940.4 Oil cup 6 1<br />
86 CZ1340G-04-014 Worm 1<br />
87 CZ1340G-04-031 Key 1<br />
88 CZ1340G-04-032 Pin 1<br />
38
Saddle and Cross Slide Assembly<br />
Index NO Part NO Description Size QTY<br />
1 JB/T4141.5 Handle M8*63 1<br />
2 CZ1340G-05-023 Screw 1<br />
3 CZ1340G-05-022 Washer 1<br />
4 CZ1340G-05-021 Handle Wheel 1<br />
5 CZ1340G-05-038 Dial Ring 1<br />
6 GB/T77 Screw M6*8 1<br />
7 GB/T70 Screw M6825 2<br />
8 GB/T301 Bearing 51104 1<br />
9 CZ1340G-05-020 Hub 1<br />
10 JB/T7940.4 Oil Ball 6 1<br />
11 GB/T5781 Screw M8*20 4<br />
12 CZ1340G-05-013 Strip 2<br />
13 CZ1340G-05-039 Saddle 1<br />
14 GB/T823 Screw M4*12 8<br />
15 CZ1340G-05-013 Plate 2<br />
16 CZ1340G-05-014 Plate 2<br />
17 GB/T70 Screw M8*30 4<br />
18 GB/T118 Taper Pin A8*40 2<br />
19 CZ1340G-05-006 Plate 2<br />
20 CZ1340G-05-007 Plate 2<br />
21 GB/T6170 Nut M6 4<br />
22 GB/T71 Screw M6*16 4<br />
23 GB/T5781 Screw M8*25 3<br />
24 JB/T7940.4 Oil Ball 8 2<br />
25 CZ1340G-05-019 Sleeve 1<br />
26 GB/T1096 Key 4*4*20 1<br />
27 CZ1340G-05-018 Gear Shaft 1<br />
28 GB/T68 Screw M3*6 1<br />
29 GB/T1096 Key 55*30 1<br />
30 CZ1340G-05-008 Lead Screw 1<br />
31 CZ1340G-05-010 Lead Nut 1<br />
32 GB/T70 Screw M6*16 1<br />
33 GB/T301 Bearing 51101 2<br />
34 CZ1340G-05-003 Bearing Housing 1<br />
35 GB/T93 Spring Washer 8 2<br />
36 GB/T70 Screw M8*25 2<br />
37 CZ1340G-05-002 Anti-dust Cover 1<br />
38 CZ1340G-05-001 Sleeve 1<br />
39 GB/T858 Washer 12 1<br />
40 GB/T810 Nut M12 1<br />
41 CZ1340G-05-032 Set Screw 2<br />
42 CZ1340G-05-031 Gib 1<br />
43 CZ1340G-05-039 Cross Slide 1<br />
44 CZ1340G-05-017 T-Bolt 2<br />
45 GB/T70 Screw M8*16 1<br />
46 CZ1340G-05-011 Sleeve 1<br />
47 JB/T7940.4 Oil Ball 8 3<br />
48 GB/T78 Screw M8*10 1<br />
49 CZ1340G-05-004 Metal piece 1<br />
50 CZ1340G-05-005 Gib M8*63 2<br />
40
Tool Post Assembly<br />
Index NO Part NO Description Size QTY<br />
1 JB/T7271.5 Knob M1050 1<br />
2 JB/T7271.6 Handle Rod 1<br />
3 CZ1340G-05-026 Lock Nut 1<br />
4 CZ1340G-05-024 Washer 1<br />
5 GB/T83 Screw M1040 8<br />
6 CZ1340G-05-029 Post Base 1<br />
7 CZ1340G-05-025 Screw 1<br />
8 GB/T78 Screw M610 2<br />
9 CZ1340G-05-030 Stop 1<br />
10 GB/T2089 Spring 0.4418 1<br />
11 CZ1340G-05-028 Top Slide 1<br />
12 JB/T7940.4 Oil Ball 6 3<br />
13 GB/T78-85 Screw M610 1<br />
14 GB/T301 Bearing 51101 2<br />
15 CZ1340G-05-034 Collar 1<br />
16 GB/T70 Screw M620 2<br />
17 GB/T6173 Nut M121 2<br />
18 GB/T78 Screw M66 1<br />
19 CZ1340G-05-036 Dial Ring 1<br />
20 GB/T117 Pin A316 1<br />
21 GB/T72701.9 Handle 825 1<br />
22 CZ1340G-05-035 Lead Screw 1<br />
23 CZ1340G-05-033 Lead Nut 1<br />
24 GB/T6170 Nut M8 2<br />
25 GB/T97.2 Washer 2<br />
26 CZ1340G-05-016 Set Screw 2<br />
27 CZ1340G-05-015 Gib 1<br />
28 CZ1340G-05-027 Swivel Slide 1<br />
29 GB/T73 Screw M88 1<br />
42
Tailstock assembly<br />
Index No. Part No. Description Size Qty.<br />
1 CZ1340G-06-020 Base 1<br />
2 CZ1340G-06-017 Screw 1<br />
3 CZ1340G-06-018 Collar 1<br />
4 GB/T879 Pin 5×26 1<br />
5 GB/T41 Nut M8 1<br />
6 GB/T79 Screw M8×35 1<br />
7 CZ1340G-06-019 Shaft 1<br />
8 JB/T7271.5 Knob BM10×50 1<br />
9 CZ1340G-06-012 Lever 1<br />
10 JB/T7271.5 Knob BM8×40 1<br />
11 CZ1340G-06-013 Screw 1<br />
12 CZ1340G-06-015 Shaft 1<br />
13 CZ1340G-06-014 Screw 2<br />
14 JB/T7940.4 Oiler 8 2<br />
15 CZ1340G-06-004 Nut 1<br />
16 GB/T70-85 Screw M4×12 3<br />
17 CZ1340G-06-006 Index ring 1<br />
18 CZ1340G-06-003 Screw 1<br />
19 GB/T1096 Key 4×16 1<br />
20 CZ1340G-06-010 Handle 4<br />
21 GB/T301 Bearing 51102 1<br />
22 CZ1340G-06-005 Flange cover 1<br />
23 JB/T7940.4 Oiler 8 1<br />
24 GB/T78 Screw M5×20 1<br />
25 CZ1340G-06-011 Screw 1<br />
26 GB/T70 Screw M6×16 4<br />
27 CZ1340G-06-009 Screw 1<br />
28 CZ1340G-06-008 Washer 1<br />
29 CZ1340G-06-007 Hand wheel 1<br />
30 GB/T75 Screw M610 1<br />
31 CZ1340G-06-016 Pivot block 1<br />
32 GB/T78 Screw M1045 3<br />
33 CZ1340G-06-001 Casting 1<br />
34 CZ1340G-06-002 Quill M.T3 1<br />
35 CZ1340G-06-021 Clamp plate 1<br />
36 GB/T95 Washer 12 1<br />
37 GB/T41 Nut M12 1<br />
44
Electric Box Assembly<br />
Index No. Part No. Description Size Qty.<br />
1 CZ1340G-09-001 <strong>Door</strong> of electrical box 1<br />
2 CZ1340G-09-007 Pad 1<br />
3 CZ1340G-09-005 Panel 1<br />
4 CZ1340G-09-011(1) Wiring diagram 1<br />
5 XB7-EA.1 Green button 1<br />
6 XB2-ES542 Emergency switch 1<br />
7 XB7-EV6 Indicator 1<br />
8 GB/T818 Screw M4×8 10<br />
9 LC1-D259 Contactor 2<br />
10 GB/T818 Screw M4×12 6<br />
11 CZ1340G-09-006 Label 7<br />
12 GB/T41 Nut M6 4<br />
13 GB/T818 Screw M4×16 2<br />
14 JH9-1.5ZG Terminal plate 1<br />
15 CZ1340G-09-009 Earth terminal 1<br />
16 JBK3-63 Trans<strong>for</strong>mer 1<br />
17 CZ1340G-09-003 Wiring plate 1<br />
18 JH9-6ZG Terminal plate 1<br />
19 CA2-DN140 Relay 1<br />
20 D97-4-20 Tube connector 1<br />
21 D97-4-24 Tube connector 2<br />
22 GB/T818 Screw M6×10 4<br />
23 CZ1340G-09-002 Electric box 1<br />
24 CZ1340G-09-004 Warning sign 1<br />
46
Follow Rest<br />
Index No. Part No. Description Size Qty<br />
1 JB/T7274.4 Knob 8×40 2<br />
2 GB/T879 Pin 3×18 2<br />
3 CZ1340G-05T03-010 Bushing 2<br />
4 CZ1340G-05T2-003 Screw 2<br />
5 CZ1340G-05T03-008 Brass Finger 2<br />
6 CZ1340G-05T02-002 Sleeve 2<br />
7 GB/T77 Set Screw M6×8 2<br />
8 GB/T79 Set Screw M6×16 2<br />
9 GB/T6170 Nut M6 2<br />
10 GB/T70 Hex Socket Cap Screw M8×45 1<br />
11 CZ1340G-05T02-001 Base Casting 1<br />
48
Steady Rest<br />
Index No. Part No. Description Size Qty<br />
1 JB/T7274.4 Knob 8×40 3<br />
2 GB/T879 Pin 3×18 3<br />
3 CZ1340G-05T03-009 Screw 3<br />
4 CZ1340G-05T03-011 Sleeve 3<br />
5 GB/T78 Set Screw M6×8 3<br />
6 GB/T6170 Nut M6 4<br />
7 CZ1340G-05T03-007 Bolt M6×30 1<br />
8 GB/T79 Set Screw M6×16 3<br />
9 CZ1340G-05T03-003 Base Casting 1<br />
10 CZ1340G-05T03-002 Clamp Screw 1<br />
11 CZ1340G-05T03-001 Clamp Pad 1<br />
12 GB/T96 Flat Washer 12 1<br />
13 GB/T6170 Nut M12 1<br />
14 GB/T119 Pin A5×25 1<br />
15 CZ1340G-05T03-004 Pivot Bolt 1<br />
16 CZ1340G-05T03-005 Lock Knob 1<br />
17 CZ1340G-05T03-006 Top Casting 1<br />
18 CZ1340G-05T03-008 Brass Finger 3<br />
19 CZ1340G-05T03-010 Bushing 3<br />
50