HEARTLAND® - The Chimney Sweep Online
HEARTLAND® - The Chimney Sweep Online
HEARTLAND® - The Chimney Sweep Online

Create successful ePaper yourself
Turn your PDF publications into a flip-book with our unique Google optimized e-Paper software.
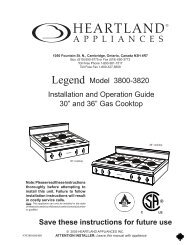
HEARTLAND ®<br />
APPLIANCES<br />
1050 Fountain Street North Cambridge, Ontario, Canada N3H 4R7<br />
Bus. (519) 650-5775 Fax (519) 650-3773 Toll Free Phone 1-800-361-1517 Toll Free Fax 1-800-327-5609<br />
Installation and Operating Instructions For<br />
Models:<br />
5200 48" Gas Top / Electric Convection Range<br />
5210 48" Gas Top / Electric Convection Self Clean Range<br />
4200 30" Gas Top / Electric Convection Range<br />
4210 30" Gas Top / Electric Convection Self Clean Range<br />
ATTENTION INSTALLER: Leave this manual with appliance<br />
Save these instructions<br />
for future use<br />
NOTE: Clock must be<br />
set or your main oven<br />
will not function!<br />
WARNING: Improper installation,<br />
adjustment, alteration, service or<br />
maintenance can cause injury or property<br />
damage. Refer to this manual. For<br />
assistance or additional information,<br />
consult a qualified installer, service<br />
agency, manufacturer (dealer). Please<br />
read these instructions thoroughly before<br />
attempting to install this unit. Failure to<br />
follow installation instructions will result<br />
in costly service calls.<br />
Model<br />
4200/4210<br />
Model<br />
5200/5210<br />
Note: Please read these instructions thoroughly before attempting to install this unit.<br />
<strong>The</strong> oven door thermometer does not sense<br />
temperature. It is for aesthestics only and is<br />
nonfunctional.<br />
CERTIFIED<br />
Manual #5716<br />
091808<br />
© 2004 HEARTLAND APPLIANCES INC.<br />
<strong>The</strong>se symbols on the nameplate mean the product has been designed<br />
certified by C.S.A. International. This design has been tested to CGA IR58<br />
and ANSI Z21.1-2005.
To move range for service or<br />
cleaning<br />
WARNING<br />
Range body rests on base.<br />
When moving, move by base<br />
only.<br />
1. Disconnect electrical power.<br />
2. Place temporary floor protection in front of<br />
range.<br />
3. Slide out from wall and place floor protection<br />
under front legs and slowly pull out to gain<br />
access to rear.<br />
4. To reinstall, reverse these instructions.<br />
!<br />
<strong>The</strong> use of a gas cooking appliance results<br />
in the production of heat and moisture in<br />
the room in which it is installed. Ensure<br />
that the kitchen is well ventilated: keep<br />
natural ventilation holes open or install a<br />
mechanical device (mechanical extractor<br />
hood)<br />
Prolonged intensive use of the appliance<br />
may call for additional ventilation, for<br />
example opening of a window, or more<br />
effective ventilation, for example increasing<br />
the level of mechanical ventilation where<br />
present.<br />
WARNING<br />
WARNING<br />
NEVER use this appliance as a space heater to heat or warm the room. Doing so<br />
may result in carbon monoxide poisoning and overheating the oven.<br />
NEVER cover any slots, holes or passages in the oven bottom or cover an entire<br />
rack with materials such as aluminum foil. Doing so blocks airflow through the oven<br />
and may cause carbon monoxide poisoning. Aluminum foil linings may also trap<br />
heat , causing a fire hazard.<br />
—FOR YOUR SAFETY—<br />
Avoid the use of aerosol containers near the range.<br />
Do not store or use gasoline or other flammable vapours or liquids in the vicinity of this appliance.<br />
Do not heat unopened glass or metal containers in the oven.<br />
Do not place pans, cookie sheets or roasters directly on the oven bottom -use the rack in its lowest<br />
position.<br />
Do not attempt to extinguish a grease fire with water. Cover grease fires with a pot lid or baking<br />
soda,always clean the oven and broiler compartment regularly.<br />
WARNING<br />
• ALL RANGES CAN<br />
TIP<br />
• INJURY TO PERSONS<br />
COULD RESULT<br />
• SEE INSTALLATION<br />
INSTRUCTIONS<br />
WARNING<br />
If the information in this manual is not followed<br />
exactly, a fire or explosion may result causing<br />
property damage, personal injury or death.<br />
WHAT TO DO IF YOU SMELL GAS<br />
• Do not try to light any appliance.<br />
• Do not touch any electrical switch; do not use<br />
any phone in your building.<br />
• Immediately call your gas supplier from a<br />
neighbour’s phone. Follow the gas supplier’s<br />
instructions.<br />
• If you cannot reach your gas supplier, call the<br />
fire department.<br />
Installation and service must be performed by a<br />
qualified installer, service agency or the gas supplier.
Gas Top/Electric Convection Models 4200/5200<br />
Gas Top/Electric Convection Self Clean Models 4210/5210<br />
CONSUMER WARRANTY<br />
ENTIRE PRODUCT – LIMITED ONE YEAR WARRANTY<br />
HEARTLAND warrants the replacement or repair of all parts, including gas components of this Cookstove which<br />
prove to be defective in material or workmanship, with the exception of the painted or porcelain enamel finish or<br />
plated surfaces, for one year from the date of original purchase. Such parts will be repaired or replaced at the option<br />
of Heartland without charge, subject to the terms and conditions set out below.<br />
<strong>The</strong> warranty period against defects in the painted or porcelain enamel finish, or plated surfaces, is 90 days from<br />
date of original purchase. <strong>The</strong> warranty does not include replacement of oven lamps or charcoal filters.<br />
OVEN & WARMING DRAWER ELEMENTS - LIMITED SECOND THROUGH THIRD YEAR<br />
WARRANTY<br />
HEARTLAND warrants the oven heating elements against defects in material or workmanship for an additional two<br />
years. <strong>The</strong>se parts will be repaired or replaced at the option of Heartland without charge, but you pay for labour and<br />
transportation subject to the terms and conditions set out below.<br />
TERMS AND CONDITIONS<br />
1. This warranty applies only for single family domestic use when the Cookstove has been properly installed<br />
according to the instructions supplied by Heartland and is connected to an adequate and proper utility service.<br />
Damage due to faulty installation, improper usage and care, abuse, accident, fire, flood, acts of God,<br />
commercial, business or rental use, and alteration, or the removal or defacing of the serial plate, cancels all<br />
obligations of this warranty. Service during this warranty must be performed by a factory Authorized Service<br />
Person.<br />
2. Warranty applies to product only in the country in which it was purchased.<br />
3. Heartland is not liable for any claims or damages resulting from any failure of the Cookstove or from service<br />
delays beyond their reasonable control.<br />
4. To obtain warranty service, the original purchaser must present the original Bill of Sale, Model and Serial<br />
number. Components repaired or replaced are warranted through the remainder of the original warranty<br />
period only.<br />
5. <strong>The</strong> warranty does not cover expense involved in making this appliance readily accessible for servicing.<br />
6. This warranty gives you specific legal rights. Additional warranty rights may be provided by law in some areas.<br />
7. Adjustments such as calibrations, levelling, tightening of fasteners, or utility connections normally associated<br />
with original installation are the responsibility of the dealer or installer and not that of the Company.<br />
TO ENSURE PROMPT WARRANTY SERVICE, SEND IN YOUR WARRANTY CARD WITHIN 10 DAYS OF PURCHASE.<br />
Customer Service<br />
If further help is needed concerning this warranty, contact:<br />
Heartland Appliances Inc.<br />
1050 Fountain St. N.<br />
PLACE OF PURCHASE______________________________<br />
Cambridge, Ontario, Canada<br />
N3H-4R7<br />
DATE OF PURCHASE_______________________________<br />
Business (519) 650-5775<br />
SERIAL NUMBER__________________________________ Fax (519)650-3773<br />
Toll Free Telephone 1-800-361-1517<br />
MODEL NUMBER__________________________________ Toll Free Fax 1-800-327-5609
TABLE OF CONTENTS<br />
Description ............................... Page<br />
1. Assembly and Installation ...................................... 2<br />
2. Assembly of Exhaust to Range ............................. 2<br />
3. Positioning the Range ............................................ 3<br />
4. Installation Clearances ........................................... 3<br />
5. Exhaust Hood ........................................................ 4<br />
6. Ventless Installation ............................................... 4<br />
7. Vented Installation .................................................. 5<br />
8. Important Safety Instructions .................................. 6<br />
9. Oven Safety ............................................................ 6<br />
10. Exhaust Hood Safety ............................................ 7<br />
11. Self Clean Oven Safety Instructions ...................... 7<br />
12.Features (Cooktop and Range) with Layout ......... 8<br />
13.Features (Warming Drawer & Storage) ................. 9<br />
14. Clock Control Panel .............................................. 9<br />
15. Control Panel Layout ….....................................10<br />
16. Top Burner Operation ...........................................11<br />
17. Power Failure Operation ..................................... 12<br />
18. Warming Drawer Control Operation ..................... 13<br />
19. Oven Bake Broil Control ...................................... 14<br />
20. Oven Operation ....................................................15<br />
21. How to Select Cooking Methods .........................16<br />
22. Clock / Timer Function ........................................17<br />
23. Time of Day Setting ............................................. 17<br />
24. Minute Minder..................................................... 17<br />
25. Time Bake ..........................................................18<br />
26. Standard & Convection Cooking Guidelines........ 19<br />
27. Meat Roasting Guide ...........................................20<br />
28. Poultry Roasting Guide ....................................... 20<br />
Description ......................................... Page<br />
30. Baking Guide ....................................................... 21<br />
31. Porcelain Care & Cleaning................................... 22<br />
32. Standard Oven & Warming Drawer Cleaning........ 22<br />
33. Self Clean Oven Cleaning .................................... 22<br />
34. How to Self Clean ................................................ 24<br />
35. Time Delay Self Clean ......................................... 25<br />
36. Cancel Time Delay Self Clean ............................. 26<br />
37. Nickel Trim .......................................................... 27<br />
38. Exhaust Hood...................................................... 27<br />
39. Convection Fan Filter........................................... 27<br />
40. Oven and Cabinet Light ....................................... 27<br />
41. Surface Burners Care & Cleaning ........................ 28<br />
42. Oven & Cabinet Light Replacement ..................... 28<br />
43. Interior Oven Racks ............................................. 29<br />
44. Rack Supports Removal ..................................... 29<br />
45. Oven Door Removal ............................................. 30<br />
46. Warming Drawer Removal ................................... 31<br />
47. <strong>The</strong> Broiler Pan .................................................... 31<br />
48. Setup & Trouble Shooting .................................... 32<br />
49. Oven <strong>The</strong>rmostat ................................................. 33<br />
50. If you still require help— ...................................... 33<br />
51. Gas Trouble Shooting Guide ................................ 34<br />
52. Conversion Kit Information ................................... 35<br />
53. Burner Valve Orifice Conversion ........................... 36<br />
54. Top Burner Orifice Conversion ............................. 36<br />
56. Parts Diagram ..................................................... 37<br />
57. Parts List............................................................. 38<br />
55. Products .............................................................. 49<br />
29. Broiling Guide ...................................................... 21<br />
1
Assembly and Installation<br />
To fully enjoy your new range, it is important that you read this booklet thoroughly.<br />
Note: Please check for any damage that may have occurred during shipping. In the unlikely event that you find any shipping<br />
damage, inform your dealer immediately!<br />
Caution when unpacking:<br />
Lift the range by the bottom skirt, do not lift by nickel trim.<br />
Unpacking:<br />
Note: to avoid injury, please wear safety equipement, glasses and gloves, while you are unpacking your new range.<br />
1) Unscrew the 12 screws that hold the crate onto the skid. <strong>The</strong>re are 8 along the bottom and 4 along the top.<br />
2) After the screws have been removed, carefully lift the crate over the stove and set it aside.<br />
3) Next with a pair of tin sips cut the metal banding that holds the stove into place.Caution metal banding is under tension!<br />
4) Carefully remove the metal banding, the 2 boards that where under the banding and the cardbord cap and styrofoam.<br />
5) You are now ready to remove the range from the skid<br />
For 30" units have one person at each end stand beside the skid and carefully lift the range by the bottom skirt, and a third<br />
person pull the skid out from underneath the range. Slowly set the range down on the floor, bending you knee's not your<br />
back!<br />
For 48" units units have one person at each end and one side, stand beside the skid and carefully lift the range by the bottom<br />
skirt, and a fourth person pull the skid out from underneath the range. Slowly set the range down on the floor, bending your<br />
knee's not your back!<br />
6) Finish unpacking the range removing packing tape around the doors and in the oven.<br />
Both 30" and 48" Ranges consist of two main parts:<strong>The</strong> Range Body, and<br />
<strong>The</strong> Cabinet / Exhaust Hood<br />
Tools required for assembly:<br />
- Phillips/Robertson Screwdriver<br />
- 5/16" ( 8 mm) wrench or crescent wrench<br />
You must have a qualified electrician connect the new range to be sure all electrical codes and rules are<br />
observed except when range is equipped with a cord and plug<br />
Gliders:<br />
<strong>The</strong> teflon glider should extend beyond the bottom of the leg by approximately<br />
1/8"-1/4". Adjusting levelling bolts in too far will cause the leg to drag on the<br />
floor potentially causing damage to flooring. (see figure 1). Check that gliders<br />
and floor are free of any debris, this will ensure you do not scratch your floor.<br />
Figure 1<br />
Teflon Glider<br />
1/8"- 1/4"<br />
Assembly of Exhaust Hood to Range<br />
See the manual entitled "Cabinet Installation Instructions<br />
for Gas, Electric, Combination and Wood Stoves" which<br />
is included with the cabinet .<br />
Figure 2<br />
(DO NOT REST CLOSET CORNER BRACKETS ON<br />
PORCELAIN SURFACE, DAMAGE TO SURFACE<br />
MAY OCCUR)<br />
2
Positioning the Range<br />
1. When the range is fully assembled, recheck all electrical connections especially between the exhaust hood and the back<br />
of the range. As well, check that all nuts and bolts have been tightened.<br />
2. Ensure teflon gliders and flooring are clean. (as described on page 2 under "Gliders"). Any openings in the wall behind the<br />
appliance or in the floor under the appliance must be sealed.<br />
3. Caution: On flooring with very rough surfaces or deep, large grooves the appliance may have to be lifted and slowly slid into<br />
position.<br />
4. Put both hands on the trim and carefully push the range into place, make sure floor is clear of all debris. Don't forget to<br />
plug in the main power cord and the exhaust hood power cable and test the operation of the appliance, before the<br />
range is in it's final position. See cabinet installation instructions.<br />
5. To level the range, simply adjust the levelling screws with teflon pads located at the bottom of each leg (the ones you<br />
assembled on page 2 under "Gliders"). Using a 5/16 (8mm) open end wrench turn the adjusting screw clockwise to raise<br />
up the corner, and counter-clockwise to lower the corner. (Don't forget the teflon glider should extend beyond the bottom<br />
of the leg by approximately 1/8"-1/4") Ensure the unit is perfectly level, or utensils may fall of during cooking.<br />
6. Note: On soft kitchen flooring, the weight of the stove may cause slight depressions in the flooring. When the range is in<br />
position and levelled, you may want to place coasters under the teflon gliders of each leg, to protect the floor. Remove the<br />
coasters when moving the range for cleaning or servicing.<br />
Installation Clearances<br />
If the range must stand beside a refrigerator, it is important for proper air circulation, that there be at least 5" of space between the<br />
two appliances.<br />
Do not install range closer than 1/2" from adjacent surfaces.<br />
To eliminate the risk of burns or fire by reaching over heated surface units, installation of cabinet storage space above the surface<br />
units should be avoided. If there is existing cabinet storage space have at least 30 1/4" (768 mm) of clearance. (see fig 3)<br />
For best cooking results, your range should be level. This can be checked with a carpenter’s level on top of the cooking surface<br />
and across the oven rack. If levelling is required, adjust the leveller screws under one or more of the legs (see"Positioning the Range"<br />
step 5).<br />
Fig 3 Installation Clearances<br />
0<br />
0<br />
min<br />
30 1/4"<br />
768 mm<br />
0<br />
0<br />
min 18"<br />
457 mm<br />
min<br />
30 1/4"<br />
77 cm<br />
1"<br />
2.5 cm<br />
0<br />
min 18"<br />
46 cm<br />
max<br />
36 "<br />
914 mm<br />
min<br />
36 "<br />
92 cm<br />
Model 4200 / 4210 30" Installation Clearance<br />
Installation Clearances<br />
Model 5200 / 5210 48" Installation Clearance<br />
Surface adjacent to cook top-left (48") 1” (25mm) Surface adjacent to cook top-right (48") .......0” (0 mm)<br />
Surface adjacent to cook top (30") 0” (0 mm) Surface adjacent to warming oven ...............0” (0 mm)<br />
Cook top to underside of adjacent cabinets ... 18” (457 mm) Cook top to underside of cabinets .... 30 1/4” (768 mm)<br />
Maximum depth of overhead cabinets ............ 13” (330 mm) Maximum depth of counters ..................24” (610 mm)<br />
Maximum height of counters .......................... 36” (914 mm) Rear clearance 0” .........................................(0 mm)<br />
<strong>The</strong> manual valve must be installed in an accessible location in the gas piping external to the<br />
appliance for the purpose of turning on or shutting off gas to the appliancce.<br />
<strong>The</strong> clearances in the table are also stated on the rating plate and on a reproduction of the plate on<br />
the back page of this manual. (see "installation clearances" diagram)<br />
3
Exhaust Hood<br />
Your range is equipped with a variable speed range hood that may be either vented directly to the outside, or<br />
may be installed ventless. An exhaust filter is included with your hood. <strong>The</strong> filter should be cleaned periodically<br />
in soapy water. Extras are available from your dealer or directly from Heartland Appliances Inc. Please order 4<br />
or more filters at one time to save freight and handling charges.<br />
Ventless Installation<br />
Your unit is already set up for ventless operation. Cooking fumes are drawn through the filters and exhausted<br />
through the rear of the hood, back into the room. Install the exhaust filters in their location under the cabinet<br />
by first removing the light lens. <strong>The</strong>n on one side, insert one of the filters into the grooves (front and rear of the<br />
cabinet) and slide into place. Repeat these steps for the second filter<br />
Figure 4<br />
Exhaust venting<br />
options<br />
Installation of Ducting<br />
Installation through an outside wall<br />
Remove air deflector (used for ventless operation only). Cut a 3 1/2 x 10 1/2 ( 88.9mm x 266.7 mm) hole through<br />
the wall directly behind the range hood outlet (See Figure 4.), making sure no wall studs are cut. Push range into<br />
position. From outside of the house, measure distance from the siding to the range outlet. Cut duct pipe that length,<br />
plus 1” (25.4mm) for overlap into outlet. Attach vent hood to pipe. Caulk the back of vent hood and around pipe<br />
where it goes through wall and into range hood outlet so caulking seals against outside siding.<br />
Complete installation by following directions under Ventless Installation.<br />
Installation through an attic to an outside wall<br />
If the vent elbows are embedded in the wall, the range may be positioned as shown in Figure 4. Continue the duct<br />
through the ceiling into the attic. Terminate duct either on an outside wall just below the sofit using a vent hood<br />
or through the roof with a roof cap. Seal with caulking around and under cap or hood.<br />
Complete your installation by following directions under Ventless Installation.<br />
4
Vented Installation, Tools, Material, and Dimensions<br />
Tools required to install vented hood: - Hammer - Slot screwdriver<br />
- Pliers - Electric drill<br />
- Measuring tape - 3/32” (3 mm) Drill bit<br />
- 1/2” (13 mm) Drill bit - Sabre saw OR Keyhole saw<br />
Materials Required:<br />
- 3 1/4" x 10" (82.55 mm x 254 mm) metal duct—enough to go through wall or attic to outside. Elbows as required.<br />
- Roof cap or wall venthood<br />
- Caulking to seal around duct<br />
- #6 x 1/2” (82.55 mm x 254 mm) sheet metal screws<br />
<strong>The</strong> above are standard parts and are available at any hardware store or heating contractor.<br />
NOTE: A 3 1/4" x 10" (82.55mm x 254mm) exhaust adaptor is included with the exhaust hood.<br />
Venting Safety Guidelines<br />
14.0"<br />
355 mm<br />
Range Hood Outlet<br />
3 1/4" x 10"<br />
83 mm x 254 mm<br />
20 "<br />
508 mm<br />
Installation must be done in<br />
accordance with all local and<br />
national codes.<br />
Use only materials which<br />
conform to local codes in<br />
effect. Be sure power is<br />
disconnected before doing<br />
any electrical work. All duct<br />
work must be metal.<br />
749 mm<br />
56 "<br />
1422 mm<br />
36 1/8”<br />
917 mm<br />
30”<br />
762 mm<br />
4 3/4”<br />
121 mm<br />
Gas Inlet-1/2”NPT<br />
Exhaust Hood In<br />
(female receptacle)<br />
Oven Exhaust<br />
Power Cord<br />
66 1/4"<br />
1682 mm<br />
Do not use plastic duct. <strong>The</strong><br />
range hood should never<br />
be exhausted into a wall<br />
cavity or an attic where an<br />
accumulation of grease<br />
could become a fire<br />
hazard.<br />
When the installation is<br />
completed, turn on the fan<br />
and make sure that there are<br />
no obstructions in the duct.<br />
28”<br />
711 mm<br />
14 7/8"<br />
378 mm<br />
Range Hood Outlet<br />
3 1/4"x 10"<br />
83 mm x 254 mm<br />
48" model<br />
39 3/4"<br />
47 1/2" 1010 mm<br />
1207 mm<br />
14.0"<br />
355 mm<br />
<strong>The</strong> vent pipe must be<br />
mechanically fastened to<br />
the flu collar by means of<br />
sheet metal screws<br />
56"<br />
1422 mm<br />
66 1/4"<br />
1682 mm<br />
29 1/2”<br />
787 mm<br />
36 1/8"<br />
917 mm<br />
34"<br />
864 mm<br />
62 3/8"<br />
1585 mm<br />
3"<br />
76 mm<br />
29 3/4"<br />
756 mm<br />
5<br />
30" Model<br />
28”<br />
711 mm
Important Safety Instructions<br />
1. PROPER INSTALLATION—BE SURE YOUR APPLIANCE IS PROPERLY INSTALLED AND GROUNDED BY A<br />
QUALIFIED TECHNICIAN. Have the installer show you the location of the circuit breaker or fuse. Mark it for future<br />
reference.<br />
2. Never use your appliance for warming or heating the room. Use only for its intended use as described in this manual.<br />
3. Do not leave children alone. Children should not be left alone or unattended in area where appliance is in use. Children<br />
should never be allowed to sit or stand on any part of the appliance.<br />
4. Do not allow children to play with controls or any part of appliance.<br />
5. Do not climb, stand or hang on the appliance.<br />
6. Wear proper apparel—loose-fitting or hanging garments should never be worn while using the appliance. Flammable<br />
material could ignite on contact with hot surface units and cause severe burns.<br />
7. User servicing—do not repair or replace any part of the appliance unless specifically recommended in the manual.<br />
All other servicing should be referred to a qualified technician. Before performing any service, switch off circuit breaker<br />
or remove fuse.<br />
8. Storage in or on appliance—flammable materials should not be stored in an oven, near surface units or in range<br />
cabinet.<br />
9. Do not use water on grease fires – never pick up a flaming pan - smother fire or flame by covering pan with a well fitting<br />
lid, cookie sheet, metal tray or use dry chemical or foam type extinguisher.<br />
10. Use only dry potholders—moist or damp potholders on hot surfaces may result in burns from steam. Do not let<br />
potholder touch hot heating elements. Do not use a towel or other bulky cloth in place of potholder. Such materials<br />
could catch fire on hot surface unit.<br />
11. Do not let cooking grease or other flammable materials accumulate on the cooktop.<br />
Oven Safety<br />
Do not touch heating elements or interior surfaces of oven—heating elements may be hot even though they are<br />
dark in colour. Interior surfaces of an oven become hot enough to cause burns.<br />
During and after use, do not touch, or let clothing or other flammable materials to contact heating elements or interior<br />
surfaces of oven until they have had sufficient time to cool.<br />
Other surfaces of the appliance may become hot enough to cause burns—among these surfaces are, for example, oven<br />
vent openings and surfaces near these openings, oven doors.<br />
1. Use care when opening door—let hot air or steam escape before removing or replacing food.<br />
2. Do not heat unopened food containers—buildup of pressure may cause container to burst and result in injury.<br />
3. Keep oven vent ducts unobstructed.<br />
4. Placement of oven racks—always place oven racks in desired location while oven is cool. If rack must be moved while<br />
oven is hot, do not let potholder contact hot heating element in oven.<br />
5. Do not use aluminum foil to line the bottom of the oven,it could result in a risk of electric shock or fire.<br />
6
Exhaust Hood Safety<br />
Caution: Do not store items of interest to children in cabinet above the range or on top of range cabinet.<br />
Children climbing on range to reach items could be seriously injured.<br />
1. Clean exhaust hood frequently—grease should not be allowed to accumulate on hood or filter.<br />
2. If foods catch fire under the hood, turn the fan off. <strong>The</strong> fan, if operating may spread the flame.<br />
Warming Oven Safety<br />
Caution: Do not store items in the warming drawer, items stored there could be damaged if the warming control<br />
is turned on.<br />
Self Clean Safety Instructions<br />
Read the instructions below and the appropriate timer instructions before attempting to operate.<br />
Do not touch heating elements or interior surfaces of oven—heating elements may be hot even though they are dark in<br />
colour. Interior surfaces of an oven become hot enough to cause burns.<br />
During and after use, do not touch, or let clothing or other flammable materials to contact heating elements or interior surfaces<br />
of oven until they have had sufficient time to cool.<br />
Other surfaces of the appliance may become hot enough to cause burns—among these surfaces are, for example, oven vent<br />
openings and surfaces near these openings, oven doors.<br />
1. Remove utensils and cookware from the oven. Oven racks and rack supports should be removed from the oven. Racks and<br />
supports left in the oven during self clean will become discoloured, but it will not affect the protective coating.<br />
2. Remove all utensils and food from cooktop. Note: use of surface elements while range is self-cleaning is NOT<br />
RECOMMENDED.<br />
3. Remove all contents from the storage drawer. This includes plastic or aluminium utensils and any utensils with plastic parts<br />
that can become over heated and melt.<br />
4. In 48" ranges remove all contents from the storage area . This includes plastic or aluminium utensils and any utensils with<br />
plastic parts that can become over heated and melt.<br />
5. DO NOT clean the gasket. <strong>The</strong> door gasket is essential for a good seal. Care should be taken not to rub, damage or move<br />
the gasket.<br />
6. Never use a commercial oven cleaner in a self cleaning oven. This will damage the finish.<br />
7. Make sure the convection fan is off. <strong>The</strong> convection fan switch must be turned off at the control panel at the timer. (<strong>The</strong> oven<br />
light will automatically go off when the door is closed.)<br />
7
Cooking Controls<br />
<strong>The</strong> cooking controls are located on the right<br />
hand side of the cooktop; these controls<br />
offer an infinite number of heat settings for<br />
ease and accuracy in cooking and baking.<br />
Sealed Burner Features<br />
Features<br />
Control Panel<br />
A) Centre Burners - are two maximum<br />
8,000 BTU (2.34 kW) (L/P<br />
7,000BTU)with simmer of 600<br />
BTU (.2 kW) sealed gas burners<br />
,easy clean, for medium duty<br />
cooking tasks<br />
B) Left Burners - front sealed burner<br />
is maximum 10,000 BTU (2.93<br />
kW) )(L/P 9,000BTU) with simmer<br />
of 1000 BTU (.3 kW) and rear is<br />
maximum 8,000 BTU (2.34 kW)<br />
(L/P 7,000 BTU) with simmer of<br />
600 BTU (.2 kW) accurately<br />
maintain temperature.<br />
C) Right Burners (48" models only) -<br />
front sealed burner is maximum<br />
10,000 BTU (2.93 kW) )(L/P<br />
9,000BTU) with simmer of 1000<br />
BTU (.3 kW) and rear is maximum<br />
8,000 BTU (2.34 kW) (L/P<br />
7,000BTU)with simmer of 600<br />
BTU (.2 kW) , one for large jobs,<br />
one for small, easy clean.<br />
Utensil<br />
Drawer<br />
Storage<br />
D) Gas Burner Controls - allow an infinite selection of cooking temperatures, 4 controls on 30" models and<br />
6 controls on 48" models. All models feature "auto-reignition", which means if for any reason the flame<br />
goes out, it automatically begins to spark to re-ignite the burner!<br />
Oven Features<br />
E) Oven temperature control - With bake control, broil control<br />
F) Self Clean latching handle - slides to the right to lock the oven door during the self clean cycle. (self clean<br />
models only). Latch must not be used to lock door during regular cooking functions or damage to latch<br />
may occur.<br />
G) Convection oven:- baking, broiling<br />
- timed baking, broiling<br />
- convection baking, broiling<br />
- timed convection baking, broiling<br />
- 4 position racking<br />
- 4 cubic feet of energy efficient baking area (.11 cubic meters)<br />
- low maintenance high temperature self clean oven (self clean models only)<br />
8<br />
Heartland<br />
Heartland<br />
B<br />
Figure 5<br />
(48" Model shown)<br />
F<br />
H<br />
A<br />
G<br />
I<br />
C<br />
E<br />
Burner and<br />
Oven Controls<br />
D
Warming Drawer Features<br />
H) Located under the main oven, glides open for easy access<br />
- sliding humidity control<br />
- large 1 cubic foot warming area<br />
I) <strong>The</strong>rmostatic temperature control, located just right and behind the warming drawer<br />
Storage Features (48" models only)<br />
Control Panel<br />
- Rack storage area: ideal for oven racks and baking trays.<br />
- Utensil drawer: Unique storage space, keeping necessities within easy access<br />
A<br />
U<br />
T<br />
O<br />
T IM E R<br />
J<br />
S TO P<br />
K<br />
L<br />
M<br />
Please Note: Warming oven is not affected by timer settings<br />
Clock Control Panel<br />
<strong>The</strong> timer and control panel is concealed behind the cabinet door for standard and self clean models. Note: Warming Oven is<br />
not timer controlled<br />
J) Digital Timer - With minute minder and automatic start and stop cooking features.<br />
K) Rocker Switch controls the overhead light under the exhaust hood.<br />
L) Rocker Switch controls convection fan for convection baking/broiling.<br />
M) Variable speed control for exhaust fan. Switch starts on high when engaged and adjusts down to low.<br />
9
Control Panel Layout<br />
<strong>The</strong> control panel is laid out in a straight line and each control is identified by a<br />
graphic on the right side of the knob.<br />
Model 4200/4210<br />
Control Panel Model 5200/5210<br />
Control Panel<br />
0<br />
6<br />
0<br />
1<br />
Left Rear Burner Control<br />
- Medium<br />
6<br />
5<br />
4<br />
3<br />
2<br />
1<br />
Left Rear Burner Control<br />
- Medium<br />
5<br />
4<br />
3<br />
2<br />
0<br />
6<br />
5<br />
4<br />
0<br />
3<br />
2<br />
1<br />
Right Rear Burner Control<br />
- Medium<br />
6<br />
5<br />
4<br />
0<br />
3<br />
2<br />
1<br />
Left Front Burner Control<br />
- Large<br />
6<br />
5<br />
0<br />
2<br />
1<br />
Left Front Burner Control<br />
- Large<br />
6<br />
5<br />
4<br />
3<br />
2<br />
1<br />
Centre Rear Burner Control<br />
- Medium<br />
4<br />
3<br />
0<br />
0<br />
6<br />
5<br />
4<br />
3<br />
2<br />
1<br />
Right Front Burner Control<br />
- Medium<br />
6<br />
5<br />
4<br />
0<br />
3<br />
2<br />
1<br />
Centre Front Burner Control<br />
- Medium<br />
200<br />
95<br />
250<br />
120<br />
300<br />
150<br />
350<br />
175<br />
400<br />
500 450 205<br />
260 230<br />
Bake/Broil Oven Control<br />
(see page 14)<br />
Warming Drawer Indicator<br />
Light (see page 13)<br />
Bake/Broil Indicator Light<br />
6<br />
6<br />
5<br />
5<br />
4<br />
0<br />
3<br />
2<br />
2<br />
1<br />
1<br />
Right Rear Burner Control<br />
- Medium<br />
Right Front Burner Control<br />
- Large<br />
4<br />
0<br />
3<br />
F<br />
<strong>The</strong> operation of the controls are described<br />
in the following pages.<br />
200<br />
95<br />
250<br />
120<br />
300<br />
150<br />
350<br />
175<br />
400<br />
500 450 205<br />
260 230<br />
Bake/Broil Oven Control<br />
(see page 14)<br />
Warming Drawer Indicator<br />
Light (see page 13)<br />
Bake/Broil Indicator Light<br />
10
Top Burner Operation<br />
OPERATION<br />
Lighting the Top Burners<br />
Your range is equipped with a spark ignition system that is electrically operated. You need only to push in and turn the knob<br />
to any position and the burner will light. When you turn the knob, you will hear a distinct clicking noise. After the burner lights,<br />
the clicking noise will stop. Note: when lighting any one burner, all burners will spark, but only the burner that you have selected<br />
will light. All models feature "auto-reignition", which means if for any reason the flame goes out, it automatically begins to spark<br />
to re-ignite the burner!<br />
See page 12 for manual lighting procedure.<br />
6 (HI) - Quick start for cooking, brings water to<br />
boil.<br />
5 (MED HI) - Fast fry, pan broil, maintain fast boil<br />
on large amount of food.<br />
4 (MED) - Saute and brown; maintain slow boil on<br />
large amount of food.<br />
3 (MED LOW) - Cook after starting at MAX; cook<br />
with little water in covered pan.<br />
2-1 (LOW) - Steam rice, cereal; maintain serving<br />
temperature of most foods.<br />
Top Burner Control<br />
For safety reasons, always adjust the burner controls so that flames do not extend beyond the<br />
edges of pots, pans or other cooking utensils.<br />
Large pots or other over sized cooking utensils may cause random sparking from the burner. To<br />
avoid this condition lower the flame size or use smaller sized cooking utensils.<br />
Do not use a griddle directly on top of grates. To avoid random sparking, please use the Heartland<br />
Griddle Pan Kit for Classic Ranges part #7602 (complete with griddle pan support) may be<br />
purchased from your dealer or directly from Heartland.<br />
11
Power Failure Operation<br />
If electrical power is interrupted in your area, you can still cook meals on the top burners of your<br />
Heartland gas /electric range. Of course your oven will be inoperable, however, by following<br />
these simple directions you will be able to use the top burners without the benefit of electricity.<br />
Caution: make sure your hands and clothing are clear of the burner you are lighting!<br />
Manually Lighting the Top Burners<br />
1) Remove cast grate, for unobstructed access to the burner head.<br />
2) Hold a flame source to the desired burner head. We recommend a barbecue lighter to use<br />
as a flame source.<br />
3) Push in and turn the corresponding control knob to the medium setting.<br />
4) After the burner lights, adjust flame size as required.<br />
5) Carefully replace cast grate, keep fingers clear of the flame.<br />
Please note that the "auto reignition" feature will not function without electricity,<br />
therefore pay close attention to any burners in use while electrical power is interrupted!<br />
When lighting top burners manually, set<br />
control to the medium setting to prevent<br />
potential injury from the flame when<br />
replacing the grate.<br />
Top Burner Control<br />
12
Warming Drawer Control and Operation<br />
To activate the warming drawer, first find the temperature control located<br />
beside the warming drawer behind the drawer door.<br />
Select a temperature level from low to high.("-" to "+) <strong>The</strong> temperature is<br />
infinitely variable and ranges from 130°F to 220°F. (54°C to 104°C)<br />
When the control is in use the indicator will glow until the temperature level<br />
has been reached, then it will cycle on and off to maintain temperature.<br />
Warm rolls, breads, vegetables, meats etc.<br />
as well as plates on HIGH.<br />
<strong>The</strong> warming drawer also features a humidity<br />
control located along the top of the drawer<br />
door. When the control is positioned to the<br />
left stop, the humidity is retained in the warming<br />
drawer. If positioned to the right stop,<br />
then air is able to circulate allowing humidity<br />
to escape.<br />
warming oven indicator light located right<br />
and below main oven control<br />
Too keep moisture in, close humidity control. To keep things crisp, open humidity control. Proof ( rise)<br />
bread or pizza dough on LOW with humidity control closed<br />
Heartlan<br />
Heartland<br />
ClosedOpen<br />
temperature control<br />
humidity control<br />
sliding warming drawer<br />
Please note: Do not use the drawer as storage. Items stored there may be damaged if the temperature<br />
control is activated. Warming drawer may be removed for easier cleaning (see "Warming Drawer<br />
Removal" page 31")<br />
13
Bake - Broil Control<br />
Main oven<br />
indicator light<br />
Warming drawer<br />
indicator light<br />
Oven Bake/ Broil Control<br />
Baking<br />
To bake, push down and turn the oven control counter clockwise to any desired temperature.<br />
When baking is selected, the indicator light under the bake symbol lights up, and the bake<br />
element will activate. <strong>The</strong> element will then cycle on and off to maintain an average temperature<br />
in the oven<br />
Please note: that when oven is turned on to preheat, the first cycle may exceed set temperature<br />
- please allow oven to cycle on/off before placing food in oven.<br />
<strong>The</strong> temperature is infinitely variable between temperatures 150°F and 550°F (65°C and 290°C.)<br />
Broiling (do not broil with door open)<br />
To activate broil (top element), turn oven control to broil . When broiling is selected, the indicator<br />
light, lights up. To de-select broiling, turn the oven control knob to a temperature setting, which<br />
resets the control to baking mode. If knob is turned past the "BROIL" position - element will not<br />
operate. Turn back to broil position.<br />
14
Oven Operation<br />
Before You start:<br />
1. Remove the oven racks and oven rack supports and clean with soap and water. (see<br />
interior oven rack and rack support removal pg. 29 ).<br />
2. Unwrap broiler pan and clean with soap and water.<br />
3. Clean oven with soap and water, making sure that all adhesives have been removed.<br />
4. Set time on the clock, clock must be set or oven will not function! (see timer section<br />
pg. 17).<br />
5. Turn oven on to 500°F (260°C) for 30 minutes to burn off bonding agents in the insulation.<br />
<strong>The</strong>re will be an unpleasant odour and some smoke, which is unavoidable.<br />
Getting to Know Your Oven<br />
<strong>The</strong> oven light will automatically activate when the oven is opened and deactivate when the<br />
oven door is closed.<br />
Also if the oven is set for convection mode, then the convection fan will deactivate when the<br />
oven door is opened, and activate when the oven door is closed.<br />
<strong>The</strong> oven features multi level regular baking/broiling in timed or un-timed modes. For energy<br />
efficient batch baking, choose convection baking, which allows you to bake on multi levels<br />
simultaneously. For traditional baking the convection feature should be OFF.<br />
Your oven has a temperature range of 150° F to 550° F (65°C to 290°C). <strong>The</strong> oven Cycling<br />
Light glows until oven reaches the high end of heating cycle, then cycles off and on during<br />
cooking. <strong>The</strong> average of the high and low levels of the heating cycles will be approximately<br />
within 30° F of selected temperature. This temperature fluctuation is normal and standard<br />
in the appliance industry. See pages 19 and 21 for recommended baking and roasting times<br />
and temperatures.<br />
Note:<br />
1) Self Clean Models Only - Do not engage the self clean oven door latch when not in<br />
self clean mode, as it is possible the oven door safety interlock will activate at high<br />
oven temperatures and damage could occur to the locking mechanism.<br />
2) See pages 20 through 21 for recommended broil times and settings.<br />
3) Temperatures in ovens may shift over time and it is natural for the user to gradually adapt<br />
cooking times accordingly. <strong>The</strong>n, when baking in a new oven with proper calibration, results<br />
may not be as expected based on previous baking habits. Oven cavity sizes also vary from<br />
manufacturer to manufacturer and could affect cooking results slightly. <strong>The</strong>refore, it may<br />
take some time to familiarize yourself with your new oven and some adjustment in cooking<br />
times may be necessary.<br />
15
How to Select Cooking Methods<br />
Standard Baking - To bake, turn the oven control to any desired temperature between 150°F to 500°F (65°C AND 290°C).<br />
When baking is selected, the indicator lights up, and the bake element will activate. Always preheat the oven<br />
approximately 5-10 minutes. During cooking, the bake element will cycle on and off to maintain temperatures. Do not<br />
rotate control past 500°F (290°C) for bake as this is the broil position and only top element will come on.<br />
Standard Broiling - To activate broil (top element), turn oven control to broil (end stop position). When broiling is<br />
selected, the indicator lights up. At this setting the broil element comes on and stays on. To de-select broiling,<br />
turn the oven control knob to a temperature setting, which resets the control to baking mode. When broiling, the oven<br />
door should remain closed, and the grease filter installed. Please do not leave food unattended while broiling as it may<br />
smoke or even burn.<br />
Convection - when the rocker switch in the exhaust hood is set to this symbol, the convection fan has been<br />
activated. <strong>The</strong> convection fan can be operated in three modes.<br />
1) convection baking.<br />
2) convection broiling.<br />
3) convection drying.<br />
Note: When using convection baking, please ensure the grease filter is not installed, otherwise, air will<br />
not be able to properly circulate in the oven. Filter must be installed for convection broiling/roasting.<br />
Convection Baking - select a temperature on the oven control and then select "<br />
Oven is now in "Convection Bake Mode".<br />
" below the rocker switch.<br />
Convection Broiling - select "broil" on the oven control and select " " below the rocker switch. <strong>The</strong> oven<br />
needs to remain closed while in Convection Broil Mode. When broiling, please take care not to leave food<br />
unattended as it may smoke or burn.<br />
Convection Drying - leave temperature control at "OFF" and select "<br />
fan has been activated and oven is now ready to dry spices or fruits.<br />
"below the rocker switch. <strong>The</strong> convection<br />
For time bake, when the rocker switch is set to this symbol " " and the timer and temperature controls are set,<br />
the fan will then automatically activate when the selected time has been reached. For more detail on "Time Bake"<br />
see page 18.<br />
16
CLOCK/ TIMER<br />
A<br />
U<br />
T<br />
O<br />
Cooking symbol<br />
indicates oven is in<br />
auto shut off time<br />
bake mode<br />
Bell symbol indicates minute<br />
minder in operation<br />
TIMER<br />
STOP<br />
"Auto" indicates auto<br />
activate timer in operation<br />
STOP<br />
Minute minder<br />
Adjust setting up<br />
Duration of bake or S/C time<br />
Adjust setting down<br />
End bake or S/C time<br />
Initiate/Cancel<br />
Setup<br />
Time of Day Setting NOTE: Clock must be set or your main oven will not function!<br />
1. To set the time of day:<br />
a) the clock read-out will be flashing "0:00" and "AUTO" alternately.( at first time set up or after a power failure)<br />
b) press " " and " " buttons simultaneously to activate the clock time adjustment. <strong>The</strong> display will stop flashing<br />
except for the ""AUTO" symbol. You will have 3 seconds to start the next step.<br />
c) tap" " to advance time, or " " to decrease time, the display will begin at "12.00". Press and hold to advance time<br />
quickly. Set to the correct time of day (the clock is based on a 12 hr cycle).<br />
d) once the time of day has been entered, the clock is set and the appliance is ready to use.<br />
e) time of day may be adjusted at any point by pressing the" " and " " buttons and then pressing " " or " " setting<br />
buttons.<br />
Minute Minder<br />
1. To set timer: (the minute minder can be at any time even when in timer modes)<br />
a) press “ “ the minute minder button.<br />
b) Set the timer in minutes using the " " and “ “ setting buttons.<br />
c) <strong>The</strong> timer activates 5 seconds after the setting buttons are released, and returns to dime of day mode.<br />
d) when the set time has been reached the timer will sound, 2 distinct beeps.<br />
e) to see time remaining on timer press “ “ at any time.<br />
17
2. To cancel minute minder operation:<br />
a) press “ “.<br />
b) press “ “ setting button and set to zero.<br />
c) then press “ “ cancel button and the display will return to time of day mode.<br />
Time Bake (for main oven only)<br />
1. To set time bake:<br />
a) if convection is desired activate the convection fan rocker switch marked " " on the control panel below the timer.<br />
b) press the “ “ bake duration button.<br />
c) use the " " and “ “ to set the length of time you want the oven to be in operation. (<strong>The</strong> " " and “ “ setting adjust<br />
buttons work in 1 minute intervals). <strong>The</strong> oven will now turn off after the time entered has elapsed.<br />
d) to have the oven turn on at a specific time, next, press the “<br />
STOP<br />
“ end bake time button.<br />
e) use the " " and “ “ to set the actual time of the day you want the oven to shut off. After 5 seconds the display will<br />
return to time of day mode. <strong>The</strong> "AUTO" indicator will light up, showing the timer is in operation, and the “<br />
will shut off, indicating the oven is off until the timer activates the oven.<br />
“ symbol<br />
f) set Temperature Dial to desired cooking temperature. <strong>The</strong> timer calculates the start time by subtracting the cook time from<br />
the time of day you want the oven to shut off.<br />
g) when the bake cycle begins, the “ “ symbol will light up showing that the oven is in operation.<br />
h) when the time bake cycle is complete, the "AUTO" indicator will flash, the “ “ will shut off indicating the oven is off<br />
and the timer will sound (4 distinct beeps).<br />
i) the timer will sound until the “ “ cancel button is depressed. <strong>The</strong> "AUTO" indicator will flash and the oven will not<br />
work until the and the “<br />
“ button is depressed a second time. Remember the turn off your oven control.<br />
2. To cancel time bake:<br />
a) anytime during the time bake cycle depress the “ “ bake duration button and set the time to zero, and depress the<br />
“ “ cancel button to return to time of day mode.<br />
b) the minute minder can still be used during the time bake cycle.<br />
18
General Cooking Guidelines<br />
Standard & Convection Cooking<br />
Standard Cooking:<br />
Radiant Heat Pattern<br />
Diagram shows how<br />
heat is radiated from the<br />
elements, during the<br />
cooking process<br />
This is the traditional “radiant heat” style of cooking. You may choose this method of<br />
cooking for your tried and true recipes. As with all radiant style ovens, it will be<br />
necessary to preheat the oven, especially for baked goods. When roasting meats from<br />
frozen to finish, usually preheating is not required. However allow 1/3 to 1/2 more<br />
cooking timedepending on the size of the cut. To assure desired degree of doneness,<br />
use a meat thermometer for meats and poultry.<br />
Note: Bake and Broil elements are independently controlled. Broil<br />
element will not turn on when bake element is used.<br />
Convection Cooking:<br />
Convection Air Pattern<br />
Diagram shows how heat is<br />
circulated from the convection fan,<br />
distributing heat evenly around the<br />
food, during the cooking process.<br />
Note:<br />
Please ensure grease filter is not<br />
installed when selecting convection,<br />
otherwise fan will not circulate air properly<br />
Convection Roasting:<br />
Convection means conveying. A fan at the back of the oven circulates the hot air thus<br />
cooking foods from all sides, sealing in juices. <strong>The</strong> circulating air penetrates food faster<br />
therefore you may want to cook foods for less time at the usual temperature or reduce<br />
the temperature by 25 F/15 C and cook for approximately 10% less time or as indicated<br />
in our cooking guides on pages 20 and 21.<br />
With convection cooking you can cook on more than one rack at a time thus saving<br />
time and energy. Occasionally if cooking on multi-levels you may need to remove one<br />
pan sooner than the others. You can even cook a complete meal at the same time as<br />
long as you choose items that cook at the same temperature, as there is no flavour<br />
transfer; however we do not recommend an item that may spatter to cook on the same<br />
shelf as a dessert. Be sure to stagger pans if possible on multi-levels so that one is<br />
not directly over the other and leave at least 1" (2.5 cm) of space between the pans.<br />
Do not place large pans directly in front of fan, at the back of oven, as this may block<br />
the air circulation.<br />
Please Note: When cooking high moisture content foods in the oven on the<br />
convection mode,some steam/condensation may be noticed on the outside of<br />
the oven door.<br />
This method of cooking uses both hot air and radiant heat, and is similar to rotisserie<br />
cooking, where high heat is applied quickly and evenly around the meat, but instead<br />
of rotating, hot air circulates around the meat.<br />
Before beginning convection roasting, insert the grease filter at back of oven and insert<br />
the optional raised roasting rack into broiler pan and rack. Place the cuts of meat or<br />
poultry fat side up, uncovered on the raised roasting rack. This allows the air to circulate<br />
around the roast, sealing in the juices. Do not use deep roasting pans or baking pans<br />
with high sides , as air cannot circulate around the food. Insert a meat thermometer into<br />
the thickest part of the meat, avoiding bones to accurately determine doneness.<br />
Standard Broiling:<br />
This method of cooking is used to transfer high heat over a short period of time to placed<br />
in close proximity to the broiler element. Usually used to brown the surface of food,<br />
such as meringues, steaks and roasts. Place meat on the broiler pan (add water to the<br />
bottom of the pan to reduce smoking) and place on the third or fourth rack depending<br />
on the food and your personal tastes. Please do not leave food being broiled unattended<br />
- excessive smoke or burning may occur. Refer to broiling tips & cooking chart on page<br />
21.<br />
19
Cooking Guide<br />
This chart is a referance guide only, as variables such as size, tempature and individual preferances may affect the cooking time.<br />
Recipe or package directions should always take precedence. Keep a record of your results, preferred tempatures and times.<br />
Meat Roasting Guide:<br />
°F °C Minutes per lb (per kg) °F °C<br />
Beef<br />
Sirloin or Rib Roasts Rare 325 160 20-25 (45-50) 140 60<br />
Medium 325 160 25-30 (55-60) 160 70<br />
Well done 325 160 30-35 (65-70) 170 75<br />
Rump, Round (roast) Rare 275 140 40-45 (80-85) 140 60<br />
Medium 275 140 45-50 (90-95) 160 70<br />
Veal<br />
Leg, Loin, Rib Roasts Medium 325 160 30-35 (65-70) 160 70<br />
Well done 325 160 35-40 (75-80) 170 75<br />
Pork<br />
Leg or Loin Roast 325 160 20-25 (45-50) 160 70<br />
Crown Roast 325 160 15-20 (25-30) 160 70<br />
Shoulder Roast 325 160 25-30 (35-40) 160 70<br />
Ham<br />
Smoked, pre-cooked 325 160 10-15 (22-25) 140 60<br />
Lamb<br />
Foods<br />
Degree of<br />
Doneness<br />
Oven Temperature for Regular or<br />
Convection Roasting<br />
Internal<br />
Cooking<br />
Temperature<br />
Leg Rare 325 160 20-25 (45-50) 140 60<br />
Leg, Should Roasts Medium 325 160 25-30 (55-60) 160 70<br />
Well done 325 160 30-35 (65-70) 170 75<br />
Rack (Roast) Rare 400 200 10-12 (22-25) 140 60<br />
Medium 400 200 12-18 (25-38) 160 70<br />
General Cooking Tips & Preferences<br />
·Place oven rack in correct position before<br />
preheating oven.<br />
·After reading the thermometer insert another<br />
1/2"/1 cm and read again. If it reads lower than the<br />
first then continue cooking.<br />
·Meat continues to cook after removal from oven -<br />
Allow meat to stand about 15- 20 minutes before<br />
carving<br />
Convection Cooking:<br />
·For convection roasting, insert the grease filter in<br />
back of oven and place the raised roasting rack<br />
over the 2 pc. broiler pan. (broiler rack is necessary<br />
to prevent spattering).<br />
·Convection cooking may cook faster; times may<br />
often be reduced up to 10 minutes per lb (.5 Kg) -<br />
for large items meat should be checked shortly<br />
before the suggested minimum cooking time.<br />
·Recommended for “all” tender meats to give a<br />
brown outside with a juicy, tender inside<br />
·For extra browning brush lean meats with oil<br />
·Place all roasts fat side up on raised roasting rack<br />
4<br />
3<br />
2<br />
1<br />
Oven Rack<br />
Positioning<br />
Figure 1<br />
Poultry Roasting Guide:<br />
Internal<br />
Oven Temperature for Standard or<br />
Cooking<br />
Foods<br />
Convection Roast<br />
Temperature<br />
°F °C Minutes per lb (per Kg) °F °C<br />
Turkey Lbs Kg<br />
Stuffed 6 - 8 3 - 3.5 325 160 30-32 (60-65) 180 82<br />
Stuffed 10 - 12 4.5 - 5.5 325 160 23-25 (45-50) 180 82<br />
Stuffed 16 - 22 7 - 10 325 160 15-20 (30-35) 180 82<br />
Unstuffed 6 - 8 3 - 3.5 325 160 25-30 (50-55) 170 77<br />
Unstuffed 10 - 12 4.5 - 5.5 325 160 18-23 (35-40) 170 77<br />
Unstuffed 16 - 22 7 - 10 325 160 13-15 (25-30) 170 77<br />
Parts-1/2-Boneless Breast OR Leg 1 500 (g) 325 160 60-75 min. total 170 77<br />
Chicken Lbs Kg<br />
Capon 5 - 8 2.3 -3.6 325 160 18-20 (40-45) 170 77<br />
Chicken, Whole, Unstuffed 3 - 4 1.3 -1.8 325 160 20-25 (45-50) 170 77<br />
Chicken, Quarters 325 160 18-20 (40-45) 170 77<br />
General Cooking Tips & Preferences<br />
·Place oven rack in correct position before<br />
preheating oven. Rack position is 2 or 3 for standard<br />
roasting & rack 1 for convection roasting (refer to<br />
Figure 1)<br />
·For extra browning brush skin with oil<br />
·Insert a meat thermometer into the inner thigh<br />
(avoid touching the bone) to accurately determine<br />
doneness. Take a second reading inserted another 1/<br />
2"/1 cm and read again , if it reads lower than the<br />
first then continue cooking.<br />
·Poultry continues to cook after removal from oven<br />
Allow to stand 15-20 minutes before carving.)<br />
Convection Roasting:<br />
·Insert the grease filter in back of oven and place<br />
the raised roasting rack over the 2 pc. broiler pan<br />
(broiler rack is necessary to prevent spattering).<br />
·Convection cooking may be faster; times may<br />
often be reduced up to 25% - for large items check<br />
shortly before the suggested minimum cooking time.<br />
20
Broiling Guide:<br />
Foods Degree of Doneness Thickness<br />
Cooking Guide<br />
This chart is a referance guide only, as variables such as size, tempature and individual preferances may affect the cooking time.<br />
Recipe or package directions should always take precedence. Keep a record of your results, preferred tempatures and times.<br />
Approximate<br />
Time<br />
General Cooking Tips & Preferences<br />
·Insert the grease filter (provided) on to the fan shield to<br />
prevent grease build up.<br />
·Allow the oven to preheat for 8 minutes<br />
Beef<br />
Steaks Rare 3/4 - 1 inch (2 cm) 5-6 min/side<br />
Caution: Accessible parts may become hot when the broiler is in use. Children should be kept away.<br />
Baking Guide:<br />
-<br />
Medium 3/4 - 1 inch (2 cm) 7-8 min/side<br />
Ground Beef Patties Well done 3/4 - 1 inch (2 cm) 6-8 min/side<br />
Pork<br />
Pork Chops or Kabobs until no longer pink 3/4 - 1 inch (2 cm) 5-6 min/side<br />
Lamb<br />
Lamb Chops or Kabobs Medium Rare 1 inch (2 cm) 5-7 min/side<br />
Chicken<br />
Chicken Parts until juices runs clear 25-40 minutes<br />
Boneless Breasts until no longer pink 6-8 min/side<br />
Fish<br />
Whole or Steaks<br />
flakes with a fork<br />
Boneless Fillets flakes with a fork 5-10 minutes<br />
Lobster Tails, Thawed<br />
Breads<br />
Yeast Loaf<br />
Yeast Rolls<br />
Foods<br />
Focaccia or Pizza<br />
Muffins<br />
Tea Biscuits<br />
Cakes<br />
Layer Cake Mixes<br />
Angel Food Mixes<br />
Single Rack<br />
Position for<br />
Standard or<br />
Convection<br />
2<br />
2 or 3<br />
1 or 2<br />
2 or 3<br />
2 or 3<br />
2 or 3<br />
1<br />
Multiple Rack<br />
Position for<br />
Convection<br />
ONLY<br />
Not advised on<br />
multiple racks<br />
2 & 4 or 1 & 3<br />
Not advised on<br />
multiple racks<br />
2 & 4 or 1 & 3<br />
2 & 4 or 1 & 3<br />
Not advised on<br />
multiple racks<br />
Not advised on<br />
multiple racks<br />
Standard<br />
Temperature<br />
F<br />
400<br />
375<br />
400<br />
425<br />
450<br />
340<br />
325<br />
C<br />
200<br />
190<br />
200<br />
220<br />
230<br />
175<br />
160<br />
Cooking<br />
Time<br />
Minutes<br />
30 - 40<br />
15 - 20<br />
15 - 20<br />
20 - 25<br />
12 - 15<br />
30 - 36<br />
55 - 60<br />
Convection<br />
Temperature<br />
F C<br />
375<br />
350<br />
400<br />
400<br />
425<br />
300<br />
300<br />
190<br />
180<br />
200<br />
200<br />
220<br />
150<br />
150<br />
8-10 minutes<br />
Cooking<br />
Time<br />
Minutes<br />
20 - 30<br />
6 - 10<br />
12 - 18<br />
12 - 20<br />
8 - 12<br />
25 - 30<br />
40 - 45<br />
·Prepare meat, allowing frozen meat to thaw before<br />
broiling.<br />
·Slit the fat around the edge of the meat about every inch,<br />
to prevent curling. Arrange meat on the broiler pan.<br />
·Always use the broiler pan and rack supplied.<strong>The</strong>y are<br />
designed to allow fats to drip into the pan, reducing<br />
smoking while the food is cooking. If desired, the broiler<br />
pan may be lined with foil and the broiler rack may be<br />
covered with foil. However be sure to mould the foil to the<br />
broiler rack and cut slits in the foil to conform to the slits<br />
in the rack to allowjuices and fat to drain into the pan.<br />
·Broil meat on rack of broiler pan placed on oven shelf<br />
in third or fourth position (refer to Figure 1) about 4-5<br />
inches (10-12 cm) below the top element.<br />
·<strong>The</strong> closer the meat is placed to the broil element, the<br />
faster the surface browns. For rare meat, preheat the<br />
broiler unit and place the meat as close to the unit as<br />
possible.<br />
·<strong>The</strong> further away the meat is placed, the slower the<br />
surface browns and the more well done the meat will be.<br />
·A small amount of water placed in the broiler pan will<br />
reduce the smoke and splattering from hot<br />
drippings.<br />
·Turn meat with tongs, not a fork so as not to pierce meat<br />
and lose juices.<br />
·Keep oven door closed for broiling.<br />
General Cooking Tips & Preferences<br />
·Place oven rack in correct position before preheating oven<br />
(refer to Baking Guide and Figure 1on pg. 24)<br />
·Bake most frozen foods that are in foil containers on the<br />
aluminum baking sheet supplied with oven as shiny<br />
surfaces reflect the heat.<br />
Piecrusts:<br />
- Dull metal pans absorb and conduct heat the best.<br />
- Dark finishes and glass absorb more heat, cooking<br />
faster and resulting in darker crusts.<br />
- If using shiny aluminum foil pans, place on aluminum<br />
baking sheets to conduct heat better for bottom crust.<br />
-Shield edges with foil if getting too brown before<br />
completely cooked<br />
·For Layer Cakes single rack convection is recommended<br />
·For Angel Food Cakes convection is recommended with 1<br />
or 2 cakes<br />
·If using insulated baking sheets, items may take longer<br />
to cook.<br />
Cupcakes<br />
Pies<br />
Shells without Filling<br />
Double Crust with Filling<br />
Cookies<br />
Drop or Sugar<br />
Rolled<br />
2 or 3<br />
1 or 2<br />
1<br />
2 or 3<br />
1 or 2<br />
2 & 4 or 1 & 3<br />
Not advised on<br />
multiple racks<br />
Not advised on<br />
multiple racks<br />
2 & 4 or<br />
2, 3 & 4<br />
2 & 4 or<br />
2, 3 & 4<br />
350 180 20 - 25 325 160 15 - 20<br />
400 200 8 - 10 400 200 8 - 10<br />
450 230 15<br />
- then lowering to:<br />
425 220 15<br />
- then lowering to:<br />
375 190 30 - 40 350 180 20 - 25<br />
350 180 10 - 12 325 160 8 - 10<br />
375 190 8 - 10 350 180 8 - 12<br />
21<br />
Convection Baking:<br />
·Generally lids or foil covering are not recommended except<br />
for moist casseroles (e.g. lasagna) which can be covered<br />
half way through the cooking time to prevent drying out.<br />
·For quick breads (e.g. banana or zucchini loaves) do not<br />
reduce temperature since they are very dense and moist.<br />
Be sure to insert a cake tester or toothpick to see that<br />
center is cooked.<br />
·For cookies, tea biscuits and rolls, use aluminum baking<br />
sheets that are supplied with stove, do not use larger ones<br />
or ones with sides. This is so that the air can circulate<br />
evenly. When multiple racks are cooked at once, middle<br />
rack may take a few minutes longer to cook.
Porcelain and Painted Enamel<br />
Care and Cleaning<br />
Keeping it clean<br />
<strong>The</strong> porcelain and painted enamel is very serviceable and simple to clean, but because it is<br />
glass, it will not withstand rough handling or abuse. Avoid extreme variance of temperatures<br />
on porcelain. Porcelain is glass and sudden changes in temperature may cause cracking. To<br />
clean porcelain surfaces, use warm, soapy water, glass cleaner or non abrasive cleaner and<br />
a soft cloth. Avoid abrasive cleaners.<br />
If any acid based food or liquid, such as lemon juice or tomato juice, is spilled on the range, wipe<br />
it at once to prevent staining.<br />
Note: Red appliances only - a red wax coating has been added for preparation purposes which<br />
may wear off during cleaning - this is normal and does not affect finished product.<br />
Oven & Warming Drawer Cleaning<br />
Standard Oven/Warming Drawer (non self clean)<br />
Your range must be kept clean and free of accumulations of grease or spillovers which may<br />
ignite. This is most important in the oven compartment. When cleaning the oven or warming<br />
drawer, make sure it is turned “Off” and is cool. For simple spills, clean with a strong solution<br />
of detergent, then wipe with a clean damp cloth and dry.<br />
When food or grease has burned on the lining, apply a strong oven cleaning compound. Follow<br />
directions on the package, but avoid applying a strong cleaner to the front flanges or sides of<br />
end panels because it may destroy the door seals or plated surfaces. Under no circumstances<br />
should an oven cleaner be used in a hot oven or warming drawer.<br />
Oven racks, oven rack supports, broiler pan rack, oven bottoms, and broiler pan are all<br />
removable for easy cleaning. <strong>The</strong> warming drawer is also removable for easier cleaning (see<br />
page 31 for warming drawer removal instructions). Oven racks may be cleaned in your sink<br />
with dish cloth and detergent. If spillage has remained on the racks for an extended period,<br />
more vigorous cleaning with a steel wool soap pad may be required.<br />
Self Clean Oven<br />
Self Cleaning requires the use of the clock timer. Read the instructions below and the<br />
appropriate timer instructions before attempting to operate. After the self clean cycle is<br />
completed, the shiny luster of the oven cavity may diminish in some areas, this is not uncommon<br />
and it does not affect the operation or performance of the range<br />
1. Remove cookware from the oven. We recommend that the oven racks also be removed.<br />
If they are left in the oven, the racks will become discoloured and rough after cleaning, but it will<br />
not affect the protective coating. Wiping the racks down with a bit of vegetable oil can help with<br />
the ease of sliding the racks in and out.<br />
2. Remove any items from the warming drawer(as well as the side storage area and utensil<br />
drawer in the 48" models). This includes utensils with plastic parts that can become overheated<br />
and melt.<br />
22
3. Remove all utensils and food from cooktop.<br />
4. Wipe up heavy soil on the oven bottom.<br />
5. Clean spills on oven front frame (A) and the oven door outside of the gasket area (B) with a damp<br />
cloth. <strong>The</strong>se areas are outside the self cleaning area and soil will become baked on.<br />
A-oven front frame<br />
Do not clean gasket<br />
B-outside oven door gasket<br />
area<br />
DO NOT under any circumstance use a commercial oven cleaner, or surface coating<br />
for ovens on a self clean oven. This will damage the finish.<br />
DO NOT clean the gasket<br />
DO NOT use surface elements while range is self-cleaning<br />
DO NOT run the convection fan during self clean mode. <strong>The</strong> convection fan switch<br />
must be turned off at the control panel in the exhaust hood. (<strong>The</strong> oven light will go off<br />
automatically when the oven door is closed)<br />
23
"P 1.30" and "AUTO<br />
lights up when self<br />
clean is activated<br />
A<br />
U<br />
T<br />
O<br />
display will show time,<br />
1:30 to start, adjustable<br />
to 3:00 hours maximum<br />
T IM E R<br />
S TO P<br />
press "+" to increase<br />
self clean time<br />
press bake button to set<br />
self clean mode<br />
Figure A - Control Panel Layout<br />
How to Self Clean<br />
<strong>The</strong> recommended self clean time is 3 hours. <strong>The</strong> cycle can be set however, anywhere from 1 hour 30 minutes<br />
for light soiling, to 3 hours maximum for heavy soiling.<br />
Be sure the self clean safety instructions have been followed.<br />
1. Lock the oven door by pushing the self clean<br />
door latch fully to the right. (see fig. B)<br />
latch in open position<br />
(non self clean mode)<br />
latch in locked position<br />
(self clean mode)<br />
2. <strong>The</strong> clock will display "P1.30" which indicates<br />
one hour thirty minutes of self clean time. As<br />
well " " and "AUTO" symbol will light up,<br />
indicating the self clean cycle is active.<br />
3. Press bake " " button on the clock<br />
4. Tap the " " button for additional self clean<br />
time in one minute increments. Press and<br />
hold to advance quickly to 3:00 hour<br />
maximum. 3 hours is recommended for<br />
maximum cleaning.<br />
Figure B - self clean latch positions<br />
24
5. Turn the oven thermostat control knob clockwise until it<br />
can no longer be turned (see fig c). Bake indicator will<br />
come on.<br />
6. Your oven is now in the self clean mode and will operate<br />
in self clean mode for the time you have set.<br />
7. At the end of the cycle the oven will shut off and the clock<br />
will flash "P0.00" and the symbol "AUTO" alternately.<br />
8. Turn the thermostat control knob to “0”. <strong>The</strong> clock will flash<br />
until the the oven is unlocked.<br />
Self Clean<br />
position<br />
9. <strong>The</strong> safety interlock is active until the oven has cooled to<br />
a safe temperature (approximately 1 hour) You will not<br />
Figure C<br />
be able to unlock the oven door during this cool down<br />
period. Please do not attempt to open door while locked, or damage to locking mechanism may occur.<br />
Caution: Even after the oven door lock has released the oven may still be too hot to touch.<br />
Use caution to avoid burns.<br />
10. When the oven has sufficiently cooled, wipe away the remaining grey ash with a damp cloth.<br />
DANGER:If a large amount of smoke comes out of the oven vent it is probably because you<br />
have left something in the oven or the storage drawer. Turn off the oven thermostat control.<br />
Allow the oven to cool and use caution when removing any utensils or debris, to avoid burns.<br />
Note: Self clean mode may be cancelled at any time... by turning the oven thermostat control<br />
back to "0". Unlatch the self clean door latch.<br />
Remember, the safety interlock is active until the oven has cooled to a safe temperature - do<br />
not attempt to force open.<br />
Time Delay Self Clean<br />
To set TIME DELAY self clean<br />
1. Lock the oven door by pushing the self clean door latch fully to the right. (see fig. B)<br />
2. <strong>The</strong> clock will display "P1.30" which indicates one hour thirty minutes of self clean time. As well " "<br />
and "AUTO" symbol will light up, indicating the self clean cycle is active.<br />
3. Press bake " " button on the clock<br />
4. Tap the " " button for additional self clean time in one minute increments. Press and hold to advance<br />
quickly to 3:00 hour maximum. 3 hours is recommended for maximum cleaning.<br />
5. Next, press the "<br />
STOP<br />
" end time button, the display will change to show the time of day.<br />
25
6. Use the " " or " " to set the actual time of the day you want the oven to shut<br />
off. After 5 seconds the display will change to show self clean time remaining, the<br />
"AUTO" indicator will remain lit, and the "<br />
is not in operation and delay timer is active.<br />
" symbol will shut off showing the oven<br />
7. Turn the oven thermostat control knob, to the self clean position. (see fig C,<br />
previous page)<br />
8. Your oven is now in the delay self clean mode and will operate for the time you have<br />
set.<br />
9. When the self clean cycle begins, the " " symbol will light up showing that the<br />
oven is in operation and will be in the self clean cycle for the length of time on the<br />
display.<br />
10. At the end of the cycle the oven will shut off and the clock will flash "P0.00" and the<br />
symbol "AUTO" alternately.<br />
11.Turn the thermostat control knob to “0”. <strong>The</strong> clock will flash until the the oven is<br />
unlocked.<br />
12. <strong>The</strong> safety interlock is active until the oven has cooled (approximately 1 hour) You<br />
will not be able to unlock the oven door during this cool down period. Please do not<br />
attempt to open door while locked or damage to the locking mechanism may occur.<br />
Caution: Even after the oven door lock has released the oven may still be too hot to<br />
touch. Use caution to avoid burns.<br />
13. When the oven has sufficiently cooled wipe away the remaining grey ash with a<br />
damp cloth.<br />
DANGER: if a large amount of smoke comes out of the oven vent it is probably<br />
because you have left something in the oven or the storage drawer. Turn off the oven<br />
thermostat control. Allow the oven to cool and use caution when removing any utensils<br />
or debris, to avoid burns.<br />
To cancel time delay self clean:<br />
Turn the oven thermostat control knob, to the "0" position.<br />
26
Nickel Plated Trim<br />
Nickel plated surfaces may be cleaned with any non abrasive chrome and metal polish (such as<br />
Flitz) or Windex and a soft cloth. If any acid based food or liquid, such as lemon juice or tomato<br />
juice, is spilled on the range, wipe it at once to prevent staining.<br />
Exhaust Hood<br />
An exhaust filter is included with your exhaust hood. <strong>The</strong> filter may be cleaned periodically in soapy<br />
water. <strong>The</strong> filter should be replaced every 4 months or when they begin to restrict air flow.<br />
Replacement Filters are available from your dealer or directly from Heartland Appliances.<br />
Please order four or more at one time to save freight and handling charges. See instructions<br />
for ordering on page 39.<br />
<strong>The</strong> inside of your exhaust hood should be inspected periodically for grease buildup (a fire hazard)<br />
and cleaned as required with soap and water. Please turn off power to unit when cleaning inside<br />
the hood.<br />
Convection Fan Filter<br />
Filter may be removed and washed in soap and water or washed in a dish washer. To remove<br />
the filter, grasp the filter and pull upwards to unhook it from the deflector. Reverse the procedure<br />
to replace. Filter to be used for Convection Broil/Roasting applications only.<br />
Oven and Cabinet Light Replacement<br />
Before replacing a lamp, disconnect the power at the main fuse or circuit breaker panel. When<br />
replacing light bulbs, wait until the oven and bulb are cool. Remove oven light lens by simply<br />
unscrewing it counter clockwise.<br />
<strong>The</strong> bulb can then be unscrewed easily. Always handle the bulb with a dry (never wet) cloth to<br />
protect hands. If light bulb should break, disconnect power to range by unplugging it or removing<br />
the fuse from the panel before touching the bulb.<br />
When replacing the bulb, use only a 40 watt oven bulb available at your local hardware store<br />
or appliance dealer.<br />
When cleaning the oven, do not touch lens with a wet cloth.<br />
27
Surface Burners<br />
Top burners require little care other than to wipe off the head of each burner. If a boilover<br />
occurs, the burner cap can be easily lifted out so burner port holes can be cleaned in hot soapy<br />
water with a soft brush. <strong>The</strong>re are no bolts or screws to remove. <strong>The</strong> igniter must also be kept<br />
clean to ensure quick positive starts. Simply lift the burner cap and clean. When replacing,<br />
cap<br />
flame spreader<br />
burner base<br />
be sure the tab is locked securely in position on the burner base. For normal or everyday<br />
cleaning of light spills, wipe the burner caps with a damp cloth. For heavy duty cleaning—<br />
cooked spills, oil stains, etc. scrub with a tub and tile type of cleaner. Rinse thoroughly after<br />
every cleaning operation. Wipe away excess water . Avoid using abrasives on the burner<br />
base, as they may damage the finish on the burner base.<br />
Oven and Cabinet Light Replacement<br />
Before replacing lamp, disconnect the power at the main fuse or circuit breaker panel. When<br />
replacing light bulbs wait until the oven and bulb are cool. Remove oven light lens by simply<br />
unscrewing it counter clockwise. <strong>The</strong> bulb can then be unscrewed easily. Always handle the<br />
bulb with a dry (never wet) cloth to protect hands. If light bulb should break, disconnect power<br />
to range by unplugging it or removing the fuse from the panel before touching the bulb.<br />
Replace the bulb. Use only a 40 watt oven bulb available at your local hardware store or<br />
appliance dealer.<br />
When cleaning the oven, do not touch lens with a wet cloth.<br />
WARNING!<br />
Do not sit, lean, lift or stand on the<br />
doors or drawers of this range as<br />
possible injuries may result.<br />
28
Interior Oven Rack<br />
<strong>The</strong> oven rack is designed with stop-locks so that when placed correctly on the supports, it (a) will<br />
stop before coming completely out of the oven, (b) will not tip when placing or removing food.<br />
To install, place the rack "feet" on the rack support and push the oven rack backward along the rack<br />
support (see 1 )<br />
Push the oven rack all the way to the back until the oven rack slips off the end of the rack support<br />
(see 2 )<br />
<strong>The</strong>n pull rack support ahead slightly to engage the "feet" with the rack support (see 3 ) To remove<br />
reverse the installation procedure.<br />
Oven rack "feet"<br />
1<br />
Oven rack<br />
Rack Support<br />
2<br />
3<br />
Rack Supports<br />
<strong>The</strong> oven rack supports are designed to interlock into the oven sides but are easy to<br />
remove. First remove oven racks (see instructions above), then grasping the lower<br />
portion of the rack support, swing it out to approx. 45 degrees and gently pull down.<br />
Assemble in reverse order.<br />
29
Removal of Oven Door<br />
At times you may want to remove the oven door for thorough cleaning of the oven. Removal of the oven door is easy:<br />
1) Open oven door, and latch the brass catches on to the upper leg of the hinge. (see below). Make sure the catch is<br />
securely hinged.<br />
2) With a hand on each side of the door lift the door slightly, and pull out.<br />
3) <strong>The</strong> door weighs about 39 LBS (18 kg) , please exercise caution when removing the door.<br />
4) To replace the door reverse this sequence. Please ensure<br />
hinges are fully inserted into recptacle and that door is fully<br />
opened to disengage brass catches. When closing door<br />
again, please inspect brass catches to ensure that they<br />
are completely away from hinges or damage may occur.<br />
Make sure the brass catch is<br />
securely hinged<br />
WARNING!<br />
Do not sit, lean, lift or stand on the doors or<br />
drawers of this range as possible injuries<br />
may result.<br />
Upper leg<br />
Brass catch<br />
Oven door<br />
2) and pull out<br />
1) lift the door slightly<br />
30
Warming Drawer<br />
<strong>The</strong>se ranges are equipped with a warming drawer below the main oven. <strong>The</strong>y have a variable thermostat, which<br />
is on the right side behind the drawer front. When "ON", a light will be visible on the control panel cooktop. When<br />
removing the drawer ensure that the control is set to "0" (the off position) and the drawer is cool.<br />
To remove the drawer, open the drawer until you see a plastic clip on the side of the track attached to the drawer.<br />
Simply push down on the clip on each of the tracks and pull straight out.<br />
To install the drawer simply slide the drawer back onto the track and the clips will automatically latch into place.<br />
Note: Do not use the warming drawer as a storage area.<br />
Push plastic clip down to<br />
remove slider<br />
<strong>The</strong> Broiling Pan<br />
<strong>The</strong> broiling pan griddle allows for the proper drainage of cooking grease into the lower pan. Both the griddle<br />
and pan should always be used when broiling.<br />
If aluminum foil is used in the bottom of the pan, be absolutely sure it does not block the drain vents along<br />
edges of the pan. Many grease fires are caused by improper use of broiling pans and/or improper use of<br />
aluminum foil.<br />
Always remove the broiler pan from the compartment as soon as you finish broiling. It makes the pan much<br />
easier to wash and there is no chance that the pan and drippings will be forgotten. Grease left in the pan<br />
can catch fire if the oven is used without removing the grease. Let the pan cool first, then wash the pan and<br />
griddle in hot soapy water.<br />
Broiling Pan and Griddle<br />
31
SETUP AND TROUBLESHOOTING<br />
Burner Setup & Adjustment<br />
<strong>The</strong> range was carefully set up and inspected at the factory but some final adjustments may be necessary once the unit is<br />
installed.<br />
You should check the following:<br />
i) First check to make sure there are no gas leaks. Propane and natural gas have a very<br />
distinct smell which is easily detected by the human nose. If in doubt, soak each pipe<br />
joint with soapy water and look for bubbles. Do not use an open flame for testing.<br />
ii) Check that all the controls are operating properly by lighting each of the burners. Turn<br />
the burners on by pushing down and turning counter clockwise. Try them at low,<br />
medium and high settings.<br />
iii) Check the quality of the flame. <strong>The</strong> top burners should have a steady, relatively quiet<br />
flame with a 1/2" (13mm) sharp blue cone. <strong>The</strong>re should be no orange flame. <strong>The</strong> oven<br />
burner should have a clean blue flame with inner cones of 1/4" to 1/2" (6.35mm to<br />
13mm). See figure 8.<br />
If everything checks out, you’re “cooking with gas”. If not, refer to the gas trouble shooting guide on page 34<br />
Outer Cone<br />
Inner Cone<br />
figure 8.<br />
32
Range Problem Solver<br />
To save time and money before you call for service, check this<br />
guide.<br />
If you have a problem it may be minor. You may be able to<br />
correct it yourself. Use this Guide to locate your problem and<br />
then follow the suggested recommendation.<br />
Oven will not work<br />
• Plug on range is not completely inserted in the wall<br />
receptacle.<br />
• <strong>The</strong> circuit breaker in your house has been tripped or a<br />
fuse is blown in the switch panel.<br />
• <strong>The</strong> multi pin plug from the exhaust hood is not properly<br />
or completely plugged in.<br />
• <strong>The</strong> timer is not set, if the timer is flashing see page 17<br />
"Time of Day Setting"<br />
• <strong>The</strong> timer is set for time bake. If "AUTO" is lit, then time<br />
bake function is on. Push the cancel " " button<br />
• <strong>The</strong> self clean high limit breaker has activated, <strong>The</strong> high<br />
limit breaker is located on the bottom of the control panel<br />
on 48" models, and in 30" models it is located under the<br />
range on the right side midway between the front and back<br />
legs. Reset by pushing in the red plunger.<br />
Food does not broil properly<br />
• Broil control not set properly<br />
• Rack position is incorrect.<br />
• Necessary preheating was not done.<br />
• Utensils are not suited for broiling.<br />
Food is not roasting properly<br />
• Oven temperature is not set correctly.<br />
• Rack position is incorrect.<br />
• Roasting pan is too small.<br />
• Improper cookware is being used.<br />
• A foil tent was not used when needed to slow down<br />
browning.<br />
Food is not baking properly<br />
• Control is not set properly.<br />
• Rack is not on correct shelf position.<br />
• <strong>The</strong> wrong cookware is being used.<br />
• Too many utensils in the oven.<br />
• Temperature setting is incorrect.<br />
Oven light does not work<br />
• Check that light switch is not jammed. <strong>The</strong> light switch<br />
activator is located at the left side bottom of the oven<br />
door.(to inspect: remove door as per page 30 instructions)<br />
• Light bulb is loose.<br />
• Bulb has blown.<br />
• Breaker or fuse has been tripped or blown.<br />
Surface units will not work<br />
• Plug on range is not completely inserted in the wall<br />
receptacle.<br />
• <strong>The</strong> circuit breaker in your house has been tripped.<br />
Oven <strong>The</strong>rmostat<br />
Oven thermostats, in time, may “drift” from the factory setting<br />
and differences in timing between an old and new oven of 5 to<br />
10 minutes are not unusual. Your oven control has been set at<br />
the factory and is more apt to be accurate than the oven which<br />
it replaced. Voltage lower than 240v will affect performance,<br />
particularly preheat time, which increases from 10-12 minutes<br />
to 20 - 22 minutes.<br />
If you still require help...<br />
Heartland Ranges contain standard electrical components<br />
available from your dealer or Heartland Appliances Inc.<br />
In case repair is required, consult your Dealer for an appliance<br />
repair depot near you. For warranty service, please call your<br />
dealer, or call Heartland:<br />
Bus. (519) 650-5501 Fax (519) 650-3773<br />
Toll Free Phone 1-800-361-1517<br />
Toll Free Fax 1-800-327-5609<br />
Have your serial number, model, and date of purchase<br />
information ready.<br />
Technical Data<br />
- Voltage 240 v / 60 Hz<br />
- Load 3.8 kW (model 5200/5210)<br />
- Load 3.8 kW (model 4200/4210)<br />
NOTE: Service amperage should be calculated by a<br />
qualified electrician.<br />
33
Gas Trouble Shooting Guide<br />
If you smell gas:<br />
Check for loose connections. Connections may loosen in transportation. If the range connections are not perfectly<br />
tight, you can have a small leak and therefore a faint gas smell. Some leaks can only be found with the controls in<br />
the "on" position exposing the user to serious burns. Never use a match or flame to locate a leak.<br />
FINDING A GAS LEAK IS NOT A “DO IT YOURSELF” PROCEDURE. IF YOU SMELL GAS, TURN OFF THE<br />
SUPPLY OF GAS TO THE RANGE AND CALL YOUR SERVICEMAN.<br />
If you have other problems:<br />
Before any component is replaced follow this four-step check list, then consult "Gas Trouble Shooting Chart" below.<br />
1. Be sure the problem is not due to improper operation.<br />
2. Check the basic adjustments: the correct pressure, dirt in the line, etc.<br />
3. Check the setting to be sure it is correct for the gas on which the range is to be used, either propane<br />
or natural gas.<br />
4. If gas pressure and all adjustments seem correct, use the chart which follows to help identify the<br />
problem and/or malfunctioning component.<br />
Gas Trouble Shooting Chart<br />
Problem Cause Remedy<br />
A. Spark Ignition<br />
1. No sparks when any control<br />
knob is turned to “light”<br />
2. No sparks when one or<br />
some control knob(s) is<br />
(are) turned to “light”<br />
3. Sparking occurs at<br />
electrodes when all control<br />
knobs are turned off<br />
No power to spark module - module<br />
switch faulty<br />
1. Check electrical supply to spark module with voltmeter - replace module<br />
Reignition electrode controlled by knob 2. Check high voltage wires carefully for loose connections or pinches in<br />
switch is grounded or has a high the wires; if connections are tight, replace high voltage wire<br />
resistance leak<br />
Electrode to far from burner base<br />
Disconnected switch lead or short<br />
in switch lead<br />
<strong>The</strong> igniter is on eccentric pin , so rotating the igniter in its place will bring<br />
the igniter closer to the burner base.<br />
3. Check all switch lead connections for looseness and wires for damage<br />
4. All burners that are turned<br />
on have lighted but<br />
electrodes are still sparking<br />
High resistance or open connection<br />
between spark output terminal and<br />
H.V.. wire receptacle (spark will<br />
jump small gap but sensing current<br />
will not)<br />
Push receptacles firmly onto all terminals<br />
Check positioning of shrink sleeving on receptacle – should be flush with end<br />
of receptacle – trim if necessary<br />
Defective module<br />
Replace module<br />
Ground/Earth lead to module<br />
disconnected or range chassis not<br />
properly connected to ground/earth by<br />
ground/earth lead or through third prong<br />
of power cord plug, combined with<br />
reversed power supply polarity<br />
Check ground/earth connection of range chassis and ground/earth lead<br />
connection to module<br />
5. One or more burners have<br />
lighted but eletrodes are still<br />
sparking<br />
Pots or cooking utensils (i.e. griddle<br />
plates) are too large and are<br />
smothering the flame causing the reignition<br />
to spark<br />
Use smaller sized pots or reduce size of flame. Do not use<br />
griddle plate directly over top of grates. Heartland Appliances<br />
sells a griddle kit #7602 complete with griddle support.<br />
34
Conversion Kits and Information<br />
Converting Model 4200/4210, 5200/5210 to Natural Gas (NAT) or Propane (LP)<br />
Normally, Model 5200/ 5210 (48") and 4200 / 4210 (30") are ordered from the factory preset for either Natural<br />
Gas or Propane. However, they can be converted after installation by converting the pressure regulator and<br />
replacing the orifices in the valves and burners with the appropriate orifice kit. Kits can be ordered from your<br />
dealer or directly from Heartland. Each kit contains one orifice for each size burner and each size burner valve,<br />
6 orifices for the 5200/ 5210 and 4 for the 4200 / 4210.<br />
<strong>The</strong> following pages describes where the various orifices are located and how to remove and replace them.<br />
Please note that each orifice is stamped with a numbered size. It is vitally important that the correct orifice<br />
is installed into each burner (see orifice to control matching chart with kit) and the valves adjusted correctly<br />
Caution! Ensure that the gas supply is shut off before proceeding with the conversion.<br />
This installation must be performed by a licensed Gas Technician.<br />
Pressure Regulator Conversion<br />
This range is equipped with a convertible pressure regulator. It is located at the rear of the stove behind the<br />
control panel. To convert the<br />
Regulator Diagram: use a screwdriver or coin<br />
and turn the cap counter clockwise to remove.<br />
"NAT" is stamped into the face<br />
(convex side) of the regulator cap<br />
regulator, remove the cap with<br />
a large flat blade screwdriver<br />
or a quarter, turn counter<br />
clockwise to remove. <strong>The</strong> cap<br />
is marked "LP" on the inside<br />
of the hollow (concave side)<br />
and "NAT" on the face (convex<br />
side) of the cap. (see<br />
illustration below). <strong>The</strong> gas you<br />
are converting to must face<br />
outward. So if you have<br />
converted to propane (LP)<br />
then the "LP" marking should<br />
be visible. Replace the cap<br />
with the appropriate side<br />
facing out and turn clockwise<br />
to lock into place.<br />
"LP" is stamped into the hollow<br />
(concave side) of the regulator<br />
cap<br />
35
Top Burner Orifice Conversion<br />
After the regulator has been converted the top<br />
burner bases require conversion:<br />
1)To expose the burner base, remove the<br />
porcelain cap and aluminum flame spreader.<br />
2) Find the 7 mm oriface removal tool, included<br />
with the kit. (<strong>The</strong> end of the tool is flattened to<br />
accept a standard slot screw driver to make the<br />
oriface removal easier) Insert the tool inside the<br />
burner base and turn the orifice out of the jet<br />
holder, COUNTER-CLOCKWISE. (Put the<br />
orifice in a safe place, in case you need to<br />
reconvert later.)<br />
3) Find the appropriately numbered orifice for the<br />
burner.<br />
4) Use the tool to screw the burner orifice into<br />
place in a clockwise motion.<br />
Before proceeding with each step, check the<br />
orifice with a flashlight to make sure there is no<br />
debris blocking the opening of the orifice. Follow<br />
the same procedure for the the rest of the burners.<br />
7 mm nut driver<br />
insert standard slot screwdiver here<br />
orifice removed<br />
remove this orifice<br />
only with the nut<br />
driver supplied.<br />
burner base<br />
close-up of burner orifice<br />
shows location of numbered<br />
size: example shown matches<br />
with 1.29 medium burner orifice<br />
for natural gas.<br />
Adjusting the Simmer(Flame size)<br />
After converting the burners with new orifaces the burner valves need<br />
to be adjusted. <strong>The</strong> gas supply should be turned on for this step:<br />
flat screw driver<br />
1) Remove the control knob only, the valve cover need not be<br />
removed.<br />
2) Turn the burner on and set to low.<br />
3) <strong>The</strong> flame size will have to be adjusted up or down depending on<br />
the gas you are converting to.<br />
To adjust flame size insert the small slot screw driver (included with<br />
this kit) inside the valve stem (see valve illustration)<br />
4) Turn the screw driver clock wise to decrease, counter clock wise<br />
to increase flame.<br />
Adjust the flame size just so the flame curls around the porcelain cap.<br />
If the igniter starts or you have problems with the flame going out you<br />
have adjusted to low.<br />
36<br />
valve stem<br />
valve<br />
When converting to LP (liquid<br />
propane) the flame will have to be<br />
adjusted down<br />
When converting to natural gas the<br />
flame will have to be adsjusted up.
HEARTLAND ®<br />
APPLIANCES<br />
Model 4210 / 5210 Electric Self Clean Range,<br />
Model 4200 / 5200 Electric Range Parts Chart<br />
1 00<br />
3599<br />
1592<br />
60283<br />
60287<br />
1556<br />
60286<br />
1595<br />
60285<br />
60288<br />
1624 + 9250<br />
1588<br />
60605<br />
1551<br />
6677<br />
9234<br />
66 76 -48"<br />
6522<br />
6660<br />
7545<br />
6659<br />
6662<br />
60226<br />
60504<br />
60521<br />
7162<br />
6663<br />
6198<br />
60604<br />
60316<br />
6661<br />
60277<br />
60239<br />
1125<br />
60238<br />
60503<br />
60520<br />
60505<br />
60522<br />
60327<br />
3556 6197<br />
2x 8202<br />
8200<br />
6 20 2<br />
8 204<br />
60250<br />
7590<br />
60330<br />
60251<br />
60252<br />
60501 1110<br />
60277 60237<br />
7 551 lrg<br />
7 552 med<br />
60309<br />
1600<br />
80131<br />
1592<br />
80138<br />
80132<br />
1556<br />
3 99<br />
1595<br />
80142<br />
1624 + 9250<br />
1588<br />
80149<br />
30"- 5237<br />
48"- 5238<br />
60307<br />
6455<br />
80141<br />
1551<br />
7545<br />
603 1<br />
60308<br />
80128<br />
60502<br />
60277<br />
1125<br />
60238<br />
7162<br />
60327<br />
7558 lrg<br />
7557 med<br />
60345<br />
60510<br />
1110<br />
80114<br />
&<br />
80113<br />
7560 lrg<br />
7559 med<br />
60501<br />
80151<br />
H-976<br />
603503<br />
60250<br />
60277<br />
60252<br />
37<br />
7562 lrg<br />
7561 med<br />
7570<br />
7569<br />
7571<br />
60306
Model 4200 / 5200 / 4210 / 5210 Range Parts Chart<br />
TO ENSURE THE CORRECT COLOUR MATCH WHEN<br />
ORDERING COLORED PANELS, BOTH THE COLOR<br />
AND SERIAL NUMBER MUST BE PROVIDED.<br />
1110 Oven Door Handle Stanchion<br />
1125 Oven Door <strong>The</strong>rmometer (Non Functional)<br />
1546 Heartland nameplate/Clips<br />
1551 Right Cabinet Bracket<br />
1556 Left Cabinet Bracket<br />
1588 Right Cabinet Corner<br />
1592 Left Cabinet Corner<br />
1595 Right Cresting Corner<br />
1600 Left Cresting Corner<br />
1624 Cabinet Door Handle<br />
3556 Gas Regulator - LP/NAT<br />
5222 30” Combination Top<br />
5232 48” Combination Top<br />
5237 30” Combo Manifold Weldment<br />
5238 48” Combo Manifold Weldment<br />
5241 Control Cover Plate (not shown) (48” model)<br />
5242 Control Cover Plate (not shown) (30” model)<br />
5716 Installation and Operating Instruction Manual<br />
60327 Control Knob<br />
6171 Oven/Bake/Broil Indicator Light Red (48” model)<br />
6171 Warming Oven Light - Red (30/48” model)<br />
6197 2 Speed Blower Control Switch<br />
6198 Range Light Switch<br />
6202 Oven Light Bulb - 40 W<br />
6437 Oven Door Hinges L & R (not shown)<br />
6455 Broiler Pan & Cover<br />
6522 Exhaust Deflector<br />
6659 Blower and Inlet Ring<br />
6660 Capacitor 5UF /370<br />
6661 Speed Control<br />
6662 Blower Knob<br />
6663 Inlet Ring<br />
6676 Exhaust Filter (48”)<br />
6677 3 1/2” x 10” Exhaust Adaptor<br />
6884 Storage Door Magnet Assembly<br />
7162 Burner Control Knob<br />
7545 Grate - Cast<br />
7551 Control Valve Medium Burner<br />
7552 Control Valve Large Burner<br />
7557 Medium Burner Cap<br />
7558 Large Burner Cap<br />
7559 Medium Flame Spreader<br />
7560 Large Flame Spreader<br />
7561 Medium Burner Base<br />
7562 Large Burner Base<br />
7569 Ignition Electrode (1200MM Lead)<br />
7570 Ignition Electrode (900MM Lead)<br />
7571 Ignition Electrode (600MM Lead)<br />
7590 Spark Module 0+6 (48” & 30”)<br />
8200 Light Socket & Housing<br />
8202 Oven Light Assembly w/light bulb<br />
38<br />
8204 Oven Lens<br />
8313 Front Band<br />
9234 Electronic Timer (self clean & non-self clean)<br />
60238 Oven Door Bubble Panel<br />
60250 Base Leg<br />
60251 48” Base Front Skirt - Nickel<br />
60252 30”/48” Base Side Skirt<br />
60254 48” Base Rear Skirt - Black<br />
60266 48” Stove Band<br />
60277 30”/48” Oven/Warming Drawer Handle<br />
60283 48” Cabinet Door Panel (specify colour)<br />
60285 48” Cresting Panel (specify colour)<br />
60286 48” Splashback (specify colour)<br />
60287 Lower Cabinet Strip (48”)<br />
60288 Upper Cabinet Strip (48”)<br />
60306 Oven/Broiler Control Switch (s/c & non-s/c)<br />
60307 Broiler Element<br />
60308 Oven Element<br />
60309 Oven Rack<br />
60310 Warming Oven Element<br />
60315 Oven Door Gasket<br />
60316 Warming Oven Gasket<br />
60327 Electric Oven Knob-single “D” New Classic<br />
60330 Oven Rack Support (4 position)<br />
60350 Warming Oven Control<br />
60351 Warming Control Knob<br />
60501 Warming Drawer Frame<br />
60502 Oven Door Frame<br />
60503 Rack Storage Door Frame<br />
60504 Utensil Drawer Frame<br />
60505 Reservoir Front<br />
60510 Warming Drawer Bubble Panel (specify colour)<br />
60520 Rack Storage Door Bubble Panel<br />
60521 Utensil Drawer Bubble Panel<br />
60522 Reservoir Bubble Panel (specify colour)<br />
60604 Blower Mounting Box<br />
60605 Cabinet Wrap Weldment (48”)<br />
80113 Left Hand Side Panel New Classic<br />
80114 Right Hand Side Panel New Classic<br />
80128 30” Front Band<br />
80131 Upper Cabinet Strip (30”)<br />
80132 Lower Cabinet Strip (30”)<br />
80138 30”Cabinet Door Panel(specify colour)<br />
80141 30” Splash back (specify colour)<br />
80142 30” Cresting Panel (specify colour)<br />
80143 Cabinet Wrap Weldment (30”)<br />
80151 30” Base Front Skirt - Nickel<br />
80152 30” Base Rear Skirt - Black<br />
9520 Cabinet Door Stantion<br />
H-692 Easy Glide Castor 1” Diameter (not shown)<br />
Please order part by number. Parts may be ordered<br />
from your dealer or direct from Heartland Appliances<br />
Inc. Telephone for prices and ordering instruction.<br />
Call 800-361-1517, and ask for the order desk.
See our complete line of kitchen appliances:<br />
3015- 30" Classic II Series Refrigerator, 18 cubic<br />
feet capacity, bottom mount freezer drawer, and<br />
convienient top mount fresh food compartment.<br />
Ice maker is available as an option. <strong>The</strong> Classic<br />
series also offers an optional Cowl. Energy efficiency<br />
rating 548 kwh/year. Also available in Metro 3225<br />
and Legand 3065 models.<br />
3115- 36" Classic Series Refrigerator, 20 cubic<br />
feet capacity, bottom mount freezer, counter depth<br />
design. Ice maker is standard. <strong>The</strong> Classic series<br />
also offers an optional Cowl. Energy efficiency<br />
rating 481 kwh/year. Also available in Metro 3325<br />
and Legand 3165 models.<br />
3530- Legand Gas / Electric kitchen range - 4<br />
sealed gas burners, electric convection oven fits in<br />
a 30" opening! Also available in stainless steel as<br />
model 3535 Metro. Cooktop versions for both<br />
Metro 3805 and Legand 3800 models are available.<br />
3630- Legand 36" Gas / Electric kitchen range - 6<br />
sealed gas burners or Electric convection oven<br />
come standard. Also available in stainless steel as<br />
model 3635 Metro. Cooktop versions for both<br />
Metro 3825 and Legand 3820 models are available.<br />
9730 (Built-in)- Dual oven, one convection, one<br />
standard radiant, with self clean oven feature.<br />
4210- 30" Gas / Electric kitchen range - 4 sealed<br />
gas burners, electric convection self clean oven<br />
fits in a 30" opening!<br />
Model 3115:<br />
Classic Series<br />
5210- 48" Gas / Electric kitchen range- 6 sealed<br />
gas burners, electric convection self clean oven,<br />
dual fuel!<br />
6210- 48" Electric kitchen range - 5 radiant burners<br />
under Eurokera Ceramic cooktop, convection self<br />
clean oven .<br />
8210-30" Electric kitchen range - 4 radiant burners<br />
under Eurokera Ceramic cooktop, convection self<br />
clean oven, fits in a 30" opening!<br />
7100- 48" Gas or propane kitchen range - 6 sealed<br />
gas burners, a chef's dream come true!<br />
9100- 30" Gas or propane kitchen range - 4 sealed<br />
gas burners, fits in a 30" opening!<br />
1900 (Oval)- Wood burning cookstove-old<br />
fashioned cooking available in two models<br />
2600 (SweetHeart)- Wood burning cookstovesame<br />
as the Oval, in a smaller version!<br />
For more information please call your dealer, or call<br />
Heartland Appliances:<br />
Phone 1-800-361-1517 or Fax 1-800-327-5609<br />
Model 1903<br />
39