Landmann... - Instruction Manual - BBQ Barbecues
Landmann... - Instruction Manual - BBQ Barbecues
Landmann... - Instruction Manual - BBQ Barbecues

Create successful ePaper yourself
Turn your PDF publications into a flip-book with our unique Google optimized e-Paper software.
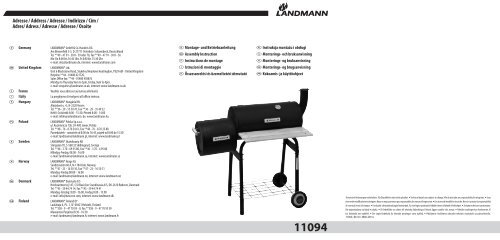
Adresse / Address / Adresse / Indirizzo / Cím /<br />
Adres/ Adress / Adresse / Adresse / Osoite<br />
k<br />
t<br />
p<br />
C<br />
H<br />
<br />
U<br />
N<br />
l<br />
q<br />
Germany<br />
United Kingdom<br />
France<br />
Italiy<br />
Hungary<br />
Poland<br />
Sweden<br />
Norway<br />
Denmark<br />
Finland<br />
LANDMANN® GmbH & Co. Handels-KG<br />
Am Binnenfeld 3-5, D-27711 Osterholz-Scharmbeck, Deutschland<br />
Tel. **49 - 47 91 - 30 8 - 59 oder 78, Fax **49 - 47 91 - 30 8 - 36<br />
Mo-Do 8:00 bis 16:45 Uhr, Fr 8:00 bis 15:30 Uhr<br />
e-mail: ohz@landmann.de, internet: www.landmann.com<br />
LANDMANN® Ltd.<br />
Unit 6 Blackstone Road, Stukeley Meadows Huntingdon, PE29 6EF · United Kingdom<br />
Helpline **44 - 01480 421720,<br />
Sales Office fax: **44 - 01480 458876<br />
Monday to Thursday 9am to 5pm, Friday, 9am to 4pm.<br />
e-mail: enquiries@landmann.co.uk, internet: www.landmann.co.uk<br />
Veuillez vous adresser au bureau allemand.<br />
La preghiamo di rivolgersi all’ufficio tedesco.<br />
LANDMANN® Hungária Kft.<br />
Almáskert u. 4., H-2220 Vecsés<br />
Tel. **36 - 29 - 55 50 70, Fax **36 - 29 - 35 49 32<br />
Hétfő-Csütörtök 8:00 - 15:30, Péntek 8:00 - 14:00<br />
e-mail: infohun@landmann. de, www.landmann.hu<br />
LANDMANN® Polska Sp.z.o.o.<br />
ul. Kuziennicza 13b, 59-400 Jawor, Polska<br />
Tel. **48 - 76 - 8 70 24 61, Fax **48 - 76 - 8 70 23 88<br />
Poniedziałek - czwartek od 8:00 do 16:45, piątek od 8:00 do 15:30<br />
e-mail: landmann@landmann.pl, internet: www.landmann.pl<br />
LANDMANN® Skandinavia AB<br />
Storgatan 70, S-568 32 Skillingaryd, Sverige<br />
Tel. **46 - 3 70 - 69 35 80, Fax **46 - 3 70 - 4 95 80<br />
Måndag-Fredag, 08.00 - 16.00<br />
e-mail: landmann@landmann.se, internet: www.landmann.se<br />
LANDMANN® Norge AS<br />
Sandstuveien 60 A, N-1184 Oslo, Norway<br />
Tel. **47 - 23 - 16 50 10, Fax **47 - 23 - 16 50 11<br />
Mandag-Fredag 08:00 - 16:00<br />
e-mail: landmann@landmann.no, internet: www.landmann.no<br />
LANDMANN® Danmark A/S<br />
Hvidsværmervej 147, C/O BasicCon Scandinavia A/S, DK-2610 Rødovre, Danmark<br />
Tel. **45 - 59 44 74 14, Fax **45 - 59 44 74 41<br />
Mandag-Torsdag: 8.00 - 16.00, Fredag 8.00 - 15.00<br />
e-mail: info@basiccon.com, internet: www.landmann.dk<br />
LANDMANN® Finland OY<br />
Laulakuja 4, PL. 1, SF-00421 Helsinki, Finland<br />
Tel. **358 - 9 - 47 70 93 - 0, Fax **358 - 9 - 47 70 93 50<br />
Maanantai-Perjantai 8:30 - 16:30<br />
e-mail: landmann@landmann.fi, internet: www.landmann.fi<br />
k Montage- und Betriebsanleitung<br />
t Assembly <strong>Instruction</strong><br />
p <strong>Instruction</strong>s de montage<br />
C Istruzioni di montaggio<br />
H Összeszerelési és üzemeltetési útmutató<br />
Instrukcja montażu i obsługi<br />
U Monterings- och bruksanvisning<br />
N Monterings- og bruksanvisning<br />
l Monterings- og brugsanvisning<br />
q Kokoamis- ja käyttöohjeet<br />
11094<br />
Technische Änderungen vorbehalten. Für Druckfehler wird nicht gehaftet. u Technical details are subject to change. We do not take any responsibility for misprints. u Sous<br />
réserve de modifications techniques. Nous ne nous porterons pas responsables des erreurs d’impression. u Con riserva di modifiche tecniche. Non ci si assume la responsabilità<br />
di eventuali errori di stampa. u A műszaki változtatások jogát fenntartjuk. Az esetleges nyomtatási hibákért nem vállalunk felelősséget. u Zmiany techniczne zastrzeżone.<br />
Nie odpowiadamy za błędy w druku. u Vi förbehåller oss rätten till tekniska förändringar. Feltryck ligger utanför vårt ansvar. u Tekniske endringer kan forekomme. Vi<br />
tar forbehold om trykkfeil. u Der tages forbehold for tekniske ændringer samt trykfejl. u Pidätämme itsellämme oikeuden teknisiin muutoksiin ja painovirheisiin.<br />
11094 / 09-10 / #009-2011bt
Inhaltsverzeichnis / Contents / Sommaire / Indice / Tartalomjegyzék /<br />
Spis treści / Innehåll / Deleliste / Indholdsfortegnelse / Sisällysluettelo<br />
Gewährleistung / Warranty / Garantie / Garanzia / Jótállás /<br />
Gwarancja / Garanti / Garanti / Garanti /Takuu<br />
D<br />
„Grill-Lok“<br />
Montage- und Betriebsanleitung....................................................................................................3<br />
<br />
“Grill-Lok”<br />
<strong>Instruction</strong>s for setting up and operating........................................................................................8<br />
F<br />
« Barbecue locomotive »<br />
<strong>Instruction</strong>s de montage et de service...........................................................................................13<br />
I<br />
"Barbecue a Locomotiva"<br />
Montaggio e istruzioni d'uso.........................................................................................................18<br />
H<br />
„Grill-Lok“<br />
Összeszerelési és üzemeltetési útmutató.......................................................................................23<br />
<br />
„Grill wózkowy z piecem do wędzenia“<br />
Instrukcja montażu i obsługi..........................................................................................................28<br />
S<br />
"Grill-Lok"<br />
Monterings- och bruksanvisning...................................................................................................33<br />
N<br />
"Grill-lokomotiv"<br />
Monterings- og bruksanvisning.....................................................................................................38<br />
<br />
„Loko-grill“<br />
Montage- og betjeningsvejledning...............................................................................................43<br />
<br />
Puutarhagrilli<br />
Asennus- ja käyttöohje..................................................................................................................48<br />
k Gewährleistung<br />
Wir übernehmen die Gewährleistung für die Grill-Lok für die<br />
Dauer von zwei Jahren ab Kaufdatum. Die Gewährleistung<br />
umfasst Verarbeitungsmängel und fehlerhafte Teile; sie<br />
erstreckt sich auf den Ersatz dieser Teile. Kosten für Fracht,<br />
Montage, Ersatz verschlissener Teile (Kohlerost, Grillrost,<br />
Grillkammer) und Sonstiges sind nicht Bestandteil der<br />
Gewährleistung. Sie erlischt bei falscher Handhabung und<br />
wenn eigenmächtige Veränderungen, gleich welcher Art, an<br />
der Grill-Lok vorgenommen wurden.<br />
t Warranty<br />
We grant a warranty for the barbecue grill for the duration of<br />
two years, starting with the date of purchase, please provide<br />
proof of purchase. The warranty includes manufacturing<br />
deficiencies and defective parts; it extends to the replacement<br />
of these parts. Expenses for shipping, installation, replacement<br />
of worn parts and other cost are not covered by the warranty.<br />
The warranty lapses in case of mishandling and if any kind of<br />
unauthorized use.<br />
p Garantie<br />
Nous offrons une garantie de deux ans à partir de la date<br />
d'achat sur ce barbecue locomotive. La garantie couvre les<br />
défauts de fabrication et les pièces défectueuses, elle s'étend<br />
au remplacement de ces pièces. Les frais de transport, de<br />
montage, de remplacement de pièces usées (chambre de grill,<br />
gril, grille à charbon) ou autres n'entrent pas dans la garantie.<br />
La garantie s'annule en cas de maniement erroné ou si des<br />
modifications, quelles qu'elles soient, sont effectuées sur le<br />
barbecue locomotive, sans concertation préalable.<br />
C Garanzia<br />
Assumiamo la garanzia per il barbecue a locomotiva per una<br />
durata di due anni dalla data di acquisto. La garanzia include<br />
difetti nella lavorazione e pezzi difettosi, comprende anche<br />
il ricambio di questi pezzi. I costi per trasporto, montaggio<br />
e sostituzione di pezzi usurati (braciere a bacinella, griglia,<br />
camera di cottura) ed altro non sono oggetto della garanzia.<br />
La garanzia cessa al momento di un impiego errato e se sono<br />
state effettuate arbitrariamente modifiche, indifferente di che<br />
tipo, al barbecue a locomotiva.<br />
H Jótállás<br />
A Grill-Lok-ra a vásárlás időpontjától számított kettőévi jótállást<br />
vállalunk. A jótállás a gyártási hibákra és meghibásodott<br />
alkatrészre terjed ki, és az érintett alkatrészek kicserélésére<br />
vonatkozik. A szállítás, szerelés és az elhasználódott alkatrészek<br />
(szénrács, grillrács, grillkamra) és egyebek cseréje nem képezik<br />
a szavatosság részét. Megszűnik a készülék helytelen kezelése<br />
esetén, valamint a Grill-Lok-on végrehajtott bármilyen jellegű<br />
önhatalmú változtatás esetében.<br />
Gwarancja<br />
Grill posiada dwuletnią gwarancję, licząc od dnia zakupu.<br />
Gwarancja obejmuje wady produkcyjne i wybrakowane części<br />
oraz zapewnia wymianę tych części.<br />
Koszty dostawy, montażu, wymiany zużytych części (ruszt<br />
węglowy, ruszt grillowy, komora do wędzenia) i inne nie są<br />
objęte niniejszą gwarancją.<br />
Nieprawidłowa obsługa i wszelkie samowolne modyfikacje<br />
grilla prowadzą do wygaśnięcia gwarancji.<br />
U Garanti<br />
Vi lämnar garanti för grilloken i två år från inköpsdatum..<br />
Garantin omfattar tillverkningsfel och felaktiga delar; den<br />
sträcker sig till ersättning av dessa delar.<br />
Kostnader för frakt, montering, ersättning av förslitna delar<br />
(eldfat, grillgaller, kolgaller) och annat ingår inte i garantin.<br />
Vid felaktig hantering och egenmäktiga ändringar på<br />
grilloken, av vilken typ dessa än må vara, förfaller garantin.<br />
N Garanti<br />
Vår garanti for grill-lokomotivet gjelder i to år fra kjøpsdato.<br />
Den gjelder for produksjonsfeil, defekte deler og utskifting av<br />
slike.<br />
Kostnader for frakt, montering, utskifting av slitasjedeler<br />
(kullrist, grillrist, grillkammer) og annet omfattes ikke av<br />
garantien.<br />
Garantien gjelder ikke ved feil bruk og ved egne endringer,<br />
uansett hvilken type, på grill-lokomotivet.<br />
l Garanti<br />
Vi yder garanti for loko-grillen i en periode på to år efter<br />
købsdato.<br />
Garantien omfatter produktionsfejl og fejlbehæftede dele og<br />
omfatter udskiftning af sådanne dele.<br />
Garantien omfatter ikke omkostninger for fragt, montage,<br />
udskiftning af slidte dele (kulrist, grillrist, grillkammer) eller<br />
lignende.<br />
Garantien bortfalder ved forkert anvendelse, eller hvis der<br />
uden forudgående aftale foretages ændringer af loko-grillen<br />
uanset art.<br />
q Takuu<br />
Myönnämme puutarhagrillille takuun, joka on voimassa kaksi<br />
vuotta ostopäivästä.<br />
Takuu kattaa työ- ja materiaalivirheet ja korvaa viallisten<br />
osien vaihdon.<br />
Rahti-, asennus-, kuluvien osien (tulipesä, grilliritilä,<br />
grillikammio) vaihto- yms. kulut eivät kuulu takuun piiriin.<br />
Takuu mitätöityy, jos puutarhagrilliä käsitellään väärin tai<br />
muutetaan omavaltaisesti.
“Grill-Lok”<br />
<strong>Instruction</strong>s for setting up and operating<br />
Introduction<br />
Before you put the LANDMANN Grill-Lok into service<br />
please read through these instructions carefully for<br />
setting up and operating the unit<br />
You will soon see:<br />
It is easy and simple to set up and operate. Problems will<br />
not occur if used according to instructions as a barbecue<br />
grill in the open air.<br />
Use in conformity with regulations<br />
The Grill-Lok may only be used for grilling using<br />
LANDMANN charcoal lumps or briquettes. Smoking<br />
can only be carried out using wood chips or smoke<br />
powder with spice mixtures as additives. When doing<br />
so, all the guidelines in these instructions must be<br />
adhered to.<br />
NB: Only for private use<br />
General instructions for successful<br />
installation<br />
Read through the instructions carefully and follow<br />
the notes on safety. Take sufficient time to fit the<br />
unit together. Before beginning create an even work<br />
surface about two or three metres square. Take the<br />
unit out of the packaging. Lay out the components<br />
and necessary tools within easy reach.<br />
Please note: Do not tighten up all the screw<br />
connections until you have finished assembling the<br />
unit. Otherwise it can set up undesirable tensile<br />
forces.<br />
Make preparations for assembly<br />
Check that you have a full set of components with the<br />
aid of the attached list and drawing. Lay out the parts<br />
and the necessary tools ready for assembling.<br />
8 LANDMANN<br />
Cleaning / Care<br />
Cleaning will of course be necessary from time to time<br />
in order to keep a good appearance.<br />
Do not use abrasive agents.<br />
Never use water to quench the Grill-Lok when hot.<br />
We recommend that the grid, drip pan area and<br />
smoking chamber be cleaned each time they are<br />
used, using a carbon grease remover.<br />
Each time the American barbecue and smoker is used<br />
the Grill-Lok will acquire a typical smoky aroma. In<br />
order to preserve it, the interior walls of the large<br />
chamber and the parts of the Grill-Lok untouched by<br />
smoked products do not need to be cleaned.<br />
Notes on safe operation of the Grill-Lok<br />
The Grill-Lok must stand in a stable position on a firm<br />
foundation during operation.<br />
Set the Grill-Lok up so it is shielded from the wind.<br />
Do not use in confined spaces or in roofed-over<br />
areas.<br />
Use only safe firelighters.
BEWARE of burns<br />
➱➱<br />
CAUTION! This Grill-Lok gets very hot and must<br />
not be moved when in operation.<br />
➱➱<br />
Do not use in confined spaces.<br />
➱➱<br />
When lighting use barbecue gloves or a pair of<br />
tongs.<br />
➱➱<br />
Allow the Grill-Lok to cool down completely<br />
before cleaning.<br />
DANGEROUS for children and pets<br />
➱➱<br />
CAUTION! Keep children and pets at a distance.<br />
➱➱<br />
Never leave a hot Grill-Lok unattended.<br />
BEWARE of explosions<br />
➱➱<br />
CAUTION! Do not use spirits or petrol for igniting<br />
or re-igniting.<br />
➱➱<br />
CAUTION! Use only firelighters that meet the<br />
European Standard for Firelighters (EN 1860-3)<br />
➱➱<br />
Never use water to extinguish wood chips or<br />
smoke powder.<br />
expected from grill lighters.<br />
For grilling:<br />
➱➱<br />
CAUTION! Use odour-neutral firelighters<br />
➱➱<br />
Let the lighters burn through completely and<br />
do not start grilling until the charcoal lumps or<br />
briquettes are covered in a grey coating of ash.<br />
For American barbecue:<br />
➱➱<br />
CAUTION! Use odour-neutral firelighters. Do<br />
not use lighter fluids, lighter gels and lighters<br />
containing paraffin.<br />
➱➱<br />
Let the lighters burn through completely before<br />
putting the products in the Grill-Lok.<br />
For smoking:<br />
➱➱<br />
CAUTION! Use odour-neutral firelighters. Do<br />
not use lighter fluids, lighter gels and lighters<br />
containing paraffin.<br />
➱➱<br />
Let the lighters burn through completely before<br />
putting the products to be smoked in the Grill-<br />
Lok.<br />
INSTRUCTIONS for lighting<br />
➱➱<br />
If used appropriately no toxic effects are to be<br />
LANDMANN 9
List of parts<br />
1. Chimney cover 1<br />
2. Chimney<br />
1<br />
3. Thermometer 1<br />
4. Lid for large chamber 1<br />
5. Shelf bracket 2<br />
6. Shelf board 3<br />
7. Wheel support arch 2<br />
8. Wheel axle 1<br />
9. Wheel 2<br />
10. Support cap 2<br />
11. Wire tray 1<br />
12. Stand support arch 2<br />
13. Support brace 2<br />
14. Ventilation flap 1<br />
15. Small chamber 1<br />
16. Lid for small chamber 1<br />
17. Handle for chamber 3<br />
18. Large chamber 1<br />
19. Hinge 4<br />
20. Charcoal grid 2<br />
21. Barbecue grid 2<br />
Fixing elements<br />
M6x58<br />
M6x45<br />
M5x25<br />
M6x12<br />
M6x12<br />
M5x12<br />
M6<br />
M5<br />
M6<br />
6x<br />
12x<br />
6x<br />
1x<br />
8x<br />
16x<br />
4x<br />
1x<br />
22x<br />
28x 2x 6x<br />
Assembly<br />
1. Stand the large chamber (R) with the small<br />
opening for the chimney on the ground.<br />
2. Join the support arches (G/L) together at the<br />
short ends and hook the wire tray (K) into the<br />
holes provided in the support arches (G/L)<br />
3. Bolt the assembled support arches (G/L) to the<br />
large chamber (R) using M6x45 bolts and M6<br />
nuts so that the holes for the wheel axle (H) are<br />
on the ground.<br />
4. Now attach the support braces (M) to the support<br />
arches (G/L) on each side with M6x45 bolts and<br />
M6 nuts.<br />
5. Turn the chamber (R) upside down and push the<br />
wheel axles (H) through the holes in the wheel<br />
support arches (G). Push the wheels (I) over the<br />
ends of the wheel axle (H) and fix them with two<br />
split pins.<br />
6. Turn the large chamber (R) upside down again so<br />
that the large opening points upwards. Position<br />
the small chamber (O) on the opening and bolt<br />
them both together using M6x12 bolts and M6<br />
nuts.<br />
7. Attach the ventilation flap (N) to the small<br />
chamber using M6 x 12 and lock nut.<br />
8. The next step is to attach the shelf brackets (E)<br />
to the large chamber(R) with M6x12 bolts and<br />
M6 nuts. Bolt the shelf boards (F) to the shelf<br />
brackets (E) with M5x25 bolts and M5 nuts<br />
9. Release the nuts from the bolts on the chimney<br />
(B) and insert them through the holes provided<br />
10 LANDMANN
on the right-hand side of the large chamber (R).<br />
Bolt on the chimney (B) by means of the nuts so<br />
that it points upwards.<br />
10. The handles (Q) for the drums are mounted using<br />
M6x58 bolts and M6 nuts. Ensure that the spacer<br />
pieces slide over the bolts and that the nuts are<br />
screwed on from the inside of the lids (D/P) and<br />
the small chamber (O).<br />
11. Fit the thermometer (C) into the hole on the large<br />
lid (D) and secure using the Thermometer clamp.<br />
12. Place two charcoal grids (T) in the large chamber<br />
(R). If using indirect cooking, one of the charcoal<br />
grids (T) can be placed in the small chamber (O.)<br />
13. Place two barbecue grids (U) in the large<br />
chamber (R).<br />
14. Tighten up all bolts after assembly is complete.<br />
How may the Grill-Lok be used<br />
Before you can use the Grill-Lok in all its versatility, it<br />
must be burned-in. Use wood from trees for firing up<br />
and let this burn in both drums for up to two hours.<br />
This procedure will enable a coating of carbon black to<br />
build up in the inner chamber. Keep the temperature<br />
low by shutting the lid and closing off the ventilation<br />
flaps.<br />
1. Grilling:<br />
Direct grilling 160°C to 300°C<br />
Charcoal lumps or briquettes are lit in the large<br />
chamber. The products for grilling lie directly above the<br />
glowing coals and can only be laid over them when the<br />
coals are covered in a thin grey coating of ash.<br />
Indirect grilling 160°C to 250°C<br />
Charcoal lumps or briquettes are lit in the small chamber.<br />
The products for grilling in the large chamber are thus<br />
not directly above the glowing coals. The fat that runs<br />
off cannot burn, as it does not drip on to the coals.<br />
2. American Barbecue:<br />
at 90°C to 160°C<br />
Firing with different types of wood takes place in<br />
the small chamber. Wood from broad-leaved trees<br />
and fruit trees may be used. The meat will acquire<br />
an additional intense flavour from the wood. Make<br />
sure that the wood is thoroughly dried out in order<br />
to prevent excessive smoke production and poor<br />
combustion. You can regulate the heat of the fire<br />
via the ventilation flap and the chimney cover<br />
by supplying air in larger or smaller quantities.<br />
Depending on the thickness of the meat the cooking<br />
process may be drawn out over a fairly long period.<br />
3. Smoking:<br />
Hot smokers from 50º to 90º C<br />
This smoking process provides short smoking times for<br />
quick consumption of e.g. fish and sausages. At these<br />
high temperatures the core temperature rises as far as<br />
the cooking range. The result is the highly appreciated<br />
smoker colouring and the typical smoker aroma.<br />
Medium-heat smokers from 25º to 50º C<br />
This smoking option allows fish and meat to stay<br />
juicy. The typical aroma is promoted by proteolytic<br />
enzymes and the smoker products remain tender.<br />
They must of course be consumed quickly, as the<br />
storage life is limited.<br />
Cold smokers up to 25º C<br />
This smoking option may vary between a few hours<br />
and a number of weeks. It is used primarily when the<br />
smoked product is to be made for keeping for a long<br />
period. At the same time an intense smokey flavour<br />
is produced. No cooking process takes place, as the<br />
product stays raw. Particular care must be taken to<br />
ensure that this process takes place at an outside air<br />
temperature of below 5ºC. At higher temperatures<br />
the product could easily spoil.<br />
You can refine your smoked product by using spice<br />
mixtures during the smoking process.<br />
LANDMANN 11
On the smoking process<br />
1. Let the pickled smoker product dry out<br />
sufficiently in the fresh air at a low temperature<br />
and under no circumstances allow it to hang in<br />
the sun.<br />
2. Spread wood chips or smoke powder evenly in<br />
the small chamber.<br />
3. When placing the smoker product in the oven<br />
ensure there is minimum contact with the grid<br />
or the walls. Then you will be able to remove the<br />
finished smoked product more easily without it<br />
disintegrating.<br />
4. Light the wood chips or smoker meal using a<br />
neutral firelighter. Let the lighter burn through<br />
completely before you introduce the smoker<br />
product.<br />
5. After smoking allow the smoker product to<br />
cool down so it does not break up when being<br />
removed.<br />
Hot smoking with fish<br />
Trout – approx 300g<br />
1. Clean oven-ready trout in running water and<br />
dry thoroughly. With deep-frozen goods make<br />
sure they are dried with particular care, as they<br />
have a high water content.<br />
2. Squeeze lemon juice into the trout, sprinkle on<br />
salt and pepper.<br />
3. The smoking time is approx. 25 minutes at 80ºC<br />
to 90ºC.<br />
For extra seasoning juniper berries can be added to<br />
the wood chips / smoker meal. These will give the fish<br />
a delicate flavour.<br />
To 1 kg of wood chips or smoker meal put 100g of<br />
whole juniper berries.<br />
Sie 100g ganze Wacholderbeeren.<br />
Environmental instructions and measures<br />
for disposal<br />
Pay attention to cleanliness and safety when handling<br />
the Grill-Lok and disposing of residues. Ensure that<br />
residual waste is only disposed of in metal or noncombustible<br />
containers intended for this purpose.<br />
For individual requirements for American <strong>Barbecues</strong> and smokers, we recommend you refer to relevant literature.<br />
12 LANDMANN