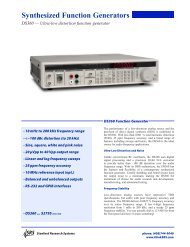
DS335 Synthesized Function Generator
DS335 Synthesized Function Generator
DS335 Synthesized Function Generator

You also want an ePaper? Increase the reach of your titles
YUMPU automatically turns print PDFs into web optimized ePapers that Google loves.
4-20 Calibration<br />
Bessel Filter Adjustment<br />
This adjustment sets the bandpass of the <strong>DS335</strong>'s Bessel waveform filter.<br />
1) Set the <strong>DS335</strong> to RAMP waveform, 8 Vpp, 10 kHz frequency. Connect<br />
the <strong>DS335</strong>'s output to an oscilloscope with a 50W terminator. Set the<br />
<strong>DS335</strong> for 50Ω Load Impedance. Set the scope to 2 V/div vertical and<br />
200 ns/div horizontal.<br />
2) Adjust C542 to make the output rise time as fast as possible while<br />
minimizing the peak-to-peak ripple.<br />
CALIBRATION<br />
The <strong>DS335</strong> is fully calibrated at the factory with all calibration bytes secured<br />
in ROM and RAM. The user can change the calibration bytes in RAM after<br />
changing the position of the calibration jumper JP200. The list of calibration<br />
bytes on page 6-2 shows the address and function of every byte. The only<br />
calibration byte that might need adjustment as the instrument ages is the<br />
frequency reference byte. The following procedure describes the adjustment<br />
of the <strong>DS335</strong>'s clock calibration calbyte. In the case where the calibration<br />
bytes in RAM get corrupted, the user can recall the factory calibration bytes.<br />
Please refer to page 6-1 for that procedure.<br />
Allow the <strong>DS335</strong> at least 1/2 hour warmup before beginning calibration. All<br />
calibrations should be done with the <strong>DS335</strong> completely assembled and 1/2<br />
hour of warmup after reassembly. When the new calbyte values are<br />
determined they should be entered into the <strong>DS335</strong>'s RAM.<br />
Clock Calibration<br />
This procedure sets the frequency of the <strong>DS335</strong>'s internal 10 MHz clock.<br />
The procedure is identical for standard and optional oscillators. Be sure that<br />
the <strong>DS335</strong> has been completely reassembled and warmed up for at least 1/2<br />
hour before this calibration is started.<br />
1) Connect the <strong>DS335</strong>'s <strong>Function</strong> output to the frequency counter input with<br />
a 50W terminator. Use the frequency standard as the counter's<br />
timebase.<br />
2) Adjust the value of calbyte 0 so that the frequency is within 1 Hz of 10<br />
MHz (0.01 Hz for optional oscillators). The range of calbyte 0 is 0 to<br />
4095.<br />
<strong>DS335</strong> <strong>Synthesized</strong> <strong>Function</strong> <strong>Generator</strong>