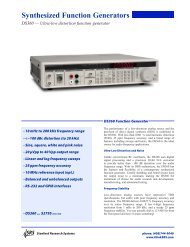
DS335 Synthesized Function Generator
DS335 Synthesized Function Generator
DS335 Synthesized Function Generator

Create successful ePaper yourself
Turn your PDF publications into a flip-book with our unique Google optimized e-Paper software.
2-18 Sweeps & FSK<br />
RS232 Setup<br />
To set the <strong>DS335</strong>'s RS232 interface press [SHIFT][2]. The RS232 enable<br />
selection will be displayed. Use the UP/DOWN ARROW keys to enable the<br />
RS232 interface. Press [SHIFT][2] again to display the RS232 baud rate<br />
selection. The available baud rates of 300, 600, 1200, 2400, 4800, or 9600<br />
baud can be set with the UP/DOWN ARROW keys.<br />
NOTE: If no interface option is present the message "no RS232" will be<br />
displayed when the RS232 menu is accessed. Only one of the GPIB and<br />
RS232 interfaces may be active at a given time, the GPIB interface is<br />
automatically disabled when RS232 is enabled.<br />
User Service Requests<br />
Communications Data<br />
While the GPIB is enabled the user may issue a service request (SRQ) by<br />
pressing [SHIFT][4]. The message "srq sent" will be displayed, and the GPIB<br />
LED will light. The GPIB LED will go off after the host computer does a serial<br />
poll of the <strong>DS335</strong>. Note: the user service request is in addition to the usual<br />
service requests based on status conditions (see PROGRAMMING section<br />
for details).<br />
Press [SHIFT][2] three times to display the last 256 characters of data that<br />
have been received by the <strong>DS335</strong>. This display is a 3 character window into<br />
the <strong>DS335</strong>'s input data queue that could be scrolled to view the previous 256<br />
characters. The data is displayed in ASCII hex format, with each input<br />
character represented by 2 hexadecimal digits. The most recently received<br />
character has a decimal point indicator. Pressing [DOWN ARROW] scrolls<br />
the display to the beginning of the queue, and [UP ARROW] scrolls to later in<br />
the queue.<br />
AUTO-TEST<br />
Introduction<br />
SELF-TEST<br />
The <strong>DS335</strong> has a built-in test routine that allows the user to test a large<br />
portion of instrument functionality quickly and easily. Self-test starts every<br />
time the <strong>DS335</strong> is turned ON.<br />
The <strong>DS335</strong>'s self-test is always executed on power-up. The test checks<br />
most of the digital circuitry in the <strong>DS335</strong>, and should end with the display<br />
"test pass". If the self-test encounters a problem it will immediately stop and<br />
display a warning message. See the TROUBLESHOOTING section for a list<br />
and explanation of the error messages. If the <strong>DS335</strong> fails its test it still may<br />
be operated.<br />
The <strong>DS335</strong> tests its CPU and data memory, ROM program memory,<br />
calibration constant integrity, the computer interfaces, and the modulation<br />
program memory<br />
Items not tested are the connections from the PC boards to the BNC<br />
connectors, the 12-bit waveform DAC, the output amplifier, the offset and<br />
amplitude control circuits, and the output attenuators.<br />
CALIBRATION BYTES<br />
It is possible to recall and modify the <strong>DS335</strong> factory calibration bytes. Please<br />
refer to the Test and Calibration Chapter for more detail.<br />
<strong>DS335</strong> <strong>Synthesized</strong> <strong>Function</strong> <strong>Generator</strong>