ShadowLine_Manual_EN.pdf - Clay Paky
ShadowLine_Manual_EN.pdf - Clay Paky
ShadowLine_Manual_EN.pdf - Clay Paky

Create successful ePaper yourself
Turn your PDF publications into a flip-book with our unique Google optimized e-Paper software.
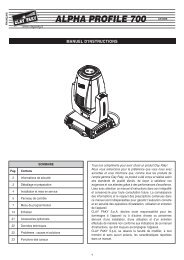
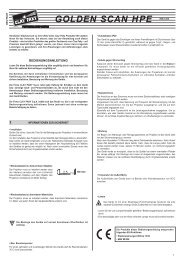
• Changing the lamp<br />
Open the projector, loosen the two<br />
side nuts (20) of the lamp to be<br />
changed and remove it from the supports<br />
(21). Remove the new lamp from<br />
its box, loosen the two side nuts (20)<br />
and locate the lamp in the supports<br />
(21). Finally, retighten the nuts.<br />
20<br />
21<br />
• Routine cleaning<br />
To maintain the light output of the projector undiminished, parts that tend to accumulate<br />
dust and grease must be cleaned periodically.<br />
In most circumstances, the projector will give long and trouble-free service if these<br />
simple guidelines are followed.<br />
To remove dirt from the lenses and filters, use a soft cloth moistened with any liquid<br />
detergent suitable for cleaning glass.<br />
IMPORTANT: do not use solvents or alcohol<br />
Parts that need cleaning frequently.<br />
Parts that need cleaning monthly.<br />
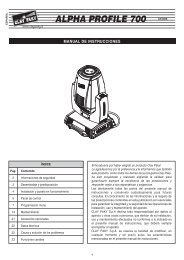
IMPORTANT: for uniform distribution of<br />
the light beam, the lamp must be positioned<br />
so that the glass pip (22) on the<br />
bulb does not coincide with the optical<br />
axis of the projector. With this in mind,<br />
locate the pip as high up as possible.<br />
20 22<br />
Internal components should also be given a general clean once a year, dislodging<br />
dust and dirt with a brush and removing it simultaneously with a vacuum cleaner.<br />
CAUTION: The projector uses a high pressure lamp with external starter.<br />
- When fitting a new lamp, read the manufacturer's instructions carefully.<br />
- The lamp must always be changed without delay if damaged or deformed by<br />
heat.<br />
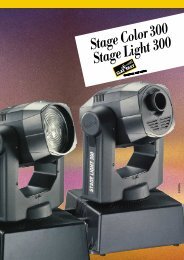
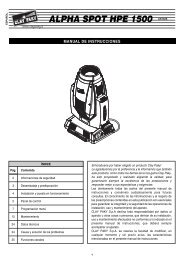
• Changing the colour filters<br />
Having opened the projector,<br />
identify the filter to be<br />
changed, grip firmly between<br />
thumb and forefinger and push<br />
against the spring clip (23)<br />
until free of the fixed clips (24).<br />
Bend the filter outwards and<br />
remove.<br />
Offer the new filter to the<br />
spring clip (23) and anchor<br />
behind the two fixed clips (24).<br />
24<br />
23<br />
9<br />
TROUBLESHOOTING<br />
PROJECTOR DOES NOT LIGHT UP<br />
ELECTRONICS NOT WORKING<br />
PROJECTION FAULTY FAULTS<br />
REDUCED BRIGHTNESS<br />
ANOMALIES<br />
POSSIBLE CAUSES<br />
CHECKS AND REMEDIES<br />
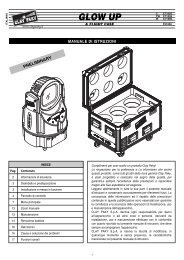
• Installing wide angle lenses<br />
Remove the projector front<br />
cover. Unscrew knobs (25),<br />
rotate the front lens plate (26)<br />
from the parking position to<br />
the operating position in<br />
alignment with the projector<br />
axis and then perform the<br />
same operation with the rear<br />
lens plate (27).<br />
Refit the knobs and secure<br />
the two lens plates.<br />
25<br />
26<br />
27<br />
•<br />
• •<br />
•<br />
•<br />
•<br />
•<br />
••<br />
No electrical power supply.<br />
Lamp expended or faulty.<br />
Signal transmission cable shortcircuiting<br />
or disconnected.<br />
Address codes incorrect.<br />
Defect in electronic circuits.<br />
Lenses broken.<br />
Deposit of dust or grease.<br />
Check that power is available at the<br />
mains socket.<br />
Change lamp (see instructions).<br />
Change cables.<br />
See projector coding instructions.<br />
Contact an authorized technician.<br />
Contact an authorized technician.<br />
Clean (see instructions).<br />
• Lubrication of sliding contact<br />
parts - QS LT<br />
To ensure perfect operation of sliding contact<br />
parts of the projector, lubricate sparingly<br />
at 6-monthly intervals using Kernite<br />
Lube-K-AC grease.<br />
10