SUDS-MISER® AUTOMATIC WASHER - Whirlpool Corporation
SUDS-MISER® AUTOMATIC WASHER - Whirlpool Corporation
SUDS-MISER® AUTOMATIC WASHER - Whirlpool Corporation

Create successful ePaper yourself
Turn your PDF publications into a flip-book with our unique Google optimized e-Paper software.
®<br />
<strong>SUDS</strong>-MISER ®<br />
<strong>AUTOMATIC</strong> <strong>WASHER</strong><br />
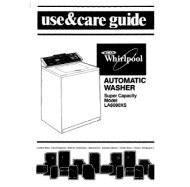
Use & Care Guide<br />
For questions about features, operation/performance,<br />
parts, accessories or service, call:<br />
1-300-363-344 (Australia)<br />
0-800-442-584 (New Zealand)<br />
Table of Contents................................................. 2<br />
3951077B
TABLE OF CONTENTS<br />
<strong>WASHER</strong> SAFETY ..........................................................................3<br />
PARTS AND FEATURES................................................................4<br />
<strong>WASHER</strong> USE.................................................................................5<br />
Understanding Washer Cycles ....................................................5<br />
Loading.........................................................................................5<br />
Normal Sounds ............................................................................5<br />
Starting Your Washer...................................................................6<br />
Selecting a Cycle and Time .........................................................7<br />
Stain Removal Tips ......................................................................7<br />
Using the <strong>SUDS</strong>-MISER ® System................................................7<br />
Extra Rinse and Spin....................................................................8<br />
Drain and Spin..............................................................................8<br />
Adding Liquid Fabric Softener .....................................................9<br />
<strong>WASHER</strong> CARE .............................................................................9<br />
Cleaning Your Washer .................................................................9<br />
Water Inlet Hoses.........................................................................9<br />
Vacation, Storage, and Moving Care...........................................9<br />
TROUBLESHOOTING ....................................................................9<br />
ASSISTANCE OR SERVICE.........................................................11<br />
WARRANTY ..................................................................................12<br />
2
<strong>WASHER</strong> SAFETY<br />
Your safety and the safety of others are very important.<br />
We have provided many important safety messages in this manual and on your appliance. Always read and obey all<br />
safety messages.<br />
This is the safety alert symbol.<br />
This symbol alerts you to potential hazards that can kill or hurt you and others.<br />
All safety messages will follow the safety alert symbol and either the word “DANGER” or<br />
“WARNING.” These words mean:<br />
You can be killed or seriously injured if you don't<br />
immediately follow instructions.<br />
You can be killed or seriously injured if you don't<br />
follow instructions.<br />
All safety messages will tell you what the potential hazard is, tell you how to reduce the chance of injury, and tell you<br />
what can happen if the instructions are not followed.<br />
■ Read all instructions before using the washer.<br />
■ Do not wash articles that have been previously<br />
cleaned in, washed in, soaked in, or spotted with<br />
petrol, dry-cleaning solvents, other flammable, or<br />
explosive substances as they give off vapours<br />
that could ignite or explode.<br />
■ Do not add petrol, dry-cleaning solvents, or other<br />
flammable, or explosive substances to the wash<br />
water. These substances give off vapours that<br />
could ignite or explode.<br />
■ Under certain conditions, hydrogen gas may be<br />
produced in a hot water system that has not been<br />
used for 2 weeks or more. HYDROGEN GAS IS<br />
EXPLOSIVE. If the hot water system has not<br />
been used for such a period, before using the<br />
washing machine, turn on all hot water taps and<br />
let the water flow from each for several minutes.<br />
This will release any accumulated hydrogen gas.<br />
As the gas is flammable, do not smoke or use an<br />
open flame during this time.<br />
IMPORTANT SAFETY INSTRUCTIONS<br />
WARNING: To reduce the risk of fire, electric shock, or injury to persons when using the washer, follow basic<br />
precautions, including the following:<br />
■ Do not allow children to play on or in the washer. Close<br />
supervision of children is necessary when the washer<br />
is used near children.<br />
■ Before the washer is removed from service or discarded,<br />
remove the door or lid.<br />
■ Do not reach into the washer if the drum, tub or agitator<br />
is moving.<br />
■ Do not install or store the washer where it will be exposed<br />
to the weather.<br />
■ Do not tamper with controls.<br />
■ Do not repair or replace any part of the washer or<br />
attempt any servicing unless specifically recommended<br />
in this Use and Care Guide or in published user-repair<br />
instructions that you understand and have the skills to<br />
carry out.<br />
■ See Installation Instructions for grounding<br />
requirements.<br />
■ If the supply cord is damaged, it must be replaced by<br />
the manufacturer or its service agent or a similarly qualified<br />
person in order to avoid a hazard.<br />
SAVE THESE INSTRUCTIONS<br />
3
PARTS AND FEATURES<br />
1. Control panel<br />
2. Model and serial number label<br />
3. Agitator<br />
4. Lid<br />
5. Liquid bleach dispenser<br />
6. Basket<br />
7. Tub<br />
Other feature your washer may have<br />
DURASMOOTH white porcelain basket<br />
Control panel<br />
4
<strong>WASHER</strong> USE<br />
Understanding Washer Cycles<br />
When the Cycle Control knob is set to a number and pulled out,<br />
the washer fills (to the selected load size) before agitation and<br />
timing start. The washer begins agitating immediately after filling;<br />
agitation occurs with the washer lid down.<br />
During agitation, the agitator creates a continuous rollover action<br />
that provides a thorough cleaning of the wash load.<br />
Loading<br />
For rated load capacity, refer to model and serial label/plate<br />
which is located on your washer as shown in “Parts and<br />
Features.”<br />
Loading suggestions<br />
For these suggested full-sized loads, set the LOAD SIZE selector<br />
to the highest load size setting.<br />
SUPER CAPACITY <strong>WASHER</strong>S<br />
Heavy Work Clothes<br />
3 pair pants<br />
3 shirts<br />
4 pair jeans<br />
1 coverall<br />
1 overall<br />
After agitation starts, the Cycle Control knob turns clockwise until<br />
it points to an Off area and the cycle ends.<br />
NOTE: The washer pauses briefly throughout each cycle. These<br />
pauses are normal for washer operation.<br />
WASH<br />
RINSE<br />
1. Fill 1. Fill<br />
Delicates<br />
3 camisoles<br />
1 quilted robe<br />
4 slips<br />
6 undergarments<br />
Towels<br />
10 bath towels<br />
10 hand towels<br />
Mixed Load<br />
3 double sheets<br />
4 pillowcases<br />
8 T-shirts<br />
6 pair shorts<br />
2 sets of sleepwear<br />
1 child’s outfit<br />
14 wash cloths<br />
1 bath mat<br />
2 shirts<br />
2 blouses<br />
8 handkerchiefs<br />
2. Wash selected<br />
time<br />
3. Drain No<br />
agitation †<br />
2. Rinse<br />
3. Drain No<br />
agitation<br />
4. Spin 4. Spin-Spray rinse<br />
5. Spin<br />
Normal Sounds<br />
Your new washer may make sounds your old one didn’t. Because<br />
the sounds might be unfamiliar, you may be concerned about<br />
them. These sounds are normal.<br />
During washing<br />
When you select a small load size setting, your washer has a<br />
lower water level. This can cause a clicking sound from the upper<br />
part of the agitator.<br />
During drain<br />
If water is drained quickly from your washer (depending on your<br />
installation), you may hear air being pulled through the pump<br />
during the end of draining.<br />
After drain and before spin<br />
When the cycle changes from draining to spinning, you may hear<br />
gears engaging.<br />
†<br />
The Permanent Press cycle<br />
partially drains, fills, agitates<br />
briefly, and drains.<br />
6. Off<br />
5
Starting Your Washer<br />
■ Items should move easily through the wash water.<br />
Overloading can cause poor cleaning.<br />
■ To reduce wrinkling of permanent press clothes and some<br />
synthetic knits, use a large load size to provide more space<br />
(see step 5).<br />
2. (OPTIONAL) Pour measured liquid bleach into the liquid<br />
bleach dispenser. Bleach will be dispensed automatically<br />
during the wash part of the cycle.<br />
Fire Hazard<br />
Never place items in the washer that are<br />
dampened with petrol or other flammable fluids.<br />
No washer can completely remove oil.<br />
Do not dry anything that has ever had any type of<br />
oil on it (including cooking oils).<br />
Doing so can result in death, explosion, or fire.<br />
WARNING<br />
■<br />
■<br />
Never use more than 250 mL (1 cup) for a full load. Use<br />
less with a smaller load size.<br />
Follow the manufacturer’s directions for safe use.<br />
■ To avoid spilling, use a cup with a pouring spout. Do not<br />
let bleach splash, drip, or run down into the washer<br />
basket.<br />
■ Use only liquid bleach in this dispenser.<br />
3. Close the washer lid.<br />
4. Turn the LOAD SIZE selector to the correct setting for your<br />
wash load and the type of fabric being washed.<br />
Electrical Shock Hazard<br />
Plug into an earthed plug socket outlet.<br />
Do not remove earth pin.<br />
Do not use an adaptor.<br />
Do not use an extension cord.<br />
Failure to follow these instructions can result in<br />
death, fire, or electrical shock.<br />
1. Measure detergent and pour it into the washer. If desired, add<br />
powdered or liquid colour safe bleach. If the water<br />
temperature is too low, dilute the detergent in warm water.<br />
Add extra detergent for the Super Wash cycle. Follow<br />
detergent manufacturer’s directions.<br />
■ Choose a load size that allows the load to move freely for<br />
best fabric care. See "Loading."<br />
■ You may change the load size selection after the washer<br />
has started filling by turning the selector to a different<br />
setting.<br />
5. Set the TEMPERATURE selector to the correct setting for the<br />
type of fabric and soils being washed. Use the warmest water<br />
safe for fabric. Follow garment label instructions.<br />
Your washer uses automatic temperature control to maintain<br />
a uniform water temperature by regulating incoming hot and<br />
cold water. This helps eliminate undissolved detergent and<br />
ensures consistent cleaning results. The cold wash is<br />
regulated at approximately 24ºC (75ºF) by adding small<br />
amounts of hot water during the cold fill. The warm wash is<br />
maintained at approximately 38ºC (100ºF).<br />
NOTE: Make sure that both hot and cold water taps are fully<br />
turned on, or the automatic temperature control feature will<br />
not work properly.<br />
Water Temp<br />
Use For<br />
Hot<br />
44°C (111°F)<br />
or above<br />
Whites and pastels<br />
Heavy soils<br />
■<br />
Drop a sorted load of clothes loosely into your washer.<br />
Warm<br />
32°-43°C<br />
(90°-110°F)<br />
Bright colours<br />
Moderate to light soils<br />
■<br />
Load evenly to maintain washer balance. Mix large and small<br />
items. Larger items such as sheets should be added last.<br />
Cold<br />
21°-32°C<br />
(70°-90°F)<br />
Colours that bleed or fade<br />
Light soils<br />
6
NOTE: In wash water temperatures colder than 21°C (70ºF),<br />
detergents do not dissolve well. Soils can be difficult to<br />
remove. Some fabrics can retain wear wrinkles and have<br />
increased pilling (the formation of small, lint-like balls on the<br />
surface of garments).<br />
6. Push in the Cycle Control knob and turn it clockwise to the<br />
wash cycle you want. Reduce the wash time when using a<br />
small load size setting. See “Selecting a Cycle and Time.”<br />
Pull out the Cycle Control knob to start the washer.<br />
To stop or restart your washer<br />
■ To stop the washer at any time, push in the Cycle Control<br />
knob. Do NOT stop the washer while it’s pumping out the<br />
water.<br />
■ To restart the washer, close the lid (if open) and pull out<br />
the Cycle Control knob.<br />
7. (OPTIONAL) If desired, add diluted liquid fabric softener to<br />
the final rinse water. See “Adding Liquid Fabric Softener.”<br />
Selecting a Cycle Selecting a Cycle and Time<br />
This section describes the available wash cycles and will help<br />
you make the best cycle selections for your wash loads. Each<br />
cycle is designed for different types of fabric and soil levels.<br />
NOTE: When tested to AS2040-1990 for wash performance, the<br />
Regular/Normal cycle was selected with extra large load size,<br />
warm wash, and cold rinse.<br />
■<br />
■<br />
The washer pauses briefly throughout each cycle. These<br />
pauses are normal. Refer to “Normal Sounds” to learn more<br />
about the sounds you may hear during a wash cycle.<br />
Refer to “Understanding Washer Cycles” to learn what<br />
happens during a wash cycle.<br />
Casual/Permanent Press cycle<br />
This cycle starts with high-speed agitation and then steps to lowspeed<br />
agitation for cleaning permanent press and synthetic<br />
fabrics that are lightly or moderately soiled. To reduce wrinkling,<br />
this cycle features a cool-down phase at the end of the wash<br />
followed by a low-speed spin. After the rinse, the cycle ends with<br />
a short high-speed spin for maximum water removal.<br />
Gentle—Use this 4-minute setting for cleaning delicate items and<br />
washable knits that are lightly or moderately soiled.<br />
Pre Wash cycle<br />
This cycle features a brief period of high-speed agitation and a<br />
short high-speed spin to help remove heavy soils and stains that<br />
need pretreatment. Use warm water for prewashing stained<br />
laundry. Hot water can set stains. After the Pre Wash cycle ends,<br />
add detergent and select a new wash cycle.<br />
Stain Removal Tips<br />
Stained or heavily soiled items may need to be prewashed or<br />
soaked for best results. Soaking helps remove protein-type<br />
stains such as blood, milk, or grass. Prewashing helps loosen soil<br />
before washing.<br />
■<br />
■<br />
■<br />
■<br />
■<br />
■<br />
■<br />
■<br />
Use cold or warm water for soaking or prewashing stained<br />
laundry. Hot water can set stains.<br />
Most stains are easier to remove when they are fresh. Old or<br />
set stains may not come out. Follow package directions for<br />
pretreatment products.<br />
Before treating any stain, find out what kind of stain it is, how<br />
old the stain is, what kind of fabric it is, and if the fabric is<br />
colourfast. (Check the care label.)<br />
When bleach is recommended, use a bleach that is safe for<br />
the fabric.<br />
Test stain removers on an inside seam or hidden corner of the<br />
item to see if the colour is removed.<br />
Put the stained area face-down on a paper towel or white<br />
cloth. Apply the stain remover to the back of the stain. This<br />
forces the stain off the fabric instead of through it.<br />
Meat tenderizer or enzyme presoaks help break down some<br />
protein stains so they are easier to remove.<br />
Washing and drying can set some stains.<br />
Using the <strong>SUDS</strong>-MISER ® System<br />
The <strong>SUDS</strong>-MISER system on your washer allows you to save the<br />
wash water from one cycle to re-use in another cycle.<br />
Cycle Control knob<br />
Regular cycle<br />
This cycle starts with high-speed agitation for cleaning sturdily<br />
constructed cottons and linens. High-speed spin shortens drying<br />
times. Select up to 18 minutes of wash time for cleaning lightly,<br />
moderately or heavily soiled loads.<br />
Super Wash—Use this setting for washing heavily soiled loads<br />
that need maximum soil removal. Follow detergent<br />
manufacturer’s directions for heavily soiled clothing. The Super<br />
Wash setting automatically prewashes the laundry and advances<br />
into the Normal cycle.<br />
How the <strong>SUDS</strong>-MISER System works<br />
The system uses a drain hose and a suds return hose to store the<br />
wash water from one cycle for re-use in another cycle.<br />
■ The drain hose carries the wash water to a standpipe drain or<br />
to another tub with an open drain.<br />
■ The suds return hose moves a portion of the used wash water<br />
to a storage tub, then back into the washer for re-use.<br />
7
Drain system needed<br />
You can use one of the following three drain systems for your<br />
<strong>SUDS</strong>-MISER ® washer. See “Installation Instructions” for<br />
complete details for installing your washer.<br />
Storage tub<br />
NOTE: The end of the suds return hose has a plastic strainer to<br />
prevent objects from being pulled into the washer during Suds<br />
Return.<br />
Suds<br />
return<br />
hose<br />
Suds<br />
return<br />
hose<br />
Drain hose<br />
Standpipe<br />
Plastic<br />
strainer<br />
Suds<br />
return<br />
hose<br />
Wash system using one laundry tub and a<br />
standpipe<br />
Storage tub<br />
Wash system using one laundry tub and an<br />
in-tub standpipe<br />
Drain hose<br />
In-tub<br />
standpipe<br />
NOTE: A standpipe drain is available for placement in the drain<br />
opening. To order, ask for In-Tub Standpipe, Part Number 89121,<br />
from your nearest authorized <strong>Whirlpool</strong> appliance dealer.<br />
Saving your wash water<br />
The system will save the wash water from the Pre Wash and<br />
Regular cycles and from the Casual Permanent Press/Gentle<br />
cycle (after the cool-down).<br />
1. Push in the Cycle Control knob and turn it clockwise to the<br />
desired cycle.<br />
2. Place a plug in the suds storage tub.<br />
3. Pull out the Cycle Control knob.<br />
Re-using your wash water<br />
The storage tub holds the wash water from your last wash load.<br />
The soils in the wash water settle to the bottom of the storage tub<br />
and remain in the storage tub when the water is pumped back<br />
into the washer. Drain the storage tub after the wash water is<br />
pumped back into the washer.<br />
1. Push in the Cycle Control knob and turn it clockwise to<br />
<strong>SUDS</strong> RETURN. Do not add items to the washer at this time.<br />
2. Pull out the Cycle Control knob. Most of the water from the<br />
storage tub is pumped back into the washer basket.<br />
3. When the Suds Return is complete, push in the Cycle Control<br />
knob.<br />
4. Add about ½ the recommended amount of detergent for your<br />
next wash load.<br />
5. Turn the Cycle Control knob clockwise to the desired cycle.<br />
6. Pull out the Cycle Control knob to start the washer.<br />
7. Drain the storage tub.<br />
Suds<br />
return<br />
hose<br />
Storage tub<br />
Drain hose<br />
Drain tub<br />
Extra Rinse and Spin<br />
When using extra detergent for heavily soiled clothes, or washing<br />
special-care items, you may find an extra rinse and spin is<br />
needed.<br />
1. Push in the Cycle Control knob and turn it clockwise to any of<br />
the Rinse settings.<br />
2. Pull out the Cycle Control knob. The washer fills to the<br />
selected load size, agitates, drains, and spins.<br />
NOTE: An EXTRA RINSE option is available (on some models).<br />
See “Starting Your Washer.”<br />
Wash system using two wash tubs<br />
Drain and Spin<br />
A drain and spin may help shorten drying times for some heavy<br />
fabrics or special-care items by removing excess water.<br />
1. Push in the Cycle Control knob and turn it clockwise to any of<br />
the Spin settings.<br />
2. Pull out the Cycle Control knob. The washer drains, then<br />
spins.<br />
8
Adding Liquid Fabric Softener<br />
Always dilute fabric softener with 125 to 250 mL (½ to 1 cup)<br />
warm water. Undiluted fabric softener can stain fabrics.<br />
■<br />
■<br />
■<br />
Add diluted fabric softener only in the final rinse.<br />
Fabric softener should not be mixed with other laundry<br />
products. Greasy stains can form. To remove greasy stains,<br />
wet the stain and rub with liquid detergent or a bar of soap.<br />
Rewash.<br />
Too much fabric softener can make some items (diapers and<br />
towels) nonabsorbent. If this happens, use less fabric<br />
softener, or do not use it every time.<br />
<strong>WASHER</strong> CARE<br />
Cleaning Your Washer<br />
Cleaning the exterior<br />
Use a soft, damp cloth or sponge to wipe up any spills such as<br />
detergent or bleach. Occasionally wipe the outside of your<br />
washer to keep it looking new.<br />
Cleaning the interior<br />
Clean your washer interior by mixing 250 mL (1 cup) of liquid<br />
bleach and 500 mL (2 cups) of detergent. Pour this into your<br />
washer and run it through a complete cycle using hot water.<br />
Repeat this process if necessary.<br />
NOTE: Remove any hard water deposits using only cleaners<br />
labeled as washer safe.<br />
Water Inlet Hoses<br />
Replace inlet hoses after five years of use to reduce the risk of<br />
hose failure. Periodically inspect and replace inlet hoses if<br />
bulges, kinks, cuts, wear, or leaks are found.<br />
The appliance is to be connected to the water mains using the<br />
new hose-sets supplied and that old hose-sets should not be<br />
re-used.<br />
When replacing your inlet hoses, mark the date of replacement<br />
on the label with a permanent marker.<br />
Vacation, Storage, and Moving Care<br />
Install and store your washer where it will not freeze. Because<br />
some water may stay in the hoses, freezing can damage your<br />
washer. If storing or moving your washer during freezing weather,<br />
winterize it.<br />
Non-use or vacation care<br />
Operate your washer only when you are at home. If you will be on<br />
vacation or not using your washer for an extended period of time,<br />
you should:<br />
■ Unplug washer or disconnect power.<br />
■ Turn off the water supply to the washer. This helps avoid<br />
accidental flooding (due to a water pressure surge) while you<br />
are away.<br />
To winterize washer<br />
1. Shut off both water taps.<br />
2. Disconnect and drain water inlet hoses.<br />
3. Put 1 L (quart) of R.V.-type antifreeze in the basket.<br />
4. Run washer on a drain and spin setting (see “Drain and Spin”)<br />
for about 30 seconds to mix the antifreeze and water.<br />
5. Unplug washer or disconnect power.<br />
To use washer again<br />
1. Flush water pipes and hoses.<br />
2. Reconnect water inlet hoses.<br />
3. Turn on both water taps.<br />
4. Plug in washer or reconnect power.<br />
5. Run the washer through a complete cycle with 250 mL (1 cup)<br />
of detergent to clean out antifreeze.<br />
TROUBLESHOOTING<br />
First try the solutions suggested here and possibly avoid<br />
the cost of a service call...<br />
■<br />
■<br />
■<br />
■<br />
■<br />
■<br />
■<br />
■<br />
■<br />
Washer won’t fill, rinse or agitate or wrong temperature<br />
Check the following:<br />
Is the power cord plugged into an earthed plug socket outlet<br />
Is the indicator on the Cycle Control knob properly lined up<br />
with a cycle Turn the Cycle Control knob to the right slightly<br />
and pull to start.<br />
Are the water inlet valve screens clogged<br />
Are both the hot and cold water taps turned on<br />
Is the water inlet hose kinked<br />
Does the water level seem too low, or does the washer<br />
appear to not fill completely<br />
The top of the agitator is much higher than the highest water<br />
level. This creates a perception that the washer is not filling<br />
completely. This is normal.<br />
Washer stops<br />
Check the following:<br />
Is the power cord plugged into an earthed plug socket outlet<br />
Is the indicator on the Cycle Control knob properly lined up<br />
with a cycle Turn the Cycle Control knob to the right slightly<br />
and pull to start.<br />
Are the water inlet valve screens clogged<br />
Are both the hot and cold water taps turned on<br />
Is the water inlet hose kinked<br />
Is there power at the plug<br />
Check your electrical source or call an electrician.<br />
Has a fuse blown or is the circuit breaker open<br />
If problem continues, call an electrician.<br />
Are you using an extension cord<br />
Do not use an extension cord.<br />
Is the washer in a normal pause in the Casual/Permanent<br />
Press cycle<br />
The washer pauses for about 2 minutes in the Casual/<br />
Permanent Press cycle. Allow the cycle to continue.<br />
Is the washer overloaded<br />
Wash smaller loads.<br />
Washer won’t drain or spin<br />
Is the drain hose clogged, or the end of the drain hose<br />
more than 244 cm (96 in.) above the floor<br />
9
■<br />
■<br />
■<br />
■<br />
■<br />
■<br />
■<br />
■<br />
■<br />
■<br />
■<br />
■<br />
■<br />
See “Installation Instructions” for proper installation of drain<br />
hose.<br />
Is the lid open<br />
The lid must be closed during operation.<br />
Is there excessive sudsing<br />
Always measure detergent. Follow manufacturer’s directions.<br />
If you have very soft water, you might need to use less<br />
detergent.<br />
Is your voltage low<br />
Check your electrical source or call an electrician. Do not use<br />
an extension cord.<br />
Washer continues to fill or drain, or the cycle seems<br />
stuck<br />
Is the top of drain hose lower than the water level in<br />
washer<br />
The top of the hose must be higher than the water level in the<br />
washer for proper operation. See “Installation Instructions.”<br />
Does the drain hose fit too tightly in the standpipe, or is it<br />
taped to the standpipe<br />
The drain hose should be loose yet fit securely. Do not seal<br />
the drain hose with tape. The hose needs an air gap. See<br />
“Installation Instructions.”<br />
Washer makes noise<br />
Is the load balanced and the washer level<br />
The wash load should be balanced and not overloaded.<br />
The washer must be level. The front feet should be properly<br />
installed and the nuts tightened. Reset the rear leveling legs<br />
(if needed). See “Installation Instructions.”<br />
Did you completely remove the yellow shipping strap with<br />
cotter pins<br />
See “Installation Instructions.”<br />
Are the gears engaging after the drain and before spin, or<br />
is the upper part of agitator clicking during wash<br />
These are normal washer noises.<br />
Washer leaks<br />
Check the following:<br />
Are the fill hoses tight Are the fill hose washers properly<br />
seated Is the drain hose clamp properly installed See<br />
“Installation Instructions.”<br />
Is the sink or drain clogged<br />
Sink and standpipe must be able to handle 64 L (17 gal.) of<br />
water per minute.<br />
Is water deflecting off the tub ring or the load<br />
Center the tub before starting the washer.<br />
The wash load should be balanced and not overloaded. The<br />
fill or spray rinses can deflect off the load.<br />
The washer must be level. The front feet should be properly<br />
installed and the nuts tightened. Reset the rear leveling legs<br />
(if needed). See “Installation Instructions.”<br />
Check household plumbing for leaks.<br />
Washer basket is crooked<br />
Was the washer basket pulled forward during loading<br />
The wash load should be balanced and not overloaded. Push<br />
the basket to the center before starting wash.<br />
■<br />
■<br />
■<br />
■<br />
■<br />
■<br />
■<br />
■<br />
■<br />
■<br />
■<br />
■<br />
■<br />
Is the load balanced, and is the washer level<br />
The wash load should be balanced and not overloaded.<br />
The washer must be level. The front feet should be properly<br />
installed and the nuts tightened. Reset the rear leveling legs<br />
(if needed). See “Installation Instructions.”<br />
The washer basket moves while washing.<br />
This is normal.<br />
Agitator operation<br />
The top of the agitator is loose, or moves in only one<br />
direction.<br />
This is normal.<br />
Dispenser clogged or bleach leaking<br />
Did you put powdered or colour-safe bleach in the liquid<br />
bleach dispenser<br />
Add powdered or liquid colour-safe bleach directly to the<br />
basket. Do not use the bleach dispenser for colour-safe<br />
bleach.<br />
Load too wet<br />
Did you use the right cycle for the load being washed<br />
Select a cycle with a higher spin speed.<br />
Did you use a cold rinse<br />
Cold rinses leave loads wetter than warm rinses. This is<br />
normal.<br />
Residue or lint on load<br />
Did you sort properly<br />
Sort lint givers (towels, chenille) from lint takers (corduroy,<br />
synthetics). Also sort by colour.<br />
Did you overload the washer<br />
The wash load must be balanced and not overloaded. Lint<br />
can be trapped in the load if overloaded. Wash smaller loads.<br />
Check the following:<br />
Was paper or tissue left in the pockets<br />
Did you use enough detergent Follow manufacturer’s<br />
directions. Use enough detergent to hold the lint in the water.<br />
Is your water colder than 21°C (70°F) Wash water colder<br />
than 21°C (70°F) may not completely dissolve the detergent.<br />
Stains on load<br />
Did you follow the manufacturer’s directions when adding<br />
detergent and fabric softener<br />
Measure detergent and fabric softener. Use enough detergent<br />
to remove soil and hold it in suspension.<br />
Dilute fabric softener and add to the rinse portion of a cycle<br />
only. Do not drip fabric softener on clothes.<br />
Is there above average iron (rust) in water<br />
You may need to install an iron filter.<br />
Did you properly sort the load<br />
Sort dark clothes from whites and lights.<br />
Did you unload the washer promptly<br />
To avoid dye transfer, unload the washer as soon as it stops.<br />
10
■<br />
■<br />
■<br />
■<br />
■<br />
■<br />
■<br />
■<br />
■<br />
■<br />
■<br />
Load is wrinkled<br />
Did you unload the washer promptly<br />
Unload the washer as soon as it stops.<br />
Did you use the right cycle for the load being washed<br />
Use the Casual/Permanent Press cycle or a cycle with low<br />
spin speeds (if available) to reduce wrinkling.<br />
Did you overload the washer<br />
The wash load must be balanced and not overloaded. Loads<br />
should move freely during washing.<br />
Was the wash water warm enough to relax wrinkles, or<br />
are you using warm rinses<br />
If safe for the load, use warm or hot wash water. Use cold<br />
rinse water.<br />
Are the hot and cold water hoses reversed<br />
Check to be sure the hot and cold water hoses are connected<br />
to the right taps. See “Installation Instructions.”<br />
Load is tangled or twisted<br />
Did you overload the washer<br />
The wash load must be balanced and not overloaded. Loads<br />
should move freely during washing.<br />
Did you wrap items around the agitator<br />
Drop items loosely into the washer. Do not wrap items around<br />
the agitator.<br />
Gray whites, dingy colours<br />
Did you properly sort the load<br />
Dye transfer can occur when mixing whites and colours in a<br />
load. Sort dark clothes from whites and lights.<br />
Was the wash temperature too low<br />
Use hot or warm washes if safe for the load. Hot water should<br />
be at least 44°C (111°F) to clean heavy soils.<br />
Did you use enough detergent, or do you have hard<br />
water<br />
Use more detergent for washing heavy soils in cold or hard<br />
water.<br />
Are the hot and cold water hoses reversed<br />
Check to be sure the hot and cold water hoses are connected<br />
to the right taps. See “Installation Instructions.”<br />
ASSISTANCE OR SERVICE<br />
Before calling for assistance or service, please check<br />
“Troubleshooting.” It may save you the cost of a service call. If<br />
you still need help, follow the instructions below.<br />
When calling, please know the purchase date and the complete<br />
model and serial number of your appliance. This information will<br />
help <strong>Whirlpool</strong> to better respond to your request.<br />
If you need replacement parts<br />
If you need to order replacement parts, <strong>Whirlpool</strong> recommends<br />
that you only use factory specified parts. These parts will fit right<br />
and work right because they are made with the same precision<br />
used to build every new WHIRLPOOL ® appliance. To locate<br />
replacement parts in your area, call the Customer Interaction<br />
Centre or your nearest <strong>Whirlpool</strong> designated service company.<br />
Call the <strong>Whirlpool</strong> Customer Interaction Centre at<br />
1-300-363-344 (Australia) or 0-800-442-584 (New Zealand).<br />
Our consultants provide assistance with:<br />
■ Features and specifications on our full line of appliances<br />
■ Installation information<br />
■ Use and maintenance procedures<br />
■ Accessory and repair parts sales<br />
■ Referrals to local dealers, repair parts distributors, and<br />
service companies<br />
<strong>Whirlpool</strong> designated service technicians are trained to fulfill the<br />
product warranty and provide after-warranty service.<br />
NOTE: If the power supply cord of this washer is damaged, it<br />
must be replaced by a special cord (Part Number 8316026)<br />
available from the dealer from whom you purchased the washer<br />
or a <strong>Whirlpool</strong> designated service company.<br />
Gearcase assembly covered by your warranty<br />
Garment damage<br />
■<br />
■<br />
■<br />
■<br />
Check the following:<br />
Were sharp items removed from pockets before washing<br />
Empty pockets, zip zippers, snap or hook fasteners before<br />
washing.<br />
Were strings and sashes tied to prevent tangling<br />
Were items damaged before washing Mend rips and broken<br />
threads in seams before washing.<br />
Did you overload the washer<br />
The wash load must be balanced and not overloaded. Loads<br />
should move freely during washing.<br />
Did you properly add liquid bleach<br />
Do not pour liquid bleach directly on load. Wipe up bleach<br />
spills. Undiluted bleach will damage fabrics.<br />
Did you follow the manufacturer’s care label instructions<br />
11
WHIRLPOOL ® <strong>WASHER</strong> WARRANTY<br />
TWO-YEAR FULL WARRANTY<br />
For two years from the date of purchase, when this washer is used in domestic or single-family applications, and operated and<br />
maintained according to instructions attached to or furnished with the product, <strong>Whirlpool</strong> (Australia) Pty Limited will pay for replacement<br />
parts and repair labour to correct defects in materials or workmanship. Service must be provided by <strong>Whirlpool</strong> (Australia) Pty Limited or<br />
its appointed Service Claimants.<br />
NINETY-DAY FULL WARRANTY<br />
For ninety days from the date of purchase, when this washer is used in commercial, multi-family or personal applications, and operated<br />
and maintained according to instructions attached to or furnished with the product, <strong>Whirlpool</strong> (Australia) Pty Limited will pay for<br />
replacement parts and repair labour to correct defects in materials or workmanship. Service must be provided by <strong>Whirlpool</strong> (Australia)<br />
Pty Limited or its appointed Service Claimants.<br />
THIRD THROUGH FIFTH YEAR LIMITED WARRANTY - ON TOP, LID AND GEARCASE ASSEMBLY<br />
For the third through fifth year from the date of purchase, when this washer is operated and maintained according to instructions<br />
attached to or furnished with the product, <strong>Whirlpool</strong> (Australia) Pty Limited will pay for replacement parts for any top and lid rust, and<br />
any part of the gearcase assembly, if defective in materials or workmanship.<br />
THIRD THROUGH TENTH YEAR LIMITED WARRANTY - ON OUTER TUB<br />
For the third through tenth year from the date of purchase, when this washer is operated and maintained according to instructions<br />
attached to or furnished with the product, <strong>Whirlpool</strong> (Australia) Pty Limited will pay for replacement parts for the outer tub should it<br />
crack or fail to contain water, if defective in materials or workmanship.<br />
<strong>Whirlpool</strong> (Australia) Pty Limited will not pay for:<br />
1. Service calls to correct the installation of your washer, to instruct you how to use your washer, or to replace house fuses or correct<br />
house wiring or plumbing.<br />
2. Damage resulting from accident, alteration, misuse, abuse, fire, flood, acts of God, improper installation, installation not in<br />
accordance with local electrical and plumbing codes, or use of products not approved by <strong>Whirlpool</strong> (Australia) Pty Limited.<br />
3. Repairs which result from parts not having been fitted by an authorized <strong>Whirlpool</strong> person or entity, or from the use of the appliance<br />
in a manner other than the use for which it was specifically designed.<br />
4. Replacement parts or repair labour costs for units operated outside Australia or New Zealand.<br />
5. Repairs to parts or systems resulting from unauthorized modifications made to the appliance.<br />
6. Costs associated with service calls, freight or transport of goods requiring service from areas outside of those which are serviced by<br />
<strong>Whirlpool</strong> (Australia) Pty Limited or its appointed Service Claimants.<br />
WHIRLPOOL (AUSTRALIA) PTY LIMITED SHALL NOT BE LIABLE FOR INCIDENTAL OR CONSEQUENTIAL DAMAGES.<br />
The benefits conferred by this express warranty are additional to all other conditions, warranties, guaranties, rights and remedies<br />
expressed or implied by the Trade Practices Act, the New Zealand Sale of Goods Act and similar State or Territory laws and all other<br />
obligations and liabilities on the part of the manufacturer or supplier and nothing contained herein shall restrict or modify such rights,<br />
remedies, obligations or liabilities.<br />
If you need service, first see “Troubleshooting.” Additional help can be found by checking “Assistance or Service,” or calling our<br />
Customer Interaction Centre at 1-300-363-344 (Australia) or 0-800-442-584 (New Zealand).<br />
5/00<br />
Keep this book and your sales slip together for future<br />
reference. You must provide proof of purchase or installation<br />
date for in-warranty service.<br />
Write down the following information about your washer to better<br />
help you obtain assistance or service if you ever need it. You will<br />
need to know your complete model number and serial number.<br />
You can find this information on the model and serial number<br />
label/plate, located on your appliance as shown in “Parts and<br />
Features.”<br />
Dealer name_____________________________________________________<br />
Model number __________________________________________________<br />
Serial number __________________________________________________<br />
Model number _________________________________________________<br />
Serial number __________________________________________________<br />
Purchase date _________________________________________________<br />
3951077B<br />
© 2002 <strong>Whirlpool</strong> <strong>Corporation</strong>.<br />
All rights reserved.<br />
® Registered Trademark/TM Trademark of <strong>Whirlpool</strong>, U.S.A.<br />
4/02<br />
Printed in U.S.A.