Installation Guide.pdf - Lumber Liquidators
Installation Guide.pdf - Lumber Liquidators
Installation Guide.pdf - Lumber Liquidators

Create successful ePaper yourself
Turn your PDF publications into a flip-book with our unique Google optimized e-Paper software.
Page 1 of 9<br />
Thank you for choosing MORNING STAR ® Bamboo flooring!<br />
Nail and Glue installation instructions.<br />
PLEASE READ THESE INSTRUCTIONS THOROUGHLY BEFORE BEGINNING YOUR INSTALLATION.<br />
WE RECOMMEND THAT THE INSTALLER HAVE KNOWLEDGE OF AND FOLLOW ALL INSTALLATION GUIDELINES AS SET FORTH BY THE<br />
NATIONAL WOOD FLOORING ASSOCIATION WWW.NWFA.ORG. INSTALLATION WARRANTIES ORIGINATE FROM THE INSTALLER.<br />
WHERE THESE INSTRUCTIONS DIFFER FROM NWFA GUIDELINES THIS DOCUMENT TAKES PRECEDENCE.<br />
Look for helpful [TIPS] and [CAUTIONS] throughout this document<br />
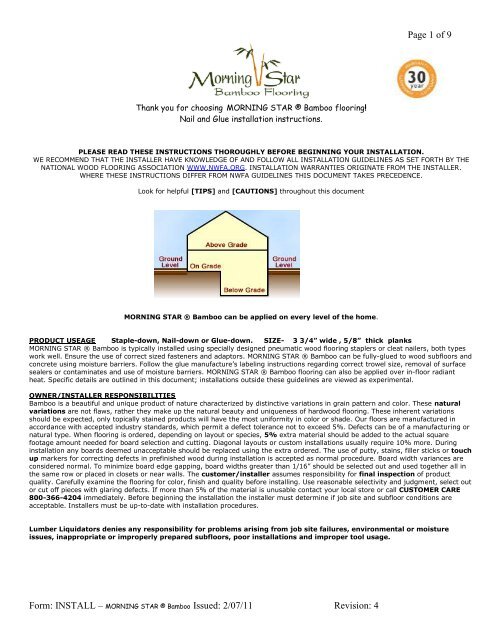
MORNING STAR ® Bamboo can be applied on every level of the home.<br />
PRODUCT USEAGE Staple-down, Nail-down or Glue-down. SIZE- 3 3/4” wide , 5/8” thick planks<br />
MORNING STAR ® Bamboo is typically installed using specially designed pneumatic wood flooring staplers or cleat nailers, both types<br />
work well. Ensure the use of correct sized fasteners and adaptors. MORNING STAR ® Bamboo can be fully-glued to wood subfloors and<br />
concrete using moisture barriers. Follow the glue manufacture’s labeling instructions regarding correct trowel size, removal of surface<br />
sealers or contaminates and use of moisture barriers. MORNING STAR ® Bamboo flooring can also be applied over in-floor radiant<br />
heat. Specific details are outlined in this document; installations outside these guidelines are viewed as experimental.<br />
OWNER/INSTALLER RESPONSIBILITIES<br />
Bamboo is a beautiful and unique product of nature characterized by distinctive variations in grain pattern and color. These natural<br />
variations are not flaws, rather they make up the natural beauty and uniqueness of hardwood flooring. These inherent variations<br />
should be expected, only topically stained products will have the most uniformity in color or shade. Our floors are manufactured in<br />
accordance with accepted industry standards, which permit a defect tolerance not to exceed 5%. Defects can be of a manufacturing or<br />
natural type. When flooring is ordered, depending on layout or species, 5% extra material should be added to the actual square<br />
footage amount needed for board selection and cutting. Diagonal layouts or custom installations usually require 10% more. During<br />
installation any boards deemed unacceptable should be replaced using the extra ordered. The use of putty, stains, filler sticks or touch<br />
up markers for correcting defects in prefinished wood during installation is accepted as normal procedure. Board width variances are<br />
considered normal. To minimize board edge gapping, board widths greater than 1/16” should be selected out and used together all in<br />
the same row or placed in closets or near walls. The customer/installer assumes responsibility for final inspection of product<br />
quality. Carefully examine the flooring for color, finish and quality before installing. Use reasonable selectivity and judgment, select out<br />
or cut off pieces with glaring defects. If more than 5% of the material is unusable contact your local store or call CUSTOMER CARE<br />
800-366-4204 immediately. Before beginning the installation the installer must determine if job site and subfloor conditions are<br />
acceptable. Installers must be up-to-date with installation procedures.<br />
<strong>Lumber</strong> <strong>Liquidators</strong> denies any responsibility for problems arising from job site failures, environmental or moisture<br />
issues, inappropriate or improperly prepared subfloors, poor installations and improper tool usage.<br />
Form: INSTALL – MORNING STAR ® Bamboo Issued: 2/07/11 Revision: 4
Page 2 of 9<br />
JOB SITE INSPECTION<br />
For best performance, wood flooring should be one of the last items installed. Heating and air conditioning systems should be fully<br />
operating and running at least 7 days before the installation. To prevent moisture related issues such as board edge cupping, all wet<br />
work involving water or moisture (plumbing, plaster /drywall ceilings or wall finishes, painting, etc.) should be finished with ample<br />
time allowed for complete drying prior to wood floor installation. New concrete should be cured and at least 60 to 90 days old.<br />
ACCLIMATION/CONDITIONING OF THE FLOORING -SEE MOISTURE<br />
All wood products are affected by environmental conditions especially prefinished materials. Acclimate the new flooring in the areas to<br />
be installed to normal lived-in conditions while in the boxes. For air flow, open box ends for products protected in plastic. Length of<br />
time is not the determining factor. The goal is to reach a moisture equilibrium or balance between the new flooring with its<br />
surroundings before installation. This balance could be achieved in as little as 1 to 5 days, or longer for some exotic species. For best<br />
performance, condition the flooring to consistent indoor temperatures of 60°-80° F and indoor humidity levels of 30% - 50%. Very<br />
dry or humid regions usually require extended conditioning. Recommended acclimation levels maintained even after the installation<br />
will minimize board movement, excessive squeaks and gaps.<br />
Proper acclimation, moisture testing of the product and subfloor, even jobsite conditions all work together for the continued success of<br />
the installation and is the responsibility of those overseeing the project -the installer or wood floor owner.<br />
HANDLE WITH CARE<br />
To prevent board warping or bowing; do not cut the packaging plastic support bindings until ready to install. Do not stand flooring on<br />
ends or sides. Do not store directly on bare concrete or next to outside walls. Cartons should be placed as close to the center of the<br />
installation area as possible. Store flat supporting to the ends and center sections. Store in a dry place being sure to provide air flow<br />
under and around cartons. Keep out of direct sunlight and away from air vents.<br />
VENTILATION OF CRAWL SPACES<br />
To prevent moisture build-up homes with crawl spaces must have vents for proper cross-ventilation.<br />
Provide year-round air circulation with multiple vents. Venting allows damp areas to dry-out. Vents must be adequately spaced so that<br />
no dead air spaces remain. Under the home in the crawlspace use black 6-mil polyethylene sheet plastic as a moisture barrier.<br />
Completely Cover 100% of the surface of the ground to guard against excessive moisture. Overlap plastic seams 6” and duct tape.<br />
Delay installation until the above guidelines are completed.<br />
MOISTURE<br />
[CAUTION] Most installation failures result from a moisture imbalance. All subfloors must be tested for moisture content. Know your<br />
moisture levels and document the readings. Do not deliver flooring to the jobsite until moisture problems are corrected.<br />
Wood subfloors: Determine if conditions are dry before installing. Wood subfloor moisture reading must not exceed 12%. The ideal<br />
moisture content within bamboo flooring is 4%-6%. The differential balance between new boards and subfloor must not exceed 4%.<br />
If moisture readings are too high, postpone installation, find the moisture source and correct. Raise heat and increase ventilation,<br />
holding off installation until proper conditions are met.<br />
Do not use pressure treated plywood for interior use, these can have high moisture content and or latent with rot resistant chemicals<br />
Concrete subfloor: Prior to installation, concrete should preferably be 60 to 90 days old, the moisture content of concrete must be<br />
measured with a meter specifically designed for concrete moisture measurements. The moisture measurement must not exceed 3 lbs<br />
per 1,000 sqft, in 24 hours. Moisture testing only determines the presence of moisture at the time of measurement. Of greater concern<br />
is future moisture passing up through the slab to the surface, therefore, the use of a moisture barrier is necessary.<br />
CEMENT MOISTURE TESTING PROCEDURES<br />
Calcium chloride test is the only quantitative test available at this time and must be performed to determine the extent of moisture<br />
passing through the slab. The emission of moisture through the slab must not exceed 3 lbs per 1,000 sqft, in 24 hours. Calcium<br />
chloride test kits are available at most flooring supply distributors.<br />
Phenolphthalein tests may also be performed by using a 3% phenolphthalein solution in water-free alcohol. Drill dime-sized holes,<br />
¼" deep, in various areas of the concrete slab, particularly around the walls. Then apply two drops of the solution into each of the<br />
drilled holes. If there is no color change in the solution, then there is not enough moisture to affect the installation. If the solution turns<br />
pink or dark red within five minutes, further testing must be done with a moisture Encounter meter or calcium chloride test kit.<br />
Condensation tests may be performed by taping 18"x18" polyethylene sheets in several locations on the concrete slab. Heat lamps<br />
are then placed close enough to warm these areas and allowed to remain in place for 48 hours. Moisture on the plastic sheets or<br />
darkening of the concrete surface under the sheets is an indication of high moisture in the concrete.<br />
Alkalinity test. Alkali can be visible as a white powder on the surface of the concrete. Alkali is excess salt contained within the<br />
concrete that can cause adhesive failure over time. This problem is magnified if moisture is present and passing through the concrete<br />
depositing excess salt on the concrete surface. A simple pH test will determine the presence of alkali on a slab surface; Apply a few<br />
drops of distilled water to a small thoroughly clean and scraped concrete surface area and place a strip of pH paper to the wetted area.<br />
The paper will change color within 5 minutes. Compare the color change to the chart standard supplied with the paper to indicate the<br />
Form: INSTALL – MORNING STAR ® Bamboo Issued: 2/07/11 Revision: 4
Page 3 of 9<br />
pH of degree of alkalinity. A pH range from 5 to 10 is acceptable. Corrective measures must be taken with any concrete slab that<br />
measures a pH reading above 10. Contact adhesive manufacturer for corrective instructions.<br />
Owner and installer are solely and jointly responsible for site conditions, pre-installation moisture checking of new floor<br />
and subfloor and must ensure that all conditions and specifications listed in this guide have been thoroughly met prior to<br />
installation of hardwood floor.<br />
SUBFLOOR PREPARATION<br />
Do not install flooring directly over joist without subflooring.<br />
All structural panels/underlayment must be installed sealed-side down, and provide ¾” perimeter spacing. Square-edged or non tongue<br />
and grooved panels used as a subfloor will require a minimum 1/8˝ (3 mm) expansion space between all plywood seams.<br />
Panels must meet minimum CDX grade Exposure 1 and US Voluntary Product Standard PS1-95, PS2-04 or Canadian performance<br />
standard CAN/CSA 0325-0-92 for construction sheathing. Check underside of panel for codes. Minimum of 3/8˝panel thickness when<br />
used as an underlayment. Joist spacing determines minimum subfloor thickness.<br />
• Joist spacing 16” on center<br />
Plywood: Minimum of (5/8˝) Oriented Strand Board (OSB): Minimum (3/4˝, 23/32”) AdvanTech Minimum (3/4˝, 23/32”)<br />
• Joist spacing 16” up to 19.2” on center<br />
Plywood: Minimum of (3/4˝, 23/32”) Oriented Strand Board (OSB): Minimum of (3/4˝, 23/32”)<br />
• Joist spacing over 19.2”up to maximum 24” on center<br />
Plywood: Minimum of (7/8”) Oriented Strand Board (OSB): Minimum of (1”)<br />
Particleboard or Masonite: not recommended, remove or cover with 3/8” plywood.<br />
Pressure treated plywood can have high moisture content and rot resistant chemicals, do not use for interior applications.<br />
Flat wood subfloors<br />
• The final surface must be flat to within 3/16" in a 6' radius, or within ¼” in 10’. Subfloor must be securely nailed or screwed down<br />
to joists to prevent movement or squeaks. Install over 16” center-to-center joist sub-structure. Thoroughly inspect and replace existing<br />
floor or subfloor that shows evidence of water damage or structural weakness. Check for and repair any sagging or loose sections of a<br />
wood subfloor. Squeaky or loose boards should be re-nailed. An uneven or cupped wood subfloor is an indication of excess moisture,<br />
identify and correct. High spots may be planed or sanded down. Low spots should be cut out and repaired or may be filled with old<br />
pieces of firm vinyl or build up with 30 lb. black roofing paper. Do not fill low areas under naildown flooring with cement patches as<br />
these will break down over time.<br />
Flat concrete<br />
• A flat cement surface is very important when gluing down ridged solid wood. The final surface must be flat to within 1/8" in a 6'<br />
radius, or within 3/16” in 10’. Sand or grind down high spots. Fill valleys or low areas with cement based leveling compounds<br />
compatible with the flooring adhesives. Allow extra drying time for the leveling compounds. Do not install on new concrete less than<br />
60-90 days old.<br />
GENERAL INFORMATION (all installations)<br />
• Customers are advised to be home during the installation for consultation.<br />
• Customer and installer should discuss installation and layout to maximize satisfaction.<br />
• Inspect flooring during installation.<br />
• Maintain proper perimeter expansion gap.<br />
• Trim bottom of the door frame with handsaw to insert boards underneath.<br />
• Avoid board grouping. Board sizes should be intermingled.<br />
• Floor should be installed from several cartons at the same time to ensure good color, shade and appearance.<br />
• Save a box of flooring for use in future repairs.<br />
• After installation, do not fully cover the new installation with plastic or paper. Moisture or board discoloration issues may result.<br />
• Because jobsite conditions can be dry today and wet tomorrow the use of moisture barriers are recommended.<br />
Form: INSTALL – MORNING STAR ® Bamboo Issued: 2/07/11 Revision: 4
Board placements (all installation methods)<br />
Page 4 of 9<br />
Avoid board-end “line up”<br />
Typically, board stagger is three times a board’s width, or 6”. Good board placement provides greater floor strength and better overall<br />
floor appearance.<br />
BAMBOO FASTENER SELECTION<br />
Special nailers, shims, shoe accessories or fasteners are usually required to accommodate bamboo flooring<br />
Note: Only use flooring machines that are fully adjustable and that engage the top profile over the tongue at the appropriate angle.<br />
Make sure that the base is smooth, in good working condition and seats properly against the board to prevent top edge and surface<br />
dimple damage. Test and adjust the air pressure to ensure proper setting of staples.<br />
FASTENER SELECTION SEE [BAMBOO NAILING TIPS]<br />
(All bamboo styles)<br />
CLEAT NAILERS; 18-20 gage Cleat nails up to 1½” long<br />
Powernail Flex, M200, M250 Primatech Q500, Q550 or similar<br />
Powernail 50m, 50p 18gage nailer or similar<br />
STAPLERS; 15-16 gage Staples 1/2” wide up to 1 ½”- long (Staples not recommended for Strand bamboo)<br />
Bostich MIIIFS<br />
Powernail 445FS<br />
Cleats<br />
staples<br />
Important: Set air compressor to 70-80 PSI. Test and adjust air pressure to ensure proper setting of fasteners. Make sure that the<br />
fastening machine is fully adjustable, is in good working condition, is at the appropriate angle and seats properly against the tongue of<br />
the board to prevent top edge and surface dimple damage.<br />
Note: Only use flooring stapler/nailers that are fully adjustable and that engage the top profile over the tongue at the<br />
appropriate angle. Make sure that the flooring stapler/nailer is in good working condition and seats properly against the<br />
board to prevent top edge and surface dimple damage.<br />
[BAMBOO NAILING TIPS]:<br />
Form: INSTALL – MORNING STAR ® Bamboo Issued: 2/07/11 Revision: 4
Page 5 of 9<br />
TEST THE NAILER:<br />
Using one of the recommended staple or cleat type nail guns, test by fastening a sacrificial board to the floor in a well-lighted area.<br />
Verify air pressure setting and any tongue damage, make all adjustments and corrections before installation begins, and remove the<br />
test board. Tongue fracture and surface dimpling during installation is common and can be minimized by (1) using a thinner nail<br />
thickness, (2) using the recommended shoe adaptor, or (3) changing the angle of nail entry. To minimize tongue fracture, many<br />
installers will temporarily adjust the nailer angle by applying layers of duct tape to the bottom foot plate of the nailer. In addition, to<br />
reduce the occurrence of surface dimpling the use of flooring nailers with 18 gage cleat type fasteners are recommended for bamboo<br />
especially the much harder Strand Bamboo. The use of an over-size base plate to protect the board is also encouraged. If however,<br />
surface dimpling or tongue fracture still occurs, drilling pilot holes and hand nailing may be required. Gluing down bamboo is also an<br />
option to avoid issues associated with nailing. Staplers not recommended for fastening Strand Bamboo as a wider drive bar in Staple<br />
machines can act like a wood chisel, splitting the tongues. Do not mix fasteners. Staples and cleats hold differently and when mixed<br />
can result in irregular seasonal gapping, squeaking and or movement. When face or top nailing, pick areas of the grain or pattern that<br />
would best conceal touch-up fillers. Pounding boards together during assembly with a rubber mallet may damage the finish or<br />
unprotected board edges.<br />
NAILDOWN INSTRUCTIONS<br />
Starting point, first three rows<br />
• When installing over crawl spaces or rooms over basements use 15 lb. black roofing paper to provide some protection against<br />
moisture vapors, butt seam edges together. Red rosin paper may be used where there are no moisture issues.<br />
Install the flooring perpendicular to the floor joist. Use the longest, straightest boards available for the first two rows.<br />
(1) Determine the starting wall. At the two opposite ends of this wall, measure out and mark the floor the width of the floor<br />
plus the expansion gap. The Expansion gap is normally the same as the thickness of the new flooring, for example,<br />
1/2” flooring will require 1/2” expansion.<br />
(2) Snap on the floor a chalk line connecting the two floor marks. While maintaining the expansion space, place the groove<br />
side along the starting wall and align the tongue side of the first row of boards on the chalk line. THE FIRST THREE<br />
ROWS MUST BE STRAIGHT.<br />
(3) Pre-drill and top nail the first row of boards only. Hand nail the following rows until nailing machines can be used.<br />
(4) Next, rack-out or lay-out the floor for best visual appearance and adjust before nailing the floor.<br />
[CAUTION]: When top nailing pre-finished wood it is recommended to pre-drill and hand nail. Although pneumatic nailers are faster<br />
they easily damage the wood surface and finishes. Ensure that the nailer is not damaging the pre-finished wood.<br />
COMPLETING THE FLOOR<br />
• During installation, work several rows at a time, REFER to nailing schedule below. Tighten boards as necessary to reduce gaps.<br />
Striking boards together using a rubber mallet can bruise or damage the flooring or finish.<br />
• End-joints of adjacent rows should be staggered 6˝ when possible to ensure a more favorable overall appearance. Top-nail the first<br />
and last rows where clearance does not permit blind nailing with stapler or finish nailer.<br />
• Rip or cut final row to fit and top-nail. If the final row is less than 1˝ in width it should first be edge-glued to the last UNINSTALLED<br />
row and the two joined units should be face-nailed as one board.<br />
Nailing schedule recommendations;<br />
Place fasteners every 10”-12” intervals and within 3”-4” of board ends, with at least two fasteners in every board.<br />
GLUE DOWN OVERVIEW<br />
[TIPS]:<br />
• <strong>Lumber</strong> <strong>Liquidators</strong> recommends moisture testing, the use of moisture barriers and 100% urethane wood flooring adhesives<br />
• To ensure glue transfer, glue manufactures recommend rolling the flooring throughout installation using a 85-100 lb roller<br />
• For the best result, do not mix adhesive products. Use moisture barriers and adhesives from the same manufacturer’s product line.<br />
• Use the trowel size recommended by the adhesive company to get required spread rate and ridging height. Typically, trowel size is<br />
determined by board type, size and surface texture. (Ensure a 95% min glue-to-board glue transfer).<br />
• During constant use trowel teeth will wear down. For best glue coverage use a new trowel with each new container of adhesive.<br />
• Discard twisted or warped boards.<br />
•Follow the glue manufacturer’s labeling instructions regarding adhesive set time, correct trowel size, removal of surface sealers or<br />
contaminates and use of moisture barriers.<br />
•Intermix product from several cartons as you install the floor to insure color, grain and shade mix.<br />
•Install the flooring parallel to the longest wall in the room. Keep the flooring straight using a chalk line.<br />
Blue painter tape #2080 can be used to keep rows or sections of floor boards together until the adhesive has cured. (incorrect tape<br />
can harm the finish.) Tape together 4 or 5 rows at 18” intervals.<br />
[CAUTION]: Many installers choose to use straps or clamps in an effort to force board rows tighter together during installation. Be<br />
aware that over-strapping may adversely affect the floor and can result in glue-bond failure, seam peaking, twisted boards, or outof-square<br />
flooring board alignment.<br />
ADHESIVES<br />
Form: INSTALL – MORNING STAR ® Bamboo Issued: 2/07/11 Revision: 4
ADHESIVE DRY TIME IS DEPENDANT ON JOB SITE TEMPERATURE AND HUMIDITY CONDITIONS.<br />
Page 6 of 9<br />
Manufacturer<br />
Mapei 800-992-6273 Bostiks 800-523-6530<br />
WFM a moisture barrier<br />
MVP a moisture barrier<br />
Ultrabond 990,980 flooring adhesive BBA flooring adhesive<br />
Eco 995 An all-in-one adhesive and moisture barrier<br />
Vapor-Lock An all-in-one adhesive and moisture barrier<br />
Cured adhesive can cloud, chemically damage or etch the floor’s finish. Clean wet adhesive from the surface of the floor<br />
frequently with mineral spirits or manufacturer-recommended remover. Use clean towels, changing frequently to prevent<br />
haze and adhesive residue.<br />
Examples shown are approximate and given for estimating purposes only. Actual jobsite coverage may vary.<br />
Have several trowel sizes on hand, aim for a 85% min glue-to-board coverage.<br />
For applying Moisture Barriers<br />
Average coverage<br />
For applying Flooring Adhesives<br />
Average coverage<br />
…………………………………………………….…….<br />
GLUE DOWN INSTRUCTIONS<br />
Step 1<br />
(1) Determine the starting wall, usually the longest foundation wall. At the two opposite ends of this wall, measure out and<br />
mark on the floor the width of several rows of boards, (this could be 12”to 24”) include the expansion gap.<br />
The Expansion gap is normally the same as the thickness of the new flooring, for example, 1/2” flooring will require 1/2”<br />
expansion.<br />
(2) Next, use a chalk line to connect the two marks. Follow this chalked line when applying both the adhesive and boards.<br />
THE FIRST ROWS MUST BE STRAIGHT.<br />
(3) Using an approved trowel and wood flooring adhesive, glue the first few rows in the dry area, between the wall and chalk<br />
line.<br />
(4) First row only. Using a table saw remove the tongue part, then place the tongue side towards the wall with groove side<br />
facing outwards. Lay flooring into the adhesive following the straight line. Stay off the new hardwood while working.<br />
(5) Progressively lay-in the next boards by engaging the tongue and groove then drop board into adhesive. Avoid dragging or<br />
sliding boards together as this can trap or squeeze glue up in between the boards creating gaps. Continue working 4 or 5<br />
rows together, then measure and cut the last boards as needed to complete the rows.<br />
(6) The balance of a board cut is used to start a new row, discard lengths under 6”. Avoid clustering of end joints. Stagger the<br />
ends of the boards correctly. Smaller boards should be intermixed throughout the installed floor. A tapping block can be<br />
used to gently tap the boards into proper position. During installation, end gaps between boards can be minimized by<br />
temporarily locking a completed row in place by using spacers placed between the wall and the last board of each row,<br />
remove when glue has dried.<br />
(7) Repeat the process. Chalk new lines, spread adhesive and continue working 4 or 5 rows together until completed.<br />
INSTALLING THE LAST ROW<br />
Form: INSTALL – MORNING STAR ® Bamboo Issued: 2/07/11 Revision: 4
Page 7 of 9<br />
Step 2:<br />
•Most often, the entire length of the last row will need to be trimmed so that it is narrow enough to fit the remaining space. It should<br />
be glued and wedged into place. Leave all spacers in the expansion space until the adhesive has cured, then remove. Keep the floor<br />
free from foot traffic, until adhesive has cured.<br />
• Be sure not to spread adhesive too far ahead of your work area.<br />
• If the adhesive skins over and fails to transfer, remove and spread new adhesive to achieve proper bonding to the subfloor.<br />
Occasionally lift a board and check for adhesive transfer. Adequate adhesive transfer is necessary to ensure sufficient holding strength.<br />
• When not in use, keep the adhesive container tightly closed to prevent thickening and difficulty in spreading the adhesive. Proper<br />
ventilation within the room should be provided. Follow the recommendations on the adhesive container.<br />
Post-installation<br />
• After installation, allow glue to fully cure for 24 hrs before replacing furniture and foot traffic.<br />
• For matching milling and finish sheen, save a box of flooring in case of future repairs.<br />
MOLDINGS & TRANSITIONS:<br />
<strong>Installation</strong> Tips:<br />
• Moldings must be predrilled to avoid splitting whenever they are to be secured with nails or fasteners.<br />
•The tool of choice for cutting hardwood moldings is a 10” or 12” motorized miter saw with pre-set adjustments for the basic miter cuts<br />
at 22.5°, 45°, and 90°.<br />
• A carbide tipped blade makes the best cuts. Be sure the saw blade rotation is positioned to cut into the finished face.<br />
•When installing Wall Base molding, place the bottom nail below the finished line of the Quarter Round.<br />
•On wall base or quarter round moldings, never restrict the hardwood floor’s natural contraction/expansion movement by driving the<br />
fasteners at a downward angle into the floor. Attach the moldings to the wall or vertical surface.<br />
• When splicing, miter cuts hide better than square cuts.<br />
1) Base Board - for adding a custom finish along any wall.<br />
2) Quarter-Round - for covering the expansion gap left at walls and other fixed surfaces.<br />
3) Reducer Molding - used as a transition strip to lower floors.<br />
4) Stair Nosing - for finishing the exposed edges of stairs and landings.<br />
5) T-Expansion - for joining two areas of flooring together of similar heights.<br />
6) Reducer Molding – thinner strip, used as a transition strip to lower floors.<br />
7) End Cap - for finishing the space at sliding glass doors, at bath tubs or transitioning to carpet.<br />
BAMBOO REPAIRS<br />
•Minor scratch or dent damage can be repaired with a touch-up or filler kit available at most home centers. Major damage may require<br />
individual board replacements and is best accomplished by professional flooring installers.<br />
SEASONAL CHANGES - What to Expect (all installation methods)<br />
Seasonal gapping should be expected in all wood flooring and does not constitute a product failure.<br />
It is normal that wood floors will be affected by fluctuating levels of humidity within the building. Care should be taken to control<br />
humidity levels to within the 30-50% range. To protect your investment and to assure that your floors provide lasting satisfaction, note<br />
recommendations below:<br />
• (Dry) Heating Season - A humidifier may be needed to prevent excessive shrinkage in wood floors due to low humidity levels. Wood<br />
stoves, radiant floor heat and electric heat will create dryer conditions.<br />
• (Humid, Wet) Non-Heating Season - Proper humidity levels can be maintained by use of an air conditioner or dehumidifier. Avoid<br />
excessive exposure to water during periods of inclement weather. Do not obstruct expansion joints around the perimeter of your floor.<br />
RADIANT HEAT SYSTEMS (all installation methods)<br />
Form: INSTALL – MORNING STAR ® Bamboo Issued: 2/07/11 Revision: 4
Page 8 of 9<br />
General Precautions and Recommendations<br />
MORNING STAR ® Bamboo can be successfully applied over in-floor radiant heat. Because of the wide array of systems on the market,<br />
each with its own features, please consult with your radiant flooring provider for recommended installation methods. Hydronic systems<br />
must include in-floor temperature sensors and an outdoor thermostat that allows the system to adjust the water temperature<br />
according to anticipated heat loss. Radiant heat contributes to the drying out of all woods. Use of a humidification system may be<br />
required to maintain the proper humidity level. The indoor relative humidity must be maintained between 30-50% year round. Failure<br />
to do so can result in edge cupping, squeaking delamination, splintering, or face checking.<br />
Avoid shock to the floor, Before installation, run new systems to dissipate hidden or trapped moisture. During installation, reduce<br />
thermostat to 65°F. 48 hours after installation, slowly raise the temperature of the heating system to its preferred operating level<br />
over a period of 5 days. The surface temperature of the subfloor must never exceed 80°F in any location. The temperature setting<br />
must always remain within 15°F of normal operating level, and should never be turned completely off. Excessive heat, rapid heating,<br />
and/or failure to maintain humidity levels between 30-50% is likely to result in cracking, cupping, squeaking and other forms of<br />
floor issues. Slight surface splits (checking), particularly at the ends of planks, should be expected with installations over radiant heat<br />
and does not constitute a product failure.<br />
Test for moisture, This procedure must be followed regardless of the time of year.<br />
Prior to installation over radiant heat, moisture testing must be conducted and documented. The moisture content for concrete<br />
substrates must not exceed 3.0 lbs. per 1000 square feet in 24 hrs per ASTM 1669-89 (Calcium Chloride Test). Wood subfloors should<br />
not exceed 12% using a pin type meter. Do not install the flooring until excess moisture is corrected.<br />
RADIANT INSTALLATIONS Related information can be found on our website “Flooring 101”<br />
Always use moisture barriers.<br />
(1) When nailing planks over radiant heat ensure that fasteners are holding the flooring without damage to the radiant system.<br />
(2) When fully gluing planks over radiant heat ensure that the adhesives are recommended for this application.<br />
ROUTINE MAINTENANCE and PROTECTION<br />
Do<br />
1. Sweep, dust, or vacuum the floor regularly with a recommended floor attachment (not a beater bar) to prevent accumulation of<br />
dirt and grit that can scratch or dull the floor finish. A more frequent dust-mopping or vacuuming schedule may be required in very<br />
sandy areas such as a beach home.<br />
2. Periodically clean the floor with manufacturers cleaning products or products made specifically for urethane finishes; never use<br />
oil soaps, detergents or wax.<br />
3. Use a damp cloth to blot up spills as soon as they happen.<br />
4. For tough spots, such as oil, paint, markers, ink, or tar, apply mineral spirits on a clean white cloth then wipe the area with a<br />
damp cloth to remove any residue.<br />
5. For spots such as candle wax or chewing gum, harden the spot with ice and then gently scrape with a plastic scraper, such as a<br />
credit card.<br />
6. Entry mats will help collect the dirt, sand, grit, oil, asphalt, or driveway sealer or pool chlorines that might otherwise be tracked<br />
onto your floor.<br />
7. Keep your pet’s nails trimmed to prevent them from scratching your floor.<br />
8. UV sunlight will enhance the tone of different species of hardwood to varying degrees. Periodically rearranging your area rugs and<br />
furniture will allow the floor to antique or age evenly.<br />
9. Use a dolly when moving heavy furniture or appliances; use a piece plywood or Masonite to protect the floor. Never try to slide or<br />
roll heavy objects across the floor.<br />
10. Use floor protectors under desks and wide-load bearing rollers to minimize indentations and scratches from heavy objects such<br />
as office desk chairs. As a rule, the heavier the object, the wider the floor protector.<br />
11. Maintain a normal indoor relative humidity level between 30-50% and temperatures of 60°-80° throughout the year to<br />
minimize the natural expansion and contraction of the wood.<br />
Do not<br />
1. Do not wash or wet mop the floor with soap, water, oil-soap detergent, or any other liquid cleaning material. This could cause<br />
swelling, warping, delamination, and joint-line separation, and void the warranty.<br />
2. Do not use steel wool, abrasive cleaners, or strong ammoniated or chlorinated type cleaners.<br />
3. Do not use any type of buffing or polishing machine, these can generate heat or hot spots.<br />
4. Do not use rubber, foam or plastic backed mats as they may discolor the flooring finish. To prevent slippage, use an approved rug<br />
underlayment.<br />
5. Avoid excessive exposure to water during periods of inclement weather.<br />
6. Do not walk on the floor with stiletto heels, shoes with sports cleats or exposed metal parts.<br />
7. Do not allow sharp, pointed, or rough textured objects to be exposed to the hardwood flooring.<br />
8. <strong>Lumber</strong> <strong>Liquidators</strong> does not endorse the use of steam cleaning machines on hard wood products, use at your own risk.<br />
9. Toys and tools can scratch the finishes, scratches and dents are jobsite related, not warrantable.<br />
10. If using glue-down or floating installation methods, do not allow foot traffic or heavy furniture on floor for 24 hours.<br />
Form: INSTALL – MORNING STAR ® Bamboo Issued: 2/07/11 Revision: 4
Page 9 of 9<br />
CAUTION: WOOD DUST Cut wood flooring outside<br />
Sawing, sanding and machining wood products can produce wood dust. Airborne wood<br />
dust can cause respiratory, eye and skin irritation. The International Agency for Research<br />
on Cancer (IARC) has classified wood dust as a nasal carcinogen in humans.<br />
Precautionary Measures: equipped power tools with a dust collector. If high dust levels are encountered;<br />
use an appropriate NIOSH-designated dust mask. Avoid dust contact with eye and skin.<br />
First Aid Measures in case of irritation: In case of irritation, flush eyes or skin with water for at least 15 minutes.<br />
CAUTION: USE EYE AND EAR PROTECTION<br />
HELPFUL TOOL LISTING PER INSTALLATION METHOD<br />
Nail down<br />
■ Appropriate nailer and fasteners ■ Expansion spacers ■ Moisture meter ■ Tapping block ■ Hand tools, Utility knife ■ Hammer ■ Pencil<br />
■ Under-cut jam saw ■ Hand saw ■ Circular, miter and jig saw (carbide blade) ■ Tape measure or folding rule ■ Carpenter’s square<br />
■ Drill ■ Chalk line ■ Calculator ■ Blue masking tape ■ Safety glasses ■ Silicone caulk ■ Transition moldings<br />
Glue down<br />
■ Manufactures recommended cleaner ■ 100% Urethane moisture barrier and flooring adhesives ■ Correct trowel size ■ Expansion<br />
spacers ■ Moisture meter ■ 2080 blue painters tape ■ Laminate pull or tapping bar ■ Tapping block ■ Hand tools, Utility knife<br />
■ Hammer ■ Pencil ■ Under-cut jam saw ■ Hand saw ■ Circular, miter and jig saw (carbide blade) ■ Tape measure or folding rule<br />
■ Carpenter’s square ■ Drill ■ Chalk line ■ Calculator ■ Blue masking tape ■ Safety glasses ■ Silicone caulk ■ Transition moldings<br />
APROVED INSTALLATION METHODS<br />
FLOOR PLACEMENTS NAIL GLUE FLOAT<br />
ABOVE GRADE yes yes<br />
ON GRADE yes yes<br />
BELOW GRADE yes yes<br />
RADIANT HEAT yes yes<br />
ELASTILON<br />
yes<br />
SUBFLOOR TYPES<br />
CONCRETE no yes<br />
GYPCRETE no no<br />
OSB ¾” minimum yes yes<br />
PLYWOOD 5/8” min yes yes<br />
PARTICLE BOARD no no<br />
ASPHALT TILE no no<br />
FIRM LINOLEUM yes yes<br />
FIRM KITCHEN VYNYL yes yes<br />
VCT VINYL TILES no no<br />
CUSHION VYNYL no no<br />
RUBBER TILES no no<br />
STEEL no no<br />
CERAMIC/MARBLE no yes<br />
CARPET no no<br />
TO OBTAIN ASSISTANCE WITH FLOORING PRODUCT INFORMATION, PLEASE CONTACT THE STORE OF ORIGINAL PURCHASE OR<br />
CONTACT CUSTOMER CARE AT 800-366-4204. YOU MAY ALSO VISIT THE “FLOORING 101” or www.lumberliquidators.com FOR<br />
INSTALLATION TIPS AND ADDITIONAL WARRANTY INFORMATION.<br />
Form: INSTALL – MORNING STAR ® Bamboo Issued: 2/07/11 Revision: 4