CD1230/CD1240/CD1250 (basic) - Gabbey Business Machines
CD1230/CD1240/CD1250 (basic) - Gabbey Business Machines
CD1230/CD1240/CD1250 (basic) - Gabbey Business Machines

Create successful ePaper yourself
Turn your PDF publications into a flip-book with our unique Google optimized e-Paper software.
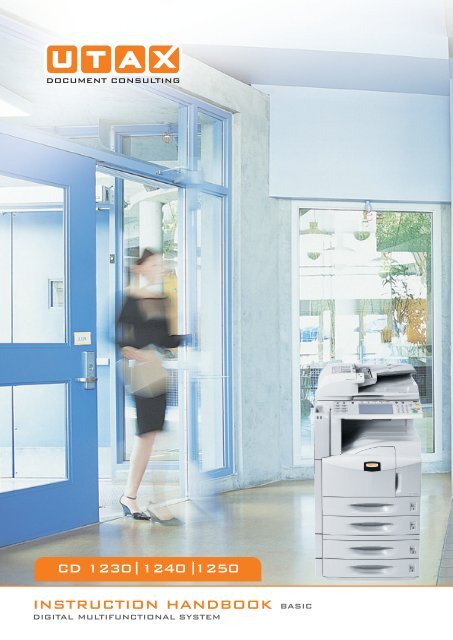
CD 1230 1240 1250<br />
INSTRUCTION HANDBOOK<br />
DIGITAL MULTIFUNCTIONAL SYSTEM<br />
BASIC
This Operation Guide is for models CD 1230, CD 1240 and CD 1250.<br />
In this guide, CD 1230 refers to the 30 ppm (prints per minute) model,<br />
CD 1240 to the 40 ppm model and CD 1250 to the 50 ppm model.<br />
NOTE: This Operation Guide contains information that corresponds to using both<br />
the inch and metric versions of these machines.
Legal and Safety Information<br />
Please read this information before using your machine. This<br />
chapter provides information on the following topics.<br />
• Legal Information..............................................................ii<br />
• Regarding Trade Names ................................................. iii<br />
• Energy Star (ENERGY STAR ® ) Program........................vi<br />
• Safety Conventions in This Guide.................................. vii<br />
• Caution Labels .............................................................. viii<br />
• Installation Precautions ...................................................ix<br />
• Precautions for Use.........................................................xi<br />
• Laser Safety .................................................................. xiv<br />
• Safety Instructions Regarding the Disconnection of<br />
Power ................................................................ xv<br />
OPERATION GUIDE<br />
i
Legal and Safety Information<br />
Legal Information<br />
Notice<br />
The information in this guide is subject to change without notification. Additional<br />
pages may be inserted in future editions. The user is asked to excuse any<br />
technical inaccuracies or typographical errors in the present edition.<br />
No responsibility is assumed if accidents occur while the user is following the<br />
instructions in this guide. No responsibility is assumed for defects in the printer’s<br />
firmware (contents of its read-only memory).<br />
This guide, any copyrightable subject matter sold or provided with or in connection<br />
with the sale of the machine, are protected by copyright. All rights are reserved.<br />
Copying or other reproduction of all or part of this guide, any copyrightable subject<br />
matter without the prior written consent of copyright owner is prohibited. Any<br />
copies made of all or part of this guide, any copyrightable subject must contain the<br />
same copyright notice as the material from which the copying is done.<br />
Legal Restriction On Copying<br />
• It may be prohibited to copy copyrighted material without permission of the<br />
copyright owner.<br />
• It is prohibited under any circumstances to copy domestic or foreign<br />
currencies.<br />
• Copying other items may be prohibited.<br />
ii<br />
OPERATION GUIDE
Legal and Safety Information<br />
Regarding Trade Names<br />
• KPDL is a trademark of Kyocera Corporation.<br />
• Microsoft, MS-DOS, Windows, Windows NT and Internet Explorer are<br />
registered trademarks of Microsoft Corporation in the U.S.A. and/or<br />
other countries.<br />
• Windows Me and Window XP are trademarks of Microsoft<br />
Corporation.<br />
• PCL is a trademark of Hewlett-Packard Company.<br />
• Adobe Acrobat, Adobe Reader and PostScript are trademarks of<br />
Adobe Systems, Incorporated.<br />
• Ethernet is a registered trademark of Xerox Corporation.<br />
• Novell and NetWare are registered trademarks of Novell, Inc.<br />
• Centronics is a trademark of Centronics Data Computer Corporation.<br />
• IBM and IBM PC/AT are trademarks of International <strong>Business</strong><br />
<strong>Machines</strong> Corporation.<br />
• Power PC is a trademark of IBM in the U.S.A. and/or other countries.<br />
• AppleTalk is a registered trademark of Apple Computer, Inc.<br />
• CompactFlash and CF are trademarks of SanDisk, Inc.<br />
• PC-PR201/65A is a product of NEC Corporation.<br />
• VP-1000 is a product of Seiko Epson Corporation.<br />
• This machine has been developed using embedded real-time<br />
operating system Tornado by Wind River Systems, Inc.<br />
• PCL6, a command language of HP LaserJet emulated by this<br />
machine, is using the compatible system PeerelessPrintXL developed<br />
by Peerless Systems Corporation. PeerelessPrintXL is a trademark of<br />
Peerless Systems Corporation (2381 Rosecrans Ave. ElSegundo, CA<br />
90245, U.S.A.).<br />
• TrueType is a registered trademark of Apple Computer, Inc.<br />
• DFHSGOTHIC-W5 and DFHSMINCHO-W3 are Heisei fonts. Kyocera<br />
Mita Corporation is using these fonts under agreements with the<br />
Japanese Standards Association. Any form of reproduction of these<br />
fonts without prior consent of Kyocera Mita Corporation is prohibited.<br />
• Heisei fonts have been developed by the working groups in<br />
collaboration with the Japanese Standards Association. Reproduction<br />
of these fonts without permission is prohibited.<br />
• TypeBankG-B, TypeBankM-M and Typebank-OCR are trademarks of<br />
TypeBank ® .<br />
• All European language fonts installed in this machine are used under<br />
licensing agreement with Monotype Imaging Inc.<br />
• Helvetica, Palatino and Times are registered trademarks of Linotype-<br />
Hell AG.<br />
• ITC Avant Garde Gothic, ITC Bookman, ITC ZapfChancery and ITC<br />
ZapfDingbats are registered trademarks of International Type-face<br />
Corporation.<br />
OPERATION GUIDE<br />
iii
Legal and Safety Information<br />
• UFST MicroType ® fonts by Monotype Imaging Inc. are installed in<br />
this machine.<br />
• This machine contains the NF module developed by ACCESS Co.,<br />
Ltd.<br />
• This machine contains the software having modules developed by<br />
Independent JPEG Group.<br />
All other brands and product names are registered trademarks or<br />
trademarks of their respective companies. The designations and ® will<br />
not be used in this Operation Guide.<br />
GPL<br />
This product contains GPL (www.fsf.org/copyleft/gpl.html) software as part<br />
of its firmware.<br />
Monotype Imaging License Agreement<br />
1 Software shall mean the digitally encoded, machine readable,<br />
scalable outline data as encoded in a special format as well as the<br />
UFST Software.<br />
2 You agree to accept a non-exclusive license to use the Software to<br />
reproduce and display weights, styles and versions of letters,<br />
numerals, characters and symbols (Typefaces) solely for your own<br />
customary business or personal purposes at the address stated on<br />
the registration card you return to Monotype Imaging. Under the<br />
terms of this License Agreement, you have the right to use the Fonts<br />
on up to three printers. If you need to have access to the fonts on<br />
more than three printers, you need to acquire a multi-user license<br />
agreement which can be obtained from Monotype Imaging.<br />
Monotype Imaging retains all rights, title and interest to the Software<br />
and Typefaces and no rights are granted to you other than a License<br />
to use the Software on the terms expressly set forth in this<br />
Agreement.<br />
3 To protect proprietary rights of Monotype Imaging, you agree to<br />
maintain the Software and other proprietary information concerning<br />
the Typefaces in strict confidence and to establish reasonable<br />
procedures regulating access to and use of the Software and<br />
Typefaces.<br />
4 You agree not to duplicate or copy the Software or Typefaces, except<br />
that you may make one backup copy. You agree that any such copy<br />
shall contain the same proprietary notices as those appearing on the<br />
original.<br />
5 This License shall continue until the last use of the Software and<br />
Typefaces, unless sooner terminated. This License may be<br />
terminated by Monotype Imaging if you fail to comply with the terms<br />
of this License and such failure is not remedied within thirty (30) days<br />
after notice from Monotype Imaging. When this License expires or is<br />
terminated, you shall either return to Monotype Imaging or destroy all<br />
copies of the Software and Typefaces and documentation as<br />
requested.<br />
iv<br />
OPERATION GUIDE
Legal and Safety Information<br />
6 You agree that you will not modify, alter, disassemble, decrypt,<br />
reverse engineer or decompile the Software.<br />
7 Monotype Imaging warrants that for ninety (90) days after delivery,<br />
the Software will perform in accordance with Monotype Imagingpublished<br />
specifications, and the diskette will be free from defects in<br />
material and workmanship. Monotype Imaging does not warrant that<br />
the Software is free from all bugs, errors and omissions.<br />
The parties agree that all other warranties, expressed or implied,<br />
including warranties of fitness for a particular purpose and<br />
merchantability, are excluded.<br />
8 Your exclusive remedy and the sole liability of Monotype Imaging in<br />
connection with the Software and Typefaces is repair or replacement<br />
of defective parts, upon their return to Monotype Imaging.<br />
In no event will Monotype Imaging be liable for lost profits, lost data,<br />
or any other incidental or consequential damages, or any damages<br />
caused by abuse or misapplication of the Software and Typefaces.<br />
9 Massachusetts U.S.A. law governs this Agreement.<br />
10 You shall not sublicense, sell, lease, or otherwise transfer the<br />
Software and/or Typefaces without the prior written consent of<br />
Monotype Imaging.<br />
11 Use, duplication or disclosure by the Government is subject to<br />
restrictions as set forth in the Rights in Technical Data and Computer<br />
Software clause at FAR 252-227-7013, subdivision (b)(3)(ii) or<br />
subparagraph (c)(1)(ii), as appropriate. Further use, duplication or<br />
disclosure is subject to restrictions applicable to restricted rights<br />
software as set forth in FAR 52.227-19 (c)(2).<br />
12 You acknowledge that you have read this Agreement, understand it,<br />
and agree to be bound by its terms and conditions. Neither party<br />
shall be bound by any statement or representation not contained in<br />
this Agreement. No change in this Agreement is effective unless<br />
written and signed by properly authorized representatives of each<br />
party. By opening this diskette package, you agree to accept the<br />
terms and conditions of this Agreement.<br />
OPERATION GUIDE<br />
v
Legal and Safety Information<br />
Energy Star (ENERGY STAR ® ) Program<br />
We have determined as a participating company in the International<br />
Energy Star Program that this machine is compliant with the standards laid<br />
out in the International Energy Star Program.<br />
About the International Energy Star Program<br />
Sleep<br />
Automatic 2-Sided Copy Functions<br />
Paper Recycling<br />
International Energy Star Program has as its <strong>basic</strong> goals the promotion of<br />
efficient energy use and the reduction of the environmental pollution that<br />
accompanies energy consumption by promoting the manufacture and sale<br />
of products that fulfill program standards.<br />
International Energy Star Program standards require that multi-function<br />
machines come equipped with a Low Power Mode where energy<br />
consumption is reduced after a certain amount of time elapses since the<br />
machine was last used, as well as an Off Mode where the machine<br />
automatically turns itself off after there is no activity within a set amount of<br />
time. When the machine includes printer and fax functions, the printer and<br />
fax must enter a Low Power Mode where power consumption is<br />
automatically reduced after a certain amount of time elapses since they<br />
were last used, and they must also support a Sleep Mode where power<br />
consumption is reduced to a minimum when there is not activity within a<br />
set amount of time.<br />
This machine is equipped with the following features as a result of its<br />
compliance with International Energy Star Program standards.<br />
This machine has a Sleep Mode only to attain further savings of energy.<br />
The machine automatically enters Sleep when 15 minutes have passed<br />
since the machine was last used. The amount of time of no activity that<br />
must pass before Sleep is activated may be lengthened. For more<br />
information refer to Sleep and Auto Sleep on page 3-4.<br />
The Energy Star Program encourages the use of 2-sided copying which<br />
reduces the load on the environment and this machine includes 2-sided<br />
copying as a standard function. For example, by copying two 1-sided<br />
originals onto a single sheet of paper as a 2-sided copy, it is possible to<br />
lower the amount of paper used. For more information refer to Duplex<br />
Copying on page 3-13.<br />
The Energy Star Program encourages the use of environmentally friendly<br />
recycled paper. Your sales or service representative can provide<br />
information about recommended paper types.<br />
vi<br />
OPERATION GUIDE
Legal and Safety Information<br />
Safety Conventions in This Guide<br />
Symbols<br />
The sections of this guide and parts of the machine marked with symbols<br />
are safety warnings meant to protect the user, other individuals and<br />
surrounding objects, and ensure correct and safe usage of the machine.<br />
The symbols and their meanings are indicated below.<br />
WARNING: Indicates that serious injury or even death may result<br />
from insufficient attention to or incorrect compliance with the<br />
related points.<br />
CAUTION: Indicates that personal injury or mechanical damage<br />
may result from insufficient attention to or incorrect compliance<br />
with the related points.<br />
The symbol indicates that the related section includes safety warnings.<br />
Specific points of attention are indicated inside the symbol.<br />
.... [General warning]<br />
.... [Warning of danger of electrical shock]<br />
.... [Warning of high temperature]<br />
The symbol indicates that the related section includes information on<br />
prohibited actions. Specifics of the prohibited action are indicated inside<br />
the symbol.<br />
.... [Warning of prohibited action]<br />
.... [Disassembly prohibited]<br />
The • symbol indicates that the related section includes information on<br />
actions which must be performed. Specifics of the required action are<br />
indicated inside the symbol.<br />
.... [Alert of required action]<br />
.... [Remove the power plug from the outlet]<br />
....<br />
[Always connect the machine to an outlet with a ground<br />
connection]<br />
Please contact your service representative to order a replacement if the<br />
safety warnings in this Operation Guide are illegible or if the guide itself is<br />
missing (fee required).<br />
OPERATION GUIDE<br />
vii
Legal and Safety Information<br />
Caution Labels<br />
Caution labels have been attached to the machine at the following<br />
locations for safety purposes. Be sufficiently careful to avoid fire or electric<br />
shock when removing a paper jam or when replacing toner.<br />
The area indicated in the label<br />
carries high voltage. Never<br />
touch parts in this area, because<br />
there is a danger of electric<br />
shock.<br />
The area indicated in the<br />
label carries high<br />
temperature. Do not<br />
touch parts in this area,<br />
because there is a danger<br />
of getting burned.<br />
The area indicated in the<br />
label carries high<br />
temperature. Do not<br />
touch parts in this area,<br />
because there is a danger<br />
of getting burned.<br />
Do not attempt to incinerate the toner<br />
container or the waste toner box.<br />
Dangerous sparks may cause burns.<br />
Moving parts inside. Do not<br />
touch parts in this area,<br />
because there is a danger of<br />
injury.<br />
NOTE: Do not remove these labels.<br />
viii<br />
OPERATION GUIDE
Legal and Safety Information<br />
Installation Precautions<br />
Environment<br />
CAUTION<br />
Avoid placing the machine on or in locations which are unstable<br />
or not level. Such locations may cause the machine fall down or<br />
fall over. This type of situation presents a danger of personal<br />
injury or damage to the machine.<br />
Avoid locations with humidity or dust and dirt. If dust or dirt<br />
become attached to the power plug, clean the plug to avoid the<br />
danger of fire or electrical shock.<br />
Avoid locations near radiators, heaters or other heat sources, or<br />
locations near flammable items to avoid the danger of fire.<br />
To keep the machine cool and facilitate changing of parts and<br />
maintenance, allow access space as shown below. Leave<br />
adequate space, especially around the rear cover, to allow air to<br />
be properly ventilated out of the machine.<br />
3 15/16"<br />
10 cm<br />
11 13/16"<br />
30 cm<br />
11 13/16"<br />
30 cm<br />
39 3/8"<br />
100 cm<br />
Other precautions<br />
Adverse environment conditions may affect the safe operation and<br />
performance of the machine. Install in an air-conditioned room and avoid<br />
the following locations when selecting a site for the machine.<br />
• Avoid locations near a window or with exposure to direct sunlight.<br />
• Avoid locations with vibrations.<br />
• Avoid locations with drastic temperature fluctuations.<br />
• Avoid locations with direct exposure to hot or cold air.<br />
• Avoid poorly ventilated locations.<br />
OPERATION GUIDE<br />
ix
Legal and Safety Information<br />
If the floor is delicate against casters, when this machine is moved after<br />
installation, the floor material may be damaged.<br />
During copying, some ozone is released, but the amount does not cause<br />
any ill effect to one's health. If, however, the machine is used over a long<br />
period of time in a poorly ventilated room or when making an extremely<br />
large number of copies, the smell may become unpleasant. To maintain<br />
the appropriate environment for copy work, it is suggested that the room<br />
be properly ventilated.<br />
Power supply/Grounding the machine<br />
Other precautions<br />
Handling of plastic bags<br />
WARNING<br />
Do not use a power supply with a voltage other than that<br />
specified. Avoid multiple connections in the same outlet. These<br />
types of situations present a danger of fire or electrical shock.<br />
Plug the power cord securely into the outlet. If metallic objects<br />
come into contact with the prongs on the plug, it may cause a fire<br />
or electric shock.<br />
Always connect the machine to an outlet with a ground<br />
connection to avoid the danger of fire or electrical shock in case<br />
of an electric short. If an earth connection is not possible, contact<br />
your service representative.<br />
Connect the power plug to the closest outlet possible to the machine.<br />
WARNING<br />
Keep the plastic bags that are used with the machine away from<br />
children. The plastic may cling to their nose and mouth causing<br />
suffocation.<br />
x<br />
OPERATION GUIDE
Legal and Safety Information<br />
Precautions for Use<br />
Cautions when using the machine<br />
WARNING<br />
Do not place metallic objects or containers with water (flower<br />
vases, flower pots, cups, etc.) on or near the machine. This type<br />
of situation presents a danger of fire or electrical shock should<br />
they fall inside.<br />
Do not remove any of the covers from the machine as there is a<br />
danger of electrical shock from high voltage parts inside the<br />
machine.<br />
Do not damage, break or attempt to repair the power cord. Do not<br />
place heavy objects on the cord, pull it unnecessarily or cause<br />
any other type of damage. These types of situations present a<br />
danger of fire or electrical shock.<br />
Never attempt to repair or disassemble the machine or its parts<br />
as there is a danger of fire, electrical shock or exposure to the<br />
laser. If the laser beam escapes, there is a danger of it causing<br />
blindness.<br />
If the machine becomes excessively hot, smoke appears from<br />
the machine, there is an odd smell, or any other abnormal<br />
situation occurs, there is a danger of fire or electrical shock. Turn<br />
the main power switch off immediately, be absolutely certain to<br />
remove the power plug from the outlet and then contact your<br />
service representative.<br />
If anything harmful (paper clips, water, other fluids, etc.) falls into<br />
the machine, turn the main power switch off immediately. Next,<br />
be absolutely certain to remove the power plug from the outlet to<br />
avoid the danger of fire or electrical shock. Then contact your<br />
service representative.<br />
Do not remove or connect the power plug with wet hands, as<br />
there is a danger of electrical shock.<br />
Always contact your service representative for maintenance or<br />
repair of internal parts.<br />
OPERATION GUIDE<br />
xi
Legal and Safety Information<br />
CAUTION<br />
Do not pull the power cord when removing it from the outlet. If the<br />
power cord is pulled, the wires may become broken and there is<br />
a danger of fire or electrical shock. (Always grasp the power plug<br />
when removing the power cord from the outlet.)<br />
Always remove the power plug from the outlet when moving the<br />
machine. If the power cord is damaged, there is a danger of fire<br />
or electrical shock.<br />
Always hold the designated parts only when lifting or moving the<br />
machine.<br />
For safety purposes, always remove the power plug form the<br />
outlet when performing cleaning operations.<br />
If dust accumulates within the machine, there is a danger of fire<br />
or other trouble. It is therefore recommended that you consult<br />
with your service representative in regard to cleaning of internal<br />
parts. This is particularly effective if accomplished prior to<br />
seasons of high humidity. Consult with your service<br />
representative in regard to the cost of cleaning the internal parts of the<br />
machine.<br />
Other precautions<br />
Do not place heavy objects on the machine or cause other damage to the<br />
machine.<br />
During the use, do not<br />
• Open the front cover,<br />
• Turn off the main power switch,<br />
• Pull out the power plug.<br />
When lifting or moving the machine, contact your service representative.<br />
Do not touch electrical parts, such as connectors or printed circuit boards.<br />
They could be damaged by static electricity.<br />
Do not attempt to perform any operations not explained in this guide.<br />
Do not look directly at the light from the scanning lamp as it may cause your<br />
eyes to feel tired or painful.<br />
This machine comes equipped with an HDD (hard disk drive). Do not<br />
attempt to move the machine while the power is still on. Since any resulting<br />
shock or vibration may cause damage to the hard disk, be sure to turn off<br />
the power before attempting to move the machine.<br />
xii<br />
OPERATION GUIDE
Legal and Safety Information<br />
Cautions when handling consumables<br />
CAUTION<br />
Do not attempt to incinerate the toner container or the waste<br />
toner box. Dangerous sparks may cause burns.<br />
Keep the toner container and the waste toner box out of the<br />
reach of children.<br />
If toner happens to spill from the toner container or the waste<br />
toner box, avoid inhalation and ingestion, as well as contact with<br />
your eyes and skin.<br />
• If you do happen to inhale toner, move to a place with fresh<br />
air and gargle thoroughly with a large amount of water. If coughing<br />
develops, contact a physician.<br />
• If you do happen to ingest toner, rinse your mouth with water and drink<br />
1 or 2 cups of water to dilute the contents of you stomach. If<br />
necessary, contact a physician.<br />
• If you do happen to get toner in your eyes, flush them thoroughly with<br />
water. If there is any remaining tenderness, contact a physician.<br />
• If toner does happen to get on your skin, wash with soap and water.<br />
Do not attempt to force open or destroy the toner container or the<br />
waste toner box.<br />
Other precautions<br />
If the optional Fax kit is installed and the main power switch is off,<br />
transmitting/receiving Fax is disabled. Do not turn off the main power<br />
switch, but press the Power key on the operation panel to enter Sleep<br />
mode.<br />
Return the exhausted toner container and waste toner box to your dealer<br />
or service representative. The collected toner container and waste toner<br />
box will be recycled or disposed in accordance with the relevant<br />
regulations.<br />
Store the machine while avoiding exposure to direct sunlight.<br />
Store the machine in a place where the temperature stays below 40ºC<br />
while avoiding sharp changes of temperature and humidity.<br />
If the machine will not be used for an extended period of time, remove the<br />
paper from the cassette and the Multi Purpose (MP) Tray, return it to its<br />
original package and reseal it.<br />
OPERATION GUIDE<br />
xiii
Legal and Safety Information<br />
Laser Safety<br />
Laser radiation could be hazardous to the human body. For this reason, laser<br />
radiation emitted inside this machine is hermetically sealed within the protective<br />
housing and external cover. In the normal operation of the product by user, no<br />
radiation can leak from the machine.<br />
This machine is classified as Class 1 laser product under IEC 60825.<br />
Caution: Performance of procedures other than those specified in this manual<br />
may result in hazardous radiation exposure.<br />
These labels are attached to the laser scanner unit inside the machine and are not<br />
in a user access area.<br />
The label shown below is attached on the right side of the machine.<br />
xiv<br />
OPERATION GUIDE
Legal and Safety Information<br />
Safety Instructions Regarding the Disconnection of Power<br />
Caution: The power plug is the main isolation device! Other switches on the<br />
equipment are only functional switches and are not suitable for isolating the<br />
equipment from the power source.<br />
VORSICHT: Der Netzstecker ist die Hauptisoliervorrichtung! Die anderen Schalter<br />
auf dem Gerät sind nur Funktionsschalter und können nicht verwendet werden,<br />
um den Stromfluß im Gerät zu unterbrechen.<br />
DECLARATION OF CONFORMITY<br />
TO<br />
89/336/EEC, 73/23/EEC, 93/68/EEC and 1995/5/EC<br />
We declare under our sole responsibility that the product to which this<br />
declaration relates is in conformity with the following specifications.<br />
EN55024<br />
EN55022 Class B<br />
EN61000-3-2<br />
EN61000-3-3<br />
EN60950<br />
EN60825-1<br />
EN300330-1<br />
EN300330-2<br />
Radio Frequency Transmitter<br />
Radio Tag Technology<br />
This machine contains the transmitter module. We, the manufacturer hereby<br />
declare that this equipment is in compliance with the essential requirements and<br />
other relevant provisions of Directive 1999/5/EC.<br />
In some countries the radio tag technology used in this equipment to<br />
identify the toner container may be subject to authorization and the use of<br />
this equipment may consequently be restricted.<br />
OPERATION GUIDE<br />
xv
Legal and Safety Information<br />
xvi<br />
OPERATION GUIDE
About this Operation Guide<br />
This Operation Guide contains the following chapters.<br />
Chapter 1 - Part Names<br />
Identifies machine parts and operation panel keys.<br />
Chapter 2 - Preparation before Use<br />
Explains adding paper, placing original, connecting the machine, and<br />
necessary configurations before first use.<br />
Chapter 3 - Basic Operation<br />
Describes the procedures for <strong>basic</strong> copying, printing and scanning.<br />
Chapter 4 - Optional Equipment<br />
Introduces the convenient optional equipment available for this machine.<br />
Chapter 5 - Maintenance<br />
Describes cleaning and toner replacement.<br />
Chapter 6 - Troubleshooting<br />
Explains how to handle error messages, paper jams and other problems.<br />
Appendix<br />
Explains how to enter characters, and lists the machine specifications.<br />
OPERATION GUIDE<br />
xvii
About this Operation Guide<br />
Included Guides<br />
Conventions in This Guide<br />
The following guides are supplied with the machine. Refer to them as<br />
necessary.<br />
Operation Guide (This Guide)<br />
Describes how to load paper, <strong>basic</strong> copy, print and scan operations, and<br />
troubleshooting.<br />
Advanced Operation Guide<br />
Explains copying, printing and scanning features in depth, as well as<br />
default settings.<br />
The following conventions are used depending on the nature of the<br />
description.<br />
Convention Description Example<br />
Bold<br />
Indicates the operation panel<br />
key or a computer screen.<br />
Press the Start key.<br />
[Regular] Indicates the touch panel keys. Press [OK].<br />
Italic<br />
Note<br />
Important<br />
Caution<br />
Indicates the message<br />
displayed on the touch panel.<br />
Used to emphasize a key word,<br />
phrase or references to<br />
additional information.<br />
Indicates supplemental<br />
information or operations for<br />
reference.<br />
Indicates items that are required<br />
or prohibited so as to avoid<br />
problems.<br />
Indicates what must be<br />
observed to prevent injury or<br />
machine breakdown and how to<br />
deal with it.<br />
Ready to copy is displayed.<br />
For more information refer to Sleep and<br />
Auto Sleep on page 3-4.<br />
NOTE:<br />
IMPORTANT:<br />
CAUTION:<br />
xviii<br />
OPERATION GUIDE
About this Operation Guide<br />
Description of Operation Procedure<br />
In this Operation Guide, the continuous operation of the keys on the touch<br />
panel is as follows:<br />
Actual procedure<br />
Press [Copy].<br />
<br />
Press [Next] of Quick Setup.<br />
<br />
Press [] twice.<br />
<br />
Press [Change] of Original Image.<br />
Description in this<br />
Operation Guide<br />
Press [Copy], [Next] of Quick<br />
Setup, [] twice, and then<br />
[Change] of Original Image.<br />
OPERATION GUIDE<br />
xix
About this Operation Guide<br />
Originals and Paper Sizes<br />
This section explains the notation used in this guide when referring to sizes<br />
of originals or paper sizes.<br />
As in A4, B5 and Letter, which may be used either in the horizontal or<br />
vertical direction, horizontal direction is indicated by an additional R<br />
character in order to indicate the orientation of the original/paper.<br />
Set direction Indicated size *<br />
Vertical direction A4, B5, A5, B6,<br />
B<br />
B<br />
A6, 16K, Letter,<br />
Statement<br />
A<br />
A<br />
Original<br />
Paper<br />
For original/paper, dimension A is longer than B.<br />
Horizontal direction<br />
A<br />
B<br />
A<br />
B<br />
A4-R, B5-R, A5-R,<br />
B6-R, A6-R, 16K-<br />
R, Letter-R,<br />
Statement-R<br />
Original<br />
Paper<br />
For original/paper, dimension A is shorter than B.<br />
* The size of original/paper that can be used depends on the function<br />
and source tray. For further details, refer to the page detailing that<br />
function or source tray.<br />
Icons on the Touch Panel<br />
The following icons are used to indicate originals and paper set directions<br />
on the touch panel.<br />
Set direction Originals Paper<br />
Vertical direction<br />
Horizontal direction<br />
xx<br />
OPERATION GUIDE
Contents<br />
Contents<br />
Legal and Safety Information<br />
About this Operation Guide<br />
1 Part Names<br />
Machine . . . . . . . . . . . . . . . . . . . . . . . . . . . . . . . . . . . . . . . . . . . . . . . . . . . . . . . . . . . . . . . . . . . 1-2<br />
Operation Panel . . . . . . . . . . . . . . . . . . . . . . . . . . . . . . . . . . . . . . . . . . . . . . . . . . . . . . . . . . . . . 1-5<br />
Touch Panel . . . . . . . . . . . . . . . . . . . . . . . . . . . . . . . . . . . . . . . . . . . . . . . . . . . . . . . . . . . . . . . . 1-6<br />
2 Preparation before Use<br />
Determining Connection Method and Preparing Cables . . . . . . . . . . . . . . . . . . . . . . . . . . . . . . 2-3<br />
Connecting Cables . . . . . . . . . . . . . . . . . . . . . . . . . . . . . . . . . . . . . . . . . . . . . . . . . . . . . . . . . . . 2-5<br />
Setting Date and Time . . . . . . . . . . . . . . . . . . . . . . . . . . . . . . . . . . . . . . . . . . . . . . . . . . . . . . . . 2-8<br />
Configuring Network (LAN Cable Connection) . . . . . . . . . . . . . . . . . . . . . . . . . . . . . . . . . . . . . 2-10<br />
Installing Software . . . . . . . . . . . . . . . . . . . . . . . . . . . . . . . . . . . . . . . . . . . . . . . . . . . . . . . . . . 2-12<br />
Selecting Default Screen (Optional) . . . . . . . . . . . . . . . . . . . . . . . . . . . . . . . . . . . . . . . . . . . . . 2-13<br />
Changing Language (Optional) . . . . . . . . . . . . . . . . . . . . . . . . . . . . . . . . . . . . . . . . . . . . . . . . 2-14<br />
Loading Paper . . . . . . . . . . . . . . . . . . . . . . . . . . . . . . . . . . . . . . . . . . . . . . . . . . . . . . . . . . . . . 2-15<br />
Loading Originals . . . . . . . . . . . . . . . . . . . . . . . . . . . . . . . . . . . . . . . . . . . . . . . . . . . . . . . . . . . 2-25<br />
3 Basic Operation<br />
Power On/Off . . . . . . . . . . . . . . . . . . . . . . . . . . . . . . . . . . . . . . . . . . . . . . . . . . . . . . . . . . . . . . . 3-2<br />
Sleep and Auto Sleep . . . . . . . . . . . . . . . . . . . . . . . . . . . . . . . . . . . . . . . . . . . . . . . . . . . . . . . . 3-4<br />
Adjusting Operation Panel Angle . . . . . . . . . . . . . . . . . . . . . . . . . . . . . . . . . . . . . . . . . . . . . . . . 3-5<br />
Touch Panel Display . . . . . . . . . . . . . . . . . . . . . . . . . . . . . . . . . . . . . . . . . . . . . . . . . . . . . . . . . . 3-6<br />
Copying . . . . . . . . . . . . . . . . . . . . . . . . . . . . . . . . . . . . . . . . . . . . . . . . . . . . . . . . . . . . . . . . . . . 3-7<br />
Printing - Printing from Applications . . . . . . . . . . . . . . . . . . . . . . . . . . . . . . . . . . . . . . . . . . . . . 3-18<br />
Sending . . . . . . . . . . . . . . . . . . . . . . . . . . . . . . . . . . . . . . . . . . . . . . . . . . . . . . . . . . . . . . . . . . 3-20<br />
Specifying Destination . . . . . . . . . . . . . . . . . . . . . . . . . . . . . . . . . . . . . . . . . . . . . . . . . . . . . . . 3-34<br />
Using Document Box . . . . . . . . . . . . . . . . . . . . . . . . . . . . . . . . . . . . . . . . . . . . . . . . . . . . . . . . 3-37<br />
Printing a Document Stored in Removable USB Memory . . . . . . . . . . . . . . . . . . . . . . . . . . . . 3-48<br />
Canceling/Viewing/Changing Job . . . . . . . . . . . . . . . . . . . . . . . . . . . . . . . . . . . . . . . . . . . . . . 3-50<br />
Checking Remaining Toner and Paper . . . . . . . . . . . . . . . . . . . . . . . . . . . . . . . . . . . . . . . . . . 3-54<br />
Quick Setup Screen . . . . . . . . . . . . . . . . . . . . . . . . . . . . . . . . . . . . . . . . . . . . . . . . . . . . . . . . . 3-55<br />
4 Optional Equipment<br />
Overview of Optional Equipment . . . . . . . . . . . . . . . . . . . . . . . . . . . . . . . . . . . . . . . . . . . . . . . . 4-2<br />
Document Processor . . . . . . . . . . . . . . . . . . . . . . . . . . . . . . . . . . . . . . . . . . . . . . . . . . . . . . . . . 4-4<br />
Paper Feeder . . . . . . . . . . . . . . . . . . . . . . . . . . . . . . . . . . . . . . . . . . . . . . . . . . . . . . . . . . . . . . . 4-4<br />
3000 Sheet Paper Feeder . . . . . . . . . . . . . . . . . . . . . . . . . . . . . . . . . . . . . . . . . . . . . . . . . . . . . 4-5<br />
Built-in Finisher . . . . . . . . . . . . . . . . . . . . . . . . . . . . . . . . . . . . . . . . . . . . . . . . . . . . . . . . . . . . . 4-5<br />
Document Finisher . . . . . . . . . . . . . . . . . . . . . . . . . . . . . . . . . . . . . . . . . . . . . . . . . . . . . . . . . . . 4-9<br />
3000 Sheet Document Finisher . . . . . . . . . . . . . . . . . . . . . . . . . . . . . . . . . . . . . . . . . . . . . . . . . 4-9<br />
Job Separator . . . . . . . . . . . . . . . . . . . . . . . . . . . . . . . . . . . . . . . . . . . . . . . . . . . . . . . . . . . . . . 4-10<br />
Document Table . . . . . . . . . . . . . . . . . . . . . . . . . . . . . . . . . . . . . . . . . . . . . . . . . . . . . . . . . . . . 4-10<br />
Key Counter . . . . . . . . . . . . . . . . . . . . . . . . . . . . . . . . . . . . . . . . . . . . . . . . . . . . . . . . . . . . . . . 4-11<br />
Fax Kit . . . . . . . . . . . . . . . . . . . . . . . . . . . . . . . . . . . . . . . . . . . . . . . . . . . . . . . . . . . . . . . . . . . 4-12<br />
Data Backup Kit . . . . . . . . . . . . . . . . . . . . . . . . . . . . . . . . . . . . . . . . . . . . . . . . . . . . . . . . . . . . 4-12<br />
Security Kit (USB Key) . . . . . . . . . . . . . . . . . . . . . . . . . . . . . . . . . . . . . . . . . . . . . . . . . . . . . . . 4-13<br />
Serial Interface . . . . . . . . . . . . . . . . . . . . . . . . . . . . . . . . . . . . . . . . . . . . . . . . . . . . . . . . . . . . . 4-13<br />
OPERATION GUIDE<br />
xxi
Contents<br />
PDF Upgrade Kit (USB Key) . . . . . . . . . . . . . . . . . . . . . . . . . . . . . . . . . . . . . . . . . . . . . . . . . . 4-14<br />
5 Maintenance<br />
Cleaning . . . . . . . . . . . . . . . . . . . . . . . . . . . . . . . . . . . . . . . . . . . . . . . . . . . . . . . . . . . . . . . . . . . 5-2<br />
Toner Container and Waste Toner Box Replacement . . . . . . . . . . . . . . . . . . . . . . . . . . . . . . . . 5-7<br />
6 Troubleshooting<br />
Solving Malfunctions . . . . . . . . . . . . . . . . . . . . . . . . . . . . . . . . . . . . . . . . . . . . . . . . . . . . . . . . . 6-2<br />
Responding to Error Messages . . . . . . . . . . . . . . . . . . . . . . . . . . . . . . . . . . . . . . . . . . . . . . . . . 6-4<br />
Clearing Paper Jams . . . . . . . . . . . . . . . . . . . . . . . . . . . . . . . . . . . . . . . . . . . . . . . . . . . . . . . . 6-10<br />
Appendix<br />
Character Entry Method . . . . . . . . . . . . . . . . . . . . . . . . . . . . . . . . . . . . . . . . . . . . . . . . .Appendix-2<br />
Specifications . . . . . . . . . . . . . . . . . . . . . . . . . . . . . . . . . . . . . . . . . . . . . . . . . . . . . . . . .Appendix-6<br />
Index<br />
xxii<br />
OPERATION GUIDE
1 Part Names<br />
This chapter identifies the machine parts and operation panel<br />
keys.<br />
• Machine........................................................................ 1-2<br />
• Operation Panel ........................................................... 1-5<br />
• Touch Panel.................................................................. 1-6<br />
OPERATION GUIDE 1-1
Part Names<br />
Machine<br />
1<br />
3<br />
2<br />
9<br />
10<br />
4<br />
5<br />
6<br />
7<br />
8<br />
11<br />
12<br />
1 Original Cover (Option)<br />
2 Original Size Indicator Plates<br />
3 Clip Holder<br />
4 Receive Indicator … Blinks while data is received<br />
5 Error Indicator… Blinks when an error occurs and the job is stopped<br />
6 Left Cover 1<br />
7 Left Cover 1 Lever<br />
8 Left Cover 2<br />
9 Platen<br />
10 Operation Panel<br />
11 Cassette 1<br />
12 Cassette 2<br />
1-2 OPERATION GUIDE
Part Names<br />
13<br />
14<br />
36<br />
15<br />
34 35<br />
33<br />
25<br />
26<br />
27<br />
16<br />
29<br />
19<br />
28<br />
30<br />
20<br />
21<br />
22<br />
31<br />
32<br />
17 18<br />
24 23<br />
OPERATION GUIDE 1-3
Part Names<br />
13 Toner Container<br />
14 Toner Container Stopper<br />
15 Waste Toner Box<br />
16 Front Cover<br />
17 Paper Width Adjusting Tab<br />
18 Length Adjustment Plate<br />
19 Top Tray<br />
20 Main Power Switch<br />
21 Paper Width Guides<br />
22 Multi Purpose (MP) Tray<br />
23 Memory Card Cover Holder<br />
24 Handles<br />
25 USB Memory Slot (A2)<br />
26 USB Memory Slot (A3)<br />
27 Memory Card Slot<br />
28 Network Interface Connector<br />
29 USB Interface Connector<br />
30 Parallel Interface Connector<br />
31 Option Interface Slot (OPT1)<br />
32 Option Interface Slot (OPT2)<br />
33 USB Memory Slot (A1)<br />
34 Green Knob (A1)<br />
35 Paper Feed Unit (A2)<br />
36 Paper Feed Unit Cover (A2)<br />
1-4 OPERATION GUIDE
Part Names<br />
Operation Panel<br />
1<br />
5 9 10 11 12 13 14 15 16 17 18<br />
Ready to copy.<br />
Copies<br />
1<br />
2<br />
Copy Image<br />
Set Original.<br />
3<br />
4<br />
Auto<br />
Normal 0 A4<br />
Plain<br />
Zoom Density Paper<br />
Original : - - -<br />
Selection<br />
Zoom : 100%<br />
Paper : - - -<br />
1-sided<br />
Text+Photo Collate<br />
>>1-sided<br />
Duplex<br />
Original<br />
Collate/<br />
Image<br />
Offset<br />
Quick Setup Org./Paper/<br />
Image<br />
Layout/Edit Advanced<br />
Finishing<br />
Quality<br />
Setup<br />
Status 10/5/2006 10:10<br />
8<br />
7<br />
6<br />
19<br />
20<br />
21<br />
22<br />
23<br />
1 System Menu Key/Indicator<br />
2 Status/Job Cancel Key/Indicator<br />
3 Program Key/Indicator<br />
4 Application Key<br />
5 Counter Key/Indicator<br />
6 Copy Key/Indicator<br />
7 Send Key/Indicator<br />
8 Document Box Key/Indicator<br />
9 Accessibility Display Key/Indicator<br />
10 Print Indicator … Blinks during printing operation<br />
11 Send Indicator … Blinks while data is transmitted<br />
12 Receive Indicator … Blinks while data is received<br />
13 Memory Indicator …Blinks while the machine is accessing to hard<br />
disk, fax memory, Data Backup Kit (Option) or<br />
USB memory (general-purpose item)<br />
14 Error Indicator … Blinks when an error occurs and the job is stopped<br />
15 Help Key/Indicator<br />
16 Logout Key/Indicator<br />
17 Power Key<br />
18 Main Power Indicator<br />
19 Numeric Keys<br />
20 Clear Key<br />
21 Start Key/Indicator<br />
22 Stop Key<br />
23 Reset Key<br />
OPERATION GUIDE 1-5
Part Names<br />
Touch Panel<br />
Copy Screen<br />
Press Copy to access this screen.<br />
1<br />
[Quick Setup]<br />
Screen<br />
Ready to copy.<br />
Copies<br />
1<br />
Copy Image<br />
Set Original.<br />
Original<br />
Zoom<br />
Paper<br />
: - - -<br />
: 100%<br />
: - - -<br />
Auto<br />
Normal 0 A4<br />
Plain<br />
Zoom Density Paper<br />
Selection<br />
1-sided<br />
Text+Photo Collate<br />
>>1-sided<br />
Duplex<br />
Original<br />
Image<br />
Collate/<br />
Offset<br />
Quick Setup Org./Paper/<br />
Image<br />
Layout/Edit Advanced<br />
Finishing<br />
Quality<br />
Setup<br />
Status 10/5/2006 10:10<br />
2<br />
[Original/Paper/<br />
Finishing] Screen<br />
Ready to copy.<br />
Copies<br />
1<br />
Copy Image<br />
Original<br />
Size<br />
Paper<br />
Selection<br />
Mixed Sized<br />
Originals<br />
Original<br />
Orientation<br />
Set Original.<br />
Collate/<br />
Offset<br />
Staple<br />
Output<br />
Tray<br />
Original<br />
Zoom<br />
Paper<br />
: - - -<br />
: 100%<br />
: - - -<br />
Quick Setup Org./Paper/<br />
Image<br />
Layout/Edit Advanced<br />
Finishing<br />
Quality<br />
Setup<br />
Status 10/5/2006 10:10<br />
3<br />
[Image Quality]<br />
Screen<br />
Ready to copy.<br />
Copies<br />
1<br />
Copy Image<br />
Density<br />
Original<br />
Image<br />
EcoPrint<br />
Set Original.<br />
Original<br />
Zoom<br />
Paper<br />
: - - -<br />
: 100%<br />
: - - -<br />
Quick Setup Org./Paper/<br />
Image<br />
Layout/Edit Advanced<br />
Finishing<br />
Quality<br />
Setup<br />
Status 10/5/2006 10:10<br />
1-6 OPERATION GUIDE
Part Names<br />
4 [Layout /Edit]<br />
Screen<br />
Ready to copy.<br />
Copies<br />
1<br />
Copy Image<br />
Zoom Combine Margin/<br />
Centering<br />
Border Erase<br />
Set Original.<br />
Booklet Duplex Cover<br />
Form<br />
Overlay<br />
Original<br />
Zoom<br />
Paper<br />
: - - -<br />
: 100%<br />
: - - -<br />
Page #<br />
Memo Page<br />
Quick Setup Org./Paper/<br />
Finishing<br />
Image<br />
Quality<br />
Layout/Edit Advanced<br />
Setup<br />
Status 10/5/2006 10:10<br />
5<br />
[Advanced Setup]<br />
Screen<br />
Ready to copy.<br />
Copies<br />
1<br />
Copy Image<br />
Continuous<br />
Scan<br />
Auto Image<br />
Rotation<br />
Negative<br />
Image<br />
Mirror<br />
Image<br />
Set Original.<br />
Job Finish<br />
Notice<br />
File Name<br />
Entry<br />
Priority<br />
Override<br />
Multi-page<br />
Form<br />
Original<br />
Zoom<br />
Paper<br />
: - - -<br />
: 100%<br />
: - - -<br />
Repeat<br />
Copy<br />
Quick Setup Org./Paper/<br />
Finishing<br />
Image<br />
Quality<br />
Layout/Edit Advanced<br />
Setup<br />
Status 10/5/2006 10:10<br />
Send Screen<br />
Press the Send key to access this screen.<br />
1<br />
[Destination] Screen<br />
Ready to send.<br />
Place original.<br />
Destination<br />
Detail<br />
ABC abc@defg.com<br />
DEF def@aaa.com<br />
To:<br />
1/2<br />
Destination<br />
Address<br />
Book<br />
E-mail<br />
Addr Entry<br />
1<br />
0123456789<br />
Chain Detail/Edit Delete Recall<br />
Folder Path<br />
Entry<br />
001 002<br />
003 004<br />
005<br />
AAA BBB CCC DDD EEE<br />
No.<br />
006 007 008 009 010<br />
FFF GGG HHH III JJJ<br />
1/10<br />
Destination Quick Setup Type of Original/ Color/Image Advanced<br />
Transmission<br />
Setup<br />
Status 10/5/2006 10:10<br />
2<br />
[Quick Setup]<br />
Screen<br />
Ready to send.<br />
Place original.<br />
Sending Image<br />
Destination<br />
Destination<br />
1<br />
KLMNOP<br />
Set Original.<br />
abcdefg@ccc.com<br />
aaazzz@eee.com<br />
1/1<br />
Original<br />
Zoom<br />
Send<br />
: - - -<br />
:<br />
:<br />
100%<br />
- - -<br />
100%<br />
Zoom<br />
1-sided<br />
Normal 0<br />
Density<br />
Text+Photo<br />
200x100dpi<br />
Normal<br />
Scan<br />
Resolution<br />
Full Color<br />
Destination<br />
Quick Setup<br />
2-sided/Book<br />
Original<br />
Original<br />
Image<br />
Type of Original/<br />
Transmission<br />
Color<br />
Selection<br />
Color/Image<br />
Advanced<br />
Setup<br />
Status 10/5/2006 10:10<br />
OPERATION GUIDE 1-7
Part Names<br />
3 [Type of Original/<br />
Transmission]<br />
Screen<br />
Ready to send.<br />
Place original.<br />
Sending Image<br />
Original<br />
Size<br />
Mixed Sized<br />
Originals<br />
2-sided/Book<br />
Original<br />
Destination<br />
1<br />
Sending Size<br />
Set Original.<br />
Original<br />
Orientation<br />
File Format<br />
File<br />
Separation<br />
Long<br />
Original<br />
Original<br />
Zoom<br />
Send<br />
: - - -<br />
: 100%<br />
: - - -<br />
Destination Quick Setup Type of Original/<br />
Transmission<br />
Color/Image Advanced<br />
Setup<br />
Status 10/5/2006 10:10<br />
4<br />
[Color/Image]<br />
Screen<br />
Ready to send.<br />
Place original.<br />
Sending Image<br />
Destination<br />
1<br />
Density<br />
Original<br />
Image<br />
Scan<br />
Resolution<br />
Color<br />
Selection<br />
Set Original.<br />
Sharpness<br />
Background<br />
Density Adj.<br />
Original<br />
Zoom<br />
Send<br />
: - - -<br />
: 100%<br />
: - - -<br />
Destination<br />
Quick Setup<br />
Type of Original/<br />
Transmission<br />
Color/Image<br />
Advanced<br />
Setup<br />
Status 10/5/2006 10:10<br />
5<br />
[Advanced Setup]<br />
Screen<br />
Ready to send.<br />
Place original.<br />
Sending Image<br />
Border Erase Zoom Job Finish<br />
Notice<br />
Destination<br />
1<br />
Set Original.<br />
Centering<br />
File Name<br />
Entry<br />
Continuous<br />
Scan<br />
E-mail<br />
Subject/Body<br />
Original<br />
Zoom<br />
Send<br />
: - - -<br />
: 100%<br />
: - - -<br />
Multi-page<br />
Form<br />
Destination<br />
Quick Setup<br />
Type of Original/<br />
Transmission<br />
Color/Image<br />
Advanced<br />
Setup<br />
Status 10/5/2006 10:10<br />
Document Box Screen<br />
Press the Document Box key to access this screen.<br />
1<br />
[Custom Box]<br />
Screen<br />
Custom Box<br />
No. Box Name Owner Use(%)<br />
001 SALES anonymous - - - -<br />
001/001<br />
Edit Box<br />
Store File Detail Open<br />
Custom Box Job Box Removable Memory<br />
Status 10/5/2006 10:10<br />
1-8 OPERATION GUIDE
Part Names<br />
2 [Job Box] Screen<br />
Job Box<br />
Box Name<br />
Private Print/Stored Job<br />
Quick Copy/Proof and Hold<br />
Repeat Copy<br />
Form for Form Overlay(Copy)<br />
Files<br />
0<br />
0<br />
0<br />
2<br />
001/001<br />
Open<br />
Custom Box<br />
Job Box<br />
Removable Memory<br />
Status 10/5/2006 10:10<br />
3<br />
[Removable<br />
Memory] Screen<br />
Removable Memory<br />
Removable Memory<br />
Name Date Size<br />
Print Delete Detail<br />
001/001<br />
Memory<br />
Detail<br />
Remove<br />
Memory<br />
Custom Box<br />
Job Box<br />
Removable Memory<br />
Status 10/5/2006 10:10<br />
4<br />
[FAX Box] Screen<br />
(Displayed only<br />
when optional FAX<br />
kit is installed)<br />
FAX Box<br />
No. Name Owner Use(%)<br />
001 FAX Box 001 3-1 User 1<br />
100%<br />
002 FAX Box 002 3-2 User 2<br />
80%<br />
003<br />
004<br />
FAX Box 003 3-3<br />
FAX Box 004 3-4<br />
User 3<br />
User 4<br />
60%<br />
001/001<br />
40%<br />
Edit Box<br />
005 FAX Box 005 3-5<br />
User 5<br />
20%<br />
006 FAX Box 006 3-6<br />
User 6<br />
0%<br />
Detail<br />
Open<br />
Custom Box<br />
Job Box<br />
Removable Memory<br />
FAX Box<br />
Status 10/5/2006 10:10<br />
Status/Job Cancel Screen<br />
Press the Status/Job Cancel key to access this screen.<br />
1<br />
[Printing Jobs]<br />
Screen<br />
Status<br />
Status<br />
Log<br />
Type<br />
All<br />
Job No. Accepted Time Type Job Name User Name Status<br />
000081 14:21<br />
doc20060506142153<br />
AAAAA<br />
InProcess<br />
000082 14:22<br />
doc20060506142210<br />
AAAAA<br />
Waiting<br />
001/001<br />
Pause All<br />
Print Jobs<br />
Cancel<br />
Priority<br />
Override<br />
Detail<br />
Printing Jobs Sending Jobs Storing Jobs Device/<br />
Communication<br />
Paper/Supplies<br />
Status 10/5/2006 10:10<br />
OPERATION GUIDE 1-9
Part Names<br />
2 [Sending Jobs]<br />
Screen<br />
Status<br />
Type<br />
Status Scheduled Job Log<br />
All<br />
Job No. Accepted Time Type Destination<br />
User Name Status<br />
000091 14:47 doc20060506144753<br />
AAAAA Waiting<br />
001/001<br />
Cancel<br />
Detail<br />
Printing Jobs Sending Jobs Storing Jobs Device/ Paper/Supplies<br />
Communication<br />
Status 10/5/2006 10:10<br />
3<br />
[Storing Jobs]<br />
Screen<br />
Status<br />
Status<br />
Log<br />
Type<br />
All<br />
Job No. Accepted Time Type<br />
Job Name<br />
User Name<br />
000092 000091 14:47 doc20060506144759<br />
doc20060225144758<br />
AAAAA<br />
Status<br />
InProcess<br />
001/001<br />
Cancel<br />
Detail<br />
Printing Jobs Sending Jobs Storing Jobs Device/<br />
Communication<br />
Paper/Supplies<br />
Status 10/5/2006 10:10<br />
4<br />
[Device/<br />
Communication Job]<br />
Screen<br />
Status<br />
Scanner<br />
Ready.<br />
Printer<br />
Ready.<br />
Hard Disk<br />
OK<br />
Removable Memory<br />
Memory Card<br />
Not connected.<br />
Not connected.<br />
Format Remove<br />
Display<br />
Error<br />
Format Printing list<br />
Status<br />
Printing Jobs<br />
Sending Jobs<br />
Storing Jobs<br />
Device/<br />
Communication<br />
Paper/Supplies<br />
10/5/2006 10:10<br />
5<br />
[Paper/Supplies]<br />
Screen<br />
Detail<br />
Toner Information Paper Others<br />
Toner Type Status Size Type Status Status<br />
Black(K)<br />
Waste Toner OK<br />
% A3<br />
A3<br />
A4<br />
A4<br />
A4<br />
Plain<br />
Plain<br />
Plain<br />
Plain<br />
Plain<br />
30%<br />
30%<br />
30%<br />
30%<br />
0%<br />
Staple A<br />
Staple B<br />
Punch waste<br />
OK<br />
No Staples<br />
OK<br />
Printing Jobs Sending Jobs Storing Jobs Device/<br />
Communication<br />
Paper/Supplies<br />
Status 10/5/2006 10:10<br />
1-10 OPERATION GUIDE
Part Names<br />
Program Screen<br />
Press the Program key to access this screen.<br />
1<br />
[Call] Screen<br />
Program<br />
01<br />
06<br />
No.<br />
02<br />
07<br />
03<br />
04<br />
08<br />
09<br />
001/005<br />
05<br />
10<br />
Call Register Edit<br />
Status 10/5/2006 10:10<br />
2 [Register] Screen<br />
Program<br />
01<br />
06<br />
02<br />
07<br />
03<br />
04<br />
08<br />
09<br />
001/005<br />
05<br />
10<br />
Call Register Edit<br />
Status 10/5/2006 10:10<br />
3<br />
[Edit] Screen<br />
Program<br />
01<br />
06<br />
02<br />
07<br />
03<br />
04<br />
08<br />
09<br />
001/005<br />
05<br />
10<br />
Call Register Edit<br />
Status 10/5/2006 10:10<br />
OPERATION GUIDE 1-11
Part Names<br />
1-12 OPERATION GUIDE
2 Preparation before Use<br />
This chapter explains the preparations before using this<br />
equipment for the first time as well as the procedures for<br />
loading papers and originals.<br />
• Determining Connection Method and Preparing Cables .. 2-3<br />
• Connecting Cables....................................................... 2-5<br />
• Setting Date and Time.................................................. 2-8<br />
• Configuring Network (LAN Cable Connection)........... 2-10<br />
• Installing Software ...................................................... 2-12<br />
• Selecting Default Screen (Optional)........................... 2-13<br />
• Changing Language (Optional) .................................. 2-14<br />
• Loading Paper............................................................ 2-15<br />
• Loading Originals ....................................................... 2-25<br />
OPERATION GUIDE 2-1
Preparation before Use<br />
Documents Contained in the Attached CD-ROM<br />
Documents<br />
The following documents are contained in the attached CD-ROM (Product<br />
Library). Refer to them as necessary.<br />
Extended Printer Driver User Guide<br />
Network FAX Driver Operation Guide<br />
Embedded Web Server Operation Guide<br />
Network Tool for Clients Operation Guide<br />
Network Tool for Direct Printing Operation Guide<br />
2-2 OPERATION GUIDE
Preparation before Use<br />
Determining Connection Method and Preparing Cables<br />
Connection Example<br />
Check the method to connect the equipment to PC or network, and have<br />
the necessary cables ready.<br />
Determine the method to connect the equipment to PC or network by<br />
referring to the illustration below.<br />
Connecting the scanner to your PC network with a network<br />
cable (100BASE-TX or 10BASE-T)<br />
Administrator’s<br />
PC<br />
Printing<br />
Embedded Web Server<br />
Network settings Scanner<br />
default settings User and<br />
destination registration<br />
MFP<br />
Network<br />
Send E-mail<br />
Sends the image data<br />
of scanned originals to<br />
the desired recipient<br />
as a file attached to an<br />
E-mail message.<br />
Parallel<br />
Network<br />
Send SMB<br />
USB<br />
Saves the scanned<br />
image as a data file on<br />
your PC.<br />
Network<br />
Network FAX<br />
(Option)<br />
Network<br />
Network<br />
Send FTP<br />
Sends the scanned<br />
image as a data file on<br />
the FTP.<br />
FAX (Option)<br />
FAX<br />
TWAIN Scanning<br />
Network<br />
TWAIN is a<br />
standardized interface<br />
for communication<br />
between software<br />
applications and image<br />
acquisition devices.<br />
OPERATION GUIDE 2-3
Preparation before Use<br />
Preparing Necessary Cables<br />
The following interfaces are available to connect the equipment to PC.<br />
Prepare the necessary cables according to the interface you use.<br />
Interfaces Available as Standard<br />
Function Interface Necessary Cable<br />
Printer/Scanner<br />
/Network FAX*<br />
Network interface<br />
LAN (10Base-T or<br />
100Base-TX, Shielded)<br />
Printer USB interface USB2.0 compatible cable<br />
(Hi-Speed USB compliant,<br />
Max. 5.0 m, Shielded)<br />
Parallel interface<br />
Parallel cable (IEEE1284<br />
Compliant, Max. 1.5 m)<br />
Optional Interface<br />
* Function available by using optional fax kit. For details of Network<br />
FAX, refer to the operation guide of the fax kit.<br />
Serial interface is available as option.<br />
Function Interface Necessary Cable<br />
Printer Serial interface RS-232C cable (Max. 15 m)<br />
2-4 OPERATION GUIDE
Preparation before Use<br />
Connecting Cables<br />
Connecting LAN Cable (Optional)<br />
Follow the steps below to connect a LAN cable to the machine.<br />
1<br />
When the machine is powered, first press the Power key on the operation<br />
panel. Check that the Power indicator and the memory indicator are off.<br />
After this, turn off the main power switch.<br />
Check that the indicator<br />
is off.<br />
2<br />
Connect a LAN cable to the network interface located on right side of the<br />
body.<br />
3<br />
Connect the other end of the cable to HUB.<br />
4<br />
Configure the network. For details, refer to Configuring Network (LAN<br />
Cable Connection) on page 2-10.<br />
OPERATION GUIDE 2-5
Preparation before Use<br />
Connecting Parallel/USB Cable (Optional)<br />
Follow the steps below to connect a printer cable of parallel or USB<br />
interface to the machine.<br />
1<br />
When the machine is powered, first press the Power key on the operation<br />
panel. Check that the Power indicator and the memory indicator are off.<br />
After this, turn off the main power switch.<br />
Check that the indicator<br />
is off.<br />
2<br />
If connection is established using a parallel cable, PC to be connected<br />
should also be powered off.<br />
3<br />
Connect the printer cable to each interface located on right side of the<br />
body.<br />
When Connecting to Parallel Interface<br />
2-6 OPERATION GUIDE
Preparation before Use<br />
When Connecting to USB Interface<br />
Connecting Power Cable<br />
4<br />
Connect the other end of the cable to PC.<br />
Connect one end of the supplied power cable to the machine and the other<br />
end to power outlet.<br />
IMPORTANT: Only use the power cable that comes with the machine.<br />
OPERATION GUIDE 2-7
Preparation before Use<br />
Setting Date and Time<br />
Follow the steps below to set date and time in the place of installation.<br />
When you send an E-mail using the transmission function, the date and<br />
time of this setting will be stamped in the header of E-mail message. Set<br />
the date, time and time difference from GMT of the region where the<br />
machine is used.<br />
NOTE: Be sure to set the time difference before setting date and time.<br />
1 Turn on the main power<br />
switch.<br />
2<br />
Press the System Menu key.<br />
3<br />
Press [], [Date/Timer] and then [Change] of Time Zone.<br />
4 Select the region<br />
and press [OK].<br />
Date/Timer - Time Zone<br />
Set time zone.<br />
Please select the location nearest you.<br />
Time Zone<br />
-12:00 Eniwetok<br />
-11:00 Midway Is<br />
-10:00 Hawaii<br />
-09:00 Alaska<br />
1/13<br />
-08:00 Pfic Time<br />
-07:00 Arizona<br />
Cancel<br />
OK<br />
Status 10/5/2006 10:10<br />
NOTE: Press [] or [] to view next region.<br />
5<br />
Press [Change] of Date/Time.<br />
2-8 OPERATION GUIDE
Preparation before Use<br />
6 Press [Off] or [On] of<br />
Summer Time.<br />
Date/Timer - Date/Time<br />
Set the date and time.<br />
On<br />
Y<br />
M<br />
D<br />
Summer Time<br />
Off<br />
H<br />
M<br />
S<br />
On<br />
Cancel<br />
OK<br />
Status 10/5/2006 10:10<br />
7<br />
Set the date and<br />
time. Press [+] or [–]<br />
in each setting.<br />
Date/Timer - Date/Time<br />
Set the date and time.<br />
On<br />
Y<br />
M<br />
D<br />
Summer Time<br />
Off<br />
H<br />
M<br />
S<br />
On<br />
Cancel<br />
OK<br />
Status 10/5/2006 10:10<br />
NOTE: Settings include Year (Y), Month (M), Date (D), Hour (H), Minute<br />
(M) and Second (S).<br />
8 Press [OK].<br />
9 When exiting, press [Close] repeatedly to return to the System Menu<br />
default screen.<br />
OPERATION GUIDE 2-9
Preparation before Use<br />
Configuring Network (LAN Cable Connection)<br />
The machine comes with the network interface as standard and supports<br />
each protocol of TCP/IP, IPX/SPX, NetBEUI and AppleTalk, allowing<br />
network printing on various platforms such as Windows, Macintosh, UNIX<br />
and NetWare.<br />
Setting TCP/IP (When Using Fixed IP Address)<br />
Follow the steps below to set TCP/IP when fixed IP address is used. Make<br />
sure that IP address is ready by asking your network administrator to<br />
obtain it in advance.<br />
1 Press the System Menu key.<br />
2<br />
Press [System], [Change] of Network and then [Change] of TCP/IP.<br />
3<br />
Press [On] of TCP/<br />
IP.<br />
System - TCP/IP<br />
Use TCP/IP.<br />
Off<br />
DHCP<br />
On<br />
On<br />
Off<br />
IP Address<br />
0.0.0.0<br />
Subnet Mask<br />
0.0.0.0<br />
Default<br />
Gateway<br />
0.0.0.0<br />
Cancel<br />
OK<br />
Status 10/5/2006 10:10<br />
4 Press [Off] of DHCP.<br />
5 Press [IP Address]<br />
and enter IP address<br />
using the numeric<br />
keys.<br />
System - TCP/IP<br />
Use TCP/IP.<br />
Off<br />
DHCP<br />
On<br />
On<br />
Off<br />
IP Address<br />
192.168.1.150<br />
Subnet Mask<br />
0.0.0.0<br />
Default<br />
Gateway<br />
0.0.0.0<br />
Cancel<br />
OK<br />
Status 10/5/2006 10:10<br />
2-10 OPERATION GUIDE
Preparation before Use<br />
6 Press [Subnet Mask] and enter address using the numeric keys.<br />
7 Press [Default Gateway] and enter address using the numeric keys.<br />
8 Check that all addresses are entered correctly, and press [OK].<br />
9 Press the Power key, and after confirming that the Power key/indicator<br />
and memory indicator have turned off, turn the main power switch off and<br />
on.<br />
Setting TCP/IP (When Using DHCP)<br />
Follow the steps below to set TCP/IP when DHCP server is available.<br />
1 Press the System Menu key.<br />
2<br />
Press [System], [Change] of Network and then [Change] of TCP/IP.<br />
3<br />
Press [On] of TCP/<br />
IP and [On] of<br />
DHCP.<br />
System - TCP/IP<br />
Use TCP/IP.<br />
Off<br />
DHCP<br />
On<br />
On<br />
Off<br />
IP Address<br />
0.0.0.0<br />
Subnet Mask<br />
0.0.0.0<br />
Default<br />
Gateway<br />
0.0.0.0<br />
Cancel<br />
OK<br />
Status 10/5/2006 10:10<br />
4 Press [OK].<br />
5 Press the Power key, and after confirming that the Power key/indicator<br />
and memory indicator have turned off, turn the main power switch off and<br />
on.<br />
OPERATION GUIDE 2-11
Preparation before Use<br />
Installing Software<br />
Install appropriate software on your PC from the attached Product Library<br />
CD-ROM if you want to use the printer function of this machine or perform<br />
TWAIN transmission or FAX transmission from your PC.<br />
NOTE: Installation on Windows XP, Windows NT 4.0/2000 and Server<br />
2003 must be installed by a user logged on with administrator privileges.<br />
Plug and Play is disabled on this device when in Sleep Mode. Wake the<br />
device from Sleep Mode before continuing. See Sleep and Auto Sleep on<br />
page 3-4.<br />
2-12 OPERATION GUIDE
Preparation before Use<br />
Selecting Default Screen (Optional)<br />
Select the default screen (on the touch panel) to appear following the<br />
opening screen after power-on. The default screen is selectable from<br />
among the following.<br />
Default screen<br />
Copy<br />
Send<br />
Status<br />
Document box<br />
Program<br />
Screen appearing immediately after power-on.<br />
Default screen for copying (screen to appear when<br />
the Copy key is pressed)<br />
Default screen for sending (screen to appear when<br />
the Send key is pressed)<br />
Default screen for status/job cancel (screen to appear<br />
when the Status/Job Cancel key is pressed)<br />
Default screen for document box (screen to appear<br />
when the Document Box key is pressed)<br />
Default screen for program (screen to appear when<br />
the Program key is pressed)<br />
1<br />
Press the System Menu key.<br />
2 Press [Common Settings] and then [Change] of Default Screen.<br />
3 Select the desired<br />
default screen.<br />
Common Settings - Default Screen<br />
Set the default screen to be displayed when main power switch is turned on.<br />
Copy<br />
English Send<br />
Status Document Box Program<br />
Cancel<br />
OK<br />
Status 10/5/2006 10:10<br />
4<br />
Press [OK].<br />
5<br />
When exiting, press [Close] repeatedly to return to the System Menu<br />
screen.<br />
OPERATION GUIDE 2-13
Preparation before Use<br />
Changing Language (Optional)<br />
Follow the steps below to change the language to appear on the touch<br />
panel.<br />
1<br />
Press the System Menu key.<br />
2 Press [Common Settings] and then [Change] of Language.<br />
3 Press the key for the<br />
language you wish<br />
to use.<br />
Common Settings - Language<br />
Set the language to use for the touch panel display.<br />
English<br />
Deutsch<br />
Français<br />
Español<br />
Italiano<br />
Português<br />
Nederlands<br />
Cancel<br />
OK<br />
Status 10/5/2006 10:10<br />
4<br />
The message instructing you to turn the power off and on appears, press<br />
[OK].<br />
5<br />
Press the Power key on the operation panel. Check that the Power key<br />
and the memory indicator are off. After this, turn on the main power switch<br />
again.<br />
Touch panel language will be changed.<br />
2-14 OPERATION GUIDE
Preparation before Use<br />
Loading Paper<br />
Before Loading Paper<br />
As standard, paper can be loaded in the two drawers of cassettes and the<br />
MP Tray. As option, paper feeder and the side feeder of 3,000 sheets<br />
capacity are also available (refer to Chapter 4 Options).<br />
When you open a new package of paper, fan through the sheets to<br />
separate them slightly prior to loading in the following steps.<br />
1 Bend the whole set of papers to swell them in the middle.<br />
2<br />
Hold the papers at both ends and stretch them while giving a swell over the<br />
entire papers.<br />
3<br />
Raise the right and left hands alternately to create a gap and feed air<br />
between the papers.<br />
4<br />
Finally, align the papers on a level, flat table.<br />
If the paper is curled or folded, straighten it before loading. Paper that is<br />
curled or folded may cause paper jam.<br />
CAUTION: If you copy onto used paper (paper already used for copying),<br />
do not use paper that is stapled or clipped together. This may damage the<br />
machine or cause poor image quality.<br />
NOTE: If print outputs are curled or not neatly stapled, turn the papers in<br />
the cassette upside down.<br />
Avoid exposing opened paper to high temperatures and high humidity as<br />
dampness can be a cause of problem. Seal any remaining paper after<br />
loading the MP Tray or cassette in the paper storage bag.<br />
If the machine will not be used for a prolonged period, protect all paper<br />
from humidity by removing from the cassettes and sealing in the paper<br />
storage bag.<br />
OPERATION GUIDE 2-15
Preparation before Use<br />
NOTE: If you use special paper such as letterheads, paper with holes or<br />
paper with pre-prints like logo or company name.<br />
Loading Paper in the Cassettes<br />
Up to 500 sheets of standard paper (80 g/m 2 ) or colored paper may be<br />
loaded in each of the standard two drawers of cassettes.<br />
The following paper sizes are supported: Ledger, Legal, Oficio II,<br />
8.5×13.5", Letter, Letter-R, Statement-R, A3, B4, A4, A4-R, B5-R, A5-R,<br />
Folio, 8K, 16K, and 16K-R.<br />
1<br />
Pull the cassette out toward you until it stops.<br />
NOTE: Do not pull out more than one cassette at a time.<br />
2 Holding the paper width adjusting tab, move the paper width guide to fit the<br />
paper.<br />
NOTE: Paper sizes are marked on the cassette.<br />
2-16 OPERATION GUIDE
Preparation before Use<br />
3 Using the paper length<br />
adjusting tab, move the plate<br />
to fit the paper.<br />
4<br />
Align the paper flush against<br />
the left side of the cassette.<br />
IMPORTANT:<br />
• Before loading the paper, be sure that it is not curled or folded. Paper<br />
that is curled or folded may cause paper jams.<br />
• Ensure that the loaded paper does not exceed the level indicated (see<br />
illustration below).<br />
• When loading the paper, keep the side toward the sealed side facing<br />
up.<br />
• Paper length and width guides must be adjusted to the paper size.<br />
Loading the paper without adjusting these guides may cause skewed<br />
feeding and paper jams.<br />
• Be sure that the paper length and width guides rest securely against<br />
the paper. If there is a gap, readjust the guides to fit the paper.<br />
OPERATION GUIDE 2-17
Preparation before Use<br />
5 Insert the appropriate paper<br />
size card in the slot to indicate<br />
the size of the paper inside.<br />
6<br />
Gently push the cassette back in.<br />
NOTE: If the machine will not be used for a prolonged period, protect all<br />
paper from humidity by removing from the cassettes and sealing in the<br />
original package.<br />
7 Select the type of the paper (plain, recycled, etc.) loaded in the cassette.<br />
(Refer to Selecting Paper Size and Type to the Cassettes on page 2-21).<br />
Loading Paper in the MP Tray<br />
Up to 200 sheets of plain paper (80 g/m 2 ) may be loaded in the MP Tray.<br />
The MP Tray accepts the paper sizes from A3 to Hagaki and from Ledger<br />
to Statement-R. Be sure to use the MP Tray when you print on any special<br />
paper.<br />
NOTE: The capacity of the MP Tray is as follows.<br />
• Thick paper (120 g/m 2 ): 130 sheets<br />
• Thick paper (160 g/m 2 ), Japanese noshi paper: 100 sheets<br />
• Thick paper (200 g/m 2 ), Rough paper (45 g/m 2 ): 50 sheets<br />
• Hagaki: 80 sheets<br />
• OHP film: 25 sheets<br />
• Envelope DL, Envelope C5, Comm. #10, Monarch, Youkei 4, Youkei 2<br />
: 20 sheets<br />
NOTE: When you load custom size paper, enter the paper size by<br />
referring to Selecting Paper Size and Type to the MP Tray on page 2-23.<br />
When you use special paper such as transparency or thick paper, select<br />
the paper type by referring to Selecting Paper Size and Type to the MP<br />
Tray on page 2-23.<br />
2-18 OPERATION GUIDE
Preparation before Use<br />
1 Open the MP Tray.<br />
2<br />
Adjust the paper width guides<br />
to the width of the paper.<br />
3<br />
Insert the paper along the<br />
paper width guides into the<br />
tray until it stops.<br />
IMPORTANT: Keep the side toward the sealed side facing up.<br />
Curled paper must be uncurled before use.<br />
Straighten the top edge if it is curled.<br />
Loading Envelopes<br />
Up to 20 envelopes may be loaded in the MP Tray.<br />
Acceptable envelope sizes are as follows.<br />
Acceptable Envelope<br />
Size<br />
Monarch 3 1/8"×7 1/2"<br />
Comm. #10 4 1/8"×9 1/2"<br />
Envelope DL<br />
110×220 (mm)<br />
OPERATION GUIDE 2-19
Preparation before Use<br />
Acceptable Envelope<br />
Size<br />
Envelope C5<br />
162×229 (mm)<br />
Executive 7 1/4"×10 1/2"<br />
Comm. #9 3 7/8"×8 7/8"<br />
Comm. #6-3/4 3 5/8"×6 1/2"<br />
ISO B5<br />
Envelope C4<br />
Oufuku Hagaki<br />
Youkei 2 Haguruma Envelope Swiss-You 2 w/o<br />
border print WE-S2<br />
Youkei 4 LIFE E506B (w/o border print)<br />
176×250 (mm)<br />
229×324 (mm)<br />
200×148 (mm)<br />
162×114 (mm)<br />
234×105 (mm)<br />
1 Open the MP Tray.<br />
2 Adjust the paper width guides<br />
to the width of the envelope.<br />
3 In the case of the landscape form envelope, close the flap. Insert the<br />
envelope all the way along the width guides, keeping the printing side faceup<br />
and with the flap positioned backward.<br />
In the case of the portrait form envelope, open the flap. Insert the envelope<br />
all the way along the width guides, keeping the printing side face-up and<br />
with the flap positioned opposite to the entrance.<br />
2-20 OPERATION GUIDE
Preparation before Use<br />
IMPORTANT: How to load envelope (orientation and facing) will differ<br />
depending on the type of envelope. Be sure to load it in a correct way.<br />
Otherwise printing may be done in wrong direction or on wrong face.<br />
NOTE: When you load envelope in the MP Tray, select the envelope type<br />
by referring to Selecting Paper Size and Type to the MP Tray on page 2-<br />
23.<br />
Selecting Paper Size and Type<br />
Selecting Paper Size and Type to the Cassettes<br />
When you use the cassettes 1 or 2 or the optional side feeder (cassettes 3<br />
and 4), select the paper size and paper type you load.<br />
When you use the optional side feeder (cassette 3) of up to 3,000 sheets<br />
capacity, select the paper type only.<br />
Selection Item<br />
Selectable Size/Type<br />
Paper Size Auto Paper size is automatically detected and<br />
selected. Select whether the paper is in<br />
Metric size or in Inch size.<br />
Standard<br />
Size 1<br />
Standard<br />
Size 2<br />
Select from the standard sizes. Selectable<br />
paper sizes are as follows.<br />
Inch size: Ledger, Letter-R, Letter, Legal,<br />
Statement-R, 8.5×13.5" and Oficio II<br />
Metric size: A3, B4, A4, A4-R, B5, B5-R,<br />
A5-R, and Folio<br />
Select from the standard sizes not included<br />
in the Standard Size 1. Selectable paper<br />
sizes are as follows.<br />
Inch size: A3, B4, A4, A4-R, B5, B5-R, A5-<br />
R, and Folio, 8K, 16K-R and 16K<br />
Metric size: Ledger, Letter-R, Letter, Legal,<br />
Statement-R, 8.5×13.5" and Oficio II, 8K,<br />
16K-R and 16K<br />
OPERATION GUIDE 2-21
Preparation before Use<br />
Selection Item<br />
Paper Type<br />
Selectable Size/Type<br />
Plain, Rough, Vellum, Recycled, Preprinted,<br />
Bond, Color, Prepunched, Letterhead, High<br />
Quality and Custom 1~8<br />
1<br />
Press the System Menu key.<br />
2<br />
Press [Common Settings], [Change] of Original/Paper Setup, [Change] of<br />
Cassette setting, [Change] of the required paper source and then [Change]<br />
of Paper Size.<br />
3<br />
For automatic<br />
detection of the<br />
paper size, press<br />
[Auto] and select<br />
[Metric] or [Inch] as<br />
the unit.<br />
To select the paper<br />
size, press<br />
[Standard Sizes 1]<br />
or [Standard Sizes<br />
2] and select the<br />
paper size.<br />
Common Settings - Custom 1<br />
Auto<br />
Standard<br />
Sizes 1<br />
Standard<br />
Sizes 2<br />
Set cassette paper size.<br />
A3 A4 A4 A5<br />
B4 B5 B5<br />
Cancel<br />
Status 10/5/2006 10:10<br />
OK<br />
4<br />
Press [OK].<br />
5<br />
Press [Change] in Media Type Setting and select the paper type. Then<br />
press [OK].<br />
2-22 OPERATION GUIDE
Preparation before Use<br />
Selecting Paper Size and Type to the MP Tray<br />
Select the paper size and paper type when using the MP Tray. You may<br />
select in advance the paper size and paper type that will be used often.<br />
Paper<br />
Size<br />
Item<br />
Auto<br />
Standard<br />
Size 1<br />
Standard<br />
Size 2<br />
Others<br />
Size<br />
Entry<br />
Description<br />
Paper size is automatically detected and<br />
selected. Select whether the paper is in Metric<br />
size or in Inch size.<br />
Select from the standard sizes. Selectable paper<br />
sizes are as follows.<br />
Inch size: Ledger, Letter-R, Letter, Legal,<br />
Statement-R, Executive, 8.5×13.5", and Oficio II<br />
Metric size: A3, A4-R, A4, A5-R, A6-R B4-R, B5-<br />
R, B5, B6-R and Folio<br />
Select from the standard sizes not included in the<br />
Standard Size 1. Selectable paper sizes are as<br />
follows.<br />
Inch size: A3, A4-R, A4, A5-R, A6-R B4-R, B5-R,<br />
B5, B6-R and Folio, 8K, 16K-R and 16K<br />
Metric size: Ledger, Letter-R, Letter, Legal,<br />
Statement-R, Executive, 8.5×13.5", and Oficio II,<br />
8K, 16K-R and 16K<br />
Select from special standard sizes and custom<br />
sizes.<br />
Selectable paper sizes are as follows.<br />
ISO B5, Envelope #10, Envelope #9, Envelope<br />
#6, Envelope Monarch, Envelope DL, Envelope<br />
C5, Envelope C4, Hagaki, Oufuku Hagaki, Youkei<br />
4, Youkei 2<br />
Enter the size not included in the standard size.<br />
Selectable paper sizes are as follows.<br />
Inch size<br />
X (Horizontal): 5.83~17" (in 0.01" increments),<br />
Y (Vertical): 3.86~11.69" (in 0.01" increments)<br />
Metric size<br />
X (Horizontal): 148~432 mm (in 1mm<br />
increments),<br />
Y (Vertical): 98~297 mm (in 1mm increments)<br />
Paper Type<br />
Selectable paper types are as follows.: Plain,<br />
Transparency, Rough, Vellum, Labels,<br />
Letterhead, Recycled, Preprinted, Bond,<br />
Cardstock, Color, Prepunched, Envelope, Thick,<br />
High Quality and Custom 1~8<br />
OPERATION GUIDE 2-23
Preparation before Use<br />
1 Press the System Menu key.<br />
2 Press [Common Settings], [Change] in Original/Paper Setup, [Change] in<br />
MP Tray Setting, and then [Change] in Paper Size.<br />
3<br />
For automatic detection of the paper size, press [Auto] and select [Metric]<br />
or [Inch] as the unit.<br />
To select the paper<br />
size, press any of<br />
[Standard Sizes 1],<br />
[Standard Sizes 2],<br />
[Others] or [Size<br />
Entry] and select the<br />
paper size.<br />
Common Settings - Multi Purpose Tray Setting<br />
Auto<br />
Standard<br />
Sizes 1<br />
Standard<br />
Sizes 2<br />
Others<br />
Set the multi-purpose tray paper size.<br />
A3 A4 A4 A5<br />
A6 B4 B5 B5<br />
B6<br />
Size Entry<br />
Cancel<br />
OK<br />
Status Paper is present in Document Processor.<br />
10/5/2006 10:10<br />
If you have chosen<br />
[Size Entry], press<br />
[+] or [–] to enter X<br />
(horizontal) and Y<br />
(vertical) sizes. You<br />
may enter the size<br />
directly using the<br />
numeric keys by<br />
pressing [#-Keys].<br />
Common Settings - Multi Purpose Tray Setting<br />
Auto<br />
Standard<br />
Sizes 1<br />
Standard<br />
Sizes 2<br />
Others<br />
Set the multi-purpose tray paper size.<br />
Size Entry<br />
X(148 - 432)<br />
432 mm<br />
# Keys<br />
Y(98 - 297)<br />
297 mm<br />
# Keys<br />
Cancel<br />
OK<br />
Status Paper is present in Document Processor.<br />
10/5/2006 10:10<br />
4<br />
Press [OK].<br />
5<br />
Press [Change] in Media Type Setting and select the paper type. Then<br />
press [OK].<br />
2-24 OPERATION GUIDE
Preparation before Use<br />
Loading Originals<br />
Placing Originals on the Platen<br />
Follow the steps below to load originals for copying, sending or storing.<br />
You may place book or magazine on the platen in addition to ordinary<br />
sheet originals.<br />
1 Open the original cover.<br />
NOTE: If the optional document processor is installed, open the<br />
document processor. Before opening the document processor, be sure<br />
that there are no originals left on the original table or on the original eject<br />
table. Originals left on the original table or on the original eject table may<br />
fall off when the document processor is opened.<br />
Keep the document processor open if the original is 40 mm or thicker.<br />
2<br />
Place the original. Put the<br />
scanning side facedown and<br />
align it flush against the<br />
original size indicator plates<br />
with the back left corner as the<br />
reference point.<br />
OPERATION GUIDE 2-25
Preparation before Use<br />
Original size indicator plates<br />
(Inch models)<br />
(Metric models)<br />
3<br />
Close the original cover.<br />
CAUTION: Do not push the original cover forcefully when you close it.<br />
Excessive pressure may crack the platen glass.<br />
NOTE: Shadows may be produced around the edges and in the middle<br />
of open-faced originals.<br />
CAUTION: Do not leave the document processor open as there is a<br />
danger of personal injury.<br />
2-26 OPERATION GUIDE
Preparation before Use<br />
Loading Originals in the Document Processor<br />
The optional document processor automatically scans each sheet of<br />
multiple originals. Both sides of two-sided originals are scanned.<br />
Part Names of Document Processor<br />
(6)<br />
(5)<br />
(2) (1) (4)<br />
(3)<br />
(1) Original table<br />
(2) Original width guides<br />
(3) Opening handle<br />
(4) Original eject table<br />
(5) Top cover<br />
(6) Original placement indicator<br />
Originals Supported by the Document Processor<br />
The document processor supports the following types of originals.<br />
Weight 45 g/m 2 to 160 g/m 2<br />
Size<br />
Maximum A3 to Minimum A5-R<br />
Maximum Ledger to Minimum Statement-R<br />
Capacity Plain paper (80 g/m 2 ), High quality paper (50 g/m 2 ),<br />
Colored paper, Recycled paper: 100 sheets (Mixed sized<br />
originals: 30 sheets)<br />
Thick paper (120 g/m 2 ): 66 sheets<br />
Thick paper (160 g/m 2 ): 50 sheets<br />
Art paper, Rough paper, Coated paper: 1 sheet<br />
High quality paper (110 g/m 2 ): 73 sheets<br />
Originals Not Supported by the Document Processor<br />
Do not use the document processor for the following types of originals.<br />
• Soft originals such as vinyl sheets<br />
• Transparencies such as OHP film<br />
• Carbon paper<br />
• Originals with very slippery surfaces<br />
• Originals with adhesive tape or glue<br />
• Wet originals<br />
OPERATION GUIDE 2-27
Preparation before Use<br />
• Originals with correction fluid which is not dried<br />
• Irregularly shaped (non-rectangular) originals<br />
• Originals with cut-out sections<br />
• Crumpled paper<br />
• Originals with folds (Straighten the folds before loading. Failure to do<br />
so may cause the originals to jam).<br />
• Originals bound with clips or staples (Remove the clips or staples and<br />
straighten curls, wrinkles or creases before loading. Failure to do so<br />
may cause the originals to jam).<br />
How to Load Originals<br />
CAUTION: Before loading originals, be sure that there are no originals left<br />
on the original eject table. Originals left on the original eject table may<br />
cause the new originals to jam.<br />
1<br />
Adjust the original width<br />
guides to fit the originals.<br />
2<br />
Place the originals. Put the<br />
side to be scanned (or the first<br />
side of two-sided originals)<br />
face-up. Slide the leading<br />
edge into the document<br />
processor as far as it will go.<br />
The originals placement<br />
indicator will be lit.<br />
CAUTION: Confirm that the original width guides exactly fit the originals.<br />
If there is a gap, readjust the original width guides. The gap may cause the<br />
originals to jam.<br />
2-28 OPERATION GUIDE
Preparation before Use<br />
Ensure that loaded originals do not exceed the level indicated. Exceeding<br />
the maximum level may cause the originals to jam (see the figure below).<br />
Originals with punched holes or perforated lines should be placed in such<br />
a way that the holes or perforations will be scanned last (not first).<br />
OPERATION GUIDE 2-29
Preparation before Use<br />
2-30 OPERATION GUIDE
3 Basic Operation<br />
This chapter explains the following operations.<br />
• Power On/Off................................................................ 3-2<br />
• Sleep and Auto Sleep................................................... 3-4<br />
• Adjusting Operation Panel Angle ................................. 3-5<br />
• Touch Panel Display..................................................... 3-6<br />
• Copying ........................................................................ 3-7<br />
• Printing - Printing from Applications ........................... 3-18<br />
• Sending ...................................................................... 3-20<br />
• Specifying Destination................................................ 3-34<br />
• Using Document Box.................................................. 3-37<br />
• Printing a Document Stored in Removable USB<br />
Memory .......................................................................3-48<br />
• Canceling/Viewing/Changing Job............................... 3-50<br />
• Checking Remaining Toner and Paper....................... 3-54<br />
• Quick Setup Screen ................................................... 3-55<br />
OPERATION GUIDE 3-1
Basic Operation<br />
Power On/Off<br />
Power On<br />
Open the main power switch cover and turn the main power switch on.<br />
Blinking/Lighting of each Key/Indicator<br />
When turning on the main power switch, the Key/Indicator such as the<br />
Copy key or the Send key blinks.<br />
Blinking:<br />
This function is in preparation. When each key is ready, the<br />
indicator lights out one by one.<br />
Lights-out: This function is ready.<br />
Lighting:<br />
This function is selected. [Copy] is selected as the default so<br />
that the Copy key/indicator lights on first.<br />
NOTE: The key which indicator is off can be used even if any other key<br />
remains blinking.<br />
Power Off<br />
When turning off the main power switch, press the Power key on the<br />
operation panel to off. Make sure that the Power key and the memory<br />
indicator are off before turning off the main power switch.<br />
CAUTION: Turning off the main power switch before pressing the Power<br />
key to off may cause damage to the equipped hard disk.<br />
3-2 OPERATION GUIDE
Basic Operation<br />
Make sure that the indicator is off.<br />
In case of not using the machine for extended period of time<br />
CAUTION: If the machine will not be used for hours (overnight, etc.), turn<br />
the main power switch off. If it will not be used for an extended period of<br />
time (vacations, etc.), remove the power plug from the outlet for safety<br />
purposes.<br />
CAUTION: Do not turn the main power switch off when the optional fax<br />
kit is installed. If you turn the main power switch off, you cannot receive<br />
FAX automatically.<br />
OPERATION GUIDE 3-3
Basic Operation<br />
Sleep and Auto Sleep<br />
Sleep<br />
To enter Sleep, press the Power key. All indicators on the touch panel will<br />
go out to save power consumption except the Main Power indicator. This<br />
status refers to Sleep.<br />
If print data is received during Sleep, the print job is performed while the<br />
touch panel remains unlit.<br />
When using optional fax, received fax data is printed out also with the<br />
operation panel remaining unlit.<br />
To resume, press the Power key. The machine will be ready to operate<br />
within 15 seconds.<br />
Auto Sleep<br />
Auto Sleep automatically switches the machine into Sleep if left idle for a<br />
preset time. The default preset time is 45 minutes for the 30 and 40 ppm<br />
models, and 90 minutes for the 50 ppm model.<br />
3-4 OPERATION GUIDE
Basic Operation<br />
Adjusting Operation Panel Angle<br />
Adjust the angle of the operation panel in two steps by releasing the<br />
operation panel lock lever.<br />
OPERATION GUIDE 3-5
Basic Operation<br />
Touch Panel Display<br />
Display of Originals and Paper<br />
The touch panel displays the selected paper source and output tray.<br />
Ready to copy.<br />
Copy Image<br />
Original position<br />
Copies<br />
1<br />
Size/orientation of<br />
original and paper<br />
Original<br />
Zoom<br />
Paper<br />
:<br />
A4<br />
: 100%<br />
:<br />
A4<br />
100% Normal 0 Auto<br />
Zoom Density Original<br />
Size<br />
1-sided<br />
>>1-sided<br />
Duplex<br />
Text+Photo<br />
Original<br />
Image<br />
Output<br />
tray<br />
Paper<br />
source<br />
Collate<br />
Collate/<br />
Offset<br />
Quick Setup<br />
Org./Paper/<br />
Finishing<br />
Image<br />
Quality<br />
Layout/Edit<br />
Advanced<br />
Setup<br />
Status 10/5/2006 10:10<br />
Display in Changing Screen<br />
The stand-by display (icon) may appear when the touch panel screen is<br />
changed.<br />
Normal stand-by display<br />
Ready to copy.<br />
Copy Image<br />
Copies<br />
1<br />
Continuous<br />
Scan<br />
Auto Image<br />
Rotation<br />
Negative<br />
Image<br />
Mirror<br />
Image<br />
Set Original.<br />
Job Finish<br />
Notice<br />
Priority<br />
Override<br />
Multi-page<br />
Form<br />
Original<br />
Zoom<br />
Paper<br />
: - - -<br />
: 100%<br />
: - - -<br />
Repeat<br />
Copy<br />
Quick Setup<br />
Org./Paper/<br />
Finishing<br />
Image<br />
Quality<br />
Layout/Edit<br />
Advanced<br />
Setup<br />
Status 10/5/2006 10:10<br />
Stand-by Display When System Menu Operation Is Completed<br />
When the system<br />
menu operation is<br />
completed and<br />
another function<br />
(such as copying) is<br />
used, the display<br />
below appears.<br />
Original<br />
Zoom<br />
Send<br />
Ready to copy.<br />
Copy Image<br />
Set Original.<br />
:<br />
:<br />
:<br />
- - -<br />
100%<br />
- - -<br />
Please wait.<br />
Changing system setting…<br />
Copies<br />
1<br />
Duplex<br />
Original<br />
Image<br />
Collate/<br />
Offset<br />
Quick Setup Org./Paper/<br />
Finishing<br />
Image<br />
Quality<br />
Layout/Edit Advanced<br />
Setup<br />
Status 10/5/2006 10:10<br />
3-6 OPERATION GUIDE
Basic Operation<br />
Copying<br />
Follow the steps as below for <strong>basic</strong> copying.<br />
1<br />
Press the Copy key when the<br />
Copy key/indicator is off.<br />
NOTE: If you place the original and press the Start key before the copier<br />
has warmed up, only the scanning is performed in advance and the<br />
copying job starts upon completion of the warm-up.<br />
2<br />
Place the originals on the<br />
platen or in the optional<br />
document processor.<br />
NOTE: For loading instructions, refer to Loading Originals on page 2-25.<br />
3<br />
Check that [Auto] is selected of Paper Selection on the touch panel. Paper<br />
that matches the size of the original will be selected automatically.<br />
To change the paper<br />
size, press [Paper<br />
Selection] and<br />
select desired paper<br />
source.<br />
Ready to copy.<br />
Copy Image<br />
Set Original.<br />
Copies<br />
1<br />
Original<br />
Zoom<br />
Paper<br />
Auto<br />
Normal 0 A4<br />
Plain<br />
Zoom Density Paper<br />
Selection<br />
1-sided<br />
Text+Photo Collate<br />
>>1-sided<br />
Duplex<br />
Original<br />
Image<br />
Collate/<br />
Offset<br />
Quick Setup Org./Paper/<br />
Image<br />
Layout/Edit Advanced<br />
Finishing<br />
Quality<br />
Setup<br />
Status 10/5/2006 10:10<br />
NOTE: Select paper size manually, if necessary, instead of using<br />
automatic paper selection.<br />
OPERATION GUIDE 3-7
Basic Operation<br />
4 Use the numeric keys to enter<br />
the copy quantity. Specify<br />
desired number up to 999.<br />
5<br />
Press the Start key to start<br />
copy.<br />
6<br />
Remove the finished copies<br />
from the top tray.<br />
Adjusting Density<br />
Adjust the copy density.<br />
Density Adjustment<br />
Option<br />
Manual<br />
Auto<br />
Description<br />
Adjust density using the 7 or 13 levels.<br />
Optimum density is selected depending on<br />
density of original.<br />
3-8 OPERATION GUIDE
Basic Operation<br />
1 Press [Image<br />
Quality] and then<br />
[Density].<br />
Ready to copy.<br />
Copy Image<br />
Copies<br />
1<br />
Density<br />
Original<br />
Image<br />
EcoPrint<br />
Set Original.<br />
Original<br />
Zoom<br />
Paper<br />
: - - -<br />
: 100%<br />
: - - -<br />
Quick Setup Org./Paper/<br />
Finishing<br />
Image<br />
Quality<br />
Layout/Edit Advanced<br />
Setup<br />
Status 10/5/2006 10:10<br />
2<br />
Adjust density manually pressing [-3] (Lighter) to [+3] (Darker). You can<br />
change the density level [-3] (Lighter) to [+3] (Darker) by half a step.<br />
To change density<br />
adjustment from<br />
[Manual] to [Auto],<br />
press [Auto].<br />
Density<br />
Ready to copy.<br />
Auto<br />
Copies<br />
1<br />
Press [OK] to display<br />
the image.<br />
Lighter Normal Darker<br />
-3<br />
-2 -1 0 +1 +2 +3<br />
-2.5 -1.5 -0.5 +0.5 +1.5 +2.5<br />
Add Shortcut<br />
Cancel<br />
OK<br />
Status 10/5/2006 10:10<br />
3<br />
Press [OK].<br />
Selecting Image Quality<br />
Select image quality suited to the type of original.<br />
Image Quality Option<br />
Text+Photo<br />
Text<br />
Photo<br />
Description<br />
For originals with both text and<br />
photographs.<br />
For originals primarily consisting of text.<br />
For originals primarily consisting of<br />
photographs.<br />
OPERATION GUIDE 3-9
Basic Operation<br />
1 Press [Image<br />
Quality] and then<br />
[Original Image].<br />
Ready to copy.<br />
Copy Image<br />
Density<br />
Original<br />
Image<br />
EcoPrint<br />
Copies<br />
1<br />
Set Original.<br />
Original<br />
Zoom<br />
Paper<br />
: - - -<br />
: 100%<br />
: - - -<br />
Quick Setup Org./Paper/<br />
Finishing<br />
Image<br />
Quality<br />
Layout/Edit Advanced<br />
Setup<br />
Status 10/5/2006 10:10<br />
2<br />
Select the image<br />
quality.<br />
Original Image<br />
Ready to copy.<br />
Copies<br />
1<br />
Press [OK] to display<br />
the image.<br />
Select original document type<br />
for best copy results.<br />
[Text + Photo]: Text and photos together.<br />
[Text]: Only text, no photos.<br />
[Photo]: Only photos, no text.<br />
Text+Photo<br />
Text<br />
Photo<br />
Add Shortcut<br />
Cancel<br />
OK<br />
Status 10/5/2006 10:10<br />
Zoom Copying<br />
3<br />
Press [OK].<br />
Auto Zoom<br />
Adjust the magnification to reduce or enlarge the original image. The<br />
following zoom options are available.<br />
Automatically reduces or enlarges the original image suited to the selected<br />
paper size.<br />
Ledger: 129 %<br />
Letter-R<br />
A4<br />
A3: 141 %<br />
Statement-R: 64 %<br />
A5: 70 %<br />
3-10 OPERATION GUIDE
Basic Operation<br />
Manual Zoom<br />
Manually reduces or enlarges the original image in 1% increment between<br />
25 and 400%.<br />
25 %<br />
400 %<br />
Preset Zoom<br />
Reduces or enlarges at preset magnifications.<br />
The following magnifications are available.<br />
Model<br />
Inch Models<br />
Zoom Level (OriginalCopy)<br />
100%, Auto, 400% (Max.), 200% (STMT>>Ledger),<br />
154%(STMT>>Legal), 129% (Letter>>Ledger), 121%<br />
(Legal>>Ledger), 78% (Legal>>Letter), 77%<br />
(Ledger>>Legal), 64% (Ledger>>Letter), 50%<br />
(Ledger>>STMT), 25% (Min.)<br />
Metric Models 100%, Auto, 400% (Max.), 200% (A5>>A3), 141%<br />
(A4>>A3, A5>>A4), 127% (Folio>>A3), 106%<br />
(11×15">>A3), 90% (Folio>>A4), 75% (11×15">>A4),<br />
70% (A3>>A4, A4>>A5), 50%, 25% (Min.)<br />
Metric Models<br />
(Asia Pacific)<br />
100%, Auto, 400%, Max, 200% (A5>>A3), 141%<br />
(A4>>A3, B5>>B4), 122% (A4>>B4, A5>>B5), 115%<br />
(B4>>A3, B5>>A4), 86% (A3>>B4, A4>>B5),<br />
81%(B4>>A4, B5>>A5), 70% (A3>>A4, B4>>B5),<br />
50%, 25% (Min.)<br />
OPERATION GUIDE 3-11
Basic Operation<br />
XY Zoom<br />
Select vertical and horizontal magnifications individually. Reduce or<br />
enlarge original images in 1% increment between 25 and 400%.<br />
Y<br />
X<br />
1<br />
Press [Layout/Edit]<br />
and then [Zoom].<br />
Ready to copy.<br />
Copies<br />
1<br />
Copy Image<br />
Zoom Combine Margin/<br />
Centering<br />
Border Erase<br />
Set Original.<br />
Booklet Duplex Cover<br />
Form<br />
Overlay<br />
Original<br />
Zoom<br />
Paper<br />
: - - -<br />
: 100%<br />
: - - -<br />
Page #<br />
Memo Page<br />
Quick Setup Org./Paper/<br />
Image<br />
Layout/Edit Advanced<br />
Finishing<br />
Quality<br />
Setup<br />
Status 10/5/2006 10:10<br />
2 Press [Standard Zoom] to use Auto Zoom.<br />
Press [+] or [–] to change the displayed magnification as desired. You can<br />
also enter the magnification directly using the numeric keys by pressing [#<br />
keys].<br />
When using Preset<br />
Zoom, select the key<br />
of desired<br />
magnification.<br />
When using XY<br />
Zoom, press [XY<br />
Zoom].<br />
Press [+] or [–] to<br />
change the<br />
displayed<br />
magnifications of X<br />
(horizontal) and Y (vertical). You can also enter the magnification directly<br />
using the numeric keys by pressing [# keys].<br />
Press [Original Orientation] to select orientation of the originals, either [Top<br />
Edge Top] or [Top Edge Left]. Then press [OK].<br />
3 Press [OK].<br />
Zoom<br />
Ready to copy.<br />
Press [OK] to display<br />
the image.<br />
Standard<br />
Zoom<br />
XY Zoom<br />
X<br />
Add Shortcut<br />
(25 - 400)<br />
# Keys<br />
Y (25 - 400)<br />
# Keys<br />
Cancel<br />
Copies<br />
Status 10/5/2006 10:10<br />
%<br />
%<br />
Top Edge<br />
Top<br />
Original<br />
Orientation<br />
OK<br />
1<br />
3-12 OPERATION GUIDE
Basic Operation<br />
Duplex Copying<br />
Produce two-sided copies. The following duplex options are available.<br />
One-sided to Two-sided<br />
Produces two-sided copies from one-sided originals. In case of an odd<br />
number of originals, the back side of the last copy will be blank.<br />
5<br />
4<br />
5<br />
3<br />
4<br />
3<br />
2<br />
2<br />
1<br />
1<br />
Original<br />
Copy<br />
The following binding options are available.<br />
A<br />
B<br />
Original Left/Right to Binding Left/Right: Images on the second sides<br />
are not rotated.<br />
Original Left/Right to Binding Top: Images on the second sides are<br />
rotated 180°. Copies can be bound on the top edge, facing the same<br />
orientation when turning the pages.<br />
ghi<br />
def<br />
abc<br />
Original<br />
A<br />
ghi<br />
abc<br />
def<br />
Copy<br />
B<br />
ghi<br />
abc<br />
def<br />
Two-sided to One-sided<br />
Copies each side of a two-sided original onto two individual sheets.<br />
Optional document processor is required<br />
.<br />
2<br />
1<br />
1<br />
2<br />
Original<br />
Copy<br />
The following binding options are available.<br />
Binding Left/Right: Images on the second sides are not rotated.<br />
Binding Top: Images on the second sides are rotated 180º.<br />
OPERATION GUIDE 3-13
Basic Operation<br />
Two-sided to Two-sided<br />
Produces two-sided copies from two-sided originals. Optional document<br />
processor is required.<br />
2<br />
1<br />
4<br />
3<br />
5<br />
2<br />
1<br />
4<br />
3<br />
5<br />
Original<br />
Copy<br />
NOTE: The paper sizes supported in Two-sided to Two-sided are Ledger,<br />
Legal, Letter, Executive Statement-R, Oficio II, 8.5×13.5", A3, B4, A4, B5,<br />
A5-R and Folio.<br />
Book to One-sided<br />
Produces a 1-sided copy of a 2-sided or open book original.<br />
1<br />
2<br />
1<br />
2<br />
Original<br />
Copy<br />
The following binding options are available.<br />
Binding Left: Originals with facing pages are copied from left to right.<br />
Binding Right: Originals with facing pages are copied from right to left.<br />
NOTE: The following sizes of original and paper are supported in Twosided<br />
to One-sided and Book to One-sided. Original: Ledger, Letter-R, A3,<br />
B4, A4-R, B5-R, A5-R and 8K. Paper: Letter, A4, B5 and 16K. You may<br />
change paper size and reduce or enlarge copy to match that size.<br />
3-14 OPERATION GUIDE
Basic Operation<br />
Book to Two-sided<br />
Produces two-sided copies from an open book original with facing pages.<br />
1<br />
2<br />
3 4<br />
2<br />
1<br />
4<br />
3<br />
0<br />
1<br />
2<br />
3<br />
2 1<br />
4 3<br />
2<br />
1<br />
4<br />
3<br />
3<br />
2 1<br />
0<br />
Original<br />
Copy<br />
NOTE: The sizes of original and paper supported in Book to Two-sided<br />
are Letter, A4, B5, and 16K.<br />
1<br />
Press [Layout/Edit]<br />
and then [Duplex].<br />
Ready to copy.<br />
Copies<br />
1<br />
Copy Image<br />
Zoom Combine Margin/<br />
Centering<br />
Border Erase<br />
Set Original.<br />
Booklet Duplex Cover<br />
Form<br />
Overlay<br />
Original<br />
Zoom<br />
Paper<br />
: - - -<br />
: 100%<br />
: - - -<br />
Page #<br />
Memo Page<br />
Quick Setup Org./Paper/<br />
Image<br />
Layout/Edit Advanced<br />
Finishing<br />
Quality<br />
Setup<br />
Status 10/5/2006 10:10<br />
2 Select the desired<br />
Duplex option.<br />
Duplex<br />
Ready to copy.<br />
Copies<br />
1<br />
1-sided<br />
>>1-sided<br />
Press [OK] to display<br />
1-sided<br />
>>2-sided<br />
the image.<br />
2-sided<br />
>>1-sided<br />
2-sided<br />
>>2-sided<br />
Finishing<br />
Book<br />
>>1-sided<br />
Book<br />
>>2-sided<br />
Binding<br />
Left/Right<br />
Binding<br />
Top<br />
Top Edge Top<br />
Original<br />
Orientation<br />
Add Shortcut<br />
Cancel<br />
OK<br />
Status 10/5/2006 10:10<br />
3<br />
If you choose [2-sided>>2-sided], [2-sided>>1-sided], [Book>>1-sided] or<br />
[Book>>2-sided], select the binding edge of the originals of Original.<br />
4 If you choose [1-sided>>2-sided], [2-sided>>2-sided] or [Book>>2-sided],<br />
select the binding edge of the finished copies of Finished.<br />
5 Press [Original Orientation] to select orientation of the originals, either [Top<br />
Edge Top] or [Top Edge Left]. Then press [OK].<br />
OPERATION GUIDE 3-15
Basic Operation<br />
6 Press [OK].<br />
Collate/Offset Copying<br />
7<br />
Place the originals and press the Start key.<br />
If the original is placed on the platen, scan it and replace it with a next one.<br />
Then, press the Start key.<br />
Collate<br />
After scanning all originals, press [Scan Finish] to start copying.<br />
Scan multiple originals and<br />
deliver complete sets of copies<br />
as required according to page<br />
number.<br />
1<br />
2<br />
3<br />
3<br />
2<br />
1<br />
3<br />
2<br />
1<br />
3<br />
2<br />
1<br />
Original<br />
Copy<br />
Offset<br />
Use offset to produce copies<br />
after rotating each set (or<br />
page) by 90º.<br />
3<br />
3<br />
2<br />
1<br />
1<br />
2<br />
3<br />
2<br />
1<br />
3<br />
2<br />
1<br />
Original<br />
Copy<br />
NOTE: To use offset function, load the same sized paper with different<br />
orientation in the paper source other than the selected paper source.<br />
The paper sizes supported in Offset are A4, B5, Letter and 16K.<br />
1<br />
Press [Org./Paper/<br />
Finishing] and then<br />
[Collate/Offset].<br />
Ready to copy.<br />
Copy Image<br />
Copies<br />
1<br />
Original<br />
Size<br />
Paper<br />
Selection<br />
Mixed Sized<br />
Originals<br />
Original<br />
Orientation<br />
Press [OK] to display<br />
the image.<br />
Collate/<br />
Offset<br />
Staple<br />
Output<br />
Tray<br />
Original<br />
Zoom<br />
Paper<br />
: - - -<br />
: 100%<br />
: - - -<br />
Quick Setup Org./Paper/<br />
Finishing<br />
Image<br />
Quality<br />
Layout/Edit Advanced<br />
Setup<br />
Status 06/06/2006<br />
3-16 OPERATION GUIDE
Basic Operation<br />
2 To use collate<br />
copying, press [On]<br />
of Collate.<br />
Collate/Offset<br />
Ready to copy.<br />
Copies<br />
1<br />
To use offset<br />
copying, press [Off]<br />
or [Each set] of<br />
Offset.<br />
Press [OK] to display<br />
the image.<br />
Collate<br />
Offset<br />
Off Same Width<br />
Off<br />
On<br />
Each set<br />
Press [OK].<br />
Add Shortcut<br />
Cancel<br />
OK<br />
Status 10/5/2006 10:10<br />
3<br />
Use the numeric keys to enter the copy quantity.<br />
4 Place the originals and press the Start key.<br />
OPERATION GUIDE 3-17
Basic Operation<br />
Printing - Printing from Applications<br />
Follow the steps below to print documents from applications.<br />
1<br />
Create a document using an application.<br />
2<br />
Click File and select Print in the application. The Print dialog box appears.<br />
3 Click Name of<br />
Printer and select<br />
this machine from<br />
the list.<br />
4 Enter the desired print quantity in Number of copies box. Enter any<br />
number up to 999.<br />
When there is more than one document, select Collate to make print<br />
output one by one in the sequence of page number.<br />
5<br />
Click Properties. The Properties dialog box appears.<br />
6 Select Basic tab and click Page Size to select the paper size.<br />
To print on the special paper such as thick paper or transparency, click<br />
Media Type menu and select the paper type.<br />
7<br />
Click Source and select the paper source.<br />
NOTE: If you choose Auto Select, papers are supplied automatically<br />
from the paper source loaded with the papers of optimum size and type.<br />
To print on the special paper such as envelope or thick paper, place it on<br />
the MP Tray and select MP Tray.<br />
8<br />
Select paper orientation, either Portrait or Landscape, to match the<br />
orientation of the document.<br />
If you select Rotated, the document will be printed after being rotated<br />
180°.<br />
9<br />
Click OK button to return to the Print dialog box.<br />
3-18 OPERATION GUIDE
Basic Operation<br />
10 Click OK button to start printing.<br />
OPERATION GUIDE 3-19
Basic Operation<br />
Sending<br />
Follow the steps as below for <strong>basic</strong> sending. The following four options are<br />
available.<br />
• Send as E-mail: Sends a scanned original image as an attached file of<br />
E-mail...page 3-20<br />
• Send to Folder (SMB): Stores a scanned original image in a shared<br />
folder of any PC...page 3-22<br />
• Send to Folder (FTP): Stores a scanned original image in a folder of<br />
FTP server...page 3-25<br />
• Image Data Scanning with TWAIN: Loads the document data stored in<br />
custom box to PC...page 3-28<br />
NOTE: Originals in color can be scanned by adding more memory in the<br />
machine. Consult with your service.<br />
Different sending options can be specified in combination. Refer to<br />
Sending to Different Types of Destinations (Multi Sending) on page 3-36.<br />
Send as E-mail<br />
Sends a scanned original image as an attached file of E-mail.<br />
NOTE: To enable sending as E-mail, network connection and SMTP<br />
server setting are required. Consult your system administrator about the<br />
setting.<br />
1<br />
Place the originals on the<br />
platen or in the optional<br />
document processor.<br />
NOTE: For loading instructions, refer to Loading Originals on page 2-25.<br />
3-20 OPERATION GUIDE
Basic Operation<br />
2 Press the Send key to display<br />
the [Send] screen.<br />
3<br />
Press [E-mail Addr Entry] and then [E-mail Address].<br />
NOTE: Destination can be specified using the address book or the onetouch<br />
keys. Refer to Specifying Destination on page 3-34.<br />
4<br />
Enter destination E-<br />
mail address and<br />
press [OK].<br />
Ready to send.<br />
Place original.<br />
E-mail Address Entry<br />
E-mail Address Entry<br />
E-mail<br />
Address<br />
Destination<br />
0<br />
To:<br />
Cc:<br />
Bcc:<br />
Add a new E-mail destination.<br />
Press [E-mail Address], then enter<br />
the address using the keyboard screen.<br />
To:/Cc:/Bcc: can also be set.<br />
Add to Addr Book<br />
Next Dest.<br />
Cancel<br />
OK<br />
Status 10/5/2006 10:10<br />
5 Press [To:], [Cc:] or [Bcc:] to change the recipient status as necessary.<br />
To specify another destination, go to the next step. To specify only one<br />
destination, go to the step 7.<br />
6<br />
Press [Next Dest.] and repeat the steps 4 and 5 to specify the destination.<br />
Up to 100 E-mail addresses can be specified.<br />
NOTE: When [Add to Addr Book] is displayed, the destinations are<br />
registered in the address book.<br />
7<br />
Press [OK]. The destinations are registered in the destination list.<br />
8 Check the destination list.<br />
Select a destination and press [Detail/Edit] to check and edit it. Refer to the<br />
steps 4 and 5 to edit the destination as necessary.<br />
OPERATION GUIDE 3-21
Basic Operation<br />
Select a destination<br />
and press [Delete] to<br />
remove the<br />
destination from the<br />
list.<br />
Ready to send.<br />
Place original.<br />
Destination<br />
Detail<br />
ABC abc@defg.com<br />
Chain Detail/Edit Delete Recall<br />
To:<br />
Destination<br />
Address<br />
Book<br />
E-mail<br />
Addr Entry<br />
Folder Path<br />
Entry<br />
1<br />
001 002<br />
003 004<br />
005<br />
AAA BBB CCC DDD EEE<br />
006 007 008 009 010<br />
FFF GGG HHH III JJJ<br />
No.<br />
1/10<br />
Destination Quick Setup Type of Original/ Color/Image Advanced<br />
Transmission<br />
Setup<br />
Status 10/5/2006 10:10<br />
9<br />
Change the original size, scan resolution, etc. if necessary.<br />
10 Press the Start key. The<br />
scanned original is sent to the<br />
specified E-mail address.<br />
Send to Folder (SMB)<br />
Stores a scanned original image file in the specified shared folder of any<br />
PC.<br />
1<br />
Place the originals on the<br />
platen or in the optional<br />
document processor.<br />
NOTE: For loading instructions, refer to Loading Originals on page 2-25.<br />
3-22 OPERATION GUIDE
Basic Operation<br />
2 Press the Send key to display<br />
the [Send] screen.<br />
3<br />
Press [Folder Path Entry] and then [SMB].<br />
NOTE: Destination can be specified using the address book or the onetouch<br />
keys. For details, refer to Specifying Destination on page 3-34.<br />
4<br />
Enter host name,<br />
path, user name and<br />
password. Press the<br />
key of the item to be<br />
entered, and the<br />
entry screen<br />
appears.<br />
Folder Path Entry<br />
SMB<br />
FTP<br />
Ready to send.<br />
Place original.<br />
Host Name<br />
Path<br />
Login<br />
User Name<br />
Login<br />
Password<br />
Destination<br />
1<br />
Connection<br />
Test<br />
Add to Addr Book<br />
Next Dest.<br />
Cancel<br />
OK<br />
Status 10/5/2006 10:10<br />
5 Enter the destination<br />
data and press [OK].<br />
Host Name<br />
Use the keyboard to enter.<br />
Limit: 126 characters<br />
Input: 0characters<br />
Backspace<br />
Upper-case Lower-case No./Symbol Space<br />
Cancel<br />
OK<br />
Status 10/5/2006 10:10<br />
Data to be entered are as follows.<br />
Item<br />
Host name*<br />
Path<br />
Data to be entered<br />
Host name or IP address of the sender<br />
PC<br />
Path to the receiving folder such as<br />
follows.<br />
For example, \User\ScanData.<br />
Max.<br />
characters<br />
Up to 62<br />
characters<br />
Up to 126<br />
characters<br />
OPERATION GUIDE 3-23
Basic Operation<br />
Item<br />
Data to be entered<br />
Max.<br />
characters<br />
Login User<br />
Name<br />
Login<br />
Password<br />
User name to access the folder Up to 62<br />
characters<br />
Password to access the folder Up to 62<br />
characters<br />
* Specify the port number different from the default (139) using the<br />
format of Host Name: Port No.<br />
6<br />
Upon completion of<br />
all entries, press<br />
[Connection Test] to<br />
check the<br />
connection.<br />
Folder Path Entry<br />
SMB<br />
FTP<br />
Ready to send.<br />
Place original.<br />
Host Name<br />
Path<br />
Login<br />
User Name<br />
Login<br />
Password<br />
Destination<br />
1<br />
Connection<br />
Test<br />
Add to Addr Book<br />
Next Dest.<br />
Cancel<br />
OK<br />
Status 10/5/2006 10:10<br />
NOTE: Connected appears when connection to the destination is<br />
correctly established. If Cannot connect appears, review the entry.<br />
To specify another destination, go to the next step. To specify only one<br />
destination, go to the step 8.<br />
7<br />
Press [Next Dest.] and repeat the steps 4 to 6 to specify the destination.<br />
Up to 10 folders can be specified.<br />
NOTE: When [Add to Addr Book] is displayed, the entry is registered in<br />
the address book.<br />
8<br />
Press [OK] to register the entry in the destination list.<br />
9<br />
Check the destination list.<br />
Select a destination and press [Detail/Edit] to check and edit it. Edit it, if<br />
necessary, referring to the steps 5 to 7.<br />
3-24 OPERATION GUIDE
Basic Operation<br />
Select a destination<br />
and press [Delete] to<br />
remove the<br />
destination from the<br />
list.<br />
ABC<br />
Ready to send.<br />
Place original.<br />
Destination<br />
/User/ScanData<br />
Detail<br />
Chain Detail/Edit Delete Recall<br />
To:<br />
Destination<br />
Address<br />
Book<br />
E-mail<br />
Addr Entry<br />
Folder Path<br />
Entry<br />
1<br />
001 002<br />
003 004<br />
005<br />
AAA BBB CCC DDD EEE<br />
006 007 008 009 010<br />
FFF GGG HHH III JJJ<br />
No.<br />
1/10<br />
Destination Quick Setup Type of Original/ Color/Image Advanced<br />
Transmission<br />
Setup<br />
Status 10/5/2006 10:10<br />
10<br />
Change the original size, scan resolution, etc. if necessary.<br />
11 Press the Start key. The<br />
scanned original data file is<br />
sent to the specified shared<br />
folder of PC.<br />
Send to Folder (FTP)<br />
Stores a scanned original image in a folder of FTP server.<br />
1<br />
Place the originals on the<br />
platen or in the optional<br />
document processor.<br />
NOTE: For loading instructions, refer to Loading Originals on page 2-25.<br />
2<br />
Press the Send key to display<br />
the [Send] screen.<br />
OPERATION GUIDE 3-25
Basic Operation<br />
3 Press [Folder Path Entry] and then [FTP].<br />
NOTE: Destination can be specified using the address book or the onetouch<br />
keys. Refer to Specifying Destination on page 3-34.<br />
4 Enter host name,<br />
path, user name and<br />
password. Press the<br />
key of the item to be<br />
entered, and the<br />
entry screen<br />
appears.<br />
Folder Path Entry<br />
SMB<br />
FTP<br />
Ready to send.<br />
Place original.<br />
Host Name<br />
Path<br />
Login<br />
User Name<br />
Login<br />
Password<br />
Destination<br />
1<br />
Connection<br />
Test<br />
Add to Addr Book<br />
Next Dest.<br />
Cancel<br />
OK<br />
Status Executing TX job .<br />
10/5/2006 10:10<br />
5<br />
Enter the destination<br />
data and press [OK].<br />
Host Name<br />
Use the keyboard to enter.<br />
Limit: 62 characters<br />
Input: 0 characters<br />
Backspace<br />
Upper-case Lower-case No./Symbol Space<br />
Cancel<br />
OK<br />
Status 10/5/2006 10:10<br />
Data to be entered are as follows.<br />
Item<br />
Data to be entered<br />
Max.<br />
characters<br />
Host<br />
name*<br />
Host name or IP address of FTP server Up to 62<br />
characters<br />
Path<br />
Path to the receiving folder.<br />
For example, \User\ScanData.<br />
Otherwise the data will be saved in home<br />
directory.<br />
Up to 126<br />
characters<br />
Login<br />
User<br />
Name<br />
Login<br />
Password<br />
FTP server log-in user name Up to 62<br />
characters<br />
FTP server log-in password Up to 62<br />
characters<br />
* Specify the port number different from the default (21) using the<br />
format of Host Name: Port No.<br />
3-26 OPERATION GUIDE
Basic Operation<br />
6 Upon completion of<br />
all entries, press<br />
[Connection Test] to<br />
check the<br />
connection.<br />
Folder Path Entry<br />
SMB<br />
FTP<br />
Ready to send.<br />
Place original.<br />
Host Name<br />
Path<br />
Login<br />
User Name<br />
Login<br />
Password<br />
Destination<br />
1<br />
Connection<br />
Test<br />
Add to Addr Book<br />
Next Dest.<br />
Cancel<br />
OK<br />
Status Executing TX job .<br />
10/5/2006 10:10<br />
NOTE: Connected appears when connection to the destination is<br />
correctly established. If Cannot connect appears, review the entry.<br />
If you wish to specify another destination, go to the next step. If the<br />
destination is only one, go to the step 8.<br />
7 Press [Next Dest.] and repeat the steps 5 to 7 to specify the destination.<br />
Up to 10 folders (total number of SMB and FTP folders) can be specified.<br />
NOTE: When [Add to Addr Book] is displayed, the entry is registered in<br />
the address book.<br />
8 Press [OK] to register the entry in the destination list.<br />
9<br />
Check the destination list.<br />
Select a destination and press [Detail/Edit] to check and edit it. Edit it, if<br />
necessary, referring to the steps 4 to 6.<br />
Select a destination<br />
and press [Delete] to<br />
remove the<br />
destination from the<br />
list.<br />
Ready to send.<br />
Place original.<br />
Destination<br />
Detail<br />
ABC SCANDATA<br />
Chain Detail/Edit Delete Recall<br />
To:<br />
1/1<br />
Destination<br />
Address<br />
Book<br />
E-mail<br />
Addr Entry<br />
Folder Path<br />
Entry<br />
1<br />
001 002<br />
003 004<br />
005<br />
AAA BBB CCC DDD EEE<br />
No.<br />
006 007 008 009 010<br />
FFF GGG HHH III JJJ<br />
1/10<br />
Destination Quick Setup Type of Original/ Color/Image Advanced<br />
Transmission<br />
Setup<br />
Status Executing TX job .<br />
10/5/2006 10:10<br />
10<br />
Change the original size, scan resolution, etc. if necessary.<br />
OPERATION GUIDE 3-27
Basic Operation<br />
11 Press the Start key. The<br />
scanned original data file is<br />
saved to the specified FTP<br />
server.<br />
Image Data Scanning with TWAIN<br />
Load the document data stored in custom box to PC.<br />
NOTE: The document data must already be stored in the Custom Box.<br />
For detail, see Using Document Box on page 3-37.<br />
Adding the machine to PC<br />
Add this machine to PC to select the machine’s Custom Box.<br />
1 Select Start button of the Windows display, All Programs, TWAIN Driver<br />
Setting and then TWAIN Driver Setting.<br />
NOTE: You can also add the machine to PC when selecting Start of the<br />
Windows display, Control Panel and then TWAIN Setting.<br />
2 Click Add button.<br />
3-28 OPERATION GUIDE
Basic Operation<br />
3 Enter the machine name in Scanner Name field.<br />
4 Select the machine from Model field.<br />
5<br />
Enter the machine address in Scanner Address field.<br />
NOTE: When the machine address is unknown, contact Administrator.<br />
6<br />
Select Inch or Metric.<br />
7<br />
Click User Authentication Settings button.<br />
OPERATION GUIDE 3-29
Basic Operation<br />
8 Select the checkbox beside Authentication, enter Login User Name (up<br />
to 64 characters) and Password (up to 64 characters) and then click OK<br />
button.<br />
9<br />
Click OK button.<br />
10<br />
The machine is added to PC and the machine name and model name are<br />
displayed in Scanner List field.<br />
NOTE: Click Delete button to delete the added machine. Click Edit<br />
button to change names.<br />
Scanning document data<br />
Scan the document data stored in the Custom Box of the machine.<br />
1 Activate the TWAIN compatible application.<br />
2<br />
Select the machine using the application and display the TWAIN dialog<br />
box.<br />
NOTE: For selecting the machine, see the Operation Guide or Help for<br />
each application software.<br />
3-30 OPERATION GUIDE
Basic Operation<br />
3 Select Custom Box storing the document data to be scanned from Box List<br />
field. The document data in Custom Box appears in Document List field.<br />
4 Set how to display the document data. Click Setting button to select each<br />
item.<br />
Item<br />
Description<br />
View<br />
Delete<br />
Invert<br />
Change the display in Document List field<br />
to List or Thumbnails.<br />
After scanning the document data, delete<br />
the data from Custom Box.<br />
Invert the document data color to start<br />
scanning.<br />
5 Click OK button.<br />
OPERATION GUIDE 3-31
Basic Operation<br />
6 Select the document data to be scanned from Document List filed.<br />
Enter the document data name in Search field to find the data having the<br />
same document data name or the same head part of the document data<br />
name.<br />
3-32 OPERATION GUIDE
Basic Operation<br />
7 Click Detail button to display the selected document data. When the<br />
document data includes multiple pages, select the checkbox beside the<br />
pate you want to scan. The selected pages is scanned.<br />
8 Click Acquire button. The document data is scanned.<br />
OPERATION GUIDE 3-33
Basic Operation<br />
Specifying Destination<br />
Choosing from Address Book<br />
When specifying destination, choose from the address book or use the<br />
one-touch keys.<br />
Select the destination registered in the address book.<br />
1 In the <strong>basic</strong> screen<br />
for sending, press<br />
[Address Book].<br />
Ready to send.<br />
Place original.<br />
Destination<br />
ABC SCANDATA<br />
Detail<br />
To:<br />
Destination<br />
Address<br />
Book<br />
1<br />
1/1<br />
E-mail<br />
Addr Entry<br />
Chain Detail/Edit Delete Recall<br />
Folder Path<br />
Entry<br />
001 002<br />
003 004<br />
005<br />
AAA BBB CCC DDD EEE<br />
006 007 008 009 010<br />
FFF GGG HHH III JJJ<br />
No.<br />
1/10<br />
Destination Quick Setup Type of Original/ Color/Image Advanced<br />
Transmission<br />
Setup<br />
Status Executing TX job .<br />
10/5/2006 10:10<br />
2<br />
Press the checkbox<br />
to select the desired<br />
destination from the<br />
list. You may choose<br />
multiple<br />
destinations. The<br />
selected destination<br />
is indicated by a<br />
checkmark in the<br />
check box.<br />
Place original.<br />
Addr Book<br />
Dest. No. Type Name Detail<br />
0001<br />
0002<br />
0003<br />
0004<br />
0005<br />
ABC DEF JKL MNO PQRS TUV WXYZ<br />
GHI 0-9<br />
E-mail<br />
Address Book<br />
AAAAA<br />
BBBBB<br />
Group1<br />
Group2<br />
Group3<br />
Folder<br />
Sort<br />
abcd@efg.com<br />
tuvw@xyz.com<br />
Name<br />
Group<br />
Search(Name)<br />
Search(No.)<br />
Detail<br />
Cancel<br />
OK<br />
Status Executing TX job .<br />
10/5/2006 10:10<br />
NOTE: To cancel the selection, press the check box and remove the<br />
check mark.<br />
3 When sending as E-mail, press [To:], [Cc:] or [Bcc:] to change the recipient<br />
status if necessary.<br />
4<br />
Press [OK] to register the selected destination in the destination list.<br />
NOTE: To delete the destination in the list, select the destination and<br />
press [Delete].<br />
3-34 OPERATION GUIDE
Basic Operation<br />
Destination Search<br />
Destinations<br />
registered in the<br />
address book can be<br />
searched.<br />
Advanced search by<br />
type or by initial<br />
letter is also<br />
available.<br />
Place original.<br />
Addr Book<br />
Dest. No. Type Name Detail<br />
0001<br />
0002<br />
0003<br />
0004<br />
0005<br />
Address Book<br />
AAAAA<br />
BBBBB<br />
Group1<br />
Group2<br />
Group3<br />
Sort<br />
abcd@efg.com<br />
tuvw@xyz.com<br />
ABC DEF JKL MNO PQRS TUV WXYZ<br />
GHI 0-9<br />
Name<br />
Search(Name)<br />
Search(No.)<br />
Detail<br />
E-mail<br />
Folder<br />
Group<br />
Cancel<br />
OK<br />
Status Executing TX job .<br />
10/5/2006 10:10<br />
Keys<br />
used<br />
Search type<br />
Subjects searched<br />
1 Search by name Search by registered name.<br />
2 Search by address<br />
number<br />
3 Advanced search<br />
by destination type<br />
4 Advanced search<br />
by initial letter<br />
Search by registered address number.<br />
Advanced search by type of registered<br />
destination (E-mail, Folder (SMB/FTP),<br />
FAX or Group). (FAX: Only when<br />
optional fax kit is installed).<br />
Advanced search by initial letter of<br />
registered name.<br />
Search by name<br />
Press [Search(Name)] and enter the required name.<br />
Search by address number<br />
Press [Search (No.)] and enter the address number you wish to search.<br />
Advanced search by destination type<br />
Press any of [E-mail], [Folder], [FAX] or [Group]. The destinations<br />
registered by that type are displayed.<br />
Advanced search by initial letter<br />
Press the key for the required initial letter.<br />
OPERATION GUIDE 3-35
Basic Operation<br />
Choosing by One-Touch Key<br />
Select the<br />
destination using the<br />
one-touch key.<br />
In the <strong>basic</strong> screen<br />
for sending, press<br />
the one-touch key<br />
where the<br />
destination is<br />
registered.<br />
Ready to send.<br />
Place original.<br />
Destination<br />
Detail<br />
ABC SCANDATA<br />
Chain Detail/Edit Delete Recall<br />
001 002<br />
003 004<br />
005<br />
AAA BBB CCC DDD EEE<br />
006 007 008 009 010<br />
FFF GGG HHH III JJJ<br />
Destination<br />
Destination Quick Setup Type of Original/ Color/Image Advanced<br />
Transmission<br />
Setup<br />
Status 10/5/2006 10:10<br />
To:<br />
1/1<br />
No.<br />
1/10<br />
Address<br />
Book<br />
E-mail<br />
Addr Entry<br />
Folder Path<br />
Entry<br />
1<br />
NOTE: If the one-touch key for desired destination is hidden on the<br />
touch panel, press [] or [] to scroll and view next or previous onetouch<br />
key.<br />
Choosing by Speed Dial<br />
Access the<br />
destination by<br />
specifying 3-digit<br />
one-touch key<br />
number (speed dial).<br />
In the <strong>basic</strong> screen<br />
for sending, press<br />
the No. key and<br />
enter 3-digit onetouch<br />
key number in<br />
the numeric entry<br />
screen.<br />
Ready to send.<br />
Place original.<br />
Destination<br />
Detail<br />
ABC SCANDATA<br />
Chain Detail/Edit Delete Recall<br />
001 002<br />
003 004<br />
005<br />
AAA BBB CCC DDD EEE<br />
006 007 008 009 010<br />
FFF GGG HHH III JJJ<br />
Destination<br />
Destination Quick Setup Type of Original/ Color/Image Advanced<br />
Transmission<br />
Setup<br />
Status 10/5/2006 10:10<br />
To:<br />
1/1<br />
No.<br />
1/10<br />
Address<br />
Book<br />
E-mail<br />
Addr Entry<br />
Folder Path<br />
Entry<br />
1<br />
Sending to Different Types of Destinations (Multi Sending)<br />
Multiple types of destinations, E-mail, Folder (SMB/FTP) or FAX (option),<br />
may be specified at one time for sending. This is called Multi Sending, a<br />
useful feature that allows transmission to different types of destinations (Email,<br />
folder, etc.) with a single operation.<br />
Procedures are the same as used in specifying the destinations of<br />
respective types. Continue to enter E-mail address or folder path so that<br />
they appear in the destination list. Press the Start key to launch<br />
transmission to all destinations at one time.<br />
3-36 OPERATION GUIDE
Basic Operation<br />
Using Document Box<br />
Follow the steps as below for <strong>basic</strong> operations for using document box.<br />
NOTE: It is assumed that the document box has already been created<br />
and registered.<br />
Storing Document in Custom Box<br />
Store documents in the custom box.<br />
1<br />
Place the originals<br />
on the platen or in<br />
the optional<br />
document<br />
processor.<br />
Ready to store in Box.<br />
File Name:<br />
Storing Image<br />
Set Original.<br />
Program Detail:<br />
Zoom<br />
Original<br />
Orientation<br />
Border Erase<br />
Original<br />
Size<br />
Original<br />
Image<br />
Mixed Sized<br />
Originals<br />
Centering<br />
File Name<br />
Entry<br />
Original<br />
Zoom<br />
Paper<br />
:<br />
:<br />
:<br />
- - -<br />
100%<br />
- - -<br />
Density<br />
2-sided/Book<br />
Original<br />
Color<br />
Selection<br />
Storing<br />
Size<br />
# Keys<br />
Quick Setup<br />
Functions<br />
Status 10/5/2006 10:10<br />
NOTE: For loading instructions, refer to Loading Originals on page 2-25.<br />
2<br />
Press the Document Box key<br />
to display the Document Box<br />
screen.<br />
3<br />
Press [Custom Box]<br />
and select the box in<br />
which the file to be<br />
stored.<br />
Custom Box<br />
No. Box Name Owner Use(%)<br />
001 Box 001 User 1<br />
20%<br />
001/001<br />
Edit Box<br />
Store File Detail Open<br />
Custom Box<br />
Job Box<br />
Removable Memory<br />
FAX Box<br />
Status 10/5/2006 10:10<br />
NOTE: The custom box storing a file needs to be created in advance.<br />
OPERATION GUIDE 3-37
Basic Operation<br />
4 Press [Store File].<br />
Custom Box<br />
No. Box Name Owner Use(%)<br />
001 Box 001 User 1<br />
20%<br />
001/001<br />
Edit Box<br />
Store File Detail Open<br />
Custom Box<br />
Job Box<br />
Removable Memory<br />
FAX Box<br />
Status 10/5/2006 10:10<br />
NOTE: If a password is set for the custom box in advance, enter the<br />
correct password.<br />
5 Change the original<br />
type, scan density,<br />
etc. if necessary.<br />
Ready to store in Box.<br />
File Name:<br />
Storing Image<br />
Program Detail:<br />
Zoom<br />
Original<br />
Orientation<br />
Border Erase<br />
Original<br />
Size<br />
Set Original.<br />
Original<br />
Image<br />
Mixed Sized<br />
Originals<br />
Centering<br />
File Name<br />
Entry<br />
Original<br />
Zoom<br />
Paper<br />
:<br />
:<br />
:<br />
- - -<br />
100%<br />
- - -<br />
Density<br />
2-sided/Book<br />
Original<br />
Color<br />
Selection<br />
Storing<br />
Size<br />
# Keys<br />
Quick Setup<br />
Functions<br />
Status 10/5/2006 10:10<br />
6 Press the Start key. The<br />
original will be scanned and its<br />
data will be stored in the<br />
specified document box.<br />
Printing Document Stored in Custom box<br />
Print the documents stored in the custom box.<br />
1<br />
Press the Document Box key<br />
to display the Document Box<br />
screen.<br />
3-38 OPERATION GUIDE
Basic Operation<br />
2 Press [Custom Box]<br />
and select the box<br />
containing the<br />
document you wish<br />
to print.<br />
Custom Box<br />
No. Box Name Owner Use(%)<br />
001 Box 001 User 1<br />
20%<br />
001/001<br />
Edit Box<br />
Store File Detail Open<br />
Custom Box<br />
Job Box<br />
Removable Memory<br />
FAX Box<br />
Status 10/5/2006 10:10<br />
3<br />
Press [Open].<br />
Custom Box<br />
No. Box Name Owner Use(%)<br />
001 Box 001 User 1<br />
20%<br />
001/001<br />
Edit Box<br />
Store File Detail Open<br />
Custom Box<br />
Job Box<br />
Removable Memory<br />
FAX Box<br />
Status 10/5/2006 10:10<br />
NOTE: If a password is set for the custom box in advance, enter the<br />
correct password.<br />
4<br />
From the list, select<br />
the checkbox beside<br />
the document to be<br />
printed. The<br />
selected document<br />
is indicated by a<br />
checkmark in the<br />
check box.<br />
Program Detail:<br />
Name Date Size<br />
0001 Document1 2006/05/05 11:11 21 MB<br />
001/001<br />
Detail<br />
Print Send Join Move Delete<br />
Store File<br />
Close<br />
Status 10/5/2006 10:10<br />
NOTE: Multiple documents cannot be selected and printed. To cancel the<br />
selection, press the check box and remove the check mark.<br />
5<br />
Press [Print].<br />
OPERATION GUIDE 3-39
Basic Operation<br />
6 Change paper<br />
selection, 1sided/2-<br />
sided print, etc. if<br />
necessary.<br />
Ready to store in Box.<br />
File Name: Program Detail:<br />
Printing Image<br />
Copies<br />
1<br />
Set Original.<br />
Auto<br />
Collate<br />
Off<br />
Original<br />
Zoom<br />
Paper<br />
Paper<br />
Selection<br />
1-sided<br />
>>1-sided<br />
Duplex<br />
Collate/<br />
Offset<br />
Off<br />
Delete after<br />
Printed<br />
Staple/Punch<br />
Quick Setup<br />
Functions<br />
Cancel<br />
Status 10/5/2006 10:10<br />
7 Press the Start key to start<br />
printing the selected<br />
document.<br />
Sending Document Stored in Custom Box<br />
Send the documents stored in the custom box.<br />
1 Press the Document Box key<br />
to display the Document Box<br />
screen.<br />
2 Press [Custom Box]<br />
and select the box<br />
containing the<br />
document you to be<br />
sent.<br />
Custom Box<br />
No. Box Name Owner Use(%)<br />
001 Box 001 User 1<br />
20%<br />
001/001<br />
Edit Box<br />
Store File Detail Open<br />
Custom Box<br />
Job Box<br />
Removable Memory<br />
FAX Box<br />
Status 10/5/2006 10:10<br />
3-40 OPERATION GUIDE
Basic Operation<br />
3 Press [Open].<br />
Custom Box<br />
No. Box Name Owner Use(%)<br />
001 Box 001 User 1<br />
20%<br />
001/001<br />
Edit Box<br />
Store File Detail Open<br />
Custom Box<br />
Job Box<br />
Removable Memory<br />
FAX Box<br />
Status 10/5/2006 10:10<br />
NOTE: If a password is set for the custom box in advance, enter the<br />
correct password.<br />
4 From the list, select<br />
the checkbox beside<br />
the document to be<br />
sent. The selected<br />
document is<br />
indicated by a<br />
checkmark in the<br />
check box.<br />
Box No.<br />
Name Date Size<br />
0001 Document1 2006/05/05 11:11 21 MB<br />
001/001<br />
Detail<br />
Print Send Join Move Delete<br />
Store File<br />
Close<br />
Status 10/5/2006 10:10<br />
NOTE: Multiple documents cannot be selected and printed. To cancel the<br />
selection, press the check box and remove the check mark.<br />
5 Press [Send].<br />
6<br />
Specify the<br />
destination.<br />
Ready to send from Box.<br />
Enter Destination.<br />
Destination<br />
2<br />
AAAAA<br />
Destination<br />
abcd@efg.com<br />
Detail<br />
To:<br />
Address<br />
Book<br />
BBBBB<br />
tuvw@xyz.com<br />
Bcc:<br />
1/1<br />
E-mail<br />
Addr Entry<br />
Chain Detail/Edit Delete<br />
Recall<br />
001 002<br />
003 004<br />
005<br />
AAA BBB CCC DDD EEE<br />
No.<br />
Folder Path<br />
Entry<br />
FAX No.<br />
Entry<br />
006 007 008 009 010<br />
FFF GGG HHH III JJJ<br />
1/10<br />
Destination<br />
Quick Setup<br />
Functions<br />
Color/Image<br />
Cancel<br />
Status 10/5/2006 10:10<br />
NOTE: Refer to Specifying Destination on page 3-34 on how to choose<br />
destinations.<br />
OPERATION GUIDE 3-41
Basic Operation<br />
7 Press the Start key to start<br />
sending the selected<br />
document.<br />
Editing Document Stored in Custom Box<br />
Move a document from one custom box to another or join multiple<br />
documents together.<br />
Move Documents<br />
1<br />
Press the Document Box key<br />
to display the Document Box<br />
screen.<br />
2 Press [Custom Box]<br />
and select the box<br />
containing the<br />
document to be<br />
moved.<br />
Custom Box<br />
No. Box Name Owner Use(%)<br />
001 Box 001 User 1<br />
20%<br />
001/001<br />
Edit Box<br />
Store File Detail Open<br />
Custom Box<br />
Job Box<br />
Removable Memory<br />
FAX Box<br />
Status 10/5/2006 10:10<br />
3-42 OPERATION GUIDE
Basic Operation<br />
3 Press [Open].<br />
Custom Box<br />
No. Box Name Owner Use(%)<br />
001 Box 001 User 1<br />
20%<br />
001/001<br />
Edit Box<br />
Store File Detail Open<br />
Custom Box<br />
Job Box<br />
Removable Memory<br />
FAX Box<br />
Status 10/5/2006 10:10<br />
NOTE: If a password is set for the custom box in advance, enter the<br />
correct password.<br />
4 From the list, select<br />
the check box<br />
beside the<br />
document to be<br />
moved. The<br />
selected document<br />
is indicated by a<br />
checkmark in the<br />
check box.<br />
Program Detail:<br />
Name Date Size<br />
0001 Document 1 2006/05/05 11:11 1 MB<br />
0002 Document 2 2006/05/05 11:12 1 MB<br />
001/001<br />
Detail<br />
Print Send Join Move Delete<br />
Store File<br />
Close<br />
Status 10/5/2006 10:10<br />
NOTE: To cancel the selection, press the check box and remove the<br />
check mark.<br />
5 Press [Move].<br />
6<br />
Select the<br />
destination box and<br />
press [Move]. The<br />
document will be<br />
moved to the box.<br />
Move<br />
Select target location and press [Move].<br />
Custom Box<br />
No. Box Name<br />
Owner<br />
0001 Box 001<br />
AAAA<br />
Use(%)<br />
100%<br />
0002 Box 002<br />
AAAA<br />
80%<br />
001/001<br />
Cancel<br />
Move<br />
Status 10/5/2006 10:10<br />
NOTE: If a password is set for the destination box in advance, enter the<br />
correct password.<br />
OPERATION GUIDE 3-43
Basic Operation<br />
Join Documents<br />
Join the documents stored in the custom box.<br />
NOTE: Only documents contained in the same custom box can be<br />
joined. If necessary, move the documents to the same custom box in<br />
advance.<br />
1 Press the Document Box key<br />
to display the Document Box<br />
screen.<br />
2<br />
Press [Custom Box]<br />
and select the box<br />
containing the<br />
documents to be<br />
joined.<br />
Custom Box<br />
No. Box Name Owner Use(%)<br />
001 Box 001 User 1<br />
20%<br />
001/001<br />
Edit Box<br />
Store File Detail Open<br />
Custom Box<br />
Job Box<br />
Removable Memory<br />
FAX Box<br />
Status 10/5/2006 10:10<br />
3<br />
Press [Open].<br />
Custom Box<br />
No. Box Name Owner Use(%)<br />
001 Box 001 User 1<br />
20%<br />
001/001<br />
Edit Box<br />
Store File Detail Open<br />
Custom Box<br />
Job Box<br />
Removable Memory<br />
FAX Box<br />
Status 10/5/2006 10:10<br />
NOTE: If a password is set for the custom box in advance, enter the<br />
correct password.<br />
3-44 OPERATION GUIDE
Basic Operation<br />
4 From the list, select<br />
the check box to<br />
switch to the<br />
documents to be<br />
joined. Up to 10<br />
documents can be<br />
joined. The selected<br />
documents are<br />
indicated by a<br />
checkmark in the<br />
check box.<br />
Program Detail:<br />
Name Date Size<br />
0001 Document 1 2006/05/05 11:11 1 MB<br />
0002 Document 2 2006/05/05 11:12 1 MB<br />
001/001<br />
Detail<br />
Print Send Join Move Delete<br />
Store File<br />
Close<br />
Status 10/5/2006 10:10<br />
NOTE: To cancel the selection, press the check box and remove the<br />
check mark.<br />
5<br />
Press [Join].<br />
6 Arrange the documents in the desired order.<br />
Press the document<br />
to be rearranged.<br />
The document will<br />
be highlighted.<br />
Press [Up] or [Down]<br />
to move the<br />
document up or<br />
down according to<br />
the order to be<br />
joined.<br />
Join<br />
Confirm the order of documents to combine.<br />
File Name<br />
Date<br />
Size<br />
Document 1 2006/05/05 10:10 1 MB<br />
Document 2 2006/05/05 10:15 1 MB<br />
Cancel<br />
001/001<br />
Up<br />
Down<br />
Next<br />
Status 10/5/2006 10:10<br />
7<br />
Press [Next].<br />
8 Press [File Name].<br />
Join<br />
Enter file name for combined document.<br />
File Name<br />
Cancel<br />
Back<br />
Join<br />
Status 10/5/2006 10:10<br />
9<br />
Enter a new file name for the documents joined, and press [OK].<br />
NOTE: Refer to the Appendix for entering characters.<br />
OPERATION GUIDE 3-45
Basic Operation<br />
10 Press [Join]. The<br />
documents will be<br />
joined.<br />
Program Detail:<br />
Name Date Size<br />
0001 Document 1 2006/05/05 11:11 1 MB<br />
0002 Document 2 2006/05/05 11:12 1 MB<br />
001/001<br />
Detail<br />
Print Send Join Move Delete<br />
Store File<br />
Close<br />
Status 10/5/2006 10:10<br />
NOTE: Original documents before joining are retained. Delete them if<br />
unnecessary.<br />
Printing Document Stored in Job Box<br />
Print the documents stored in the job box. The following boxes and<br />
documents are contained in the job box.<br />
Type of box contained<br />
Private Print/Stored Job<br />
Quick Copy/Proof and<br />
Hold<br />
Repeat Copy<br />
Form for Form Overlay<br />
(Copy)<br />
Documents stored<br />
Print jobs stored by using Private Print or<br />
Stored Job functions.<br />
Print jobs stored by using Quick Print or<br />
Proof and Hold functions.<br />
Copy job with Repeat Copy setting.<br />
Form data used for Form Overlay (Copy).<br />
1<br />
Press the Document Box key<br />
to display the Document Box<br />
screen.<br />
2<br />
Press [Job Box].<br />
3-46 OPERATION GUIDE
Basic Operation<br />
3 Select the box<br />
containing the<br />
document to be<br />
printed among<br />
[Private Print/Stored<br />
Job], [Quick Copy/<br />
Proof and Hold],<br />
[Repeat Copy] or<br />
[Form for Form<br />
Overlay(Copy)].<br />
Press [Open].<br />
4<br />
Select the document<br />
to be printed and<br />
press [Print] to start<br />
printing.<br />
Private Print/Stored Job<br />
Quick Copy/Proof and Hold<br />
Repeat Copy<br />
Form for Form Overlay(Copy)<br />
Custom Box<br />
Job Box<br />
Box Name<br />
Job Box<br />
Removable Memory<br />
Files<br />
1<br />
0<br />
0<br />
Open<br />
Status 10/5/2006 10:10<br />
Job Box<br />
Private Print/Stored Job<br />
Name Date Size<br />
Document 1.pdf 2006/05/05 10:00 30 MB<br />
2<br />
Document 2.pdf 1 2006/05/05 2006/05/05 10:10 10:00 2030<br />
MB MB<br />
001/001<br />
Detail<br />
Print<br />
Delete<br />
Status 10/5/2006 10:10<br />
Close<br />
NOTE: If a password is set for the custom box in advance, enter the<br />
correct password.<br />
OPERATION GUIDE 3-47
Basic Operation<br />
Printing a Document Stored in Removable USB Memory<br />
Connect a removable USB memory to the machine to print PDF data<br />
stored in the memory. Printing can be performed easily without using PC.<br />
Limitations<br />
• Only PDF file data (version 1.4 or earlier) is printable.<br />
• High compression PDF files and encrypted PDF files are not<br />
supported.<br />
• PDF file you wish to print should have an extension (.pdf).<br />
• The PDF file to print must be at the root directory of the USB memory.<br />
• Multiple documents cannot be selected and printed.<br />
• Use the USB memory properly formatted by this machine.<br />
• Plug a USB memory directly into the USB memory slot. We do not<br />
warrant that USB memory printing is error free if a USB hub is used.<br />
Printing<br />
Print documents stored in the removable USB memory.<br />
1<br />
Press the Document Box key to display the Document Box screen.<br />
2<br />
Plug a USB memory into the<br />
USB memory slot.<br />
NOTE: Use the USB memory formatted by this machine. If a USB<br />
memory formatted by any other device is used, Removable Memory is not<br />
formatted. may appear. To format a USB memory, press [Format] and<br />
follow the instructions on the screen.<br />
3<br />
Press [Removable Memory].<br />
3-48 OPERATION GUIDE
Basic Operation<br />
4 Select the file to be<br />
printed and press<br />
[Print].<br />
Removable Memory<br />
Removable Memory<br />
Name Date Size<br />
Document 1 2006/05/09 10:00 1 MB<br />
Print<br />
Document 2 2006/05/09 10:10 1 MB<br />
Document 3 2006/05/10 09:50 1 MB<br />
Document 4 2006/05/10 10:00 1 MB<br />
Document 5 2006/05/10 10:05 1 MB<br />
Delete<br />
Detail<br />
001/999<br />
Memory<br />
Detail<br />
Remove<br />
Memory<br />
Custom Box Job Box Removable Memory FAX Box<br />
Status 10/5/2006 10:10<br />
5<br />
Enter the number of<br />
copies you wish to<br />
print by using [+]/[–]<br />
or the numeric keys.<br />
Then press [Start<br />
Print] to start<br />
printing.<br />
Document 001<br />
Copy(s)(1 - 999)<br />
Cancel<br />
Start Print<br />
Removing USB Memory<br />
Remove the USB memory.<br />
CAUTION: Be sure to follow the proper procedure to avoid damaging the<br />
destruction of data or USB memory.<br />
1<br />
Press the Document Box key to display the Document Box screen.<br />
2 Press [Removable Memory].<br />
3<br />
Press [Remove<br />
Memory].<br />
Removable Memory<br />
Removable Memory<br />
Name Date Size<br />
Document 1<br />
Document 2<br />
2006/05/09 10:00<br />
2006/05/09 10:10<br />
1 MB<br />
1 MB<br />
Document 3<br />
Document 4<br />
Document 5<br />
2006/05/10 09:50<br />
2006/05/10 10:00<br />
2006/05/10 10:05<br />
1 MB<br />
1 MB<br />
1 MB<br />
001/999<br />
Memory<br />
Detail<br />
Remove<br />
Memory<br />
Print<br />
Delete<br />
Detail<br />
Custom Box Job Box Removable Memory FAX Box<br />
Status 10/5/2006 10:10<br />
4 Remove the USB memory after Removable Memory can be safely<br />
removed is displayed.<br />
OPERATION GUIDE 3-49
Basic Operation<br />
Canceling/Viewing/Changing Job<br />
Canceling Job<br />
Follow the steps as below to cancel any print or send job being executed,<br />
view job detail, or perform the waiting print job first (Priority Override).<br />
Job handling operation is done in the Status/Job Cancel screen.<br />
Cancel any job while it is under printing, sending or waiting.<br />
NOTE: You cannot the print of originals that have been received by fax.<br />
1 Press the Status/Job Cancel key to display the Status/Job Cancel screen.<br />
2<br />
Press any of [Printing Jobs], [Sending Jobs] or [Storing Jobs].<br />
Jobs which can be cancelled in each screen are as follows.<br />
[Printing Jobs]: 7 jobs of Copy, Printer, Box, FAX, E-mail reception,<br />
Removal Memory and Report<br />
[Sending Jobs]: 5 jobs of E-mail, Folder, TWAIN, FAX, Multiple<br />
(combination of multi sending methods)<br />
[Storing Jobs]: 3 jobs of Scan, Printer and Fax<br />
3 Select the job you wish to cancel and press [Cancel]. Canceling will appear<br />
of Status and the job will be canceled.<br />
NOTE: The canceled job will be displayed in the Log screen.<br />
Status<br />
Status<br />
Log<br />
Type<br />
All<br />
Job No. Accepted Time Type<br />
Job Name User Name Status<br />
438<br />
14:44 doc20060225144435 Waiting<br />
001/001<br />
Pause All<br />
Print Jobs<br />
Cancel<br />
Priority<br />
Override<br />
Detail<br />
Printing Jobs Sending Jobs Storing Jobs Device/<br />
Communication<br />
Paper/Supplies<br />
Status 10/5/2006 10:10<br />
4<br />
Repeat the steps 2 and 3 to cancel other jobs.<br />
3-50 OPERATION GUIDE
Basic Operation<br />
Viewing Job Detail<br />
View the status of the job being executed or under waiting.<br />
1<br />
Press the Status/Job Cancel key to display the Status/Job Cancel screen.<br />
2<br />
Press any of [Printing Jobs], [Sending Jobs] or [Storing Jobs].<br />
3 Select the job you<br />
wish to view and<br />
press [Detail].<br />
Status<br />
Status<br />
Type<br />
All<br />
Job No. Accepted Time Type<br />
Log<br />
Job Name User Name Status<br />
438<br />
14:44 doc20060225144435 Waiting<br />
001/001<br />
Pause All<br />
Print Jobs<br />
Cancel<br />
Priority<br />
Override<br />
Detail<br />
Printing Jobs Sending Jobs Storing Jobs Device/<br />
Communication<br />
Paper/Supplies<br />
Status 10/5/2006 10:10<br />
4<br />
Details of the<br />
selected job will be<br />
displayed.<br />
Detail Job No.:<br />
Job No.:<br />
000091<br />
Job Type:<br />
Printing Job - Copy<br />
User Name:<br />
ABCDE<br />
Job Name:<br />
Status:<br />
Printing<br />
Copies:<br />
5/7<br />
AAAAA<br />
Accepted Time:<br />
15:51:51<br />
1/2<br />
Close<br />
NOTE: Press [] or [] to view next detail. In the sending job, view the<br />
destination by pressing [Detail] of Destination or Status/Destination.<br />
5<br />
Press [Close] to end viewing.<br />
Viewing Job Log<br />
View the jobs that have been finished or canceled.<br />
1<br />
Press the Status/Job Cancel key to display the Status/Job Cancel screen.<br />
2 Press any of [Printing Jobs], [Sending Jobs] or [Storing Jobs]. Then press<br />
[Log].<br />
OPERATION GUIDE 3-51
Basic Operation<br />
3 Select the job you<br />
wish to view and<br />
press [Detail].<br />
Status<br />
Type<br />
Status<br />
All<br />
Log<br />
Job No. Date Type<br />
Job Name<br />
User Name<br />
Result<br />
000080 02/25 14:24<br />
doc20060225142427<br />
OK<br />
000081 02/25 14:22<br />
doc20060225142253<br />
OK<br />
000082 02/25 14:21<br />
doc00100043520060225142110<br />
OK<br />
001/001<br />
000083 02/25 14:13<br />
doc20060225141358<br />
NG<br />
000084 02/25 14:10<br />
doc20060225141034<br />
OK<br />
Detail<br />
Printing Jobs Sending Jobs Storing Jobs Device/<br />
Communication<br />
Paper/Supplies<br />
Status Executing TX job . 10/5/2006 10:10<br />
4<br />
Details of the<br />
selected job will be<br />
displayed.<br />
Detail Job No.:<br />
Job No.:<br />
000091<br />
Job Type:<br />
Printing Job - Copy<br />
User Name:<br />
ABCDE<br />
Result:<br />
OK<br />
Job Name:<br />
AAAAA<br />
Accepted Time:<br />
End Time:<br />
13:51:51 13:52:25<br />
1/2<br />
Close<br />
NOTE: Press [] or [] to view next detail. Press [Detail] of Destination<br />
or Status/Destination in the Sending Jobs to view the destinations.<br />
5 Press [Close] to end viewing.<br />
Print Job Suspension and Interruption (Priority Override)<br />
Suspend the current print job temporarily to run a more urgent queued job.<br />
This refers to Priority Override.<br />
NOTE: If the current print job is specified as Priority Override, the new<br />
urgent job will be executed after completion of the current job.<br />
1<br />
Press the Status/Job Cancel key to display the Status/Job Cancel screen.<br />
3-52 OPERATION GUIDE
Basic Operation<br />
2 Select the job you<br />
wish to give priority<br />
and press [Priority<br />
Override]. The print<br />
job currently under<br />
way will be<br />
suspended to start<br />
the priority print job.<br />
Status<br />
Status<br />
Log<br />
Type<br />
All<br />
Job No. Accepted Time Type<br />
Job Name User Name Status<br />
438 14:44 doc20060225144435 Waiting<br />
001/001<br />
Pause All<br />
Print Jobs<br />
Cancel<br />
Priority<br />
Override<br />
Detail<br />
Printing Jobs Sending Jobs Storing Jobs Device/<br />
Communication<br />
Paper/Supplies<br />
Status 10/5/2006 10:10<br />
3<br />
The suspended print job will resume after completion of the Priority<br />
Override.<br />
OPERATION GUIDE 3-53
Basic Operation<br />
Checking Remaining Toner and Paper<br />
Follow the steps below to check remaining toner and paper on the touch<br />
panel.<br />
NOTE: Size and type of paper loaded in each paper source can also be<br />
checked.<br />
1 Press the Status/Job Cancel key to display Status/Job Cancel screen.<br />
2<br />
Press [Paper/Supplies].<br />
3<br />
Check the remaining toner of Toner Information and the remaining paper<br />
of each paper source of Paper.<br />
NOTE: Remaining toner level is indicated by any of the 11 levels<br />
between 100 and 0%. The smaller the number, the fewer the remaining<br />
toner.<br />
Paper remaining in the MP Tray is indicated either by 100% or 0%.<br />
3-54 OPERATION GUIDE
Basic Operation<br />
Quick Setup Screen<br />
In the initial screen for copying and sending (the screen which appears<br />
immediately after the Copy or Send key is first pressed after power-on),<br />
the typical and generally often used functions are picked up and registered<br />
from among the versatile functions of this machine. This initial screen is<br />
called Quick Setup Screen. Registration of functions in the Quick Setup<br />
Screen can be adjusted to suit your work environment for better efficiency.<br />
Functions Available for Registration in Quick Setup Screen<br />
Default registrations and the functions available for registration are as<br />
follows.<br />
Copying<br />
Sending<br />
Function<br />
Default Registration<br />
1: Zoom<br />
2: Density<br />
3: Staple/Punch<br />
4: Duplex<br />
5: Original Image<br />
6: Collate/Offset<br />
1: Zoom<br />
2: Density<br />
3: Resolution<br />
4: 2-sided/Book Original<br />
5: Original Image<br />
6: Color Selection<br />
Functions Available for<br />
Registration<br />
• Paper Selection<br />
• Zoom<br />
• Staple/Punch<br />
• Density<br />
• Duplex<br />
• Combine<br />
• Collate/Offset<br />
• Original Image<br />
• Original Size<br />
• Original Size<br />
• 2-sided/Book Original<br />
• Sending Size<br />
• Original Orientation<br />
• File Format<br />
• Send Setting-Density<br />
• Original Image<br />
• Scan Resolution<br />
• Color Selection<br />
• Zoom<br />
OPERATION GUIDE 3-55
Basic Operation<br />
Function<br />
Default Registration<br />
Functions Available for<br />
Registration<br />
Document<br />
Box<br />
Document<br />
Storage<br />
1: Zoom<br />
2: Density<br />
3: Resolution<br />
4: 2-side/Book Original<br />
5: Original Image<br />
6: Color Selection<br />
• Color<br />
• Storing Size<br />
• Density<br />
• 2-side/Book Original<br />
• Resolution<br />
• Zoom<br />
• Original Orientation<br />
• Original Size<br />
• Original Image<br />
Sending<br />
From Box<br />
1: File Format<br />
2: Delete After Transmitted<br />
• File Format<br />
• Delete After Transmitted<br />
Printing<br />
From Box<br />
1: Paper Selection<br />
2: Delete After Printed<br />
3: Staple/Punch<br />
4: Duplex<br />
5: Collate/Offset<br />
• Paper Selection<br />
• Staple/Punch<br />
• Delete After Printed<br />
• Collate/Offset<br />
• Duplex<br />
Changing Registration<br />
The following procedure is one of an example for replacing the registration<br />
of Density with Original Image Quality in the Quick Setup Screen for<br />
copying.<br />
Ready to copy.<br />
Copy Image<br />
Copies<br />
1<br />
Set Original.<br />
Original<br />
Zoom<br />
Paper<br />
: - - -<br />
: 100%<br />
: - - -<br />
Auto<br />
Text+Photo A4<br />
Plain<br />
Zoom<br />
Original<br />
Image<br />
Paper<br />
Selection<br />
1-sided<br />
Normal 0 Collate<br />
>>1-sided<br />
Duplex Density Collate/<br />
Offset<br />
Quick Setup Org./Paper/<br />
Image<br />
Layout/Edit Advanced<br />
Finishing<br />
Quality<br />
Setup<br />
Status 10/5/2006 10:10<br />
1<br />
Press the System Menu key.<br />
2<br />
Press [Copy], [Change] of Quick Setup Registration, and then [Change] of<br />
Original Image.<br />
3-56 OPERATION GUIDE
Basic Operation<br />
3 Press [Key 4] here<br />
as the key to set<br />
replacement<br />
location.<br />
Copy - Paper Selection<br />
Register Paper Selection function on the Quick Setup screen.<br />
Off Key 1<br />
Key 2 Key 3<br />
Key 4<br />
Key 5 Key 6<br />
Cancel<br />
OK<br />
Status 10/5/2006 10:10<br />
4<br />
Press [OK]. The Original Image Quality function will be newly registered.<br />
OPERATION GUIDE 3-57
Basic Operation<br />
3-58 OPERATION GUIDE
4 Optional Equipment<br />
This chapter introduces the optional equipment available for<br />
the machine.<br />
• Overview of Optional Equipment.................................. 4-2<br />
• Document Processor.................................................... 4-4<br />
• Paper Feeder ............................................................... 4-4<br />
• 3000 Sheet Paper Feeder............................................ 4-5<br />
• Built-in Finisher............................................................. 4-5<br />
• Document Finisher ....................................................... 4-9<br />
• 3000 Sheet Document Finisher.................................... 4-9<br />
• Job Separator............................................................. 4-10<br />
• Document Table ......................................................... 4-10<br />
• Key Counter ................................................................4-11<br />
• Fax Kit ........................................................................ 4-12<br />
• Data Backup Kit.......................................................... 4-12<br />
• Security Kit (USB Key) ............................................... 4-13<br />
• Serial Interface ........................................................... 4-13<br />
• PDF Upgrade Kit (USB Key) ...................................... 4-14<br />
OPERATION GUIDE 4-1
Optional Equipment<br />
Overview of Optional Equipment<br />
The following optional equipment is available for the machine.<br />
Document Processor<br />
Document Table<br />
Mailbox<br />
Built-in Finisher<br />
Job Separator<br />
Document Finisher<br />
3000 Sheet Document<br />
Finisher<br />
Folding Unit<br />
Paper Feeder<br />
3000 Sheet<br />
Paper Feeder<br />
4-2 OPERATION GUIDE
Optional Equipment<br />
Key Counter<br />
Security Kit<br />
Data Backup Kit<br />
PDF Upgrade Kit<br />
Fax Kit<br />
Serial Interface<br />
OPERATION GUIDE 4-3
Optional Equipment<br />
Document Processor<br />
Automatically scans originals. Also you can perform for duplex copying and<br />
split copying.<br />
For document processor operation, refer to Loading Originals in the<br />
Document Processor on page 2-27.<br />
Paper Feeder<br />
Add an additional 2 paper cassettes like Cassette 2 of the machine. Paper<br />
capacity and loading method are the same as Cassettes 1 and 2. Refer to<br />
Loading Paper in the Cassettes on page 2-16.<br />
NOTE: Left cover 3 is located on the left side of the paper feeder for use<br />
in clearing paper jams.<br />
4-4 OPERATION GUIDE
Optional Equipment<br />
3000 Sheet Paper Feeder<br />
In addition to the standard cassettes, a 3000 sheet paper feeder holding<br />
3,000 sheets of A4, Letter or B5 paper can be added.<br />
NOTE: Left cover 3 is located on the left side of the 3000 sheet paper<br />
feeder for use in clearing paper jams.<br />
Built-in Finisher<br />
The built-in finisher holds a large quantity of finished prints. The finisher<br />
offers a convenient means of sorting. Sorted finished prints may also be<br />
stapled.<br />
1<br />
2<br />
1 Finisher tray<br />
2 Finisher process tray<br />
OPERATION GUIDE 4-5
Optional Equipment<br />
Finisher tray serves as an output tray of sorted prints.<br />
Use the auxiliary tray to sort Ledger, Legal, 8.5×13.5", Oficio II, Letter,<br />
Letter-R, A3, B4, A4, A4-R, B5, Folio, 8K or 16K prints.<br />
Adding Staples<br />
1 Pull to open the stapler front<br />
cover.<br />
2<br />
Pull out the staple holder.<br />
4-6 OPERATION GUIDE
Optional Equipment<br />
3 Remove the empty staple case<br />
from the staple holder.<br />
4 Holding the staple holder in<br />
your left hand and a new<br />
staple case in your right hand,<br />
insert the staple case into the<br />
staple holder in the direction of<br />
an arrow.<br />
5<br />
Insert the staple case fully to<br />
the end. Pull to remove the<br />
paper tape wound on the<br />
staple case.<br />
6<br />
Insert the staple holder into the<br />
slot of the staple unit again.<br />
When fully inserted, the staple<br />
holder locks with a clicking<br />
sound.<br />
OPERATION GUIDE 4-7
Optional Equipment<br />
Clearing Staple Jam<br />
1 Pull out the staple holder referring to Steps 1 and 2 of Adding Staples.<br />
2 Holding the knob A on the face<br />
plate of the staple holder, lift<br />
the face plate.<br />
A<br />
3 Clear the staple jammed in the<br />
cartridge end (staple-loaded<br />
side).<br />
4<br />
Lower the face plate of the<br />
staple holder.<br />
5<br />
Insert the face plate back in place. When fully inserted, the face plate locks<br />
with a clicking sound.<br />
6<br />
After lifting the staple unit slightly, lower it and insert it again into its place.<br />
7<br />
Close the stapler front cover.<br />
4-8 OPERATION GUIDE
Optional Equipment<br />
Document Finisher<br />
The document finisher holds a large quantity of finished copies. The<br />
finisher offers a convenient means of sorting. Sorted finished copies may<br />
also be stapled. For further details, refer to the document finisher<br />
Operation Guide.<br />
3000 Sheet Document Finisher<br />
The document finisher holds a large quantity of finished copies. The<br />
finisher offers a convenient means of sorting. It can also staple finished<br />
sets and punch holes if equipped with the appropriate optional<br />
accessories. For further details, refer to the 3000 sheet document finisher<br />
Operation Guide. Other options include the mailbox and folding unit.<br />
OPERATION GUIDE 4-9
Optional Equipment<br />
Job Separator<br />
Separates paper according to output tray for easier sorting. Specify an<br />
output tray for copy or print jobs. Or, specify the default output tray for<br />
printing from the copy or document box screen, printing from the PC, and<br />
printing of the received fax data.<br />
Document Table<br />
Place original or other documents when using the machine. It has a drawer<br />
to accommodate clips.<br />
4-10 OPERATION GUIDE
Optional Equipment<br />
Key Counter<br />
Use the key counter to monitor machine usage. The key counter offers a<br />
convenient solution for centralized management of copy volume for<br />
different departments in a large company.<br />
Inserting the Key Counter<br />
Insert the key counter securely into the key counter slot.<br />
NOTE: When the key counter function is activated, copies can only be<br />
made when a key counter is inserted. If the key counter is not inserted,<br />
Insert key counter. will be displayed.<br />
OPERATION GUIDE 4-11
Optional Equipment<br />
Fax Kit<br />
By installing the fax kit, fax send/receive is enabled. Also, it is possible to<br />
use it as a network fax, by using it with a computer. When two units of the<br />
fax kit are installed, the units can be connected to two different telephone<br />
lines which will enable quicker message transmission to a number of<br />
recipients. If one of the lines is dedicated to receiving, the time of busy line<br />
can be reduced. For further details, refer to the operation guide of the fax<br />
kit.<br />
Data Backup Kit<br />
A microchip card for storing fax reception data and job accounting data.<br />
Installation and removal of the card is performed by our service<br />
representative.<br />
Refer to the operation guide of the fax kit for the fax reception data to be<br />
stored for backup.<br />
4-12 OPERATION GUIDE
Optional Equipment<br />
Security Kit (USB Key)<br />
This machine functions by temporarily storing scanned data on an internal<br />
hard disk. After being used for output, this data is not accessible from the<br />
operation panel, but a record of the data remains on the hard disk until it is<br />
overwritten by other data. Thus, the data could conceivably be retrieved by<br />
accessing the hard disk using specialized tools.<br />
For greater security, the security kit prevents this by overwriting all<br />
unnecessary data in the storage area of the hard disk so that it cannot be<br />
retrieved.<br />
Serial Interface<br />
Install for connecting to printers with serial port interfaces. Supports the<br />
RS-232C serial interface.<br />
OPERATION GUIDE 4-13
Optional Equipment<br />
PDF Upgrade Kit (USB Key)<br />
When saving scanned originals as PDF files, enables the creation of high<br />
compression PDF files and PDF encryption.<br />
Use PDF file encryption to customize password-based rights access.<br />
4-14 OPERATION GUIDE
5 Maintenance<br />
This chapter describes cleaning and toner replacement.<br />
• Cleaning ....................................................................... 5-2<br />
• Toner Container and Waste Toner Box Replacement .. 5-7<br />
OPERATION GUIDE 5-1
Maintenance<br />
Cleaning<br />
Clean the machine regularly to ensure optimum output quality.<br />
CAUTION: For safety, always unplug the power cord before cleaning the<br />
machine.<br />
Platen Cover / Document Processor / Glass Surface<br />
Wipe the backside of the platen cover, the inside of the document<br />
processor and the glass surface with a soft cloth dampened with alcohol or<br />
mild detergent.<br />
IMPORTANT: Do not use thinner or other organic solvents.<br />
Platen Cover<br />
Document Processor<br />
1<br />
Open the top cover of the<br />
document processor and hold<br />
the green knob to lift the<br />
reverse unit.<br />
2<br />
Clean the white roller at the<br />
inside of the bottom.<br />
5-2 OPERATION GUIDE
Maintenance<br />
Glass Surface<br />
Slit Glass<br />
If black streaks or<br />
dirt appears in<br />
copies when using<br />
the optional<br />
document<br />
processor, clean the<br />
slit glass with the<br />
supplied cleaning<br />
cloth. The message<br />
Clean the slit glass.<br />
may be displayed if<br />
the slit glass<br />
requires cleaning.<br />
Clean the slit glass.<br />
03/14<br />
Hold<br />
1.Open the document processor.<br />
2.Clean the surface of the slit glass located<br />
on the left side with the supplied dry cloth.<br />
3.Close the document processor<br />
and open the document processor cover.<br />
4.Lift the reverse unit and clean the slit<br />
glass and the white sheet with a dry cloth.<br />
5.Set the reverse unit<br />
and close the document processor cover.<br />
6.Press [End].<br />
Note that dirty glass and sheet may cause<br />
black streaks to appear in the output.<br />
Status 10/5/2006 10:10<br />
End<br />
IMPORTANT: Lightly wipe the slit glass with a dry cloth. To remove<br />
adhesive material or ink, apply alcohol to a cloth and wipe lightly. Do not<br />
use water, thinner, or organic solvents.<br />
1 Remove the cloth from the cleaning cloth compartment.<br />
2 Open the document processor<br />
and wipe the slit glass (a).<br />
a<br />
3 Press [End].<br />
OPERATION GUIDE 5-3
Maintenance<br />
Separator<br />
Clean the separator regularly (at least monthly) to ensure optimum output<br />
quality.<br />
1<br />
Open the front cover.<br />
2 Remove cleaning brush (blue<br />
colored).<br />
3 Pull up left cover 1 lever and<br />
open left cover 1.<br />
4 As shown in the figure, clean<br />
dirt from the separator by<br />
moving the brush from side to<br />
side along the separator.<br />
5-4 OPERATION GUIDE
Maintenance<br />
5 Put away the cleaning brush,<br />
press the specified position of<br />
the front cover and left cover 1<br />
to close.<br />
Transfer Roller<br />
1<br />
Open the front cover.<br />
2<br />
Remove the cleaning brush<br />
(blue colored).<br />
3<br />
Pull up left cover 1 lever and<br />
open left cover 1.<br />
OPERATION GUIDE 5-5
Maintenance<br />
4 As shown in the figure, clean<br />
dirt from the transfer roller by<br />
moving the brush from side to<br />
side along the roller while<br />
rotating the roller by turning<br />
the gear at the left end of the<br />
roller.<br />
5 Put away the cleaning brush,<br />
press the specified position of<br />
the front cover and left cover 1<br />
to close.<br />
5-6 OPERATION GUIDE
Maintenance<br />
Toner Container and Waste Toner Box Replacement<br />
When the touch panel displays Add toner, replace the toner without delay<br />
although several more copies are still possible. When replacing the toner<br />
container, replace the waste toner box as well.<br />
Every time you replace the toner container, be sure to clean the parts as<br />
instructed below. Dirty parts may deteriorate output quality.<br />
CAUTION: Do not attempt to incinerate the toner container or the waste<br />
toner box. Dangerous sparks may cause burns.<br />
CAUTION: Do not attempt to force open or destroy the toner container or<br />
the waste toner box.<br />
1<br />
Open the front cover.<br />
2<br />
Push up the toner container<br />
stopper and slowly pull out the<br />
used toner container until its<br />
handle is visible.<br />
WARNING: High voltage parts inside. Handle with care because<br />
there is a danger of electric shock.<br />
CAUTION: Do not pull the toner container all the way out lest it should<br />
drop.<br />
OPERATION GUIDE 5-7
Maintenance<br />
3 Keep the stopper up, hold the<br />
toner container handle and<br />
take out slowly.<br />
4 Unwrap a new toner container<br />
and tap its top 5-6 times.<br />
5<br />
Shake the toner container at<br />
least 10 times horizontally to<br />
distribute the toner evenly.<br />
6<br />
Insert the toner container<br />
slowly while holding its handle.<br />
5-8 OPERATION GUIDE
Maintenance<br />
7 Using both hands, push in the<br />
toner container until it is<br />
locked.<br />
8 Remove the waste toner box.<br />
9<br />
Seal the opening of the waste<br />
toner box.<br />
CAUTION: Do not attempt to incinerate the toner container or the waste<br />
toner box. Dangerous sparks may cause burns.<br />
CAUTION: Do not attempt to force open or destroy the toner container or<br />
the waste toner box.<br />
10<br />
Install a new waste toner box.<br />
OPERATION GUIDE 5-9
Maintenance<br />
11 Remove the cleaning brush<br />
(blue colored).<br />
12 Pull up left cover 1 lever and<br />
open left cover 1.<br />
13<br />
As shown in the figure, clean<br />
dirt from the separator by<br />
moving the brush from side to<br />
side along the separator.<br />
14<br />
As shown in the figure, clean<br />
dirt from the transfer roller by<br />
moving the brush from side to<br />
side along the roller while<br />
rotating the roller by turning<br />
the gear at the left end of the<br />
roller.<br />
5-10 OPERATION GUIDE
Maintenance<br />
15 Put away the cleaning brush<br />
after the cleaning. Close the<br />
front cover and left cover 1 by<br />
pressing specified part.<br />
16 Open the MP Tray and remove the filters F1 and F2.<br />
F1<br />
F2<br />
17 Clean the filters using a vacuum cleaner or the like.<br />
CAUTION: Do not wash the filters with water. Do not use the attached<br />
cleaning brush.<br />
OPERATION GUIDE 5-11
Maintenance<br />
18 Put the filters back in place and close the MP Tray.<br />
NOTE: Return the exhausted toner container and waste toner box to<br />
your dealer or service representative. The collected toner container and<br />
waste toner box will be recycled or disposed in accordance with the<br />
relevant regulations.<br />
5-12 OPERATION GUIDE
6 Troubleshooting<br />
This chapter explains how to solve problems with the<br />
machine.<br />
• Solving Malfunctions .................................................... 6-2<br />
• Responding to Error Messages.................................... 6-4<br />
• Clearing Paper Jams.................................................. 6-10<br />
OPERATION GUIDE 6-1
Troubleshooting<br />
Solving Malfunctions<br />
The table below provides general guidelines for problem solving.<br />
If a problem occurs with your machine, look into the checkpoints and<br />
perform procedures indicated on the following pages. If the problem<br />
persists, contact your Service Representative.<br />
Symptom Checkpoints Corrective Actions<br />
Reference<br />
Page<br />
The operation panel<br />
does not respond<br />
when the main power<br />
switch is turned on.<br />
Is the machine plugged in<br />
Plug the power cord into an AC<br />
outlet.<br />
—<br />
Pressing the Start key<br />
does not produce<br />
copies.<br />
Is there a message on the<br />
touch panel<br />
Determine appropriate response to<br />
the message and respond<br />
accordingly.<br />
6-4<br />
Blank sheets are<br />
ejected.<br />
Are the originals loaded<br />
correctly<br />
When placing originals on the<br />
platen, place them face-down and<br />
align them with the original size<br />
indicator plates.<br />
2-25<br />
When placing originals in the<br />
optional document processor,<br />
place them face-up.<br />
2-27<br />
Printouts are too light.<br />
Is the machine in Auto<br />
Density mode<br />
Set the correct density level for<br />
auto density.<br />
—<br />
Is the machine in Manual<br />
Density mode<br />
Use [Image Quality] to set the<br />
correct density level.<br />
3-8<br />
When changing the default density<br />
level, adjust the density manually<br />
and choose the desired level.<br />
—<br />
Is the toner distributed evenly<br />
within the toner container<br />
Shake the toner container from<br />
side to side about 10 times.<br />
5-7<br />
Is there a message indicating<br />
the addition of toner<br />
Replace the toner container. 5-7<br />
Is the paper damp Replace the paper with new paper. 2-25<br />
Printouts are too dark.<br />
Is the machine in Auto<br />
Density mode<br />
Set the correct density level for<br />
auto density.<br />
—<br />
Is the machine in Manual<br />
Density mode<br />
Use [Image Quality] to set the<br />
correct density level.<br />
3-9<br />
When changing the default density<br />
level, adjust the density manually<br />
and choose the desired level.<br />
—<br />
6-2 OPERATION GUIDE
Troubleshooting<br />
Symptom Checkpoints Corrective Actions<br />
Reference<br />
Page<br />
Printouts are not<br />
clear.<br />
Did you choose appropriate<br />
image quality for the original<br />
Select appropriate image quality. 3-9<br />
Printouts are dirty.<br />
Is the platen or the document<br />
processor dirty<br />
Clean the platen or the document<br />
processor.<br />
5-2<br />
Is the transfer roller dirty Brush the transfer roller clean. 5-5<br />
Images are skewed.<br />
Are the originals placed<br />
correctly<br />
When placing originals on the<br />
platen, align them with the original<br />
size indicator plates.<br />
2-27<br />
When placing originals in the<br />
optional document processor, align<br />
the original width guides securely<br />
before placing the originals.<br />
2-27<br />
Is the paper loaded<br />
correctly<br />
Check the position of the paper<br />
width guides.<br />
2-28<br />
Papers often jam.<br />
Is the paper loaded<br />
correctly<br />
Load the paper correctly. 2-16<br />
Is the paper of the supported<br />
type Is it in good condition<br />
Remove the paper, turn it over, and<br />
reload it.<br />
2-16<br />
Is the paper curled, folded or<br />
wrinkled<br />
Are there any loose scraps or<br />
jammed paper in the<br />
machine<br />
Replace the paper with new paper. 2-16<br />
Remove any jammed paper. 6-10<br />
Printouts from the<br />
document processor<br />
have black lines.<br />
Are the slit glasses dirty Clean the slit glasses. 5-3<br />
Printouts are<br />
wrinkled.<br />
Is the paper separator of the<br />
paper feed unit dirty<br />
Clean the paper separator. 5-4<br />
Cannot print. Is the machine plugged in Plug the power cord into an AC<br />
outlet.<br />
—<br />
Is the machine powered on Turn on the main power switch. 3-2<br />
Is the printer cable<br />
connected<br />
Connect the correct printer cable<br />
securely.<br />
2-3<br />
Was the machine powered<br />
on before the printer cable<br />
was connected<br />
Power on the machine after<br />
connecting the printer cable.<br />
2-3<br />
Documents are<br />
printed improperly.<br />
Is the official application<br />
software used on PC<br />
Check that the official printer driver<br />
or application software is used.<br />
—<br />
OPERATION GUIDE 6-3
Troubleshooting<br />
Responding to Error Messages<br />
Alphanumeric<br />
If the touch panel displays any of these messages, follow the<br />
corresponding procedure.<br />
Error Message Checkpoints Corrective Actions<br />
Reference<br />
Page<br />
Acceptable staple<br />
count exceeded.<br />
Is the acceptable staple<br />
count exceeded For details,<br />
refer to the Operation Guide<br />
of the job separator,<br />
document finisher or 3,000-<br />
sheet capacity document<br />
finisher.<br />
Press [Continue] to print without<br />
using Staple.<br />
Press [Cancel] to cancel the job.<br />
—<br />
Add paper in cassette<br />
#.<br />
Is the indicated cassette out<br />
of paper<br />
Load paper. 2-15<br />
Add paper in Multi<br />
Purpose tray.<br />
Are the papers of the<br />
selected size loaded in the<br />
MP Tray<br />
Load the paper in the MP Tray<br />
which is of the size and type<br />
indicated on the touch panel.<br />
2-18<br />
Add staples.<br />
Has any of the built-in<br />
finisher, center binding<br />
finisher, document finisher or<br />
3,000-sheet capacity<br />
document finisher run out of<br />
staples<br />
If the staples are depleted, the<br />
machine will stop and the location<br />
of staple depletion will be indicated<br />
on the touch panel.<br />
Leave the machine on and follow<br />
the instruction to replace the staple<br />
case. Press [Continue] to print<br />
without using Staple.<br />
Press [Cancel] to cancel the job.<br />
4-6<br />
Add toner. – Replace the toner container. 5-7<br />
An error has<br />
occurred.<br />
– Internal error has occurred.<br />
Turn the main power switch off and<br />
on.<br />
If error occurs repeatedly, make a<br />
note of the error code displayed on<br />
the touch panel, and contact your<br />
Service Representative.<br />
—<br />
Box limit exceeded. – Document box is full, and no<br />
further storage is available. This<br />
job is canceled. Press [End].<br />
– Repeat Copy box is full, and no<br />
further repeat copy is available.<br />
Press [Continue] to print without<br />
using Repeat Copy.<br />
Press [Cancel] to cancel the job.<br />
—<br />
—<br />
6-4 OPERATION GUIDE
Troubleshooting<br />
Error Message Checkpoints Corrective Actions<br />
Reference<br />
Page<br />
Cannot connect to<br />
Authentication<br />
Server.<br />
– Press [End] and check the<br />
following items:<br />
• Registration to Authentication<br />
Serve<br />
• Password and computer<br />
address for Authentication<br />
Server<br />
• Connection of Network<br />
—<br />
Cannot duplex print<br />
this paper type.<br />
Did you select a paper size/<br />
type that cannot be duplex<br />
printed<br />
Select the available paper size/<br />
type.<br />
Press [Continue] to print without<br />
using Duplex.<br />
3-13<br />
Cannot execute this<br />
job.<br />
– This job is canceled because it is<br />
restricted by Job Accounting.<br />
Press [End].<br />
—<br />
Cannot offset this<br />
paper type.<br />
Did you select a paper size<br />
(A3, B4, A5-R, B6-R, Folio,<br />
Ledger, Statement and 8K)<br />
that cannot be offset<br />
Select the available paper size.<br />
Press [Continue] to print without<br />
using Offset.<br />
3-16<br />
Cannot punch this<br />
paper type.<br />
Did you select a paper size/<br />
type that cannot be<br />
punched<br />
Select the available paper size/<br />
type.<br />
Press [Continue] to print without<br />
using Punch.<br />
—<br />
Cannot staple this<br />
paper type.<br />
Did you select a paper size/<br />
type that cannot be stapled<br />
Select the available paper size/<br />
type.<br />
Press [Continue] to print without<br />
using Staple.<br />
—<br />
Check the cover.<br />
Is there any cover which is<br />
open<br />
Close the cover indicated on the<br />
touch panel.<br />
—<br />
Check the document<br />
processor.<br />
Is the document processor<br />
open<br />
Close the document processor. —<br />
Is the top cover of the<br />
document processor open<br />
Close the top cover of the<br />
document processor.<br />
6-21<br />
Check the finisher.<br />
Is the built-in finisher or the<br />
document finisher set<br />
correctly<br />
Set the built-in finisher or the<br />
document finisher correctly. For<br />
details, refer to the respective<br />
Operation Guides.<br />
—<br />
Is the built-in finisher tray set<br />
correctly<br />
Set the built-in finisher tray<br />
correctly.<br />
—<br />
Clean the slit glass. – Clean the slit glass using the<br />
attached cleaning cloth.<br />
5-3<br />
OPERATION GUIDE 6-5
Troubleshooting<br />
Error Message Checkpoints Corrective Actions<br />
Reference<br />
Page<br />
Empty the punch<br />
waste box.<br />
– The punch waste box of the<br />
document finisher or 3,000-sheet<br />
capacity document finisher is full.<br />
Follow the instruction on the touch<br />
panel to empty the punch waste<br />
box.<br />
—<br />
Failed to specify Job<br />
Accounting.<br />
Failed to store job<br />
retention data.<br />
– This job is canceled. Press [End]. —<br />
– This job is canceled. Press [End]. —<br />
FAX box limit<br />
exceeded.<br />
– FAX box is full, and no further<br />
storage is available. This job is<br />
canceled. Press [End].<br />
—<br />
Finisher tray is full of<br />
paper.<br />
Is the acceptable storage<br />
capacity exceeded for the<br />
document finisher tray<br />
Remove paper from the document<br />
finisher tray.<br />
If printing can be restarted, the<br />
touch panel display will prompt you<br />
to press [Continue]. Then press<br />
[Continue].<br />
—<br />
Folding tray is full of<br />
paper.<br />
Is the acceptable storage<br />
capacity exceeded for the<br />
folding tray of the 3,000-<br />
sheet capacity document<br />
finisher<br />
Remove paper from the folding<br />
tray.<br />
—<br />
Hard Disk error. – This job is canceled. Press [End]. —<br />
Incorrect Account ID. – The Account ID does not match.<br />
Check the registered Account ID.<br />
—<br />
Incorrect Login User<br />
Name or Password.<br />
– Enter correct login user name or<br />
password.<br />
—<br />
Job Accounting<br />
restriction exceeded.<br />
Is the acceptable printing<br />
count restricted by Job<br />
Accounting exceeded<br />
The printing count exceeded the<br />
acceptable count restricted by Job<br />
Accounting. Cannot print any<br />
more. This job is canceled. Press<br />
[End].<br />
—<br />
Job Separator is full<br />
of paper.<br />
Is the maximum capacity of<br />
the job separator exceeded<br />
Remove paper from the job<br />
separator and press [Continue] to<br />
resume printing.<br />
—<br />
KPDL Error. – PostScript error has occurred.<br />
Job is canceled. Press [End].<br />
—<br />
Mailbox tray is full of<br />
paper.<br />
– Remove paper from the mailbox<br />
tray.<br />
—<br />
6-6 OPERATION GUIDE
Troubleshooting<br />
Error Message Checkpoints Corrective Actions<br />
Memory card error. – Memory card is removed while it is<br />
accessed. Insert the memory card.<br />
An invalid memory card is inserted.<br />
Insert the correct memory card.<br />
Memory card error. Unable to<br />
continue the job. This job is<br />
canceled. Press [End].<br />
Memory is full. – Unable to continue the job as the<br />
memory is used up.<br />
Press [Continue] to print the<br />
scanned pages. The print job<br />
cannot be processed completely.<br />
Press [Cancel] to cancel the job.<br />
Paper jam. – If a paper jam occurs, the machine<br />
will stop and the location of the jam<br />
will be indicated on the touch<br />
panel. Leave the machine on and<br />
follow the instruction to remove the<br />
jammed paper.<br />
Print overrun. – Warning. Low printer memory. The<br />
job was paused. Press [Continue]<br />
to resume the job.<br />
Reference<br />
Page<br />
—<br />
—<br />
—<br />
—<br />
6-10<br />
—<br />
Removable memory<br />
error.<br />
Removable memory<br />
was removed.<br />
– This job is canceled. Press [End]. —<br />
– Press [End]. —<br />
Replace all originals<br />
and press [Continue].<br />
Replace the waste<br />
toner box.<br />
– Remove originals from the<br />
document processor, put them in<br />
the original order, and place them.<br />
Press [Continue] to resume<br />
printing.<br />
Press [Cancel] to cancel the job.<br />
– The waste toner box is full.<br />
Replace the waste toner box.<br />
2-27<br />
5-7<br />
Reset all originals in<br />
document processor.<br />
Is there any original left in the<br />
document processor<br />
Remove originals from the<br />
document processor.<br />
—<br />
OPERATION GUIDE 6-7
Troubleshooting<br />
Error Message Checkpoints Corrective Actions<br />
Reference<br />
Page<br />
Scanner memory is<br />
full.<br />
– Scanning cannot be performed by<br />
insufficient memory of scan. Job is<br />
canceled. Press [End].<br />
—<br />
Is the acceptable scanning<br />
count exceeded<br />
Press [Continue] to print, send or<br />
store the scanned pages. Press<br />
[Cancel] to cancel printing, sending<br />
or storing.<br />
—<br />
Send Error. – Job is canceled. Press [End]. —<br />
Set the folding tray.<br />
Is the folding tray correctly<br />
set to the 3,000-sheet<br />
capacity document finisher<br />
Set the folding tray correctly to the<br />
3,000-sheet capacity document<br />
finisher. For details, refer to the<br />
Operation Guide of the 3,000-<br />
sheet capacity document finisher.<br />
—<br />
Set the folding unit.<br />
Is the folding unit correctly<br />
set to the 3,000-sheet<br />
capacity document finisher<br />
Set the folding unit correctly to the<br />
3,000-sheet capacity document<br />
finisher. For details, refer to the<br />
Operation Guide of the 3,000-<br />
sheet capacity document finisher.<br />
—<br />
Set the punch waste<br />
box.<br />
Set the waste toner<br />
box.<br />
– The punch waste box of the<br />
document finisher or 3,000-sheet<br />
capacity document finisher is not<br />
set correctly.<br />
Follow the instruction on the touch<br />
panel to set the punch waste box<br />
correctly.<br />
– The waste toner box is not set<br />
correctly. Set it correctly.<br />
—<br />
5-7<br />
Staple error. – If a staple error occurs, the<br />
machine will stop and the<br />
corrective action will be indicated<br />
on the touch panel.<br />
Leave the machine on and follow<br />
the instruction to take an<br />
appropriate action.<br />
Staple jam. – If a staple jam occurs, the machine<br />
will stop and the location of the jam<br />
will be indicated on the touch<br />
panel.<br />
Leave the machine on and follow<br />
the instruction to remove the<br />
jammed staple.<br />
—<br />
4-8<br />
The memory card is<br />
not formatted.<br />
Is the memory card<br />
formatted<br />
Format the memory card. —<br />
6-8 OPERATION GUIDE
Troubleshooting<br />
Error Message Checkpoints Corrective Actions<br />
Reference<br />
Page<br />
The phone receiver is<br />
off the hook.<br />
– Put down the receiver. —<br />
The removal memory<br />
is not formatted.<br />
Is the removable memory<br />
formatted by this machine<br />
Use the removable memory<br />
formatted by this machine.<br />
—<br />
The source file is not<br />
found.<br />
Top tray of the<br />
machine is full of<br />
paper.<br />
– The specified file is not found. This<br />
job is canceled. Press [End].<br />
– Remove paper from the top tray,<br />
and press [Continue] to resume the<br />
job.<br />
—<br />
—<br />
Tray # is full of paper.<br />
Is the acceptable storage<br />
capacity exceeded for any of<br />
the trays A to C of the 3,000-<br />
sheet capacity document<br />
finisher<br />
Remove paper from the tray #<br />
indicated on the touch panel.<br />
If the tray B or C is full of paper,<br />
press [Continue] to resume<br />
printing.<br />
—<br />
Warning low memory. – Further scanning cannot be<br />
performed by insufficient memory<br />
Press [Continue] to print the<br />
scanned pages. Press [Cancel] to<br />
cancel the printing job<br />
—<br />
OPERATION GUIDE 6-9
Troubleshooting<br />
Clearing Paper Jams<br />
If a paper jam<br />
occurs, the touch<br />
panel will display<br />
Paper misfeed and<br />
the machine will<br />
stop. Refer to these<br />
procedures to<br />
remove the jammed<br />
paper.<br />
Job No.: 0001 Job Name: JOB001<br />
User Name: ABCDEF<br />
JAM***<br />
Paper jam.<br />
02/08<br />
1.Open left cover 1 of the machine<br />
and remove any paper that is inside.<br />
2.Open cassette 1.<br />
3.Remove the paper.<br />
4.Reset the cassette<br />
and close the cover.<br />
Hold<br />
Status 10/5/2006 10:10<br />
Jam Location Indicators<br />
If a paper jam occurs, the location of the jam will be displayed by the<br />
alphabet, which corresponds to the specific component in the machine as<br />
the following figure with clearing instructions.<br />
JOB001<br />
Job No.: Job Name: User Name:<br />
0001 ABCDEF<br />
Paper jam.<br />
1.Open left cover 1 of the machine.<br />
JAM***<br />
2.Remove the paper.<br />
3.Hold the handle to lift<br />
the duplex unit.<br />
4.Remove the paper.<br />
5.Close the cover.<br />
02/05<br />
1<br />
H<br />
1<br />
1<br />
Hold<br />
1<br />
1<br />
1<br />
E<br />
G<br />
Status 10/5/2006 10:10<br />
1<br />
E<br />
D<br />
D<br />
1<br />
1<br />
A<br />
F<br />
B<br />
1 F<br />
C<br />
1<br />
C<br />
Paper Jam<br />
Location Indicator<br />
Paper Jam Location<br />
Reference Page<br />
A Cassette 1 6-11<br />
B Cassette 2 6-13<br />
C Cassette 3 or 4 (Option) 6-14<br />
D MP Tray 6-15<br />
E Inside the left cover 1, 2 or 3 6-15<br />
F Duplex unit 6-16<br />
G Job separator output port (Option) —<br />
6-10 OPERATION GUIDE
Troubleshooting<br />
Paper Jam<br />
Location Indicator<br />
Paper Jam Location<br />
Reference Page<br />
H Document processor (Option) 6-21<br />
I Document finisher (Option) 6-22<br />
Precautions of the Paper Jam<br />
After you remove the jam, the machine will warm up again and the error<br />
message will be cleared. The machine resumes with the page which jam<br />
has occurred.<br />
• Do not reuse jammed papers.<br />
• If the paper tears during removal, be sure to remove any loose scraps<br />
of paper from the machine inside. Scraps of paper left in the machine<br />
could cause subsequent jamming.<br />
• Discard the paper that jammed in the optional document finisher or<br />
3,000-sheet capacity document finisher. The page which jam has<br />
occurred will be printed again.<br />
WARNING: High voltage is present in the charger section. Take<br />
sufficient care when working in this area, as there is a danger of electrical<br />
shock.<br />
CAUTION: The fixing unit is extremely hot. Take sufficient care when<br />
working in this area, as there is a danger of getting burned.<br />
Cassette 1<br />
Follow the steps below to clear paper jams in cassette 1.<br />
1<br />
Pull up left cover 1 lever and<br />
open left cover 1.<br />
OPERATION GUIDE 6-11
Troubleshooting<br />
2 Remove the jammed paper.<br />
3<br />
Pull out cassette 1.<br />
4 Remove the jammed paper.<br />
If the paper tears, remove<br />
every loose scrap from inside<br />
the machine.<br />
5<br />
Push cassette 1 back in place securely.<br />
6 Press the specified position to<br />
close left cover 1.<br />
6-12 OPERATION GUIDE
Troubleshooting<br />
Cassette 2<br />
Follow the steps below to clear paper jams in cassette 2.<br />
1<br />
Open left cover 2.<br />
2<br />
Remove the jammed paper.<br />
3<br />
Pull out cassette 2.<br />
4<br />
Remove the jammed paper.<br />
If the paper tears, remove<br />
every loose scrap from inside<br />
the machine.<br />
5<br />
Push cassette 2 back in place securely.<br />
OPERATION GUIDE 6-13
Troubleshooting<br />
6 Close left cover 2.<br />
Optional Cassettes 3 and 4<br />
Follow the steps below to clear paper jams in cassettes 3 or 4 when using<br />
the optional paper feeder or 3,000-sheet capacity paper feeder.<br />
1 Open left cover 3.<br />
2<br />
Remove the jammed paper.<br />
If the paper tears, remove<br />
every loose scrap from inside<br />
the machine.<br />
3<br />
Pull out the cassette in use.<br />
6-14 OPERATION GUIDE
Troubleshooting<br />
4 Remove the jammed paper.<br />
5<br />
Push the cassette back in place securely.<br />
6<br />
Close left cover 3.<br />
MP Tray<br />
Follow the steps below to clear paper jams in the MP Tray.<br />
1<br />
Remove all papers from the<br />
MP Tray.<br />
2<br />
If a paper is jammed inside, lift<br />
the lever to remove the paper.<br />
Inside the Left Covers 1, 2 and 3<br />
Follow the steps below to clear paper jams inside left cover 1, 2 or 3 when<br />
using the optional paper feeder or 3,000-sheet capacity paper feeder.<br />
OPERATION GUIDE 6-15
Troubleshooting<br />
1 Open the left cover where the<br />
paper is jammed inside.<br />
2<br />
Remove the jammed paper.<br />
If the paper tears, remove<br />
every loose scrap from inside<br />
the machine.<br />
3<br />
Close the left cover.<br />
Duplex Unit<br />
Follow the steps below to clear paper jams in the duplex unit.<br />
1<br />
Pull up left cover 1 lever and<br />
open the left cover.<br />
2 Remove the jammed paper.<br />
6-16 OPERATION GUIDE
Troubleshooting<br />
3 Lift the duplex unit and remove<br />
the jammed paper.<br />
4<br />
Press the specified position to<br />
close left cover 1.<br />
Duplex Unit and Cassette 1<br />
Follow the steps below to clear paper jams in duplex unit and cassette 1.<br />
1<br />
Pull up left cover 1 handle and<br />
open left cover.<br />
2<br />
Remove the jammed paper.<br />
OPERATION GUIDE 6-17
Troubleshooting<br />
3 Lift duplex unit and remove the<br />
jammed paper.<br />
4<br />
Pull out cassette 1 and remove the jammed paper.<br />
If the paper tears, remove<br />
every loose scrap from inside<br />
the machine.<br />
5<br />
Push cassette 1 back in place securely.<br />
6 Press the specified position to<br />
close left cover 1.<br />
Paper Feed Unit<br />
Follow the steps below to clear paper jams in the paper feed unit.<br />
1<br />
Open left cover 1.<br />
6-18 OPERATION GUIDE
Troubleshooting<br />
2 Remove the jammed paper.<br />
If the paper tears, remove<br />
every loose scrap from inside<br />
the machine.<br />
3 Open front cover.<br />
4<br />
Turn green knob (A1)<br />
clockwise.<br />
5<br />
Remove the jammed paper.<br />
If you cannot remove the<br />
paper, proceed with the next<br />
step.<br />
OPERATION GUIDE 6-19
Troubleshooting<br />
6 Pull out paper feed unit (A2).<br />
7<br />
Open paper feed unit cover<br />
(A3) and remove the jammed<br />
paper.<br />
8<br />
If the paper is torn, pull paper<br />
feed unit (A2) all the way out<br />
and lift it slightly to remove the<br />
paper.<br />
9 Remove the jammed paper.<br />
If you cannot remove the<br />
paper, proceed with the next<br />
step.<br />
10<br />
Push paper feed unit (A2) back in place, and close front cover.<br />
6-20 OPERATION GUIDE
Troubleshooting<br />
11 Press the specified position to<br />
close left cover 1.<br />
Optional Document Processor<br />
Follow the steps below to clear paper jams in the optional document<br />
processor.<br />
1 Remove the original from the<br />
original tray.<br />
2<br />
Open the document processor<br />
top cover.<br />
3<br />
Remove the jammed original.<br />
If the original tears, remove<br />
every loose scrap from inside<br />
the machine.<br />
OPERATION GUIDE 6-21
Troubleshooting<br />
If it is difficult to remove the<br />
original, turn the feed dial. The<br />
original will be pushed to a<br />
place where it is easier to<br />
remove.<br />
4<br />
Lift reverse unit.<br />
5<br />
Remove the jammed original.<br />
If the original tears, remove every loose scrap from inside the machine.<br />
6 Replace reverse unit, and close the document processor top cover.<br />
Optional Document Finisher<br />
7 Reload the originals on the document processor tray.<br />
If a misfeed occurs in the optional document finisher or 3,000-sheet<br />
capacity document finisher, refer to the respective Operation Guides to<br />
clear the jam.<br />
6-22 OPERATION GUIDE
Appendix<br />
• Character Entry Method .................................. Appendix-2<br />
• Specifications .................................................. Appendix-6<br />
OPERATION GUIDE<br />
Appendix-1
Appendix<br />
Character Entry Method<br />
To enter characters for a name, use the on-display keyboard in the touch<br />
panel following the steps as explained below.<br />
NOTE: As keyboard layout, QWERTY, QWERTZ and AZERTY are<br />
available same as PC keyboard. Press the System Menu, [Common<br />
Settings] and then [Change] of Key board to choose desired layout.<br />
QWERTY layout is used here as an example. You may use other layout<br />
following the same steps.<br />
Entry Screens<br />
Lower-case Letter Entry Screen<br />
Path<br />
2<br />
1<br />
Use the keyboard to enter.<br />
Limit: 126 characters<br />
Input: 0 characters<br />
3<br />
Backspace<br />
4<br />
5<br />
6<br />
Upper-case Lower-case No./Symbol Space<br />
Cancel<br />
OK<br />
7 8 9 10 11<br />
No. Display/Key Description<br />
1 Display Displays entered characters.<br />
2 Limit Display Displays maximum number of characters.<br />
3 Cursor Key Press to move the cursor on the display.<br />
4 [Back space] Press to delete a character next to the left of<br />
the cursor.<br />
5 Keyboard Press the character to enter.<br />
6 [Upper-case] Press to use upper-case letters.<br />
7 [Lower-case] Press to use lower-case letters,<br />
8 [No./Symbol] Press to enter numbers and symbols.<br />
9 [Space] Press to insert space.<br />
Appendix-2<br />
OPERATION GUIDE
Appendix<br />
No. Display/Key Description<br />
10 [Cancel] Press to cancel entered character and return to<br />
the screen before the entry.<br />
11 [OK] Press to finalize entry and return to the screen<br />
before the entry.<br />
Upper-case Letter Enter Screen<br />
Path<br />
Use the keyboard to enter.<br />
Limit: 126 characters<br />
Input: 0 characters<br />
Backspace<br />
Upper-case Lower-case No./Symbol Space<br />
Cancel<br />
OK<br />
Number/Symbol Enter Screen<br />
Path<br />
Use the keyboard to enter.<br />
Limit: 126 characters<br />
Input: 0 characters<br />
Backspace<br />
12<br />
1/4<br />
Upper-case Lower-case No./Symbol Space<br />
Cancel<br />
OK<br />
No. Display/Key Description<br />
12 []/[] To enter the number or symbol not shown in<br />
the keyboard, press the cursor key and scroll<br />
the screen to view other numbers or symbols to<br />
enter.<br />
OPERATION GUIDE<br />
Appendix-3
Appendix<br />
Entering Characters<br />
Follow the steps as below to enter List A-1 for example.<br />
1<br />
Press [Upper-case].<br />
2<br />
Press [L]. The letter<br />
L is shown on the<br />
display.<br />
Path<br />
Use the keyboard to enter.<br />
L<br />
Limit: 126 characters<br />
Input: 1 characters<br />
Backspace<br />
Upper-case Lower-case No./Symbol Space<br />
Cancel<br />
OK<br />
3<br />
Press [Lower-case].<br />
4<br />
Press [i], [s], [t] and<br />
[Space].<br />
Path<br />
Use the keyboard to enter.<br />
List<br />
Limit: 126 characters<br />
Input: 4 characters<br />
Backspace<br />
Upper-case Lower-case No./Symbol Space<br />
Cancel<br />
OK<br />
5 Press [Upper-case].<br />
6<br />
Press [A].<br />
7<br />
Press [No./Symbol].<br />
8 Press [] or [] repeatedly to view the keyboard containing [-] and [1].<br />
Appendix-4<br />
OPERATION GUIDE
Appendix<br />
9 Press [-] and [1].<br />
Path<br />
Use the keyboard to enter.<br />
List A-1<br />
Limit: 126 characters<br />
Input: 8 characters<br />
Backspace<br />
1/4<br />
Upper-case Lower-case No./Symbol Space<br />
Cancel<br />
OK<br />
10<br />
Check that the entry is correct. Press [OK].<br />
OPERATION GUIDE<br />
Appendix-5
Appendix<br />
Specifications<br />
NOTE: Specifications are subject to change without notice.<br />
Machine<br />
Copying System<br />
Originals Supported<br />
Indirect Electrostatic System<br />
Sheets, Books, 3-dimensional objects (maximum original size: A3/Ledger)<br />
Copy Sizes<br />
Cassettes 1 and 2 Ledger, Legal, Oficio II, 8.5×13.5", Letter, Letter-R, Statement-R, A3, B4, A4,<br />
A4-R, B5, B5-R, A5-R, Folio, 8K, 16K, 16K-R<br />
MP Tray<br />
Duplexing<br />
Non-Copying Margin<br />
Ledger, Legal, Oficio II, 8.5×13.5", Letter, Letter-R, Executive, Statement-R,<br />
A3, B4, A4, A4-R, B5, B5(ISO), B5-R, A5-R, B6-R, A6-R, Oufuku Hagaki,<br />
Hagaki, Envelope DL, Envelope C5, Envelope C4, Comm.#10, Comm.#9,<br />
Comm.#6-3/4, Monarch, Youkei 2, Youkei 4, Folio, 8K, 16K, 16K-R<br />
A3 to A5-R, Ledger to Statement-R<br />
0.5 to 5.5 mm maximum<br />
Paper Supply Capacity<br />
Cassettes 1 and 2 500 sheets (80 g/m 2 )<br />
MP Tray 200 sheets (80 g/m 2 )<br />
Output Tray Capacity<br />
Warm-up Time<br />
Memory<br />
Hard Disk<br />
250 sheets (80 g/m 2 ), 150 sheets (80 g/m 2 , with built-in finisher)<br />
30 sec.<br />
Time for recovery from Sleep: 15 sec.<br />
(at room temperature 22ºC/71.6ºF, 60% RH)<br />
512 MB as standard<br />
40 GB<br />
Operating Environment<br />
Temperature<br />
10 to 32.5ºC/50 to 90.5ºF<br />
Humidity 15 to 80%<br />
Altitude<br />
Illumination<br />
Power Source<br />
Dimensions (W) × (D) × (H)<br />
Weight<br />
Footprint<br />
2,500 m maximum<br />
1,500 lux maximum<br />
AC 120 V 60 Hz 11.5 A / AC 220 to 240 V 50 Hz 6.3 A<br />
29 9/16 × 25 7/16 × 29 5/16 " / 599 × 646 × 745 mm<br />
187 lbs / 85 kg<br />
29 5/8 × 25 7/16 " (with MP Tray)<br />
753 × 646 mm (with MP Tray)<br />
Appendix-6<br />
OPERATION GUIDE
Appendix<br />
Copier<br />
Copying Speed (Platen)<br />
30 ppm model A3/Ledger: 20 sheets/min<br />
B4/Legal: 20 sheets/min<br />
A4/Letter: 30 sheets/min<br />
A4-R/Letter-R: 22 sheets/min<br />
B5: 30 sheets/min<br />
B5-R: 20 sheets/min<br />
A5-R: 14 sheets/min<br />
A6-R: 16 sheets/min<br />
40 ppm model A3/Ledger: 23 sheets/min<br />
B4/Legal: 23 sheets/min<br />
A4/Letter: 40 sheets/min<br />
A4-R/Letter-R: 27 sheets/min<br />
B5: 40 sheets/min<br />
B5-R: 22 sheets/min<br />
A5-R: 16 sheets/min<br />
A6-R: 18 sheets/min<br />
50 ppm model A3/Ledger: 26 sheets/min<br />
B4/Legal: 26 sheets/min<br />
A4/Letter: 50 sheets/min<br />
A4-R/Letter-R: 31 sheets/min<br />
B5: 50 sheets/min<br />
B5-R: 24 sheets/min<br />
A5-R: 18 sheets/min<br />
A6-R: 18 sheets/min<br />
First Copy Time 30 ppm model: 3.9 sec. or less (1:1, A4/Letter, Platen)<br />
40/50 ppm model:3.5 sec. or less (1:1, A4/Letter, Platen)<br />
Resolution<br />
Continuous Copying<br />
Zoom Level<br />
Scanning: 600 × 600 dpi<br />
Printing: 600 × 600 dpi (Photo mode: 1800 dpi equivalent × 600 dpi)<br />
1 to 999 sheets<br />
Any level from 25 to 400% in 1% increments<br />
(with the document processor: 25 to 200%)<br />
Includes preset zoom levels<br />
OPERATION GUIDE<br />
Appendix-7
Appendix<br />
Printer<br />
Printing Speed<br />
First Print Time<br />
Resolution<br />
Operating System<br />
Interface<br />
Same as Copying Speed.<br />
Same as First Copy Time<br />
300 dpi (smoothing available), 600 dpi, Fast 1200 mode<br />
Windows 95 (OSR2), Windows 98 (Second Edition), Windows NT 4.0 (Service Pack<br />
5 or later), Windows 2000 (Service Pack 2 or later), Windows Me, Windows XP,<br />
Windows Server 2003, Apple Macintosh OS 9.x/OS X 10.x<br />
Parallel interface: 1 (based on IEEE1284)<br />
Network interface: 1<br />
USB memory slot: 3 (USB Hi-Speed) USB Interface Connector: 1 (USB Hi-Speed)<br />
Serial interface (optional): 1 (RS-232C)<br />
Controller<br />
Software<br />
PDL<br />
Emulation<br />
Fonts<br />
PRESCRIBE<br />
PCL6 (5e, XL)<br />
KPDL3 (PostScript3 compatible)<br />
KC-GL<br />
Line Printer<br />
IBM Proprinter X24E<br />
DIABLO 630<br />
EPSON LQ-850<br />
Outline font: 80 fonts (PCL6)<br />
136 fonts (KPDL3)<br />
Bitmap font: 1 font<br />
79 fonts are processed by outline font.<br />
Connectivity<br />
Plug & Play<br />
SNMP (printer MIB supported)<br />
Others<br />
EcoPrint<br />
Smoothing<br />
EcoMemory<br />
Internet<br />
Printing<br />
E-mail Printing<br />
e-MPS<br />
ON/OFF (printing speed not affected)<br />
KIR ON/OFF<br />
600 dpi mode: 2400 dpi equivalent × 600 dpi<br />
Memory saving by means of compression and decompression of raster data with<br />
software<br />
IPP/1.0<br />
Printing of received E-mail data<br />
Storing print data in HDD for print output<br />
Appendix-8<br />
OPERATION GUIDE
Appendix<br />
Scanner<br />
Ethernet<br />
Network Protocol<br />
Color/<br />
Monochrome<br />
Transmission<br />
System<br />
Resolution<br />
10BASE-T/100BASE-TX<br />
TCP/IP<br />
Both color and monochrome<br />
PC transmission SMB Scan to SMB<br />
FTP<br />
Scan to FTP<br />
E-mail transmission SMTP Scan to E-mail<br />
TWAIN scan TWAIN source<br />
600 dpi, 400 dpi, 300 dpi, 200 dpi, 200 ×100 dpi, 200 × 400 dpi<br />
(* Resolution in FAX mode included)<br />
Gradation B/W: (a) Text mode: Binary/dot 256 gradations (error diffusion)<br />
(b) Photo mode: Binary/dot 256 gradations (error diffusion)<br />
(c) Text/Photo mode: Binary/dot 256 gradations (error diffusion)<br />
(d) OCR mode: Binary/dot 2 gradations<br />
Color: RGB 256 values/dot<br />
Zoom Level<br />
Scanning Capacity<br />
File Format<br />
Same as Copier Zoom Level<br />
Max. 999 sheets (998 sheets for 2-sided originals)<br />
Monochrome TIFF (MMR), PDF (MMR)<br />
Gray TIFF (JPEDG), PDF (JPEG)<br />
Color JPEG, PDF (high compression)<br />
Scanning Speed 1-sided B/W 50 sheets/min<br />
Color 25 sheets/min<br />
2-sided B/W 25 sheets/min<br />
Color 12.5 sheets/min<br />
(A4 landscape, 600 dpi, Image quality: Text/Photo original)<br />
Document Processor (option)<br />
Original Feed<br />
Method<br />
Supported<br />
Original Types<br />
Automatic feed<br />
Sheet originals<br />
Paper Size<br />
Maximum: Ledger/A3<br />
Minimum: Statement-R/A5-R<br />
Paper Weight 45 to 160 g/m 2<br />
Loading Capacity<br />
Dimensions<br />
(W) × (D) × (H)<br />
Weight<br />
100 sheets (50 to 80 g/m 2 ) maximum<br />
Mixed original sizes (auto selection): 30 sheets (50 to 80 g/m 2 ) maximum<br />
22 3/8 × 20 11/16 × 5 7/8 "<br />
569 × 525 × 149 mm<br />
Approx. 28.6 lbs or less / Approx. 13 kg or less<br />
OPERATION GUIDE<br />
Appendix-9
Appendix<br />
Paper Feeder (option)<br />
Paper Supply<br />
Method<br />
Friction Feed (No. Sheets: 500, 80 g/m 2 , 2 cassettes)<br />
Paper Size<br />
Ledger, Legal, Oficio II, 8.5×13.5", Letter, Letter-R, Statement-R, A3, B4, A4, A4-R,<br />
B5, B5-R, A5-R, Folio, 8K, 16K, 16K-R<br />
Supported Paper Paper weight: 60 - 105 g/m 2<br />
Paper types: standard, recycled, color<br />
Dimensions<br />
(W) × (D) × (H)<br />
Weight<br />
23 5/16 × 23 1/4 × 12 3/8 "<br />
585 × 590 × 315 mm<br />
Approx. 57.2 lbs. / Approx. 26 kg<br />
3000 Sheet Paper Feeder (option)<br />
Paper Supply<br />
Method<br />
Friction retard method (No. sheets: 3000, 80 g/m 2 )<br />
Paper Size<br />
Letter, A4, B5<br />
Supported Paper Paper weight: 60 - 105 g/m 2<br />
Paper types: standard, recycled, color<br />
Dimensions<br />
(W) × (D) × (H)<br />
Weight<br />
23 5/16 × 23 5/8 × 12 3/8 "<br />
585 × 600 × 314 mm<br />
Approx. 50.6 lbs. / Approx. 23 kg<br />
Document Finisher (option)<br />
Number of Trays<br />
Paper Size<br />
(Non-stapling)<br />
Supported Paper<br />
Weight<br />
Maximum Sheets<br />
for Stapling<br />
Dimensions<br />
(W) × (D) × (H)<br />
Weight<br />
1 tray<br />
Ledger, Legal, Oficio II, 8.5×13.5", A3, B4, Folio, 8K: 500sheets<br />
Letter, Letter-R, A4, A4-R, B5, 16K: 1000 sheets<br />
Stapling: 80 g/m 2 or less<br />
Ledger, Legal, Oficio II, 8.5×13.5", A3, B4, Folio: 20 sheets<br />
Letter, Letter-R, A4, A4-R, B5: 30 sheets (Paper weight 80 g/m 2 or less)<br />
22 × 20 11/16 × 36 1/16 "<br />
558 × 526 × 916 mm<br />
Approx. 55 lbs. / Approx. 25 kg<br />
Appendix-10<br />
OPERATION GUIDE
Appendix<br />
3000 Sheet Document Finisher (option)<br />
Number of Trays<br />
3 tray<br />
Paper Size<br />
Tray A<br />
(Non-stapling)<br />
Tray B<br />
Tray C<br />
Supported Paper<br />
Weight<br />
Maximum Sheets<br />
for Stapling<br />
Dimensions<br />
(W) × (D) × (H)<br />
Weight<br />
Ledger, Legal, Oficio II, 8.5×13.5", A3, B4, Folio, 8K: 1500 sheets<br />
Letter, Letter-R, A4, A4-R, B5, 16K: 3000 sheets<br />
Ledger, Legal, Oficio II, 8.5×13.5", A3, B4, Folio, 8K: 100 sheets<br />
Letter, Letter-R, Statement-R, A4, A4-R, B5, B5-R, A5-R, B6-R, A6-R, 16K, 16K-R:<br />
200 sheets<br />
Hagaki: 200 sheets<br />
Letter, Statement-R, A4, B5, A5-R, B6-R, A6-R, 16K: 50 sheets<br />
Hagaki: 50 sheets<br />
Stapling: 90 g/m 2 or less<br />
Punching (option): 45 - 200 g/m 2<br />
Ledger, Legal, Oficio II, 8.5×13.5", A3, B4, Folio, 8K: 30 sheets,<br />
Letter, Letter-R, A4, A4-R, B5, 16K: 50 sheets (Paper weight 90 g/m 2 or less)<br />
26 15/16 × 22 3/16 × 42 13/16 "<br />
684 × 563 × 1087 mm<br />
Approx. 105.6 lbs. or less / Approx. 48 kg or less<br />
Job Separator (option)<br />
Number of Trays<br />
1 tray<br />
Maximum Sheets 100 sheets (80 g/m 2 )<br />
Paper Size<br />
Ledger, Legal, Oficio II, 8.5×13.5", Letter, Letter-R, Executive-R, Statement-R,<br />
A3, B4, A4, A4-R, B5, B5-R, A5-R, B6-R, Folio<br />
Paper Type Paper weight: 45 - 160 g/m 2<br />
Paper type: plain, recycled, color, thin<br />
Dimensions<br />
(W) × (D) × (H)<br />
Weight<br />
20 13/16 × 18 11/16 × 3 3/16 "<br />
530 × 475 × 82 mm<br />
3.3 lbs. or less / 1.5 kg or less<br />
OPERATION GUIDE<br />
Appendix-11
Appendix<br />
Built-in Finisher<br />
Number of Trays<br />
Paper Size<br />
(Non-Stapling)<br />
Supported<br />
Paper<br />
Weight<br />
Maximum Sheets<br />
for Stapling<br />
Dimensions<br />
(W) × (D) × (H)<br />
1 tray<br />
Ledger, Legal, Oficio II, 8.5×13.5", A3, B4, Folio: 250 sheets<br />
Letter, Letter-R, A4, A4-R, B5: 500 sheets<br />
60 to 80 g/m 2<br />
19.8 lbs or less / Approx. 9 kg or less<br />
Ledger, Legal, A3, B4, Folio: 20 sheets<br />
Letter, Letter-R, A4, A4-R, B5: 30 sheets<br />
(Paper weight 80 g/m 2 or less)<br />
12 3/16 × 16 1/8 × 6 5/16 "<br />
310 × 410 ×160 mm<br />
Environmental Specifications<br />
Time to Sleep mode (default setting)<br />
Duplexing<br />
Paper supply capability<br />
45 minutes (30 and 40 ppm models)<br />
90 minutes (50 ppm model)<br />
Standard<br />
100% recycled paper may be used.<br />
NOTE: Consult your dealer or service representative for recommended<br />
paper types.<br />
Appendix-12<br />
OPERATION GUIDE
Index<br />
Index<br />
Numerics<br />
3000 Sheet Document Finisher 4-9<br />
3000 Sheet Paper Feeder 4-5<br />
A<br />
About this Operation Guide xvii<br />
Adjusting Operation Panel Angle 3-5<br />
Appendix Appendix-1<br />
B<br />
Basic Operation 3-1<br />
Built-in Finisher 4-5<br />
C<br />
Canceling/Viewing/Changing Job 3-50<br />
Caution Labels viii<br />
Changing Language (Optional) 2-14<br />
Character Entry Method Appendix-2<br />
Checking Remaining Toner and Paper 3-54<br />
Cleaning 5-2<br />
Clearing Paper Jams 6-10<br />
Configuring Network (LAN Cable<br />
Connection) 2-10<br />
Connecting Cables 2-5<br />
Conventions in This Guide xviii<br />
Copying 3-7<br />
D<br />
Data Backup Kit 4-12<br />
Description of Operation Procedure xix<br />
Determining Connection Method and<br />
Preparing Cables 2-3<br />
Document Finisher 4-9<br />
Document Processor 4-4<br />
Document Table 4-10<br />
E<br />
Energy Star (ENERGY STAR ® ) Program vi<br />
F<br />
Fax Kit 4-12<br />
I<br />
Included Guides xviii<br />
Installation Precautions ix<br />
Installing Software 2-12<br />
J<br />
Job Separator 4-10<br />
K<br />
Key Counter 4-11<br />
L<br />
Laser Safety xiv<br />
Legal and Safety Information i<br />
Legal Information ii<br />
Loading Originals 2-25<br />
Loading Paper 2-15<br />
M<br />
Machine 1-2<br />
Maintenance 5-1<br />
OPERATION GUIDE<br />
Index-1
Index<br />
O<br />
Operation Panel 1-5<br />
Optional Equipment 4-1<br />
Originals and Paper Sizes xx<br />
Overview of Optional Equipment 4-2<br />
P<br />
Paper Feeder 4-4<br />
Part Names 1-1<br />
PDF Upgrade Kit (USB Key) 4-14<br />
Power On/Off 3-2<br />
Precautions for Use xi<br />
Preparation before Use 2-1<br />
Printing - Printing from Applications 3-18<br />
Printing a Document Stored in Removable<br />
USB Memory 3-48<br />
Q<br />
Quick Setup Screen 3-55<br />
R<br />
Regarding Trade Names iii<br />
Responding to Error Messages 6-4<br />
S<br />
Safety Conventions in This Guide vii<br />
Safety Instructions Regarding the<br />
Disconnection of Power xv<br />
Security Kit (USB Key) 4-13<br />
Selecting Default Screen (Optional) 2-13<br />
Sending 3-20<br />
Serial Interface 4-13<br />
Setting Date and Time 2-8<br />
Sleep and Auto Sleep 3-4<br />
Solving Malfunctions 6-2<br />
Specifications Appendix-6<br />
Specifying Destination 3-34<br />
T<br />
Toner Container and Waste Toner Box<br />
Replacement 5-7<br />
Touch Panel 1-6<br />
Touch Panel Display 3-6<br />
Troubleshooting 6-1<br />
U<br />
Using Document Box 3-37<br />
Index-2<br />
OPERATION GUIDE
E1U
UTAX GmbH, Ohechaussee 235, 22848 Norderstedt, Germany