Class Piano Workstation - Wenger Corporation
Class Piano Workstation - Wenger Corporation
Class Piano Workstation - Wenger Corporation

You also want an ePaper? Increase the reach of your titles
YUMPU automatically turns print PDFs into web optimized ePapers that Google loves.
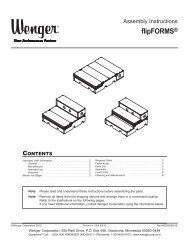
Assembly Instructions<br />
<strong>Class</strong> <strong>Piano</strong> <strong>Workstation</strong><br />
CONTENTS<br />
Warranty . . . . . . . . . . . . . . . . . . . . . . . . . . . . . . . . . . . . . . . . . . 2<br />
Important User Information. . . . . . . . . . . . . . . . . . . . . . . . . . . . 3<br />
General. . . . . . . . . . . . . . . . . . . . . . . . . . . . . . . . . . . . . . . 3<br />
Manufacturer . . . . . . . . . . . . . . . . . . . . . . . . . . . . . . . . . . 3<br />
Intended Use . . . . . . . . . . . . . . . . . . . . . . . . . . . . . . . . . . 3<br />
Before You Begin . . . . . . . . . . . . . . . . . . . . . . . . . . . . . . . . . . . 4<br />
Required Tools . . . . . . . . . . . . . . . . . . . . . . . . . . . . . . . . . . . . . 4<br />
Replacement Parts List . . . . . . . . . . . . . . . . . . . . . . . . . . . . . . 4<br />
Assembly . . . . . . . . . . . . . . . . . . . . . . . . . . . . . . . . . . . . . . . . . 5<br />
Please read and understand these Assembly Instructions before working with or using the<br />
<strong>Class</strong> <strong>Piano</strong> <strong>Workstation</strong>.<br />
If you need additional information about the <strong>Class</strong> <strong>Piano</strong> <strong>Workstation</strong>, contact <strong>Wenger</strong> <strong>Corporation</strong><br />
using the information below.<br />
©<strong>Wenger</strong> <strong>Corporation</strong> 2007 Printed in USA 03/07 Part #222E135-01<br />
<strong>Wenger</strong> <strong>Corporation</strong>, 555 Park Drive, P.O. Box 448, Owatonna, Minnesota 55060-0448<br />
Questions Call.....USA: (800) 733-0393 • International (call collect): (507) 455-4100 • www.wengercorp.com
WARRANTY<br />
The <strong>Class</strong> <strong>Piano</strong> <strong>Workstation</strong> is guaranteed free of defects in materials and workmanship for five full<br />
years.<br />
Our guarantee assures you of either a full refund or repair or replacement of the defective materials<br />
or workmanship without charge, at the discretion of our Customer Service Department.<br />
Just call a Customer Service Representative at 1-800-887-7145 and state the reason you are<br />
dissatisfied. If a product return is necessary, your representative will issue a return authorization.<br />
This is your sole remedy for breach of this warranty.<br />
Should you have a question or problem with any <strong>Wenger</strong> product, don’t hesitate to call, even if the<br />
product is past warranty. It’s important to us that all our customers be satisfied.<br />
This is the sole warranty made by <strong>Wenger</strong>. <strong>Wenger</strong> disclaims all other warranties, including the<br />
warranties of merchantability and fitness for a particular purpose, as well as all liability for incidental,<br />
consequential, special, and indirect damage. <strong>Wenger</strong> liability for direct damages shall be limited to the<br />
amount you paid for the product involved. <strong>Wenger</strong> reserves the right to make product changes without<br />
obligation to incorporate such changes into products previously sold.<br />
Some states do not allow the exclusion or limitation of damages or warranties, so the above may not<br />
apply to you. This warranty gives you specific legal rights. You may also have other rights which vary<br />
from state to state.<br />
2
IMPORTANT USER INFORMATION<br />
GENERAL<br />
Copyright © 2007 by <strong>Wenger</strong> <strong>Corporation</strong><br />
All rights reserved. No part of the contents of this manual may be reproduced, copied, or transmitted in<br />
any form or by any means including graphic, electronic, or mechanical methods or photocopying,<br />
recording, or information storage and retrieval systems without the written permission of the publisher,<br />
unless it is for the purchaser's personal use.<br />
Printed and bound in the United States of America.<br />
The information in this manual is subject to change without notice and does not represent a commitment<br />
on the part of <strong>Wenger</strong> <strong>Corporation</strong>. <strong>Wenger</strong> <strong>Corporation</strong> does not assume any responsibility for any<br />
errors that may appear in this manual.<br />
In no event will <strong>Wenger</strong> <strong>Corporation</strong> be liable for technical or editorial omissions made herein, nor for<br />
direct, indirect, special, incidental, or consequential damages resulting from the use or defect of this<br />
manual.<br />
The information in this document is not intended to cover all possible conditions and situations that might<br />
occur. The end user must exercise caution and common sense when assembling or installing <strong>Wenger</strong><br />
<strong>Corporation</strong> products. If any questions or problems arise, call <strong>Wenger</strong> <strong>Corporation</strong> at 1-800-733-0393.<br />
MANUFACTURER<br />
The <strong>Class</strong> <strong>Piano</strong> <strong>Workstation</strong> is manufactured by:<br />
<strong>Wenger</strong> <strong>Corporation</strong><br />
555 Park Drive<br />
Owatonna, MN 55060<br />
1-507-455-4100 • 1-800-733-0393<br />
www.wengercorp.com<br />
INTENDED USE<br />
• This product is intended for indoor use in normal ambient temperature and humidity conditions — it<br />
must not be exposed to prolonged outside weather conditions.<br />
• This product is intended to be assembled only as described in these instructions.<br />
3
BEFORE YOU BEGIN<br />
• Read the complete assembly procedure before you begin.<br />
• Remove all items from the shipping carton and lay them out approximately in their final position.<br />
REQUIRED TOOLS<br />
• Phillips Head Screwdriver with a short shaft • 4 mm hex wrench (supplied),<br />
if installing on a 76-key piano.<br />
REPLACEMENT PARTS LIST<br />
4<br />
3/4”<br />
Machine Screw<br />
7<br />
3<br />
3<br />
6<br />
Item Qty Description<br />
1 1 Cover, rear, plastic (not shown)<br />
2 8 Foot, rubber<br />
3 2 Grommet, wire<br />
4 4 Screw, machine, 8-32X3/4"<br />
(oyster and black)<br />
5 1 Strip, outlet (not shown)<br />
6 1 Pad, mouse<br />
7 1 Holder, music<br />
2<br />
4
ASSEMBLY<br />
1. Screw the eight rubber feet (2) into the threaded inserts.<br />
Tighten securely.<br />
Rubber<br />
Feet (2)<br />
Rubber<br />
Feet (2)<br />
Wire<br />
Grommets (3)<br />
2. Press the wire grommets (3) into the precut holes.<br />
3. The <strong>Class</strong> <strong>Piano</strong> <strong>Workstation</strong> is shipped with the<br />
end support panels positioned for an 88-key piano.<br />
To install on a (narrower) 76-key piano:<br />
a. Turn <strong>Workstation</strong> upside down.<br />
b. With 4 mm hex wrench, unlock the two Minifix<br />
cam connectors on each end.<br />
c. Remove the two screws from back panel.<br />
d. Move Minifix bolts to inner sets of holes.<br />
e. Reassemble unit.<br />
Minifix Cam<br />
Connectors<br />
f. Move both end support panels in as shown.<br />
Move Bolts Here for<br />
76-Key <strong>Piano</strong><br />
End Support Panel<br />
(in position for 76-key piano)<br />
End Support Panel<br />
(in position for 88-key piano)<br />
5
ASSEMBLY (CONTINUED)<br />
4. Set the workstation on the piano.<br />
Align the back of the workstation with the back of the piano.<br />
Press down firmly to secure the rubber feet.<br />
5. Set the computer or other equipment on top of the<br />
workstation.<br />
6. Route all power cords and cables:<br />
a. Route the computer power cord and cables, MIDI or<br />
audio cables, etc., down through the wire grommets.<br />
Align<br />
b. Plug the outlet strip power cord into a 115V AC electrical outlet.<br />
c. Plug any equipment power cords into the outlet strip.<br />
7. Attach the plastic cover (1) to the back of the<br />
workstation using four 3/4” machine screws (4).<br />
Note: Use oyster screws with white back and<br />
black screws with black back.<br />
Plastic<br />
Cover (4)<br />
3/4”<br />
Machine<br />
Screw<br />
Music<br />
Holder (7)<br />
8. Install the music holder (7).<br />
Slide it over the front edge of the workstation<br />
as shown.<br />
6
ASSEMBLY (CONTINUED)<br />
9. Place the mouse pad (6) on either the left or right<br />
side of the pullout keyboard tray and remove the<br />
adhesive-backed paper to install.<br />
Mouse<br />
Pad (6)<br />
7