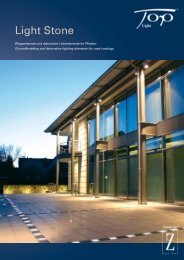
Light Stone - Top-Light
Light Stone - Top-Light
Light Stone - Top-Light

You also want an ePaper? Increase the reach of your titles
YUMPU automatically turns print PDFs into web optimized ePapers that Google loves.
Instructions <strong>Light</strong>-<strong>Stone</strong> installation:<br />
A) The maximum length between the transformer and the last stone must be no greater than 40mtrs.<br />
B) The low-voltage ground rubber cables can be laid in either (1) into the sand-layer or (2) directly into the soil.<br />
IMPORTANT: If for use in public areas it is recommended to bury the cable 80cm for protection against frost.<br />
C) It is advisable to first lay the length of ground cable allowing a loop where the light stones are to be positioned.<br />
See picture 3.<br />
D) Cut the loop and connect the <strong>Light</strong>-stone. (see assembly drawings under <strong>Light</strong>-<strong>Stone</strong> IP68 A-D.)<br />
VERY IMPORTANT: Before final positioning of the <strong>Light</strong>-stone, ensure that all lights are working and that all red<br />
cables from the transformer ground cables are connected to the red cables of the <strong>Light</strong>-stones and the black cables<br />
from the transformer ground cable are connected to the black cables from the <strong>Light</strong>-stones consistently throughout the<br />
cable run. If consistent polarity of the cable is not ensured throughout, the LED will not light.<br />
E) Transformer box installations.<br />
IP 55 Surface mounted Transformer box containing a 12V DC transformer / 230V with the primary connection being<br />
230v with the secondary output being 12v.<br />
IP 68 Underground waterproof connection: Transformer box containing a<br />
12V DC / 230V with primary connection being 230v with the secondary being 12v.<br />
After installation, the Transformer box is encapsulated using the enclosed the two part 3M Scotchcast resin No.4. (See<br />
instruction details below). When the resin has cured clip the transformer box lid into position.<br />
Resin encapsulation procedure (see picture diagram on resin packet and read instructions below).<br />
1. Remove resin sachets from outer cover.<br />
2. Pull the enclosed sachet apart in the centre to allow the two components to mix.<br />
3. Manipulate the sachet to mix the two components together thoroughly for 30 seconds.<br />
4. Ensure mixture is squeezed out of all corners.<br />
5. Mix for a further 2 minutes in the sachet.<br />
6. Cut corner and pour into transformer box.<br />
WARNING: After pouring and during the curing process the resin compound will become VERY HOT, care must be<br />
taken not to touch the resin during this process. Curing times vary between 8 and 60 minutes according to the<br />
ambient temperatures see packet for details.<br />
To calculate the maximum number of <strong>Light</strong>-stones per transformer:<br />
1 Led corresponds to 0.3 watts<br />
Transformer wattage should be divided by the number of LEDs.<br />
The result is the maximum number per transformer.<br />
Example:<br />
Transformer: 2.6 watts; LED 0.3 watts<br />
2.6 ÷ 0.3 = 8.66<br />
Rounded down = 8 LED’s<br />
LIGHT-STONE IP 68 GROUND CONNECTIONS