Masking with Silly Putty - FineScale Modeler
Masking with Silly Putty - FineScale Modeler
Masking with Silly Putty - FineScale Modeler

You also want an ePaper? Increase the reach of your titles
YUMPU automatically turns print PDFs into web optimized ePapers that Google loves.
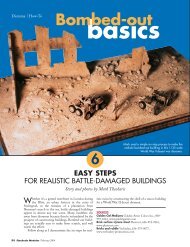
Finishing School<br />
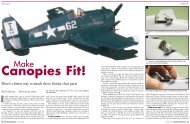
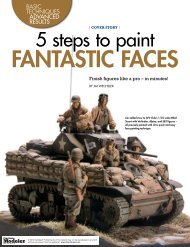
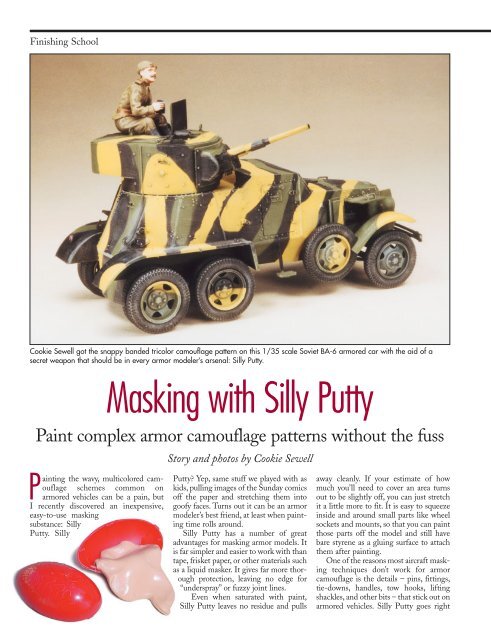
Cookie Sewell got the snappy banded tricolor camouflage pattern on this 1/35 scale Soviet BA-6 armored car <strong>with</strong> the aid of a<br />
secret weapon that should be in every armor modeler’s arsenal: <strong>Silly</strong> <strong>Putty</strong>.<br />
<strong>Masking</strong> <strong>with</strong> <strong>Silly</strong> <strong>Putty</strong><br />
Paint complex armor camouflage patterns <strong>with</strong>out the fuss<br />
Story and photos by Cookie Sewell<br />
Painting the wavy, multicolored camouflage<br />
schemes common on<br />
armored vehicles can be a pain, but<br />
I recently discovered an inexpensive,<br />
easy-to-use masking<br />
substance: <strong>Silly</strong><br />
<strong>Putty</strong>. <strong>Silly</strong><br />
<strong>Putty</strong> Yep, same stuff we played <strong>with</strong> as<br />
kids, pulling images of the Sunday comics<br />
off the paper and stretching them into<br />
goofy faces. Turns out it can be an armor<br />
modeler’s best friend, at least when painting<br />
time rolls around.<br />
<strong>Silly</strong> <strong>Putty</strong> has a number of great<br />
advantages for masking armor models. It<br />
is far simpler and easier to work <strong>with</strong> than<br />
tape, frisket paper, or other materials such<br />
as a liquid masker. It gives far more thorough<br />
protection, leaving no edge for<br />
“underspray” or fuzzy joint lines.<br />
Even when saturated <strong>with</strong> paint,<br />
<strong>Silly</strong> <strong>Putty</strong> leaves no residue and pulls<br />
away cleanly. If your estimate of how<br />
much you’ll need to cover an area turns<br />
out to be slightly off, you can just stretch<br />
it a little more to fit. It is easy to squeeze<br />
inside and around small parts like wheel<br />
sockets and mounts, so that you can paint<br />
those parts off the model and still have<br />
bare styrene as a gluing surface to attach<br />
them after painting.<br />
One of the reasons most aircraft masking<br />
techniques don’t work for armor<br />
camouflage is the details – pins, fittings,<br />
tie-downs, handles, tow hooks, lifting<br />
shackles, and other bits – that stick out on<br />
armored vehicles. <strong>Silly</strong> <strong>Putty</strong> goes right
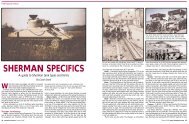
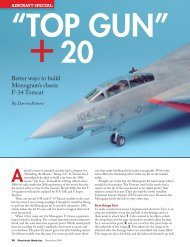
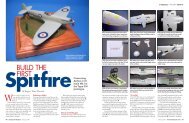
1/35 Scale<br />
After giving the BA-6 a base coat of Floquil mud, Cookie put on the <strong>Silly</strong> <strong>Putty</strong> (looks<br />
like bubble gum, doesn’t it) mask before spraying the next color. The tape keeps the<br />
overspray away from the undersides of the fenders and hull to minimize the need for<br />
touchups later on.<br />
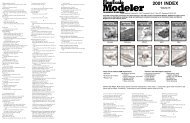
<strong>Silly</strong> <strong>Putty</strong> masks eliminate seepage and<br />
give nice sharp color definition. Cookie<br />
got good results here dry-brushing <strong>with</strong><br />
Floquil Old Concrete. It’s a light-yellowish<br />
tan that simulates summer dust and blends<br />
well <strong>with</strong> all three camo colors.<br />
over these items, but it won’t pull them<br />
off when it’s removed.<br />
My sample project is a 1/35 scale<br />
1930s Soviet BA-6 armored car built<br />
from an Eastern Express kit. I decided to<br />
give it the rather gaudy three-color camouflage<br />
scheme used during late 1941.<br />
There were some variations in the colors<br />
on the full-size vehicles; I chose to paint<br />
mine in green, black, and sand. The<br />
scheme is actually very similar to the<br />
modern Russian pattern.<br />
I had previously painted the inside of<br />
the BA-6’s engine bay, so I sealed off the<br />
openings <strong>with</strong> pieces of index card to protect<br />
the interior parts from overspray. The<br />
model was then sprayed <strong>with</strong> a base coat<br />
of Floquil mud, which is a good match<br />
for the sand color I wanted.<br />
I masked the sections I wanted to keep<br />
sand-colored <strong>with</strong> the <strong>Silly</strong> <strong>Putty</strong>. To<br />
make the masking strips, I put the <strong>Silly</strong><br />
<strong>Putty</strong> on a flat surface and rolled it out<br />
like pie dough. It must be rolled flat and<br />
relatively thin to work best. Once it was<br />
flat, I simply cut out the shapes I needed,<br />
which can be done either freehand or<br />
using a template.<br />
Unlike other materials, <strong>Silly</strong> <strong>Putty</strong><br />
does not tear easily, so I cut the strips <strong>with</strong><br />
a very sharp knife. Otherwise, instead of<br />
separating from the “rolled dough” part,<br />
the pieces would have stretched and<br />
deformed, making a mess of things.<br />
Unless you have an unusual situation,<br />
a camo pattern should be painted from<br />
lightest to darkest color, so the next color<br />
I applied was the green. After that, I<br />
added more <strong>Silly</strong> <strong>Putty</strong> strips and then<br />
painted on the black.<br />
After the paint was dry, cleanup was<br />
very simple: I just peeled off the <strong>Silly</strong><br />
<strong>Putty</strong>, rolled it up, and put it back in its<br />
egg. It separates gently from the model<br />
and usually doesn’t take hand grabs or<br />
similar photoetched metal parts <strong>with</strong> it.<br />
You can use it for several models, but on<br />
future projects pay attention to the colors<br />
the <strong>Silly</strong> <strong>Putty</strong> carries <strong>with</strong> it. Keeping it<br />
in the egg – which you forgot to do as a<br />
kid and later found the putty either stuck<br />
in Mom’s carpet or hard as a brick – is a<br />
good idea.<br />
<strong>Silly</strong> <strong>Putty</strong> masking lets you avoid the<br />
frustrating debate about whether to paint<br />
first and hope assembly goes well, or<br />
build and then hope you can get the paint<br />
on smoothly. Don’t let the “silly” name<br />
put you off – this silly stuff is for serious<br />
modelers. FSM<br />
My thanks to Steve Zaloga for introducing<br />
me to <strong>Silly</strong> <strong>Putty</strong> masking.<br />
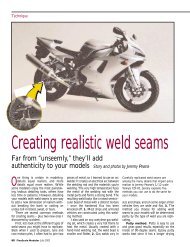
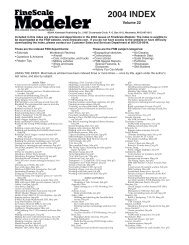
The finished BA-6 <strong>with</strong> its impressive tricolor camouflage. The wheels on these vehicles<br />
did not have matching patterns, so each wheel could be different.<br />
July 2003 www.finescale.com 55