HEAVY DUTY - KitchenAid
HEAVY DUTY - KitchenAid
HEAVY DUTY - KitchenAid

Create successful ePaper yourself
Turn your PDF publications into a flip-book with our unique Google optimized e-Paper software.
®<br />
<strong>HEAVY</strong> <strong>DUTY</strong><br />
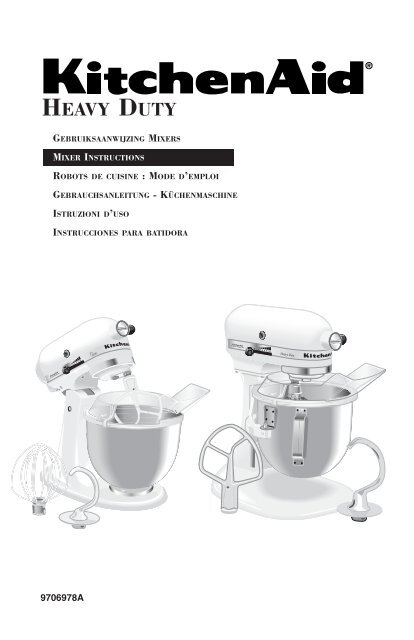
GEBRUIKSAANWIJZING MIXERS<br />
MIXER INSTRUCTIONS<br />
ROBOTS DE CUISINE : MODE D’EMPLOI<br />
GEBRAUCHSANLEITUNG - KÜCHENMASCHINE<br />
ISTRUZIONI D’USO<br />
INSTRUCCIONES PARA BATIDORA<br />
<strong>KitchenAid</strong><br />
St. Joseph, Michigan, USA 0 1 2 4 6 8 10<br />
Heavy Duty<br />
<strong>KitchenAid</strong><br />
St. Joseph, Michigan, USA 0 1 2 4 6 8 10<br />
9706978A
Table of Contents<br />
English<br />
Important Safety Instructions....................................................................................3<br />
About Your Mixer<br />
Model 5K45SS Mixer Features .........................................................................4, 5<br />
Model 5K5SS/5KPM5 Mixer Features..............................................................6, 7<br />
Using your <strong>KitchenAid</strong> ® Attachments...................................................................8<br />
Beater To Bowl Clearance.....................................................................................8<br />
Care and Cleaning ................................................................................................8<br />
Planetary Mixing Action .......................................................................................9<br />
Mixer Use..............................................................................................................9<br />
Speed Control Guide.............................................................................................9<br />
Mixing Tips.............................................................................................................10<br />
Mixing and Kneading Yeast Dough...............................................................10, 11<br />
Egg Whites..........................................................................................................11<br />
Whipped Cream..................................................................................................11<br />
When You Need Service.........................................................................................12<br />
Mixer Warranty .......................................................................................................12
Important Safety Instructions<br />
When reading the Instructions Manual…<br />
Pay special attention to sections marked by<br />
the following words:<br />
<br />
! WARNING<br />
These help you avoid accidents that could lead to<br />
injury for someone using the product incorrectly.<br />
<br />
! WARNING<br />
TO REDUCE THE RISK OF FIRE, ELECTRICAL<br />
SHOCK, INJURY TO PERSONS, OR DAMAGE<br />
WHEN USING THE MIXER, FOLLOW BASIC<br />
PRECAUTIONS, INCLUDING THE FOLLOWING:<br />
1. Read all instructions.<br />
2. To protect against risk of electrical shock,<br />
never immerse mixer in water or other<br />
liquid.<br />
3. Be sure that the prongs on the plug of the<br />
unit mate with the electrical wall<br />
receptacle into which it will be plugged.<br />
Observation of proper grounding<br />
techniques and local electrical codes is<br />
required.<br />
4. Do not let children operate or play with<br />
mixer.<br />
5. Close supervision is necessary when any<br />
appliance is used by or near children. Do<br />
not leave mixer unattended while it is<br />
operating.<br />
6. Unplug mixer from outlet when not in use,<br />
before inserting or removing parts, and<br />
before cleaning.<br />
7. Avoid contacting moving parts. Keep<br />
hands, hair, clothing, as well as spatulas<br />
and other utensils away from beater during<br />
operation to prevent injury, and/or damage<br />
to the mixer.<br />
8. Do not operate mixer unattended or near<br />
edge of work surface. When used for<br />
heavy loads or at high speeds, mixer may<br />
move on work surface.<br />
9. Remove flat beater, wire whip or dough<br />
hook from mixer before washing.<br />
10. Do not operate any appliance with a<br />
damaged cord set or after the appliance<br />
has been dropped or damaged in any<br />
manner. Return appliance to the nearest<br />
authorized service center for examination,<br />
repair or adjustment.<br />
<br />
SAVE THESE INSTRUCTIONS<br />
R-3<br />
! CAUTION<br />
These help you avoid damage to the product<br />
and/or other property.<br />
“NOTE:” or “IMPORTANT”<br />
These sections give you helpful tips on using the<br />
product.<br />
11. The use of attachments not<br />
recommended by <strong>KitchenAid</strong> may<br />
cause fire, electrical shock or injury.<br />
12. Do not use outdoors.<br />
13. Do not let cord hang over edge of table<br />
or counter, or touch hot surfaces.<br />
14. When using a mixer model with a tilt<br />
head, the head must be completely<br />
down before locking. Before mixing,<br />
make sure lock is in position by<br />
attempting to raise head.<br />
15. Do not use an extension cord.<br />
16. When making dough with the mixer,<br />
never use recipes calling for more than<br />
the following maximum measurements:<br />
Model 5K45SS – 1.12 kg (8 cups) of<br />
all-purpose flour or 840 g (6 cups) of<br />
whole wheat flour. Models 5K5SS,<br />
5KPM5, and 5KSM5 – 1.4 kg (10 cups)<br />
of all-purpose flour or 1120 g (8 cups)<br />
of whole wheat flour.<br />
17. When making dough with the mixer,<br />
never operate mixer continuously for<br />
more than 10 minutes.<br />
18. Be careful when lifting mixer as it is<br />
heavy.<br />
19. Use the mixer only for its intended<br />
function.<br />
20. ELECTRICAL REQUIREMENTS: Your<br />
<strong>KitchenAid</strong> ® Mixer operates on a regular<br />
220-240 volt A.C., 50-60 hertz house<br />
current. The wattage rating for your<br />
<strong>KitchenAid</strong> ® Mixer is printed on the trim<br />
band. This wattage is determined by using<br />
the attachment which draws the greatest<br />
power. Other recommended attachments<br />
may draw significantly less power.<br />
21. Be certain the attachment hub is secure<br />
(tighten attachment knob) prior to using<br />
mixer to avoid any possibility of the<br />
attachment hub falling into the bowl<br />
during mixing.<br />
English
5K45SS Mixer Features<br />
Attachment Hub<br />
English<br />
Motor Head<br />
Attachment Knob<br />
Speed<br />
Control<br />
Lever<br />
<strong>KitchenAid</strong><br />
St. Joseph, Michigan, USA 0 1 2 4 6 8 10<br />
Motor Head<br />
Locking Lever<br />
(not shown)<br />
Beater Shaft<br />
Flat Beater<br />
Wire Whip<br />
R-4<br />
Dough Hook<br />
Bowl Clamping Plate<br />
4.5 Qt<br />
(4.3 L)<br />
Stainless<br />
Steel Bowl<br />
R-4
<strong>KitchenAid</strong><br />
St. Joseph, Michigan, USA 0 1 2 4 6 8 10<br />
OFF<br />
ON<br />
TO ATTACH BOWL<br />
• Be sure speed control is OFF.<br />
• Tilt motor head back.<br />
• Place bowl on bowl-clamping plate.<br />
• Turn bowl gently in clockwise direction<br />
(see picture above).<br />
• Sit pouring shield on bowl.<br />
TO REMOVE BOWL<br />
• Turn speed control to OFF.<br />
• Tilt motor head back.<br />
• Turn bowl in counterclockwise direction.<br />
TO LOCK MOTOR HEAD IN RAISED<br />
POSITION<br />
• Push locking lever up into UNLOCK<br />
position and hold.<br />
• Tilt motor head back.<br />
• Move locking lever into LOCK position.<br />
TO LOCK MOTOR HEAD IN<br />
OPERATING POSITION<br />
• Push locking lever up into UNLOCK<br />
position and hold.<br />
• Lower motor head until it is completely<br />
down into operating position.<br />
• Move locking lever into LOCK position.<br />
• Before mixing, test motor head lock by<br />
attempting to raise head.<br />
NOTE: Motor head should always be kept<br />
in LOCK position when using mixer.<br />
English<br />
0 1 2 4 6 8 10<br />
TO ATTACH FLAT BEATER,<br />
WIRE WHIP, OR DOUGH HOOK<br />
• Turn speed control to OFF and unplug.<br />
• Raise motor head.<br />
• Slip beater onto beater shaft and press<br />
upward as far as possible.<br />
• Turn beater to right, hooking beater over<br />
pin on shaft.<br />
TO REMOVE FLAT BEATER,<br />
WIRE WHIP OR DOUGH HOOK<br />
• Turn speed control to OFF and unplug.<br />
• Raise motor head.<br />
• Press beater upward as far as possible<br />
and turn left.<br />
• Pull beater from beater shaft.<br />
TO OPERATE CONTROL SPEED<br />
• Speed control lever should always be set<br />
on lowest speed for starting, then<br />
gradually moved to desired higher speed<br />
to avoid splashing ingredients out of<br />
bowl. See “Speed Control Guide.”<br />
R-5
5K5SS/5KPM5 Mixer Features<br />
Motor Head<br />
Attachment Hub<br />
English<br />
Speed Control<br />
Lever<br />
Spring Latch and<br />
Bowl Pin<br />
(not shown)<br />
Locating Pins<br />
<strong>KitchenAid</strong><br />
St. Joseph, Michigan, USA 0 1 2 4 6 8 10<br />
Heavy Duty<br />
Attachment<br />
Knob<br />
Bowl Lift Handle<br />
(not shown)<br />
Beater<br />
Shaft<br />
Bowl Support<br />
Wire Whip<br />
Flat Beater<br />
Dough Hook<br />
5 Qt (4.8 L)<br />
Stainless Steel Bowl<br />
R-6
TO ATTACH BOWL<br />
• Be sure speed control is OFF.<br />
• Place bowl lift handle in down position.<br />
• Fit bowl supports over locating pins.<br />
• Press down on back of bowl until bowl<br />
pin snaps into spring latch.<br />
• Sit pouring shield on bowl.<br />
• Raise bowl before mixing.<br />
NOTE: Check that bowl and pouring shield<br />
are properly in place (5KPM5 models).<br />
TO REMOVE BOWL<br />
• Place bowl lift handle in down position.<br />
• Grasp bowl handle and lift straight up<br />
and off locating pins.<br />
Heavy Duty<br />
TO ATTACH FLAT BEATER,<br />
WIRE WHIP, OR DOUGH HOOK<br />
• Turn speed control to OFF and unplug.<br />
• Lower bowl by rotating bowl lift handle<br />
downward.<br />
• Slip flat beater on beater shaft and press<br />
upward as far as possible.<br />
• Turn beater to right, hooking beater over<br />
the pin on shaft.<br />
TO REMOVE FLAT BEATER,<br />
WIRE WHIP, OR DOUGH HOOK<br />
• Turn speed control to OFF and unplug.<br />
• Lower bowl by rotating bowl lift handle<br />
downward.<br />
• Press beater upward as far as possible<br />
and turn left.<br />
• Pull beater from beater shaft.<br />
English<br />
0 1 2 4 6 8 10<br />
TO RAISE BOWL<br />
• Rotate handle back and up until it snaps<br />
into the locked vertical position.<br />
• Bowl must always be in raised, locked<br />
position when mixing.<br />
TO LOWER BOWL<br />
• Rotate handle back and down.<br />
TO OPERATE CONTROL SPEED<br />
• Speed control lever should always be set<br />
on lowest speed for starting, then<br />
gradually moved to desired higher speed<br />
to avoid splashing ingredients out of<br />
bowl. See “Speed Control Guide.”<br />
OVERLOAD RESET BUTTON<br />
(Model 5KPM50 only)<br />
• If the mixer is overloaded, the Overload<br />
Reset Button will pop out and the mixer<br />
will shut off. Turn the Speed Control<br />
Lever to OFF. Wait a few minutes, then<br />
push in the Overload Reset Button. Turn<br />
the Speed Control Lever to the desired<br />
speed and continue mixing.<br />
R-7
Using Your <strong>KitchenAid</strong> ® Attachments<br />
English<br />
See the Stand Mixer Attachments Use and Care Guide for speed settings and operating<br />
times.<br />
Flat Beater, for normal to heavy Wire Whip for mixtures which need<br />
mixtures, such as:<br />
to incorporate air, such as:<br />
cakes<br />
biscuits<br />
eggs<br />
sponge cakes<br />
creamed frostings crumpets<br />
egg whites mayonnaise<br />
candies<br />
meat loaf<br />
heavy cream some candies<br />
cookies<br />
mashed potatoes boiled frostings<br />
pie pastry<br />
Dough Hook for mixing and kneading<br />
yeast doughs, such as:<br />
breads<br />
coffee cakes<br />
rolls<br />
buns<br />
Beater To Bowl Clearance<br />
Your mixer is adjusted at the factory so that<br />
the flat beater just clears the bottom of the<br />
bowl. If, for any reason, the flat beater<br />
strikes the bottom of the bowl, or is too far<br />
away from the bowl, clearance can be<br />
corrected as follows:<br />
Model 5K45SS:<br />
• Lift motor head.<br />
• Turn screw (A) slightly to the left to raise<br />
flat beater and to the right to lower flat<br />
beater.<br />
• Make adjustment with flat beater, so it<br />
just clears surface of bowl.<br />
Care and Cleaning of Your Mixer<br />
A<br />
Model<br />
5K5SS/5KSM5/5KPM5<br />
• Place bowl lift handle in<br />
B<br />
down position.<br />
• Turn screw (B) slightly<br />
to the left to raise flat<br />
beater and to the right<br />
to lower flat beater.<br />
• Make adjustments with flat beater, so it just<br />
clears surface of bowl.<br />
NOTE: Flat beater must not strike on bottom or<br />
side of bowl when properly adjusted. If beater or<br />
wire whip is adjusted too close so that it strikes<br />
bottom of bowl, coating may wear off of beaters<br />
or wires may wear through on wire whip.<br />
Scraping sides of bowl may be necessary under<br />
certain conditions regardless of beater<br />
adjustment. Mixer must be stopped to scrape<br />
bowl or damage to mixer may occur.<br />
<br />
! WARNING<br />
ELECTRICAL SHOCK HAZARD<br />
ALWAYS BE SURE TO UNPLUG<br />
MIXER BEFORE CLEANING TO AVOID<br />
POSSIBLE ELECTRICAL SHOCK.<br />
Wipe mixer with a damp cloth. DO<br />
NOT IMMERSE IN WATER. Wipe off<br />
beater shaft frequently, removing any<br />
residue that may accumulate.<br />
Bowl, flat beater and dough hook may be<br />
washed in an automatic dishwasher. The<br />
wire whip and these other basic accessories<br />
can be cleaned thoroughly in hot sudsy<br />
water and rinsed completely before drying.<br />
Lubrication: Motor bearings are selflubricating<br />
and should require no further<br />
attention under normal use.<br />
R-8
Planetary Mixing Action<br />
During operation, the flat<br />
beater moves around the<br />
stationary bowl, at the<br />
same time turning in the<br />
opposite direction on its<br />
own axis. The diagram<br />
shows the complete<br />
coverage of the bowl made<br />
by the path of the beater.<br />
Mixer Use<br />
Your <strong>KitchenAid</strong> ® Mixer will mix faster and<br />
more thoroughly than most other electric<br />
mixers. Therefore, the mixing time in most<br />
recipes must be adjusted to avoid<br />
overbeating.<br />
English<br />
The bowl and beater are designed to provide<br />
thorough mixing without frequent scraping.<br />
Scraping the bowl once or twice during<br />
mixing is usually sufficient.<br />
The mixer may warm up during use. Under<br />
heavy loads with extended mixing time, you<br />
may not be able to comfortably touch the<br />
top of the unit. This is normal.<br />
Speed Control Guide<br />
<br />
! WARNING<br />
PERSONAL INJURY HAZARD<br />
To avoid personal injury and damage to<br />
the beater, do not attempt to scrape<br />
bowl while mixer is operating; turn<br />
mixer off. Should scraper or other<br />
object drop into bowl, turn motor OFF<br />
before removing.<br />
NUMBER OF SPEED<br />
1 STIR For slow stirring, combining, mashing, starting all mixing<br />
procedures. Use to add flour and dry ingredients to batter, add<br />
liquids to dry ingredients, and combine heavy mixtures.<br />
2 SLOW MIXING For slow beating, mashing, faster stirring. Use to beat heavy<br />
batters and candies, start mashing potatoes or other vegetables, cut<br />
shortening into flour, beat thin or splashy batters, and mix and<br />
knead yeast dough. Use with Can Opener attachment.<br />
4 MIXING, BEATING For mixing semi-heavy batters such as cookies. Use to cream<br />
sugar and shortening and add sugar to egg whites for meringues.<br />
Medium speed for cake mixes. Use with attachments: Food<br />
Grinder, Rotor Slicer/Shredder and Fruit/Vegetable Strainer.<br />
6 BEATING, For beating or creaming, medium fast whipping. Use to finish<br />
CREAMING mixing cakes, doughnut and other batters. High speed for cake<br />
mixes. Use with Citrus Juice attachment.<br />
8 FAST BEATING, For whipping cream, egg whites, and boiled frostings.<br />
WHIPPING<br />
10 FAST<br />
WHIPPING<br />
For whipping small amounts of cream and egg whites. Use with<br />
Pasta Maker and Grain Mill attachments.<br />
NOTE: The Speed Control Lever can be set between the above speeds if a finer adjustment is required.<br />
R-9
<strong>KitchenAid</strong><br />
Mixing Tips<br />
English<br />
Converting Your Recipe to the Mixer<br />
The mixing instructions found in this book<br />
can be used to convert your favorite recipes<br />
for use with your <strong>KitchenAid</strong> ® Mixer.<br />
To help determine a mixing procedure, your<br />
own observations and experience will be<br />
needed. Watch the batter or dough and mix<br />
only until it has the desired appearance<br />
described in your recipe, such as “smooth<br />
and creamy.” Use the “Speed Control<br />
Guide” to help determine proper mixing<br />
speeds.<br />
Adding Ingredients<br />
The standard procedure to follow when<br />
mixing most batters, especially cake and<br />
cookie batters, is to add:<br />
1/3 dry ingredients<br />
1/2 liquid ingredients<br />
1/3 dry ingredients<br />
1/2 liquid ingredients<br />
1/3 dry ingredients<br />
Use Stir Speed until ingredients have been<br />
blended. Then gradually increase to desired<br />
speed.<br />
Always add ingredients as close to side of<br />
bowl as possible, not directly into moving<br />
Mixing and Kneading Yeast Dough<br />
beater. The Pouring Shield can be used to<br />
simplify adding ingredients.<br />
NOTE: If ingredients in very bottom of<br />
bowl are not thoroughly mixed, the beater<br />
is not far enough into the bowl. See “Beater<br />
to Bowl Clearance.”<br />
Cake Mixes<br />
When preparing packaged cake mixes, use<br />
Speed 4 for medium speed and Speed 6 for<br />
high speed. For best results, mix for the<br />
time stated on the package directions.<br />
Adding Nuts, Raisins or<br />
Candied Fruits<br />
Solid materials should be folded in the last<br />
few sections of mixing on Stir Speed. The<br />
batter should be thick enough to keep the<br />
fruits and nuts from sinking to the bottom<br />
of the pan during baking. Sticky fruits<br />
should be dusted with flour for better<br />
distribution in the batter.<br />
Liquid Mixture<br />
Mixtures containing large amounts of liquid<br />
ingredients should be mixed at lower<br />
speeds to avoid splashing. Increase speed<br />
only after mixture has thickened.<br />
1. Place all dry ingredients including yeast<br />
into bowl, except last 1 to 2 cups (250 mL<br />
to 500 mL) flour.<br />
2. Attach bowl and dough hook. Lock<br />
5K45SS head or raise 5K5SS/5KPM5<br />
bowl. Turn to Speed 2 and mix about<br />
15 seconds or until ingredients are<br />
combined.<br />
NOTE: If liquid ingredients are added too<br />
quickly, they will form a pool around the<br />
dough hook and slow down mixing process.<br />
<strong>KitchenAid</strong><br />
St. Joseph, Michigan, USA 0 1 2 4 6 8 10<br />
St. Joseph, Michigan, USA 0 1 2 4 6 8 10<br />
3. Continuing on Speed 2, gradually add<br />
liquid ingredients to flour mixture, about<br />
30 seconds to 1 minute. Mix 1 minute<br />
longer.<br />
R-10<br />
4. Continuing on speed 2, gently tap<br />
remaining flour around sides of bowl,<br />
1/2 cup (125 mL) at a time, as needed.<br />
Mix until dough clings to hook and<br />
cleans sides of bowl, about 2 minutes.
<strong>KitchenAid</strong><br />
St. Joseph, Michigan, USA 0 1 2 4 6 8 10<br />
6. Unlock and raise head on 5K45SS or<br />
lower bowl on 5K5SS/5KSM5 and remove<br />
dough from hook.<br />
5. When dough clings to hook, knead on<br />
Speed 2 for 2 minutes or until dough is<br />
smooth and elastic.<br />
Egg Whites<br />
NOTE: These instructions illustrate bread<br />
making with the Rapid Mix method. When<br />
using the conventional method, dissolve<br />
yeast in warm water in warmed bowl. Add<br />
remaining liquids and dry ingredients –<br />
except last 1 to 2 cups (250 mL to 500 mL)<br />
flour. Turn to Speed 2 for about 1 minute, or<br />
until ingredients are thoroughly mixed.<br />
Proceed with steps 4 through 6.<br />
English<br />
Place room temperature egg whites in<br />
clean, dry bowl. Attach bowl and wire<br />
whip. To avoid splashing, gradually turn<br />
to designated speed and whip to desired<br />
stage. See chart below.<br />
Amount<br />
Speed<br />
1 egg white Gradually to 10<br />
2-4 egg whites Gradually to 8<br />
6 or more egg whites Gradually to 6<br />
WHIPPING STAGES<br />
Frothy:<br />
Large, uneven air bubbles.<br />
Begin to hold shape:<br />
Air bubbles are fine and compact; product<br />
is white.<br />
Whipped Cream<br />
Pour cream into chilled bowl. Attach bowl<br />
and wire whip. To avoid splashing,<br />
gradually turn to designated speed and<br />
whip to desired stage. See chart below.<br />
Amount<br />
Speed<br />
59 mL (1/4 cup) Gradually to 10<br />
118 mL (1/2 cup) Gradually to 10<br />
236 mL (1 cup) Gradually to 8<br />
472 mL (2 cups) Gradually to 8<br />
WHIPPING STAGES<br />
Begins to thicken:<br />
Cream is thick and custard-like.<br />
Soft peak:<br />
Tips of peaks fall over when wire whip is<br />
removed.<br />
Almost stiff:<br />
Sharp peaks form when wire whip is<br />
removed, but whites are actually soft.<br />
Stiff but not dry:<br />
Sharp, stiff peaks form when wire whip is<br />
removed. Whites are uniform in color and<br />
glisten.<br />
Stiff and dry:<br />
Sharp, stiff peaks form when wire whip is<br />
removed. Whites are speckled and dull in<br />
appearance.<br />
Holds its shape:<br />
Cream forms soft peaks when wire whip<br />
is removed. Can be folded into other<br />
ingredients when making deserts and<br />
sauces.<br />
Stiff:<br />
Cream stands in stiff, sharp peaks when<br />
wire whip is removed. Use for topping on<br />
cakes or desserts, or filling for cream puffs.<br />
NOTE: Watch cream closely during<br />
whipping; there are just a few seconds<br />
between whipping stages. DO NOT<br />
OVERWHIP.<br />
R-11
When You Need Service<br />
English<br />
Please read the following before<br />
calling your service center.<br />
1. The mixer may warm up during use.<br />
Under heavy loads with extended mixing<br />
time periods, you may not be able to<br />
comfortably touch the top of the unit.<br />
This is normal.<br />
2. The mixer may emit a pungent odor,<br />
especially when new. This is common<br />
with electric motors.<br />
3. If flat beater strikes bowl, stop the mixer.<br />
See “Beater to Bowl Clearance.”<br />
If your mixer should malfunction or<br />
fail to operate, please check the<br />
following:<br />
1. Is your mixer plugged in<br />
2. Is the fuse in the circuit to the mixer in<br />
working order If you have a circuit<br />
breaker box, be sure the circuit is closed.<br />
3. Are the bowl and pouring shield properly<br />
in place (5KPM5 models)<br />
4. If the problem is not due to one of the<br />
above items, see "How to Obtain<br />
Service."<br />
HOW TO OBTAIN SERVICE:<br />
All service should be handled locally by an<br />
authorized <strong>KitchenAid</strong> Service Center.<br />
Contact the dealer from whom the unit was<br />
purchased to obtain the name of the nearest<br />
authorized <strong>KitchenAid</strong> service facility.<br />
Heavy Duty Mixer Warranty<br />
LENGTH OF<br />
WARRANTY:<br />
ONE YEAR FULL<br />
WARRANTY FROM<br />
date of purchase.<br />
KITCHENAID WILL<br />
PAY FOR:<br />
Replacement parts and<br />
repair labor costs to<br />
correct defects in materials<br />
or workmanship. Service<br />
must be provided by an<br />
Authorized <strong>KitchenAid</strong><br />
Service Center.<br />
KITCHENAID WILL<br />
NOT PAY FOR:<br />
A. Repairs when mixer is<br />
used for operations<br />
other than normal food<br />
preparation.<br />
B. Damage resulting from<br />
accidents, alterations,<br />
misuse, abuse, or<br />
installation/operation<br />
not in accordance with<br />
local electrical codes.<br />
KITCHENAID DOES NOT ASSUME ANY RESPONSIBILITY FOR INCIDENTAL<br />
OR CONSEQUENTIAL DAMAGES.<br />
Specifications subject to change without notice.<br />
<strong>KitchenAid</strong> Europa, Inc.<br />
Nijverheidslaan 3 Box 5<br />
Strombeek-Bever (Brussels)<br />
1853 BELGIUM<br />
9706978A<br />
©2009. All rights reserved<br />
®Registered trademark/ TM Trademark/the shape<br />
of stand mixer is a registered trademark<br />
of <strong>KitchenAid</strong>, U.S.A.<br />
1/09<br />
Printed in U.S.A.