SAS Marketing Automation 4 - Ftp Sas
SAS Marketing Automation 4 - Ftp Sas
SAS Marketing Automation 4 - Ftp Sas

You also want an ePaper? Increase the reach of your titles
YUMPU automatically turns print PDFs into web optimized ePapers that Google loves.
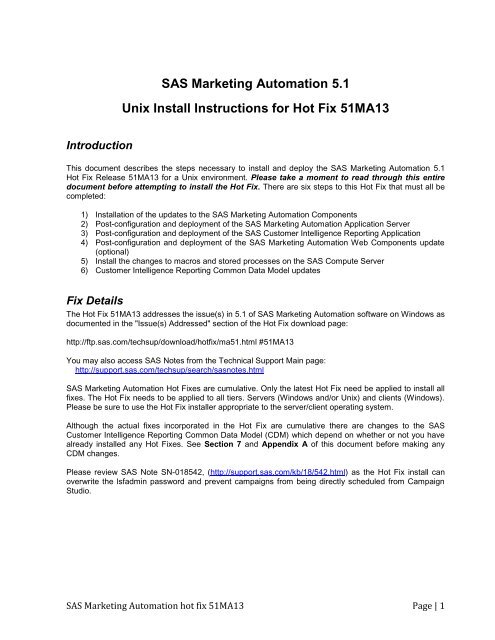
<strong>SAS</strong> <strong>Marketing</strong> <strong>Automation</strong> 5.1<br />
Unix Install Instructions for Hot Fix 51MA13<br />
Introduction<br />
This document describes the steps necessary to install and deploy the <strong>SAS</strong> <strong>Marketing</strong> <strong>Automation</strong> 5.1<br />
Hot Fix Release 51MA13 for a Unix environment. Please take a moment to read through this entire<br />
document before attempting to install the Hot Fix. There are six steps to this Hot Fix that must all be<br />
completed:<br />
1) Installation of the updates to the <strong>SAS</strong> <strong>Marketing</strong> <strong>Automation</strong> Components<br />
2) Post-configuration and deployment of the <strong>SAS</strong> <strong>Marketing</strong> <strong>Automation</strong> Application Server<br />
3) Post-configuration and deployment of the <strong>SAS</strong> Customer Intelligence Reporting Application<br />
4) Post-configuration and deployment of the <strong>SAS</strong> <strong>Marketing</strong> <strong>Automation</strong> Web Components update<br />
(optional)<br />
5) Install the changes to macros and stored processes on the <strong>SAS</strong> Compute Server<br />
6) Customer Intelligence Reporting Common Data Model updates<br />
Fix Details<br />
The Hot Fix 51MA13 addresses the issue(s) in 5.1 of <strong>SAS</strong> <strong>Marketing</strong> <strong>Automation</strong> software on Windows as<br />
documented in the "Issue(s) Addressed" section of the Hot Fix download page:<br />
http://ftp.sas.com/techsup/download/hotfix/ma51.html #51MA13<br />
You may also access <strong>SAS</strong> Notes from the Technical Support Main page:<br />
http://support.sas.com/techsup/search/sasnotes.html<br />
<strong>SAS</strong> <strong>Marketing</strong> <strong>Automation</strong> Hot Fixes are cumulative. Only the latest Hot Fix need be applied to install all<br />
fixes. The Hot Fix needs to be applied to all tiers. Servers (Windows and/or Unix) and clients (Windows).<br />
Please be sure to use the Hot Fix installer appropriate to the server/client operating system.<br />
Although the actual fixes incorporated in the Hot Fix are cumulative there are changes to the <strong>SAS</strong><br />
Customer Intelligence Reporting Common Data Model (CDM) which depend on whether or not you have<br />
already installed any Hot Fixes. See Section 7 and Appendix A of this document before making any<br />
CDM changes.<br />
Please review <strong>SAS</strong> Note SN-018542, (http://support.sas.com/kb/18/542.html) as the Hot Fix install can<br />
overwrite the lsfadmin password and prevent campaigns from being directly scheduled from Campaign<br />
Studio.<br />
<strong>SAS</strong> <strong>Marketing</strong> <strong>Automation</strong> hot fix 51MA13 Page | 1
1. Obtaining the Hot Fix Bundle<br />
Save the Hot Fix bundle (archive file) from the <strong>SAS</strong> Technical Support Hot Fix web site<br />
(http://ftp.sas.com/techsup/download/hotfix/ma51.html ) to a work directory on the server using the <strong>SAS</strong><br />
user account that originally installed <strong>SAS</strong> <strong>Marketing</strong> <strong>Automation</strong>. This is typically the „sas‟ account. The<br />
name of the downloaded archive file will vary depending on the Unix platform. The downloaded file will<br />
be one of the following:<br />
• 51ma13r6.tar for AIX<br />
• 51ma13s6.tar for Solaris<br />
• 51ma13hx.tar for HP Itanium<br />
There are check boxes included at each step to assist you with verification of the completion of each step<br />
as you work through these instructions.<br />
1.1 Installation<br />
You should perform these installation steps for each machine where the following <strong>Marketing</strong> <strong>Automation</strong><br />
components have been installed.<br />
• <strong>SAS</strong> Customer Intelligence Core Mid-Tier<br />
• <strong>SAS</strong> Customer Intelligence Web Components<br />
• <strong>SAS</strong> Customer Intelligence Studio<br />
• <strong>SAS</strong> Customer Intelligence Plug Ins for <strong>SAS</strong> Management Console<br />
• <strong>SAS</strong> <strong>Marketing</strong> <strong>Automation</strong> Launcher<br />
• <strong>SAS</strong> <strong>Marketing</strong> <strong>Automation</strong> Integration Utilities<br />
• <strong>SAS</strong> Customer Intelligence Reporting Mid-Tier<br />
• <strong>SAS</strong> <strong>Marketing</strong> <strong>Automation</strong> Server Processes (macros and stored processes)<br />
Once the Hot Fix has been installed on your Unix servers you will need to download and install the<br />
Windows 51MA13 Hot Fix onto all of your client PCs<br />
1.2 Unarchive the downloaded tar file<br />
Unarchive the 51ma13xxx tar file using the following command:<br />
tar -xvf 51ma13xxx.tar<br />
where xxx is the appropriate suffix for your unix platform.<br />
This will extract the following files into a new 51ma13_xxx directory. For example, the AIX tar file<br />
51ma13r6.tar will extract into 51ma13_r64. Sample output from the above tar command is shown below.<br />
The sizes of the files will vary based on the Unix platform. The sample below shows messages from an<br />
AIX tar file extract.<br />
x 51ma13_r64/emaauxdataio_r64.tar, 34672640 bytes<br />
x 51ma13_r64/emacore_r64.tar, 42054960 bytes<br />
x 51ma13_r64/emalauncher_r64.tar, 31641600 bytes<br />
x 51ma13_r64/emasmc_r64.tar, 34713600 bytes<br />
x 51ma13_r64/emawebnport_r64.tar, 34826240 bytes<br />
x 51ma13_r64/custintelmid_r64.tar, 34672640 bytes<br />
x 51ma13_r64/mktautor6.tar, 441344 bytes<br />
<strong>SAS</strong> <strong>Marketing</strong> <strong>Automation</strong> hot fix 51MA13 Page | 2
You can see from the tar files the following <strong>Marketing</strong> <strong>Automation</strong> Components will be updated by this Hot<br />
Fix:<br />
• <strong>Marketing</strong> <strong>Automation</strong> Integration Utilities (emaauxdataio)<br />
• Customer Intelligence Core Mid-Tier (emacore)<br />
• <strong>Marketing</strong> <strong>Automation</strong> Launcher (emalauncher)<br />
• Customer Intelligence Plugins to <strong>SAS</strong> Management Console (emasmc)<br />
• Custom,er Intelligence Web Application (emawebnport)<br />
• Customer Intelligence Reporting (custintelmid)<br />
• <strong>Marketing</strong> <strong>Automation</strong> Server Processes (mktauto)<br />
For each component on installed on your server, you‟ll need to unarchive the tar file and run the setup<br />
script. The files within the component archives are named similarly, so you will need to unarchive and<br />
execute the setup scripts one by one.<br />
Sample AIX process shown below:<br />
Step 1: Unarchive the component tar file<br />
tar -xvf emaauxdataio_r64.tar<br />
This creates 3 new files in r64 subdirectory:<br />
-rwxr-xr-x 1 sas staff 27813035 Oct 31 10:01 Setup_AIX_Power<br />
-rw-r--r-- 1 sas staff 13 Oct 31 10:01 media.inf<br />
-rw-r--r-- 1 sas staff 7603287 Oct 31 10:01 setup.jar<br />
Step 2: Run Setup script to lay down component files.<br />
cd r64<br />
chmod +x Setup*<br />
Setup_AIX_Power<br />
Note that you must turn on the execute bit for the setup script the first time you perform the unarchive.<br />
This setup command runs an InstallShield wizard to lay down the <strong>SAS</strong> components. A series of three<br />
screens will appear by the Installer that you must click through.<br />
Step 3: Repeat steps 1 and 2 (above) for each component except the <strong>Marketing</strong> <strong>Automation</strong> Server<br />
Processes (mktauto – Section 6 discusses applying the <strong>SAS</strong> Compute Server changes) until the setup<br />
scripts matching the components installed on your server have been run.<br />
Step 4: Once InstallShield Components have been run, you can verify the updated files as follows:<br />
Mid-Tier<br />
<strong>SAS</strong><strong>Marketing</strong><strong>Automation</strong>Core/4.1/Config/emacore_hf.xml (01/29/08)<br />
<strong>SAS</strong><strong>Marketing</strong><strong>Automation</strong>Core/4.1/ear/sas.iquery.metadata.jar (06/04/09)<br />
<strong>SAS</strong><strong>Marketing</strong><strong>Automation</strong>Core/4.1/ear/sas.iquery.dataservices.jar (06/04/09)<br />
___ Installation Ran Successfully<br />
<strong>SAS</strong> <strong>Marketing</strong> <strong>Automation</strong> hot fix 51MA13 Page | 3
2. Post-configuration and Deployment of the <strong>SAS</strong> <strong>Marketing</strong> <strong>Automation</strong><br />
Application Server<br />
2.1 Download Ant to Run the Post Configuration Script<br />
Apache Ant is needed to run the post-configuration script for the <strong>SAS</strong> <strong>Marketing</strong> <strong>Automation</strong> Application<br />
Server that is included in this Hot Fix. Download and install Ant 1.7 from http://ant.apache.org/. See the<br />
Apache Ant Documentation for any install details.<br />
Run ant -version from your command prompt and verify that you are accessing ant 1.7<br />
Be sure JAVA_HOME is set correctly with the location of your java installation. Failure to do so will result<br />
in errors when running the ant command.<br />
___ Downloaded ANT and verified the version<br />
2.2: Run the Post-configuration Ant script<br />
The 51MA13 Hot Fix has installed a post-configuration script, emacore_hf.xml, that will repackage<br />
sas.analytics.crm.ma.core.ear with the updated code and the deployment descriptor (ejb-jar.xml) that has<br />
already been configured for your environment. You will find emacore_hf.xml in the sas installation<br />
directory: <strong>SAS</strong><strong>Marketing</strong><strong>Automation</strong>Core/4.1/Config/emacore_hf.xml.<br />
Navigate to the bin subdirectory where ant is installed:<br />
Example: cd /usr/local/ant/apache-ant-1.7.0/bin<br />
Set JAVA_HOME for session if needed for you specific installation:<br />
Example: export JAVA_HOME=/usr/java14<br />
Stop the <strong>SAS</strong> Remote Services server before running the ant script.<br />
Run this command to execute the emacore_hf.xml script (all on one line)<br />
ant -f emacore_hf.xml<br />
-Dconfig.dir=<br />
-Dtemp.dir=<br />
-Dinstall.loc=<br />
where<br />
is the path to the Configuration Directory (eg. /saswork/MAplan) where the new<br />
sas.analytics.crm.ma.core.ear files are copied when the Hot Fix is applied by executing the ant scripts.<br />
is a path to an empty temporary directory for temp files. Make sure this location is empty so<br />
that the script can execute without errors when it performs the clean up.<br />
is the location of the product install (eg.<br />
/saswork/<strong>SAS</strong>/<strong>SAS</strong><strong>Marketing</strong><strong>Automation</strong>Core/4.1)<br />
Helpful hint: create a .sh file with the command above in case you need to make corrections.<br />
Example:<br />
ant -f "/saswork/<strong>SAS</strong>/<strong>SAS</strong><strong>Marketing</strong><strong>Automation</strong>Core/4.1/Config/emacore_hf.xml"<br />
-Dconfig.dir="/saswork/MAplan" -Dtemp.dir="/saswork/hotfix_tmp"<br />
-Dinstall.loc="/saswork/<strong>SAS</strong>/<strong>SAS</strong><strong>Marketing</strong><strong>Automation</strong>Core/4.1"<br />
Final messages from the execution of the script should be similar to:<br />
<strong>SAS</strong> <strong>Marketing</strong> <strong>Automation</strong> hot fix 51MA13 Page | 4
BUILD SUCCESSFUL<br />
Total time: 11 seconds<br />
Note: A complete log from the ant script can be found in the <strong>SAS</strong> installation directory<br />
<strong>SAS</strong><strong>Marketing</strong><strong>Automation</strong>Core/4.1/emacore_hf.log.<br />
___ Successfully executed emacore_hf.xml script<br />
Verify core-remote jar and restart RemoteServices<br />
The ant script will copy an updated sas.analytics.crm.ma.core-remote.jar into the configuration directory<br />
at Lev1/web/Deployments/RemoteServices/WEB-INF/lib. The new file will have a size of 713489 kb.<br />
Once you verify the jar has been updated, restart your StartRemoteServices.bat script to restart the <strong>SAS</strong><br />
Application Services.<br />
___ Restart Remote Services<br />
2.3: Run the Post-configuration Ant script for Customer Intelligence<br />
Reporting<br />
The 51MA13 Hot Fix has installed a post-configuration script, custintelmid_hf.xml, that will repackage<br />
sas.analytics.crm.ma.ccsservice.war with updated code. You will find custintelmid_hf.xml in the <strong>SAS</strong><br />
installation directory: /saswork/<strong>SAS</strong>/<strong>SAS</strong>CustomerIntelligenceReporting/5.1/Config. Note this directory<br />
will contain a log called custintelmid_hf.log after the execution of this script. As with the previous step,<br />
execute the custintelmid_hf.xml script by using Apache Ant.<br />
Open a command window and navigate to the bin subdirectory where ant is installed:<br />
cd c:\apache-ant-1.7.0\bin<br />
Run this command to execute the custintelmid_hf.xml script (all on one line)<br />
ant -f custintelmid_hf.xml<br />
-Dconfig.dir=<br />
-Dtemp.dir=<br />
-Dinstall.loc=<br />
Helpful hint: create a .bat file with the command above in case you need to make corrections.<br />
Example:<br />
ant -f<br />
"/saswork/<strong>SAS</strong>/<strong>SAS</strong>CustomerIntelligenceReporting/5.1/Config/custintelmid_hf.xml<br />
"<br />
-Dconfig.dir="/saswork/<strong>SAS</strong>/MA51Plan" -Dtemp.dir="c:/temphf"<br />
-Dinstall.loc="/saswork/<strong>SAS</strong>/<strong>SAS</strong>CustomerIntelligenceReporting/5.1"<br />
Verify sas.analytics.crm.ma.ccsservice.war<br />
The ant script will copy an updated sas.analytics.crm.ma.ccservice.war into the configuration directory at<br />
Lev1/web/webapps. The script will have created a copy of the original war file suffixed with today‟s date.<br />
<strong>SAS</strong> <strong>Marketing</strong> <strong>Automation</strong> hot fix 51MA13 Page | 5
The Customer Intelligence Reporting war module needs to be redeployed in its respective application<br />
server (Weblogic or Websphere) for the changes to take effect.<br />
___ Successfully executed custintelmid_hf.xml script<br />
2.4: Deployment of the MA core Jar file<br />
If you are deploying to BEA WebLogic, please now follow the instructions under section 2.4.1:<br />
Deployment Instructions for BEA WebLogic.<br />
If you are deploying to IBM WebSphere, please now follow the instructions under section 2.4.2:<br />
Deployment Instructions for IBM WebSphere.<br />
2.4.1: Deployment Instructions for BEA WebLogic.<br />
After logging into the Weblogic console, Navigate to Deployments==> Applications==>MACore<br />
sas.analytics.crm.ma.core.jar in the left panel. (Note that your application name may vary. The example<br />
below used the name MACore.) Click the Configuration tab to verify your deployment path is the<br />
Lev1/web/webapps/exploded directory where the updated jar now resides. (If you used some other path,<br />
you‟ll need to extract and copy the updated jar.)<br />
Click the 'Deploy' tab at the top of the right window.<br />
Click the 'ReDeploy Applications' button under the Actions column.<br />
<strong>SAS</strong> <strong>Marketing</strong> <strong>Automation</strong> hot fix 51MA13 Page | 6
This will cause the jar file to be redeployed within the Weblogic server.<br />
Notes:<br />
It is the JAR file that is being deployed not the EAR file. Once you run the Hot Fix setup<br />
program and extract the jar file, you're done with the ear.<br />
To verify the path to the deployed jar file, click on the Configuration tab.<br />
___ Weblogic Application Server Deployed<br />
This completes the application server deployment of the Hot Fix to Weblogic. Please now skip to section<br />
3: Deployment Customer Intelligence Reporting War file.<br />
2.4.2: Deployment Instructions for IBM WebSphere.<br />
Deploying the <strong>Marketing</strong> <strong>Automation</strong> Application Server will involve uninstalling the current <strong>Marketing</strong><br />
<strong>Automation</strong> Application, and reinstalling the ear file.<br />
Before uninstalling the current <strong>Marketing</strong> <strong>Automation</strong> Application, make a back up copy of the current<br />
WAS.policy file. You can find the file in this directory.<br />
/profiles/AppSrv01/config/cells//applications/<strong>Marketing</strong> <strong>Automation</strong> 5.1.ear/deployments/<strong>Marketing</strong><br />
<strong>Automation</strong> 5.1/META-INF<br />
Where is the „home‟ directory location for WebSphere:<br />
For example: /saswork/IBM/WebSphere/AppServer<br />
Stop the <strong>Marketing</strong> <strong>Automation</strong> 5.1 application from your Websphere console:<br />
Uninstall the <strong>Marketing</strong> <strong>Automation</strong> 5.1 application from your Websphere console<br />
Save the configuration<br />
Next, the newly configured <strong>Marketing</strong> <strong>Automation</strong> 5.1 application needs to be reinstalled.<br />
The deployed location of the configured ear file is typically on the mid-tier machine that hosts the<br />
<strong>Marketing</strong> <strong>Automation</strong> Software. This machine should contain a directory or path named:<br />
<strong>SAS</strong> <strong>Marketing</strong> <strong>Automation</strong> hot fix 51MA13 Page | 7
Lev1/web/webapps<br />
Where is a directory name that represents the configuration directory used to<br />
originally configure the mid-tier environment through the <strong>SAS</strong> Software Navigator.<br />
Deploy Application to Web Server<br />
Deploy <strong>SAS</strong> <strong>Marketing</strong> <strong>Automation</strong> Application Server using the Websphere admin console<br />
a) Applications->Install New Application<br />
• Select “Local path” radio button<br />
• Select Browse button and navigate to the MA ear file (/Lev1/<br />
web/webapps/sas.analytics.crm.ma.core.ear)<br />
• Choose Next<br />
• Choose Next<br />
• Choose Continue on the Application Security Warnings panel<br />
• Step 1: Choose Next<br />
• Step 2: Choose Next<br />
• Step 3: Choose Next<br />
• Step 4: Choose Next<br />
• Step 5: Choose Next<br />
• Step 6: Check the “Select” box for Web Module “<strong>SAS</strong> Customer Intelligence Servlets”<br />
then Choose Next<br />
• Step 7: Choose Next<br />
• Step 8: Choose Finish<br />
• Save<br />
b) Applications->Enterprise Applications<br />
• Select <strong>Marketing</strong> <strong>Automation</strong> 5.1 link<br />
• Classloader Mode: PARENT_LAST<br />
• Apply/Save<br />
c) Locate your saved copy of the WAS.policy file, and copy it back to its original location at<br />
/config/cells//applications/<strong>Marketing</strong><br />
<strong>Automation</strong> 4.4.ear/deployments/<strong>Marketing</strong> <strong>Automation</strong> 4.4/META-INF.<br />
d) Applications->Enterprise Applications<br />
• Select <strong>Marketing</strong> <strong>Automation</strong> 5.1 check box<br />
• Select Start button<br />
___ Websphere Application Server Deployed<br />
<strong>SAS</strong> <strong>Marketing</strong> <strong>Automation</strong> hot fix 51MA13 Page | 8
3. Deployment of the Customer Intelligence Reporting War file<br />
If you are deploying to BEA WebLogic, please now follow the instructions under section 3.1.1<br />
Deployment Instructions for BEA WebLogic.<br />
If you are deploying to IBM WebSphere, please now follow the instructions under section 3.1.2:<br />
Deployment Instructions for IBM WebSphere.<br />
3.1.1: Deployment Instructions for BEA WebLogic.<br />
After logging into the Weblogic console, Navigate to Deployments==> Web Application Modules<br />
==> sas.analytics.crm.ma.ccsservice in the left panel. (Note that your Target name may vary. The<br />
example below used the name <strong>SAS</strong>ManagedServer.)<br />
Click the Configuration tab to verify your deployment path is the Lev1/web/webapps/directory<br />
where the updated war file now resides.<br />
Click the Deploy tab in order to redeploy the war file.<br />
Click the 'ReDeploy' button under the Actions column.<br />
___ Weblogic Customer Intelligence Reporting war Deployed<br />
This completes the Customer Intelligence reporting war file deployment to Weblogic. Please now skip to<br />
Section 4.<br />
3.1.2: Deployment Instructions for IBM WebSphere.<br />
Re-deploy <strong>SAS</strong> Customer Intelligence Reporting war components using the Websphere Admin console.<br />
Navigate to Applications->Enterprise Applications<br />
Select the Stop button to stop CICommonServices<br />
<strong>SAS</strong> <strong>Marketing</strong> <strong>Automation</strong> hot fix 51MA13 Page | 9
Select the update button to update CICommonServices<br />
On the next screen, fill in the path to the sas_analytics_crm_ma_ccsservice_war file<br />
(Lev1/web/webapps)<br />
Type /ccs as the Context Root<br />
Choose Next<br />
Choose Next<br />
Choose Continue on the Application Security Warnings panel<br />
Select Step 4 Summary<br />
Finish<br />
Save<br />
Navigate to Applications->Enterprise Applications<br />
Select CICommonServices link<br />
Change the Classloader Mode to Parent_Last<br />
Under the startup options section, enter 10 for the starting weight field.<br />
Apply and Save<br />
<strong>SAS</strong> <strong>Marketing</strong> <strong>Automation</strong> hot fix 51MA13 Page | 10
Navigate to Applications->Enterprise Applications<br />
Select CICommonServices check box<br />
Select Start button<br />
___ Websphere Customer Intelligence Reporting war Deployed<br />
<strong>SAS</strong> <strong>Marketing</strong> <strong>Automation</strong> hot fix 51MA13 Page | 11
4. Changes required to the Customer Intelligence Reporting deployment<br />
If you have already installed the 51MA05 Hot Fix you should have already reconfigured the JMS<br />
messaging. If so skip this section and continue to section 5.<br />
JMS messages enqueued on the CICommonCHTricklingInsertQueue or the<br />
CICommonRHTricklingInsertQueue have reliable persistence. Changes were made as part of the<br />
MA5105 Hot Fix to make these transient. The deployment of the CI JMS messages needs to change due<br />
to this change in persistence.<br />
If deployed to BEA WebLogic, please now follow the instructions under section 4.1.1 Changes for BEA<br />
WebLogic.<br />
If deployed to IBM WebSphere, please now follow the instructions under section 4.1.2: Changes for IBM<br />
WebSphere.<br />
4.1.1: Changes for BEA Weblogic<br />
After logging into the Weblogic console, Navigate to Services==> JMS==> Servers ==><br />
CICommonJMSServer in the left panel. (Note that your CICommonJMSServer name may vary. The<br />
example below uses the name CICommonJMSServer.)<br />
Double click on CICommonJMSServer and change<br />
Persistent Store: to None<br />
Then Navigate to Services==> JMS==> Stores ==> CICommonFileStore and right click and delete the<br />
CICommonFileStore<br />
<strong>SAS</strong> <strong>Marketing</strong> <strong>Automation</strong> hot fix 51MA13 Page | 12
Then Navigate to Services==> JMS==> ConnectionFactories ==> CICommonQueueConnectionFactory<br />
and double click and Change Default Delivery Mode to NON-Persistent<br />
Then Navigate to Services==> JMS==> ConnectionFactories ==> CICommonTopicConnectionFactory<br />
and double click and Change Default Delivery Mode to NON-Persistent<br />
<strong>SAS</strong> <strong>Marketing</strong> <strong>Automation</strong> hot fix 51MA13 Page | 13
Then Navigate to Services==> JMS==> Servers ==> CICommonJMS==>Destinations ==> All<br />
Destinations shown e.g. CICommonCHTricklingInsertQueue<br />
Leave the Enable Store setting to default (which means it will use the JMS servers Store settings)<br />
You have now completed all changes needed for CICommon on Weblogic<br />
___ Weblogic jms changes completed<br />
Please now skip to Section 5.<br />
4.1.2: Changes for IBM WebSphere<br />
After logging into the WebShere console, Navigate to Service Integration==> Buses==> CICOMMONBUS<br />
==> Destinations on right of the screen. (Note that your bus name may vary. The example below uses the<br />
name CICOMMONBUS.) You will see a list of CICommon Queue‟s and Topic‟s of which the<br />
CICommonCHTricklingInsertQueue<br />
CICommonRHTricklingInsertQueue<br />
Need to be edited<br />
<strong>SAS</strong> <strong>Marketing</strong> <strong>Automation</strong> hot fix 51MA13 Page | 14
Double click on CICommonCHTrickingInsertQueue and<br />
Under Quality of service section ensure<br />
a. Enable Producers to over-ride default reliability - Should be checked<br />
b. Default Reliability - Reliable Non Persistent<br />
c. Maximum Reliability - Reliable Non Persistent<br />
See example below:<br />
<strong>SAS</strong> <strong>Marketing</strong> <strong>Automation</strong> hot fix 51MA13 Page | 15
Click on Apply and then Save<br />
Double click on CICommonRHTrickingInsertQueue and<br />
Under Quality of service section ensure<br />
a. Enable Producers to over-ride default reliability - Should be checked<br />
b. Default Reliability - Reliable Non Persistent<br />
c. Maximum Reliability - Reliable Non Persistent<br />
See example below:<br />
<strong>SAS</strong> <strong>Marketing</strong> <strong>Automation</strong> hot fix 51MA13 Page | 16
Click on Apply and then Save<br />
You have now completed all changes needed for CICommon on websphere<br />
___ Websphere jms changes completed<br />
<strong>SAS</strong> <strong>Marketing</strong> <strong>Automation</strong> hot fix 51MA13 Page | 17
5. Deployment of the <strong>SAS</strong> <strong>Marketing</strong> <strong>Automation</strong> Web Components Update<br />
This section is optional for <strong>Marketing</strong> <strong>Automation</strong> customers. If Campaign Web Studio is not installed,<br />
you can skip to section 6. Campaign Management customers (which are not <strong>Marketing</strong> <strong>Automation</strong><br />
packages) do not have this component and therefore, must skip this step.<br />
5.1: Run the Post-configuration Ant script<br />
The 51MA13 Hot Fix has installed a post-configuration script, emawebnport_hf.xml that will repackage<br />
sas.analytics.ma.webapp.war with the updated code. You will find emawebnport_hf.xml in the sas<br />
installation directory: /<strong>SAS</strong>/<strong>SAS</strong><strong>Marketing</strong><strong>Automation</strong>Web/4.1/Config Note this directory will contain a log<br />
called emawebnport_hf.log after the execution of this script.<br />
Use a similar ant script and methodology discussed in section 2.2 above to deploy the changes:<br />
Example:<br />
ant -f "/<strong>SAS</strong>/<strong>SAS</strong><strong>Marketing</strong><strong>Automation</strong>Web/4.1/Config/emawebnport_hf.xml"<br />
-Dconfig.dir="/<strong>SAS</strong>/MAPlan" -Dtemp.dir="/<strong>SAS</strong>/temphf"<br />
-Dinstall.loc="/<strong>SAS</strong>/<strong>SAS</strong><strong>Marketing</strong><strong>Automation</strong>Web/4.1"<br />
5.2 Verify sas.analytics.crm.ma.webapp.war<br />
The ant script will copy an updated sas.analytics.crm.ma.webapp.war into the configuration directory at<br />
Lev1/web/webapps. The script will have created a copy of the original war file suffixed with today‟s date.<br />
The <strong>Marketing</strong> <strong>Automation</strong> Web Components web module needs to be redeployed in its respective<br />
application server (Weblogic or Websphere) for the changes to take effect.<br />
5.3: Deployment of the <strong>SAS</strong> Campaign Web Studio war<br />
If you are deploying to BEA WebLogic, please now follow the instructions under section 5.3.1:<br />
Deployment Instructions for BEA WebLogic.<br />
If you are deploying to IBM WebSphere, please now follow the instructions under section 5.3.2:<br />
Deployment Instructions for IBM WebSphere.<br />
5.3.1: Deployment Instructions for BEA WebLogic.<br />
After logging into the Weblogic console, Navigate to Deployments==> Web Application Modules ==><br />
sas.analytics.crm.ma.webapp in the left panel. (Note that your Target name may vary. The example<br />
below used the name <strong>SAS</strong>ManagedServer.) Click the Configuration tab to verify your deployment path is<br />
the Lev1/web/webapps/directory where the updated war file now resides.<br />
Click the 'ReDeploy' button under the Actions column.<br />
<strong>SAS</strong> <strong>Marketing</strong> <strong>Automation</strong> hot fix 51MA13 Page | 18
___ Weblogic Campaign Web Studio Deployed<br />
This completes the application server deployment of the Hot Fix to Weblogic. Please now skip to section<br />
6.<br />
5.3.2: Deployment Instructions for IBM WebSphere.<br />
Re-deploy <strong>SAS</strong> <strong>Marketing</strong> <strong>Automation</strong> Web components using the Websphere Admin console.<br />
Navigate to Applications->Enterprise Applications<br />
Select the Stop button to stop sas_analytics_crm_ma_webapp<br />
Select the update button to update sas_analytics_crm_ma_webapp<br />
On the next screen, fill in the path to the sas_analytics_crm_ma_webapp_war file<br />
(Lev1/web/webapps)<br />
Type ma as the Context Root<br />
<strong>SAS</strong> <strong>Marketing</strong> <strong>Automation</strong> hot fix 51MA13 Page | 19
Choose Next<br />
Choose Next<br />
Choose Continue on the Application Security Warnings panel<br />
Step 1 Select Next<br />
Step 2 Select Next<br />
Step 3 Check the box for Web Module “sas.analytics.crm.ma.webapp.war” then Select Next<br />
Step 4 Summary, Select Finish<br />
Save<br />
___ Websphere Campaign Web Studio Deployed<br />
<strong>SAS</strong> <strong>Marketing</strong> <strong>Automation</strong> hot fix 51MA13 Page | 20
6. Installing 51MA13 Hot Fix on the Server Tier<br />
The 51MA13 Hot Fix contains files for the <strong>Marketing</strong> <strong>Automation</strong> Server Tier.<br />
The 51ma13_xxx directory under the directory containing the Hot Fix tar file will contain a file:<br />
mktautox6.tar (where x is the appropriate suffix for the Unix platform. A for AIX etc.)<br />
With the exception of HP Itanium, where the suffix will be ‘hx’, example below:<br />
Ex: mktautohx.tar<br />
Copy this file to the /<strong>SAS</strong>_9.1 then cd to that directory<br />
Unarchive the file using tar –xvf mktautox6.tar. This will replace the necessary stored process and <strong>SAS</strong><br />
macros with the Hot Fix versions<br />
You can verify the updated files as follows<br />
/<strong>SAS</strong>_9.1/cmacros/ma/sasmacr.sas7bcat new date of Jan xx 2010<br />
/<strong>SAS</strong>_9.1/sasstp/ma/ma_cdi_update_ch.sas new date of Jan xx 2010<br />
/<strong>SAS</strong>_9.1/sasstp/ma/ma_cdi_update_rh.sas new date of Jan xx 2010<br />
/<strong>SAS</strong>_9.1/misc/ma/mapublish.map new date of Jan xx 2010<br />
/<strong>SAS</strong>_9.1/misc/ma/mapublish.map needs to be copied to the MAMisc folder. To know<br />
the location of this folder open the file /Lev1/<strong>SAS</strong>Main/appserver_autoexec.sas. Copy the<br />
mapublish.map to the path specified in the line : "libname MAMisc '..\MAMisc';" (default location: /Lev1/<strong>SAS</strong>Main/Data/MAMisc).<br />
___ <strong>SAS</strong> Compute Server updated<br />
<strong>SAS</strong> <strong>Marketing</strong> <strong>Automation</strong> hot fix 51MA13 Page | 21
7. Common Data Model DDL and Alter Scripts<br />
Released Version DDL and Alter Scripts<br />
<strong>SAS</strong> Customer Intelligence is delivered with Data Description Language (DDL) scripts to be used at<br />
installation time to create the <strong>SAS</strong> Customer Intelligence reporting Common Data Model on the<br />
underlying database. (/<strong>SAS</strong>_9.1/misc/ma/ciddlxxx.sas)<br />
The scripts that accompany the 5.1 release of Customer Intelligence do not include any changes<br />
introduced by subsequent Hot Fixes. These updates have been provided through „alter‟ DDL scripts that<br />
accompany the Hot Fixes.<br />
New customer sites that have not configured the Common Data Model should refer to the product<br />
documentation on how to configure the common data model for the first time. Then create it before<br />
running any of the alter DDL scripts. The alter scripts must then be applied in sequence following<br />
successful creation and configuration of the Common Data Model tables.<br />
If you already have Hot Fixes applied then please skip to the Hot Fix after the latest you have installed.<br />
All DDL scripts are installed to /<strong>SAS</strong>_9.1/misc/ma<br />
51MA01 Hot Fix<br />
The Customer Intelligence Hot Fix (51MA01) introduced alter scripts to modify the key of the<br />
CI_RESPONSE_HISTORY table and to add a new column to the CI_CAMPAIGN table:<br />
CAMPAIGN_FOLDER_TXT. These scripts are designed to alter a Customer Intelligence 5.1 Common<br />
Data Model that has already been installed using the DDL that was shipped with the Customer<br />
Intelligence 5.1 release. The following files are provided by the service-pack in the /<strong>SAS</strong>_9.1/misc/ma location<br />
File<br />
1 cia01ora.sas Oracle<br />
2 cia01db2.sas DB2<br />
Supported DB<br />
3 cia01trd.sas Teradata<br />
4 cia01sqs.sas SQL Server<br />
5 cia01spd.sas SPDS<br />
Appendix A: of this document provides specific guidance on how to apply the 51MA01 alter scripts.<br />
51MA02 Hot Fix<br />
The Customer Intelligence Hot Fix (51MA02) introduced a new DDL script for support of the Netezza<br />
database platform. The script comprised a full DDL that can be used to create the physical data<br />
structures for the Common Data Model tables on Netezza. The script included changes and updates that<br />
were introduced in 51MA01 so no additional alter script is required for Netezza. The file is named as<br />
follows:<br />
File<br />
Supported DB<br />
6 ciddlntz.sas Netezza<br />
If you have already installed the 51MA01 Hot Fix and are not using Netezza as your database then this<br />
<strong>SAS</strong> <strong>Marketing</strong> <strong>Automation</strong> hot fix 51MA13 Page | 22
script need not be run<br />
51MA05 Hot Fix<br />
The 51MA13 Hot Fix contains a second set of alter scripts one for each supported platform as well as<br />
introducing a new DDL script for support of the Neoview database platform and an update to the Netezza<br />
DDL.<br />
The alter scripts provide updates to add five new budget columns to the CI_COMMUNICATION table.<br />
Again, these scripts are designed to alter a Customer Intelligence 5.1 Common Data Model that has<br />
already been installed using the DDL that was shipped with the Customer Intelligence 5.1. These scripts<br />
should only be applied after the scripts from 51MA01 have been applied. The second set of alter script<br />
files are named as follows:<br />
File<br />
1 cia02ora.sas Oracle<br />
2 cia02db2.sas DB2<br />
Supported DB<br />
3 cia02trd.sas Teradata<br />
4 cia02sqs.sas SQL Server<br />
5 cia02spd.sas SPDS<br />
The full Netezza DDL discussed under the 51MA02 Hot Fix has been superseded the new versions<br />
incorporates changes needed in 51MA13<br />
A new DDL was added to support Neoview.<br />
Customers who wish to use the Common Data Model with either Netezza or Neoview should refer to the<br />
product documentation on how to configure the common data model for the first time and apply these<br />
scripts accordingly. No alter scripts are provided for these two database platforms.<br />
The Netezza and Neoview DDL scripts are named as follows:<br />
File Supported DB<br />
6 ciddlntz.sas Netezza<br />
7 ciddlneo.sas Neoview<br />
<strong>SAS</strong> <strong>Marketing</strong> <strong>Automation</strong> hot fix 51MA13 Page | 23
Appendix A: Instructions for applying changes to the Common Data Model<br />
The 51MA13 Hot Fix has supplied Alter DDL scripts for the Customer Intelligence 5.1 Common Data<br />
Model. New customer sites that have not configured the Common Data Model should refer to the<br />
product documentation on how to configure the common data model for the first time before running the<br />
Alter DDL scripts.<br />
The Hot Fix delivers Alter table DDL to modify the key of the CI_RESPONSE_HISTORY table and to add<br />
a new column to the CI_CAMPAIGN table: CAMPAIGN_FOLDER_TXT. These Alter Table DDLs will alter<br />
a Customer Intelligence 5.1 Common Data Model that has already been installed using the DDL that was<br />
shipped with the Customer Intelligence 5.1 product. The following files are downloaded with the Hot Fix.<br />
Oracle DDL:<br />
DB2 DDL:<br />
SQL Server DDL:<br />
SPD Server DDL:<br />
Teradata DDL:<br />
cia01ora<br />
cia01db2<br />
cia01sqs<br />
cia01spd<br />
cia01trd<br />
PLEASE NOTE: Prior to running any Alter table DDL, you must apply an update to the data in your<br />
CI_RESPONSE_HISTORY table(s). The primary key is being changed to add two columns:<br />
TREATMENT_SK and CELL_PACKAGE_SK. TREATMENT_SK was delivered in the original DDL script<br />
with a setting of “NULL”. TREATMENT_SK will now be set to “NOT NULL” to comply with the<br />
requirements of being a member of the primary key. All rows of data that contain a null value in the<br />
TREATMENT_SK column must be updated to a „NOT NULL” value (-1).<br />
Sample code to update TREATMENT_SK in the CI_RESPONSE_HISTORY table:<br />
PROC SQL;<br />
UPDATE <br />
SET TREATMENT_SK = -1<br />
WHERE TREATMENT_SK IS NULL;<br />
QUIT;<br />
Overall code changes required before executing the DDL scripts:<br />
1. If the CI_RESPONSE_HISTORY table was renamed when initially created, to allow for multiple<br />
subjects or business contexts, rename the table specified in the alter table statements to match<br />
the table created by your install.<br />
2. If the CONSTRAINT names were renamed when initially created to allow for multiple subjects or<br />
business contexts, rename the constraint names in the alter table statements to match the<br />
constraints created by your install.<br />
3. Modify the SUBJECT_ID column in the list of primary key columns in the execute statement, to<br />
match the modifications that were made when the table was initially created. The SUBJECT_ID<br />
column was a placeholder column name in the original CI 5.1 CI_RESPONSE_HISTORY DDL<br />
and should have been modified with key columns to a customer specific subject.<br />
4. If multiple CI_RESPONSE_HISTORY tables were created to accommodate multiple subjects and<br />
business contexts, copy and repeat all EXECUTE statements that contain the alter table code.<br />
Make the changes listed in 1, 2 and 3 above to each set of alter table code for each Response<br />
History table that you have uniquely created in your schema.<br />
*** This completes the changes to CI_RESPONSE_HISTORY ***<br />
<strong>SAS</strong> <strong>Marketing</strong> <strong>Automation</strong> hot fix 51MA13 Page | 24
Install specifics for Teradata customers:<br />
Since the change to the CI_RESPONSE_HISTORY table requires a change to the primary key of the<br />
table, the above alter table instructions do not apply to Teradata. Teradata will not allow a primary key to<br />
be dropped and dropping the key is necessary to accomplish this modification to the table.<br />
Prior to running the supplied Teradata code, perform the following tasks:<br />
If data exists in your CI_RESPONSE_HISTORY table, save the data to another table. This Hot<br />
Fix requires deletion of the CI_RESPONSE_HISTORY table, so saving the data is essential.<br />
Drop the existing CI_RESPONSE_HISTORY table.<br />
Make the following changes to the supplied code for the CI_RESPONSE_HISTORY table:<br />
1. If the CI_RESPONSE_HISTORY table was renamed when initially created to allow for multiple<br />
subjects or business contexts, rename the table specified in the create table statements to match<br />
the table created by your install.<br />
2. If the primary key constraint name was renamed when initially created to allow for multiple<br />
subjects or business contexts, rename the constraint name in the create table code statements to<br />
match the constraints created by your install.<br />
3. Modify the SUBJECT_ID column in the list of primary key columns in the execute statement, to<br />
match the modifications that were made when the table was initially created. The SUBJECT_ID<br />
column was a placeholder column name in the original CI 5.1 CI_RESPONSE_HISTORY DDL<br />
and should have been modified with key columns to a customer specific subject.<br />
4. If multiple CI_RESPONSE_HISTORY tables were created to accommodate multiple subjects and<br />
business contexts, copy and repeat all EXECUTE statements that contain the create table code.<br />
Make the changes listed in 1, 2 and 3 above to each set of create table code for each Response<br />
History table that you have uniquely created in your schema.<br />
5. Reload the saved data from your existing CI_RESPONSE_HISTORY table to the newly created<br />
CI_RESPONSE_HISTORY table.<br />
*** This completes the changes to the CI_RESPONSE_HISTORY table. ***<br />
Install specifics for DB2 customers:<br />
The DB2 Alter table code has to be run in two passes. First make the changes listed above in the section<br />
titled: Overall code changes required before executing the DDL scripts. Next, after the primary key is<br />
dropped and the TREATMENT_SK column in the CI_RESPONSE_HISTORY table has been set to NULL<br />
in the first section of SQL code, you must have your DBA REORG the CI_RESPONSE_HISTORY table.<br />
This is a DB2 requirement and you cannot continue until this is done!<br />
After your DBA has run the REORG on the CI_RESPONSE_HISTORY table, you must un-comment<br />
the final set of Proc SQL code statements provided in the last section of the DDL script and run only<br />
this SQL code to create the new primary key on the CI_RESPONSE_HISTORY table. This<br />
completes the changes to your DB2 CI_RESPONSE_HISTORY table.<br />
<strong>SAS</strong> <strong>Marketing</strong> <strong>Automation</strong> hot fix 51MA13 Page | 25