Heavy Duty Balanced Opposed Compressors - Ariel Corporation
Heavy Duty Balanced Opposed Compressors - Ariel Corporation Heavy Duty Balanced Opposed Compressors - Ariel Corporation
FOR MODELS: JGZ AND JGU SECTION 1 - DESIGN SPECIFICATIONS & DATA TABLE 1-12 HOERBIGER VALVE ASSEMBLY FASTENERS - TIGHTENING VALUES FASTENER A Peripheral Cap Screws 10 - 32 Hex Socket Head 25 lb x in. (3) 12-28 43 lb x in. (5) 1/4 110 lb x in. (12) 5/16 176 lb x in. (20) 3/8 21 (28) a. For Prevailing-Torque Lock Nuts, use Column 40 on page 3 or 4 in the Tool Box Torque Chart (ER-63). b. 12 Point Cap Screw Center Fasteners in Valve Assemblies not marked SPL (Spiralock Threads), must be cleaned with Loctite Safety Solvent and locked with one or two drops of Loctite #272 thread locking compound. Do not use petroleum lubricants. c. 12 Point Cap Screws in Valve Assemblies with Spiralock Threads and marked SPL (see Figure 1- 10) are lubricated, both threads and seating surfaces, with a petroleum type lubricant only. d. 29 lb x ft (39 N·m) for 1/2 – 20 Bottom Half - Drake Lock Nut with non-metallic Plates in Liftwasher Type Valves. Bottom Views NOMINAL SIZE INCH – TPI Discharge Seat FIGURE 1-10 SPIRALOCK THREADED VALVE ASSEMBLY - MARKED “SPL” Tightening Torque Procedures TYPE Suction Guard TORQUE, LB X FT (N·m) Listed below are some procedures which make fastener tightening more accurate and will help to be sure that the proper torque is being applied. 1. Be sure that the torque wrench is properly calibrated and used by qualified personnel to achieve the required fastener tightening torque for all critical parts. 2. Always check to determine over what range the torque wrench is accurate, since most torque wrenches are not accurate over their entire range. 3. Tighten all multi-bolt assemblies in steps (need not apply to Grade 5 cap screws). Tighten each cap screw until snug using an alternating (criss-cross) pattern, refer to Figure 5-49 on page 5-60 for typical pattern sequence. Next, tighten each cap screw to 25% of full torque, moving across from cap screw to cap screw, in an alternating (criss-cross) pattern. Repeat this step for 50%, 75%, and 100% of full torque. PAGE 1 - 22 7/09
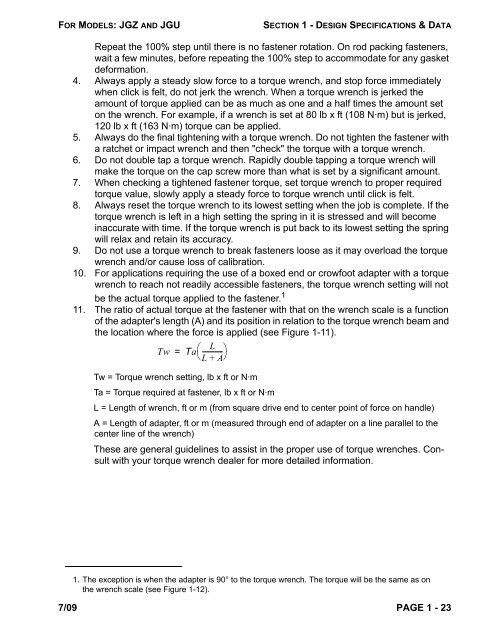
FOR MODELS: JGZ AND JGU SECTION 1 - DESIGN SPECIFICATIONS & DATA Repeat the 100% step until there is no fastener rotation. On rod packing fasteners, wait a few minutes, before repeating the 100% step to accommodate for any gasket deformation. 4. Always apply a steady slow force to a torque wrench, and stop force immediately when click is felt, do not jerk the wrench. When a torque wrench is jerked the amount of torque applied can be as much as one and a half times the amount set on the wrench. For example, if a wrench is set at 80 lb x ft (108 N·m) but is jerked, 120 lb x ft (163 N·m) torque can be applied. 5. Always do the final tightening with a torque wrench. Do not tighten the fastener with a ratchet or impact wrench and then "check" the torque with a torque wrench. 6. Do not double tap a torque wrench. Rapidly double tapping a torque wrench will make the torque on the cap screw more than what is set by a significant amount. 7. When checking a tightened fastener torque, set torque wrench to proper required torque value, slowly apply a steady force to torque wrench until click is felt. 8. Always reset the torque wrench to its lowest setting when the job is complete. If the torque wrench is left in a high setting the spring in it is stressed and will become inaccurate with time. If the torque wrench is put back to its lowest setting the spring will relax and retain its accuracy. 9. Do not use a torque wrench to break fasteners loose as it may overload the torque wrench and/or cause loss of calibration. 10. For applications requiring the use of a boxed end or crowfoot adapter with a torque wrench to reach not readily accessible fasteners, the torque wrench setting will not be the actual torque applied to the fastener. 1 11. The ratio of actual torque at the fastener with that on the wrench scale is a function of the adapter's length (A) and its position in relation to the torque wrench beam and the location where the force is applied (see Figure 1-11). L Tw = Ta⎛------------ ⎞ ⎝L+ A⎠ Tw = Torque wrench setting, lb x ft or N·m Ta = Torque required at fastener, lb x ft or N·m L = Length of wrench, ft or m (from square drive end to center point of force on handle) A = Length of adapter, ft or m (measured through end of adapter on a line parallel to the center line of the wrench) These are general guidelines to assist in the proper use of torque wrenches. Consult with your torque wrench dealer for more detailed information. 1. The exception is when the adapter is 90° to the torque wrench. The torque will be the same as on the wrench scale (see Figure 1-12). 7/09 PAGE 1 - 23
- Page 1 and 2: ARIEL Heavy Duty Balanced Opposed C
- Page 3 and 4: FOR MODELS: JGZ AND JGU TABLE OF CO
- Page 5 and 6: FOR MODELS: JGZ AND JGU TABLE OF CO
- Page 7 and 8: FOR MODELS: JGZ AND JGU TABLE OF CO
- Page 9 and 10: FOR MODELS: JGZ AND JGU SECTION 1 -
- Page 11 and 12: FOR MODELS: JGZ AND JGU SECTION 1 -
- Page 13 and 14: FOR MODELS: JGZ AND JGU SECTION 1 -
- Page 15 and 16: FOR MODELS: JGZ AND JGU SECTION 1 -
- Page 17 and 18: FOR MODELS: JGZ AND JGU SECTION 1 -
- Page 19 and 20: FOR MODELS: JGZ AND JGU SECTION 1 -
- Page 21 and 22: FOR MODELS: JGZ AND JGU SECTION 1 -
- Page 23 and 24: FOR MODELS: JGZ AND JGU SECTION 1 -
- Page 25 and 26: FOR MODELS: JGZ AND JGU SECTION 1 -
- Page 27 and 28: FOR MODELS: JGZ AND JGU SECTION 1 -
- Page 29: FOR MODELS: JGZ AND JGU SECTION 1 -
- Page 33 and 34: FOR MODELS: JGZ AND JGU SECTION 1 -
- Page 35 and 36: FOR MODELS: JGZ AND JGU SECTION 1 -
- Page 37 and 38: FOR MODELS: JGZ AND JGU SECTION 2 -
- Page 39 and 40: FOR MODELS: JGZ AND JGU SECTION 2 -
- Page 41 and 42: FOR MODELS: JGZ AND JGU SECTION 2 -
- Page 43 and 44: FOR MODELS: JGZ AND JGU SECTION 2 -
- Page 45 and 46: FOR MODELS: JGZ AND JGU SECTION 2 -
- Page 47 and 48: FOR MODELS: JGZ AND JGU SECTION 2 -
- Page 49 and 50: FOR MODELS: JGZ AND JGU SECTION 2 -
- Page 51 and 52: FOR MODELS: JGZ AND JGU SECTION 3 -
- Page 53 and 54: FOR MODELS: JGZ AND JGU SECTION 3 -
- Page 55 and 56: FOR MODELS: JGZ AND JGU SECTION 3 -
- Page 57 and 58: FOR MODELS: JGZ AND JGU SECTION 3 -
- Page 59 and 60: FOR MODELS: JGZ AND JGU SECTION 3 -
- Page 61 and 62: FOR MODELS: JGZ AND JGU SECTION 3 -
- Page 63 and 64: FOR MODELS: JGZ AND JGU SECTION 3 -
- Page 65 and 66: FOR MODELS: JGZ AND JGU SECTION 3 -
- Page 67 and 68: FOR MODELS: JGZ AND JGU SECTION 4 L
- Page 69 and 70: FOR MODELS: JGZ AND JGU SECTION 4 L
- Page 71 and 72: FOR MODELS: JGZ AND JGU SECTION 4 L
- Page 73 and 74: FOR MODELS: JGZ AND JGU SECTION 4 L
- Page 75 and 76: FOR MODELS: JGZ AND JGU SECTION 4 L
- Page 77 and 78: FOR MODELS: JGZ AND JGU SECTION 4 L
- Page 79 and 80: FOR MODELS: JGZ AND JGU SECTION 4 L
FOR MODELS: JGZ AND JGU SECTION 1 - DESIGN SPECIFICATIONS & DATA<br />
Repeat the 100% step until there is no fastener rotation. On rod packing fasteners,<br />
wait a few minutes, before repeating the 100% step to accommodate for any gasket<br />
deformation.<br />
4. Always apply a steady slow force to a torque wrench, and stop force immediately<br />
when click is felt, do not jerk the wrench. When a torque wrench is jerked the<br />
amount of torque applied can be as much as one and a half times the amount set<br />
on the wrench. For example, if a wrench is set at 80 lb x ft (108 N·m) but is jerked,<br />
120 lb x ft (163 N·m) torque can be applied.<br />
5. Always do the final tightening with a torque wrench. Do not tighten the fastener with<br />
a ratchet or impact wrench and then "check" the torque with a torque wrench.<br />
6. Do not double tap a torque wrench. Rapidly double tapping a torque wrench will<br />
make the torque on the cap screw more than what is set by a significant amount.<br />
7. When checking a tightened fastener torque, set torque wrench to proper required<br />
torque value, slowly apply a steady force to torque wrench until click is felt.<br />
8. Always reset the torque wrench to its lowest setting when the job is complete. If the<br />
torque wrench is left in a high setting the spring in it is stressed and will become<br />
inaccurate with time. If the torque wrench is put back to its lowest setting the spring<br />
will relax and retain its accuracy.<br />
9. Do not use a torque wrench to break fasteners loose as it may overload the torque<br />
wrench and/or cause loss of calibration.<br />
10. For applications requiring the use of a boxed end or crowfoot adapter with a torque<br />
wrench to reach not readily accessible fasteners, the torque wrench setting will not<br />
be the actual torque applied to the fastener. 1<br />
11. The ratio of actual torque at the fastener with that on the wrench scale is a function<br />
of the adapter's length (A) and its position in relation to the torque wrench beam and<br />
the location where the force is applied (see Figure 1-11).<br />
L<br />
Tw =<br />
Ta⎛------------<br />
⎞<br />
⎝L+ A⎠<br />
Tw = Torque wrench setting, lb x ft or N·m<br />
Ta = Torque required at fastener, lb x ft or N·m<br />
L = Length of wrench, ft or m (from square drive end to center point of force on handle)<br />
A = Length of adapter, ft or m (measured through end of adapter on a line parallel to the<br />
center line of the wrench)<br />
These are general guidelines to assist in the proper use of torque wrenches. Consult<br />
with your torque wrench dealer for more detailed information.<br />
1. The exception is when the adapter is 90° to the torque wrench. The torque will be the same as on<br />
the wrench scale (see Figure 1-12).<br />
7/09 PAGE 1 - 23


