Omega-Ply Installation Manual - Laminators Inc.
Omega-Ply Installation Manual - Laminators Inc.
Omega-Ply Installation Manual - Laminators Inc.
- No tags were found...

Create successful ePaper yourself
Turn your PDF publications into a flip-book with our unique Google optimized e-Paper software.
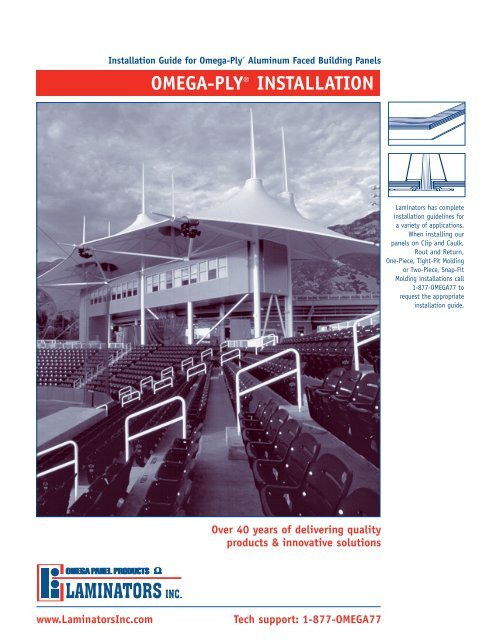
<strong>Installation</strong> Guide for <strong>Omega</strong>-<strong>Ply</strong> ® Aluminum Faced Building Panels<br />
OMEGA-PLY ® INSTALLATION<br />
<strong>Laminators</strong> has complete<br />
installation guidelines for<br />
a variety of applications.<br />
When installing our<br />
panels on Clip and Caulk,<br />
Rout and Return,<br />
One-Piece, Tight-Fit Molding<br />
or Two-Piece, Snap-Fit<br />
Molding installations call<br />
1-877-OMEGA77 to<br />
request the appropriate<br />
installation guide.<br />
Over 40 years of delivering quality<br />
products & innovative solutions<br />
www.<strong>Laminators</strong><strong>Inc</strong>.com<br />
Tech support: 1-877-OMEGA77
BEFORE YOU START<br />
Substrate and Framing<br />
Prior to installation, the installer MUST verify that the<br />
framing and substrate are in compliance with all<br />
architects' specifications.<br />
Inspect BOTH primary and secondary wall framing to verify<br />
that all girts, angles, channels, studs and sheathing and<br />
other structural panel support members and anchorage<br />
have been installed within the following tolerances:<br />
1/4" in any 20' length vertically or horizontally<br />
1/2" in any building elevation<br />
Inspect sheathing to verify that sheathing joints are<br />
supported by framing and that installation is within<br />
flatness tolerances. These surfaces must be even, smooth,<br />
sound, clean and dry. If the substrate or framing is not<br />
within architectural specifications, the installer must<br />
submit a written report to the General Contractor listing<br />
conditions that are detrimental to the installation of<br />
panels. Do NOT proceed with installation until<br />
unsatisfactory conditions have been corrected.<br />
Summary of Installer Responsibility<br />
The Panel Installer assumes total responsibility for all<br />
components of the panel installation including, but not<br />
limited to attachment to sub-construction, panel-to-panel<br />
joints, joints between panels and dissimilar material, and<br />
the joint seal associated with panel system.<br />
<strong>Installation</strong> Supplies & Accessories<br />
See page 7 to be sure you are using materials that have<br />
been tested and approved by <strong>Laminators</strong> for use with<br />
<strong>Omega</strong>-<strong>Ply</strong> panels. Inventory all materials and accessories<br />
to ensure that all materials are available on-site. Call Tech<br />
Support if you need additional recommendations.<br />
Receiving and Storage<br />
Examination: Upon receipt of materials, perform a thorough<br />
examination to identify any damage that may have occurred<br />
during shipping.<br />
Storage: Panels are to be stored horizontally on pallets<br />
with a positive slope for drainage of water and should be<br />
covered with watertight and ventilated materials. Standing<br />
water will damage panel finish.<br />
No more than 1500 pounds should be stacked on one<br />
pallet. Depending on panel size, this should be fewer than<br />
50 panels at 30 pounds per panel and less than 2-1/2'<br />
high. Do not stack other materials on or in contact with<br />
panels to prevent staining, denting, or other damage.<br />
Storage temperature must not exceed 120ºF (49ºC).<br />
<strong>Omega</strong>-<strong>Ply</strong> panels are manufactured with a slight concave<br />
bow to assist in bonding the center to studs and furring.<br />
Panels must be kept stacked and weighted to retain the<br />
bow during storage.<br />
<strong>Laminators</strong>’ warranty does not cover water damage caused<br />
by improper storage or installation. Inspect panels on<br />
delivery, then store them on skids 8" above the ground.<br />
Place a breathable cover over them and store them in a<br />
ventilated space under roof.<br />
Tech Support: 1-800-523-2347<br />
If wet panels are discovered, uncrate them and dry them<br />
with towels to prevent wood rotting, paint attaining or<br />
aluminum corrosion.<br />
Panel Handling<br />
Use clean work gloves to avoid hand injury from any sharp<br />
edges and to prevent smudging of the prefinished surfaces.<br />
Although panels are shipped with protective masking on<br />
both sides, always lift one panel completely off the next to<br />
prevent scratches. Do not slide one panel across another.<br />
Protect panels from construction hazards. Good construction<br />
practice provides for panel protection and cleaning in<br />
the contract documents. Normally these are the general<br />
contractor’s responsibility. Temporary protection may be<br />
required if welding, cutting, sandblasting, or other<br />
potentially damaging construction activities are<br />
scheduled nearby.<br />
Cutting the Panels<br />
<strong>Omega</strong>-<strong>Ply</strong> panels are designed to be cut to size on the<br />
job site. Even if the panels have been received cut to<br />
size, it may be necessary to do some minor trimming to<br />
account for areas of an elevation that may be out of<br />
square. To cut <strong>Omega</strong>-Lite panels, use a circular saw with<br />
a sharp, carbide-tipped blade – (40-tooth minimum).<br />
Do not remove the protective masking from the panel face.<br />
After cutting, use a screwdriver or deburring tool (see<br />
page 7) to remove burrs or sharp edges from the panels.<br />
Carbide-tipped<br />
blade (40 tooth min.)<br />
recommended<br />
Safety tip: Wear safety glasses when cutting!<br />
Wear gloves when handling cut edges!<br />
Ventilation is Important<br />
The wood or exterior gypsum board of the substrate<br />
must be protected and ventilated. Trapped moisture can<br />
cause major damage in a short time. When mounting over<br />
exterior gypsum or masonry, use steel strapping or hat<br />
channels to separate panels from the structure for good<br />
air circulation.<br />
Flashing<br />
<strong>Laminators</strong> can supply flashing materials made from<br />
0.32"(0.813 mm) aluminum sheet painted to match the<br />
adjacent panel system or surface.<br />
Use proper flashing technique when installing flashing<br />
with panels.<br />
Complete product specifications can be<br />
downloaded from our architectural web site<br />
www.<strong>Laminators</strong><strong>Inc</strong>.com or you<br />
can request them by fax at 215-721-1239.<br />
©2007 <strong>Laminators</strong> <strong>Inc</strong>orporated. <strong>Omega</strong>-<strong>Ply</strong> ® Aluminum Faced Building Panels <strong>Installation</strong> Guide.
www.<strong>Laminators</strong><strong>Inc</strong>.com<br />
TABLE OF CONTENTS<br />
<strong>Omega</strong>-<strong>Ply</strong> ® Building Panels<br />
Available in many attractive colors, smooth or stucco finish, economical <strong>Omega</strong>-<strong>Ply</strong>® panels provide a<br />
decorative accent for fascias, soffits, and storefronts. Its high impact-resistant plywood or hardboard core<br />
and aluminum facing make it the strongest panel we manufacture. It can withstand high wind and<br />
structural loads. Step-by-step installation instructions should be followed to obtain desired results with<br />
an <strong>Omega</strong>-<strong>Ply</strong> System.<br />
Before You Start<br />
Inside Front Cover<br />
Panel Maintenance 1<br />
Caulking the Panels 2<br />
Preparing the Wall 3<br />
<strong>Installation</strong> 4 - 6<br />
Tools and Accessories 7 - 8<br />
Tools and Accessories Available from <strong>Laminators</strong> 8<br />
Code of Quality<br />
Inside Back Cover<br />
<strong>Omega</strong>-<strong>Ply</strong> Panel Maintenance<br />
For scratches and rub-marks:<br />
<strong>Omega</strong>-<strong>Ply</strong> touch-up paint and re-paint instructions are<br />
available from <strong>Laminators</strong>. For larger paint repairs, call<br />
<strong>Laminators</strong> for standard paints designed for aluminum surfaces<br />
available at paint stores.<br />
Keep harsh solvents away from finish:<br />
Panel finishes are resistant to most but not all solvents and<br />
chemicals. If in doubt, call <strong>Laminators</strong> for compatibility charts.<br />
You can safely use mineral spirits to remove uncured sealants<br />
and paints.<br />
Routine cleaning:<br />
<strong>Omega</strong>-<strong>Ply</strong> panels should be washed periodically to keep them<br />
bright. Plain water and a clean cloth are all you need to remove<br />
ordinary dirt buildup. A mild, non-abrasive household detergent<br />
with a clean-water rinse can be used for more stubborn stains.<br />
Solvents such as alcohols, mineral spirits, naphtha, turpentine,<br />
and xylene can be applied with a soft cloth. Never soak panels<br />
in solvents.<br />
Panels with metallic paint finishes:<br />
The protective masking on the face of each panel should be<br />
left in place until work is complete on any given area of an<br />
installation. However, to help ensure good color uniformity,<br />
periodically remove the masking from half of a panel (peel<br />
masking upward from the bottom of the panel) to check for<br />
color, paint defects, scratches and dents.<br />
On panels with metallic finishes, a good color match is much<br />
more difficult to achieve. In this case, two adjoining panels<br />
should be periodically checked by removing the masking from<br />
half of two panels as the installation progresses. The masking<br />
should then be taped back over the panel to protect it.<br />
Should any defects be found, stop work immediately and call<br />
<strong>Laminators</strong> for assistance.<br />
When installing panels with metallic finishes, it is very<br />
important that the directional arrows on the panel<br />
masking are oriented in the same direction.<br />
Color variation is a characteristic of Aluminum composite<br />
panels with metallic paint finishes. <strong>Laminators</strong> <strong>Inc</strong>orporated<br />
DOES NOT warrant a color match for these panels.<br />
©2007 <strong>Laminators</strong> <strong>Inc</strong>orporated <strong>Omega</strong>-<strong>Ply</strong> ® Aluminum Building Panels <strong>Installation</strong> Guide.<br />
1
CAULKING THE PANELS<br />
Tech Support: 1-800-523-2347<br />
Pay special attention to caulking instructions. <strong>Omega</strong>-<strong>Ply</strong> cores are water-absorbent; water causes the core<br />
to swell, rot, and corrode the aluminum face leading to panel failure. If you have any questions about<br />
proper installation procedures, call <strong>Laminators</strong> for knowledgeable, personal service.<br />
Water problems can be prevented by careful caulking. Please follow instructions! When caulking inside tight<br />
moldings/extrusions use “self-healing” sealants, such as butyl or solvent-based acrylic types. Do not use<br />
elastic, rubber-forming sealants (such as urethanes, silicones or latex) in moldings/extrusions with<br />
woodcore panels — they leak!<br />
Cleanup is easy with mineral spirits and a non-marking scraper. Where moldings meet walls, door frames,<br />
and windows, fill the gap with elastic, rubber-forming sealants, such as silicones, urethanes, polysulfides,<br />
and latexes. Where needed, use a bond-breaker back-up, like caulking rope or silicone backer rod, as<br />
shown below.<br />
Panel<br />
Silicone<br />
sealant<br />
“J”<br />
Molding<br />
Silicone<br />
sealant<br />
Window<br />
Frame<br />
Silicone<br />
sealant<br />
“H” Molding<br />
Silicone<br />
sealant<br />
Panel<br />
Wall<br />
Caulking rope or<br />
silicone backer rod<br />
Setting block<br />
Panel<br />
Caulking rope or<br />
silicone backer rod<br />
Silicone<br />
sealant<br />
“J” Molding<br />
Wall<br />
Silicone<br />
sealant<br />
Self-healing sealants should be used at the joints of frame members and glazing stops.<br />
Rubber-forming sealants should be used between moldings and adjacent building materials.<br />
2<br />
©2007 <strong>Laminators</strong> <strong>Inc</strong>orporated <strong>Omega</strong>-<strong>Ply</strong> ® Aluminum Building Panels <strong>Installation</strong> Guide.
www.<strong>Laminators</strong><strong>Inc</strong>.com<br />
PREPARING THE WALL<br />
Cut away<br />
Prepare the Wall for Panel <strong>Installation</strong><br />
Lay out the wall to be covered so that the joints work in your<br />
favor. Put the edges where long, straight cuts would fall, such as<br />
next to windows or doors. Pick a corner or the edge of a window or<br />
door as a starting point, measure accordingly, then snap the lines.<br />
Set chalk lines to establish verticals, then view the entire wall.<br />
Ensure Panel Drainage<br />
In installations more than the height of one panel (8'), vertical and<br />
horizontal moldings will cross paths. It is important that vertical,<br />
Reveal “H” moldings not be blocked, because they carry drainage<br />
down the panel wall.<br />
To ensure that no blockage occurs,“H”moldings should be installed<br />
in a continuous, uninterrupted descent from top to bottom.<br />
We recommend in installations more than 8' high that<br />
horizontal moldings be cut into lengths and fitted between<br />
the vertical moldings.<br />
The dotted line shown in the drawing indicates an area where<br />
two moldings will intersect. This area must be cut away so that<br />
after installation, moldings will sit on the same plane.An area<br />
approximately four square inches should be adequate for the entire<br />
intersection. Use tin snips to cut the area to be removed. Using<br />
sheet metal pliers (duck bill vice grips), bend the material up and<br />
down until the piece snaps off.<br />
Improved drainage and cavity ventilation can be achieved by<br />
overlapping vertical extrusions with horizontals. Run vertical<br />
moldings through, and abut horizontals for the best expansion/<br />
contraction control. Measure and cut the first panel as necessary<br />
to obtain a true vertical edge.<br />
Install Furring<br />
Trim all openings and bottom edge to roof deck or sidewalks with<br />
flashing, as appropriate, and install furring, if desired. If the wall is<br />
concrete, install furring to prevent moisture build-up. For drywall,<br />
furring should be installed with fasteners going through the drywall<br />
into structural members. If a wall is uneven, furring can be used<br />
with shims to level the surface.<br />
Locate furring strips on center at panel joints. Space strips<br />
every 16" on center so that intermediates will provide adequate<br />
panel support when adhesive is applied. If you use gypsum<br />
board, you must use furring for strength and ventilation, and<br />
cover the gypsum with building paper. Fasteners for furring must<br />
go completely through the gypsum board and into a structural<br />
member. Panels are then anchored to the furring. Be sure to use<br />
exterior grade gypsum board.<br />
Install furring as you go, or work ahead of panel installers. Take<br />
care to measure and space furring to leave room for caulk and trim.<br />
©2007 <strong>Laminators</strong> <strong>Inc</strong>orporated <strong>Omega</strong>-<strong>Ply</strong> ® Aluminum Building Panels <strong>Installation</strong> Guide.<br />
3
INSTALLATION<br />
Tech Support: 1-800-523-2347<br />
2 rubber shims in<br />
bottom molding<br />
of each panel<br />
Install Moldings<br />
Moldings are blind-fastened, so you must make sure screws<br />
don’t get in the way of panels when panels are inserted in<br />
moldings. Use 1" galvanized drywall screws, 13/4" ring-shank<br />
or screw-shank nails (galvanized, aluminum, or stainless<br />
steel). TEK screws should be used for steel framing. Install<br />
the corner or edge molding. Make sure it is plumb and true.<br />
Establish a baseline at right angles to the corner,<br />
and install the bottom, drip-edge or “J” molding for<br />
one panel.<br />
Shim the bottom molding off the ground or sidewalk<br />
before fastening so that moisture and salt cannot attack the<br />
molding or the panel. Don’t forget to remove the shim when<br />
fastening is completed.<br />
“J”<br />
molding<br />
Furring<br />
Measure Space For the First Panel<br />
Measure and cut the panel to fit the space. Plan on<br />
cutting the outside corner to establish a true<br />
vertical edge.<br />
Insert Shims in the Molding<br />
Peel paper from the rubber shims. Place two of the shims in<br />
the bottom molding. These provide a cushion for panel<br />
expansion and a reservoir of sealant.<br />
Adjustable<br />
outside<br />
corner<br />
Shim<br />
Carefully Caulk the Moldings<br />
Using a silicone caulk recommended by <strong>Laminators</strong>, see page<br />
7, run enough sealant into all moldings so that it oozes out<br />
when the panel is installed. Two 3/16" diameter beads caulk<br />
will ensure that there are no skips in the sealant. Only caulk<br />
molding for one panel at a time.<br />
See page 2 for caulking recommendations.<br />
4<br />
©2007 <strong>Laminators</strong> <strong>Inc</strong>orporated <strong>Omega</strong>-<strong>Ply</strong> ® Aluminum Building Panels <strong>Installation</strong> Guide.
www.<strong>Laminators</strong><strong>Inc</strong>.com<br />
INSTALLATION<br />
Apply Panel Adhesive<br />
Apply a bead of panel adhesive to intermediate framing.<br />
For sheathing, apply thick daubs of a recommended panel<br />
adhesive. This will limit panel deflection caused by wind<br />
or weight. Be sure to use a <strong>Laminators</strong>’ approved panel<br />
adhesive, see page 7.<br />
Peel Back the Clear Masking<br />
Don’t forget to peel plastic masking back 3-6" from the<br />
edges on the front before inserting panels in the molding.<br />
Remove it completely from the back of the panel. All<br />
masking should be removed when the installation is<br />
completed. Masking should be left on no more than 2<br />
weeks or it becomes nearly impossible to remove.<br />
Install the Panel<br />
Place the bottom edge of the panel into the precaulked<br />
molding. With the bottom edge in place, push the panel<br />
firmly against the wall, then pull it away. Check to be sure<br />
the adhesive contacts the panel at all points. If so, push<br />
the panel into place immediately. If not, apply more<br />
adhesive to make sure it contacts wall.<br />
Slide the Panel Into the Edge or Corner Molding<br />
Slide the panel sideways into the precaulked edge or<br />
corner molding. You can use wide-blade putty knives<br />
to “shoehorn” the panel into the vertical molding<br />
if needed.<br />
Seat the Panel Securely<br />
Seat the panel in the corner molding using a 2" x 6"<br />
tapper. Hold the top of the 2" x 6" near the top of the<br />
panel edge and swing the bottom to strike the edge of<br />
the panel – or you can hold the 2" x 6" against the<br />
panel and hit it with a hammer. Using the 2" x 6"<br />
tapper prevents damaging the edge of the panel.<br />
©2007 <strong>Laminators</strong> <strong>Inc</strong>orporated <strong>Omega</strong>-<strong>Ply</strong> ® Aluminum Building Panels <strong>Installation</strong> Guide.<br />
5
INSTALLATION<br />
Tech Support: 1-800-523-2347<br />
Check Your Work<br />
Measure to be sure the panel is fully inserted into the<br />
molding. This will ensure that panel edges stay covered<br />
as the building expands and moves over time. Look for<br />
uniform “squeeze-out” of caulk all around the panel.<br />
If molding is required at the top of the first row of panels,<br />
caulk and attach an “H,” reveal “H,” or “J” molding<br />
along the top edge of the panel.<br />
Clean up the Squeeze-out<br />
Scrape any excess caulk off with a non-marking plastic<br />
scraper and clean the panel with mineral spirits.<br />
Insert the Next “H” Molding<br />
Fit the next vertical “H” molding. Fill the molding with caulk<br />
then install the molding over the edge of the last panel you<br />
installed. Fasten the molding as before.<br />
Repeat the installation process until finished.<br />
Fill all joints between moldings and adjoining construction<br />
at the ends of panel runs with silicone caulk. Cover the top<br />
of the panels with polyethylene to keep water out if flashing<br />
or a parapet is to be installed at a later date.<br />
Remove masking from the front of the panel. Failure to<br />
do so within two weeks will make masking impossible<br />
to remove.<br />
Don't forget to remove masking and shims when installation<br />
is complete<br />
Liquid Nails® Heavy-Duty for Construction & Remodeling<br />
Apply a generous amount of Liquid Nails® to the<br />
sheathing to prevent panel adhesive from drawing the<br />
panel toward the building as it dries, Gaska foam tape<br />
should be placed out in the field of the panel where it will<br />
shim the adhesive to the proper thickness away from the<br />
furring or sheathing.<br />
There are several types of Liquid Nails®. Each Liquid Nails<br />
adhesive is specially formulated to bond to various<br />
substrates and common building materials with different<br />
construction requirements.<br />
LN-901 Heavy-Duty for Construction & Remodeling is the<br />
only exterior version that will stick to wet and/or frozen<br />
lumber as well as metal panels.<br />
<strong>Laminators</strong>’ recommendations for sealants are developed<br />
from our field tests and compiled from years of feedback<br />
from our customers. Recommendations are based on<br />
product availability, durability and ease of application. We<br />
suggest that the sealants build up enough strength in an<br />
overnight cure so that bubbles do not form. We supply<br />
caulk in custom colors to match our panels.<br />
Carefully review the caulk manufacturer’s literature for skin<br />
formation, tack-free time and cure times before using.<br />
Remember, your environmental condition is the biggest<br />
factor in deciding which sealant is appropriate for your<br />
project. Caulk only one joint at a time so that the caulk<br />
does not skin over before it can be tooled. Only caulk 4' to<br />
6' at a time for a smooth finish.<br />
It is important to only use sealants from our<br />
recommended list and to always test your sealant in the<br />
environmental conditions you are currently working in to<br />
find the one that works best. Consult with us if your caulk<br />
is not performing as expected.<br />
Liquid Nails® is a registered trademark of Macco Adhesives<br />
6<br />
©2007 <strong>Laminators</strong> <strong>Inc</strong>orporated <strong>Omega</strong>-<strong>Ply</strong> ® Aluminum Building Panels <strong>Installation</strong> Guide.
www.<strong>Laminators</strong><strong>Inc</strong>.com<br />
TOOLS AND ACCESSORIES<br />
Hand Tools<br />
Aviation or “tin” snips for cutting extrusions or<br />
flashing metal<br />
Carpenter’s circular saw (7-1/4" blade) with 40 teeth (min.)<br />
for cutting panels to size – triple chip grind (for nonferrous<br />
metal or plastic)<br />
Deburring tool (or screwdriver) to remove burrs from cut<br />
panel edges<br />
Disc grinder or sander (4-5") to adjust sheathing, panel,<br />
and extruded moldings for a good fit.<br />
Fine, single-cut flat file for trueing metal edges of panels<br />
or moldings<br />
Hammer (with crutch tip) or a rubber mallet to<br />
adjust panels<br />
Jigsaw with sharp, 24-tooth, sheet metal cutting blade to<br />
make panel cuts<br />
Miter saw for cutting extruded aluminum moldings<br />
Sheet metal pliers (duck-bill vice grips) to trim moldings<br />
Screw gun to drive self-drilling, self-tapping screws<br />
for mounting panels and extruded moldings with #2<br />
Phillips-head tips and 1/8" quick-change drill bits<br />
Screws (galvanized)<br />
#6 x 1-1/4" bugle-head drywall or #12 phillips-head<br />
pan-head screws for securing clips into sheathing<br />
#8 or #10 x 3/4" or longer, TEKS/3 screws to secure clips<br />
into steel studs<br />
#6 x 1/2" and #6 x 1" Phillips pan-head, TEKS/2 screws<br />
for mounting moldings to plywood or metal<br />
Caulking Tools<br />
Caulking gun (11oz. or 1-quart tube) for panel adhesive<br />
Caulking rope or backer rod; use 1/4" or 3/8" to<br />
suit job<br />
Clean rags (24), approximately 2' x 2' in size for caulk<br />
wiping and clean-up<br />
Masking tape (Scotch brand Safe Release Masking tape TM<br />
is recommended) 1" wide<br />
Mineral spirits to clean caulk from panels if necessary<br />
Plastic putty knife (1-1/2") for use with 1" masking<br />
tape to keep caulk off the panel faces, making the job<br />
easy to clean up<br />
Utility knife to cut and trim tape<br />
Contractor’s Supplies<br />
Furring strips or studs as needed<br />
Gloves (clean) to handle panels<br />
Insulation, 3/4" foam to go between furring strips<br />
Peel-and-stick flex flashing (“Snow and Rain<br />
flashing”) for flashing building transitions and bottom<br />
edges of sheathing<br />
Safety goggles<br />
Rubber shims, for spacing if molding is used<br />
Wood shims, for spacing between ground and<br />
bottom molding<br />
Tape measure<br />
Panel Adhesives (Tested and Approved)<br />
Surebond® (1-847-843-1818)<br />
SB-400; PS-800<br />
Macco Adhesives (1-800-634-0015)<br />
LN-901 Liquid Nails® Heavy-Duty<br />
for Construction and Remodeling<br />
Franklin International (1-800-877-4583)<br />
Titebond® construction adhesive<br />
Silicone Sealants (Tested and Approved)<br />
GE Silicone (1-800-332-3390)<br />
Silpruf®<br />
Silglaze® II<br />
Dow Corning (1-800-248-2481)<br />
(20 year warranty available)<br />
791 Silicone sealant<br />
795 Silicone sealant<br />
995 Silicon sealant<br />
Tremco (1-800-321-7906)<br />
Spectrem® 1<br />
Gaska Foam Tape<br />
Gaska Tape, <strong>Inc</strong>. (1-800-423-1571)<br />
V 710 3/16" x 1/4" x 2"<br />
Note: Trademarks are registered by the companies noted<br />
How Much Will I Need<br />
For every 100 square feet of <strong>Omega</strong>-<strong>Ply</strong> panels<br />
you will need:<br />
• 3 tubes silicone sealant<br />
• 2 tubes panel adhesive<br />
• 1 roll Gaska Foam Tape<br />
©2007 <strong>Laminators</strong> <strong>Inc</strong>orporated <strong>Omega</strong>-<strong>Ply</strong> ® Aluminum Building Panels <strong>Installation</strong> Guide.<br />
7
TOOLS AND ACCESSORIES<br />
Tech Support: 1-800-523-2347<br />
Available Direct from <strong>Laminators</strong> <strong>Inc</strong>orporated<br />
Call 1-877-OMEGA77 to order.<br />
<strong>Omega</strong>-<strong>Ply</strong> Moldings:<br />
“H” molding<br />
Part #4705<br />
“J” molding<br />
Part #4715<br />
If you plan to use 2-Piece moldings<br />
for installation of <strong>Omega</strong>-<strong>Ply</strong> panels,<br />
please call <strong>Laminators</strong> to discuss<br />
the special procedures required for<br />
their installation.<br />
Inside corner (drip cap)<br />
Part #4276<br />
Reveal Molding<br />
Part #5014<br />
Adjustable (bendable<br />
outside corner)<br />
Part #4735<br />
Fabrication Supplies Available from <strong>Laminators</strong> <strong>Inc</strong>orporated<br />
Color-matched sheet metal for flashing<br />
Color-matched soffit vents 3/4" diameter<br />
Panel adhesive<br />
LN-901 Liquid Nails ® for heavy-duty<br />
construction and remodeling<br />
Color-matched caulk<br />
Dow Corning caulk<br />
995 Silicone sealant<br />
Tremco<br />
Spectrum® 1 silicone sealant<br />
Gaska foam tape<br />
V 710 3/16" x 2"<br />
8<br />
©2007 <strong>Laminators</strong> <strong>Inc</strong>orporated <strong>Omega</strong>-<strong>Ply</strong> ® Aluminum Building Panels <strong>Installation</strong> Guide.
www.<strong>Laminators</strong><strong>Inc</strong>.com<br />
CODE OF QUALITY<br />
Can Anyone Install <strong>Omega</strong>-<strong>Ply</strong> ® Panels<br />
Our installers work in several areas of construction trade specialities:<br />
• Wall cladding • Glass and glazing<br />
• Sheet metal • Roofing contractors<br />
• Carpentry • Metal fabricators<br />
What is a Factory Authorized Installer<br />
Factory authorized installers have signed the <strong>Laminators</strong> Code of Quality.<br />
What is the <strong>Laminators</strong> Code of Quality<br />
The Code of Quality represents an installers’ commitment to:<br />
• Ensure that ALL tradesmen on a given project understand and strictly adhere<br />
to the contents of this guide.<br />
• Maintain regular communication with the general contractor and architect to<br />
ensure that all pre-existing conditions as well as the finished job are consistent<br />
with the approved drawings.<br />
• Have all shop drawings approved and signed by the architect and general<br />
contractor prior to beginning installation. Any mid-job plan modification MUST<br />
be approved and signed by the architect and the general contractor.<br />
• Guarantee all workmanship for a period of not less than one year.<br />
www.<strong>Laminators</strong><strong>Inc</strong>.com<br />
Visit our web site for standard CAD details.<br />
Download the architectural details you need.<br />
Call tech support if you can’t find what you’re looking for,<br />
or for installation assistance.<br />
Support Materials<br />
Available from <strong>Laminators</strong> to help with your installation requirements:<br />
Call 1-877-OMEGA77 or visit www.<strong>Laminators</strong><strong>Inc</strong>.com<br />
<strong>Laminators</strong>’ warranty is limited to the panel construction only and<br />
does not apply to panel fabrication, storage or installation.<br />
©2007 <strong>Laminators</strong> <strong>Inc</strong>orporated. <strong>Omega</strong>-<strong>Ply</strong> ® Aluminum Faced Building Panels <strong>Installation</strong> Guide.
WARNING!<br />
FAILURE TO<br />
FOLLOW THESE<br />
GUIDELINES<br />
WILL VOID YOUR<br />
WARRANTY!<br />
For technical and installation support, call<br />
1-877-OMEGA77<br />
or visit www.<strong>Laminators</strong><strong>Inc</strong>.com<br />
©2007 <strong>Laminators</strong> <strong>Inc</strong>orporated. All rights reserved. www.<strong>Laminators</strong><strong>Inc</strong>.com 3255 Penn Street, Hatfield, PA 19440-1731<br />
A123 (11/07)<br />
<strong>Omega</strong>-<strong>Ply</strong> ® Aluminum Faced Building Panels <strong>Installation</strong> Guide.