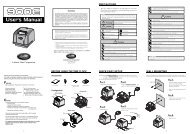
AirTime Wall Clock - Lathem
AirTime Wall Clock - Lathem
AirTime Wall Clock - Lathem
- No tags were found...

Create successful ePaper yourself
Turn your PDF publications into a flip-book with our unique Google optimized e-Paper software.
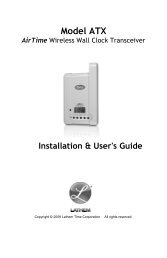
<strong>Wall</strong> <strong>Clock</strong> Installation Instructions<br />
Quick Start Steps<br />
1. Install an <strong>AirTime</strong> ATX Series Transceiver (refer to Transceiver instructions).<br />
2. Press the TRANS button on the front of the Transceiver to begin manual signal transmission.<br />
3. Insert two (2) CR123A lithium batteries (included) in the clock’s battery compartment.<br />
4. Press the RESET button on the back of the clock for 2 seconds to begin “listening” for the signal.<br />
5. The LED on the front of the clock flashes Green every two (2) seconds and reception starts.<br />
6. When the signal is received, the LED will flash Green every second and correction will occur.<br />
NOTE: This equipment has been tested and found to comply with the limits for a Class B digital device, pursuant to Part 15 of<br />
the FCC Rules. These limits are designed to provide reasonable protection against harmful interference in a residential<br />
installation. This equipment generates, uses, and can radiate radio frequency energy and, if not installed and used in<br />
accordance with the instructions, may cause harmful interference to radio communications. However, there is no guarantee<br />
that interference will not occur in a particular installation. If this equipment does cause harmful interference to radio or<br />
television reception, which can be determined by turning the equipment off and on, the user is encouraged to try to correct<br />
the interference by one or more of the following measures:<br />
• Reorient or relocate the receiving antenna.<br />
• Increase the separation between the equipment and receiver.<br />
• Connect the equipment into an outlet on a circuit different from that to which the receiver is connected.<br />
• Consult the dealer or an experienced radio/TV technician for help.<br />
This equipment complies with FCC radiation exposure limits set forth for an uncontrolled environment. This equipment should<br />
be installed and operated with minimum distance 20cm between the radiator and your body. This Transceiver must not be colocated<br />
or operating in conjunction with any other antenna or Transceiver.
Hanging the clock<br />
The <strong>AirTime</strong> series <strong>Wall</strong> <strong>Clock</strong>s have a specially designed hanging bracket that prevents a<br />
simple upward motion from removing it from the wall. Secure a mounting screw in the<br />
desired location and slide the key hole at the bottom of the hanging track over the screw.<br />
Move the clock down, left, then slightly down and back to the right to secure it correctly.<br />
If the clock is fit with an optional trim ring (model AT12RP-T), there is an optional hanger<br />
bracket to allow for 8X8, 8X6 wall box or speaker baffle installation. To install this bracket<br />
remove the two screws securing the maze bracket, replace it with the hanger bracket and<br />
secure the two screws. The trim ring also allows for replacing existing surface mount clocks<br />
that are installed on a surface hanger.<br />
Normal Operation<br />
In normal operation the clock listens for a synchronization signal 12 times per day (on even<br />
hours at the 58 th minute between 50 th and 59 th second). The LED will not flash during normal<br />
operation.<br />
Verifying Reception of Last Signal<br />
Press the A button to verify that the clock received the last transmission signal from the ATX<br />
Series master. The LED on the front will flash Green to indicate that the last transmission<br />
was received successfully. If the LED flashes Red, then the last transmission was not<br />
received. This may indicate the <strong>Wall</strong> <strong>Clock</strong> is located outside the transmission area.<br />
Start Reception<br />
Press the B button to manually set the clock to “listen” mode. The green LED on the front of<br />
the clock will flash every 2 seconds. When a signal is received from an ATX series master,<br />
the LED will flash every second. The second hand will stop at 12:00 and the minute and hour<br />
hands will rapidly advance to the correct time. (If no signal is received, then verify that your<br />
ATX Series master is transmitting or move the clock to a different, closer location)<br />
Manual Time Setting<br />
Press the B button for 5 seconds until the second hand stops. Press the A button to advance<br />
the minute hand one minute. Hold the A button to rapidly advance the minute and hour<br />
hands. Press the B button when the hands reach the correct time. The clock will start<br />
normal timekeeping operation.<br />
Copyright © 2009 <strong>Lathem</strong> Time Corporation. All rights reserved. Information subject to change without notice.<br />
Document No: USG0073A<br />
<strong>Lathem</strong> and <strong>AirTime</strong> are registered trademarks of <strong>Lathem</strong> Time Corporation. Revised: 4-7-2009