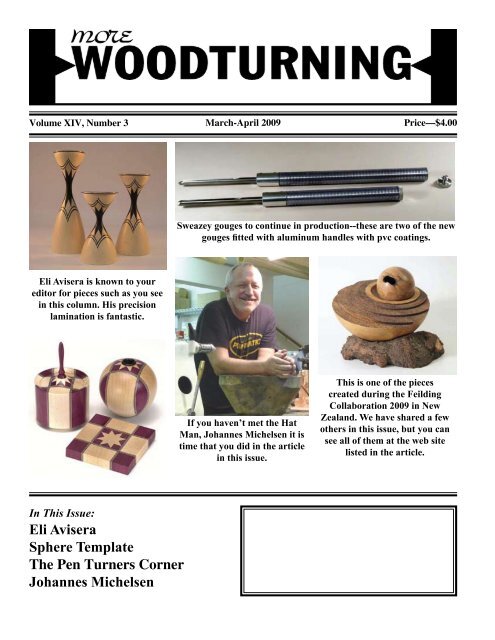
Eli Avisera Sphere Template The Pen Turners Corner Johannes ...
Eli Avisera Sphere Template The Pen Turners Corner Johannes ...
Eli Avisera Sphere Template The Pen Turners Corner Johannes ...

Create successful ePaper yourself
Turn your PDF publications into a flip-book with our unique Google optimized e-Paper software.
Volume XIV, Number 3 March-April 2009 Price—$4.00<br />
Sweazey gouges to continue in production--these are two of the new<br />
gouges fitted with aluminum handles with pvc coatings.<br />
<strong>Eli</strong> <strong>Avisera</strong> is known to your<br />
editor for pieces such as you see<br />
in this column. His precision<br />
lamination is fantastic.<br />
If you haven’t met the Hat<br />
Man, <strong>Johannes</strong> Michelsen it is<br />
time that you did in the article<br />
in this issue.<br />
This is one of the pieces<br />
created during the Feilding<br />
Collaboration 2009 in New<br />
Zealand. We have shared a few<br />
others in this issue, but you can<br />
see all of them at the web site<br />
listed in the article.<br />
In This Issue:<br />
<strong>Eli</strong> <strong>Avisera</strong><br />
<strong>Sphere</strong> <strong>Template</strong><br />
<strong>The</strong> <strong>Pen</strong> <strong>Turners</strong> <strong>Corner</strong><br />
<strong>Johannes</strong> Michelsen<br />
More Woodturning March-April 2009 Page 1
Note: We now offer subscription<br />
copies as a Portable Document<br />
File (*.PDF) that you can read on<br />
your computer. You can archive<br />
your copies on your computer and<br />
search them for subjects of interest.<br />
This method provides quick delivery<br />
of the issue. This is a cost savings<br />
for foreign subscribers who have to<br />
pay a great deal extra for postage.<br />
If interested, e-mail me at:<br />
fred@morewoodturning.net<br />
Note 2: Anyone who owns a<br />
computer and likes to read More<br />
Woodturning on their computer or to<br />
archive it onto their computer, will<br />
be pleased to learn that we now have<br />
all issues (from Oct 1996) of More<br />
Woodturning ever published in PDF<br />
format. While we offer individual<br />
years on a CD-ROM for $25.00, we<br />
have come up with a special price<br />
which includes all issues published<br />
at the date that the order is placed on<br />
a single CD-ROM for just $95.00.<br />
This is a significant savings over<br />
the single year price. Order from:<br />
More Woodturning, PO Box 2168,<br />
Snohomish, WA 98291 USA.<br />
Note: For people who have never visited our web site, go to<br />
www.morewoodturning.net<br />
<strong>The</strong>re is a lot of information at our site, including a sample magazine<br />
in PDF format.<br />
• FITS ALL LATHES<br />
• EASY & SAFE TO USE<br />
• SOLID CONSTRUCTION<br />
• CD ROM TRAINING VIDEO<br />
Page 2 More Woodturning March-April 2009
Contents<br />
<strong>Eli</strong> <strong>Avisera</strong>: A Different Approach.<br />
......................................................4<br />
Sweazey Gouges to Continue in Production..........................................9<br />
<strong>Sphere</strong> <strong>Template</strong>.........................11<br />
<strong>Pen</strong>Turner’s <strong>Corner</strong>...................14<br />
Letter to Editor...........................17<br />
Feilding Collaboration 2009.....18<br />
Questions and Answers from the Internet...........................................19<br />
Using a Depth Drill....................19<br />
Spinner Tops..............................19<br />
A Spigot Chuck You Can Make.21<br />
<strong>Johannes</strong> Michelsen-<strong>The</strong> Hat Man<br />
....................................................24<br />
More About Through Chucks ..29<br />
Coming Events..........................30<br />
Making the Ball for a Chinese Ball<br />
....................................................32<br />
Insurance Coverage for AAW Members.............................................34<br />
More On Rolling Pins & a Couple<br />
New Tricks...........................36<br />
A Collaborative Group Project..38<br />
<strong>The</strong> Market Place......................39<br />
About the Cover:<br />
<strong>The</strong> photos on the cover of<br />
this issue were taken from stories<br />
found in the issue. If you<br />
were familiar with the Sweazey<br />
Gouges your will be pleased to see<br />
that production will continue even<br />
though an accident ended the life<br />
of Bob Sweazey this last summer.<br />
<strong>The</strong> new version is illustrated on<br />
the cover.<br />
EDITORAL<br />
This issue is being put together a bit earlier than usual, because Mildred<br />
and I will be attending the Desert Woodturning Roundup in Mesa,<br />
Arizona and then flying to Florida for the International Wood Collector’s<br />
Society meeting and also doing a couple of Chinese Ball demonstrations<br />
for clubs in Northern Florida. I expect that we’ll be doing stories on both<br />
of these events in a future issue.<br />
Our writers are continuing to produce new stories to help fill the<br />
pages of More Woodturning with some stories not written by your editor.<br />
If you have an item or project that you feel would be worth sharing<br />
with our readers, please contact me by mail or by e-mail. E-mail is the<br />
preferred method, because it is so easy to answer. My e-mail address is:<br />
fred@morewoodturning.net. You can also submit your stories by e-mail<br />
if the photos are not too many or too large. If your story has a number of<br />
photographs, I would prefer that you submit the story on a CD-ROM to<br />
our Post Office Box: PO. Box 2168, Snohomish, WA 98291.<br />
We actually have two stories in this issue on making spheres. One<br />
by David Reed Smith in which he uses a <strong>Sphere</strong> <strong>Template</strong> that he has developed<br />
and one by your editor in which the Vermec <strong>Sphere</strong> Turning Rig<br />
is used to shape the sphere. This is my preferred method if I am trying to<br />
make precision sphere as required for making the Chinese Ball.<br />
Our question and answer column has dropped off a bit this issue,<br />
partially because I was a bit sick and did not monitor the newsgroups for<br />
questions that I thought would be pertinent for our publication. I answer<br />
many questions that I feel have too limited an interest to publish in More<br />
Woodturning. If you have questions, Lyle and I will attempt to answer<br />
them. Since each of us takes different approaches to turning wood you<br />
generally get different views on the same question.<br />
I again urge you to renew your subscription as it expires, note we<br />
send you a post card telling you that your subscription is about to expire.<br />
I also urge you to tell your friends about More Woodturning. We still<br />
wish to increase our circulation enough that we can go back to full color<br />
on every page.<br />
Remember, More Woodturning is not a big money maker for me. It<br />
was designed to give me something to do that would benefit the woodturning<br />
community and would make it worthwhile for me to keep staying<br />
active for many years to come. It costs money to publish the magazine<br />
and I either have to contribute the funds from my savings or get the funds<br />
required from my subscribers and advertisers. So, I ask you to help me<br />
keep the magazine going for many years into the future by renewing your<br />
subscriptions and by getting others to subscribe.<br />
I hope you all had a great holiday season at the end of last year and<br />
the beginning of this year and wish you great success with your turning<br />
in 2009 and many years beyond.<br />
Fred Holder, Editor and Publisher<br />
More Woodturning March-April 2009 Page 3
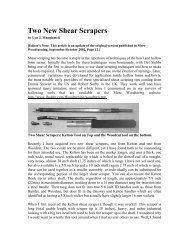
<strong>Eli</strong> <strong>Avisera</strong>: A Different Approach<br />
by Gary C. Dickey<br />
Even before spending a week<br />
at Arrowmont taking a course with<br />
Israeli woodturner <strong>Eli</strong> <strong>Avisera</strong>, I was<br />
hooked on the idea that tool design<br />
and sharpening techniques, were<br />
a vital key to successful turning.<br />
Virtually every teacher I ever had<br />
except for the first two had preached<br />
that “sharp tools are the essential<br />
difference between good and bad<br />
woodturning.”<br />
<strong>The</strong> first lathe I ever saw<br />
was a table top model from Sears in<br />
a back corner of a neighbor’s barn<br />
circa 1966. <strong>The</strong> neighbor’s grandson,<br />
Willie, who was about my age<br />
would spend summers at the farm<br />
More Woodturning is published monthly<br />
except April and October for $35.00 per<br />
year by Fred and Mildred Holder at 19805<br />
Fales Road, Snohomish, WA 98296. Mailing<br />
Address is P. O. Box 2168, Snohomish WA<br />
98291-2168. Telephone: (360) 668-0976.<br />
E-Mail: fred@morewoodturning.net, WEB<br />
Page URL: http://www.morewoodturning.<br />
net. Periodicals Postage paid at Snohomish,<br />
Washington and at additional mailing office.<br />
More Woodturning is sold by subscription<br />
at $35.00 for one year and at a single<br />
copy price of $4.00 plus $1.50 postage<br />
and handling. Editorial material submitted<br />
for publication must be accompanied<br />
by a stamped, self-addressed envelope to<br />
ensure return if it is not accepted for use.<br />
More Woodtunring uses materials from<br />
many sources and many authors, the views<br />
expressed herein are, therefore, those of<br />
the authors and not necessarily those of the<br />
Publishers. More Woodturning receives a<br />
number of products each year for evaluation,<br />
but accepts no responsibility for return of<br />
those products unless specifically requested<br />
to do so, in advance!<br />
POSTMASTER: Send address changes<br />
to More Woodturning, P. O. Box 2168,<br />
Snohomish WA 98291-2168.<br />
USPS No. 015387<br />
Page 4 More Woodturning March-April 2009<br />
just up the road from our house, so<br />
we became fast friends.<br />
One day, while plundering<br />
in the barn, I saw a piece of machinery<br />
sitting on a table in the corner<br />
and asked my friend about it. At<br />
that moment I met my first turning<br />
teacher and had my introductory<br />
lesson in woodturning.<br />
“You gotta see this--it’s the<br />
coolest thing ever,” Willie said.<br />
Without further explanation, he<br />
grabbed a piece of oak stove wood<br />
from the pile nearby and chucked it<br />
between centers. <strong>The</strong>n, holding a<br />
(barely) sharpened large screwdriver<br />
from off the table, he hit the switch<br />
and started scraping. It wasn’t the<br />
smoothest turning in the world, but<br />
when the splinters stopped flying<br />
he had a rough replica of a round<br />
bladed medieval dagger and I was<br />
hooked on woodturning.<br />
For the rest of the summer<br />
we scraped out daggers and<br />
swords until Willie’s grandmother<br />
noticed that the stove wood pile<br />
was disappearing faster than she<br />
was burning it. But by then it was<br />
time to go back to school and I was<br />
just old enough to sign up for shop<br />
class where I discovered they had<br />
a school lathe. That’s where I met<br />
my second woodturning teacher.<br />
Sam Hill took great pains<br />
to introduce us to each and every<br />
tool in the shop...except for the<br />
lathe. When I pointed out that he<br />
had omitted showing us the lathe,<br />
Sam said sternly, “Boys, that is the<br />
most dangerous tool in the shop.<br />
I don’t want to catch any of you<br />
messin’ with it. I don’t even use it<br />
myself.”<br />
Needless to say, I was disappointed.<br />
So disappointed, in fact,<br />
that I went whining home to mama,<br />
complaining to anyone who would<br />
listen that the only reason I signed<br />
up for shop class was to work on the<br />
lathe. After mama could no longer<br />
stand the whining, she piled me in<br />
the car and drove off for the school<br />
to talk to the principal. When the<br />
principal could no longer stand the<br />
whining, she ushered us down the<br />
hall to the school shop where we<br />
confronted Sam Hill.<br />
As I recall, it took about<br />
another half hour of whining to subdue<br />
Sam Hill, but he finally gave in,<br />
with one parting shot as we retreated<br />
down the hall. “Well, I’m not going<br />
to be responsible if he kills himself<br />
on that damn thing,” he shouted.<br />
Before the semester was<br />
over, Sam Hill had sawed his thumb<br />
off on the bandsaw. Poetic justice<br />
I’d say. We tried to get the biology<br />
teacher to add it to the collection of<br />
snakes, birds, and lizards preserved<br />
in formaldehyde that lined the<br />
shelves in the lab.<br />
Sam left the teaching profession<br />
the following semester, replaced<br />
by a lady wrestler, who once<br />
pinned a slightly effeminate classmate<br />
to the workbench and sewed<br />
lace on the back of his jeans.<br />
It was no wonder that <strong>Eli</strong><br />
<strong>Avisera</strong> (and a host of my later<br />
teachers) questioned my early<br />
woodturning education. I thought I<br />
had fooled Ray Key into thinking I<br />
was a competent woodturner, until<br />
his critique of our work on the last<br />
day of his class.<br />
“So you turned this, huh”<br />
he asked looking over my best effort.<br />
“Yes sir,” I said swelling<br />
with pride.
<strong>Eli</strong>’s Combination Tool above was the result of trying to develop a safe turning tool for his son<br />
who, at an early age, wanted to be able to turn in his father’s shop even when unsupervised. It has<br />
characteristics of the gouge without the danger of getting a catch. Note the double bevel which has<br />
become a standard for many <strong>Avisera</strong> Tools. Both the beading tool and the skew are ground straight<br />
across at the cutting edge. Since there are no sharp changes between the bevel and the rest of the tool<br />
(a rolled edge), both are easily sharpened by hand without a need for a jig. (Photos courtesy Hamlet<br />
Tools)<br />
“Hummm,” he said still examining<br />
it. Wincing slightly , he put it<br />
back on the table and moved along,<br />
while muttering almost imperceptibly<br />
under his breath, “I suppose it<br />
was a pretty good piece of wood till<br />
you got hold of it.”<br />
So the reason I bring up this<br />
whole dreary episode is to properly<br />
set the backdrop for that day that<br />
<strong>Eli</strong> <strong>Avisera</strong> stepped into my shop<br />
for a week long visit and a series<br />
of demonstrations leading up to<br />
the AAW symposium in Richmond<br />
this summer. It would be an understatement<br />
to say that his visit was<br />
a woodturning epiphany--a sudden<br />
manifestation of the essence<br />
or meaning of what tool design and<br />
sharpening is all about.<br />
With a new line of his signature<br />
tools now being produced by Hamlet<br />
Tools of Sheffield, England, <strong>Eli</strong> has<br />
brought reality to his theories of what<br />
turning tools should be. At the heart<br />
[Text Continued on Page 6]<br />
More Woodturning March-April 2009 Page 5
<strong>Eli</strong> <strong>Avisera</strong> Continued from<br />
Page 5<br />
of these theories, is the idea that<br />
tools should be surgically sharp and<br />
at the same time easily kept that<br />
way. For this reason, his tools, for<br />
the most part incorporate double<br />
bevels. By grinding a small 2 mm<br />
“cutting bevel” at the tip of the tool,<br />
with a secondary bevel just behind<br />
it, one can quickly sharpen the tool<br />
to suit any curve.<br />
“It really doesn’t matter what<br />
angle is ground on the secondary<br />
bevel as long as it is ground back<br />
further than the cutting bevel,” <strong>Eli</strong><br />
explained.<br />
His “shear cutter”—what I<br />
always referred to as a scraper—is<br />
sharpened upside down. Instead of<br />
lowering the rear part of the rest on<br />
the grinder, <strong>Eli</strong> raises the rear part<br />
of the rest to an angle of about 75<br />
degrees, then flips the tool over with<br />
the cutting edge flat against the rest,<br />
hanging over slightly to grind a new<br />
edge.<br />
“You always do things upside<br />
down and backwards,” I told him.<br />
“That’s because I come from<br />
the opposite side of the world.<br />
Would you like to see me turn while<br />
standing on my head” he asked.<br />
One thing I really like about<br />
his skews, parting tools and beading<br />
tools is the ease with which he<br />
sharpens them. Instead of having<br />
sharp angles at the point where the<br />
bevel begins, all of them have a<br />
convex grind, so it becomes a simple<br />
matter to rock the tool back and<br />
forth on the grind stone for a few<br />
seconds to renew the sharpness.<br />
<strong>Avisera</strong>’s unique tools have<br />
been developed based on over 30<br />
years of experience in woodturning.<br />
All of his children, including his<br />
son, Aviad and daughters, Lital and<br />
<strong>Eli</strong>’s talents as a fine woodworker as well as a woodturner are<br />
displayed in his segmented turning blocks which resulted in several<br />
of his signature pieces featuring the distinctive purple heart star<br />
which takes on different characteristics in his candlesticks.<br />
Ravit, as well as his wife, Riki, have<br />
found their way into his shop and<br />
are all accomplished woodturners<br />
in their own right. His son showed<br />
interest at the early age of seven.<br />
Fearing that the youngster might<br />
be injured with traditional turning<br />
tools, <strong>Avisera</strong> designed and built his<br />
Combination Tool.<br />
“I needed a tool that was virtually<br />
‘catch proof’ yet could be used<br />
like a gouge and, as always, would<br />
be easy to sharpen. And it needed<br />
to be safe enough for a seven-yearold.”<br />
<strong>The</strong> answer was the Combination<br />
Tool. <strong>The</strong> design incorporates<br />
a rounded double bevel<br />
without a flute with a subtle negative<br />
rake. <strong>The</strong> end is ground much<br />
like a fingernail gouge, but there’s<br />
no flute. Not only is it safe, but it<br />
can be used very much like a gouge<br />
by turning the cutting edge in the<br />
direction of the cut. Since there<br />
are no swept back sharpened wings<br />
like the modern bowl gouge, it can<br />
also be used like a spindle gouge<br />
for making beads and coves.<br />
“With this tool, there was<br />
little danger of catches and it proved<br />
to be a very versatile tool even for<br />
Although once striving in the<br />
“bigger is better” school of<br />
woodturning, <strong>Eli</strong> has since<br />
devoted his efforts to smaller, yet<br />
more intricate, turned objects.<br />
the more experienced woodturners.”<br />
he said. Later <strong>Avisera</strong> applied<br />
the same principle to his gouges,<br />
grinding them with two bevels. <strong>The</strong><br />
cutting edge is a very small bevel<br />
similar to his combination tool. All<br />
of his chisels including the beading,<br />
parting and skew tools are ground<br />
in convex shapes, exactly opposite<br />
from traditional chisels.<br />
“Not only does the tool provide<br />
better control and cut easier, but<br />
it becomes much easier to sharpen,”<br />
he explained.<br />
Page 6 More Woodturning March-April 2009
This sequence shows the <strong>Avisera</strong> Jig being used to incorporate vertical inlays on a bowl. By routing<br />
90 degree grooves at indexed points around the bowl, pieces of contrasting wood can be glued into the<br />
grooves then turned down to reveal a nice pattern both inside and outside the bowl.<br />
Recognizing that, as with<br />
any new approach to tool design,<br />
there would be a learning curve,<br />
<strong>Eli</strong> has begun releasing his Masters<br />
Course Woodturning series of<br />
DVDs produced by the English firm<br />
of Karl Tickle Media Productions<br />
(KTMP).<br />
With a special emphasis on<br />
classical woodturning, the series is<br />
divided into three sections: Beginner,<br />
Intermediate and Advanced.<br />
Aside from a thorough grounding<br />
in tool sharpening, <strong>Eli</strong> explains<br />
the why and how of his departure<br />
from traditional tools and carries<br />
the viewer from the very basics of<br />
turning through the most complex.<br />
In introducing his unique range of<br />
tools he explains the unusual grinds<br />
and how they can benefit the turner<br />
in getting the best finish with almost<br />
no sanding. <strong>The</strong> videos<br />
feature a series of well planned<br />
and executed projects including:<br />
a unique variation on the Rude<br />
Osolnik candlestick design; segmented,<br />
textured and inlaid boxes<br />
and bowls; goblets turned from his<br />
signature segmented “star” blanks<br />
and many other projects that build<br />
upon steadily increasing skills.<br />
As I look back on my own<br />
woodturning education--made up<br />
mostly of fits and starts and a great<br />
pile of mistakes in the fireplace-- I<br />
can only wish that I had had this series<br />
of videos and <strong>Eli</strong>’s tools when<br />
[Continued on Page 8]<br />
To Subscribe to More Woodturning:<br />
Check the Print Subscription Period Below:<br />
United States Canada Other Countries<br />
__One Year/$35 __One Year/$48 __One Year/$68<br />
__Two Years/$70 __Two Years/$100 __Two Years/$105<br />
__Three Years/$105 __Three Years/$145 __Three Years/$205<br />
All amounts in US Dollars! We Accept Visa/MC.<br />
Electronic Version (PDF): For People receiving Electronic issues,new price<br />
by year only: $25.00/One year. We need an e-mail for the electronic version.<br />
Because of the significant postage increase for outside the United States,<br />
recommend the Electronic Version for all Foreign Subscribers.<br />
Thank You!!<br />
Please Enter Your Name and Address Below:<br />
Name: _________________________________________________<br />
Address: _______________________________________________<br />
City: ______________________ State: ______ ZIP: ____________<br />
E-Mail for Electronic Subscribers: ____________________________<br />
Clip and Mail with Your Check, Cash, or Charge Card Information to:<br />
More Woodturning, PO Box 2168, Snohomish, WA 98291<br />
More Woodturning March-April 2009 Page 7
Continued from Page 7.<br />
Next to his love of woodturning, is <strong>Eli</strong>’s passion for teaching. Here<br />
he explains a texturing technique which results in his unique finish<br />
called “Jerusalem Stone,” based upon a stone found in the Holy<br />
City near his home.<br />
Texturing, painting and carving<br />
have become integral parts of<br />
<strong>Eli</strong>’s work as shown by these two<br />
photos.<br />
I started turning 40 years ago.<br />
My advice: Try them; you’ll<br />
like them.<br />
“THE ELIMINATOR”<br />
Hollowing Tool<br />
ELIMINATES:<br />
CATCHES,<br />
TEAR OUT,<br />
SHARPENING<br />
Available in three sizes: 1/4, 3/8, 1/2 inch cutters. Tool shafts are<br />
milled with flats for both right and left hand cutting.<br />
Available from: Packard Woodworks and Craft Supplies USA<br />
www.jewelwood.com<br />
Page 8 More Woodturning March-April 2009
Sweazey Gouges<br />
to Continue in<br />
Production<br />
Due to the loss of our friend<br />
and fellow woodturner Bob<br />
Sweazey, producer of the Sweazey<br />
gouge, there have been questions<br />
raised regarding the future of the<br />
Sweazey gouge. Since Bob and<br />
Dave Schweitzer, a well-known<br />
Pacific Northwest woodturner,<br />
originally collaborated on the design<br />
and manufacturing of the Sweazey<br />
tools, Dave has decided to continue<br />
with the tool production.<br />
<strong>The</strong> tools will be produced<br />
under the name D-WAY TOOLS.<br />
He will continue with the 1/2” bowl<br />
gouge along with developing a full<br />
line of bowl gouges, spindle gouges<br />
and beading tools. He has also<br />
<strong>The</strong> Sweazey Gouges as being conntinued by Dave Schweitzer.<br />
<strong>The</strong>se gouges come with solid alumnuim handles with PVC over the<br />
aluminum to make them more comfortable to hold.<br />
<strong>The</strong> business end of the gouge<br />
illustrated above.<br />
designed and is producing a new<br />
aluminum handle. <strong>The</strong> tools will<br />
be manufactured using the same<br />
high speed steel and heat treat lab<br />
that Bob Sweazey used.<br />
<strong>The</strong> bowl gouges are produced<br />
from premium M42 cobalt highspeed<br />
steel, chosen because of its<br />
superior wear resistance and edgeholding<br />
qualities compared to the<br />
more common M2 steel. <strong>The</strong> heat<br />
treating process is accomplished in<br />
a vacuum chamber (to prevent contamination)<br />
followed by quenching<br />
in nitrogen. <strong>The</strong> steel is then tem-<br />
[Continued on Next Page]<br />
More Woodturning March-April 2009 Page 9
Sweazey Gouges Continued<br />
from Previous Page.<br />
pered at 1000 degrees F in a nitrogen<br />
atmosphere to achieve a hardness of<br />
66rc yielding a very hard (but not<br />
too hard) material. <strong>The</strong> result is an<br />
exceedingly durable edge able to<br />
retain its sharpness for a long period<br />
of time. Any questions regarding<br />
D-Way Tools can be e-mailed to.<br />
dwaytools@hctc.com<br />
<strong>The</strong> web-site for D-Way Tools<br />
is not finished at this time but will<br />
be available soon. You can also<br />
contact Dave Schweitzer at 360-<br />
432-9509.<br />
Web Site Descriptions for the<br />
tools:<br />
Aluminum Handle is milled<br />
from 6061 aluminum round bar<br />
and comes in 3/8”, 1/2” or 5/8”<br />
and is 16” in length. It has a PVC<br />
comfortable grip and has a drilled<br />
Dave is also bringing out a hollowing tool shown here. This is a<br />
stabalized tool designed to turn on the far side of the vessel. A spring<br />
provides wall thickness determination. Looks like a nice tool.<br />
& threaded knob which can be removed<br />
to load ballast if you feel you<br />
need the extra weight. <strong>The</strong> handle<br />
is milled out of solid aluminum bar<br />
which ads to balance and strength of<br />
handle instead of aluminum tubing<br />
. Hollowing Tool is made from<br />
5/8’s cold rolled steel and comes<br />
with an adjustable tangtung G cutter<br />
which allows for rotation of the<br />
cutter depending on which part of<br />
the hollow form you are working,<br />
it also comes with an outrigger and<br />
adjustable thickness gauge. It is<br />
designed to be used for reverse rotation<br />
on your lathe and if you have<br />
never hollowed in reverse you are<br />
in for a great experience. It allows<br />
for a more comfortable position at<br />
the lathe.<br />
Page 10 More Woodturning March-April 2009
<strong>Sphere</strong> <strong>Template</strong><br />
cardboard, etc. I used aluminum<br />
flashing as it’s sturdy but can be cut<br />
out with scissors. If you used label<br />
stock, just attach the label to the<br />
substrate. If you use plain paper, use<br />
spray adhesive to attach the label.<br />
Cover the whole front surface of the<br />
template with clear tape (2” packing<br />
tape for instance). <strong>The</strong>n cut out the<br />
template.<br />
Begin by turning a<br />
cylinder that is the diameter<br />
of the sphere<br />
that you want.<br />
by David Reed Smith<br />
At a symposium several years<br />
ago I watched a demo by Myron<br />
Curtis on turning spheres. Myron<br />
started by turning a cylinder exactly<br />
as long as its diameter-the cylinder<br />
would have a square cross-section.<br />
<strong>The</strong>n he consulted a table to find a<br />
distance, which he measured from<br />
each corner and marked on the cylinder.<br />
He then removed the corner,<br />
cutting from line to line-yielding an<br />
octagonal cross-section . <strong>The</strong>n he<br />
consulted the table again for a new<br />
distance to be measured each way<br />
from the resulting corners. <strong>The</strong>se<br />
corners were then cut away from<br />
line to line, yielding a hexadecagon<br />
(16 sided) cross-section.<br />
Drawing1: <strong>The</strong> <strong>Template</strong><br />
I don’t like consulting tables.<br />
Or particularly doing math all the<br />
time if I don’t have to, so sometime<br />
after I got home I used my CAD program<br />
to draw up a template where<br />
the proper measurements can be<br />
read off a scale. After making the<br />
cylinder one simply measures the<br />
diameter. <strong>The</strong> larger scale is used<br />
(it reads from both ends) to directly<br />
mark the proper distance. <strong>The</strong> corners<br />
are removed. <strong>The</strong>n the smaller<br />
scale is used to mark the proper<br />
distance from the new corners.<br />
Making the <strong>Template</strong><br />
<strong>The</strong> template is Drawing1.<br />
Even if what you’re reading has a<br />
copy of the template I suggest you<br />
download the pdf file from my web<br />
site (http://www.davidreedsmith.<br />
com/Articles/ScoopOrnament/<br />
<strong>Sphere</strong><strong>Template</strong>/<strong>Sphere</strong><strong>Template</strong>.<br />
pdf) and print out the pdf, as it will<br />
be more accurate that way. You<br />
can print the template out onto<br />
large label stock, or plain paper.<br />
Find a suitable substrate to fasten<br />
the template to. You can use very<br />
thin wood, or plywood, cereal box<br />
Using the <strong>Template</strong><br />
Begin by turning a cylinder<br />
that is the diameter of the sphere<br />
that you want. You can turn between<br />
centers or hold the work in<br />
a chuck-there’s no difference to the<br />
procedure other than having two or<br />
one nub to deal with. Measure the<br />
diameter of the cylinder with calipers<br />
and use the calipers to transfer<br />
the measurement to the cylinder as<br />
in Figure 1. Make parting tool cuts<br />
just outside each mark, then clean<br />
up the parting tool cuts with skew<br />
or spindle gouge, ending up right<br />
on the lines. This procedure is very<br />
sensitive to starting conditions-the<br />
cylinder has to have a square crosssection<br />
so be sure that your end cuts<br />
are perpendicular to the lathe axis.<br />
You’ll need to taper the nubs holding<br />
the future sphere to gain access<br />
so you can measure and mark on<br />
the ends.<br />
[Continued on Next Page]<br />
More Woodturning March-April 2009 Page 11
<strong>Sphere</strong> <strong>Template</strong> continued<br />
from Page 11<br />
Figure 1. After turning a<br />
cylinder and marking out a<br />
length that is exactly the same as<br />
the diameter.<br />
Thinking of the work as half a<br />
cross-section, you have two corners,<br />
one at each end. Use the larger scale<br />
of the template to measure in both directions<br />
from each corner of the cylinder<br />
as in Figure 2. If you haven’t<br />
cut the nubs thin enough, then go back<br />
and cut them smaller, don’t guess at<br />
this stage. Next use a spindle gouge<br />
or other tool to cut away the corners<br />
from line to line. Don’t try to hog it<br />
all off at once, instead make a series<br />
of parallel cuts, adjusting as you go<br />
to end up with a straight, not curved,<br />
cut from line to line as in Figure 3.<br />
Figure 3. After turning away<br />
the corners between the lines.<br />
This yields an octagonal, or<br />
8 sided cross-section. You can<br />
double check your work by using<br />
the more acute end of the template<br />
to check the angle at each corner.<br />
Thinking of the work as half<br />
a cross section, you now have 4<br />
corners. Using the smaller scale,<br />
measure in both directions from<br />
each corner as in Figure 4. Now<br />
turn away the corners from line to<br />
line, as in Figure 5. <strong>The</strong> result in<br />
cross section will be a hexadecagon,<br />
or 16 sided polygon. You can<br />
double check your work using the<br />
more obtuse angle on the end of<br />
the template to check the angle at<br />
each corner.<br />
Figure 4. Measuring from each<br />
corner of the octagon with the<br />
smaller scale.<br />
Figure 5. After cutting away the<br />
corners of the octagon between<br />
the lines.<br />
Round over each remaining<br />
corner as in Figure 6. <strong>The</strong>n complete<br />
the shaping and finish the sphere by<br />
sanding with progressively finer<br />
abrasives, as in Figure 7.<br />
Where <strong>Turners</strong> Turn First<br />
Figure 2. Using the larger scale<br />
to measure away from edge of the<br />
cylinder.<br />
INFORMATION AND RESOURCES FOR<br />
WOODTURNERS WORLDWIDE<br />
Find articles, projects, new products, vendors, club listings,<br />
turner websites, courses and schools, discussion forum,<br />
books and videos and much more!<br />
WWW.WOODTURNINGONLINE.COM<br />
Page 12 More Woodturning March-April 2009
Figure 6. After rounding over<br />
the corners of the hexadecagon.<br />
Figure 7. After the final<br />
shaping with abrasives.<br />
<strong>The</strong> Geometry<br />
For those of you who like a bit<br />
of a theoretical frame to hang rote<br />
procedures on, I’ve done up a few<br />
drawings to illustrate what’s happening<br />
in cross-section. Drawing<br />
2 shows the cross-section of the<br />
beginning cylinder with the future<br />
sphere shown in blue. Drawing 3<br />
shows what the larger scale does (it’s<br />
0.29:1), measuring 0.29 of the sphere<br />
diameter from the corners of the<br />
square locates the corners of the octagon<br />
that contains the same sphere.<br />
of the hexadecagon (16 sided) that<br />
contains the sphere.<br />
Drawing 4. Measuring a<br />
distance equal to 0.11 times the<br />
diameter from the corner of the<br />
octagon locates the corners of<br />
the hexadecagon.<br />
About the Author: David<br />
Reed Smith is a basement woodturner<br />
who lives, turns, tinkers and<br />
writes in Hampstead, Maryland. He<br />
welcomes comments, complaints<br />
and suggestions via email at David@DavidReedSmith.com.<br />
Drawing 2. <strong>The</strong> starting cylinder,<br />
in cross-section, containing the<br />
sphere in blue.<br />
Drawing 3. Measuring a distance<br />
equal to 0.29 times the diameter<br />
from the corner of the square<br />
cross-section locates the corners<br />
of the octagon.<br />
Drawing 4 shows what the<br />
smaller scale does, measuring 0.11 of<br />
the sphere diameter from each corner<br />
of the octagon locates the corners<br />
Chinese Ball<br />
Tools<br />
I have recently become a dealer<br />
for the Crown Chinese Ball Tools and<br />
have an inventory of sets and extra<br />
handles on hand for immediate shipment.<br />
A set includes one handle, four<br />
cutters, a tool to make a tapered<br />
hole, and a pamplet written by David<br />
Springett. <strong>The</strong>se are priced at $125.00<br />
for each set.<br />
<strong>The</strong> handles include a wooden<br />
handle and a metal piece to attach the<br />
cutters and ride on the ball. <strong>The</strong>se are<br />
priced at $36.20 each. I recommend<br />
three additional handles.<br />
Fred Holder<br />
PO Box 2168<br />
Snohomish, WA 98291<br />
360-668-0976<br />
More Woodturning March-April 2009 Page 13
<strong>Pen</strong>Turner’s <strong>Corner</strong><br />
by Don Ward<br />
<strong>Pen</strong>turning News<br />
I hope the resources from last<br />
month’s article were useful. We can<br />
never have too many places from<br />
which to purchase penturning stuff<br />
nor can we have too many resources<br />
for penturning inspiration and instruction.<br />
Several, if not most, of the<br />
internet places, books, videos, and<br />
suppliers have been useful to me and<br />
my penturning journey.<br />
<strong>The</strong> Desert Woodturning<br />
Roundup is now history. I had a<br />
great time meeting several who regularly<br />
read More Woodturning and<br />
the <strong>Pen</strong>turner’s <strong>Corner</strong>. Thanks for<br />
you words of encouragement. <strong>The</strong><br />
penturner’s meeting on Friday night<br />
was successful, informative, and<br />
fun. Thanks to Anthony Turchetta<br />
for his hard work in making the<br />
penturner’s meeting a great event.<br />
Thanks Tony!<br />
Two more symposiums and<br />
penturner’s meetings loom in the<br />
near future. First, the Utah Woodturning<br />
Symposium in May and the<br />
AAW at the end of June. Both will<br />
have penturning activities and the<br />
Utah Woodturning Symposium will<br />
have several penturning rotations<br />
once again this year. <strong>The</strong> 7th Annual<br />
<strong>Pen</strong>turners Rendevous will be held<br />
on Wednesday evening, May 13th<br />
in Provo UT. This year, as in recent<br />
years, it will be held at 7PM after the<br />
CSUSA Super Wednesday. <strong>The</strong> Rendezvous<br />
gathering will be in the Mc-<br />
Kay Event Center again. Plan time<br />
to park and find the room for a 7PM<br />
start. We will have the pen display,<br />
pen related vendors and authors, and<br />
demonstrations. At 9PM, we’ll start<br />
the door prize drawings.<br />
For those who haven’t attended<br />
the event, it goes a bit like this.<br />
<strong>The</strong> Wednesday before the Utah<br />
Woodturners Symposium is the<br />
Craft Supplies USA Open House.<br />
<strong>The</strong>re is a huge clearance sale at<br />
CSUSA beginning at 8am. <strong>The</strong>re<br />
are demos all day long from 10 to 4<br />
featuring many of the national and<br />
international turners in town for the<br />
Symposium. <strong>The</strong>re will be a room<br />
with penturning demos as well. <strong>The</strong><br />
CSUSA event winds down after<br />
4pm. <strong>The</strong> <strong>Pen</strong>turners Rendezvous<br />
begins at 7pm. From 7 PM onward<br />
are displays, demos, sales, and mingling.<br />
At 9 PM, the drawings for the<br />
door prizes begin. <strong>The</strong>y continue<br />
until everything is gone. Not long<br />
afterwards, the Rendezvous winds<br />
down as most attendees are going<br />
to be up early to attend the Symposium.<br />
<strong>The</strong> details of the 2009<br />
<strong>Pen</strong>turners Rendezvous are available<br />
at http://penmakersguild.com/<br />
provo09.htm<br />
<strong>The</strong> key dates to remember are:<br />
Online Rendezvous Registrations -<br />
Thursday, April 30th <strong>Pen</strong> Display<br />
Submissions - Saturday, May 2nd<br />
Any penturner may send pens<br />
to be in the pen display. <strong>The</strong> display<br />
will be shown at the Rendezvous<br />
and then taken to the instant gallery<br />
for the duration of the symposium.<br />
<strong>The</strong> display will be taken to the<br />
AAW symposium in June and then<br />
the pens will be returned to the<br />
rightful owners. You can find more<br />
information about the <strong>Pen</strong> Display<br />
by emailing to: display@penmakersguild.com<br />
You can see pictures of past<br />
events at: http://penmakersguild.<br />
com/provo08.htm http://penmakersguild.com/provo07.htm<br />
http://<br />
penmakersguild.com/provo06/provo06.htm<br />
http://penmakersguild.<br />
com/provo05/provo05.htm http://<br />
penmakersguild.com/provo04/provo04.htm<br />
http://penmakersguild.<br />
com/provo03.htm<br />
Unique and Beautiful Laser<br />
Cut <strong>Pen</strong> Kits<br />
Would you like to try something<br />
new Would you like to make<br />
a pen that will surely turn heads and<br />
wow your fellow club members If<br />
so, then continue reading.<br />
Ken Nelsen, owner of Kallenshaan<br />
Woods in Las Vagas, NV,<br />
makes some incredible laser cut pen<br />
inlay kits. You may have seen the<br />
“stars and stripes” laser inlay kit in<br />
the latest Craft Supplies USA catalog.<br />
This inlay kit is one of Ken’s<br />
creations. CSUSA sells the “stars<br />
and stripes” inlay kit for a couple<br />
of their kits and Ken sells the “stars<br />
and strips” laser inlay kits for several<br />
other pen kits. Figure 1 shows<br />
a completed “stars and stripes” pen<br />
and Figure 2 shows the inlay parts<br />
unassembled.<br />
As you can see from the pictures<br />
there are actually 50 stars<br />
which must be glued into 50 laser<br />
cut star pockets on a preturned blue<br />
dyed curly maple blank. Also, there<br />
are laser cut red and white stripes<br />
laser cut from red dyed curly maple<br />
and natural curly maple. <strong>The</strong> white<br />
stripes will be glued into the red<br />
stripe section. <strong>The</strong>n the glued up<br />
blanks are put on the mandrel and<br />
turned to final dimensions then<br />
sanded and finished as usual. Sounds<br />
like a daunting task, doesn’t it But<br />
Ken has excellent instructions and if<br />
they are followed exactly then you<br />
will have a beautiful pen to sell or<br />
add to your collection.<br />
Page 14 More Woodturning March-April 2009
Kallenshaan Woods sells several<br />
other laser cut inlay kits. I have<br />
made several of them and they make<br />
excellent pens that are not only<br />
beautiful but sell well also. One of<br />
my favorites is the piano inlay kit.<br />
Figure 3 shows the piano inlay kit<br />
made onto the baron pen kit. <strong>The</strong><br />
grand piano inlay kit is also available<br />
for the sierra and the majestic<br />
pen kits. Laser engraved pen boxes<br />
are also available for most of Ken’s<br />
laser inlay kits. <strong>The</strong> engraved boxes<br />
are theme specific to each laser kit.<br />
Are there any jig saw puzzle<br />
fans out there<br />
Need a puzzle to do when the<br />
weather is too cold in the shop to<br />
turn a pen Kallenshaan Woods also<br />
has a jigsaw puzzle laser inlay kit.<br />
Yes, I said jigsaw puzzle. Puzzle<br />
pieces are cut from preturned blanks<br />
and the pieces must be assembled<br />
and glued together. Each piece is<br />
made from different woods and is<br />
numbered for accurate assembling.<br />
Assemble the puzzle pieces, glue<br />
them together, and turn the newly<br />
made blank. Figure 4 shows some<br />
completed jigsaw puzzle pens.<br />
Remember, Ken supplies excellent<br />
instructions for making his inlay<br />
kits. <strong>The</strong> puzzle inlay pen will be<br />
quite the conversation at your next<br />
woodturning club meeting.<br />
[Continued on page 16]<br />
Holland 4 Wheel Steady<br />
100% improvement over 3 wheel<br />
steadies<br />
25% larger swing capacity, fits lathe<br />
sizes, 12,14,16,18,20,24<br />
Easy to build of plywood<br />
Plans for sale $20.00 + $2.00 s/h<br />
Custom Built $275.00 + s/h<br />
email: wmhollan@optonline.net<br />
phone 631-281-0302<br />
Call or Write for your FREE Copy of our<br />
156 Page Color Catalog!<br />
Featuring:<br />
• <strong>Pen</strong> Kits and Supplies<br />
• Project Kits<br />
• Full Range of Lathes<br />
• All Major Brands of Chucks<br />
• Turning Squares<br />
• Dymondwood<br />
• Henry Taylor, Hamlet and Sorby Tools<br />
all at the best prices!<br />
Order Your Free Woodturners Catalog Today<br />
Craft Supplies USA<br />
1287 E. 1120 S.<br />
Provo, Utah 84606 USA<br />
TEL: 800-551-8876<br />
Overseas Telephone: 001-801-373-0919<br />
More Woodturning March-April 2009 Page 15
Continued from Previous<br />
Page<br />
Kallenshaan Woods also has<br />
the following inlay kits: the California<br />
flag, the Canadian flag, the Texas<br />
flag, the flag of Israel, the Hawaiian<br />
flag, the Australian flag, the Christian<br />
fish, and the Arizona flag just<br />
to mention a few. Several others are<br />
available and new designs are added<br />
often. Also, seasonal inlay kits are<br />
sometimes available. Check out all<br />
of the laser inlay kit Kallenshaan<br />
Woods has by going to http://www.<br />
kallenshaanwoods.com . You will<br />
find some really cool laser inlay kits<br />
and really nice folks that take care<br />
of their customers.<br />
Bullet Case or Cartridge <strong>Pen</strong>s<br />
Revisited<br />
If you are one of the several<br />
who enjoyed the articles on cartridge<br />
pen but don’t have them time<br />
or inclination to make the cartridge<br />
parts needed for these pens, then this<br />
is for you. Little River Crafts, owned<br />
by Eric Rasmussen, does all of the<br />
hard work and offers several choices<br />
of cartridge pen parts. Eric offers<br />
shell cases with the actual lead bullet<br />
installed along with the transmission.<br />
He also has the split cartridge<br />
ready to go. All parts are powdered<br />
coated for lasting beauty.<br />
Currently Little River Crafts<br />
had 308 and 30-06 shell cases in<br />
both brass and chrome. Eric also<br />
offers a shell parts for the cigar pen<br />
as well as the 7mm slimline and<br />
Euro. Check out the excellent cartridge<br />
pen kits and parts sold by Eric<br />
at http://supplies.littlerivercrafts.<br />
com/ . Eric makes the orders as he<br />
receives them so a week or so lead<br />
time in necessary. Eric sells excellent<br />
products.<br />
Figure 1. Stars and Strips pen from Kallenshaan Woods<br />
Figure 2. Stars and Strips parts<br />
unassembled.<br />
Others often sell similar items<br />
on both http://www.penturners.org<br />
(IAP) and http://www.thepenshop.<br />
net . Check in the classifieds and<br />
see who is selling. <strong>The</strong> only current<br />
cartridge items offered, other that<br />
Little River Crafts, can be seen at<br />
this link to a post on <strong>The</strong> <strong>Pen</strong> Shop:<br />
http://www.thepenshop.net/forum/<br />
viewtopic.phpf=19&t=52 and the<br />
post was back on Dec 29th. Several<br />
guys make batches of these parts and<br />
advertise and when they sell out they<br />
take a couple of weeks and make<br />
more and post another ad.<br />
IAP Local Chapters <strong>The</strong> International<br />
Association of <strong>Pen</strong>turners,<br />
aka IAP, an online penmaking forum<br />
to discuss discus all things pens can<br />
be found at http://www.penturners.<br />
org . <strong>The</strong> IAP is in the process of<br />
organizing local chapters. One purpose<br />
of these local chapeters is to<br />
meet with others who enjoy penturning.<br />
Another purpose is to futher the<br />
art of penturning by sharing ideas,<br />
tools, and techniques. <strong>The</strong> North<br />
Texas chapter met back in November<br />
and we had our second meeting<br />
in mid January. <strong>The</strong>se meetings are<br />
fun, informative, and offer a great<br />
experience to learn from some really<br />
talented penturners. Log onto http://<br />
Figure 3: Grand Piano Laser Inlay Kit from Kallenshaan Woods.<br />
Page 16 More Woodturning March-April 2009
corner coffee store. Dried before use<br />
they will work but I prefer the natural<br />
wood sawdust. An alternative for<br />
cracks is to make firewood out of the<br />
turning, which I do too often.<br />
Bill Tarleton Lafayette CA<br />
Fighre 4: Jigsaw Puzzle Inlay Kit from Kallenshaan Woods.<br />
Reviewed in the February<br />
2006 issue of More Woodturning.<br />
www.penturners.org/forum/forumdisplay.phpf=73<br />
and see if there<br />
is a local chapter in your area and<br />
make plans to attend the next meeting.<br />
If there isn’t a local chapter<br />
in your area, consider joining and<br />
starting one. We even had a member<br />
from Missouri visit the last meeting<br />
of the North Texas chapter.<br />
I hope to meet some of you at<br />
the upcoming symposiums in either<br />
Utah or New Mexico. Remember,<br />
comments about this column are<br />
welcome and can be emailed to me<br />
at don@RedRiver<strong>Pen</strong>s.com<br />
Do a good turn daily! Don<br />
Chinese Ball<br />
Tools<br />
I have recently become a dealer<br />
for the Crown Chinese Ball Tools and<br />
have an inventory of sets and extra<br />
handles on hand for immediate shipment.<br />
A set includes one handle, four<br />
cutters, a tool to make a tapered<br />
hole, and a pamplet written by David<br />
Springett. <strong>The</strong>se are priced at $125.00<br />
for each set.<br />
<strong>The</strong> handles include a wooden<br />
handle and a metal piece to attach the<br />
cutters and ride on the ball. <strong>The</strong>se are<br />
priced at $36.20 each. I recommend<br />
three additional handles.<br />
Fred Holder<br />
PO Box 2168<br />
Snohomish, WA 98291<br />
360-668-0976<br />
Letter to Editor<br />
Fred,<br />
Some months ago I told you I was not thrilled with thin<br />
CA glue. Well in recent months I have made friends with it.<br />
Several of my Valley Oak bowls had narrow long obvious<br />
cracks after a year of drying. <strong>The</strong> cracks ran with the grain.<br />
<strong>The</strong>se were easily filled with oak sawdust then followed by<br />
thin CA glue. <strong>The</strong> results looked beautiful and natural. <strong>The</strong><br />
bowls were finished with wipe on poly for a long lasting protective<br />
finish. I have had similar success with Black Walnut<br />
and some other woods using the sawdust from the same wood.<br />
Although the CA glue/sawdust does make a darkened line<br />
compared with the rest of the turning, for those cracks that<br />
run with the grain it looks like a natural feature in the wood.<br />
Now cracks across the grain can also be filled this way but<br />
I prefer to make them stand out in a decorative way with a<br />
colored epoxy. <strong>The</strong>y can almost never be made to look natural.<br />
Some of my turning friends use coffee grounds and CA glue.<br />
Coffee grounds can be obtained in different shades from your<br />
New Video:<br />
“Relief Carved<br />
Embellishments for Wood<br />
Projects”<br />
Available in:<br />
DVD for $30.00 plus $3.00 S/H<br />
VHS for $20.00 plus $3.00 S/H<br />
Order from: Tony Cortese<br />
20850 NW 13th Street, Dunnellon, FL 34431<br />
PH: 352-489-5652<br />
E-Mail: romeowoodturner@msn.com<br />
Web Site: www.tonycortese.org<br />
More Woodturning March-April 2009 Page 17
Feilding Collaboration 2009<br />
For the fourth year in succession, the Feilding<br />
Turning Collaboration in New Zewaland began on<br />
January 07, 2009. To see all of the results of this six<br />
day event, go to the following web site:<br />
http://www.naw.org.nz/galleries/feilding%20<br />
collab%202009/index.html.<br />
We are providing a few of the pieces here in for<br />
your enjoyment.<br />
Planetarium (Set Team Piece)--Made by Graeme<br />
McIntyre, Ron Muir, and Roy Miers from Rimu,<br />
Red Beech, and Black Maire and using paint<br />
gold and glitter, this piece is 290mm in diameter.<br />
Holey Holly--Made by Jim Lowe, Graeme<br />
McIntyre, Maurice Watt, and Jan Ottow from<br />
Holly, pierced and painted, this piece is 140mm<br />
high.<br />
Rocking--Made by Heather Vivian, Geoff<br />
Addison, Dick Veitch, Jan Ottow, Jim Lowe,<br />
Jill Mabey, Robbie Graham, and Phil Quinn<br />
from Macrocarpa and decorated with gold leaf,<br />
pyrography and paint, this piece is 250mm wide.<br />
Butterfly Dish--Made by Jill and Roger Mabey<br />
from Ash and paints, this piece is 280mm in<br />
diameter.<br />
More Woodturning March-April 2009 Page 18
Questions and<br />
Answers from the<br />
Internet<br />
Using a Depth Drill<br />
Question: I have just completed<br />
one of my larger projects<br />
that seems to take over the shop. It<br />
is a large segmented form which I<br />
posted pics of on both WOW and<br />
AAW. Won’t bore you all with that.<br />
I took a day to clean up the shop and<br />
make the tools find their homes. In<br />
the process I decided to make some<br />
tweaks to jigs, and do a little more<br />
organizing. One of the things I did<br />
is sharpen a 3/8 drill that I use for a<br />
depth gauge. Even after sharpening<br />
I find that drilling into endgrain,<br />
it still wants to wander off of true<br />
and winds up wobbling pretty significantly,<br />
and the hole winds up far<br />
from true center of the stock. I have<br />
a “D” drill that I made from drill<br />
rod and it does tend to seek the true<br />
center but requires a start with the<br />
tailstock. It also takes longer and<br />
gets hotter. I have seen some of the<br />
pros use a drill with a handle for this<br />
function and thought I would make<br />
a handle for my drill, but with it<br />
wandering so much, not sure I want<br />
to. How do they do it What is your<br />
experience with the hand held drills<br />
used as a depth gauge<br />
—M. Foster<br />
Fred’s Answer: I’m not sure<br />
that I can really add anything to<br />
what has been said already. As<br />
many have noted, it is common for<br />
the drill bit to wander when drilling<br />
into end grain. Here is what I do,<br />
and it normally works well, I lay<br />
the skew chisel on its side and find<br />
the rotating center of the wood. I<br />
push the skew in until it is centered<br />
and is cutting a nice “V” like recess<br />
that is large enough to accept my<br />
3/8” drill that I use to mark depth.<br />
It has a handle like a file handle on<br />
the drill and the drill is super glued<br />
into the handle. I then turn the lathe<br />
on at somewhere between 500 and<br />
1000 rpm, align the drill shaft with<br />
the ways of the lathe bed and press<br />
the drill into the pre-cut recess. Most<br />
of the time it drills straight. All of<br />
the BIC pens I make are drilled freehand<br />
with a 9/64” drill bit mounted<br />
in a wooden handle. Again I simply<br />
align the shaft of the drill bit with<br />
the lathe bed. <strong>The</strong> freehand method<br />
works for me, but I do not make<br />
large hollow forms.<br />
—Fred Holder<br />
Lyle’s Response: I also do the<br />
recess to start the drill even when I<br />
use the tailstock. And even when<br />
I use a Forestner bit I cut a shoulder<br />
to make sure the drills start on<br />
center. But any drill will want to<br />
take a path of least resistance and<br />
wander from true center. But in<br />
the hollowing process that is only<br />
a little distraction as you start each<br />
cut in hollowing, no big deal. <strong>The</strong><br />
key word to me here is depth gauge.<br />
<strong>The</strong> starting hole in hollowing, in<br />
my opinion, should be for easy hollowing<br />
not a depth gauge. I will not<br />
know the exact bottom depth of my<br />
hollow form until I get the outside<br />
shape finished. I can not do the entire<br />
outside shape in a small footed<br />
vessel until I have the top portion<br />
of the vessel completed. If I make<br />
a small foot at the base and try to<br />
go out and hollow the top/mouth of<br />
the vessel I will have vibration...not<br />
a good plan. So I estimate where<br />
the inside of the bottom shape will<br />
be and drill a entry hole at least<br />
1/2 inch short of the bottom. <strong>The</strong><br />
laser will help me get the bottom<br />
depth and bottom shape accurately.<br />
Even with hand held blind turning<br />
the drill should not be used as the<br />
depth gauge. I have made some<br />
ugly shaped hollow forms because<br />
my drill hole was too deep.<br />
—Lyle Jamieson<br />
Spinner Tops<br />
Question: I recently started<br />
turning bowls and I end of with<br />
these wooden cones as scrap. I<br />
have made a few into “tops” for the<br />
grandkids and they work great. Any<br />
thoughts on bowl turning as being<br />
the ORIGINAL source of this toy.<br />
Note: I just clean up the pointy<br />
end of the piece (where it has been<br />
parted off or broken off) and drill<br />
a hole in the fat end for a dowel<br />
a couple of inches long. One can<br />
simply spin the top by hand to get<br />
it going or: I also found it handy to<br />
make a little handle that has a hole<br />
to fit the dowel. This acts as a bearing<br />
when we wrap string around the<br />
dowel and pull to get the top going<br />
a lot faster than we can by spinning<br />
by hand.<br />
—Pete Stanaitis<br />
Fred’s Answer: I have not<br />
been able to find anything that might<br />
date the origin of the spinning top.<br />
In his book “<strong>The</strong> Top” copyrighted<br />
1973, D. W. Gould was unable to<br />
find anything to date the origin of<br />
tops. He did find mentions of the top<br />
as early as 1461, but I suspect that<br />
it was developed much earlier than<br />
that. I recently reviewed a book,<br />
“Tops the Universal Toy” by Michael<br />
Cullen. It is an excellent book<br />
on a wide range of tops, but doesn’t<br />
even try to define the origin of these<br />
neat childrens toys. I guess over the<br />
[Continued on Page 29.]<br />
More Woodturning March-April 2009 Page 19
Editor’s Books for Sale<br />
Books Written by the Editor of More Woodturning<br />
Making the Chinese<br />
Ball<br />
Revised 2008, by Fred<br />
Holder.<br />
This revised booklet outlines Fred’s<br />
trials and tribulations in conquering<br />
this project. Tells how to make<br />
the tools needed to use the Crown<br />
Chinese Ball Tools. Booklet now<br />
contains 64 pages of information.<br />
Price is $10.00 including shipping.<br />
Order from: Fred Holder, PO Box<br />
2168, Snohomish, WA 98291.<br />
Telephone 360-668-0976.<br />
Price: $28.00, plus $5.00s/h<br />
Price: $27.00, plus $5.00 s/h<br />
I have purchased 25 copies of<br />
<strong>The</strong> Woodturner’s FAQ Book and<br />
have them available as signed<br />
copies for $19.95 plus $5.00<br />
for shipping by Priority Mail<br />
(Washington State residents<br />
please add 8% for sales tax.)<br />
We accept cash, check, or<br />
MasterCard and Visa credit<br />
<br />
book, which is “required reading<br />
for all new turners” directly<br />
from the author:<br />
Fred Holder<br />
More Woodturning<br />
PO Box 2168<br />
Snohomish, WA 98296 USA<br />
“Two Books in One”<br />
a CD-ROM<br />
This CD-ROM contains Fred’s<br />
newest book, “<strong>The</strong> Turning Process”<br />
and the above book “Making<br />
the Chinese Ball” on one CD-ROM.<br />
Both books are in PDF format and<br />
require Adobe Acrobat Reader to<br />
read them on your computer. <strong>The</strong><br />
Turning Process is a 105 page<br />
booklet designed for beginner to<br />
intermediate woodturners. It might<br />
even have something worthwhile for<br />
experienced woodturners.<br />
Available by 9/10/2008<br />
Price for this CD-ROM<br />
is just $14.95 including postage<br />
within the United States.<br />
Order from: Fred Holder, PO Box<br />
2168, Snohomish, WA 98291.<br />
Telephone: 360-668-0976<br />
<strong>The</strong>se books seemed<br />
to be missing from most US<br />
Sources. So I have purchased<br />
25 of each book for resale. If<br />
you haven’t had an opportunity<br />
to purchase one, this is<br />
an opportunity to get a signed<br />
copy. Books will be shipped<br />
by Priority Mail.<br />
Fred Holder<br />
More Woodturning<br />
PO Box 2168<br />
Snohomish, WA 98291 USA<br />
TEL: 360-668-0976<br />
Back Issues of More Woodturning<br />
Available on CD-ROM<br />
Anyone who owns a computer and likes to read More Woodturning<br />
on their computer or to archive it onto their computer, will<br />
be pleased to learn that we now have all issues of More Woodturning<br />
ever published in PDF format. While we offer individual years<br />
on a CD-ROM for $25.00, we have come up with a special price<br />
which includes all issues published from October 1996 to the date<br />
that the order is placed on a single CD-ROM for just $95.00. This<br />
<br />
More Woodturning, PO Box 2168, Snohomish, WA 98291 USA.<br />
Page 20 More Woodturning March-April 2009
A Spigot Chuck You Can Make<br />
by Fred Holder<br />
It was common practice to<br />
make spigot chucks out of wood<br />
before the invention and proliferation<br />
of the modern scroll chuck.<br />
<strong>The</strong>se generally had a hole turned<br />
to the specified diameter, a turned<br />
down section which had been sawed<br />
through to cut it into eight or more<br />
segments, and a clamping device<br />
such as a ring to compress the segments<br />
onto the item it was designed<br />
to hold. <strong>The</strong>se served turners for<br />
many years and still can be used<br />
quite effectively. <strong>The</strong>y are not as<br />
handy as the modern scroll chuck;<br />
i.e., the Nova, Stronghold, Carlson,<br />
etc., nor do they have the holding<br />
power of these modern chucks. <strong>The</strong>y<br />
are however, inexpensive.<br />
Several years ago (note this<br />
article was written in 1996), I had<br />
need for a spigot chuck to hold<br />
something, I’ve long since forgotten<br />
what, for finished turning. I<br />
made that first one by mounting a<br />
block of hard maple on a faceplate,<br />
turning the necessary hole, turning<br />
down the area over the hole, sawing<br />
it into eight segments, and then in<br />
place of a ring, I used a hose clamp<br />
that was handy in my tool box. <strong>The</strong><br />
hose clamp served as a compressible<br />
ring. A ring is smooth, but the hose<br />
clamp can do some knuckle knocking<br />
if you don’t exert care. Anyway,<br />
it worked quite well. I suspect I had<br />
seen an article showing this somewhere,<br />
but, if so, I don’t remember<br />
it. Anyway, I’m not taking credit for<br />
inventing the idea.<br />
<strong>The</strong> main problem with this<br />
approach was that you tied up a<br />
faceplate. You take to chuck off of<br />
the faceplate and you can never get<br />
it back so it fits exactly. It was time<br />
consuming to have to make a new<br />
spigot chuck each time I needed<br />
one. So, I purchased some 3/4-16<br />
TPI nuts to fit my lathe headstock<br />
(at the time this was written, all of<br />
my lathes had 3/4” x 16 tpi spindles)<br />
turned a recess in one end of a piece<br />
of wood to fit the outside diameter<br />
of the nut (actually, I left it sort of<br />
a press fit so that the corners of the<br />
nut cut shallow grooves down the<br />
side of the hole as it was pressed in).<br />
I pressed this nut into place using<br />
my bench vise and applied epoxy<br />
to fill in the gaps between the flats<br />
of the nut and the hole. Once the<br />
epoxy had set up (about 24 hours), I<br />
drilled a hole for the spigot to enter,<br />
turned down the area over the hole,<br />
sawed it into eight segments with<br />
a small dovetail saw, and applied a<br />
hose clamp to squeeze the segments<br />
down onto the spigot. It worked real<br />
well and I no longer had a faceplate<br />
tied up. <strong>The</strong> whole rig cost about<br />
$2.00 plus the cost of the wood and<br />
since the wood came out of a firewood<br />
pile it didn’t cost much.<br />
I subsequently purchased a<br />
couple of Nova chucks and discontinued<br />
use of these home-made<br />
spigot chucks. However, I made<br />
one for use on my foot powered<br />
lathe to hold one inch dowel stock.<br />
It worked well enough that I decided<br />
to make others to hold several<br />
smaller sized spigots; i.e., 5/8”, 1/2”,<br />
3/8”. <strong>The</strong>se four chucks are pictured<br />
in Figure 1. <strong>The</strong>y work quite well<br />
on the foot-powered lathe and look<br />
just right for it. <strong>The</strong>y also work quite<br />
well on regular lathes, you just have<br />
to exert care to avoid the spinning<br />
hose clamp.<br />
If you don’t have a scroll chuck<br />
that will fit the job at hand, you can<br />
always make up a home made spigot<br />
chuck from a scrap of firewood, a<br />
nut that fits your headstock, and a<br />
hose clamp. <strong>The</strong>re is not really any<br />
size limitation to this, except that<br />
as you go larger and more weight<br />
is applied to the bond between the<br />
wood and the nut, it would be a good<br />
idea to shift to a faceplate to have<br />
[Continued on Page 22.]<br />
Make 2-3 Bowls from 1 Blank<br />
with My New BowlSaw<br />
Turn Nested Bowls from 6” or 8” bowl blanks with a $39.95<br />
hand-held tool I call the Bowlsaw.<br />
See my website bowlsaw.com for details.<br />
Steussy Creations<br />
415-897-1457 334 Atherton Ave., Novato, CA 94945<br />
More Woodturning March-April 2009 Page 21
Spigot Chuck Continued<br />
from Page 21<br />
greater holding power. You can<br />
always make up a special faceplate<br />
for your chuck that has a metal plate<br />
welded to the nut. If you have a<br />
friend with a welder the cost should<br />
be minimal.<br />
I’ve included a sequence of<br />
photographs with captions that<br />
pretty well describe the sequence of<br />
events necessary to make up one of<br />
these spigot chucks. Have fun! Oh,<br />
incidentally, if you come up with an<br />
interesting variation on this device,<br />
please let us know so that we can<br />
advise our readers.<br />
Figure 1. Homemade Spigot<br />
Chuck made from a 1” x 8 tpi<br />
nut, a scrap of wood, and a hose<br />
clamp.<br />
Note: I have taken<br />
new photographs for<br />
use with this story<br />
because the original<br />
photos were very<br />
poor.<br />
Figure 2. Begin by drilling a<br />
suitable size piece of wood with a<br />
1-5/8” Forstner Bit. You can drill<br />
on the lathe or on a drill press as<br />
shown here.<br />
<strong>The</strong> piece shown in Figure 2 is<br />
about a two and 1/2 inch hexagon<br />
piece from the scrap bin. <strong>The</strong> chunk<br />
of wood was about 3-1/2 inches<br />
long.<br />
I’ve drilled it on<br />
the drill press, but<br />
is could have been<br />
mounted in my Nova<br />
chuck with the 50mm<br />
jaws.<br />
Here, I’ve drilled it on the<br />
drill press, but it could have been<br />
mounted in my Nova chuck with the<br />
50mm jaws and could just as easily<br />
been mounted to a faceplate or<br />
on a screw chuck. As shown here, I<br />
begin by drilling a one and 5/8 inch<br />
diameter hole to a depth equal to the<br />
thickness of the nut. One could also<br />
drill the hole deeper with a 1” drill<br />
to make sure the chuck will clear the<br />
threaded portion of the lathe head<br />
stock spindle.<br />
Figure 3. This shows the hole<br />
drilled to accept a 1” x 8tpi nut.<br />
I simply used the bench vise<br />
to press the nut into the recess and<br />
then applied medium thick super<br />
glue to fill in the gaps between the<br />
round hole and the square side of<br />
the nut.<br />
Figure 4. Here the nut has been<br />
pressed into the wood and thick<br />
super glue applied to the cracks.<br />
I used a bench vise, but a press<br />
or hammer and block of wood can<br />
do the job as well. Now, apply medium<br />
thick super glue or epoxy to<br />
the gaps between the flats on the nut<br />
and the curved surface of the recess.<br />
Allow it to set up properly, generally<br />
Page 22 More Woodturning March-April 2009
overnight is sufficient and 24 hours<br />
is more than adequate.<br />
Figure 5. Again mount the block<br />
on the lathe, using the nut to<br />
screw onto the lathe headstock<br />
nose. If your lathe has a step<br />
as most of my lathes do, use<br />
washers to shim away from the<br />
step. You don’t want to damage<br />
that step by screwing a nut up<br />
tightly against it.<br />
Now, turn the block round and<br />
drill the spigot hole in the end of<br />
the piece of wood. Drill through<br />
until you hit the hole drilled from<br />
the other side.<br />
Make it too thin and the chuck<br />
will be weak at this point, too thick<br />
and the chuck won’t compress properly.<br />
I generally turn about three<br />
decorative grooves on my chucks.<br />
Not necessary, but it makes them<br />
look better.<br />
Figure 7. Make sure you have<br />
turned the stepped down part<br />
small enough to fit the clamp<br />
you have available while the<br />
chuck is still on the lathe.<br />
I either use a dovetail saw or<br />
the bandsaw and finish the depth<br />
with the dovetail saw. Either way<br />
you want the cuts made down to<br />
the shoulder of the stepped down<br />
part. At this point, I generally oil<br />
my new chuck. It simply makes it<br />
look better.<br />
Editor’s Note: We are<br />
reprinting this article here<br />
in response to a number of<br />
people requesting more information<br />
as a result of the<br />
Q&A question concerning<br />
a “Through Chuck.” I have<br />
forwarded a copy of this<br />
article as it was originally<br />
printed to at least two people<br />
and feel that there were likely<br />
others who wondered about<br />
this chuck idea, but didn’t<br />
bother to ask. I hope it will<br />
be of use to our readers, especially<br />
those who have just reciently<br />
started to turn wood.<br />
For what it is worth, these<br />
little chucks perform very<br />
well at a minimual cost.<br />
Incidentally, I did take<br />
new color photos to include<br />
with the reprinted article.<br />
Unfortunately, they have<br />
wound up on a black and<br />
white page. <strong>The</strong> PDF version<br />
will have them in color. <strong>The</strong><br />
1996 original photos have<br />
long since been lost and the<br />
black and white pictures in<br />
the original article were not<br />
up to the standards we are<br />
trying to maintain in More<br />
Woodturning.<br />
Figure 6. Turn down an inch or<br />
so of the piece to give about 1/8<br />
to 3/16 inch wall thickness over<br />
the spigot area. Saw the stepped<br />
down spigot area into eight<br />
equal pieces as shown.<br />
Figure 8. Here the 3/8” spigot<br />
chuck is being used to hold a<br />
spinner top blank for turning.<br />
More Woodturning March-April 2009 Page 23
<strong>Johannes</strong> Michelsen-<strong>The</strong> Hat Man<br />
by Fred Holder<br />
<strong>The</strong> first time I saw <strong>Johannes</strong><br />
Michelsen demonstrate the making<br />
of a hat was several years ago at<br />
Bonnie Klein’s shop. I’ve never aspired<br />
to make a hat, but I’ve always<br />
been impressed with <strong>Johannes</strong>’ skill<br />
at turning wood so thin to make a<br />
beautiful hat. I did have an opportunity<br />
to interview <strong>Johannes</strong> in 2001<br />
and published that interview in the<br />
July 2001 issue of More Woodturning.<br />
During that interview, <strong>Johannes</strong><br />
described how he got into hat making<br />
hats and I’m going to briefly<br />
quote that here:<br />
“Before I made wood hats,<br />
I wore felt hats...cowboy hats.<br />
<strong>The</strong>y’re rare and not readily available<br />
in Vermont so when it came<br />
time for a new hat, because my Datsun<br />
pickup truck was small enough<br />
that my head...my hat rubbed on<br />
the headliner and wore the hat out.<br />
I couldn’t go buy one because the<br />
stores didn’t have them anymore.<br />
<strong>The</strong>re wasn’t enough demand for<br />
cowboy hats in Vermont to sustain<br />
the sales. So I always say if I had<br />
lived in Arizona I probably wouldn’t<br />
be turning wood hats today because<br />
I would’ve been able to buy a new<br />
hat when I needed it.<br />
“So not being able to get a hat,<br />
I said well I’ll just turn a wooden<br />
one that won’t wear out. So I made<br />
that a joke and that joke went for ten<br />
years and I used to put the bowls and<br />
vases on my head that I turned and<br />
joke about the hat that I would make<br />
one day. And then in November of<br />
1990 Albert McCoff was getting<br />
married. Albert ...marrying sent me<br />
an invitation...please come to our<br />
western wedding...come dressed<br />
appropriately.<br />
Page 24 More Woodturning March-April 2009<br />
“So I said to myself if it’s not<br />
time to turn that wood hat now, it<br />
never will be. So I made the first<br />
hat and went to Albert’s wedding...<br />
hat number one and I gave it to him<br />
and started the collection and that’s<br />
what started it all.”<br />
<strong>The</strong> hat he showed us during<br />
the demonstration at Jack McDaniel’s<br />
shop in November 2008 was<br />
numbered 1667. So in 18 years he<br />
has made a significant number of<br />
hats, all because he bought a Datsun<br />
pickup truck and lived in Vermont.<br />
As I understand it, the hats that<br />
he makes during demonstrations<br />
are not included in that count. He<br />
numbers only the one’s that he is<br />
making to sell.<br />
During the demonstration, I<br />
took over 130 photographs, but<br />
have eliminated a lot of them for<br />
this story. Basically, I’m going to let<br />
the photos and their captions tell the<br />
story of how <strong>Johannes</strong> Michelsen<br />
makes a wooden cowboy hat.<br />
Figure 1. <strong>Johannes</strong> the Hat Man<br />
is ready for action and leaning<br />
on the block of wood that will<br />
become two hats-a large one<br />
and a small one cored from the<br />
crown.<br />
Figure 2. <strong>Johannes</strong> started the<br />
demonstration by showing us his<br />
bending frame for shaping the<br />
brim of the hat while it dries.<br />
Figure 3. Here <strong>Johannes</strong> is<br />
beginning to turn the hat from a<br />
block of wood mounted between<br />
centers.
Figure 4. <strong>Johannes</strong> passed<br />
around the hat he was wearing.<br />
This photo shows the signature<br />
that he puts in each hat he makes<br />
for sale.<br />
Figure 7. About this time it was<br />
time to sharpen his chisel and I<br />
got a close up shot of the bevel<br />
and cutting edge. <strong>The</strong> overall<br />
bevel is pretty much rounded.<br />
Figure 10. Satisfied that he<br />
has a fair start on shaping the<br />
underside of the brim, <strong>Johannes</strong><br />
cut a recess in the bottom of the<br />
hat blank to fit on a chuck. He<br />
could then reverse the blank on<br />
the lathe and start shaping the<br />
outside of the hat.<br />
Figure 5. Here is an overall view<br />
of the hat being passed around.<br />
Figure 8. Here <strong>Johannes</strong> is<br />
beginning to shape the bottom of<br />
the brim.<br />
Figure 11. <strong>The</strong> blank has been<br />
mounted in a chuck, but the<br />
faceplate remains on the blank.<br />
[Continued on Next Page]<br />
Figure 6. <strong>The</strong> wood has been<br />
partially shaped between centers<br />
and now <strong>Johannes</strong> is attaching<br />
a faceplate on the part that will<br />
become the crown of the hat.<br />
Figure 9. <strong>Johannes</strong> stopped at this point and drew pictures of the<br />
two basic styles of western style hat that he turns-the range rider<br />
(left) and the trail boss.<br />
More Woodturning March-April 2009 Page 25
Woodturning Books For Sale<br />
We are pleased to offer the following books from Linden Publishing for<br />
sale through More Woodturning.<br />
Here are the titles we are offering:<br />
• All Screwed up!: Turned Puzzles and Boxes Featuring Chased threads<br />
by John Berkeley $24.95<br />
• 500 Wood Bowls $24.95<br />
• Beyond Basic Turning: Off-Center, Coopered, and Laminated Work,<br />
by Jack Cox $28.95<br />
• Chris Child’s Projects for Woodturners, by Chris Child $16.95<br />
• Decorating Turned Wood: <strong>The</strong> Maker’s Eye, by Liz and Michael<br />
O’Donnell $19.95<br />
• Fabulous Turned Wood Projects, by Hazeu Hiebert, et al $17.95<br />
• Richard Raffan Turning Guides, Slipcase Set, by Richard Raffan $59.95<br />
• Segmented Turning: A Complete Guide, by Ron Hampton $19.95<br />
• <strong>The</strong> Art of Segmented Wood Turning: A Step-by-Step Guide,<br />
by Malcolm Tibbetts $25.95<br />
• <strong>The</strong> Complete Illustrated Guide to Turning by Richard Raffan $39.95<br />
• <strong>The</strong> Lathe Book, by Ernie Conover $24.95<br />
• <strong>The</strong> Woodturner’s Workbook, by Ray Key $19.95<br />
• <strong>The</strong> Woodturner’s FAQ Book, by Fred Holder $19.95<br />
• Turn a Bowl: Getting Good Results the First Time Around,<br />
by Ernie Conover $19.95<br />
• Turned Boxes: 50 Designs, by Chris Stott $19.95<br />
• Turning Boxes with Richard Raffan: (revised and updated) $24.95<br />
• Turning Bowls with Richard Raffan, by Richard Raffan $24.95<br />
• Turning Boxes with Richard Raffan $24.95<br />
• Turning Green Wood, by Michael O’Donnell $17.95<br />
• Turning <strong>Pen</strong>s and <strong>Pen</strong>cils, by Kip Christensen & Rex Burningham $17.95<br />
• Turning Projects, by Richard Raffan $21.95<br />
• Turning Wood with Richard Raffan, by Richard Raffan $24.95<br />
• Wood for Woodturners by Mark Baker $19.95<br />
• Woodturning: A Foundation Course, by Keith Rowley $19.95<br />
• Woodturning: A Fresh Approach, by Robert Chapman $17.95<br />
• Woodturning Forms and Materials, by John Hunnex $19.95<br />
• Woodturning Projects, by Mark Baker $19.95<br />
• Woodturner’s Wooden Clock Cases by Tim Ashby $5.95<br />
<strong>The</strong> Hat Man Continued<br />
from Pervious page<br />
Figure 12. Using a McNaughton<br />
parting tool, <strong>Johannes</strong> cuts<br />
groove in the hat blank parallel<br />
to the crown of the hat.<br />
Figure 13. He now cuts a groove<br />
with the parting tool that is<br />
parallel to the brim of the hat<br />
that will intercept the other<br />
groove cut parallel to the crown.<br />
Pay shipping of $4.25 for the first book plus $1.00 for each additional book.<br />
Priority Mail is $6.50 for the first book and $1.00 for each additonal book.<br />
Foreign Customers please request a quote for shipping costs.<br />
Order three books and take a 10 percent discount on the order.<br />
Note: Discount does not apply to postage.<br />
Master Card and Visa Charge Cards Accepted<br />
Send Orders to:<br />
More Woodturning<br />
P. O. Box 2168<br />
Snohomish, WA 98291-2168<br />
Telephone: 360-668-0976<br />
Fax: 360-668-1798<br />
Figure 14. This photos shows the<br />
ring of wood that was removed<br />
with the two parting cuts.<br />
Page 26 More Woodturning March-April 2009
Figure 15. With the excess wood<br />
out of the way, <strong>Johannes</strong> could<br />
begin shaping the crown of the<br />
hat.<br />
Figure 18. At this point, a coring<br />
tool comes into play to remove a<br />
cone out of the crown of the hat.<br />
This cuts down on the amount<br />
of wood that must be removed<br />
with the gouge and also provides<br />
a blank to use in making a small<br />
hat.<br />
Figure 20. This view shows how<br />
the light is used to determine the<br />
consistency of the wall thickness.<br />
Figure 16. This photo shows the<br />
tiny step that was made in the<br />
crown to define the headband.<br />
Figure 19. Starting to refine the<br />
inside of the crown now that the<br />
core of wood has been removed.<br />
In all cases, light is used to help<br />
define the thickness of the wood;<br />
however, he did check the wall<br />
thickness from time to time with<br />
a pair of calipers.<br />
Figure 21. This is the final<br />
mounting fixture for the hat.<br />
At this point the brim has been<br />
final turned to the appropriate<br />
thickness and only the crown<br />
needs to be refined.<br />
Figure 17. <strong>The</strong> blank has been<br />
reversed to have the faceplate<br />
mounted on the lathe spindle.<br />
He is now able to start refining<br />
the thickness of the brim.<br />
[Continued on Next Page]<br />
More Woodturning March-April 2009 Page 27
<strong>The</strong> Hat Man Continued<br />
from Pervious page<br />
Figure 24. <strong>The</strong> hat is finished<br />
and ready to remove from the<br />
lathe.<br />
demonstration for the day. Perhaps<br />
in some other issue, I’ll bring a story<br />
on turning a small cowboy hat with<br />
<strong>Johannes</strong> Michelsen.<br />
I must again thank Jack Mc-<br />
Daniel for making his wonderful<br />
shop available for these demonstrations<br />
and <strong>Johannes</strong> Michelsen for<br />
doing such a wonderful demonstration.<br />
If you’ve never seen <strong>Johannes</strong><br />
make a hat, please try to catch one<br />
of his demonstrations when he is in<br />
your area or at a symposium that you<br />
are attending.<br />
Figure 22. <strong>The</strong> hat has been<br />
mounted on the fixture to final<br />
turn the crown of the hat. At<br />
this point the faceplate has been<br />
removed and the excess wood<br />
will be turned away.<br />
Figure 23. At this point,<br />
<strong>Johannes</strong> burned the surface<br />
of the hat band by pressing a<br />
piece of hardwood against the<br />
hatband as the wood spun. It<br />
does a nice job of evenly burning<br />
the color required for the<br />
hatband.<br />
Figure 25. <strong>Johannes</strong> is applying<br />
tape to the brim to help protect<br />
it while it is being formed in the<br />
bending fixture.<br />
Although I’m not going to cover<br />
it in this article, <strong>Johannes</strong> took the<br />
core that he had removed from the<br />
crown of the hat and turned a smaller<br />
version of the hat to complete his<br />
“THE ELIMINATOR”<br />
Figure 26. <strong>The</strong> hat has been<br />
fitted into the bending frame<br />
where it will remain until it is<br />
dry.<br />
Hollowing Tool<br />
ELIMINATES:<br />
CATCHES,<br />
TEAR OUT,<br />
SHARPENING<br />
Available in three sizes: 1/4, 3/8, 1/2 inch cutters. Tool shafts are<br />
milled with flats for both right and left hand cutting.<br />
Available from: Packard Woodworks and Craft Supplies USA<br />
www.jewelwood.com<br />
Page 28 More Woodturning March-April 2009
Q&A Continued from Page<br />
19<br />
last 20 years that I’ve made well<br />
over a thousand tops. Originally,<br />
from a solid blank, and then using<br />
a scrap of wood with a hard maple<br />
3/8” dowel added from which to<br />
turn the stem.<br />
When I first started turning<br />
wood it would sometimes be two to<br />
three weeks between opportunities<br />
to get in the shop and turn wood. I<br />
found that my tool control had decreased<br />
from the last opportunity.<br />
I found that turning two or three<br />
spinner tops before trying to turn<br />
anything else helped me regain my<br />
tool control and I always recommend<br />
that new turners give this<br />
technique a try. <strong>The</strong> core of a bowl<br />
often makes a good basic spinner<br />
top when you add a stem.<br />
—Fred Holder<br />
More About Through<br />
Chucks<br />
Question: I really like the<br />
magazine. I am a novice turner with<br />
a Delta midi-lathe. I get a great deal<br />
of USEFUL information from your<br />
publication. More than other “fancy,<br />
slick-looking” magazines. Keep up<br />
the good work! Now the question:<br />
In the current issue (January 2009)<br />
you talk about “Through chucks”.<br />
Is there somewhere I can get more<br />
detail on how to make these <strong>The</strong><br />
article didn’t go into any detail. Are<br />
these made of wood What are the<br />
1x8 tpi nuts for, or better, how are<br />
they used with the chuck Thanks<br />
again!<br />
—Joe Scheffer<br />
Fred’s Response: <strong>The</strong> article<br />
from the December 1996 issue describes<br />
how to make those chucks in<br />
detail. (PS: I e-mailed Joe a copy of<br />
that article.) <strong>The</strong> article will explain<br />
the purpose of the 1” x 8 tpi nuts,<br />
I used them in place of tying up a<br />
faceplate with the chuck. <strong>The</strong> article<br />
tells and shows how to use the nuts<br />
to make the chuck fit your lathe<br />
spindle. <strong>The</strong>se were called several<br />
different names: Spring Chucks,<br />
Spigot Chuck, etc. <strong>The</strong>y were<br />
mostly used to hold a spigot of some<br />
<br />
• Solid, robust, 4 jaw self-centring Chuck<br />
• Fits largest range of accessories on<br />
the market today including Vicmarc<br />
VM90 & VM100, Teknatool, and ‘lookalike’<br />
versions of these chucks<br />
• Fast clockwise rotational clamping<br />
• Satin etch finish to prevent rust<br />
• Totally enclosed back with unique indexing<br />
plate with up to 144 divisions<br />
• Unique pinion design provides handle<br />
clearance for large work<br />
• Optional Indexing bracket to suit most<br />
lathes<br />
Check out our range of woodworking<br />
equipment and accessories at:<br />
www.vermec.com<br />
39 Dalton Street, Kippa-Ring QLD 4021<br />
AUSTRALIA<br />
Ph: +61 7 3284 3733 Fax: +61 7 32842733<br />
Email: vermec@netspace.net.au<br />
length and of a specific size; i.e., the<br />
size of the hole drilled through the<br />
chuck. If the article doesn’t answer<br />
you questions, get back to me with<br />
specific questions and I’ll try to<br />
answer more fully.<br />
Maybe it is time to re-run that<br />
article on the Spigot Chuck. It has<br />
been 12 years since that was published.<br />
I’ve done so in this issue,<br />
see Page 21.<br />
—Fred Holder<br />
More Woodturning March-April 2009 Page 29
Coming Events<br />
<strong>The</strong> Central Indiana Chapter<br />
of the American Association of<br />
Woodturners (CICAAW) is hosting<br />
a weekend seminar with Clay<br />
Foster on March 7th and 8th. It will<br />
be an all-day affair with a potluck<br />
lunch. Cost is $25 for a single day or<br />
$45 for both days. It will be held at<br />
a state-of-the-art woodshop, located<br />
on Gasoline Alley and owned by<br />
Donald Skiles, a local Indianapolis<br />
businessman. For more information,<br />
check www.cicaaw.org.<br />
* * *<br />
2009 Southern States Symposium<br />
IX will be held at the Georgia<br />
Mountains Center, Gainesville,<br />
GA on April 24 through 26, 2009.<br />
Featured demonstrators are: Soren<br />
Berger from New Zealand, John<br />
Jordan from Tennessee, Dennis<br />
Liggett from Colorado, and Chris<br />
Ramsey from Kentucky. For more<br />
information go to their Web Site:<br />
http://www.southernstatessymposium.org/.<br />
* * *<br />
Utah Woodturning Symposium<br />
2009 to be held May 14<br />
through 16, 2009 will mark the<br />
30th year that this symposium has<br />
been held. Mike Mahoney is again<br />
the symposium director and the<br />
location, I asume, is the same as<br />
for the 2008 symposium. For more<br />
information on this event, keep in<br />
touch with their web site: www.<br />
utahwoodturning.com.<br />
* * *<br />
<strong>The</strong> AAW 23rd Annual Symposium<br />
will be held June 26 through<br />
28, 2009 at the Albuquerque Convention<br />
Center, Albuquerque, New<br />
Mexico. <strong>The</strong> complete schedule will<br />
feature more than 120 rotations,<br />
plus many more events. Featured<br />
demonstratiors include: Nick Cook,<br />
Emmet Kane, Virginia Dotson, Peter<br />
Hromek, Mike Mahoney, Rolly<br />
Munroe, David Nittmann, David<br />
Springett, and John Wessels.<br />
AAW local chapter, New<br />
Mexico Woodturners, who will<br />
be hosting the 2009 Symposium,<br />
have selected the Holland’s Rose<br />
organization as recipient of Return<br />
To <strong>The</strong> Community gifts this year.<br />
Holland’s Rose is an all-volunteer<br />
organization dedicated to providing<br />
affordable housing and other<br />
services to patients and families<br />
who must travel to Albuquerque<br />
for medical care. For more information<br />
on the symposium go to: www.<br />
woodturner.org.<br />
* * *<br />
North Carolina Woodturning<br />
Symposium will be held October<br />
23-25, 2009 in the Greensboro<br />
Coliseum Special Events Center,<br />
Greensboro, NC. It will feature 63<br />
rotations by International, National<br />
and Local area demonstrators. <strong>The</strong><br />
demonstrator list includes: Allen<br />
Batty, Stewart Batty, Jimmy Clews,<br />
Ray Key, Stewart Mortimer, Chris<br />
Ramsey, and Nick Cook. For more<br />
details go to http://northcarolinawoodturning.com/<br />
and visit frequently<br />
to keep up to date<br />
•••<br />
<strong>The</strong> Woodturners of Olympia<br />
2009 “Creativity in Woodturning”<br />
Manufacturer’s of the Worlds Largest Range of Fine<br />
Woodworking Handtools<br />
CROWN HAND TOOLS LTD.<br />
332-334 Coleford Road, Darnall<br />
Sheffield, S9 5PH England<br />
Symposium will be held Saturday,<br />
July 25, 2009. Eric Lofstrom will<br />
begin the day with a demonstration<br />
on woodturning basics. Eric will be<br />
followed by Jimmy Clewes. Jimmy<br />
is a well-known teacher and demonstrator<br />
in his native England as well<br />
as here in the USA. He will be performing<br />
demonstrations covering:<br />
• Design, shape, form & aesthetics<br />
• Oriental Boxes<br />
• Turning a twist and long stem<br />
goblet, and<br />
• Colorings<br />
<strong>The</strong> cost for the full day is $70<br />
for early payment. After June 1,<br />
2009 the cost is $80. Children under<br />
the age of 18 can register for $10 if<br />
attending with a paying adult.<br />
Lunch is included in the cost<br />
if payment is received before July<br />
12.<br />
Demonstrations will start<br />
promptly at 8 a.m. and end by 4:30<br />
p.m. Door prize drawings will be<br />
made after the final presentation.<br />
Location is the Komachin<br />
Middle School located at 3650 College<br />
St. SE, Lacey, WA. 98503.<br />
For more information or to<br />
register see http://www.woodturnersofolympia.org/<br />
or send payment<br />
directly to Al Price at 4112 Teakwood<br />
Ct. SE, Lacey, WA. 98503.<br />
Questions may also be directed to<br />
Al on 360-791-0396.<br />
TEL: England 114 272 3366 FAX: 114 272 5252<br />
E-Mail: info@crowntools.ltd.uk Web Site: www.crownhandtools.ltd.uk<br />
Page 30 More Woodturning March-April 2009
Note, we will also be offering<br />
either two one day classes or a two<br />
day class from Jimmy on the 26-27<br />
of July, but we don’t have the details<br />
nailed down yet to include in the<br />
announcement. <strong>The</strong>y will send an<br />
update to include in a later issue as<br />
soon as finalized.<br />
* * *<br />
Ohio Valley Woodturners<br />
Guild will sponsor its 6th biennial<br />
symposium “Turning 2009 on Oct<br />
16-18, 2009 in Cincinnati, Ohio.<br />
Featuring: David Ellsworth, Jean-<br />
François Escoulen, Bonnie Klein,<br />
Alan Lacer, Jon Magill, Stuart Mortimer,<br />
Jennifer Shirley & Jacques<br />
Vesery. For more information check<br />
their Web Site: http://www.ovwg.<br />
org/.<br />
* * *<br />
Editor’s Note: If you have an<br />
event coming up such as the ones<br />
listed here, please let us know in time<br />
to let our readers know that it is coming.<br />
Send information about your<br />
forthcoming symposium or event to<br />
fred@morewoodturning.net or to<br />
More Woodturning, PO Box 2168,<br />
Snohomish, WA 98291 USA.<br />
T h i s s p a c e<br />
could have reported<br />
on your<br />
clubs coming<br />
event had we recieved<br />
information<br />
about it.<br />
Send us your Symposium information<br />
so that we may share it<br />
with our readers.<br />
Woodturning Books For Sale<br />
We are pleased to offer Schiffer Woodturning Books for Sale through<br />
More Woodturning. Here are the titles we are offering:<br />
• <strong>The</strong> Basics of Turning Spirals by Bill Bowers $14.95<br />
• Easy Turning Projects for the Smaller Lathes by Bill Bowers $14.95<br />
• Great Turning Projects for the Smaller Lathe by Bill Bowers $14.95<br />
• Turning Threaded Boxes by John Swanson $14.95<br />
• Turning Wooden Jewelry by Judy Ditmer $12.95<br />
• Basic Bowl Turning with Judy Ditmer $12.95<br />
• Dick Sing Turns Miniature Birdhouses by Dick Sing $14.95<br />
• Turning Humidors with Dick Sing by Dick Sing $14.95<br />
• <strong>Pen</strong>s From the Wood Lathe by Dick Sing $12.95<br />
• Dick Sing ReTurns: Unique and Unusual <strong>Pen</strong>s from the<br />
Wood Lathe by Dick Sing $14.95<br />
• Wood Lathe Projects for Fun and Profit by Dick Sing $12.95<br />
• Useful Beauty: Turning Practical Items on a Wood Lathe by Dick Sing $12.95<br />
• Turning Bowls by Dick Sing (NEW) $14.95<br />
• Turning Ornaments and Eggs by Dick Sing (NEW) $14.95<br />
• Projects for the Mini Lathe by Dick Sing (NEW) $14.95<br />
• Turning Candlesticks by Mike Cripps $14.95<br />
• Turning Goblets by Mike Cripps $12.95<br />
• Turning <strong>Pen</strong>s and Desk Accessories by Mike Cripps $12.95<br />
• Wood Turning for the Garden, Projects for Outdoors by Michael Cripps $12.95<br />
• Segmented Wood Turning, by William Smith $14.95<br />
• Mini Lathe Magic: Big Projects from a Small Lathe, by Ron Hampton $14.95<br />
• A Turner’s Guide to Veneer Inlays, by Ron Hampton $14..95<br />
Pay shipping of $5.00 for each book.<br />
Foreign Customers please request a quote for shipping costs.<br />
Order three books and take a 10 percent discount on the order.<br />
Master Card and Visa Charge Cards Accepted<br />
Send Orders to:<br />
More Woodturning<br />
P. O. Box 2168<br />
Snohomish, WA 98291-2168<br />
More Woodturning March-April 2009 Page 31
Making the Ball for a Chinese Ball<br />
by Fred Holder<br />
Making the ball to be used in<br />
making a Chinese Ball requires a bit<br />
of precision because the spacing of<br />
the holes must be precise and this<br />
requires a round ball that measures<br />
2-1/2” in diameter. Over the 10<br />
years since I started making the<br />
Chinese Ball, I’ve use a number of<br />
different methods to make the ball.<br />
<strong>The</strong> series of photographs taken for<br />
this story were done during a production<br />
run of six or seven balls. I<br />
used the Vermec <strong>Sphere</strong> Turning Rig<br />
for actually making the balls round<br />
and a Sizing Rig that I purchased<br />
from Craft Supplies Ltd. in the UK<br />
several years ago. It was supposedly<br />
designed to hold a 3/8” Bedan, but<br />
I found that it held my Ashley Iles<br />
parting tool very well. <strong>The</strong> balls that<br />
I made during this run were of hard<br />
maple, white ash, madrone, and elm.<br />
<strong>The</strong> elm had been soaked in Cedar<br />
Shield and turned very nicely. Hopefully,<br />
this series of photos with captions<br />
will explain the process that I<br />
go through in making balls for my<br />
Chinese Balls.<br />
<strong>The</strong> actual dimension of the<br />
blank can be a low as 2-3/4” square<br />
by about three inches long. I mount<br />
this block between centers using<br />
Morse Taper Extensions on both the<br />
headstock and tailstock.<br />
Figure 2. Using a 1-3/8 inch<br />
spindle roughing gouge, I turn<br />
the block round and to some<br />
dimension larger than the final<br />
dimension of 2-1/2 inches. This<br />
doesn’t have to be perfectly<br />
smooth at this point, but it does<br />
need to have all of the flat areas<br />
turned away.<br />
Figure 4. Using the sizing tool to<br />
make a number of grooves along<br />
the cylinder to make it easy to<br />
turn to final size. I generally use<br />
the roughing gouge to turn away<br />
most of the excess wood and<br />
then a 3/4 inch skew chisel to<br />
make the final cuts, thus leaving<br />
a fairly smooth surface.<br />
Figure 3. This is the tool that<br />
I use to set the diameter of the<br />
cylinder. It is called a sizing tool<br />
and is sold by Craft Supplies<br />
Ltd. in the UK. I’ve had it for<br />
years, but had never before used<br />
it with my Ashley Iles parting<br />
tool. It worked great.<br />
Figure 5. Here I am using the<br />
Soren Berger sphere caliper to<br />
check the size of the cylinder.<br />
When I’ve final turned to 2-1/2<br />
inches, the caliper will just slip<br />
over the center of the cylinder.<br />
Figure 1. I generally start with a<br />
three inch near square piece of<br />
wood as shown here.<br />
Editor’s Note: <strong>The</strong> method of making a ball shown here is<br />
only one of several methods detailed in my book, “Making the<br />
Chinese Ball or Five Concentric <strong>Sphere</strong>s” which is available for<br />
$10.00 as a printed version or for $8.00 as a downloaded PDF<br />
file from our web site. In that book, I describe all of the various<br />
methods that I know of for making a ball.<br />
Page 32 More Woodturning March-April 2009
Figure 6. <strong>The</strong> next measurement<br />
is to set the width of the cylinder<br />
to match the diameter of the<br />
cylinder. Here I’m marking the<br />
length with the Berger <strong>Sphere</strong><br />
caliper.<br />
Figure 7. I then use a parting<br />
tool to make cuts on each end<br />
to create a cylinder that is the<br />
same length as it is in diameter.<br />
I generally leave about a 3/4<br />
inch diameter tenon on each end<br />
of the cylinder to give a good<br />
hold with the drive and tail<br />
centers.<br />
Figure 9. For this bunch of<br />
spheres, I’m using the Vermec<br />
<strong>Sphere</strong> Turing Rig shown here.<br />
Of the three rigs I have, this is<br />
the best made and most rugged,<br />
it also cost the most. You can<br />
actually use a home made<br />
swinging jig to perform the<br />
following operations, but I find<br />
this best. And it uses a carbide<br />
cutter similar to the Hunter<br />
Tool and the <strong>Eli</strong>minator Tool. It<br />
would cut cleaner, if one could<br />
rotate the cutter for a 45 degree<br />
angle cut for each sweep across<br />
the ball surface.<br />
Figure 11. I began by setting the<br />
cutter in a bit and making cuts<br />
on either side of the cylinder. I<br />
continue this operation: crank<br />
the cutter in a bit and make cuts<br />
on both sides of the cylinder.<br />
Figure 12. As I near the size of<br />
the ball, I began to make smaller<br />
depths of cut and move the tool<br />
slower over the surface of the<br />
sphere. This allows the cutter to<br />
produce a smoother surface.<br />
Figure 8. It is a good idea to<br />
check the length of the cylinder<br />
after making the parting cuts.<br />
Figure 10. <strong>The</strong>re may be better<br />
ways, but I’ve found that<br />
eyeballing the rig to as near<br />
center as possible and then<br />
checking the cutter against<br />
the corner of each side of the<br />
cylinder works about as good as<br />
anything to precisely center the<br />
pivot point of the rig under the<br />
cylinder.<br />
Figure 13. I have a special<br />
Chinese Ball chuck that has a<br />
fairly large hole in the bottom<br />
of the spherical recess to allow<br />
the tenon on the end of the ball<br />
to pass through and allow the<br />
spherical portion of the ball to<br />
fit snugly into the chuck.<br />
More Woodturning March-April 2009 Page 33
Making a Ball Continued<br />
from Previous Page<br />
Figure 14. When mounting the<br />
ball into the chuck, I use the<br />
tail center to help align the ball<br />
properly.<br />
Figure 15. Once the ball is<br />
properly situated in the chuck, I<br />
tighten the top and use a spindle<br />
gouge to turn away the tenon.<br />
I then reverse the ball in the<br />
chuck and turn away the other<br />
tenon.<br />
Figure 16. When I feel that I’ve<br />
turned away the tenon properly,<br />
I use my little cardboard<br />
template to check the surface as<br />
shown in this photo.<br />
Figure 17. <strong>The</strong> finished ball is<br />
now ready to be made into a<br />
Chinese Ball. You may be able<br />
to note on the upper right hand<br />
side of the sphere at about 2:00<br />
pm the small area that was<br />
turned with the gouge.<br />
<strong>The</strong> process just described is<br />
the process that I go through when<br />
making balls to be used in making<br />
the Chinese Ball. I generally accumulate<br />
six to 10 cubes for a ball<br />
making operation. I turn each cube<br />
into a cylinder that is as long as it<br />
is in diameter before setting up the<br />
swinging jig to turn the cylinders<br />
into a spherical shape. This is much<br />
more efficient than doing one ball<br />
at a time.<br />
Remember in this example,<br />
I’m turning balls for use in making<br />
the Chinese Ball and the balls are<br />
2-1/2 inches in diameter. Should<br />
you choose to make larger balls,<br />
the process is similar, you simply<br />
need to make a larger chuck to use<br />
in removing the tenons after turning<br />
the ball. Incidentally, before I started<br />
making the Chinese Ball in 1998, I<br />
made a lot of balls for sale at craft<br />
fairs and called them “worry balls.”<br />
<strong>The</strong>y were in various sizes from 2<br />
inches to three inches.<br />
Insurance Coverage<br />
for AAW Members<br />
After many years of searching,<br />
the AAW has reached an agreement<br />
with a well-respected national company<br />
that specializes in providing<br />
health and other insurance to associations<br />
such as the AAW. We<br />
can now offer most of our U.S.<br />
resident members and their families<br />
medical insurance policies at very<br />
competitive rates through Association<br />
Health Programs (AHP) from<br />
Overland Park, Kansas.<br />
AHP administers the health<br />
insurance needs of over 180 national<br />
associations, representing<br />
2.5 million people. This huge block<br />
of buyers allows AHP to negotiate<br />
the lowest premiums available. On<br />
average, AHP expects to save AAW<br />
members substantial amounts on<br />
premiums. This may be the biggest<br />
benefit of your AAW membership.<br />
We talked with many associations<br />
that already do business<br />
with AHP, and without exception<br />
they were all delighted with the<br />
service and premiums. Complaints<br />
were minimal and always handled<br />
promptly to members’ satisfaction.<br />
AHP offers a 100% guarantee.<br />
If you are insurable, they will always<br />
be able to give you the lowest<br />
costs, compared to any other source.<br />
If you have any existing medical<br />
conditions, AHP guarantees that<br />
their liberal underwriting will allow<br />
you to pay less. <strong>The</strong>y further guarantee<br />
that upon annual renewal, they<br />
will obtain for you the lowest rates<br />
on health insurance and analyze<br />
your coverage to keep premiums<br />
in line with alternative insurance<br />
suppliers.<br />
AHP will place our AAW<br />
members and their families in with<br />
Page 34 More Woodturning March-April 2009
a large block of buyers in each state,<br />
with members from all the other associations<br />
that they represent. <strong>The</strong>y<br />
will only use “A” rated insurers<br />
such as Humana, Blue Cross, Aetna,<br />
United Health Care, Healthnet, or<br />
Assurant. In all of these, policy<br />
rates and renewals will be based<br />
on age and not your future medical<br />
conditions. Once a policy is issued,<br />
our members cannot be cancelled<br />
due to any change in your medical<br />
condition.<br />
AHP cannot offer medical<br />
insurance coverage in the states<br />
of Maine, Massachusetts, Rhode<br />
Island, or Vermont due to state<br />
health insurance laws. Due to state<br />
mandates, there are limited health<br />
insurance opportunities in New<br />
York and New Jersey. Alaska and<br />
Hawaii have limited policies available<br />
as well.<br />
In general, you can expect $5<br />
to $8 million of lifetime maximum<br />
benefits per person, comprehensive<br />
full-coverage major medical insurance,<br />
unlimited routine care, unlimited<br />
prescriptions, PPO options<br />
or the ability to see any doctor or<br />
hospital of your choice, and coverage<br />
that is good anywhere in the<br />
United States.<br />
AHP can also offer group<br />
policies for any business of three or<br />
more employees or officers. <strong>The</strong>y<br />
can also provide policies to cover<br />
Health Savings Accounts, Medicare<br />
Supplements, and Medicare<br />
Part D coverage, dental, disability<br />
income, critical illness, and international<br />
travel insurance. Through<br />
their large-block purchasing power,<br />
AHP can also provide the lowest<br />
premium rates on life insurance for<br />
term, whole life, second to die, key<br />
man, or universal life.<br />
If one of the insurance policies<br />
you need is long-term care insurance,<br />
through AHP you can save a<br />
substantial discount off of premiums<br />
that provide for home care, assisted<br />
living care, adult living care, and<br />
nursing home care. AHP offers policies<br />
that provide for 100% coverage<br />
for any services that you may need<br />
in any care. Insurance companies<br />
providing this coverage include<br />
MetLife, John Hancock, Principal,<br />
Guardian, Medical Mutual, Physicians<br />
Mutual, and Genworth.<br />
AHP can also help save you on<br />
the costs of premiums for your auto<br />
and home insurance.<br />
Here are some frequently asked<br />
questions:<br />
1. Can the AHP brokered insurance<br />
be used anywhere I travel in the<br />
United States Yes.<br />
2. Will all doctors and hospitals<br />
accept this coverage Yes.<br />
3. Does the health insurance<br />
program cover pre-existing conditions<br />
Yes, on insurable conditions<br />
like asthma, high blood pressure,<br />
cholesterol, or broken limbs, for<br />
individual policies. On group policies,<br />
there are never pre-existing<br />
condition exceptions. Individual<br />
policies will not cover pre-existing<br />
conditions such as heart problems,<br />
malignant cancers, strokes, Crohn’s<br />
disease, diabetes, seizures or severe<br />
chronic ailments. For members with<br />
these chronic pre-existing conditions,<br />
AHP has the availability to<br />
help members in 32 states with the<br />
state health insurance guaranteed<br />
risk pools. This service will be done<br />
at no cost to our members.<br />
4. Are pre-existing conditions<br />
an issue on acceptance to a plan or<br />
the premium rates Yes, each case<br />
will be individually evaluated, and<br />
appropriate recommendations will<br />
be made.<br />
5. Does AHP require a health<br />
examination No.<br />
6. Do I need to be a current<br />
AAW member to get the benefits of<br />
these policies Yes.<br />
If someone you know who<br />
is not an AAW member wants to<br />
pursue this opportunity to purchase<br />
insurance through our large buying<br />
block, represented by AHP, they can<br />
either contact AHP at 1-888-450-<br />
3040 or go to www.associationpros.<br />
com/assoc/aaw and submit an application.<br />
Be sure to ask for the AAW<br />
rates. If they are pleased with the<br />
quoted rates, they can join the AAW<br />
by going to www.woodturner.org.<br />
To get an application to receive<br />
a quote, either call 1-888-450-3040<br />
or go to www.associationpros.com/<br />
assoc/aaw, fill it out, and click submit.<br />
John Hill, Chair AAW Insurance<br />
Advisory Committee<br />
828-645-6633<br />
Editor’s Note: Here is another<br />
reason to join the AAW, if<br />
you are not already a member.<br />
This is especially true if you do<br />
not have a job that provides health<br />
insurance for you and your family.<br />
It appears that this company that<br />
AAW has connected with can also<br />
save members money on home<br />
insurance and auto insurance as<br />
well as health insurance.<br />
I personally have been taking<br />
advantage of the AAW insurance<br />
set up for our shops and small<br />
businesses such as my More<br />
Woodturning business and my<br />
woodworking shop neither of<br />
which are covered by our regular<br />
home owner’s insurance. If<br />
you have a shop and sell some of<br />
your work, I recommend that you<br />
check into the AAW insurance for<br />
your shop.<br />
More Woodturning March-April 2009 Page 35
More On Rolling Pins & a Couple New Tricks<br />
by Bob Heltman, CMW, AAW<br />
Copyright 12-2008<br />
This is kind of like the OLD<br />
story of the fellow who was blacking<br />
his stove (actually an ANCIENT<br />
story - in the days of wood stoves).<br />
He spilled some of that black stove<br />
paint on the floor, so he painted<br />
it too. <strong>The</strong>n he slopped some on<br />
the threshold, so that got painted<br />
as well. This kept on until he also<br />
painted the back porch, walkway<br />
to the garage, and one garage wall<br />
before he ran out of paint.<br />
In like manner, once I got started<br />
making rolling pins, it seemed<br />
necessary to make more than a few<br />
more. And it became interesting to<br />
learn something about types of rolling<br />
pins and maybe their history.<br />
Way back before recorded history,<br />
mankind found grains could be<br />
crushed, mixed with water, allowed<br />
to ferment (sourdough bread), and<br />
then baked into something edible.<br />
At first these were round lumps<br />
and then somebody discovered that<br />
if you pounded the lumps flatter<br />
they baked quicker, and you could<br />
even put meat between the flattened<br />
dough, and that was the first, unrecorded<br />
sandwich. It was probably<br />
described something like, “Ugh,<br />
Tastem GOOD, want MORE!”<br />
<strong>The</strong> Etruscans (around 850 BC<br />
on the Italian peninsula) are credited<br />
with being the first known users<br />
of rolling pins. <strong>The</strong>y were nothing<br />
more than smooth tree limb sections,<br />
debarked, maybe smoothed more<br />
with stones used as sandpaper. I<br />
wasn’t there so can’t say for sure.<br />
Ever since then rolling pins of a<br />
great variety have been crafted of<br />
many materials, including stone,<br />
clay-ceramic, metal, and plastic.<br />
Page 36 More Woodturning March-April 2009<br />
<strong>The</strong>se days they are commercially<br />
made at the rate of around 700,000<br />
per year. Handles at each end were<br />
an invented addition by African-<br />
American J. W. Reed in the late<br />
19th century.<br />
Figure 1. Small knots were<br />
encountered but easily fixed.<br />
Well sir, being mentally fortified<br />
with all this history, as clearly I<br />
was participating in an ancient<br />
and honorable tradition, the next<br />
project was a French rolling pin.<br />
This one I made of a 2 foot length<br />
of seasoned Sourwood from a limb<br />
standing in my shop studio for<br />
several years awaiting its purpose.<br />
A few small knots were encountered.<br />
<strong>The</strong>se I filled with sanding<br />
dust and a drop of superglue. <strong>The</strong><br />
shape of this 22” long “Frenchie”<br />
was 2 1/4” diameter at the center,<br />
with gently curved tapering toward<br />
both ends of 1 1/2” dia. While I<br />
could have made a perfect parabolic<br />
template, shaping by eye and feel<br />
was more fun and challenging. After<br />
sanding through the grits down<br />
to 400 I put on a Nitrileglove<br />
and massaged thin superglue all<br />
over the surface. I’ve been told that<br />
when superglue cures it is a rugged<br />
Lexan type plastic surface, and<br />
food safe too. After curing I sanded<br />
from 320 to 400 grit, and then used<br />
Scotch- Britetype pads from an<br />
auto supply store (used for car refinishing),<br />
going through their “grits”<br />
from black to maroon to white, as<br />
shown below.<br />
Figure 2. Sanding materials<br />
used.<br />
Figure 3. French Pastry rolling<br />
pin wouldn’t fit in rack.<br />
This long rolling pin would not<br />
fit in my rolling pin display rack, so<br />
I inserted a screw eye in one end and<br />
hung it on a side cabinet. It is ready<br />
for action in case anybody knows<br />
how to make thin French pastry, or<br />
even wants to. “Be prepared!” as<br />
the Boy Scouts say. It also looks<br />
a lot better than an old debarked
tree limb. Neat conversation starter<br />
too.<br />
My next project was a “regular”<br />
rolling pin. I wanted the rolling part<br />
to be a foot wide. Given the size of<br />
log sections on hand it was quickly<br />
determined that this time I’d have to<br />
make separate handles. So, oak was<br />
the main rolling part and the handles<br />
I made out of a chunk of honey locust<br />
that had been sitting around in<br />
want of a suitable project.<br />
and taking light cuts I brought the<br />
final diameter to proper size.<br />
Figure 5. Using a C-Clamp as a<br />
guide when turning.<br />
<strong>The</strong> next step was to remove<br />
any tool marks and smooth the oak<br />
surface. <strong>The</strong> trick for doing that was<br />
to use my belt sander, held at about<br />
a 45 degree angle, with the belt<br />
moving in the direction opposite of<br />
the surface rotation of the rolling<br />
pin. This process worked very well<br />
and rather quickly. If the sander is<br />
constantly moved back and forth the<br />
diameter is kept constant. Turning<br />
tool marks become quickly evident,<br />
and disappear soon thereafter.<br />
pin, and twisted off the ends. <strong>The</strong>se<br />
two surfaces were sanded smooth,<br />
and the centers carefully found and<br />
marked for Forstner bit drilling of<br />
holes 3/4” diameter by about an<br />
inch deep.<br />
Figure 7. Drilling ends for<br />
handles.<br />
Figure 4. Wood borer hole<br />
looked as if it would turn away.<br />
After starting to turn the quarter<br />
log section I noticed a wood borer<br />
hole. It was near the sapwood area<br />
and I guessed it would disappear<br />
as turning decreased the diameter<br />
toward the 2 1/2” dia. goal. True<br />
enough, that happened. However,<br />
if not, I could use sanding dust<br />
and superglue to plug the hole; no<br />
problem.<br />
As the end diameter approached<br />
I wanted to obtain a rather accurate<br />
and consistent diameter, so I screwed<br />
a C-clamp onto my roughing gouge,<br />
set so it would glide along the tool<br />
rest which was fixed parallel to the<br />
lathe bed. By holding the C-clamp<br />
Figure 6. Using a belt sander to<br />
smooth the rolling pin.<br />
After belt sanding, a quick<br />
back and forth sanding with 220 and<br />
then 320 grit sandpaper was done,<br />
and then thin superglue applied all<br />
over the rolling pin surface. When<br />
cured, 320 then 400 grit sandpaper<br />
was followed by the 3 “grits” of<br />
the ScotchBrite pads and a VERY<br />
smooth, sealed, and beautiful surface<br />
resulted.<br />
Using a thin parting tool I<br />
brought each cutoff end to about<br />
1/8” diameter, removed the rolling<br />
Figure 8. Turning handles.<br />
Figure 9. <strong>The</strong> full rack.<br />
<strong>The</strong> drilling was done on a<br />
floor length drill press. I brought the<br />
[Continued on Next Page]<br />
More Woodturning March-April 2009 Page 37
Rolling Pin Continued from<br />
Previous Page.<br />
drill bit tip into the center marked<br />
small awl hole, made sure the rolling<br />
pin was vertical, turned on the<br />
drill press, grabbed the rolling pin<br />
FIRMLY, and smoothly brought<br />
the drill bit into the wood to about<br />
one inch depth. This was a bit tricky<br />
and took coordination, but worked<br />
out just fine.<br />
<strong>The</strong> table was cleared of chips,<br />
ends reversed, and the second end<br />
hole was drilled in the same manner.<br />
Next came cutting the locust<br />
blanks to size, about 1 1/2” square<br />
by 5” long. One end was chucked<br />
and the tailstock brought up to pin<br />
the other end in place. <strong>The</strong> end to be<br />
inserted into the body of the rolling<br />
pin was made next to the tailstock,<br />
so the tailstock could be slid back<br />
and the rolling pin’s hole brought<br />
up to the handle to check for a light<br />
press fit. A snug fit, with a collar<br />
that presses against the side body<br />
of the pin, glued, would give sturdy<br />
results.<br />
A slight chamfer was made<br />
where the handle would enter<br />
the hole, and a slight recess cut<br />
next to the collar on the handle.<br />
This allowed space for glue, and<br />
stray wood fibers. A spindle gouge<br />
brought the outer ends to smaller<br />
size. Each handle was sanded, superglue<br />
surfaced, and sanded again<br />
like the main body of the rolling pin.<br />
After removing the handles with a<br />
cutoff tool, the nibs were sanded off<br />
and the remaining ends coated with<br />
thin superglue.<br />
Eyeballing was used to make<br />
the handles pretty much the same.<br />
<strong>The</strong> locust was very hard and wire<br />
burning small grooves did not work,<br />
so I used the fine tip of a felt tipped<br />
Page 38 More Woodturning March-April 2009<br />
marker. This worked well and the<br />
superglue sealed all in place.<br />
Since the drilled holes were<br />
the same in diameter and depth, and<br />
each handle pre-fitted for the proper<br />
tight fit, the final step of attaching<br />
the handles was approached with<br />
confidence soon justified.<br />
<strong>The</strong> holes were deeper than the<br />
tenon on the handles to allow for<br />
air compression and to assure no<br />
bottoming out as the handles were<br />
driven home. Medium superglue<br />
was squeezed around the inside<br />
top of each hole, and the handles<br />
inserted and tapped home with a<br />
wood mallet.<br />
N e x t I w e n t t o m y<br />
Burnmasterwoodburner and on<br />
one end marked in my name, date,<br />
and “oak + locust” for all posterity.<br />
Creating heirlooms is fun.<br />
With hand in Nitrile glove,<br />
more medium superglue was applied<br />
to the ends of the main roller<br />
body, and stroked into place with a<br />
finger, assuring a good seal around<br />
the handle of each collar.<br />
<strong>The</strong> result is 2nd from the top,<br />
my rack is now full, and I plan to<br />
make a few more slightly different<br />
rolling pins for relatives and friends.<br />
It is generally held that clear rock<br />
maple is the best wood to use, but<br />
with my superglue coating method<br />
most any wood will work.<br />
Furthermore, it is more interesting<br />
to used “troubled” wood as<br />
the results are quite attractive and<br />
just as functional. It is also somewhat<br />
nicer to NOT make everything<br />
with engineering precision, and<br />
allow for little artistic touches and<br />
variations. People who constantly<br />
worry about precision are the types<br />
who silently feel floor markings for<br />
elevators should at least be shown to<br />
3 decimal places; floor 7.000 instead<br />
of plain 7, for example. That’s called<br />
over-engineering!<br />
Considerable precision is fine if<br />
you are production turning 100 balusters<br />
for a railing project. In those<br />
cases use calipers and a “preacher,”<br />
which is a stick positioned above<br />
the turning that is marked with<br />
every dimension location and size.<br />
In the last picture, imagine if all the<br />
rolling pins were exactly the same;<br />
how boring.<br />
With variations the pastry chef<br />
can choose a rolling pin for the day<br />
and have a little more fun in life.<br />
A Collaborative<br />
Group Project<br />
Shape that I photographed when<br />
we were in downtown Cancun,<br />
Mexico.
Our collaborative group project<br />
for January was to be made from<br />
a piece of wood about 3” in diameter<br />
and 6” long. I photographed<br />
this neat shape while we were in<br />
Cancun, Mexico in December. I felt<br />
it would be a good project for the<br />
January Collaborative meeting. Unfortunately,<br />
penemonia somewhat<br />
limited my time to work on it and I<br />
was unable to finish the project. My<br />
partial effort is shown below. <strong>The</strong><br />
wood wasn’t quite long enough for<br />
the project, but it was fun.<br />
Unfinished project, hopefully,<br />
I’ll get it completed by the<br />
March meeting.<br />
Big Tree Tools, Inc.<br />
Innovative tools for<br />
woodturners<br />
See our web site featuring our Sharpening<br />
System including the NEW<br />
Versa-Jig - sharpen all your tools on<br />
our system.<br />
bigtreetools.com<br />
1-888-turning (887-6464)<br />
PayPal accepted<br />
<strong>The</strong> Market Place<br />
<strong>The</strong> first 10 words of classified advertisements<br />
are free to subscribers, additional<br />
words are 20-cents per word, no minimum.<br />
On non-subscriber advertisements, price is<br />
20-cents per word with a minimum billing<br />
of $4.00.<br />
Beginning and advanced woodturning<br />
classes. Call Ted Bartholomew 253-927-6855,<br />
Tacoma, WA.<br />
Sharpening Machine for all Woodworkers<br />
- <strong>The</strong> Big Tree Tools machine is a flat<br />
platen belt and buff machine for woodworkers,<br />
which allows a wide range of belt grits to be<br />
used, and belt changes take only a few seconds.<br />
Now our Versa-Jig is included with every machine<br />
allowing you to sharpen all the hand tools<br />
in your shop! <strong>The</strong> convenience and accuracy<br />
are unequaled. Visit bigtreetools.com to view<br />
photos, see our other tools and read articles on<br />
turning by Jon Siegel. See ad in this issue or<br />
call 1.888.TURNING<br />
Super Glue 2 0z. $5.50, Thin, Medium.<br />
Thick, Accelerator 2oz. $3.00. acwtinc@ameritech.net.<br />
PAYPAL, VISA & MASTERCARD.<br />
LOGLAMPS.COM ARTISTIC & CUSTOM<br />
WOODTURNING, INC. 1-800-894-8123<br />
Make pens using your drill press with a<br />
Vertilathe. http://vertilathe.freeyellow.com<br />
Woodturning on a VB36 Lathe, at<br />
Higher Manaton Farm. SW England. Web Site:<br />
www.turning-wood.com<br />
Faceplates: Straight from manufacture,<br />
heavy duty aluminum, brightly colored anodize,<br />
most common sizes. Visit our website:<br />
www.minkcrafts.com or call toll free (866)<br />
956-2200.<br />
<strong>The</strong> Burl Source. Large supply of Australian<br />
Burl Caps, turning blanks, pen blanks,<br />
and large jarrah burl slabs. Check us out at www.<br />
theburlsource.com or call 801-942-2616.<br />
Emory’s Woodturning E-Books www.<br />
asthewoodturns.com/books.html.<br />
Free Wet Grind/Hone Instant Change<br />
Sharpening System Plans: http://www.DavidReedSmith.com.<br />
Maple Turning Blanks--PRICE $6-8<br />
PBF+S&H cut to size, call 360-942-3468 or<br />
e-mail: john@hamptonwoodcraft.com.<br />
<strong>Pen</strong> Finishing Kit: A must for all pen<br />
turners! Obtain a scratch free remarkale shine on<br />
all surfaces including stabilized woods, acrylics<br />
and solid surface materials using the new 2”x2”<br />
double sided foam backed sanding pads. Kit contains<br />
instructions for use and seven color coded<br />
pads ranging from 300 to 12,000 grit. $13.95.<br />
BG Artforms. TEL: 888-717-4202.<br />
Easier, Faster Segmented Vessel Design,<br />
Web Site: www.segmentedturning.com.<br />
TEL: (805) 489-5309.<br />
Woodturning classes – Satisfaction<br />
guaranteed. Call Larry Miller 360-412-1583,<br />
Olympia, Washington”<br />
Cabochons for woodturners at www.<br />
yoyospin.com/cab<br />
Woodturning Instruction: Now that I<br />
have insurance through the AAW Craft Workers<br />
Insurance Program, I can again offer training<br />
in my shop. If interested in basic woodturning<br />
instruction or specialized training such as the<br />
Chinese Ball, contact me at: 360-668-0976.<br />
Fred Holder.<br />
New Video--”Relief carved Embellishments<br />
for Wood Projects”. DVD--$30.00<br />
plus $3.00 S/H. VHS $20.00 plus $3.00 S/H.<br />
Contact: Tony Cortese, 20850 NW 13th Street,<br />
Dunnellon, FL 34431. Ph 352-489-5652. E-mail:<br />
romeowoodturner@msn.com.<br />
NEW REDUCED PRICE: Simplified<br />
Fluting with Al Caton. Video-$20.00 plus S&H<br />
$3.00. DVD-$30.00 plus S&H $3.00. Insturction<br />
and inexpensive jigs for fluted works of art.<br />
Order from: Al Caton, PO Box 2360, Dunnellon,<br />
FL 34430. TEL: 352-465-0562. E-Mail: alcat@<br />
bellsouth.net.<br />
Making the Chinese Ball, Revised 2008,<br />
by Fred Holder. <strong>The</strong> revised booklet outlines<br />
Fred’s trials and tribulations in attempting to<br />
conquer this project. Tells how to make the tools<br />
needed to use the Crown Chinese Ball Tools.<br />
Booklet now contains 64 pages of information.<br />
Order from Fred Holder, PO Box 2168, Snohomish,<br />
WA 98291. Price is $10.00 including<br />
shipping. Telephone 360-668-0976.<br />
Bowl Coring with the McNaughton.<br />
A DVD by Reed Gray (aka robo hippy). Everything<br />
you need to know about how to use<br />
this tool, from will it work on your lathe, to<br />
the laser pointer system that is available. $30<br />
including shipping in the US. Contact Reed<br />
Gray 541-463-9634, or reedgray@comcast.<br />
net. (05-09)<br />
Limited quantities of Mountain Mahogany<br />
(curly leaf). Flat rate postal box (12<br />
x12 x5 1/2 inches) $50 and up depending on<br />
what you want. Green logs sections, or green<br />
blanks, sealed, and plastic wrapped. Contact<br />
Reed Gray 541-463-9634, or reedgray@comcast.net.<br />
(12-08)<br />
Jimmy Clewes says, “<strong>The</strong> tool works<br />
really well in a variety of situations but lends<br />
itself particularly well to small detail work, finials<br />
etc and miniature turning.” For perfect coves<br />
every time, visit the Home of the Coving Tool at:<br />
www.jonathanhess.com. Or call 703-378-8508.<br />
Through 02-09<br />
For Sale: 24” Powermatic woodturning<br />
lathe, model 4224; used less than 20 hrs;<br />
Powermatic is asking $5200 for new purchase;<br />
I am asking $3,600. I am located in Moneta,<br />
VA. 24121. Phone 540-420-7462.<br />
Turn Nested Bowls from 6” or 8” bowl<br />
blanks with a $39.95 hand-held coring tool I call<br />
the BowlSaw. Check bowlsaw.com for details<br />
or e-mail me at Steuss@aol.com. For questions<br />
call 415-897-1457. Steussy Creations.<br />
More Woodturning March-April 2009 Page 39
MANUFACTURER OF QUALITY WOODTURNING LATHES, CHUCKS AND ACCESSORIES<br />
VM150 CHUCK<br />
INTRODUCING A WORLD FIRST AND<br />
A REVOLUTION IN CHUCK DESIGN<br />
Q. Have you ever wished you<br />
could have the operating speed of<br />
a lever operated chuck but the<br />
clamping power of a key chuck<br />
A. Well look no further. This is a<br />
world first which combines the two<br />
and with this easy to use chuck you<br />
will be amazed by how useful and<br />
how extraordinary it is.<br />
<strong>The</strong> VM150 has two actions, one to quickly open and close the chuck as though<br />
it was lever operated (fully opens within 3 revolutions), the other to tighten<br />
using the 'T' key as you would in a standard key operated scroll chuck.<br />
Place the supplied 10mm Allen key in<br />
the locating pinion, disengage by<br />
turning anti-clockwise then rotate the<br />
scroll like a lever operated chuck. To<br />
engage pin, line up the dots and turn<br />
clockwise this will engage the scroll,<br />
then place the Allen key into one of<br />
the other two larger pinions and rotate<br />
the key to tighten.<br />
Check our website for the full range of Lathes, Chucks and Accessories<br />
For your nearest Vicmarc ® dealer please contact us:<br />
Phone: + 61 7 3284 3103 Fax: + 61 7 3283 4656<br />
Web: www.vicmarc.com<br />
Email: vicmarc@vicmarc.com<br />
Page 40 More Woodturning March-April 2009