Create successful ePaper yourself
Turn your PDF publications into a flip-book with our unique Google optimized e-Paper software.
Safety • Setup • Adjustments • Operation • Maintenance • Troubleshooting • Parts Lists • Warranty<br />
OPERATOR’S <strong>MANUAL</strong><br />
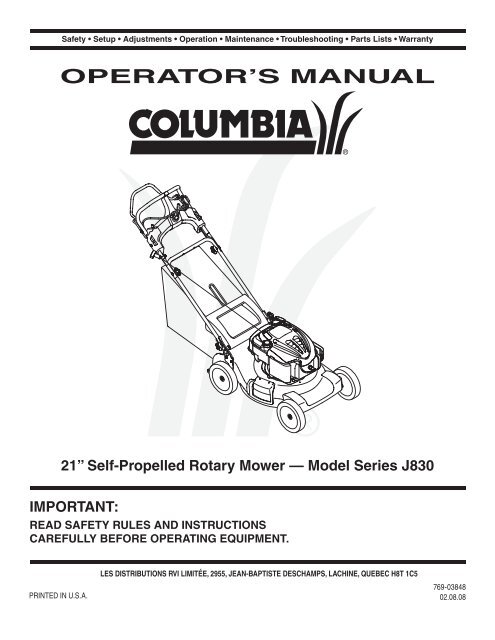
21” Self-Propelled Rotary Mower — Model Series J830<br />
IMPORTANT:<br />
READ SAFETY RULES AND INSTRUCTIONS<br />
CAREFULLY BEFORE OPERATING EQUIPMENT.<br />
PRINTED IN U.S.A.<br />
LES DISTRIBUTIONS RVI LIMITÉE, 2955, JEAN-BAPTISTE DESCHAMPS, LACHINE, QUEBEC H8T 1C5<br />
769-03848<br />
02.08.08
This Operator’s Manual is an important part of your new equipment. It will help you assemble,<br />
prepare and maintain the unit for best performance. Please read and understand what it says.<br />
Table of Contents<br />
Slope Gauge........................................................ 3<br />
Safe Operation Practices.................................... 4<br />
Set-Up .................................................................. 6<br />
Operation............................................................. 8<br />
Maintenance...................................................... 10<br />
Adjustments ..................................................... 11<br />
Off-Season Storage........................................... 14<br />
Trouble Shooting............................................... 15<br />
Illustrated Parts Lists........................................ 16<br />
Warranty............................................................. 20<br />
Finding and Recording Model Number<br />
BEFORE YOU START ASSEMBLING<br />
YOUR NEW EQUIPMENT,<br />
please locate the model plate on the equipment and copy the<br />
the model number and the serial number to the sample model<br />
plate provided to the right. You can locate the model plate by<br />
standing at the operating position and looking down at the rear<br />
of the machine.<br />
<br />
<br />
<br />
<br />
<br />
<br />
<br />
<br />
Customer Support<br />
1. If you have difficulty assembling this product or have any questions regarding the controls, operation or maintenance of this<br />
unit, please call an authorized dealer.<br />
Please have your unit’s model number and serial number ready when you call. See previous section to locate this<br />
information.<br />
2. The engine manufacturer is responsible for all engine-related issues in terms of performance, power-rating, specifications,<br />
warranty, and service. Depending on the engine manufacturer, more information is included in this publication or packed<br />
separately with this product.
Use this page as a guide to determine slopes where you may not operate safely. Do not operate<br />
your lawn mower on such slopes.<br />
1<br />
Slope<br />
Gauge<br />
15°<br />
Fold along dotted line (represents a 15° slope)<br />
or a fence post<br />
or a corner of a building...<br />
Sight and hold this level with a vertical tree...<br />
WARNING<br />
Do not mow on inclines<br />
with a slope in excess<br />
of 15 degrees (a rise<br />
of approximately<br />
2-1/2 feet every 10<br />
feet). A riding mower<br />
could overturn and<br />
cause serious injury.<br />
If operating a walkbehind<br />
mower on such<br />
a slope, it is extremely<br />
difficult to maintain your<br />
footing and you could<br />
slip, resulting in serious<br />
injury.<br />
Operate RIDING<br />
mowers up and down<br />
slopes, never across<br />
the face of slopes.<br />
Operate<br />
WALK-BEHIND<br />
mowers across the<br />
face of slopes, never<br />
up and down slopes.
2<br />
Safe<br />
Operation<br />
Practices<br />
WARNING<br />
This symbol points<br />
out important safety<br />
instructions which, if<br />
not followed, could<br />
endanger the personal<br />
safety and/or property<br />
of yourself and others.<br />
Read and follow all<br />
instructions in this<br />
manual before attempting<br />
to operate<br />
this machine. Failure<br />
to comply with these<br />
instructions may result<br />
in personal injury. When<br />
you see this symbol.<br />
HEED ITS WARNING!<br />
Your Responsibility<br />
Restrict the use<br />
of this power machine<br />
to persons who read,<br />
understand<br />
and follow the warnings<br />
and instructions<br />
in this manual<br />
and on the machine.<br />
WARNING: Engine Exhaust, some of its constituents, and certain vehicle components contain<br />
or emit chemicals known to the State of California to cause cancer and birth defects or other<br />
reproductive harm.<br />
DANGER: This machine was built to be operated according to the rules for safe operation in this manual. As with<br />
any type of power equipment, carelessness or error on the part of the operator can result in serious injury. This<br />
machine is capable of amputating hands and feet and throwing objects. Failure to observe the following safety<br />
instructions could result in serious injury or death.<br />
General Operation<br />
1. Read this operator’s manual carefully in its entirety before<br />
attempting to assemble this machine. Read, understand, and<br />
follow all instructions on the machine and in the manual(s)<br />
before operation. Keep this manual in a safe place for future<br />
and regular reference and for ordering replacement parts.<br />
2. Be completely familiar with the controls and the proper use of<br />
this machine before operating it.<br />
3. This machine is a precision piece of power equipment, not a<br />
plaything. Therefore, exercise extreme caution at all times.<br />
Your unit has been designed to perform one job: to mow grass.<br />
Do not use it for any other purpose.<br />
4. Never allow children under 14 years old to operate this<br />
machine. Children 14 years old and over should read and<br />
understand the instructions in this manual and should be<br />
trained and supervised by a adult.<br />
5. Only responsible individuals who are familiar with these rules<br />
of safe operation should be allowed to use this machine.<br />
6. Thoroughly inspect the area where the equipment is to be<br />
used. Remove all stones, sticks, wire, bones, toys and other<br />
foreign objects which could be tripped over or picked up<br />
and thrown by the blade. Thrown objects can cause serious<br />
personal injury.<br />
7. Plan your mowing pattern to avoid discharge of material toward<br />
roads, sidewalks, bystanders and the like. Also, avoid discharging<br />
material against a wall or obstruction which may cause<br />
discharged material to ricochet back toward the operator.<br />
8. To help avoid blade contact or a thrown object injury, stay<br />
in the operator zone behind the handles and keep children,<br />
bystanders, helpers and pets at least 75 feet from the mower<br />
while it is in operation. Stop machine if anyone enters the area.<br />
9. Always wear safety glasses or safety goggles during operation<br />
and while performing an adjustment or repair to protect your eyes.<br />
Thrown objects which ricochet can cause serious injury to the<br />
eyes.<br />
10. Wear sturdy, rough-soled work shoes and close-fitting slacks<br />
and shirts. Shirts and pants that cover the arms and legs<br />
and steel-toed shoes are recommended. Never operate this<br />
machine in bare feet, sandals, slippery or light weight (e.g.<br />
canvas) shoes.<br />
11. Do not put hands or feet near rotating parts or under the cutting<br />
deck. Contact with the blade can amputate hands and feet.<br />
12. A missing or damaged discharge cover can cause blade<br />
contact or thrown object injuries.<br />
13. Many injuries occur as a result of the mower being pulled<br />
over the foot during a fall caused by slipping or tripping. Do<br />
not hold on to the mower if you are falling; release the handle<br />
immediately.<br />
14. Never pull the mower back toward you while you are walking. If<br />
you must back the mower away from a wall or obstruction first<br />
look down and behind to avoid tripping and then follow these<br />
steps:<br />
a. Step back from the mower to fully extend your arms.<br />
b. Be sure you are well balanced with sure footing.<br />
c. Pull the mower back slowly, no more than half way toward you.<br />
d. Repeat these steps as needed.<br />
15. Do not operate the mower while under the influence of alcohol or<br />
drugs.<br />
16. Do not engage the self-propelled mechanism on units so<br />
equipped while starting engine.<br />
17. The blade control handle is a safety device. Never attempt<br />
to bypass its operation. Doing so makes the safety device<br />
inoperative and may result in personal injury through contact with<br />
the rotating blade. The blade control handle must operate easily<br />
in both directions and automatically return to the disengaged<br />
position when released.<br />
18. Never operate the mower in wet grass. Always be sure of your<br />
footing. A slip and fall can cause serious personal injury. If you<br />
feel you are losing your footing, release the blade control handle<br />
immediately and the blade will stop rotating within three seconds.<br />
19. Mow only in daylight or in good artificial light. Walk, never run.<br />
20. Stop the blade when crossing gravel drives, walks or roads.<br />
21. If the equipment should start to vibrate abnormally, stop the<br />
engine and check immediately for the cause. Vibration is generally<br />
a warning of trouble.<br />
22. Shut the engine off and wait until the blade comes to a complete<br />
stop before removing the grass catcher or unclogging the chute.<br />
The cutting blade continues to rotate for a few seconds after the<br />
engine is shut off. Never place any part of the body in the blade<br />
area until you are sure the blade has stopped rotating.<br />
23. Never operate mower without proper trail shield, discharge cover,<br />
grass catcher, blade control handle or other safety protective<br />
devices in place and working. Never operate mower with<br />
damaged safety devices. Failure to do so, can result in personal<br />
injury.<br />
24. Muffler and engine become hot and can cause a burn. Do not<br />
touch.<br />
25. Never attempt to make a wheel or cutting height adjustment while<br />
the engine is running.<br />
26. Only use parts and accessories made for this machine by the<br />
manufacturer. Failure to do so can result in personal injury.<br />
27. When starting engine, pull cord slowly until resistance is felt, then<br />
pull rapidly. Rapid retraction of starter cord (kickback) will pull<br />
hand and arm toward engine faster than you can let go. Broken<br />
bones, fractures, bruises or sprains could result.<br />
28. If situations occur which are not covered in this manual, use care<br />
and good judgment. Call customer assistance for the name of<br />
your nearest servicing dealer.<br />
Slope Operation<br />
Slopes are a major factor related to slip and fall accidents which can<br />
result in severe injury. Operation on slopes requires extra caution.<br />
If you feel uneasy on a slope, do not mow it. For your safety, use<br />
the slope gauge included as part of this manual to measure slopes<br />
before operating this unit on a sloped or hilly area. If the slope is<br />
greater than 15 degrees, do not mow it.<br />
Do:<br />
1. Mow across the face of slopes; never up and down. Exercise<br />
extreme caution when changing direction on slopes.<br />
2. Watch for holes, ruts, rocks, hidden objects, or bumps which can<br />
cause you to slip or trip. Tall grass can hide obstacles.
3. Always be sure of your footing. A slip and fall can cause serious<br />
personal injury. If you feel you are losing your balance, release<br />
the blade control handle immediately, and the blade will stop<br />
rotating within 3 seconds.<br />
Do Not:<br />
1. Do not mow near drop-offs, ditches or embankments, you could<br />
lose your footing or balance.<br />
2. Do not mow slopes greater than 15 degrees as shown on the slope<br />
gauge.<br />
3. Do not mow on wet grass. Unstable footing could cause slipping.<br />
Children<br />
Tragic accidents can occur if the operator is not alert to the presence<br />
of children. Children are often attracted to the mower and the mowing<br />
activity. They do not understand the dangers. Never assume that<br />
children will remain where you last saw them.<br />
1. Keep children out of the mowing area and under the watchful<br />
care of a responsible adult other than the operator.<br />
2. Be alert and turn mower off if a child enters the area.<br />
3. Before and while moving backwards, look behind and down for<br />
small children.<br />
4. Use extreme care when approaching blind corners, doorways,<br />
shrubs, trees, or other objects that may obscure your vision of a<br />
child who may run into the mower.<br />
5. Keep children away from hot or running engines. They can suffer<br />
burns from a hot muffler.<br />
6. Never allow children under 14 years old to operate a power<br />
mower. Children 14 years old and over should read and understand<br />
the operation instructions and safety rules in this manual<br />
and should be trained and supervised by a parent.<br />
Service<br />
Safe Handling Of Gasoline:<br />
1. To avoid personal injury or property damage use extreme care<br />
in handling gasoline. Gasoline is extremely flammable and the<br />
vapors are explosive. Serious personal injury can occur when<br />
gasoline is spilled on yourself or your clothes which can ignite.<br />
Wash your skin and change clothes immediately.<br />
2. Use only an approved gasoline container.<br />
3. Never fill containers inside a vehicle or on a truck or trailer bed<br />
with a plastic liner. Always place containers on the ground away<br />
from your vehicle before filling.<br />
4. Remove gas-powered equipment from the truck or trailer and<br />
refuel it on the ground. If this is not possible, then refuel such<br />
equipment on a trailer with a portable container, rather than from<br />
a gasoline dispenser nozzle.<br />
5. Keep the nozzle in contact with the rim of the fuel tank or<br />
container opening at all times until fueling is complete. Do not<br />
use a nozzle lock-open device.<br />
6 Extinguish all cigarettes, cigars, pipes and other sources of<br />
ignition.<br />
7. Never fuel machine indoors because flammable vapors will<br />
accumulate in the area.<br />
8. Never remove gas cap or add fuel while the engine is hot or running.<br />
Allow engine to cool at least two minutes before refueling.<br />
9. Never over fill fuel tank. Fill tank to no more than ½ inch below<br />
bottom of filler neck to provide for fuel expansion.<br />
10. Replace gasoline cap and tighten securely.<br />
11. If gasoline is spilled, wipe it off the engine and equipment. Move<br />
unit to another area. Wait 5 minutes before starting the engine.<br />
12. Never store the machine or fuel container near an open flame,<br />
spark or pilot light as on a water heater, space heater, furnace,<br />
clothes dryer or other gas appliances.<br />
13. To reduce fire hazard, keep mower free of grass, leaves, or<br />
other debris build-up. Clean up oil or fuel spillage and remove<br />
any fuel soaked debris.<br />
14. Allow a mower to cool at least 5 minutes before storing.<br />
General Service:<br />
1. Never run an engine indoors or in a poorly ventilated area.<br />
Engine exhaust contains carbon monoxide, an odorless and<br />
deadly gas.<br />
2. Before cleaning, repairing, or inspecting, make certain the<br />
blade and all moving parts have stopped. Disconnect the spark<br />
plug wire and ground against the engine to prevent unintended<br />
starting.<br />
3. Check the blade and engine mounting bolts at frequent<br />
intervals for proper tightness. Also, visually inspect blade for<br />
damage (e.g., bent, cracked, worn) Replace blade with the<br />
original equipment manufacture’s (O.E.M.) blade only, listed<br />
in this manual. “Use of parts which do not meet the original<br />
equipment specifications may lead to improper performance<br />
and compromise safety!”<br />
4. Mower blades are sharp and can cut. Wrap the blade or wear<br />
gloves, and use extra caution when servicing them.<br />
5. Keep all nuts, bolts, and screws tight to be sure the equipment<br />
is in safe working condition.<br />
6. Never tamper with safety devices. Check their proper operation<br />
regularly.<br />
7. After striking a foreign object, stop the engine, disconnect the<br />
spark plug wire and ground against the engine. Thoroughly<br />
inspect the mower for any damage. Repair the damage before<br />
starting and operating the mower.<br />
8. Never attempt to make a wheel or cutting height adjustment<br />
while the engine is running.<br />
9. Grass catcher components, discharge cover, and trail shield<br />
are subject to wear and damage which could expose moving<br />
parts or allow objects to be thrown. For safety protection,<br />
frequently check components and replace immediately with<br />
original equipment manufacturer’s (O.E.M.) parts only, listed<br />
in this manual. “Use of parts which do not meet the original<br />
equipment specifications may lead to improper performance<br />
and compromise safety!”<br />
10. Do not change the engine governor setting or overspeed the<br />
engine. The governor controls the maximum safe operating<br />
speed of the engine.<br />
11. Check fuel line, tank, cap, and fittings frequently for cracks or<br />
leaks. Replace if necessary.<br />
12. Do not crank engine with spark plug removed.<br />
13. Maintain or replace safety labels, as necessary.<br />
14. Observe proper disposal laws and regulations. Improper<br />
disposal of fluids and materials can harm the environment.<br />
Do not modify engine<br />
To avoid serious injury or death, do not modify engine in any way.<br />
Tampering with the governor setting can lead to a runaway engine<br />
and cause it to operate at unsafe speeds. Never tamper with<br />
factory setting of engine governor.<br />
Average Useful Life<br />
According to the Consumer Products Safety Commission (CPSC)<br />
and the U.S. Environmental Protection Agency (EPA), this product<br />
has an Average Useful Life of seven (7) years, or 60 hours of<br />
operation. At the end of the Average Useful Life, buy a new<br />
machine or have the machine inspected annually by an authorized<br />
service dealer to ensure that all mechanical and safety systems<br />
are working properly and not worn excessively. Failure to do so can<br />
result in accidents, injuries or death.<br />
2<br />
Safe<br />
Operation<br />
Practices<br />
WARNING<br />
This machine is equipped<br />
with an internal combustion<br />
engine and should<br />
not be used on or near<br />
any unimproved forestcovered,<br />
brushcovered or<br />
grass-covered land unless<br />
the engine’s exhaust<br />
system is equipped with a<br />
spark arrester meeting applicable<br />
local or provincial<br />
laws (if any).<br />
If a spark arrester is used,<br />
it should be maintained in<br />
effective working order by<br />
the operator.<br />
A spark arrester for the muffler<br />
is available through your<br />
nearest engine authorized<br />
service dealer.<br />
Notice regarding Emissions<br />
Engines which are certified<br />
to comply with California<br />
and federal EPA emission<br />
regulations for SORE (Small<br />
Off Road Equipment) are<br />
certified to operate on regular<br />
unleaded gasoline, and<br />
may include the following<br />
emission control systems:<br />
Engine Modification (EM)<br />
and Three Way Catalyst<br />
(TWC) if so equipped.
3<br />
Setup &<br />
Adjustment<br />
NOTE: This Operator’s<br />
Manual covers<br />
several models. Lawn<br />
Mower features vary by<br />
model. Not all features<br />
discussed (or engines<br />
pictured) in this manual<br />
are applicable to all<br />
Lawn Mower models.<br />
NOTE: Reference to<br />
right, left, front and rear<br />
of the lawn mower is in<br />
relation to the operating<br />
position.<br />
IMPORTANT<br />
Make sure to route<br />
cable outside the<br />
lower handle. Do not<br />
crimp cable while<br />
lifting the handle up.<br />
B<br />
A<br />
Figure 3-1<br />
Figure 3-2<br />
A<br />
B<br />
NOTE: The units illustrated may vary slightly from your unit.<br />
1. Remove loose parts and any packing material which<br />
may be between upper and lower handles.<br />
a. Pull up and back on the upper handle to raise the<br />
handle from position A into the operating position<br />
B. See Figure 3-1. Make sure the lower handle is<br />
seated securly into the handle mounting brackets.<br />
b. Tighten star knobs securing upper handle to<br />
lower handle. Make sure that each carriage bolt is<br />
seated properly in the handle.<br />
2. Tighten star knobs securing the lower handle to handle<br />
backets. See Figure 3-2.<br />
3. Rope guide Setup as follows, see Figure 3-3:<br />
a. Hold the blade control against the upper handle.<br />
Position A.<br />
b. Slowly pull starter rope out of engine. Position B.<br />
Release blade control.<br />
c. Slip starter rope into the rope guide. Position C.<br />
d. Tighten rope guide wing nut. Position D.<br />
4. Secure cables to the lower handle using the cable tie.<br />
Pull cable tie tight and cut off excess.<br />
5. To assemble the grasscatcher:<br />
a. Place bag over frame (black plastic side is the bottom<br />
of bag.) Insert the hooks on the frame through<br />
the holes in the side plastic channels of the bag.<br />
b. Secure bag to frame by working the plastic channels<br />
on bag over frame. All of the plastic channels<br />
except center top of bag attach from the outside of<br />
bag. Center top of bag attaches from the inside of<br />
bag.<br />
6. Before attaching the grass catcher, the rear mulching<br />
plug must be removed. Refer to Figure 3-4.<br />
a. Lift rear discharge door.<br />
b. Remove rear mulching plug.<br />
IMPORTANT<br />
This unit is shipped<br />
without gasoline or<br />
oil in the engine. Fill<br />
up gasoline and oil<br />
as instructed in the<br />
accompanying engine<br />
manual BEFORE<br />
operating your mower.<br />
C<br />
B<br />
Figure 3-3<br />
D<br />
A<br />
B<br />
Figure 3-4
7. Attaching Grass Catcher to Mower<br />
a. Lift the rear discharge door.<br />
b. Place the grass catcher on the pivot rod. Let go<br />
of discharge door so that it rests on the grass<br />
catcher. See Figure 3-5.<br />
WARNING: Never operate mower<br />
unless the hooks on the grass<br />
catcher are firmly seated on the pivot<br />
rod, and the rear discharge door<br />
rests firmly against top of the grass<br />
catcher.<br />
8. To install the rear mulching plug.<br />
a. Lift rear discharge door and lift grass catcher up<br />
and out, off of the pivot rod.<br />
b. Insert the rear mulching plug as shown in Figure<br />
3-4 and release the rear discharge door.<br />
9. If converting to side discharge, make sure grass<br />
catcher is off unit and rear mulching plug is in place.<br />
a. On the side of the mower deck, lift the hinged<br />
mulching plug. See Figure 3-6.<br />
b. Slide the two hooks on the side discharge deflector<br />
under the hinge pin on the hinged mulching<br />
plug assembly. Lower the hinged mulching plug.<br />
NOTE: Do not remove the hinged mulching plug at any<br />
time, even when you are not mulching.<br />
B<br />
B<br />
Figure 3-5<br />
A<br />
A<br />
3<br />
Setup &<br />
Adjustment<br />
NOTE: Make certain<br />
bag is turned right side<br />
out before assembling<br />
(warning label will be on<br />
the outside).<br />
NOTE: Make certain<br />
cables are routed to the<br />
outside of the handle so<br />
they are not in the way<br />
when attaching the grass<br />
catcher.<br />
Cutting Height Adjustment<br />
The height adjuster determines the cutting height of the<br />
mower. The adjuster is located above the left rear wheel.<br />
To adjust the cutting height, pull the lever out and away<br />
from the mower and then move it forward or back to<br />
select a new cutting height. See Figure 3-7.<br />
Figure 3-6<br />
WARNING<br />
A<br />
C<br />
B<br />
Never operate mower<br />
unless the hooks on<br />
the grass catcher are<br />
firmly seated on the<br />
pivot rod, and the<br />
rear discharge door<br />
rests firmly against<br />
top of the grass<br />
catcher.<br />
Figure 3-7<br />
All mowers are<br />
equipped with a rear<br />
protective guard. The<br />
guard helps eliminate<br />
projectiles thrown<br />
by the blade from<br />
injuring the operator.<br />
DO NOT REMOVE<br />
THIS GUARD.
4<br />
Operating<br />
Your Lawn<br />
Mower<br />
Electric Start<br />
Ignition Switch<br />
Recoil Starter<br />
Know Your Lawn Mower<br />
Drive Control<br />
Blade Control<br />
Speed Control<br />
Cutting Height<br />
Adjustment Lever<br />
WARNING<br />
Read, understand,<br />
and follow all instructions<br />
and warnings<br />
on the machine and<br />
in this manual before<br />
operating.<br />
This blade control<br />
mechanism is a<br />
safety device. Never<br />
attempt to bypass its<br />
operations.<br />
Use extreme care<br />
when handling<br />
gasoline. Gasoline is<br />
extremely flammable<br />
and the vapors are<br />
explosive. Never fuel<br />
the machine indoors<br />
or while the engine<br />
is hot or running.<br />
Extinguish cigarettes,<br />
cigars, pipes and<br />
other sources of<br />
ignition.<br />
Mulch Plug<br />
Blade Control Handle<br />
The blade control handle is located on the upper handle<br />
of the mower. See Figure 4-1. The blade control handle<br />
must be depressed in order to operate the unit. Release<br />
the blade control handle to stop the engine and blade.<br />
Drive Control Handle<br />
The drive control handle is located on the underside<br />
of the upper handle. Squeeze the drive control handle<br />
against the upper handle to engage drive system.<br />
Release the control handle to disengage the drive<br />
system in order to stop, slow down, or backup.<br />
Recoil Starter<br />
The recoil starter is attached to the right upper handle.<br />
Stand behind the unit and pull the recoil starter rope to<br />
start the unit.<br />
Cutting Height Adjustment Lever<br />
The height adjuster determines the cutting height of the<br />
mower. The adjuster is located above the left rear wheel,<br />
refer to the Adjustment Section.<br />
Mulch Plug<br />
The mulch plug is used for mulching purpose. Instead of<br />
collecting the grass clippings in the grass catcher, your<br />
mower has the option of recirculating the clippings back<br />
to the lawn. Make sure that the rear discharge door is<br />
closed and the grass catcher is removed from unit while<br />
mulching.<br />
Figure 4-1<br />
Speed Control<br />
The speed control is located on the variable speed control<br />
housing on the upper handle. This control is used to select<br />
the forward speed of the mower. See Figure 4-1 inset.<br />
IMPORTANT: Move the speed control only when the<br />
engine is running. Changing the speed control setting with<br />
the engine off can damage the mower.<br />
NOTE: The speeds noted on the speed control are not<br />
exact. Speed will vary depending on belt wear, cable wear,<br />
and mowing conditions.<br />
Electric Start Ignition Switch<br />
The electric start ignition switch is located on the right<br />
side of the variable speed control housing on the upper<br />
handle. It is used only for the electric starter.<br />
Before Starting<br />
1. Service the engine with gasoline and oil as instructed<br />
in the separate engine manual.<br />
WARNING: Be sure no one other than the<br />
operator is standing near the lawn mower<br />
while starting engine or operating mower.<br />
Never run engine indoors or in enclosed,<br />
poorly ventilated areas. Engine exhaust<br />
contains carbon monoxide, an odorless<br />
and deadly gas. Keep hands, feet, hair<br />
and loose clothing away from any moving<br />
parts on engine and lawn mower.
Figure 4-2<br />
2. Attach spark plug wire to spark plug. If unit is<br />
equipped with a rubber boot over the end of the<br />
spark plug wire, make certain the metal loop on the<br />
end of the spark plug wire (inside the rubber boot)<br />
is fastened securely over the metal tip on the spark<br />
plug.<br />
Starting Engine<br />
Refer to the separate engine manual packed with<br />
your unit.<br />
To Start Engine<br />
1. If your unit is equipped with a primer, prime engine as<br />
instructed in the separate engine manual packed with<br />
your unit.<br />
2. Standing behind the unit, depress the blade control<br />
handle and hold it against the upper handle as shown<br />
in Figure 4-2.<br />
3. Electric Start (If Equipped): Turn ignition key to the<br />
right to start the engine. See Figure 4-1. Release the<br />
key after the engine starts.<br />
Recoil Start: Grasp recoil starter handle and pull<br />
rope out with a rapid, continuous, full arm stroke. See<br />
Figure 4-2. Keeping a firm grip on the starter handle,<br />
let the rope rewind slowly. Repeat until engine cranks.<br />
Let the rope rewind each time slowly.<br />
4. Holding these two handles together firmly, grasp<br />
recoil starter handle and pull rope out with a rapid,<br />
continuous, full arm stroke. See Figure 4-2. Keeping<br />
a firm grip on the starter handle let the rope rewind<br />
slowly. Repeat until engine cranks. Let the rope<br />
rewind each time slowly.<br />
To Stop Engine<br />
1. Release the blade control handle to stop the engine<br />
and blade.<br />
2. Disconnect and ground the spark plug wire as<br />
instructed in the separate engine manual to prevent<br />
accidental starting while equipment is unattended.<br />
WARNING: Wait for the blade to stop<br />
completely before doing any work<br />
on the mower or to remove the grass<br />
catcher.<br />
Using Your Lawn Mower<br />
Be sure the lawn is clear of stones, sticks, wire, or other<br />
objects which could damage the lawn mower or the<br />
engine. Such objects could be accidently thrown by the<br />
mower in any direction and cause serious personal injury<br />
to the operator and others.<br />
WARNING: If you strike a foreign object,<br />
stop the engine. Remove wire from<br />
the spark plug, thoroughly inspect the<br />
mower for any damage, and repair the<br />
damage before restarting and operating<br />
the mower. Extensive vibration of the<br />
mower during operation is an indication<br />
of damage. The unit should be promptly<br />
inspected and repaired.<br />
1. Once the engine is running, squeeze the drive control<br />
against the upper handle to propel mower.<br />
2. To change speed, move speed control to the desired<br />
speed.<br />
NOTE: When selecting a drive speed, use the first speed<br />
until you are comfortable and familiar with the operation<br />
of the mower.<br />
Using as Mulcher<br />
For mulching grass, remove the grass catcher, insert<br />
rear mulch plug, and remove side discharge chute from<br />
the mower. For effective mulching, do not cut wet grass.<br />
If the grass has been allowed to grow in excess of four<br />
inches, mulching is not recommended. Use the grass<br />
catcher to bag clippings instead.<br />
Using Grass Catcher<br />
You can use the grass catcher to collect clippings while<br />
you are operating the mower.<br />
1. Attach grass catcher following instructions in the<br />
“Assembly & Set-Up” section. Grass clippings will<br />
automatically collect in bag as you run mower. Operate<br />
mower till grass bag is full.<br />
2. Stop engine completely by releasing the blade control.<br />
Make sure that the unit has come to a complete stop.<br />
3. Lift discharge door and pull grass bag up and away<br />
from 3. the mower to remove the bag. Dispose of the<br />
grass clippings and reinstall the bag when complete.<br />
4<br />
Operating<br />
Your Lawn<br />
Mower<br />
WARNING<br />
The operation of any<br />
lawn mower can result<br />
in foreign objects<br />
being thrown into<br />
the eyes, which can<br />
damage your eyes<br />
severely. Always wear<br />
safety glasses while<br />
operating the mower,<br />
or while performing<br />
any adjustments or<br />
repairs on it.<br />
Be sure no one other<br />
than the operator is<br />
standing near the lawn<br />
mower while starting<br />
engine or operating<br />
mower. Never run<br />
engine indoors or<br />
in enclosed, poorly<br />
ventilated areas. Engine<br />
exhaust contains<br />
carbon monoxide, an<br />
odorless and deadly<br />
gas. Keep hands, feet,<br />
hair and loose clothing<br />
away from any moving<br />
parts on engine and<br />
lawn mower.
5<br />
Maintaining<br />
Your Lawn<br />
Mower<br />
WARNING<br />
Always stop engine,<br />
disconnect spark plug,<br />
and ground against<br />
engine before cleaning,<br />
lubricating or doing any<br />
kind of maintenance on<br />
your machine.<br />
IMPORTANT: Do not<br />
use a pressure washer<br />
or garden hose to clean<br />
your unit. These may<br />
cause damage to electric<br />
components, spindles,<br />
pulleys, bearings, or the<br />
engine. The use of water<br />
will result in shortened life<br />
and reduce serviceability.<br />
Cutting grass in<br />
sandy soil condition<br />
causes abrasive wear<br />
to the blade.<br />
Lubrication<br />
1. Lubricate the pivot points on the blade control handle<br />
at least once a season with light oil. The blade<br />
control must operate freely in both directions. See<br />
Figure 5-1.<br />
2. If your mower is equipped with ball bearing wheels,<br />
lubricate at least once a season with a light oil, all<br />
other types require no lubrication. However, if the<br />
wheels are removed for any reason, lubricate the<br />
surface of the axle bolt and the inner surface of the<br />
wheel with light automotive oil.<br />
3. Lubricate the torsion spring and pivot point periodically<br />
with light oil to prevent rust. See Figure 5-1.<br />
4. The transmission is pre-lubricated and sealed at the<br />
factory and does not require lubrication.<br />
5. Follow the accompanying engine manual for lubrication<br />
schedule and instruction.<br />
Deck Care<br />
Clean underside of the mower deck after each use<br />
to prevent build-up of grass clippings or other debris.<br />
Follow steps below for this job.<br />
1. Disconnect spark plug wire. Drain gasoline from<br />
lawn mower or place a piece of plastic under the gas<br />
cap.<br />
2. Tip mower so that it rests on the housing. Keep<br />
the side with the air cleaner facing up. Hold mower<br />
firmly.<br />
WARNING: Never tip the mower more<br />
than 90º in any direction and do not<br />
leave the mower tipped for any length<br />
of time. Oil can drain into the upper<br />
part of the engine causing a starting<br />
problem.<br />
3. Scrape and clean the underside of the deck with a<br />
suitable tool. Do not spray with water.<br />
IMPORTANT: Do not use a pressure washer or garden<br />
hose to clean your unit. These may cause damage to<br />
bearings, or the engine. The use of water will result in<br />
shortened life and reduce serviceability.<br />
4. Put the mower back on its wheels on the ground. If<br />
you had put plastic under the gas cap earlier, make<br />
sure to remove it now.<br />
Engine<br />
1. Refer to the separate engine manual for engine<br />
maintenance instructions.<br />
2. Maintain engine oil as instructed in the separate<br />
engine manual packed with your unit. Read and<br />
follow instructions carefully.<br />
3. Under normal conditions service air cleaner as instructed<br />
in the separate engine manual packed with<br />
your unit. Clean every few hours under extremely<br />
dusty conditions. Poor engine performance and<br />
flooding usually indicates that the air cleaner should<br />
be serviced.<br />
Figure 5-1<br />
4. The spark plug should be cleaned and the gap reset<br />
once a season. Spark plug replacement is recommended<br />
at the start of each mowing season; check<br />
engine manual for correct plug type and gap specifications.<br />
NOTE: This spark ignition system meets all requirements<br />
of the Canadian Interference-Causing Equipment<br />
Regulations.<br />
5. Clean the engine regularly with a cloth or brush.<br />
Keep the cooling system (blower housing area) clean<br />
to permit proper air circulation which is essential to<br />
engine performance and life. Be certain to remove all<br />
grass, dirt and combustible debris from muffler area.<br />
Rear Flap Replacement<br />
The rear flap is attached to the back of the mower deck,<br />
and is designed to minimize the possibility that objects<br />
will be thrown from the rear of the mower toward the<br />
operator. If the rear flap becomes damaged, replace as<br />
follows.<br />
1. Lift rear door, remove screw and press flap in on either<br />
side to remove from hole. See Figure 5-2.<br />
2. Remove screw and flap from opposite hole and replace<br />
with new flap following these steps in reverse order.<br />
10
A<br />
Tab<br />
Slot<br />
5<br />
Maintaining<br />
Your Lawn<br />
Mower<br />
B<br />
Figure 5-2<br />
Figure 5-3<br />
AdjustmentsVariable Speed Cable<br />
Periodic adjustment of the variable speed cable may<br />
be necessary due to normal wear on the drive system.<br />
Adjustment is needed if unit begins to run too slow or too<br />
fast.<br />
1. Start engine and place shift lever in the third speed<br />
position.<br />
2. Stop engine and disconnect spark plug wire and<br />
ground it against engine.<br />
3. With engine off, shift back to first speed. This will<br />
provide slack in the cable.<br />
4. Carefully remove the harness assembly from the<br />
speed control housing by removing the three screws<br />
securing it to the housing. See Figure 5-3.<br />
5. Remove back cover of speed control housing by<br />
removing the three screws securing it to the housing.<br />
See Figure 5-4.<br />
6. Remove screw and flat washer securing cable. See<br />
Figure 5-4.<br />
NOTE: Make sure to take note of which slot in housing<br />
cable is in.<br />
7. Using a pair of needle nose pliers or similar tool, move<br />
eyelet in cable only one slot to the left in housing as<br />
shown in Figure 5-5.<br />
NOTE: Moving eyelet to the left speeds unit up; moving it<br />
to the right slows it down.<br />
8. Replace screw and washer removed earlier and reassemble<br />
back of housing. Reattach battery harness<br />
assembly to the speed control housing, making sure<br />
to snap the tab on the harness into the slot on the<br />
housing. See Figure 5-3. Secure with the three screws<br />
removed earlier.<br />
Figure 5-4<br />
WARNING<br />
When removing<br />
the cutting blade<br />
for sharpening or<br />
replacement or<br />
when sliding the belt<br />
around it, protect<br />
your hands with a<br />
pair of heavy gloves<br />
or use a heavy rag to<br />
hold the blade.<br />
An unbalanced blade<br />
will cause excessive<br />
vibration when rotating<br />
at high speeds. It<br />
may cause damage<br />
to mower, and could<br />
break causing personal<br />
injury.<br />
Figure 5-5<br />
11
5<br />
Maintaining<br />
Your Lawn<br />
Mower<br />
NOTE: When replacing<br />
the belt, check that the<br />
newly installed belt is<br />
seated correctly and is<br />
riding smoothly on the<br />
engine pulley.<br />
Blade Care<br />
Periodically inspect the blade adapter for cracks,<br />
especially if you strike a foreign object. Replace when<br />
necessary. Follow the steps below for blade service:<br />
1. Disconnect spark plug boot from spark plug. Turn<br />
mower on its side making sure that the air filter and<br />
the carburetor are facing up.<br />
2. Remove the bolt and the blade bell support which<br />
hold the blade and the blade adapter to the engine<br />
crankshaft. See Figure 5-5.<br />
3. Remove blade and adapter from the crankshaft.<br />
NOTE: When removing these items, a wave washer<br />
may also come off with the adapter. Be sure to include<br />
this washer when reassembling the blade adapter.<br />
Failure to do so will result in the unit not being able to<br />
change speeds.<br />
4. The blade may be resharpened by removing it and<br />
either grinding or filing the cutting edge keeping<br />
as close to the original bevel as possible. Do not<br />
attempt to sharpen the blade while it is still on the<br />
mower.<br />
5. It is extremely important that each cutting edge<br />
receives an equal amount of grinding to prevent an<br />
unbalanced blade.<br />
NOTE: Improper blade balance will result in excessive<br />
vibration causing eventual damage to the engine and<br />
mower. Be sure to carefully balance blade after sharpening.<br />
Possible damage resulting from blade unbalance<br />
condition is not the responsibility of the manufacturer.<br />
NOTE: Always remove blade from the adapter for<br />
testing balance.<br />
5. The blade can be tested for balance by balancing it<br />
on a round shaft screwdriver. Remove metal from the<br />
heavy side until it balances evenly.<br />
6 Before reassembling the blade and the blade<br />
adapter to the unit, lubricate the engine crankshaft<br />
and the inner surface of the blade adapter with light<br />
oil.<br />
7. Install the blade adapter on the crankshaft with the<br />
“star” away from the engine. See Figure 5-5. Place<br />
the blade with the side marked “bottom” (or with part<br />
number) facing away from the adapter. Align the<br />
blade bell support over the blade with the tabs in the<br />
holes of the blade and insert the hex bolt.<br />
8. Tighten the hex bolt to the torque listed below:<br />
Blade Mounting Torque<br />
Center Bolt 450 in. lb. min., 600 in.lb. max.<br />
To insure safe operation of your unit, ALL nuts and bolts<br />
must be checked periodically for correct tightness.<br />
Belt Care<br />
NOTE: Several components must be removed in order<br />
to change the mower’s belt. See an authorized dealer to<br />
have your belt replaced.<br />
Blade<br />
Adapter<br />
Replacing Battery<br />
Bolt<br />
Blade Bell<br />
Support<br />
WARNING: Batteries contain sulfuric<br />
acid which may cause burns. Do not<br />
short circuit or mutilate batteries in any<br />
way. Do not put batteries in fire as these<br />
may burst or release toxic materials.<br />
1. Remove the ignition key.<br />
2. Remove the three screws securing battery harness<br />
assembly to the speed control housing and place<br />
them to the side.<br />
3. Carefully remove the harness assembly from the<br />
speed control housing. See Figure 5-6.<br />
Tab<br />
Figure 5-5<br />
Figure 5-6<br />
Blade<br />
Slot<br />
12
4. Carefully remove old battery and replace with new<br />
one. Connect the positive lead to the positive side of<br />
the battery pack, then connect the negative side. See<br />
Figure 5-7.<br />
IMPORTANT: When replacing battery pack in harness<br />
assembly, battery pack must be positioned with the<br />
positive terminal to the left side and the negative<br />
terminal to the right side of panel (Positive terminal is<br />
closest to the key switch). See Figure 5-7. Replacing<br />
battery pack incorrectly will cause serious damage.<br />
5. Reattach battery harness assembly to the speed<br />
control housing, making sure to snap the tab on the<br />
harness into the slot on the housing. See Figure 5-5.<br />
Secure with the three screws removed earlier.<br />
WARNING: Do not remove the battery<br />
pack from the electric starter housing<br />
for any reason other than replacement.<br />
Key<br />
Switch<br />
Positive<br />
Terminal<br />
Figure 5-7<br />
Negative<br />
Terminal<br />
Charging Battery<br />
WARNING: The battery contains<br />
corrosive fluid and toxic material;<br />
handle with care and keep away from<br />
children. Do not puncture, disassemble,<br />
mutilate or incinerate the<br />
battery. Explosive gases could be<br />
vented during charging or discharging.<br />
Use in a well ventilated area, away<br />
from sources of ignition.<br />
NOTE: The special designed plug on the charger will<br />
only fit into the plug on the battery box.<br />
1. Plug the battery charger into the port on the<br />
underside of the battery housing. See Figure 5-7.<br />
2. Insert the battery charger plug into a standard 120<br />
volt household outlet. Charge battery for 8 to 10<br />
hours before initial use. Do not charge longer<br />
than 12 hours. The battery should only need to<br />
be charged upon initial setup and after any other<br />
extended periods of non-use.<br />
3. After charging, disconnect charger plug from outlet<br />
first, then disconnect charger lead from battery.<br />
IMPORTANT: Always plug charger lead into battery<br />
pack lead first, and then insert battery charger plug<br />
into 120 volt standard household outlet. Follow this<br />
order of action every time you charge the battery.<br />
WARNING: Use only the battery<br />
charger supplied with this mower.<br />
5<br />
Maintaining<br />
Your Lawn<br />
Mower<br />
WARNING<br />
When removing<br />
the cutting blade<br />
for sharpening or<br />
replacement or<br />
when sliding the belt<br />
around it, protect<br />
your hands with a<br />
pair of heavy gloves<br />
or use a heavy rag to<br />
hold the blade.<br />
2<br />
1<br />
An unbalanced blade<br />
will cause excessive<br />
vibration when rotating<br />
at high speeds. It<br />
may cause damage<br />
to mower, and could<br />
break causing personal<br />
injury.<br />
Figure 5-8<br />
13
5<br />
Maintaining<br />
Your Lawn<br />
Mower<br />
NOTE: The engine can<br />
be started manually if<br />
the fuse burns out.<br />
Replacing Fuse<br />
The electric starter circuit and battery are protected by a<br />
40 ampere fuse. If the fuse burns out, the electric starter<br />
will not operate. If the unit fails to start with the electric<br />
starter, perform the following steps to check the fuse<br />
inside the battery housing:<br />
1. Open the battery cover as described in Replacing<br />
Battery. Refer to Figure 20.<br />
2. Remove fuse from socket and inspect as shown in<br />
Figure 23. If it is burned out, replace with standard<br />
automotive 40 ampere fuse.<br />
3. Carefully place wiring back into housing, close<br />
battery cover, and fold upper handle back into place.<br />
NOTE: The engine can be started manually if the<br />
fuse burns out.<br />
Figure 5-9<br />
General Recommendations<br />
1. Always observe safety rules when performing<br />
any maintenance.<br />
2. The warranty on this lawn mower does not cover<br />
items that have been subjected to operator abuse<br />
or negligence. To receive full value from warranty,<br />
operator must maintain the lawn mower as<br />
instructed here.<br />
3. Changing of engine-governed speed will void<br />
engine warranty.<br />
4. All adjustments should be checked at least once each<br />
season.<br />
5. Periodically check all fasteners and make sure these<br />
are tight.<br />
Off-Season Storage<br />
The following steps should be taken to prepare your lawn<br />
mower for storage.<br />
• Clean and lubricate mower thoroughly as described in<br />
the lubrication instructions.<br />
• We do not recommend the use of a pressure washer<br />
or garden hose to clean your unit.<br />
• Refer to engine manual for correct engine<br />
storage instructions.<br />
• Coat mower’s cutting blade with chassis grease to<br />
prevent rusting.<br />
• Store mower in a dry, clean area. Do not store next to<br />
corrosive materials, such as fertilizer.<br />
When storing any type of power equipment in a poorly<br />
ventilated or metal storage shed, care should be taken to<br />
rust-proof the equipment. Using a light oil or silicone, coat<br />
the equipment, especially cables and all moving parts of<br />
your lawn mower before storage.<br />
14
Problem<br />
Engine fails to start<br />
Cause<br />
1. Blade control handle disengaged.<br />
2. Spark plug wire disconnected.<br />
3. Fuel tank empty or stale fuel.<br />
4. Engine not primed.<br />
5. Faulty spark plug.<br />
6. Blocked fuel line.<br />
7. Engine flooding.<br />
8. Fuel valve (if quipped) closed.<br />
9. Engine not choked (if equipped with<br />
choke).<br />
10. Burnt fuse. (Electric Start only).<br />
Remedy<br />
1. Engage blade control handle.<br />
2. Connect wire to spark plug.<br />
3. Fill tank with clean, fresh gasoline.<br />
4. Refer to engine manual.<br />
5. Clean, adjust gap, or replace.<br />
6. Clean fuel line.<br />
7. Wait a few minutes to restart, but do not prime.<br />
8. Open fuel valve. See engine manual.<br />
9. Choke engine. See engine manual.<br />
10. Replace fuse (see Maintenance Section).<br />
6<br />
Trouble<br />
Shooting<br />
Engine runs erratic<br />
Engine overheats<br />
1. Spark plug wire loose.<br />
2. Blocked fuel line or stale fuel.<br />
3. Gas cap vent plugged.<br />
4. Water or dirt in fuel system.<br />
5. Dirty air cleaner.<br />
6. Carburetor out of adjustment.<br />
1. Engine oil level low.<br />
2. Dirty air filter.<br />
3. Air flow restricted.<br />
4. Carburetor not adjusted properly.<br />
1. Connect and tighten spark<br />
plug wire.<br />
2. Clean fuel line; fill tank with clean, fresh<br />
gasoline.<br />
3. Clear vent.<br />
4. Drain fuel tank and carburetor. Refill with fresh<br />
fuel.<br />
5. Refer to engine manual.<br />
6. Refer to engine manual.<br />
1. Fill crankcase with proper oil.<br />
2. Refer to the engine manual packed with your<br />
unit.<br />
3. Remove blower housing and clean.<br />
4. Refer to engine manual.<br />
For repairs beyond<br />
the minor adjustments<br />
listed here,<br />
contact an authorized<br />
service dealer.<br />
Occasional skip (hesitates)<br />
at high speed<br />
1. Spark plug gap too close.<br />
2. Carburetor idle mixture adjustment<br />
improperly set.<br />
1. Adjust gap to .030”. Refer to engine manual.<br />
2. Refer to engine manual.<br />
Idles poorly<br />
1. Spark plug fouled, faulty or gap too<br />
wide.<br />
2. Carburetor improperly adjusted.<br />
3. Dirty air cleaner.<br />
1. Reset gap to .030” or replace spark plug.<br />
Refer to engine manual.<br />
2. Refer to engine manual.<br />
3. Refer to engine manual.<br />
Excessive vibration<br />
1. Cutting Blade loose or unbalanced.<br />
2. Bent cutting blade.<br />
1. Tighten blade and adapter. Balance blade<br />
2. Replace blade.<br />
Mower will not mulch<br />
grass<br />
1. Wet grass.<br />
2. Excessive high grass.<br />
3. Dull blade.<br />
1. Do not mow when grass is wet;<br />
wait until later to cut.<br />
2. Mow once at a high cutting height, then mow<br />
again at desired height or make a narrower<br />
cutting path.<br />
3. Sharpen or replace blade.<br />
Uneven cut<br />
1. Wheels not positioned correctly.<br />
2. Dull blade.<br />
1. Place all four wheels in same height position.<br />
2. Sharpen or replace blade.<br />
Wheels will not propel<br />
1. Belt not installed properly.<br />
2. Debris clogging drive operation.<br />
1. Checking belt for proper pulley installation and<br />
movement.<br />
2. Clean out debris.<br />
15


