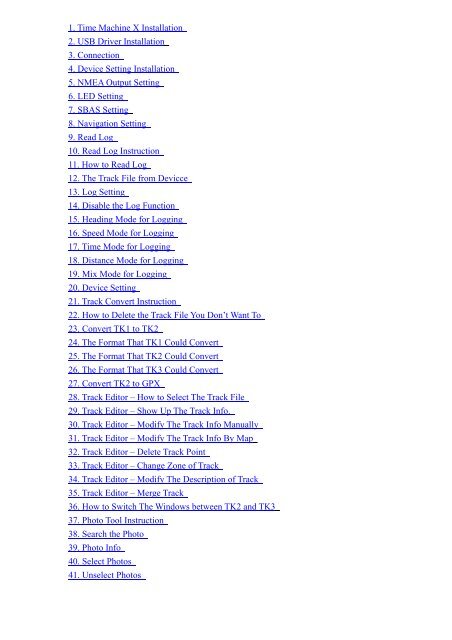
1. Time Machine X Installation 2. USB Driver Installation ... - GPSDGPS
1. Time Machine X Installation 2. USB Driver Installation ... - GPSDGPS
1. Time Machine X Installation 2. USB Driver Installation ... - GPSDGPS

Create successful ePaper yourself
Turn your PDF publications into a flip-book with our unique Google optimized e-Paper software.
<strong>1.</strong> <strong>Time</strong> <strong>Machine</strong> X <strong>Installation</strong><br />
<strong>2.</strong> <strong>USB</strong> <strong>Driver</strong> <strong>Installation</strong><br />
3. Connection<br />
4. Device Setting <strong>Installation</strong><br />
5. NMEA Output Setting<br />
6. LED Setting<br />
7. SBAS Setting<br />
8. Navigation Setting<br />
9. Read Log<br />
10. Read Log Instruction<br />
1<strong>1.</strong> How to Read Log<br />
1<strong>2.</strong> The Track File from Devicce<br />
13. Log Setting<br />
14. Disable the Log Function<br />
15. Heading Mode for Logging<br />
16. Speed Mode for Logging<br />
17. <strong>Time</strong> Mode for Logging<br />
18. Distance Mode for Logging<br />
19. Mix Mode for Logging<br />
20. Device Setting<br />
2<strong>1.</strong> Track Convert Instruction<br />
2<strong>2.</strong> How to Delete the Track File You Don’t Want To<br />
23. Convert TK1 to TK2<br />
24. The Format That TK1 Could Convert<br />
25. The Format That TK2 Could Convert<br />
26. The Format That TK3 Could Convert<br />
27. Convert TK2 to GPX<br />
28. Track Editor – How to Select The Track File<br />
29. Track Editor – Show Up The Track Info.<br />
30. Track Editor – Modify The Track Info Manually<br />
3<strong>1.</strong> Track Editor – Modify The Track Info By Map<br />
3<strong>2.</strong> Track Editor – Delete Track Point<br />
33. Track Editor – Change Zone of Track<br />
34. Track Editor – Modify The Description of Track<br />
35. Track Editor – Merge Track<br />
36. How to Switch The Windows between TK2 and TK3<br />
37. Photo Tool Instruction<br />
38. Search the Photo<br />
39. Photo Info<br />
40. Select Photos<br />
4<strong>1.</strong> Unselect Photos
4<strong>2.</strong> Geotagging to Photo<br />
43. Make the KMZ File of Photo<br />
44. See The Photo by Google Earth<br />
45. Make The KMZ File of Track<br />
46. See The Track by Google Earth<br />
47. Make The KMZ File of Photo-track<br />
48. See The Photo-track by Google Earth<br />
49. How to Upload The Photo to Locr Photo<br />
50. See the Photo in The Locr Photo<br />
5<strong>1.</strong> The Photo and Geographic info in Locr
<strong>1.</strong> <strong>Time</strong> <strong>Machine</strong> X <strong>Installation</strong><br />
Install <strong>Time</strong> <strong>Machine</strong> X.<br />
“Change”<br />
If you want to install <strong>Time</strong> <strong>Machine</strong> X to different folder, please select<br />
Next
After you reconfirm all information, please select “Install”.<br />
Launch the program after installation.<br />
Press “Finish” to complete installation.
Connection Setting<br />
Device Setting<br />
Track Convert<br />
Track Editor<br />
Photo Tool<br />
Language Selection<br />
Configuration<br />
Help<br />
Process percentage<br />
Process Status<br />
Device Mode
<strong>2.</strong> <strong>USB</strong> <strong>Driver</strong> <strong>Installation</strong><br />
If there is no <strong>USB</strong> driver in you computer, then TMX will install it<br />
automatically, otherwise, please execute the <strong>USB</strong> driver in D:\ProgramFild\<strong>Time</strong><br />
<strong>Machine</strong> X\<strong>USB</strong> <strong>Driver</strong>
Next<br />
Next
Select “I accept the terms of the license agreement” and press “Next”<br />
Next
Install<br />
Finish
3. Connection<br />
The above icon shows the connection is failed.<br />
If you can’t find the device or connection failed all the time, please select “COM<br />
Port Refresh”<br />
Select the COM Port.<br />
Select the baud rate, the default is 57600.<br />
After reconfirm the device is power on and connected, please select<br />
“Connect”.<br />
When the device is connected, the icon will shows as above.<br />
When the data is transmitted, the icon will be revolving.
4. Device Setting Instruction<br />
GPS SettingFor set the GPS parameters.<br />
GPS InformationTo show the GPS related information.<br />
The GPS Satellite Location is show on Sky Plot Chart.<br />
For show GPS Satellite Signal.<br />
For show received NMEA sentences.<br />
Current Device Mode.<br />
GPS Reboot.<br />
GPS Hot Start.<br />
GPS Warm Start.<br />
GPS Cold Start.
5. NMEA Output Setting<br />
NMEA Output<br />
1) To avoid losing the record function, the default of RM<br />
<br />
2)
6. LED Setting<br />
After the GPS fix position,<br />
The LED blink period, for this case, 2000ms (2 seconds).<br />
During this period, the time of LED off.<br />
For this case, after the GPS fix position, the LED will on for one second<br />
and off for one second.
7. SBAS Setting<br />
Space Based Augmentation Systems (SBAS)<br />
Enable or Disable.<br />
Allow MSG0<br />
Apply Integrity information.<br />
Apply SBAS correction information.<br />
Ranging (use for navigation)<br />
The number of SBAS satellite you want to use.<br />
Scan the serial number of SBAS satellite.<br />
Set Setting.
8. Navigation Setting<br />
Navigation Setting<br />
Choose the Dynamic Platform.<br />
Set the speed and hold location when speed under the setting.<br />
Chose the fix position mode (2D, 3D or Auto)<br />
Please set the “fixed altitude” used when the fix position mode is 2D<br />
DGPS <strong>Time</strong>out<br />
Allow Almanac Navigation.<br />
It can speed up fix position but lead to worse<br />
accuracy.<br />
Enable RAIM check.
Navigation Input Filters<br />
Set the initial Min. SVs. (When power on but not fix position)<br />
Set the initial Min. signal strength. (When power on but not fix position)<br />
Set the Min. SVs. (After fix position)<br />
Set the Max. SVs. (After fix position)<br />
Set the Min. SV elevation.<br />
Set the Min signal strength. (After fix position)<br />
DR <strong>Time</strong>out.<br />
PDOP MaskWhen the value is bigger, the inaccuracy is bigger, but you can fix<br />
position in the worse environment. And the smaller value is the higher accuracy is,<br />
but you may be not able to fix position in the worse environment.<br />
TDOP MaskWhen the value is bigger, the inaccuracy is bigger, but you can fix<br />
position in the worse environment. And the smaller value is the higher accuracy is,<br />
but you may be not able to fix position in the worse environment.<br />
Position Accuracy Mask.<br />
<strong>Time</strong> Accuracy Mask.<br />
Set Setting.
9. Read Log<br />
Log Operation.<br />
Log and Device information.<br />
All track files from Device.
10. Read Log Instruction<br />
Read Log.<br />
Cancel Read Log.<br />
Delete Record in the device.<br />
Verify track file.<br />
Record Number (points)<br />
Percentage of the record in the device.
1<strong>1.</strong> How to Read Log<br />
Press “Read Log” button for downloading track file from device. (Please<br />
make sure the connection is working.)<br />
Number of track point.<br />
You can press “Cancel Read Log” button to stop the downloading.<br />
Download Percentage.<br />
The status of download.<br />
Read Log Success.<br />
<strong>Time</strong><strong>Machine</strong>X will verify the downloaded file automatically. Verify success.
1<strong>2.</strong> The Track Files from Device<br />
Log Reading finished.<br />
Downloaded track file.<br />
Total tracks of this track file.<br />
Total points of these tracks.
13. Log Setting<br />
Switch to Log Setting page<br />
<strong>Time</strong><strong>Machine</strong>X will read the setting of device automatically.<br />
The device current was in the “heading mode” for recording tracks.
14. Disable the Log Function<br />
Select “Disable”.<br />
Press “Set” button, then the log function is disabled now.
15. Heading Mode for Logging<br />
Press “Heading” button to Select Heading mode for logging.<br />
Valid speed for record.<br />
Speed Unit.<br />
the setting.<br />
Set the Min. speedThe device will stop log function when speed of GPS under<br />
the setting.<br />
Set the Max. speedThe device will stop log function when speed of GPS over<br />
Range of angle-change for recordingThe device will recode one point when<br />
the angle change more then 5 degrees on left and right(total 10 degrees), and recode<br />
the other one point when the angle change 10 degrees again based on the last point.<br />
Show up the present range of angle.<br />
Set the range of angle.
Press “Set” button, then the device is changed to Heading Mode.<br />
16. Speed Mode for Logging<br />
Press “Speed” button to select Speed Mode for logging.<br />
Valid speed for record.<br />
The parameter is suitable for all modes.<br />
Set the Min. of speed.<br />
Set the Max. of speed.<br />
Range of speed for adjustment.<br />
First part 0-15KMH.<br />
Second part 15-55KMH.<br />
Third part 55-95KMH.<br />
Fourth part 95-150KMH.
Set the interval time for recording when GPS speed during the first part.<br />
Set the interval time for recording when GPS speed during the second part.<br />
Set the interval time for recording when GPS speed during the third part.<br />
Set the interval time for recording when GPS speed during the Fourth part.<br />
Press “Set” button, then the device is changed to Speed Mode.
17. <strong>Time</strong> Mode for Logging<br />
Press “<strong>Time</strong>” button to select <strong>Time</strong> Mode for logging.<br />
Valid speed for record.<br />
The parameter is suitable for all modes.<br />
Interval time for recording.<br />
Set the interval time.<br />
Press “Set” button, then the device is changed to <strong>Time</strong> Mode.
18. Distance Mode for Logging<br />
Press “Distance” button to select Distance Mode for logging.<br />
Valid speed for record.<br />
The parameter is suitable for all modes.<br />
Set the distance.<br />
Distance displayThe device will recode one point when the displacement over<br />
the setting, and recode the other one point when the displacement over the setting<br />
again based on the last point.<br />
Press “Set” button, then the device is changed to Distance Mode.
19. Mix Mode for Logging<br />
Press “Mix” button to select Mix Mode for logging.<br />
Valid speed for record.<br />
The parameter is suitable for all modes.<br />
Same as the <strong>Time</strong> Mode.<br />
Same as the Distance Mode.<br />
Press “Set” button, then the device is changed to Mix Mode.
20. Device Setting<br />
Device Setting<br />
<strong>Time</strong> to auto sleep (Unit: second)When the device without any connection<br />
outrun the time set, then the device will turn off automatically if the log function is<br />
disabled, otherwise, the device sill shut down the Bluetooth function only.<br />
After you key in the <strong>Time</strong> to auto sleep, please press “Set” button.<br />
Set the Password for device. (4 digits).<br />
After you key in the Password, please press “Change Password” button.<br />
Disable the Password.<br />
Set the speed, and the track point will be marked when over speed.<br />
After you set the speed, please press “Set” button.<br />
Device name setting.<br />
Device info setting.
2<strong>1.</strong> Track Convert Instruction<br />
Track Convert<br />
TK1Included one or more tracks and every track covers “Push To Log” points<br />
if you did it.<br />
TK2Included only one track, and this track would covers “Push To Log”<br />
points if you did it. TK2<br />
TK3Included only point including “Push To Log” point.<br />
format.<br />
Application formatYou could convert TK1TK2 or TK3 into the supported
2<strong>2.</strong> How to Delete the Track File You Don’t Want To<br />
Please choose the file you want to delete.<br />
Click the right key on mouse, and select “Delete” to delete one file or “Delete<br />
All” to delete all files.
23. Convert TK1 to TK2<br />
The steps of Track Convert.<br />
Select one or more track files in TK<strong>1.</strong><br />
Drag to TK<strong>2.</strong><br />
Convert completed.
24. The Format That TK1 Could Convert<br />
TK1 is able to convert to TK2, TK3, KMZ, Google Maps, Visual Earth, GPX, CSV,<br />
PLT, and TXT.
25. The Format That TK2 Could Convert<br />
TK2 is able to convert to TK3, KMZ, Google Maps, Visual Earth, GPX, CSV, PLT,<br />
and TXT.
26. The Format That TK3 Could Convert<br />
TK3 is able to convert to KMZ, Google Maps, Visual Earth, GPX, CSV, PLT, and<br />
TXT.
27. Convert TK2 to GPX<br />
<strong>1.</strong> Select one or more track files in TK<strong>2.</strong><br />
<strong>2.</strong> Drag to GPX column.<br />
Convert completed.
28. Track Editor – How to Select the Track File<br />
Track Editor<br />
Select the Track file.<br />
Double click the selected file.
29. Track Editor – Show Up The Track Info.<br />
Select a track file and double click. The info as<br />
will show up.<br />
Track point info.<br />
Diagram of track point.<br />
Press “Altitude” button to see the diagram with altitude “
30. Track Editor – Modify the Track Info manually<br />
Select a track point in the track diagram or in the track point table.<br />
Manual Modification<br />
Select the info you want to modify and click.<br />
Key in the info you prefer.<br />
Press “Enter”.<br />
Double click and the correct info is shown up.<br />
Modification completed.
3<strong>1.</strong> Track Editor – Modify the Track Info by Map<br />
Select a track point and double click.<br />
The point shows on the diagram.<br />
Map show up.
Select the point and drag-drop to the position you prefer.<br />
The new info will show up.<br />
Press “Confirm” button to complete the modification.
After you press the “Confirm” button, all related info will be changed.<br />
When you complete all modification, please save or save as the track file.<br />
3<strong>2.</strong> Track Editor – Delete Track Point<br />
Delete Track Point<br />
Select a track point and press the “delete” button on your keyboard or click the right
key on your mouth.<br />
Deletion Completed.<br />
33. Track Editor – Change Zone of Track.<br />
Select a track file and click the right key on your mouse for changing the zone time.
Select the zone time you prefer and press “OK” button.<br />
The zone time is changed.
34. Track Editor – Modify the Description of Track<br />
Select a track file and click the right key on your mouse for creating or modifying the<br />
description of track.<br />
Key in the description and press “OK” .<br />
The description of track is modified.
35.Track Editor – Merge Track<br />
Merge track files<br />
Select more than one track file.<br />
Click the right key on your mouse and choose the “Merge Track” .<br />
The success message will show up includes the new file name<br />
<strong>Time</strong> <strong>Machine</strong> X will list the track file according to time and named the file by the<br />
earliest track file.
36. How to Switch the Windows between TK2 and TK3<br />
Click the title of TK2 or TK3 to switch to TK3 and TK<strong>2.</strong>
37. Photo Tool Instruction<br />
Photo Tool<br />
The folder of photo in PC side.<br />
Photo Browser.<br />
here.<br />
Mark the photo you want to use on Photo Brower, then the photo will show up<br />
Track Data.<br />
Track files (Click the title of TK2 or TK3 would switch to TK3 or TK2)<br />
KMZ file (for Google Earth) area and Track line setting for Google Earth.<br />
Upload to Web album.
38. Search The Photo<br />
Select the folder for photo.<br />
To show the photo you also can double click the right key on your mouse.
39. Photo Info<br />
Select a photo and click the right key on your mouse to see the photo info.<br />
Photo information.
40. Select Photos<br />
Double click the photo in Photo Browser and it will show on the Photo Selected Area<br />
automatically.<br />
You also can click the right key on your mouse for some selecting function.
4<strong>1.</strong> Unselect Photos<br />
Double chick Photo file mark of photo then the photo will be canceled from the Photo<br />
Selected Area.
4<strong>2.</strong> Geotagging to Photo<br />
Auto-Geotagging Photos<br />
When the photo in the Photo Selected Area.<br />
photo to track file.<br />
Double click the track file and <strong>Time</strong><strong>Machine</strong>X will auto mapping the<br />
Track Data.<br />
Auto compare photo with track file and geotagging. (Please refer to following<br />
table; the 3 photos were taken in the same period of selected track and geotagged.<br />
Geographic info from GPS.
Manual Geotagging Photo<br />
list.<br />
Choose track point and click the right key on your mouse for show function<br />
Press the “Get Geotag from track point” button.<br />
Select photo in “Photo selected Area” and click the right key on your mouse<br />
for show function list. In this time, you should be see some information for GeoTage<br />
in the red frame.<br />
photo”.<br />
You will see Geotag as below while after Click the “Paste Geotag to
43. Make The KMZ File of Photo<br />
If the photo in the Photo Selected Area included GPS info,<br />
Press the “Photo KMZ” button to make the KMZ file for photo.<br />
The KMZ file for photo will show on KMZ Area.<br />
Select a file and double click, the photo will show on Google Earth. (Please<br />
reconfirm that you have installed the Google Earth)
44. See the Photo by Google Earth<br />
All info in the Google Earth.<br />
The icon shows there is a photo.<br />
Click the icon and you will see the photo and photo info.
45. Make the KMZ File of Track<br />
Press the “Track KMZ” button to make the KMZ file of track.<br />
The KMZ file for photo will show on KMZ Area.<br />
Select a file and double click, the photo will show on Google Earth.<br />
(Please reconfirm that you have installed the Google Earth)
46. See The Track by Google Earth<br />
The track shows on Google Earth as above.
47. Make the KMZ File of Photo-track<br />
Photo –Track.<br />
Press the “Photo-Track KMZ” button to make the KMZ file of<br />
The KMZ file of photo-track will show on KMZ Area.<br />
Select a file and double click, the photo will show on Google Earth. (Please<br />
reconfirm that you have installed the Google Earth)
48. See the Photo-track by Google Earth<br />
The photo-track shows on Google Earth as above.
49. How to Upload the Photo to Locr Photo<br />
Mark the photo in the Photo Selected Area.<br />
Key in the Locr ID.<br />
Key in Password.<br />
Select the Privacy Status.<br />
Press the “Upload Photo to Locr” button to upload, and “Cancel Upload” to<br />
stop the uploading.<br />
Uploading status.<br />
If Press the “Upload Photo to Locr” button lead to occurred like as below error<br />
message. Please run dotnetfx.exe for resolve this issue. The file place at C:\Program<br />
Files\<strong>Time</strong> <strong>Machine</strong> X\Help\dotnetfx.exe
50. See the Photo in the Locr Photo<br />
After uploading, please click “Go to Locr” to see the photos.
The photos in Locr is shown as above.<br />
Select the photo included the Geographic info to see the position.<br />
5<strong>1.</strong> The Photo and Geographic info in Locr<br />
The photo was taken in the location shown on the map.