The New Elcometer 456 Coating Thickness Gauge - AltaPaints and ...
The New Elcometer 456 Coating Thickness Gauge - AltaPaints and ...
The New Elcometer 456 Coating Thickness Gauge - AltaPaints and ...

Create successful ePaper yourself
Turn your PDF publications into a flip-book with our unique Google optimized e-Paper software.
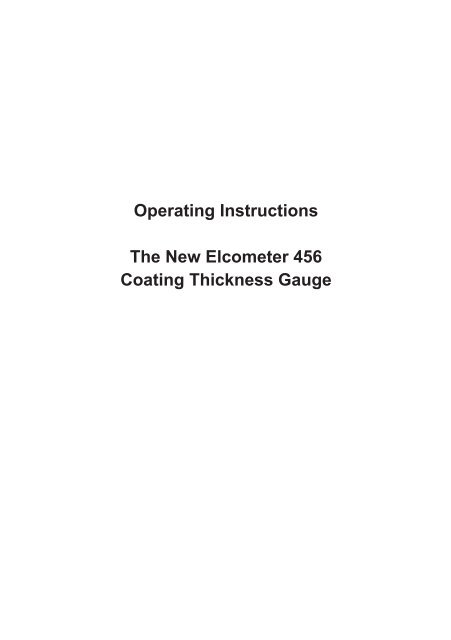
Operating Instructions<br />
<strong>The</strong> <strong>New</strong> <strong>Elcometer</strong> <strong>456</strong><br />
<strong>Coating</strong> <strong>Thickness</strong> <strong>Gauge</strong>
R<br />
R<br />
en<br />
Pb<br />
Hg<br />
<strong>The</strong> <strong>Elcometer</strong> <strong>456</strong> is available in 4 models. This User Guide is written for the Model T. Where applicable<br />
the Model E, Model B <strong>and</strong> Model S are referenced.<br />
<strong>The</strong> <strong>Elcometer</strong> <strong>456</strong> Models B, S & T meet the Radio <strong>and</strong> Telecommunications<br />
Terminal Equipment Directive. <strong>The</strong> Model E meets the Electromagnetic Compatibility<br />
Directive. This product is Class B, Group 1 ISM equipment according to CISPR 11.<br />
Class B product: Suitable for use in domestic establishments <strong>and</strong> in establishments<br />
directly connected to a low voltage power supply network which supplies buildings<br />
used for domestic purposes. Group 1 ISM product: A product in which there is<br />
intentionally generated <strong>and</strong>/or used conductively coupled radio-frequency energy<br />
which is necessary for the internal functioning of the equipment itself.<br />
This device complies with Part 15 of the FCC Rules. Operation is subject to the<br />
following two conditions: (1) this device may not cause harmful interference, <strong>and</strong> (2)<br />
this device must accept any interference received, including interference that may<br />
cause undesired operation.<br />
NOTE: This equipment has been tested <strong>and</strong> found to comply with the limits for a Class B digital device,<br />
pursuant to Part 15 of the FCC Rules. <strong>The</strong>se limits are designed to provide reasonable protection against<br />
harmful interference in a residential installation. This equipment generates, uses <strong>and</strong> can radiate radio<br />
frequency energy <strong>and</strong>, if not installed <strong>and</strong> used in accordance with the instructions, may cause harmful<br />
interference to radio communications. However, there is no guarantee that interference will not occur in a<br />
particular installation. If this equipment does cause harmful interference to radio or television reception,<br />
which can be determined by turning the equipment off <strong>and</strong> on, the user is encouraged to try to correct the<br />
interference by one or more of the following measures:<br />
-- Reorient or relocate the receiving antenna.<br />
-- Increase the separation between the equipment <strong>and</strong> receiver.<br />
– Connect the equipment into an outlet on a circuit different from that to which the receiver<br />
is connected.<br />
-- Consult the dealer or an experienced radio/TV technician for help.<br />
Modifications not expressly approved by <strong>Elcometer</strong> Limited could void the user’s authority to operate the<br />
equipment under FCC rules.<br />
This Class B digital apparatus complies with Canadian ICES-003<br />
is a registered trademark of <strong>Elcometer</strong> Limited, Edge Lane, Manchester. United Kingdom<br />
are trademarks owned by Bluetooth SIG Inc <strong>and</strong> licensed to <strong>Elcometer</strong> Limited.<br />
Bluetooth SIG QDID = B014393<br />
All other trademarks acknowledged.<br />
<strong>Gauge</strong> dimensions: 141 x 73 x 37mm (5.55 x 2.87 x 1.46").<br />
<strong>Gauge</strong> Weight: Integral: 156g (5.5oz) including batteries; Separate: 161g (5.68oz) including batteries.<br />
Applicable patents:<br />
US6243 661; US5886522; US6762603; US7606671; GB2306009; GB2367135; GB2342450; DE10131827<br />
© <strong>Elcometer</strong> Limited 2011-12. All rights reserved. No part of this document may be reproduced,<br />
transmitted, transcribed, stored (in a retrieval system or otherwise) or translated into any language, in any<br />
form or by any means (electronic, mechanical, magnetic, optical, manual or otherwise) without the prior<br />
written permission of <strong>Elcometer</strong> Limited.<br />
TMA-0489 Issue 03<br />
www.elcometer.com
R<br />
CONTENTS<br />
en<br />
Section<br />
Page<br />
1 GAUGE OVERVIEW AND BOX CONTENTS........................................................... 4<br />
2 GETTING STARTED................................................................................................. 5<br />
3 TAKING A READING................................................................................................. 7<br />
4 CALIBRATING THE GAUGE.................................................................................... 8<br />
5 THE DISPLAY........................................................................................................... 9<br />
6 THE GAUGE FEATURES......................................................................................... 11<br />
7 BATCHING (ST)........................................................................................................ 23<br />
8 DOWNLOADING DATA USING ELCOMASTER 2.0 (BST)...................................... 32<br />
9 ELCOMASTER FOR ANDROID (BST)..................................................................... 51<br />
10 CALIBRATING THE ELCOMETER <strong>456</strong> (EBST)....................................................... 53<br />
11 CHANGING THE WELCOME SCREEN (BST)......................................................... 57<br />
12 GAUGE FIRMWARE UPDATES (BST).................................................................... 58<br />
13 GAUGE ICONS & ERROR CODES (EBST)............................................................. 59<br />
14 GAUGE MENU STRUCTURES (EBST)................................................................... 63<br />
15 ABOUT IMO PSPC (ST)........................................................................................... 67<br />
16 GAUGE TECHNICAL SPECIFICATIONS (EBST).................................................... 68<br />
17 PROBE TECHNICAL SPECIFICATIONS (EBST)..................................................... 69<br />
18 GAUGE & PROBE ACCESSORIES (EBST)............................................................ 72<br />
19 ADDITIONAL REFERENCE INFORMATION........................................................... 74<br />
20 INDEX....................................................................................................................... 75<br />
www.elcometer.com
R<br />
en<br />
WELCOME<br />
Thank you for your purchase of this <strong>Elcometer</strong> <strong>456</strong> <strong>Coating</strong> <strong>Thickness</strong><br />
<strong>Gauge</strong>. Welcome to <strong>Elcometer</strong>.<br />
<strong>Elcometer</strong> are world leaders in the design, manufacture <strong>and</strong> supply of<br />
coatings inspection equipment. Our products cover all aspects of coating<br />
inspection, from development through application to post application<br />
inspection.<br />
<strong>The</strong> <strong>Elcometer</strong> <strong>456</strong> <strong>Coating</strong> <strong>Thickness</strong> <strong>Gauge</strong> is a world beating product.<br />
With the purchase of this gauge you now have access to the worldwide<br />
service <strong>and</strong> support network of <strong>Elcometer</strong>.<br />
For more information visit www.elcometer.com<br />
ABOUT YOUR GAUGE<br />
<strong>The</strong> <strong>Elcometer</strong> <strong>456</strong> <strong>Coating</strong> <strong>Thickness</strong> <strong>Gauge</strong> is a h<strong>and</strong>held gauge for fast<br />
<strong>and</strong> accurate measurement of the thickness of coatings on metal<br />
substrates.<br />
<strong>The</strong> gauge is available in four models; Model E, B, S <strong>and</strong> T.<br />
This manual describes the operation of all the <strong>Elcometer</strong> <strong>456</strong> models <strong>and</strong><br />
indicates, where necessary, which specific model(s) the feature is<br />
available on in brackets after the feature.<br />
All versions of the gauge feature an easy-to-use menu driven graphical<br />
interface which guides the user through tasks such as gauge configuration<br />
<strong>and</strong> calibration adjustment.<br />
<strong>The</strong> gauge is available either with a built-in integral probe or as a separate<br />
probe version. A wide range of probes is available to suit requirements.<br />
CONVENTIONS IN THESE INSTRUCTIONS<br />
<strong>The</strong> <strong>Elcometer</strong> <strong>456</strong> is operated using a simple menu structure which helps<br />
you get the most from your gauge.<br />
As an example, the Languages option is located within Setup which is<br />
under the Menu softkey <strong>and</strong> is shown in these instructions as:<br />
Menu/Setup/Language<br />
3<br />
www.elcometer.com
1 GAUGE OVERVIEW AND BOX CONTENTS<br />
R<br />
1<br />
2<br />
3<br />
4<br />
<strong>Gauge</strong> Overview<br />
1 LED Indicators - Red (left), Green (right)<br />
2 Colour Screen<br />
3 Multifunction Softkeys<br />
4 On/Off Key<br />
5 Internal Probe / Separate Probe Connection<br />
6 USB Data Output Socket (below cover)<br />
7 Battery Compartment (¼ turn open/close)<br />
8 Wrist Strap Connection<br />
en<br />
5<br />
6<br />
7<br />
8<br />
Box Contents<br />
§ <strong>Elcometer</strong> <strong>456</strong> <strong>Coating</strong> <strong>Thickness</strong> <strong>Gauge</strong><br />
§ Calibration Foils (Integral gauges)<br />
§ Test Certificate<br />
§ Wrist Harness<br />
§ Protective Case (B, S & T models)<br />
§ Transit Case (T model)<br />
§ 1 x Screen Protector (S & T models)<br />
§ 2 x AA Batteries<br />
§ USB Cable & ElcoMaster 2.0 Software<br />
(S & T models)<br />
§ User Guide<br />
Packaging<br />
<strong>The</strong> gauge is packed in cardboard packaging. Please ensure that this<br />
packaging is disposed of in an environmentally sensitive manner. Please<br />
Consult your Local Environmental Authority for further guidance.<br />
www.elcometer.com 4
R<br />
en<br />
2 GETTING STARTED<br />
Fitting the batteries<br />
Your gauge is supplied with batteries ready to fit. To insert or replace<br />
the batteries:<br />
1. Lift the latch at the back of the gauge <strong>and</strong><br />
+<br />
rotate anticlockwise.<br />
2. Remove the battery compartment cover.<br />
3. Insert 2 batteries (type LR6/AA) taking care to<br />
ensure correct battery polarity.<br />
+<br />
4. Replace battery compartment cover <strong>and</strong> rotate<br />
the latch clockwise to close.<br />
<strong>The</strong> battery condition is indicated by a symbol in the top right of the<br />
display:<br />
• Full symbol (orange) = batteries at full capacity<br />
• Empty symbol (red, flashing) = batteries at lowest sustainable level<br />
To maximise battery life, ensure that Auto Screen Brightness is<br />
selected, or the screen brightness is low via<br />
Menu/Setup/Display/Screen Brightness <strong>and</strong> the Bluetooth is disabled<br />
(if you are not using it) via Menu/Bluetooth <strong>and</strong> uncheck the Enable<br />
Bluetooth radio button.<br />
Connecting the probe (separate gauges only)<br />
1. Rotate the probe plug to align the pins<br />
2. Screw in the collar - clockwise<br />
2<br />
1<br />
2<br />
1<br />
5<br />
www.elcometer.com
R<br />
Fitting the wrist harness<br />
A wrist harness is supplied with each gauge. This can be fitted into the right<br />
h<strong>and</strong> side of the gauge using the wrist strap connection. To fit the harness,<br />
pass the harness loop through the wrist strap connection, pass the main<br />
wrist harness through the loop <strong>and</strong> pull.<br />
Switching the gauge on/off<br />
To switch on, press on/off key for more than 0.5 seconds.<br />
To switch off, press <strong>and</strong> hold on/off key until the screen blanks.<br />
<strong>The</strong> gauge will switch off automatically after 5 minutes of inactivity.<br />
To switch off this feature, press Menu/Setup <strong>and</strong> then de-select <strong>Gauge</strong><br />
Auto Off.<br />
Selecting a language<br />
When the gauge is switched on for the first time after dispatch from the<br />
<strong>Elcometer</strong> factory the display will show the language selection screen:<br />
1. Select your language using the éêsoftkeys<br />
2. Follow the on screen menus<br />
To access the language menu when in a foreign language:<br />
1. Switch the gauge OFF<br />
2. Press <strong>and</strong> hold the left softkey <strong>and</strong> switch the gauge ON<br />
3. Select your language using the éê<br />
softkeys<br />
<strong>The</strong> language can also be changed via Menu/Setup/Language<br />
Selecting units<br />
<strong>The</strong> <strong>Elcometer</strong> <strong>456</strong> can display readings in both metric <strong>and</strong> imperial<br />
measurement units (microns, millimetres, mils or inches). <strong>The</strong> appropriate<br />
measurement unit can be changed via Menu/Setup/Units<br />
Adjusting the beep volume<br />
Each time a measurement is taken, the gauge will beep. <strong>The</strong> beep volume<br />
can be adjusted <strong>and</strong> can even be switched off via Menu/Setup/Beep<br />
Volume<br />
en<br />
www.elcometer.com 6
R<br />
en<br />
3 TAKING A READING<br />
1. Hold the gauge (integral) or the probe by its sleeve (separate gauge)<br />
2. To take a reading, bring the probe down onto the surface whilst<br />
holding it perpendicular<br />
3. For subsequent readings, lift the probe off <strong>and</strong> then replace it onto<br />
the coated surface<br />
üDO<br />
• Hold the probe by the probe sleeve<br />
• Gently place the probe onto the surface<br />
• Allow the sleeve to make contact with the<br />
surface - to improve accuracy<br />
ûDO NOT<br />
• Drag the probe over the coated surface<br />
• Bang the probe down hard onto the surface<br />
• Allow the probe to hover over the surface as<br />
this could result in a false reading<br />
7<br />
www.elcometer.com
R<br />
4 CALIBRATING THE GAUGE<br />
Calibration adjustment is the process of setting the gauge to known values<br />
of thickness to ensure accuracy on different substrate types, shapes <strong>and</strong><br />
surface finishes.<br />
<strong>The</strong> calibration of the gauge can be adjusted using several different<br />
methods for use in accordance with National <strong>and</strong> International St<strong>and</strong>ards<br />
<strong>and</strong> the calibration adjustment method chosen depends on the condition<br />
of the substrate to be measured.<br />
1. Press the Cal softkey<br />
2. For alternative calibration methods, select Cal/Cal Method<br />
3. Select Calibrate <strong>and</strong> follow the on-screen instructions<br />
4. When prompted place the probe on the centre of the foil(s) or on<br />
the uncoated metal substrate<br />
en<br />
90°<br />
Foils can also be stacked to increase the thickness value.<br />
<strong>The</strong> calibration method is indicated on the screen by a symbol (see<br />
Multiple Calibration Methods on page 16).<br />
Not all calibration methods are available for all gauge types. For a<br />
comprehensive guide to each calibration method <strong>and</strong> the calibration<br />
adjustment process see Multiple Calibration Methods on page 16.<br />
When using an FNF probe it must be calibrated in both the ferrous mode<br />
<strong>and</strong> in the non-ferrous mode to ensure accuracy of reading.<br />
For more information on calibrating the <strong>Elcometer</strong> <strong>456</strong>, see page 53.<br />
www.elcometer.com 8
R<br />
en<br />
5 THE DISPLAY<br />
<strong>The</strong> <strong>Elcometer</strong> <strong>456</strong> gauge has a colour display:<br />
• White characters: All measurement <strong>and</strong> statistical values.<br />
• Orange characters: All menu items, statistical parameters <strong>and</strong><br />
symbols.<br />
• Red: A measurement value which is outside set limits; a limit symbol<br />
when the limit value has been exceeded (Model S & T).<br />
• - - - indicates reading outside range of probe.<br />
If you see the Cal softkey flashing, the gauge should be calibrated.<br />
m<br />
n<br />
o<br />
p<br />
q<br />
r<br />
a<br />
b<br />
c<br />
d<br />
e<br />
f<br />
g<br />
h<br />
I<br />
j<br />
k<br />
l<br />
s<br />
e<br />
t<br />
p<br />
u<br />
9<br />
www.elcometer.com
R<br />
Model<br />
a Green LED EBST<br />
b Battery Life Indicator EBST<br />
c Bluetooth On BST<br />
d Daily Alarm On ST<br />
e Substrate Type - F, N, FNF EBST<br />
f Calibration Method BST<br />
g Upper & Lower Limits On ST<br />
h Units of Measurement - µm, mils, mm, inch EBST<br />
i Reading Outside Calibration Warning On T<br />
j Batch Type - normal, counted average, IMO ST<br />
k Menu Softkey EBST<br />
l Statistics Softkey BST<br />
m Red LED - Reading outside limit / IMO Fail ST<br />
n Batch Name (when in batching)<br />
Date & Time (when not in batching)<br />
T<br />
ST<br />
o User Selectable Statistics - 4 rows BST<br />
p Reading Value EBST<br />
q Calibration Softkey EBST<br />
r Batch / Data Softkey BST<br />
s Interval Alarm On T<br />
t Lower Limit On ST<br />
u Softkeys EBST<br />
For a complete list of icons, see “<strong>Gauge</strong> Icons” on page 59 - 61<br />
Reading display size (BST)<br />
<strong>The</strong> character size of the measurement value on the<br />
display increases or decreases depending on the<br />
number of statistics that are displayed on the<br />
measurement screen.To maximise the reading size,<br />
either:<br />
reduce the number of statistical values that are<br />
displayed via Stats/Select Statistics, or<br />
switch off all the statistics by unchecking the radio<br />
button in Stats/Show Statistics On LCD<br />
en<br />
www.elcometer.com<br />
10
R<br />
en<br />
6 THE GAUGE FEATURES<br />
<strong>The</strong> <strong>Elcometer</strong> <strong>456</strong> coating thickness gauge has a number of easy to use<br />
features <strong>and</strong> functions to help the user be more efficient. <strong>The</strong>se include:<br />
Fast reading rate (EBST)<br />
<strong>The</strong> <strong>Elcometer</strong> <strong>456</strong> is capable of taking greater than 70 accurate,<br />
repeatable <strong>and</strong> reproducible measurements every minute.<br />
Easy to use menu structure in more than 30 languages (EBST)<br />
Designed to be intuitive, the <strong>Elcometer</strong> <strong>456</strong> menus <strong>and</strong> calibration<br />
instructions are available in multiple languages via<br />
Menu/Setup/Language.<br />
Bright colour screen (EBST)<br />
Each gauge is supplied with a scratch <strong>and</strong> solvent resistant 2.4"<br />
(60mm) TFT colour screen which clearly displays the reading. <strong>The</strong><br />
screen brightness can be adjusted manually (EBST) - via<br />
Menu/Setup/Display/Screen Brightness/Manual or automatically<br />
(BST) using the gauge’s ambient light sensor which can be switched<br />
on via Menu/Setup/Display/Screen Brightness/Auto.<br />
Battery or USB Powered (EBST)<br />
Each gauge can be powered either using 2 x AA lithium, alkaline or<br />
rechargeable batteries or by connecting the <strong>Elcometer</strong> <strong>456</strong> to your PC<br />
via a USB cable.<br />
Two year gauge warranty (EBST)<br />
<strong>The</strong> <strong>Elcometer</strong> <strong>456</strong> gauge is supplied with a 1 year warranty against<br />
manufacturing defects. To extend this warranty to 2 years, simply<br />
register your gauge via the elcometer.com website.<br />
Emergency light mode (BST)<br />
If all the lighting fails during an inspection in dark environments, the<br />
gauge is fitted with an emergency light feature - once selected<br />
(Menu/Emergency Light), the display turns bright white. To switch off<br />
this function either press <strong>and</strong> hold the Esc softkey or power off the<br />
gauge.<br />
11<br />
www.elcometer.com
R<br />
Automatic rotating display (BST)<br />
Using the internal accelerometer, the gauge<br />
will automatically rotate the display to allow<br />
you to easily read the thickness value in any<br />
orientation - 0°, 90°, 180° & 270°.<br />
This function can be switched off by unchecking<br />
Menu/Setup/Display/Auto<br />
Display Rotation<br />
en<br />
<strong>Gauge</strong> firmware updates (BST)<br />
Using <strong>Elcometer</strong>’s free data management software, ElcoMaster 2.0,<br />
users can receive prompts when there is a gauge firmware update<br />
available for their model version.<br />
When the <strong>Elcometer</strong> <strong>456</strong> is connected (via USB), to any computer<br />
with an internet connection <strong>and</strong> with ElcoMaster 2.0 installed,<br />
ElcoMaster 2.0 highlights the availability of a firmware update,<br />
identifies to the user the new features <strong>and</strong> guides the user through the<br />
gauge firmware update process.<br />
Caution, before upgrading your gauge firmware, ensure that you have<br />
downloaded all inspection readings from the gauge. For more<br />
information regarding ElcoMaster 2.0 see page 32 Downloading<br />
Data.<br />
Bluetooth <strong>and</strong> USB Data output (BST)<br />
<strong>Elcometer</strong> <strong>456</strong> gauges have the ability to transfer data via USB to a<br />
computer or wirelessly via Bluetooth technology to PC’s, PDA’s or<br />
mobile phones which are Bluetooth enabled using ElcoMaster 2.0<br />
or ElcoMaster for Android respectively.<br />
B l u e t o o t h d a t a o u t p u t c a n b e s w i t c h e d o n v i a<br />
Menu/Bluetooth/Enable Bluetooth. For more information<br />
regarding ElcoMaster 2.0 see page 32 Downloading Data.<br />
ElcoMaster 2.0 Data output (BST)<br />
Users can download data from any <strong>Elcometer</strong> gauge directly into<br />
ElcoMaster 2.0 by connecting the gauge to the PC <strong>and</strong> following the<br />
on screen prompts.<br />
www.elcometer.com 12
R<br />
en<br />
Once the data has been transferred to the computer, the user can<br />
produce professional reports in seconds. Data can also be<br />
transferred into programs, such as Excel®, in a similar manner.<br />
For more information regarding ElcoMaster 2.0 see page 32<br />
Downloading Data.<br />
On Screen Statistics (BST)<br />
User selectable statistical <strong>and</strong> general measurement information can<br />
be displayed on the gauge. <strong>The</strong> information to be displayed can be<br />
selected <strong>and</strong> managed by selecting the Stats softkey.<br />
Up to 8 statistics can be selected to be displayed on the reading<br />
screen via Stats/Select Statistics<br />
Ensure that Stats/Show Statistics On LCD is also checked.<br />
To view all statistics select Stats/View All<br />
<strong>The</strong> following statistical <strong>and</strong> general information can be displayed on<br />
your gauge:<br />
Symbol / icon Model Description<br />
η BST <strong>The</strong> number of readings taken<br />
x BST Mean (average)<br />
σ BST St<strong>and</strong>ard deviation<br />
Hi BST Highest reading taken<br />
Lo BST Lowest reading taken<br />
cv% BST Coefficient of variation; <strong>The</strong> COV is defined as the<br />
ratio of the st<strong>and</strong>ard deviation to the mean <strong>and</strong> is a<br />
normalised measure of dispersion - when<br />
comparing batches with widely different means,<br />
one should use the coefficient of variation for<br />
comparison instead of st<strong>and</strong>ard deviation (σ).<br />
EIV BST <strong>Elcometer</strong> index value; Used to assess a coating’s<br />
overall quality. Ideal for use in the automotive<br />
refinishing industry.<br />
USA patent number US7606671<br />
NDFT ST Nominal dry film thickness; <strong>The</strong> target or specified<br />
dry film coating thickness value.<br />
13<br />
www.elcometer.com
R<br />
Symbol / icon Model Description<br />
IMO PSPC ST I n t e r n a t i o n a l M a r i t i m e O r g a n i s a t i o n ’s<br />
Performance St<strong>and</strong>ard for Protective <strong>Coating</strong>s<br />
clearly defines the acceptance criteria for a<br />
coating. <strong>The</strong> <strong>Elcometer</strong> <strong>456</strong> can be quickly set up<br />
to display these parameters:<br />
% > N<br />
90<br />
% 100<br />
90:10<br />
X!<br />
n<br />
n<br />
ST<br />
ST<br />
ST<br />
ST<br />
ST<br />
ST<br />
ST<br />
ST<br />
<strong>The</strong> percentage of readings greater than or equal<br />
to the Nominal Dry Film <strong>Thickness</strong> Value.<br />
<strong>The</strong> percentage of readings between 0.9 x NDFT<br />
<strong>and</strong> the NDFT.<br />
Displays either pass (ü) or fail (X)<br />
To pass the IMO PSPC 90/10 rule:<br />
At least 90% of all dry film thickness readings<br />
shall be greater than or equal to the NDFT<br />
value, <strong>and</strong><br />
none of the remaining measurements shall be<br />
below 0.9 x NDFT<br />
If all the measurements taken at any point are<br />
greater than 0.9 x NDFT, but less than 90% of the<br />
readings are greater than or equal to the NDFT,<br />
were the inspection to stop, then the IMO PSPC<br />
condition would be a fail. Statistically, however,<br />
were more measurements to be taken which were<br />
all greater than or equal to the NDFT, then there<br />
would come a time when the IMO PSPC condition<br />
returns to a pass. This is depicted by the “failing”<br />
icon - X!<br />
For more information on the IMO PSPC see About<br />
IMO PSPC on page 67.<br />
Low Limit<br />
High Limit<br />
Number of readings below the low limit<br />
Number of readings above the high limit<br />
User definable warning limits can be set. Once the<br />
reading exceeds the limit the gauge notifies the<br />
user by turning the reading <strong>and</strong> relevant limit icon<br />
red, flashing the red LED, <strong>and</strong> sounding the alarm<br />
beep. For more information see Limits on page 21.<br />
en<br />
www.elcometer.com 14
R<br />
en<br />
Trend Graph (ST)<br />
By selecting Stats/Show Graph on LCD the user can view a line trend<br />
graph of the last 20 measurements. <strong>The</strong> graph is updated<br />
automatically when each reading is taken.<br />
Up to five horizontal axes are displayed representing different values /<br />
statistics as follows:<br />
Highest reading in the batch “ ”<br />
Lowest reading in the batch “ ”<br />
(for batches of more than one reading)<br />
Mean of readings in the batch “ ”<br />
(for batches of more than one reading)<br />
High limit for the batch “ ” (when enabled)<br />
Low limit for the batch “ ” (when enabled)<br />
<strong>The</strong> readings are displayed as white or red points; white if a reading is<br />
within limits (or no limits have been set), <strong>and</strong> red if outside set limits.<br />
4Users can choose to Show Graph on LCD or Show Stats on LCD (see On Screen<br />
Statistics on page 13) or neither. Show Graph on LCD is only available when in<br />
Batching, it is not available in Immediate Mode.<br />
Time <strong>and</strong> date (ST)<br />
15<br />
Once the appropriate time <strong>and</strong> date has been set (Menu/Setup/Time<br />
<strong>and</strong> Date), the user can display the time <strong>and</strong> date at the top of the<br />
<strong>Elcometer</strong> <strong>456</strong> display via Menu/Setup/Time <strong>and</strong> Date/Display<br />
Time <strong>and</strong> Date.<br />
<strong>The</strong> time format can be set to either the 12 hour or 24 hour clock via<br />
Menu/Setup/Time <strong>and</strong> Date/Set Format/Set Time Format<br />
<strong>The</strong> date format can be set to either dd/mm/yyyy, mm/dd/yyyy or<br />
yyyy/mm/dd via Menu/Setup/Time <strong>and</strong> Date/Set Format/Set<br />
Date Format<br />
Please note that the time <strong>and</strong> date is replaced by the batch name<br />
when the gauge is in Batch mode.<br />
When a batch is created, re-opened (or when the gauge is switched<br />
on whilst in batch mode) <strong>and</strong> when each reading is taken, the time <strong>and</strong><br />
date details are stored within the batch - allowing the user to have an<br />
accurate record of when the measurements were taken. <strong>The</strong> time <strong>and</strong><br />
date stamp for each reading is displayed on ElcoMaster 2.0.<br />
www.elcometer.com
R<br />
Daily <strong>and</strong> Interval Alarms (Daily: ST; Interval: T)<br />
Programming the <strong>Elcometer</strong> <strong>456</strong> alarm allows the user to set a<br />
reminder for coating inspection to be carried out. Whilst the daily<br />
alarm provides the user with a single use alarm which will then resound<br />
each day at the same time, the interval alarm allows the user to<br />
set a time period between alarms (e.g. every 2 hours) - ideal for batch<br />
inspection. Alarms can be set within Menu/Set Alarm.<br />
Multiple calibration methods (EBST)<br />
Calibration adjustment is the process of setting the gauge to known<br />
values of thickness to ensure accuracy on different substrate types,<br />
shapes <strong>and</strong> surface finishes <strong>and</strong> is often referred to as simply the<br />
“calibration”.<br />
<strong>The</strong> calibration of the gauge can be adjusted using several different<br />
methods for use in accordance with National <strong>and</strong> International<br />
St<strong>and</strong>ards <strong>and</strong> the calibration adjustment method chosen depends on<br />
the condition of the substrate to be measured.<br />
<strong>The</strong> calibration method is indicated on the screen by a symbol.<br />
When using an FNF probe it must be calibrated in both the ferrous<br />
mode <strong>and</strong> in the non-ferrous mode to ensure accuracy of reading.<br />
When switching between the Scale 1 <strong>and</strong> Scale 2 functions of the<br />
scale 2 probes (Menu/Setup/Probe) the <strong>Elcometer</strong> <strong>456</strong> should be recalibrated<br />
to ensure accuracy across the appropriate measurement<br />
range.<br />
en<br />
www.elcometer.com 16
R<br />
en<br />
17<br />
Method Description Icon Model<br />
Zero<br />
Smooth<br />
Rough /<br />
2 Point<br />
Zero Offset<br />
A simple method for calibrating on smooth<br />
substrates. Simply place the probe on the<br />
uncoated metal <strong>and</strong> the gauge will adjust the<br />
calibration accordingly. Also known as the single<br />
point calibration method.<br />
This is a more accurate method of calibrating the<br />
gauge than the Zero method as it requires the<br />
user to calibrate the gauge using a foil <strong>and</strong> the<br />
un-coated substrate.<br />
<strong>The</strong> gauge’s on-screen calibration instructions<br />
will guide the user through the calibration routine.<br />
When selecting the foil value, the user should<br />
choose a thickness that is close to but greater<br />
than the expected dry film thickness value.<br />
Ideal for calibrating the gauge on both profiled<br />
metal substrates (when the uncoated surface is<br />
accessable) <strong>and</strong> substrates where there are<br />
significant differences in the magnetic (F) or<br />
electrical (N) properties of the substrate. For<br />
example cast iron, high carbon steel or some<br />
non-magnetic stainless steel alloys.<br />
<strong>The</strong> calibration requires 2 foil values - one above<br />
the expected dry film thickness, <strong>and</strong> one below.<br />
<strong>The</strong> gauge will guide the user through the<br />
process with on screen instructions.<br />
This is the ISO 19840 method for coatings on<br />
steel surfaces roughened by blast cleaning or<br />
when the substrate profile is unknown, or not<br />
accessible. <strong>The</strong> calibration uses the smooth<br />
surface technique, <strong>and</strong> a correction value (zero<br />
offset) is applied to each reading to account for<br />
the effect of the roughened surface; the value of<br />
the offset depends on the initial surface profile<br />
<strong>and</strong> is described in ISO 19840 as follows:<br />
Profile according to Correction Offset<br />
Value µm (mils*)<br />
BST<br />
BST<br />
EBST<br />
ISO 8503-1<br />
Fine 10 (0.4)<br />
Medium 25 (1.0)<br />
Coarse 40 (1.6)<br />
* mils values are calculated <strong>and</strong> for reference<br />
as ISO 19840 indicates metric units only<br />
www.elcometer.com<br />
ST
R<br />
Method Description Icon Model<br />
Auto<br />
Factory<br />
This is a calibration method unique to the<br />
<strong>Elcometer</strong> <strong>456</strong> <strong>and</strong> has been designed to simplify<br />
<strong>and</strong> speed up the calibration process for those<br />
users who are calibrating their gauge using the<br />
same foil values each time.<br />
When the Auto calibration method is selected,<br />
the user is asked to pre-program the high <strong>and</strong> low<br />
foil values. <strong>The</strong> low foil value can be set to 0.0µm<br />
(0.0mils) for un-coated substrates.<br />
Once these foil values have been set up,<br />
selecting the calibrate routine allows the user to<br />
simply place the probe on the high foil three<br />
times, followed by the low foil three times <strong>and</strong> the<br />
gauge is automatically calibrated - returning the<br />
user to the main reading screen - automatically.<br />
By selecting this calibration method the<br />
<strong>Elcometer</strong> <strong>456</strong> returns the calibration to the<br />
gauge’s factory calibration settings.<br />
<strong>The</strong> factory calibration method should only be<br />
used if there is no other means of calibration (e.g.<br />
lost foils, lack of access to substrate, etc.).<br />
ST<br />
EBST<br />
Pre-defined Calibration Methods (ST)<br />
In addition to the st<strong>and</strong>ard calibration methods described on pages<br />
16-18, the <strong>Elcometer</strong> <strong>456</strong> has a four pre-defined calibration methods<br />
which follow relevant st<strong>and</strong>ards.<br />
<strong>The</strong>se pre-defined calibration methods not only define the calibration<br />
routine to be used, but also set up the data collection method, as<br />
defined by the appropriate st<strong>and</strong>ard.<br />
For this reason, pre-defined calibration methods can only be selected<br />
whilst the gauge is in batching mode. For more information on<br />
batching or data collection methods, see Batching on page 23.<br />
en<br />
www.elcometer.com 18
R<br />
en<br />
Method Description Icon Model<br />
ISO<br />
Sets the calibration method to Zero Offset <strong>and</strong><br />
sets the Counted Average to 5 - in accordance<br />
with ISO19840.<br />
ST<br />
SSPC PA2<br />
Swedish<br />
Australian<br />
Sets the calibration method to Rough/2 Point <strong>and</strong><br />
sets the Counted Average to 3 - in accordance<br />
with SSPC PA2.<br />
Sets the calibration method to Rough/2 Point <strong>and</strong><br />
sets the Counted Average to 5 - in accordance<br />
with Swedish st<strong>and</strong>ards.<br />
Sets the calibration method to Zero Offset, <strong>and</strong><br />
sets the Counted Average to 5 - in accordance<br />
with AS st<strong>and</strong>ards.<br />
ST<br />
ST<br />
ST<br />
For more information on how to calibrate the gauge, see Calibrating the<br />
<strong>Elcometer</strong> <strong>456</strong> on page 53.<br />
User-programmable calibration memories (T)<br />
<strong>The</strong> <strong>Elcometer</strong> <strong>456</strong> Model T allows users to store into memory up to<br />
three calibrations. Once a calibration memory has been saved, the<br />
user can select the calibration memory - without the need to<br />
re-calibrate the gauge.<br />
Calibration memories are ideal for users who are inspecting coatings<br />
on various curvatures, blast profiles or coating thicknesses.<br />
Using the gauge’s alpha-numeric function, users can re-name the<br />
calibration memory to suit the calibration setting.<br />
For example:<br />
A user who is inspecting coatings on two blast profiles - shot <strong>and</strong><br />
grit could store calibrations into Cal Memory 1 <strong>and</strong> Cal Memory 2<br />
<strong>and</strong> re-name them ‘Shot’ <strong>and</strong> ‘Grit’ respectively<br />
A user measuring on flat <strong>and</strong> curved surfaces could store the<br />
calibrations into ‘Flat cal’ <strong>and</strong> ‘Curved cal’.<br />
Thick <strong>and</strong> thin coating thickness calibrations can also be saved<br />
<strong>and</strong> renamed ‘320µm’ <strong>and</strong> ‘120µm’<br />
For more information on re-naming calibration memories, see Alphanumeric<br />
naming of batches <strong>and</strong> cal memories on page 23.<br />
19<br />
www.elcometer.com
R<br />
Outside calibration warning (T)<br />
In order to achieve the most accurate reading the gauge should be<br />
calibrated to the substrate type, shape <strong>and</strong> profile using the<br />
appropriate calibration method together with foil values that are<br />
slightly above the target dry film thickness.<br />
When using the gauge’s calibration memories, or batching (see<br />
Batching on page 23) different calibration foil values may be used in<br />
each calibration.<br />
Once the Outside calibration warning<br />
function Cal/Calibration Check has been<br />
switched on, if a coating thickness reading<br />
is taken which is more than 10% above the<br />
foil value (<strong>and</strong> 10% below the lower foil<br />
value if using Rough/ 2 point) the gauge reading alarm sounds a triple<br />
beep <strong>and</strong> the Calibration Check icon (located above the units symbol)<br />
turns red. This feature does not amend or tag any reading, it is a real<br />
time warning feature only.<br />
Calibration lock (BST)<br />
To avoid accidental amendments to the calibration settings switching<br />
on the Cal/Calibration Lock feature’ locks’ the user from undertaking<br />
any changes to the calibration without first un-checking the<br />
Cal/Calibration Lock feature.<br />
When the Calibration Lock is enabled, users can still test the<br />
calibration via Cal/Test Calibration but will be unable to validate or<br />
re-calibrate the gauge.<br />
<strong>The</strong> calibration can also be locked using a PIN Code, see page 56 for<br />
more information.<br />
en<br />
www.elcometer.com 20
R<br />
en<br />
<strong>Gauge</strong> Memory (BST)<br />
<strong>The</strong> <strong>Elcometer</strong> <strong>456</strong> versions are supplied with a varying level of<br />
memory:<br />
Model E: No memory<br />
Model B: <strong>The</strong> Model B gauge’s ‘rolling statistics’ provides<br />
accurate statistical values for all measurements<br />
taken since the statistics were last cleared<br />
(Stats/Clear Statistics). <strong>The</strong> last 5 readings,<br />
however, can be displayed by pressing the Data<br />
softkey.<br />
Model S: 1,500 readings can be stored into the gauge’s memory<br />
Model T: A total of 150,000 readings can be stored into the<br />
gauge’s memory either in a single batch or in up to<br />
2,500 batches (see Batching on page 23). Each<br />
batch can be individually named <strong>and</strong> can have its<br />
own unique calibration.<br />
Limits (ST)<br />
During the inspection process coatings can often have specified<br />
minimum <strong>and</strong>/or maximum thickness values.<br />
For example, coatings that have been applied too thinly over a<br />
surface profile can lead to rust spots appearing on the peaks of the<br />
profile. Similarly too thick a coating can also lead to premature coating<br />
failures.<br />
Users can program upper <strong>and</strong>/or lower warning limits into the<br />
<strong>Elcometer</strong> <strong>456</strong> gauge by selecting Menu/Set Limits/Set Upper or<br />
Menu/Set Limits/Set Lower.<br />
21<br />
To switch the limits on, the user should ensure that the Enable Limits<br />
radio button is checked.<br />
When an Upper Limit has been set up <strong>and</strong> enabled the “ ” icon is<br />
displayed.<br />
When a Lower Limit has been set up <strong>and</strong> enabled the “ ” icon is<br />
displayed.<br />
If both Upper <strong>and</strong> Lower limits have been set up <strong>and</strong> enabled then<br />
the two icons are displayed together as “ ”.<br />
www.elcometer.com
R<br />
When the <strong>Elcometer</strong> <strong>456</strong> gauge takes a<br />
reading which is outside the set limits the<br />
following occurs:<br />
en<br />
<strong>The</strong> Red LED flashes<br />
<strong>The</strong> reading is displayed in red<br />
<strong>The</strong> alarm beeps 3 times<br />
<strong>The</strong> associated limit icon turns red<br />
In addition, the number of readings above limit (or below limit as<br />
applicable) statistic is incremented. In Batching, the reading is<br />
tagged with either the high or low icon as appropriate. For more<br />
information see Batching on page 23.<br />
To switch off a particular limit go to Menu/Set Limits/Set Upper or<br />
Menu/Set Limits/Set Lower <strong>and</strong> set the limit value to Off using the up<br />
<strong>and</strong> down soft keys.<br />
<strong>The</strong> programmed limit values can be displayed on the reading screen<br />
via Stats/Select Statistics <strong>and</strong> checking the appropriate radio<br />
button. <strong>The</strong> maximum number of statistics that can be displayed on<br />
the reading screen at the same time is 8.<br />
If a low limit has been set up, the upper limit value cannot be lower<br />
than the pre-set lower limit.<br />
Individual limits can also be set up for each batch on Model T gauges.<br />
For more information see Batching on page 23.<br />
<strong>Gauge</strong> Welcome Screen (BST)<br />
Users can adjust the start up screen on their <strong>Elcometer</strong> <strong>456</strong> gauges<br />
via the ElcoMaster 2.0 software - see page 57 for more information.<br />
www.elcometer.com 22
R<br />
en<br />
7 BATCHING (ST)<br />
<strong>The</strong> <strong>Elcometer</strong> <strong>456</strong> gauges have two measurement modes:<br />
Immediate mode (ST): Where readings are taken, rolling statistics<br />
calculated (<strong>and</strong> displayed), but individual values are not stored in the<br />
memory; <strong>and</strong><br />
Batching (ST): Where readings are stored into memory in batches.<br />
Batches allow the user to collate readings for easier analysis of large<br />
structures or complex assemblies. <strong>Elcometer</strong> <strong>456</strong> Model T gauges<br />
can store a total of 150,000 readings in up to 2,500 batches, the<br />
Model S has one batch of up to 1,500 readings. <strong>The</strong> <strong>Elcometer</strong> <strong>456</strong><br />
has the following batching functions:<br />
Create a new batch (ST); Batch/<strong>New</strong> Batch<br />
Open an existing batch (ST); Batch/Open Existing Batch<br />
Rename an existing batch (T); Batch/Rename Batch<br />
Copy a batch - including all calibration <strong>and</strong> limit setups (T);<br />
Batch/Copy Batch<br />
Clear all the readings within the batch - but leaving all calibration<br />
<strong>and</strong> limit setups (ST); Batch/Clear Batch<br />
Review the readings, statistics, calibration, batch information (ST)<br />
<strong>and</strong> a graph of the readings (T); Batch/Review Batch<br />
Delete a Batch (ST), or all batches (T), entirely from the gauge;<br />
Batch/Delete Batch<br />
Delete the last reading entirely or delete the reading, but mark the<br />
reading as deleted in the batch memory (ST) - Batch/Deleted<br />
Reading/Delete With Tag <strong>and</strong> Batch/Deleted Reading/Delete<br />
Without Tag respectively.<br />
Creating a new batch (T)<br />
When using batching for the first time, or when you wish to open a new<br />
batch, press Batch/<strong>New</strong> Batch. <strong>The</strong> user can now:<br />
Open the batch <strong>and</strong> take readings; Batch/<strong>New</strong> Batch/Open Batch 1<br />
Rename the batch - before opening it via Batch/<strong>New</strong><br />
Batch/Rename Batch 1. (See Alpha numeric naming Batches &<br />
Cal Memories on page 24)<br />
23<br />
www.elcometer.com
R<br />
Select the appropriate calibration method - Batch/<strong>New</strong> Batch/<br />
Batch Calibration (see Multiple calibration methods on page 16)<br />
Choose the type of batch (normal, counted average or IMO PSPC)<br />
before opening it via Batch/<strong>New</strong> Batch/Batch Type (see Batch<br />
Types on page 29)<br />
Set up specific batch limits via Batch/<strong>New</strong> Batch/Batch Limits<br />
(see Limits on page 21)<br />
Set up a fixed batch size via Batch/<strong>New</strong> Batch/Fixed Batch Size<br />
(see Fixed Batch Size on page 30)<br />
Once all the batch settings have been created, press Batch/<strong>New</strong><br />
Batch/Open Batch 1 - where ‘Batch 1' may now be a re-named as<br />
required.<br />
Alpha numeric naming batches & cal memories (T)<br />
When in batching - or setting up a calibration memory (see Calibration<br />
Memories on page 19) - the user can rename the batch or cal memory<br />
to a more appropriate name.<br />
When a new batch is created, the gauge automatically names it<br />
‘Batch n’ - where ‘n’ is the next unused batch number; e.g. Batch 1,<br />
Batch 2, Batch 3, etc.<br />
To rename a batch either:<br />
when creating a new batch press Batch/<strong>New</strong> Batch/Rename<br />
Batch 1; or<br />
press Batch/Rename Batch <strong>and</strong> select the Batch to be renamed<br />
from the list of existing batches<br />
To rename a calibration memory:<br />
press Cal/Cal Memory 1; Cal/Cal Memory 2 or Cal/Cal Memory 3<br />
then select Rename Cal Memory n (where n=1, 2 or 3)<br />
This then opens up the renaming procedure to enable the user to<br />
rename the batch or cal memory.<br />
en<br />
www.elcometer.com 24
R<br />
en<br />
<strong>The</strong> current name of the batch (or<br />
cal memory) is in white in the<br />
middle of the display with a yellow<br />
‘cursor’ icon to the right of the<br />
name.<br />
Using the left arrow, right arrow<br />
<strong>and</strong> Select softkeys, the user can<br />
rename the batch or cal memory<br />
as required.<br />
<strong>The</strong> yellow, raised character or<br />
function is the item that will be<br />
‘chosen’ by pressing the Select<br />
soft key.<br />
Character<br />
OK<br />
Action<br />
Stores the name <strong>and</strong> returns the user to the previous<br />
screen<br />
Deletes the last character of the name<br />
25<br />
A, B, C... Selects the character A, B or C, etc.<br />
123<br />
ABC<br />
ÀÇü<br />
$%&<br />
Inserts a space<br />
Changes the selection characters to:<br />
1 2 3 4 5 6 7 8 9 0<br />
Changes the selection characters to:<br />
A B C D E F G H J K L M N O P Q R S T U V W X Y Z<br />
Changes the selection characters to:<br />
ÀÁÂÃÄÅÆÇÈÉÊËÌÍÎÏÐÑÒÓÔÕÖÙÚÛÜÝÞßµm<br />
Changes the selection characters to:<br />
! # ’ £ $ € % & * [ ] _ - + / \ < > : @ ; ”<br />
Pressing the Esc softkey at any time cancels the whole operation<br />
without making any changes to the original name.<br />
To store the re-named ‘name’ highlight OK <strong>and</strong> press the Select<br />
softkey.<br />
www.elcometer.com
R<br />
Opening an existing batch (ST)<br />
By selecting Batch/Open Existing Batch on the Model T, the user will<br />
find a list of all the batches that have already been created, together<br />
with the number of readings stored in each batch.<br />
To open a particular batch use the up <strong>and</strong> down arrow soft keys <strong>and</strong><br />
select the appropriate batch.<br />
<strong>The</strong> <strong>Elcometer</strong> <strong>456</strong> will return the gauge to the main reading screen<br />
<strong>and</strong> the selected batch name will be shown at the top of the display<br />
(together with a unique gauge batch id number - allowing no two<br />
batches to have exactly the same name).<br />
As the Model S only has one batch, the batch will open automatically.<br />
Copying an existing batch (T)<br />
By selecting Batch/Copy Batch the user will find a list of all the<br />
batches that have already been created, together with the number of<br />
readings stored in each batch.<br />
To copy a particular batch use the up <strong>and</strong> down arrow soft keys <strong>and</strong><br />
select the appropriate batch.<br />
<strong>The</strong> <strong>Elcometer</strong> <strong>456</strong> will then copy all the batch settings - calibration<br />
<strong>and</strong> foil values, batch type, cal method, warning limits, <strong>and</strong> the batch<br />
name - <strong>and</strong> then ask the user whether they wish to rename the batch.<br />
Pressing the Yes softkey the user will then be asked to rename the<br />
batch using the renaming procedure described on pages 24.<br />
Pressing the No softkey (or pressing the Esc softkey whilst in the<br />
renaming procedure) will make the <strong>Elcometer</strong> <strong>456</strong> copy the existing<br />
batch name to the new batch - thereby two batches will have the same<br />
batch name.<br />
Copying a batch does not copy the individual readings within that<br />
batch.<br />
Clearing an existing batch (ST)<br />
By Selecting Batch/Clear Batch on the Model T, the user will find a list<br />
of all the batches that have already been created, together with the<br />
number of readings stored in each batch.<br />
To clear a particular batch’s individual readings only, use the up <strong>and</strong><br />
down arrow soft keys <strong>and</strong> select the appropriate batch.<br />
www.elcometer.com 26<br />
en
R<br />
en<br />
As the Model S only has one batch, it is selected automatically.<br />
After a request for confirmation, the gauge will clear the readings from<br />
the selected batch <strong>and</strong> return the gauge to the list of batches (T) or the<br />
Batch Menu (S).<br />
To clear another batch (T), repeat the procedure. To return the gauge<br />
back to the previous menu, press the Back softkey.<br />
<strong>The</strong> user can clear all batches via Batch/Clear Batch/All Batches (T).<br />
Reviewing an existing batch (ST)<br />
By selecting Batch/Review Batch the user will find a list of all the<br />
batches that have already been created, together with the number of<br />
readings stored in each batch.<br />
To review a particular batch use the up <strong>and</strong> down arrow soft keys <strong>and</strong><br />
select the appropriate batch. As the Model S only has one batch, it is<br />
selected automatically.<br />
<strong>The</strong> <strong>Elcometer</strong> <strong>456</strong> will then open up the Review Batch menu, allowing<br />
the user to:<br />
Review the statistics of the batch<br />
Review the batch information, including:<br />
the date <strong>and</strong> time the batch was created<br />
the batch type - normal, counted average or IMO PSPC<br />
the probe type <strong>and</strong> serial number used to take the readings<br />
the calibration method - smooth, rough/2 point, etc.<br />
the batch limits (if set)<br />
Review the batch’s calibration information, including:<br />
the date <strong>and</strong> time the batch was last calibrated or verified<br />
the substrate type (or types if using an FNF probe)<br />
the probe type <strong>and</strong> serial number<br />
the calibration method - smooth, rough/2 point etc.<br />
the foil values used in the calibration<br />
Review the individual readings. <strong>The</strong> <strong>Elcometer</strong> <strong>456</strong> displays:<br />
the readings in numerical order, the first reading is at the top<br />
the substrate <strong>and</strong> probe scale range<br />
icons indicating a reading above “ ” or below “ ” the limit<br />
deleted readings icon “ ” is displayed if “Delete With Tag”<br />
selected, (see page 23 for more information).<br />
Review a graph of the individual readings (T), see page 28.<br />
27<br />
www.elcometer.com
R<br />
Batch Readings Graph (T)<br />
By selecting Batch/Review Batch/Graph the user can review all<br />
readings in the selected batch as a graph.<br />
Up to five horizontal axes can be displayed representing different<br />
values / statistics as follows:<br />
Highest reading in the batch “ ”<br />
Lowest reading in the batch “ ”<br />
(for batches of more than one reading)<br />
Mean of readings in the batch “ ”<br />
(for batches of more than one reading)<br />
High limit for the batch “ ”(when enabled)<br />
Low limit for the batch “ ”(when enabled)<br />
<strong>The</strong> readings are displayed as white or red<br />
vertical bars; white if a reading is within limits (or<br />
no limits have been set), <strong>and</strong> red if outside set<br />
limits.<br />
If there are more readings in the batch than can<br />
be displayed on a single screen, multiple<br />
readings will be combined into one bar. Should<br />
a single reading within the ‘combined bar’ be<br />
outside the enabled limits, the whole bar will be<br />
red.<br />
Pressing the Zoom+ softkey, allows each<br />
individual reading to be displayed, thereby<br />
showing the individual readings outside the<br />
limits.<br />
When zoomed in, the graph will always display<br />
the first 25 readings. Pressing the çsoftkey will<br />
display the last 25 readings taken. Subsequent<br />
presses of the çsoftkey will scroll backwards,<br />
pressing the èsoftkey will scroll forwards<br />
through the readings, 25 readings at a time.<br />
Pressing the Zoom- softkey returns to the original overview graph of<br />
all readings in the batch.<br />
To return the gauge to the Batch Review menu, press the Back softkey.<br />
www.elcometer.com 28<br />
en
R<br />
en<br />
Delete an existing batch (ST)<br />
By Selecting Batch/Delete Batch the user will find a list of all the<br />
batches that have already been created (T) or a single batch (S),<br />
together with the number of readings stored in each batch.<br />
To delete a particular batch’s individual readings only use the up <strong>and</strong><br />
down arrow soft keys <strong>and</strong> select the appropriate batch.<br />
After a request for confirmation, the gauge will delete the selected<br />
batch <strong>and</strong> return the gauge to the list of batches.<br />
To delete another batch, repeat the procedure, to return the gauge<br />
back to the previous menu, press the Back softkey.<br />
<strong>The</strong> user can delete all batches from the gauge by selecting<br />
Batch/ Delete Batch/All Batches (T).<br />
Exit Batching (ST)<br />
To stop using the Batching Mode <strong>and</strong> return to the Immediate mode<br />
select Batch/Exit Batching.<br />
Batch Types (ST)<br />
29<br />
When saving readings into a batch you have a choice of how the<br />
readings are managed within the gauge:<br />
Normal: Each reading is saved into memory.<br />
Press Batch/<strong>New</strong> Batch/Batch Type <strong>and</strong> then select Normal.<br />
<strong>The</strong> batch type can only be changed when creating a new batch.<br />
Counted Average: <strong>The</strong> average of a predefined number of<br />
readings is saved into memory. For example a counted average of<br />
3 means:<br />
<strong>The</strong> average of [Reading 1 + Reading 2 + Reading 3] is stored<br />
as the first measurement saved in the memory.<br />
Likewise the average of readings 4 - 6 are stored as the second<br />
measurement in the memory, etc.<br />
<strong>The</strong> individual readings within the counted average (1.2.3,<br />
4.5.6, etc.) are not saved.<br />
Press Batch/<strong>New</strong> Batch/Batch Type <strong>and</strong> then select Counted<br />
Average.<br />
<strong>The</strong> batch type can only be changed when creating a new batch.<br />
www.elcometer.com
R<br />
<strong>The</strong> <strong>Elcometer</strong> <strong>456</strong> then asks the user to set the counted average<br />
value. Using the up <strong>and</strong> down arrow softkeys, set the counted<br />
average from 2 - 99 <strong>and</strong> press the Ok softkey.<br />
This returns the user to the previous screen. Press the Back<br />
softkey to continue setting up the new batch as required before<br />
opening the new batch.<br />
If Statistics are displayed whilst measuring using the counted<br />
average function (CAF) when taking the readings used to calculate<br />
the CAF measurement, the gauge will display the rolling statistical<br />
calculations of the individual readings until all the readings that go<br />
into calculating the CAF measurement are taken. At this point the<br />
statistics then display the values of the stored CAF measurements.<br />
IMO PSPC: If you are inspecting coating thickness according to the<br />
International Maritime Organisations Performance St<strong>and</strong>ard for<br />
Protective <strong>Coating</strong>, selecting the IMO PSPC batch type <strong>and</strong> then<br />
subsequently opening the batch, the gauge automatically:<br />
• Asks the user to confirm the NDFT (nominal dry film thickness)<br />
value<br />
• Sets the statistics to display the relevant IMO PSPC values<br />
• Identifies the batch as an IMO PSPC batch for further analysis in<br />
the ElcoMaster 2.0 data management software<br />
For more information on the IMO PSPC see page 67.<br />
For more information on ElcoMaster 2.0 see page 32.<br />
Fixed Batch Size (T)<br />
When creating a new batch, by selecting Batch/<strong>New</strong> Batch <strong>and</strong><br />
checking the Fixed Batch Size radio button, users can pre-define the<br />
number of readings that are to be stored into the batch (between 1 <strong>and</strong><br />
255) using the up <strong>and</strong> down arrow softkeys.<br />
Once the batch has been opened <strong>and</strong> readings are being taken, the<br />
<strong>Elcometer</strong> <strong>456</strong> will notify the user when the fixed batch size is<br />
complete <strong>and</strong> ask if another batch is to be opened.<br />
If the user selects No, then the gauge closes the batch <strong>and</strong> exits<br />
batching - returning the gauge to the Immediate mode.<br />
en<br />
www.elcometer.com 30
R<br />
en<br />
If the user selects Yes, then the gauge automatically:<br />
Appends a ‘_1' to the original batch name<br />
Opens a new batch - copying all the batch setup <strong>and</strong> calibration<br />
information<br />
<strong>The</strong> new batch is named as the original batch, with a ‘_2'<br />
For example:<br />
A fixed batch is created <strong>and</strong> named “Component A”.<br />
When the batch is full, a new fixed batch ‘Component A_2’ is<br />
created<br />
‘Component A’ becomes ‘Component A_1’<br />
Appending the batch name in this way allows the user to quickly<br />
identify - or link - similar batches together.<br />
Once a fixed batch size batch has been filled, no additional readings<br />
can be added to that batch; a partially completed fixed batch size<br />
batch, however, can be re-opened <strong>and</strong> completed at a later date.<br />
To continue a batch link, press Batch/Open Existing Batch <strong>and</strong><br />
select the last batch in the link. If the batch is full, the gauge will prompt<br />
the user to open a new batch before continuing. If the batch is partially<br />
complete the user can complete the batch before continuing to a new<br />
batch.<br />
When downloading linked batches into ElcoMaster 2.0; the original<br />
batch name will be displayed (Component A in the above example).<br />
Selecting this batch name will download all linked batches into<br />
ElcoMaster 2.0 at the same time. For more information on<br />
downloading batches see page 40.<br />
Note: Once a fixed batch size batch has been created <strong>and</strong> data has<br />
been stored into the memory, the user cannot rename the batch<br />
name within the gauge. <strong>The</strong> batch name can be amended using<br />
the ElcoMaster 2.0 software.<br />
31<br />
www.elcometer.com
R<br />
8 DOWNLOADING DATA USING ELCOMASTER 2.0 (BST)<br />
Measurements from the <strong>Elcometer</strong> <strong>456</strong> Models B, S <strong>and</strong> T can be<br />
downloaded to a computer using the ElcoMaster 2.0 software (supplied<br />
with Model S <strong>and</strong> T gauges, downloadable from the <strong>Elcometer</strong> website for<br />
Model B gauges), or the older versions of ElcoMaster.<br />
This instruction book explains how users can download data using<br />
ElcoMaster 2.0 <strong>and</strong> should be read in conjunction with the ElcoMaster 2.0<br />
instructions.<br />
en<br />
Installing ElcoMaster 2.0<br />
To install ElcoMaster 2.0 insert<br />
the supplied mini-CD into your<br />
CD ROM drive. <strong>The</strong> software will<br />
automatically begin the install<br />
procedure.<br />
If it does not, or you have<br />
downloaded the software from<br />
the <strong>Elcometer</strong> website, run the<br />
SetupElcoMaster2.exe file.<br />
<strong>The</strong> ElcoMaster Setup Wizard<br />
will then begin.<br />
Follow the on screen wizard<br />
www.elcometer.com 32
R<br />
en<br />
It is important to read the License<br />
Agreement carefully <strong>and</strong> if the<br />
terms are acceptable, select the<br />
‘I accept this agreement’ radio<br />
button <strong>and</strong> click Next ><br />
ElcoMaster 2.0 will automatically<br />
select a default destination<br />
location for the software to be<br />
installed.<br />
Click the Browse... button to<br />
select an alternate file location.<br />
Click Next > to continue<br />
Choose any additional tasks, by<br />
selecting the appropriate check<br />
box <strong>and</strong> press Next > to continue<br />
33<br />
www.elcometer.com
R<br />
<strong>The</strong> ElcoMaster 2.0 wizard now<br />
provides a list of the settings that<br />
have been selected.<br />
Click Install to undertake the<br />
installation or < Back to review or<br />
alter any settings.<br />
ElcoMaster 2.0 will now install.<br />
Press Finish to exit Setup.<br />
en<br />
Upgrading data from older<br />
version of ElcoMaster<br />
ElcoMaster 2.0 is fitted with an<br />
internal database upgrade<br />
facility which will automatically<br />
check to see if there are any<br />
original ElcoMaster database<br />
files <strong>and</strong> ask if the user would like<br />
to upgrade the data to the new<br />
ElcoMaster 2.0 format.<br />
Upgrading can occur at any time<br />
by selecting Menu/Import/Import<br />
ElcoMaster 1.x Data <strong>and</strong><br />
selecting the relevant database<br />
file.<br />
www.elcometer.com 34
R<br />
en<br />
<strong>The</strong> ElcoMaster 2.0 Software<br />
ElcoMaster 2.0 is a simple - yet powerful - data management software<br />
solution that has been designed to allow users to generate<br />
professional reports in seconds - with the minimum of fuss.<br />
Across the top of the software is a Menu button, four ‘Action Tabs’ <strong>and</strong><br />
an exp<strong>and</strong> arrow.<br />
Menu Button Action Tabs Exp<strong>and</strong> Arrow<br />
Pressing the Menu button opens up a drop down list of options:<br />
Help : Provides <strong>Elcometer</strong> contact details <strong>and</strong> information<br />
about ElcoMaster 2.0.<br />
Update : Provides users with:<br />
the ability to update the ElcoMaster 2.0<br />
software to the latest release - connection to the<br />
internet is required for this function.<br />
the ability to upgrade the firmware of the <strong>New</strong><br />
<strong>Elcometer</strong> <strong>456</strong> coating thickness gauge (Model<br />
B, S & T)<br />
Import: Allows users to import a database from an earlier<br />
version of ElcoMaster (version 1.x)<br />
Exit: Allows users to shut down the software<br />
35<br />
www.elcometer.com
R<br />
<strong>The</strong> four Action Tabs are:<br />
Settings:<br />
Allows users to adjust:<br />
<strong>The</strong> language of ElcoMaster 2.0<br />
<strong>The</strong> units of measurement by gauge type<br />
Customise the default reports to include a user<br />
logo or image, together with footer information<br />
Adjust the normal distribution type for the<br />
histogram chart<br />
Alter the colour settings of the user interface<br />
<strong>The</strong> text file separator used when exporting files<br />
Select an alternate location to store the database<br />
Enable or disable the auto update option (where<br />
access to the internet is prohibited).<br />
Download: Allows users to connect all their <strong>Elcometer</strong> gauges<br />
®<br />
via USB, Bluetooth , or RS 232 where appropriate -<br />
see page 37.<br />
View:<br />
Allows users to:<br />
View measurement data, gauge information,<br />
measurement statistics set limits, add notes <strong>and</strong><br />
labels <strong>and</strong> view photographs <strong>and</strong> other<br />
documents<br />
Print, email or PDF st<strong>and</strong>ard reports<br />
Export data to Excel or other software packages<br />
as required<br />
Archive (<strong>and</strong> restore) old data<br />
Saved Reports: Once a user has generated a PDF report from within<br />
the View action tab, the report is automatically<br />
saved within the Saved Reports action tab - for<br />
reference <strong>and</strong> review.<br />
Pressing the Exp<strong>and</strong> Arrow switches on additional, advanced<br />
features within ElcoMaster 2.0 allowing users to:<br />
Design custom reports<br />
View data in st<strong>and</strong>ard forms - predefined within the Design<br />
Report action tab or by <strong>Elcometer</strong>.<br />
www.elcometer.com 36<br />
en
R<br />
en<br />
Connecting an <strong>Elcometer</strong> gauge to ElcoMaster 2.0 (BST)<br />
In order to download any gauge readings from the <strong>Elcometer</strong> <strong>456</strong> the<br />
user must first ‘Connect the gauge’ by clicking the ‘Connect <strong>Gauge</strong>’<br />
button on the Download action tab.<br />
Clicking ‘Connect <strong>Gauge</strong>’ starts<br />
the ElcoMaster 2.0 <strong>Gauge</strong><br />
Connect Wizard.<br />
<strong>The</strong> ElcoMaster 2.0 data<br />
management software allows<br />
users to download readings from<br />
a wide range of <strong>Elcometer</strong><br />
inspection gauges.<br />
Measurements such as surface<br />
profile, temperature, dewpoint,<br />
delta T, gloss <strong>and</strong> dry film<br />
thickness can all be downloaded,<br />
stored <strong>and</strong> reported using the<br />
ElcoMaster 2.0 software.<br />
<strong>The</strong>se instructions will inform the<br />
user how to download data from<br />
an <strong>Elcometer</strong> <strong>456</strong> coating<br />
thickness gauge. All appropriate<br />
<strong>Elcometer</strong> gauges can be<br />
downloaded in a similar way.<br />
Select the Dry Film <strong>Thickness</strong><br />
tab <strong>and</strong> press Next ><br />
ElcoMaster 2.0 supports the new<br />
<strong>Elcometer</strong> <strong>456</strong> (identified in the<br />
software as <strong>Elcometer</strong> <strong>456</strong>/4)<br />
<strong>and</strong> the <strong>Elcometer</strong> <strong>456</strong> Mk 3<br />
(<strong>Elcometer</strong> <strong>456</strong>/3).<br />
Select the <strong>Elcometer</strong> <strong>456</strong>/4<br />
tab <strong>and</strong> press Next><br />
37<br />
www.elcometer.com
R<br />
Select the appropriate<br />
connection method for the<br />
gauge<br />
<strong>Elcometer</strong> <strong>456</strong> Models B, S & T<br />
come supplied with both<br />
Bluetooth <strong>and</strong> USB data output.<br />
Users can purchase a USB<br />
B l u e t o o t h A d a p t o r f r o m<br />
<strong>Elcometer</strong> (Part number<br />
T99920130) which will provide a<br />
Bluetooth solution to computers<br />
without internal bluetooth fitted.<br />
If ElcoMaster 2.0 is installed onto<br />
a computer without Bluetooth<br />
c a p a b i l i t y, h o w e v e r, t h e<br />
Bluetooth tab is greyed out (as<br />
displayed in top image).<br />
Select the appropriate<br />
connection method<br />
Switch on the <strong>Elcometer</strong> <strong>456</strong><br />
Connect the USB cable or<br />
make sure that Bluetooth is<br />
switched on in the gauge via<br />
Menu/Bluetooth/Enable<br />
Bluetooth<br />
Bluetooth users should return<br />
their gauge to the main<br />
reading screen before<br />
continuing<br />
Press Next ><br />
After a screen prompt<br />
ElcoMaster 2.0 will search for<br />
<strong>and</strong> list all <strong>Elcometer</strong> <strong>456</strong><br />
gauges.<br />
www.elcometer.com 38<br />
en
R<br />
en<br />
39<br />
Each coating thickness gauge<br />
connected is now listed.<br />
Select the appropriate gauge<br />
<strong>and</strong> press Next ><br />
If connecting via Bluetooth, the<br />
gauges are identified using the<br />
Bluetooth ID - which can be seen<br />
o n t h e b o t t o m o f t h e<br />
Menu/Bluetooth screen.<br />
Connecting via bluetooth now<br />
requires the gauge to be ‘Paired’<br />
by keying in the gauge’s unique<br />
Bluetooth PIN Code. This code<br />
can be found on the bottom of the<br />
Menu/Bluetooth screen.<br />
Type in the Bluetooth PIN<br />
Code <strong>and</strong> press Next ><br />
ElcoMaster 2.0 will now validate<br />
the connection, press Finish<br />
when complete.<br />
<strong>The</strong> gauge is now connected <strong>and</strong><br />
ElcoMaster 2.0 will return the<br />
user to the Download action tab,<br />
<strong>and</strong> display the connected<br />
gauge.<br />
<strong>The</strong> same gauge can be<br />
connected by more than one<br />
method. Repeat the ‘Connect<br />
<strong>Gauge</strong>’ <strong>and</strong> follow the on screen<br />
prompts.<br />
By clicking on the Edit button, users can Delete the gauge from<br />
ElcoMaster 2.0, Name the gauge by a more familiar identification<br />
(Enter a User ID) or set up the gauge power up display screen<br />
(Change the Welcome screen). See Changing the Welcome Screen<br />
on page 57.<br />
www.elcometer.com
R<br />
Downloading Data from the <strong>Elcometer</strong> <strong>456</strong> (ST)<br />
Once the gauge has been connected to ElcoMaster 2.0 (see pages<br />
37-39), switch on your gauge <strong>and</strong> click the ‘Download Readings’<br />
button for the relevant gauge <strong>and</strong> connection method.<br />
<strong>The</strong> Download Wizard will now<br />
guide the user through the simple<br />
download readings process.<br />
ElcoMaster 2.0 allows users to<br />
download their gauge readings:<br />
Directly into ElcoMaster 2.0<br />
Directly into an Excel<br />
Spreadsheet<br />
into a text file for use in other<br />
software programs, or<br />
into a CQATK XML file<br />
Select the appropriate option<br />
Select or create a new project<br />
folder as required (ElcoMaster<br />
Batch File users)<br />
(Users wishing to export directly<br />
into Excel will also be asked to<br />
select a single or multiple<br />
spreadsheet option.)<br />
Select one or more individual<br />
batches or click on ‘All<br />
Batches’ <strong>and</strong> press Next ><br />
When downloading data into<br />
ElcoMaster 2.0 (as opposed to<br />
directly into a spreadsheet or a<br />
text file), downloaded data is<br />
stored in Projects - allowing<br />
users to clearly identify<br />
inspections.<br />
www.elcometer.com 40<br />
en
R<br />
en<br />
<strong>The</strong> User will be asked to select a<br />
project name from the list.<br />
Alternatively the user can create<br />
a <strong>New</strong> Project name.<br />
Select or create a new project<br />
<strong>and</strong> press Next ><br />
ElcoMaster 2.0 will provide a list<br />
of batch names, available to<br />
download from the gauge (Model<br />
S users will only see one batch at<br />
this point).<br />
Select a single, multiple or<br />
click on All Batches, as<br />
required, then press Next ><br />
Select or create a new folder<br />
to save the gauge’s data to<br />
In some cases users may have<br />
re-used an existing batch name<br />
in the gauge. <strong>The</strong> user should<br />
now chose either to select:<br />
Rename Duplicate Batches<br />
Rename All Batches, or<br />
Overwrite Existing Batches<br />
Select as required <strong>and</strong> press<br />
Next ><br />
<strong>The</strong> selected batches will now<br />
download. Once the data<br />
download has been completed,<br />
the user can check the ‘View<br />
Batches’ box <strong>and</strong> click Finish.<br />
Alternatively, click Finish <strong>and</strong><br />
select the View Action Tab<br />
41<br />
www.elcometer.com
R<br />
Viewing Data in ElcoMaster 2.0<br />
ElcoMaster 2.0 not only allows users to view <strong>and</strong> analyse data from a<br />
wide range of <strong>Elcometer</strong> gauges, but also allows users to manually<br />
input data as required.<br />
This instruction book provides a brief summary of some of the features<br />
of ElcoMaster 2.0, however users should read the ElcoMaster 2.0 help<br />
file for a complete guide.<br />
Data Tree Comm<strong>and</strong> Tabs Template Tabs<br />
en<br />
Live Reading Tab Measurement Data Window Graph Window<br />
www.elcometer.com 42
R<br />
en<br />
43<br />
By selecting the View Action Tab, users can instantly see their data.<br />
<strong>The</strong> View Action Tab can be broken down into 6 distinct areas:<br />
Data Tree Batches can be stored within folders ( ) in unique<br />
Project files ( ).<br />
By clicking on the Project filename, users can then<br />
complete unique project tags <strong>and</strong> batch tags as<br />
required.<br />
Each batch of data is identified by the type of inspection:<br />
Climate Batch<br />
Surface Profile Batch<br />
Dry Film <strong>Thickness</strong> Batch<br />
Material / Ultrasonic NDT Batch<br />
Clicking the computer mouse’s right button over a file<br />
or folder provides the user with the following functions:<br />
<strong>New</strong>:<br />
Allows users to:<br />
create a new Project ( )<br />
create a new Folder ( )<br />
import an Image ( )<br />
import a PDF Document ( )<br />
create a new batch type<br />
Cut, Copy & Paste:<br />
Cut, copy & paste inspection files <strong>and</strong> folders<br />
into other files or folders within the data tree.<br />
Delete, rename & move to:<br />
Allows delete, rename or move a file<br />
Combine & Split:<br />
Combine batches of the same type or split a<br />
batch into equal sizes or of equal time<br />
Archive & Restore:<br />
Archive <strong>and</strong> restore inspection data<br />
Print, PDF, Email & Export:<br />
Print, generate a PDF or export to Excel or a tab<br />
separated text file; the selected batch report<br />
www.elcometer.com
R<br />
By selecting the View Action Tab, users can instantly see their data.<br />
<strong>The</strong> View Action Tab can be broken down into 6 distinct areas:<br />
Comm<strong>and</strong> Tabs<br />
<strong>The</strong>re are 6 comm<strong>and</strong> tabs, which are the key<br />
functions required by the user.<br />
<strong>New</strong>:<br />
Allows users to:<br />
create a new Project ( )<br />
create a new Folder ( )<br />
import an Image ( )<br />
import a PDF, .edf, .txt. Document ( )<br />
create a new batch type<br />
Move to:<br />
Moves the selected items to a different folder or<br />
to a different page<br />
Print:<br />
Prints a report of the selected items<br />
PDF:<br />
Generates a PDF report of the selected items<br />
Email:<br />
Generates a PDF report of the selected items<br />
<strong>and</strong> attaches it to an email<br />
Export:<br />
Allows the user to export the selected items into<br />
Excel or as a text or CQATK XML file<br />
en<br />
www.elcometer.com 44
R<br />
en<br />
Template Tabs & Graph Window<br />
<strong>The</strong>re are currently 2 graphs within ElcoMaster 2.0;<br />
individuals <strong>and</strong> histogram. Clicking a template tab<br />
displays the relevant graph in the Graph Window<br />
When the Individuals Graph is displaying climate<br />
data, additional tabs appear on the right h<strong>and</strong> side,<br />
allowing the user to select a measurement to view<br />
from the following:<br />
RH: Relative Humidity<br />
Ts: SurfaceTemperature<br />
Ta: Air Temperature<br />
Td: Dewpoint Temperature<br />
TΔ: Delta T, (Ts-Td)<br />
Tdb: Dry Bulb Temperature<br />
Twb: Wet bulb Temperature<br />
SH: Specific Humidity<br />
Right mouse click on the individuals graph allows<br />
users to select the x-axis value between:<br />
Date & Time<br />
Relative Time (seconds)<br />
Reading Number Relative Time (minutes)<br />
Left clicking <strong>and</strong> dragging the mouse across the<br />
individuals chart allows users to zoom in on a<br />
specific area of the graph. <strong>The</strong> zoom can be reset by<br />
clicking on the icon.<br />
45<br />
www.elcometer.com
R<br />
Measurement Data Window<br />
<strong>The</strong> measurement data window provides the user with a<br />
range of information under 7 tabs:<br />
Details<br />
Provides useful information about the measurement gauge,<br />
serial number, batch name, date the batch was created, date<br />
<strong>and</strong> time of the first <strong>and</strong> last reading, etc.<br />
Statistics<br />
Provides the user with a wide range of statisitical<br />
calculations - mean, minimum <strong>and</strong> maximum reading,<br />
st<strong>and</strong>ard deviation, ±3σ, coefficient of variation, relevant<br />
information regarding the IMO PSPC analysis (coating<br />
thickness gauge readings only).<br />
Users can display the values on the graph by clicking the<br />
( ) icon <strong>and</strong> selecting a colour.<br />
Measurements<br />
Displays all the individual readings. Users can alter the<br />
display order (Date & Time, Relative Time (seconds),<br />
Relative Time (minutes) <strong>and</strong> Reading Number) by clicking on<br />
the column title.<br />
Individual measurements can be excluded/ included by right<br />
clicking on the specific measurement within the table.<br />
Measurements can also be amended by overtyping the<br />
relevant reading.<br />
Comments can be added to any measurement by clicking<br />
on, <strong>and</strong> then typing into, the relevant cell within the<br />
comments column.<br />
Limits<br />
Shows any limits that were used whilst taking the readings or<br />
allows users to apply limits. When set, measurements<br />
outside the limits are highlighted within the measurement<br />
tab.<br />
Users can display the values on the graph by clicking the<br />
( ) icon <strong>and</strong> selecting a colour.<br />
en<br />
www.elcometer.com 46
R<br />
en<br />
Measurement Data Window (continued)<br />
Notes<br />
Type <strong>and</strong> format a comment or note regarding the batch.<br />
Labels<br />
When a project has been set up with individual Project <strong>and</strong><br />
Batch labels (see page 43) users can amend or input the<br />
appropriate details. Project labels are applied to each file,<br />
folder <strong>and</strong> batch within the project; Batch labels apply to a<br />
specific batch. Both project <strong>and</strong> batch labels are fully user<br />
definable, however examples of project <strong>and</strong> batch labels are<br />
listed below:<br />
Project Label Examples:<br />
Client name, Structure name, Structure location,<br />
Batch Label Examples:<br />
Inspector name, shift number, area under<br />
consideration, strutt number, etc.<br />
Photos<br />
Photographs of the area under inspection, specific defects,<br />
etc can be attached to the measurement batch - simply by<br />
clicking the ( ) icon within the Photos tab.<br />
Descriptions or comments can be added below each image<br />
added.<br />
Double clicking on any photo opens up a view window<br />
allowing the user to copy the photo to clipboard (for pasting in<br />
another program, or save the photograph to another file.<br />
Data, photographs, labels etc. added within the measurement<br />
window tabs is automatically included on any reports, exports, pdf<br />
<strong>and</strong> emails generated.<br />
47<br />
www.elcometer.com
R<br />
Live <strong>Gauge</strong> Readings (BST)<br />
ElcoMaster 2.0 allows users to transfer data from a gauge as the<br />
readings are taken, to be stored in a batch within ElcoMaster 2.0.<br />
Live gauge readings can be recorded via Bluetooth or USB<br />
connections<br />
Once the gauge has been connected<br />
to ElcoMaster 2.0 (see pages 37-39),<br />
switch on your gauge <strong>and</strong> click the<br />
‘Live Readings’ button on the View<br />
Action Tab<br />
Select the appropriate batch (or<br />
create a new batch) for the<br />
readings to be recorded into<br />
ElcoMaster 2.0 will now open up<br />
the Live Readings display, <strong>and</strong> ask<br />
the user to ‘ Connect <strong>Gauge</strong>’<br />
Click on the Connect <strong>Gauge</strong><br />
Select a gauge from the list<br />
Select the relevant connection<br />
method (if more than one<br />
connection method has been set<br />
up (see pages 37-39)<br />
ElcoMaster 2.0 will then link with<br />
the selected gauge <strong>and</strong>, when ready<br />
display the gauge information within<br />
the Live Readings window.<br />
At any time the user can select a<br />
different batch to change where<br />
the next reading is taken.<br />
Click the button or switch<br />
of the gauge to disconnect<br />
en<br />
www.elcometer.com 48
R<br />
en<br />
Design Collect<br />
<strong>The</strong> ‘Design Collect’ function allows users to set up a collection<br />
template to guide Inspectors where, <strong>and</strong> in which order, readings<br />
should be taken. This image can be used as a collection guide in<br />
‡<br />
ElcoMaster 2.0 or transferred to an Android mobile phone or<br />
tablet using ElcoMaster for Android, see pages 51 - 52.<br />
Click on the Design Collect tab <strong>and</strong><br />
select an existing template or click<br />
‘<strong>New</strong> Design’<br />
When creating a new design you will<br />
be asked to:<br />
- Enter a name <strong>and</strong> description<br />
- Select the Batch Type; Profile,<br />
Material <strong>Thickness</strong> or DFT<br />
- Add the required image to collect<br />
readings against<br />
- Specify the number of readings to be<br />
collected<br />
- Enter relevant Limits<br />
- Request a prompt to begin the next set<br />
of readings or begin automatically<br />
- Choose to create a new batch for each<br />
set of readings or create a single batch<br />
with multiple reading sets<br />
Click ‘Finish’ to begin the design<br />
To design the ‘collect’ image sequence,<br />
simply click <strong>and</strong> hold each 'reading'<br />
circle in turn, drag onto the image where<br />
readings are to be taken <strong>and</strong> adjust the<br />
size accordingly.<br />
Once complete click ‘Save’ <strong>and</strong> click the<br />
'X' button in the top right to close the<br />
design window<br />
‡<br />
49<br />
To use Design Collect, switch ElcoMaster 2.0 to Advanced Mode by clicking on the right arrow, <strong>and</strong> select<br />
‘Yes’ to confirm.<br />
www.elcometer.com
R<br />
Using a Collect Design<br />
Select the ‘View’ tab<br />
Select a folder or project <strong>and</strong> click<br />
the ‘<strong>New</strong>’ button<br />
Move the cursor to relevant batch<br />
type, an additional window will<br />
appear, select the required Collect<br />
Design<br />
A new batch will be created. Unlike<br />
st<strong>and</strong>ard batches it will have an<br />
additional tab with the same name as<br />
the Collect Design, click on this to show<br />
your design. To begin collection,<br />
Click on ‘Connect <strong>Gauge</strong>’ in the ‘Live<br />
Readings’ window<br />
a<br />
Select a gauge from the list<br />
Select the relevant connection<br />
method<br />
ElcoMaster 2.0 will link the selected<br />
gauge <strong>and</strong>, when ready, display the<br />
gauge information within the Live<br />
Readings window.<br />
Once connected, green arrows will<br />
flash around the first ‘reading’ circle to<br />
measure. When a measurement is<br />
taken, the ‘reading’ circle will change to<br />
b<br />
show the measured value , <strong>and</strong> the<br />
green arrows will move to the next<br />
reading.<br />
en<br />
a<br />
b<br />
<strong>The</strong> gauge must be connected to ElcoMaster 2.0 before it will appear in the list, see pages 37 - 39<br />
<strong>The</strong> ‘reading’ circle will be green if the measurement is within set limits <strong>and</strong> red, if outside limits.<br />
www.elcometer.com 50
R<br />
en<br />
9 ELCOMASTER FOR ANDROID (BST)<br />
ElcoMaster for Android is free software for use on all smart phones<br />
<strong>and</strong> tablets running Android 2.1 or above.<br />
Compatible with Bluetooth versions of the:<br />
- <strong>Elcometer</strong> <strong>456</strong> <strong>Coating</strong> <strong>Thickness</strong> <strong>Gauge</strong><br />
- <strong>Elcometer</strong> 224 Surface Profile <strong>Gauge</strong><br />
- <strong>Elcometer</strong> 319 Dewpoint Meter<br />
Store live readings directly on the phone <strong>and</strong> save<br />
them into batches.<br />
Download batches straight to a mobile phone or<br />
tablet, allowing data analysis immediately on site.<br />
Transfer inspection data from mobile to PC for further<br />
analysis <strong>and</strong> reporting.<br />
Analyse data via sequential readings,<br />
statistics, charts & histograms or on<br />
images.<br />
51<br />
www.elcometer.com
R<br />
Download collection images created using the<br />
‘Design Collect’ function in ElcoMaster 2.0 to<br />
indicate where <strong>and</strong> in which order readings<br />
should be taken.<br />
en<br />
Take photographs <strong>and</strong> add them to<br />
batch readings at the click of a button.<br />
Map readings on to a Google Map,<br />
photographs or diagrams.<br />
Installing ElcoMaster for Android<br />
To install ElcoMaster for Android simply scan the QR code or<br />
download via www.elcometer.com or Google Play,<br />
https://play.google.com/store/apps/detailsid=com.elcometer.elcomaster,<br />
<strong>and</strong> follow the on screen instructions.<br />
www.elcometer.com 52
R<br />
en<br />
10 CALIBRATING THE ELCOMETER <strong>456</strong> (EBST)<br />
<strong>The</strong> <strong>Elcometer</strong> <strong>456</strong> gauge is available in 4 model versions. Each version<br />
has a number of calibration methods as below:<br />
Method Model E Model B Model S Model T<br />
Factory ■ ■ ■ ■<br />
Rough / 2 Point ■ ■ ■ ■<br />
Zero ■ ■ ■<br />
Smooth ■ ■ ■<br />
Zero Offset ■ ■<br />
Auto ■ ■<br />
For full descriptions of each calibration method please see page 17 - 18.<br />
<strong>The</strong> <strong>Elcometer</strong> <strong>456</strong> has on screen instructions to guide the user through<br />
each calibration method.<br />
Calibrating the <strong>Elcometer</strong> <strong>456</strong> (Model E)<br />
Press the Cal softkey <strong>and</strong> follow the on screen instructions.<br />
a b c d<br />
e<br />
53<br />
h g f<br />
www.elcometer.com
R<br />
To calibrate the <strong>Elcometer</strong> <strong>456</strong> Model E on rough surfaces:<br />
Select two foil values - one above the target dry film thickness value<br />
(thick) <strong>and</strong> one below (thin)<br />
Follow the on screen instructions<br />
more than one reading can be taken on each foil value - the average<br />
of the readings is displayed (screens c <strong>and</strong> g on page 53).<br />
To calibrate the <strong>Elcometer</strong> <strong>456</strong> Model E on smooth surfaces:<br />
Select a foil value which is above the target dry film thickness value<br />
(thick) <strong>and</strong> the uncoated base substrate (thin).<br />
When the gauge instructs the user to place the gauge onto the thin foil<br />
(calibration step 2), place the probe on the uncoated base <strong>and</strong> adjust<br />
the thickness value to 0.0µm (mils)<br />
To calibrate the <strong>Elcometer</strong> <strong>456</strong> Model E using the Factory calibration:<br />
Select either Menu/Reset/Metric <strong>Gauge</strong> or Menu/Reset/Imperial<br />
<strong>Gauge</strong>.<br />
Taking multiple readings on each foil will increase the accuracy of the<br />
calibration.<br />
Calibrating the <strong>Elcometer</strong> <strong>456</strong> (BST)<br />
Press the Cal softkey to open the Calibration<br />
menu<br />
As the <strong>Elcometer</strong> <strong>456</strong> Model B, S <strong>and</strong> T have<br />
multiple calibration methods;<br />
if the Calibration Method icon displayed is<br />
as required, press the Select softkey <strong>and</strong><br />
follow the on screen instructions<br />
the user can amend the calibration method,<br />
by selecting the appropriate method from<br />
within the Cal/Cal Method menu <strong>and</strong> press<br />
the Select softkey before selecting<br />
Calibrate from the Calibration menu<br />
en<br />
www.elcometer.com 54
R<br />
en<br />
to select the factory calibration press<br />
Cal/Factory Calibration<br />
<strong>The</strong> factory calibration returns the gauge to<br />
the calibration set up during manufacture<br />
<strong>and</strong> final test. <strong>The</strong> factory calibration is a<br />
smooth surface calibration using factory<br />
reference probes<br />
When the correct calibration method has been<br />
selected, press Cal/Calibrate <strong>and</strong> follow the on<br />
screen instructions.<br />
Taking multiple readings on each foil will<br />
increase the accuracy of the calibration.<br />
Note: Auto, ISO, SSPC PA2, Swedish <strong>and</strong><br />
Australian cal methods - where available -<br />
can only be selected whilst in batching as<br />
memory is required.<br />
Testing (BST) & Validating (ST) Calibrations<br />
<strong>The</strong> calibration of any <strong>Elcometer</strong> <strong>456</strong> B, S<br />
or T gauge can be checked at any time,<br />
without affecting any statistics or batch<br />
memory.<br />
By selecting Cal/Test Calibration the user<br />
can check the calibration of the gauge by<br />
comparing the reading value displayed<br />
versus the measured foil or coated<br />
st<strong>and</strong>ard value. (ST)<br />
Pressing the Validate Softkey will update<br />
the date <strong>and</strong> time of the last calibration.<br />
(ST)<br />
Each batch can have its own unique calibration,<br />
simply calibrate each batch independently.<br />
For more information on Batching see page 23.<br />
55<br />
www.elcometer.com
R<br />
Calibration lock (BST)<br />
To avoid accidental amendments to the calibration settings switching<br />
on the Cal/Calibration Lock feature’ locks’ the user from undertaking<br />
any changes to the calibration without first un-checking the<br />
Cal/Calibration Lock feature.<br />
When the Calibration Lock is enabled, users can still test the<br />
calibration via Cal/Test Calibration but will be unable to validate or<br />
re-calibrate the gauge.<br />
<strong>The</strong> calibration can also be locked using a PIN Code.<br />
Locking & Unlocking the Calibration Lock using a PIN Code (BST)<br />
To set a calibration lock PIN code:<br />
Press the Menu softkey <strong>and</strong> select<br />
Setup/Calibration Lock<br />
Set the four digit PIN Code using the éê<br />
softkeys to select 0 to 9 <strong>and</strong> the èsoftkey to<br />
†<br />
move from the first to the fourth digit<br />
Press Set, Escape to cancel or Adjust to amend<br />
the PIN code<br />
To unlock the calibration:<br />
Press the Cal softkey <strong>and</strong> select Calibration Lock<br />
Enter the four digit PIN Code, if set, using the éê<br />
softkeys to select<br />
†<br />
0 to 9 <strong>and</strong> the èsoftkey to move from the first to the fourth digit<br />
Press Ok or Escape to cancel<br />
To disable the calibration lock PIN Code:<br />
Press the Menu softkey <strong>and</strong> select Setup/Calibration Lock<br />
Enter the four digit PIN Code<br />
4Should the user forget or loose the PIN code, the PIN can be<br />
disabled via ElcoMaster 2.0. Using the USB cable, simply connect<br />
the gauge to a PC with ElcoMaster 2.0 Version 2.0.34 or higher<br />
installed <strong>and</strong> select Edit/Clear Calibration PIN.<br />
†<br />
<strong>The</strong> èsoftkey will appear when the “ X “ changes to a number.<br />
www.elcometer.com 56<br />
en
R<br />
en<br />
11 CHANGING THE WELCOME SCREEN (BST)<br />
Each time the <strong>Elcometer</strong> <strong>456</strong> gauge is switched on, the <strong>Elcometer</strong> logo is<br />
displayed. Users can add their own logo, image or identification details as<br />
required via ElcoMaster 2.0.<br />
Once the gauge has been connected<br />
to ElcoMaster 2.0 (see pages 37-39),<br />
to add a user welcome screen<br />
Switch on your gauge<br />
Select the Download Action Tab<br />
Click the ‘Edit’ button on the right<br />
h<strong>and</strong> side of the appropriate<br />
gauge<br />
Select ‘Change Welcome Screen’<br />
from the drop down menu<br />
Select the required image, <strong>and</strong> or<br />
add user specific text <strong>and</strong> press<br />
Next ><br />
Select ‘Stretch Image’ or ‘Centre<br />
Image’ as required <strong>and</strong> press<br />
Next ><br />
Select the appropriate connection<br />
method <strong>and</strong> press Next ><br />
ElcoMaster 2.0 will now download<br />
the selected image into the gauge.<br />
This may take some time.<br />
57<br />
www.elcometer.com
R<br />
12 GAUGE FIRMWARE UPDATES (BST)<br />
Each time the <strong>Elcometer</strong> <strong>456</strong> gauge is connected to ElcoMaster 2.0 (see<br />
pages 37-39); if the computer has access to the internet, ElcoMaster 2.0<br />
automatically checks to see if there are any gauge firmware updates for<br />
the connected gauge.<br />
ElcoMaster 2.0 will inform the user when<br />
there are any firmware updates available<br />
for the connected gauge by displaying<br />
the ‘Update <strong>Gauge</strong>’ button.<br />
Please note that users can update the<br />
gauge firmware via a USB connection<br />
only .<br />
Clicking the ‘Update <strong>Gauge</strong>’ button will<br />
display a list of the ‘Fixes’ in all the<br />
updates that have been released since<br />
the gauge’s last upgrade.<br />
en<br />
Press Next > to continue.<br />
Warning - updating the gauge firmware<br />
will result in all readings, batches,<br />
statistics <strong>and</strong> calibrations being deleted.<br />
<strong>The</strong> gauge will also be returned to the<br />
factory default settings.<br />
Press Next > to commence<br />
downloading the latest firmware to the<br />
<strong>Elcometer</strong> <strong>456</strong><br />
Warning - Do not switch off the computer<br />
or disconnect the gauge during the<br />
gauge upgrade.<br />
Typical firmware updates include gauge enhancements, amendments,<br />
language updates, etc. Users cannot upgrade a Model B to a Model S for<br />
example, nor can a ferrous gauge be upgraded to a dual ferrous/nonferrous<br />
gauge.<br />
www.elcometer.com 58
R<br />
en<br />
13 GAUGE ICONS & ERROR CODES (EBST)<br />
Statistics<br />
Icon Description Model<br />
Number of Readings BST<br />
Mean (average)<br />
BST<br />
St<strong>and</strong>ard Deviation BST<br />
Highest Reading<br />
Lowest Reading<br />
Coefficient of Variation<br />
<strong>Elcometer</strong> Index Value (EIV)<br />
NDFT Value (Nominal Dry Film <strong>Thickness</strong>)<br />
Percentage of readings greater than or equal to the<br />
NDFT Value<br />
Percentage of readings between 0.9 x NDFT <strong>and</strong> the<br />
NDFT value<br />
BST<br />
BST<br />
BST<br />
BST<br />
ST<br />
ST<br />
ST<br />
90/10 Rule Pass ST<br />
90/10 Rule Fail: 90% of readings are greater than the<br />
NDFT value<br />
90/10 Rule Fail: At least one measurement is below 0.9<br />
x NDFT. (If a number between 1 <strong>and</strong> 10 is displayed, insufficient<br />
measurements have been taken to be statistically valid)<br />
High <strong>and</strong> Low Limit Set<br />
Low Limit Set<br />
High Limit Set<br />
Number of readings above Limit<br />
Number of readings below Limit<br />
ST<br />
ST<br />
ST<br />
ST<br />
ST<br />
ST<br />
ST<br />
59<br />
www.elcometer.com
R<br />
Icon Description Model<br />
en<br />
Low Limit Set: Reading outside Low Limit<br />
High Limit Set: Reading outside High Limit<br />
Low & High Limit Set: Reading outside Low Limit<br />
Low & High Limit Set: Reading outside High Limit<br />
ST<br />
ST<br />
ST<br />
ST<br />
Calibration<br />
Icon Description Model<br />
Zero Calibration Method BST<br />
Smooth Surface Calibration Method<br />
BST<br />
Rough/ 2 Point Calibration Method EBST<br />
Zero Offset Calibration Method<br />
Auto Calibration Method<br />
ISO 19840 Calibration Method<br />
SSPC PA2 Calibration Method<br />
Swedish St<strong>and</strong>ards Calibration Method<br />
Australian St<strong>and</strong>ards Calibration Method<br />
Calibration Check<br />
Reading outside Calibration<br />
Calibration Lock<br />
ST<br />
ST<br />
ST<br />
ST<br />
ST<br />
ST<br />
T<br />
T<br />
BST<br />
www.elcometer.com 60
R<br />
en<br />
Batching<br />
Icon Description Model<br />
Batch Type: Normal ST<br />
Batch Type: Counted Average ST<br />
Batch Type: IMO PSPC ST<br />
Deleted Reading - Tagged ST<br />
General<br />
Icon Description Model<br />
Bluetooth Not Connected BST<br />
Bluetooth Connected BST<br />
USB Connected BST<br />
Ferrous Probe on Ferrous Substrate<br />
Non-Ferrous Probe on Non-Ferrous Substrate<br />
Dual FNF Probe on Ferrous Substrate<br />
Dual FNF Probe on Non-Ferrous Substrate<br />
Daily Alarm Set<br />
Interval Alarm Set<br />
Battery Life Indicator<br />
Replace Batteries<br />
User Selectable Feature: Switched Off<br />
User Selectable Feature: Switched On<br />
Beep Volume Setting<br />
EBST<br />
BST<br />
EBST<br />
EBST<br />
ST<br />
T<br />
EBST<br />
EBST<br />
EBST<br />
EBST<br />
EBST<br />
61<br />
www.elcometer.com
R<br />
Error Codes<br />
Under certain conditions, the gauge will display error messages. <strong>The</strong>se<br />
message are cleared by pressing any key. <strong>The</strong> cause of the error should<br />
be corrected before proceeding.<br />
en<br />
Message<br />
Cause / Action<br />
#1 - Probe Probe to gauge communication failure.<br />
Integral <strong>Gauge</strong>s: Contact <strong>Elcometer</strong>.<br />
Separate <strong>Gauge</strong>s: Remove probe <strong>and</strong> refit. If error<br />
persists, contact <strong>Elcometer</strong>.<br />
#2 - Probe Corrupt data output from probe.<br />
Integral <strong>Gauge</strong>s: Contact <strong>Elcometer</strong>.<br />
Separate <strong>Gauge</strong>s: Replace probe. If error persists,<br />
contact <strong>Elcometer</strong>.<br />
#3 - Probe Internal Error - contact <strong>Elcometer</strong>.<br />
Probe Unsupported<br />
Probe Changed<br />
Unstable Reading<br />
Value Too Large<br />
Calibration Error<br />
Bluetooth PC Reply<br />
Error - EEPROM Write<br />
No probe connected. Connect probe.<br />
Probe is Dual FNF but gauge is ferrous or non-ferrous<br />
only or Mk 3 probe is being used with a Mk 4 gauge.<br />
Use correct probe.<br />
Probe has been changed during a calibration<br />
procedures. Calibration adjustment required.<br />
External electromagnetic interference or gauge is faulty.<br />
Isolate from electromagnetic interference. If error<br />
persists, contact <strong>Elcometer</strong>.<br />
Calculated value is too large to be displayed. Contact<br />
<strong>Elcometer</strong>.<br />
Incorrect calibration calculation. Re-calibrate. If error<br />
persists, contact <strong>Elcometer</strong>.<br />
Bluetooth link working at limit of its range. PC is busy<br />
running other applications. Interference. PC<br />
application doesn’t send replies. Move gauge closer to<br />
PC. Shutdown other applications. Remove source of<br />
interference. If error persists, contact <strong>Elcometer</strong>.<br />
<strong>Gauge</strong> EEPROM communication error.<br />
If problem persists, EEPROM is faulty.<br />
www.elcometer.com 62
14 GAUGE MENU STRUCTURES (EBST)<br />
Please find below a simplified diagram of each <strong>Elcometer</strong> <strong>456</strong> model’s<br />
menu structures.<br />
<strong>Elcometer</strong> <strong>456</strong> Model T<br />
Select Statistics<br />
All PSPC Values<br />
Number of Readings<br />
Mean<br />
Lowest Reading<br />
Highest Reading<br />
St<strong>and</strong>ard Deviation<br />
Coefficient of Variation<br />
Low Limit Value<br />
Number Below Limit<br />
High Limit Value<br />
Number Above Limit<br />
<strong>Elcometer</strong> Index Value<br />
NDFT Value<br />
%>=NDFT<br />
% 90-100% NDFT<br />
IMO 90:10 Pass/Fail<br />
○<br />
○<br />
○<br />
○<br />
○<br />
○<br />
○<br />
○<br />
○<br />
○<br />
○<br />
○<br />
○<br />
○<br />
○<br />
○<br />
Zero<br />
Smooth<br />
Rough / 2 Point<br />
Zero Offset<br />
Auto<br />
Cal Method<br />
○<br />
○<br />
○<br />
○<br />
○<br />
Cal Memory n<br />
Saved hh:mm dd/mm/yy<br />
Select<br />
Calibrate<br />
Cal Method<br />
Test Calibration<br />
Rename Cal Memory n<br />
View Calibration Data<br />
Clear Cal Memory n<br />
where n = 1, 2, or 3<br />
Menu<br />
Delete Last Reading<br />
Setup<br />
Set Limits<br />
Set Alarm<br />
Bluetooth<br />
About<br />
Reset<br />
Emergency Light<br />
Statistics<br />
Clear Statistics<br />
View Selected<br />
View All<br />
Select Statistics<br />
Show Statistics on LCD<br />
Show Graph on LCD<br />
Batch<br />
Memory Free<br />
<strong>New</strong> Batch<br />
Open Existing Batch<br />
Exit Batching<br />
Rename Batch<br />
Copy Batch<br />
Clear Batch<br />
Review Batch<br />
Delete Batch<br />
Deleted Reading<br />
Calibration<br />
Calibrate<br />
Cal Method<br />
Cal Memory 1<br />
Cal Memory 2<br />
Cal Memory 3<br />
Factory Calibration<br />
Calibration Lock<br />
Test Calibration<br />
Calibration Check<br />
○<br />
○<br />
Units<br />
Language<br />
Time <strong>and</strong> Date<br />
Beep Volume<br />
Display<br />
Probe<br />
<strong>Gauge</strong> Auto Off<br />
Calibration Lock<br />
Setup<br />
Set Limits<br />
Enable Limits<br />
Set Upper<br />
Set Lower<br />
Set NDFT<br />
Daily Alarm<br />
Set Alarm Time<br />
Interval Alarm<br />
Set Interval<br />
Set Alarm<br />
Bluetooth<br />
Enable Bluetooth<br />
Statistics<br />
Batch Information<br />
Calibration Information<br />
Readings<br />
Graph<br />
○<br />
○<br />
○<br />
○<br />
○<br />
Auto FNF<br />
Ferrous F<br />
Non Ferrous N<br />
Probe Switch On<br />
Ferrous F1<br />
Ferrous F2<br />
Time <strong>and</strong> Date<br />
Set Time<br />
Set Date<br />
Set Format<br />
Display Time <strong>and</strong> Date ○<br />
Display<br />
Screen Brightness<br />
Screen Timeout<br />
Auto Display Rotation<br />
Opening Screen<br />
Zero<br />
Smooth<br />
Rough / 2 Point<br />
Zero Offset<br />
Auto<br />
ISO<br />
SSPC PA2<br />
Swedish<br />
Australian<br />
Probe<br />
Probe<br />
○<br />
○<br />
○<br />
○<br />
○<br />
○<br />
○<br />
○<br />
○<br />
○<br />
○<br />
○<br />
○<br />
○<br />
○<br />
○<br />
○<br />
○<br />
○<br />
○<br />
○<br />
○<br />
○<br />
○<br />
†<br />
†<br />
R<br />
Deleted Reading<br />
Delete With Tag<br />
Delete Without Tag<br />
○<br />
○<br />
en<br />
µm<br />
mm<br />
mils<br />
inch<br />
Units<br />
○<br />
○<br />
Bluetooth ID 1221-110810<br />
Calibration Lock<br />
Bluetooth Code 01234 Enable PIN<br />
About<br />
Batch Calibration<br />
<strong>Gauge</strong> Information<br />
Calibrate<br />
Probe Information<br />
Cal Method<br />
Contact<br />
Use Cal Memory 1<br />
Patents<br />
Use Cal Memory 2<br />
Use Cal Memory 3<br />
<strong>New</strong> Batch<br />
Open Batch 1<br />
Batch Type<br />
Rename Batch 1<br />
Normal<br />
Batch Calibration<br />
Counted Average<br />
Batch Type<br />
IMO PSPC<br />
Batch Limits<br />
Batch Limits<br />
Fixed Batch Size<br />
Enable Limits<br />
Set Upper<br />
Review Batch<br />
Set Lower<br />
Batch 1<br />
Set NDFT<br />
Cal Method<br />
○<br />
○<br />
○<br />
○<br />
†<br />
Menu displayed is dependent on the probe connected<br />
63<br />
www.elcometer.com
14 GAUGE MENU STRUCTURES CONTINUED (EBST)<br />
<strong>Elcometer</strong> <strong>456</strong> Model S<br />
Select Statistics<br />
All PSPC Values<br />
Number of Readings<br />
Mean<br />
Lowest Reading<br />
Highest Reading<br />
St<strong>and</strong>ard Deviation<br />
Coefficient of Variation<br />
Low Limit Value<br />
Number Below Limit<br />
High Limit Value<br />
Number Above Limit<br />
<strong>Elcometer</strong> Index Value<br />
NDFT Value<br />
%>=NDFT<br />
% 90-100% NDFT<br />
IMO 90:10 Pass/Fail<br />
Cal Method<br />
Zero<br />
Smooth<br />
Rough / 2 Point<br />
Zero Offset<br />
Auto<br />
○<br />
○<br />
○<br />
○<br />
○<br />
○<br />
○<br />
○<br />
○<br />
○<br />
○<br />
○<br />
○<br />
○<br />
○<br />
○<br />
○<br />
○<br />
○<br />
○<br />
○<br />
Menu<br />
Delete Last Reading<br />
Setup<br />
Set Limits<br />
Set Alarm<br />
Bluetooth<br />
About<br />
Reset<br />
Emergency Light<br />
Statistics<br />
Clear Statistics<br />
View Selected<br />
View All<br />
Select Statistics<br />
Show Statistics on LCD<br />
Show Graph on LCD<br />
Batch<br />
Memory Free<br />
<strong>New</strong> Batch<br />
Open Existing Batch<br />
Exit Batching<br />
Clear Batch<br />
Review Batch<br />
Delete Batch<br />
Deleted Reading<br />
Calibration<br />
Calibrate<br />
Cal Method<br />
Factory Calibration<br />
Calibration Lock<br />
Test Calibration<br />
○<br />
○<br />
○<br />
Setup<br />
Units<br />
Language<br />
Time <strong>and</strong> Date<br />
Beep Volume<br />
Display<br />
Probe<br />
<strong>Gauge</strong> Auto Off<br />
Calibration Lock<br />
Set Limits<br />
Enable Limits<br />
Set Upper<br />
Set Lower<br />
Set NDFT<br />
○<br />
○<br />
Set Alarm<br />
Daily Alarm<br />
Set Alarm Time<br />
○<br />
Bluetooth<br />
Enable Bluetooth<br />
○<br />
Bluetooth ID 1221-110810<br />
Bluetooth Code 01234<br />
About<br />
<strong>Gauge</strong> Information<br />
Probe Information<br />
Contact<br />
Patents<br />
<strong>New</strong> Batch<br />
Open Batch<br />
Batch Calibration<br />
Batch Type<br />
Deleted Reading<br />
Delete With Tag<br />
Delete Without Tag<br />
○<br />
○<br />
Time <strong>and</strong> Date<br />
Set Time<br />
Set Date<br />
Set Format<br />
Display Time <strong>and</strong> Date ○<br />
Display<br />
Screen Brightness<br />
Screen Timeout<br />
Auto Display Rotation<br />
Opening Screen<br />
○<br />
○<br />
Probe<br />
Auto FNF<br />
Ferrous F<br />
Non Ferrous N<br />
Probe Switch On<br />
○<br />
○<br />
○<br />
○<br />
Ferrous F1<br />
Ferrous F2<br />
Probe<br />
○<br />
○<br />
Batch Calibration<br />
Calibrate<br />
Cal Method<br />
Batch Type<br />
Normal<br />
Counted Average<br />
IMO PSPC<br />
○<br />
○<br />
○<br />
Cal Method<br />
Zero<br />
Smooth<br />
Rough / 2 Point<br />
Zero Offset<br />
Auto<br />
ISO<br />
SSPC PA2<br />
Swedish<br />
Australian<br />
○<br />
○<br />
○<br />
○<br />
○<br />
○<br />
○<br />
○<br />
○<br />
†<br />
†<br />
R<br />
µm<br />
mm<br />
mils<br />
inch<br />
Units<br />
○<br />
○<br />
○<br />
○<br />
en<br />
Calibration Lock<br />
Enable PIN<br />
†<br />
Menu displayed is dependent on the probe connected<br />
www.elcometer.com 64
14 GAUGE MENU STRUCTURES CONTINUED (EBST)<br />
<strong>Elcometer</strong> <strong>456</strong> Model B<br />
Select Statistics<br />
Number of Readings<br />
Mean<br />
Lowest Reading<br />
Highest Reading<br />
St<strong>and</strong>ard Deviation<br />
Coefficient of Variation<br />
<strong>Elcometer</strong> Index Value<br />
Cal Method<br />
Zero<br />
Smooth<br />
Rough / 2 Point<br />
○<br />
○<br />
○<br />
○<br />
○<br />
○<br />
○<br />
○<br />
○<br />
○<br />
Menu<br />
Delete Last Reading<br />
Setup<br />
Bluetooth<br />
About<br />
Reset<br />
Emergency Light<br />
Statistics<br />
Clear Statistics<br />
View Selected<br />
View All<br />
Select Statistics<br />
Show Statistics on LCD<br />
○<br />
Data<br />
Last Five Readings<br />
50.5 µm<br />
52.3 µm<br />
51.0 µm<br />
51.8 µm<br />
51.5 µm<br />
Escape Delete Ok<br />
Calibration<br />
Calibrate<br />
Cal Method<br />
Factory Calibration<br />
Calibration Lock<br />
Test Calibration<br />
○<br />
Setup<br />
Units<br />
Language<br />
Beep Volume<br />
Display<br />
Probe<br />
<strong>Gauge</strong> Auto Off<br />
Calibration Lock<br />
○<br />
Bluetooth<br />
Enable Bluetooth<br />
○<br />
Bluetooth ID 1221-110810<br />
Bluetooth Code 01234<br />
About<br />
<strong>Gauge</strong> Information<br />
Probe Information<br />
Contact<br />
Patents<br />
Display<br />
Screen Brightness<br />
Screen Timeout<br />
Auto Display Rotation<br />
Opening Screen<br />
Probe<br />
Auto FNF<br />
Ferrous F<br />
Non Ferrous N<br />
Probe Switch On<br />
Ferrous F1<br />
Ferrous F2<br />
Probe<br />
○<br />
○<br />
○<br />
○<br />
○<br />
○<br />
○<br />
○<br />
†<br />
†<br />
R<br />
en<br />
µm<br />
mm<br />
mils<br />
inch<br />
Units<br />
Calibration Lock<br />
Enable PIN<br />
○<br />
○<br />
○<br />
○<br />
†<br />
Menu displayed is dependent on the probe connected<br />
65<br />
www.elcometer.com
R<br />
14 GAUGE MENU STRUCTURES CONTINUED (EBST)<br />
<strong>Elcometer</strong> <strong>456</strong> Model E<br />
en<br />
Setup<br />
About<br />
Reset<br />
Menu<br />
Calibration<br />
Pressing the Cal Softkey<br />
starts the calibration process<br />
Setup<br />
Units<br />
Language<br />
Beep Volume<br />
Display<br />
Probe Switch On<br />
About<br />
<strong>Gauge</strong> Information<br />
Probe Information<br />
Contact<br />
Patents<br />
○<br />
µm<br />
mm<br />
mils<br />
inch<br />
Units<br />
Display<br />
Screen Brightness<br />
Screen Timeout<br />
www.elcometer.com 66
R<br />
en<br />
15 ABOUT IMO PSPC (ST)<br />
<strong>The</strong> <strong>Elcometer</strong> <strong>456</strong> is capable of<br />
displaying PSPC readings<br />
according to the 90/10 rule as<br />
defined in the International<br />
Maritime Organisation (IMO)<br />
requirements.<br />
To PASS 90/10<br />
At least 90% of<br />
all readings must<br />
be in this zone...<br />
NDFT<br />
90/10 FAILED if<br />
Less than 90% of<br />
all readings are in<br />
this zone...<br />
To pass the 90/10 rule:<br />
AND<br />
OR<br />
At least 90% of all thickness<br />
measurements shall be greater<br />
than or equal to the NDFT value<br />
<strong>and</strong>;<br />
0.9 x NDFT<br />
N o n e o f t h e r e m a i n i n g<br />
measurements shall be below 0.9<br />
x NDFT.<br />
... no readings<br />
must be in this<br />
zone<br />
COATING<br />
SUBSTRATE<br />
... any readings<br />
are in this zone<br />
While you are taking readings with PSPC selected, your gauge will advise<br />
you whether the readings are passing or failing the rule:<br />
When the PSPC statistics are in the passing state, the reading<br />
value is white <strong>and</strong> the green LED flashes;<br />
When the PSPC statistics are in the percent fail state, the reading<br />
value is white <strong>and</strong> both the red <strong>and</strong> green LEDs flash;<br />
When the PSPC statistics are in the reading fail state, the reading<br />
value is red <strong>and</strong> the red LED flashes.<br />
Note: <strong>The</strong> default value for NDFT is 320µm (12.6mils) - from PSPC for Ballast Water<br />
Tanks.<br />
Note: <strong>The</strong> 90/10 rule is not compatible with the counted average data collection method<br />
(see Batching on page 23) <strong>and</strong> cannot be used when saving readings using this method.<br />
67<br />
www.elcometer.com
R<br />
16 GAUGE TECHNICAL SPECIFICATIONS (EBST)<br />
Display Information<br />
60mm (2.4") QVGA colour TFT display, 320 x 240 pixels<br />
en<br />
Battery Type<br />
2 x AA dry cell batteries, rechargeable batteries can also be used<br />
Battery Life<br />
<strong>Gauge</strong> Dimensions<br />
(h x w x d)<br />
<strong>Gauge</strong> Weight<br />
(including supplied batteries)<br />
~24 hours of continuous use at 1 reading per second<br />
Using default settings & lithium batteries supplied, alkaline or rechargeable<br />
batteries may differ<br />
Integral: 141 x 73 x 37mm (5.55 x 2.87 x 1.46")<br />
Separate: 141 x 73 x 37mm (5.55 x 2.87 x 1.46")<br />
Integral: 156g (5.5oz)<br />
Separate: 161g (5.68oz)<br />
Operating Temperature -10 to 50°C (14 to 122°F)<br />
73mm (2.87")<br />
37mm (1.46")<br />
141mm (5.55")<br />
60mm (2.4")<br />
www.elcometer.com 68
R<br />
en<br />
17 PROBE TECHNICAL SPECIFICATIONS (EBST)<br />
Available in a number of designs <strong>and</strong> scale ranges, all probes are supplied with an<br />
<strong>Elcometer</strong> test certificate <strong>and</strong> a set of calibration foils appropriate to the scale range.<br />
Ferrous probes measure non magnetic coatings on ferro-magnetic substrates. Nonferrous<br />
probes measure non conductive coatings on non-ferrous metal substrates. Dual<br />
FNF probes measure both ferrous <strong>and</strong> non-ferrous applications with automatic substrate<br />
detection.<br />
Minimum Substrate <strong>Thickness</strong><br />
Maximum Operating<br />
Temperature<br />
(limited duty cycle)<br />
Storage Temperature<br />
Ferrous:<br />
Non-Ferrous:<br />
Ferrous:<br />
Non-Ferrous:<br />
PINIP:<br />
PINIP (High Temp):<br />
-10 to 60°C (14 to 140°F)<br />
0.3mm (12mils)<br />
0.1mm (4mils)<br />
150°C (300°F)<br />
80°C (176°F)<br />
80°C (176°F)<br />
250°C (480°F)<br />
SCALE 1<br />
Range<br />
0 - 1500µm (0 - 60mils)<br />
Resolution 0.1µm: 0 - 100µm; 1µm: 100 - 1500µm<br />
(0.01mil: 0 - 5mils; 0.1mil: 5 - 60mils)<br />
Accuracy<br />
±1-3% or ±2.5µm (±1-3% or ±0.1mil)<br />
Probe Design<br />
Straight<br />
Minimum Convex<br />
Surface Diameter<br />
Minimum Concave<br />
Surface Radius<br />
Minimum<br />
Headroom<br />
Minimum<br />
Sample Diameter<br />
Ferrous 4mm (0.16") 25mm (0.98") 85mm (3.35") 4mm (0.16")<br />
Non-Ferrous 10mm (0.39") 10mm (0.39") 85mm (3.35") 4mm (0.16")<br />
Dual FNF<br />
F Mode: 4mm (0.16")<br />
N Mode: 26mm (1.02") 12.5mm (0.49") 88mm (3.46")<br />
F Mode: 4mm (0.16")<br />
N Mode: 6mm (0.24")<br />
Ferrous 4mm (0.16") 25mm (0.98") 28mm (1.10") 4mm (0.16")<br />
Right Angle Non-Ferrous 10mm (0.39") 14mm (0.55") 28mm (1.10") 4mm (0.16")<br />
Dual FNF<br />
F Mode: 4mm (0.16")<br />
N Mode: 26mm (1.02") 12.5mm (0.49") 38mm (1.50")<br />
Mini M5 Ferrous 3mm (0.12") 6.5mm (0.26")<br />
F Mode: 4mm (0.16")<br />
N Mode: 6mm (0.24")<br />
Headroom: 16mm (0.63")<br />
Width: 7mm (0.28") 4mm (0.16")<br />
Anodiser Non-Ferrous 10mm (1.38") 14mm (0.55") 100mm (3.94") 4mm (0.16")<br />
PINIP<br />
Ferrous 4mm (0.16") 60mm (2.36") 170mm (6.69") 4mm (0.16")<br />
Non-Ferrous 10mm (0.39") 50mm (1.97") 180mm (7.09") 4mm (0.16")<br />
Dual FNF<br />
* Whichever is the greater<br />
69<br />
F Mode: 4mm (0.16")<br />
N Mode: 26mm (1.02") 65mm (2.56") 180mm (7.09")<br />
F Mode: 4mm (0.16")<br />
N Mode: 6mm (0.24")<br />
www.elcometer.com
R<br />
SCALE 2<br />
Range<br />
Resolution<br />
Accuracy<br />
0 - 5mm (0 - 200mils)<br />
1µm: 0 - 1mm; 10µm: 1 - 5mm<br />
(0.1mil: 0 - 50mils; 1mil: 5 - 200mils)<br />
±1-3% or ±20µm (±1-3% or ±1.0mil)<br />
For higher resolution <strong>and</strong> accuracy on thin coatings Scale 2 ferrous probes can be switched to the Scale 1 mode<br />
measurement performance<br />
en<br />
Probe Design<br />
Minimum Convex<br />
Surface Diameter<br />
Minimum Concave<br />
Surface Radius<br />
Minimum<br />
Headroom<br />
Minimum<br />
Sample Diameter<br />
Straight<br />
Ferrous 4mm (0.16") 25mm (0.98") 89mm (3.50") 8mm (0.32")<br />
Non-Ferrous 100mm (3.97") 150mm (5.90") 88mm (3.46") 14mm (0.55")<br />
Right Angle Ferrous 4mm (0.16") 25mm (0.98") 32mm (1.26") 8mm (0.32")<br />
Armoured Ferrous 4mm (0.16") 25mm (0.98") 138mm (5.43") 8mm (0.32")<br />
Telescopic Ferrous 4mm (0.16") 25mm (0.98") 36mm (1.42") 8mm (0.32")<br />
Soft <strong>Coating</strong> Ferrous Flat Surface Flat Surface 89mm (3.50") 8mm (0.32")<br />
Waterproof Ferrous 4mm (0.16") 40mm (1.98") 138mm (5.43") 8mm (0.32")<br />
PINIP<br />
Ferrous 4mm (0.16") 60mm (2.36") 174mm (6.85") 8mm (0.32")<br />
Non-Ferrous 100mm (3.97") 150mm (5.90") 185mm (7.28") 14mm (0.55")<br />
SCALE 3<br />
Range<br />
Resolution<br />
Accuracy<br />
0 - 13mm (0 - 500mils)<br />
1µm: 0 - 2mm; 10µm: 2 - 13mm<br />
(0.1mil: 0 - 100mils; 1mil: 100 - 500mils)<br />
±1-3% or ±50µm (±1-3% or ±2.0mils)<br />
Probe Design<br />
Minimum Convex<br />
Surface Diameter<br />
Minimum Concave<br />
Surface Radius<br />
Minimum<br />
Headroom<br />
Minimum<br />
Sample Diameter<br />
Straight Ferrous 15mm (0.59") 40mm (1.57") 102mm (4.02") 14mm (0.55")<br />
PINIP Ferrous 15mm (0.59") 45mm (1.77") 184mm (7.24") 14mm (0.55")<br />
* Whichever is the greater<br />
www.elcometer.com 70
R<br />
en<br />
SCALE 6<br />
Range<br />
Resolution<br />
Accuracy<br />
Ferrous: 0 - 25mm (0 - 980mils)<br />
Non-Ferrous: 0 - 30mm (0 - 1200mils)<br />
10µm: 0 - 2mm; 100µm: 2 - 30mm<br />
(1mil: 0 - 100mils; 10mil: 100 - 1200mils)<br />
±1-3% or ±100µm (±1-3% or ±4.0mils)<br />
Probe Design<br />
Straight<br />
Armoured<br />
SCALE 0.5<br />
Minimum Convex<br />
Surface Diameter<br />
Minimum Concave<br />
Surface Radius<br />
Minimum<br />
Headroom<br />
Ferrous 35mm (1.40") 170mm (6.70") 150mm (5.90")<br />
Range 0 - 500 µm (0 - 20mils)<br />
Resolution 0.1µm: 0 - 100µm; 10µm: 100 - 500µm<br />
(0.01mil: 0 - 5mils; 0.1mil: 5 - 20mils)<br />
Accuracy<br />
±1-3% or ±2.5µm (±1-3% or ±0.1mil)<br />
Minimum<br />
Sample Diameter<br />
51 x 51mm²<br />
(2 x 2 sq. inch)<br />
Non-Ferrous Flat Surface Flat Surface 160mm (6.30") 58mm (2.30")<br />
Ferrous 35mm (1.40") 170mm (6.70") 190mm (7.48")<br />
51 x 51mm²<br />
(2 x 2 sq. inch)<br />
Non-Ferrous Flat Surface Flat Surface 200mm (7.87") 58mm (2.30")<br />
Probe Design<br />
Mini-M3<br />
45mm (1.77")<br />
Mini-M3-90°<br />
45mm (1.77")<br />
Mini-M3-45°<br />
45mm (1.77")<br />
Mini-M3-90°<br />
150mm (5.90")<br />
Minimum Convex<br />
Surface Diameter<br />
Minimum Concave<br />
Surface Radius<br />
Minimum<br />
Headroom<br />
Minimum<br />
Sample Diameter<br />
Ferrous 1.9mm (0.07") 6.5mm (0.26") 6mm (0.24") 3mm (0.12")<br />
Non-Ferrous 6mm (0.24") 8.5mm (0.33") 6mm (0.24") 4mm (0.16")<br />
Ferrous 1.9mm (0.07") 6.5mm (0.26")<br />
Non-Ferrous 6mm (0.24") 8.5mm (0.33")<br />
Ferrous 1.9mm (0.07") 6.5mm (0.26")<br />
Ferrous 1.9mm (0.07") 6.5mm (0.26")<br />
Non-Ferrous 6mm (0.24") 8.5mm (0.33")<br />
Headroom: 16mm (0.63")<br />
Width: 7mm (0.28") 3mm (0.12")<br />
Headroom: 16mm (0.63")<br />
Width: 7mm (0.28") 4mm (0.16")<br />
Headroom: 18mm (0.71")<br />
Width: 7mm (0.28") 3mm (0.12")<br />
Headroom: 16mm (0.63")<br />
Width: 7mm (0.28") 3mm (0.12")<br />
Headroom: 16mm (0.63")<br />
Width: 7mm (0.28") 4mm (0.16")<br />
Mini-M3-90°<br />
300mm (11.80") Ferrous 1.9mm (0.07") 6.5mm (0.26") Headroom: 16mm (0.63")<br />
Width: 7mm (0.28") 3mm (0.12")<br />
Mini-M3-45°<br />
300mm (11.80") Ferrous 1.9mm (0.07") 6.5mm (0.26") Headroom: 18mm (0.71")<br />
Width: 7mm (0.28") 3mm (0.12")<br />
Mini-M3-90°<br />
400mm (15.70") Non-Ferrous 6mm (0.24") 8.5mm (0.33") Headroom: 16mm (0.63")<br />
Width: 7mm (0.28") 4mm (0.16")<br />
* Whichever is the greater<br />
71<br />
www.elcometer.com
R<br />
18 GAUGE & PROBE ACCESSORIES (EBST)<br />
Probe Placement Jig<br />
en<br />
An ideal accessory for measuring coatings not only on small or<br />
complex components but also when the highest levels of<br />
repeatability <strong>and</strong> accuracy are required. Each Probe Placement<br />
Jig is supplied with a probe housing to suit Scale 1 or Scale 2<br />
Straight Probes <strong>and</strong> a component holder. Additional<br />
accessories are also available.<br />
Description<br />
Probe Placement Jig<br />
Component H<strong>and</strong> Vice<br />
Cable Release Assembly<br />
Dual FNF Probe Housing Adaptor<br />
Mini Probe Housing Adaptor<br />
Jumbo <strong>and</strong> V-Probe Adaptors<br />
Part Number<br />
T95012880<br />
T95013028<br />
T95012888<br />
T95015961<br />
T95016896<br />
Jumbo <strong>and</strong> V-Probe Adaptors, when attached to any <strong>Elcometer</strong><br />
<strong>456</strong> Scale 1 or Scale 2 straight probe, improve measurement<br />
accuracy <strong>and</strong> repeatability on flat <strong>and</strong> curved surfaces.<br />
Description<br />
Part Number<br />
F <strong>and</strong> N Probes<br />
Dual FNF Probes<br />
Jumbo Adaptor T9997766- T99913225<br />
V-Probe Adaptor T9997381- T99913133<br />
<strong>Gauge</strong> Accessories<br />
Description<br />
Part Number<br />
Separate <strong>Gauge</strong>s<br />
Integral <strong>Gauge</strong>s<br />
Protective Case T99923369 T<strong>456</strong>21820<br />
Plastic Transit Case T<strong>456</strong>23465 T<strong>456</strong>23466<br />
Benchtop Inspection St<strong>and</strong> T<strong>456</strong>22371 -<br />
Self Adhesive Screen Protectors (x10) T99922341 T99922341<br />
USB Bluetooth Adaptor - for PC’s without Bluetooth T99920130 T99920130<br />
USB Cable T99921325 T99921325<br />
www.elcometer.com 72
R<br />
en<br />
Calibration Accessories<br />
Formal quality systems, such as those described in ISO 9000,<br />
require that gauges be properly controlled, logged <strong>and</strong> in<br />
calibration. Increasingly, users are specifying that the readings<br />
taken by gauges are traceable to National St<strong>and</strong>ards.<br />
Three types of coating thickness st<strong>and</strong>ards are available from<br />
<strong>Elcometer</strong> - Calibration Foils; Coated St<strong>and</strong>ards <strong>and</strong> Zero Test<br />
Plates.<br />
Foil Sets<br />
Scale Range<br />
Scale 1:<br />
0-1500 µm (0-60mils)<br />
Foil Values<br />
Part Number<br />
(µm) (mils) Un-Certified Certified<br />
25, 50, 125, 250, 500,<br />
1000<br />
1.0, 2.0, 5.0, 10, 20, 40 T99022255-1 T99022255-1C<br />
Scale 2:<br />
0-5mm (0-200mils)<br />
25, 50, 125, 250,<br />
500,1000, 2000, 3000<br />
1.0, 2.0, 5.0, 10, 20, 40,<br />
80, 120<br />
T99022255-2 T99022255-2C<br />
Scale 3:<br />
0-13mm (0-500mils)<br />
250, 500, 1000, 2000,<br />
4000, 8000<br />
10, 20, 40, 80, 160, 315 T99022255-3 T99022255-3C<br />
Scale 6:<br />
0-30mm (0-1200mils)<br />
1000, 2000, 5000,<br />
9500, 15mm, 25mm<br />
40, 80, 200, 375, 590,<br />
980<br />
T99022255-6 T99022255-6C<br />
Scale M3:<br />
0-500 µm (0-20mils)<br />
12.5, 25, 50, 125, 250,<br />
500<br />
0.5, 1.0, 2.0, 5.0, 10, 20 T99022255-7 T99022255-7C<br />
Scale 2B:<br />
0-5mm (0-200mils)<br />
25, 50, 125, 250,<br />
500,1000, 2000, 2000<br />
1.0, 2.0, 5.0, 10, 20, 40,<br />
80, 80<br />
T99022255-8 T99022255-8C<br />
<strong>The</strong> Scale 2B foil sets are designed for the <strong>Elcometer</strong> <strong>456</strong> soft coating probe <strong>and</strong> have a larger foil surface area. Individual foils are also<br />
available - contact <strong>Elcometer</strong> or visit our website for more information.<br />
Coated <strong>Thickness</strong> St<strong>and</strong>ards<br />
Values<br />
Part Number<br />
(µm) (mils) Ferrous Non-Ferrous<br />
0, 40, 75, 125, 175 0, 1.6, 3.0, 5.0, 7.0 T995111262 T995111271<br />
0, 50, 80 ,125, 200 0, 2.0, 3.0, 5.0, 8.0 T995111263 -<br />
0, 50, 150, 250, 500 0, 2.0, 6.0, 10, 20 T995111261 -<br />
Zero Test Plates<br />
Description Dimensions Part Number<br />
Ferrous Non-Ferrous<br />
Zero Test Plate ±1% 50.8 x 25.4mm (2.0 x 1.0”) T9994910- T9994911-<br />
Zero Test Plate ±2% 76.2 x 50.8mm (3.0 x 2.0”) T9999529- T9999530-<br />
Zero Test Plate; large ±2% 76.2 x 101.6mm (3.0 x 4.0”) T9994054- T9994055-<br />
73<br />
www.elcometer.com
R<br />
19 ADDITIONAL REFERENCE INFORMATION<br />
St<strong>and</strong>ards<br />
en<br />
<strong>The</strong> <strong>Elcometer</strong> <strong>456</strong> can be used in accordance with the following National <strong>and</strong> International<br />
St<strong>and</strong>ards:<br />
AS 2331.1.4 ASTM E 376 DIN 50981 ISO 19840 ISO 2808-12<br />
AS 3894.3-B ASTM G 12 DIN 50984 ISO 2063 NF T30-124<br />
AS/NZS 1580.108.1 BS 3900-C5-6B ECCA T1 ISO 2360 SS 184159<br />
ASTM B 499 BS 3900-C5-6A EN 13523-1 ISO 2808-6A SSPC PA 2<br />
ASTM D 1186-B BS 5411-11 IMO MSC.215(82) ISO 2808-6B US Navy NSI 009-32<br />
ASTM D 1400 BS 5411-3 IMO MSC.244 (83) ISO 2808-7C US Navy PPI 63101-000<br />
ASTM D 7091 BS 5599 ISO 1461 ISO 2808-7D<br />
St<strong>and</strong>ards in grey have been superceded but are still recognised in some industries.<br />
Certification<br />
Every <strong>Elcometer</strong> <strong>456</strong> gauge <strong>and</strong> separate probe is supplied with a Test Certificate free of<br />
charge. For separate gauges, the test measurements are generated using factory reference<br />
probes. Each probe test certificate is generated using factory reference gauges.<br />
Comprehensive Calibration Certificates, traceable to National St<strong>and</strong>ards (UKAS <strong>and</strong> NIST)<br />
are also available <strong>and</strong> should be requested at the point of order. Please speak to your<br />
<strong>Elcometer</strong> representative for further information.<br />
Warranty <strong>and</strong> Maintenance<br />
<strong>The</strong> <strong>Elcometer</strong> <strong>456</strong> does not contain any user serviceable components. In the unlikely event<br />
of a fault, the gauge should be returned to your local <strong>Elcometer</strong> supplier or directly to<br />
<strong>Elcometer</strong>. <strong>The</strong> warranty will be invalidated if the gauge has been opened.<br />
<strong>The</strong> <strong>Elcometer</strong> <strong>456</strong> gauge is supplied with a 1 year warranty against manufacturing defects. To<br />
extend this warranty to 2 years, register your gauge via the www.elcometer.com website.<br />
Probes are consumable items <strong>and</strong> have a 1 year warranty from the date of purchase against<br />
manufacturing defects only. <strong>The</strong> probe tip will wear <strong>and</strong> its life will depend on the number of<br />
readings taken <strong>and</strong> how abrasive the coating is. Probe life can be prolonged by careful<br />
positioning of the probe on the surface.<br />
This gauge incorporates a Liquid Crystal Display (LCD). If the display reaches a temperature<br />
above 70°C (158°F) it may be damaged. This can happen if the gauge is left in a car, parked in<br />
strong sunlight.<br />
Always store the gauge in its carrying pouch when not in use.<br />
Remove the batteries from the gauge <strong>and</strong> store them separately if the gauge is to remain<br />
unused for a long period of time. This will prevent damage to the gauge in the event of<br />
malfunction of the batteries.<br />
www.elcometer.com 74
R<br />
en<br />
20 INDEX<br />
Numerics<br />
2 Point Calibration Method 17, 53, 60<br />
2 Year <strong>Gauge</strong> Warranty 11, 68<br />
90/10 Rule 14, 59, 67<br />
A<br />
Accessories 72<br />
Alarms; Daily & interval 16, 61<br />
AS 2331.1.4 74<br />
AS 3894.3-B 74<br />
AS/NZS 1580.108.1 74<br />
ASTM B 499 74<br />
ASTM D 1186-B 74<br />
ASTM D 1400 74<br />
ASTM D 7091 74<br />
ASTM E 376 74<br />
ASTM G 12 74<br />
Australian Calibration Method 19, 60<br />
Auto Calibration Method 18, 60<br />
B<br />
Batching 23<br />
Batch calibration memories 24<br />
Clearing an existing batch 26<br />
Copying an existing batch 26<br />
Creating a new batch 23<br />
Delete an existing batch 29<br />
Naming batches 24<br />
Opening an existing batch 26<br />
Readings graph 28<br />
Reviewing an existing batch 27<br />
Batch Mode 23<br />
Batch Naming 24<br />
Batch Size 30<br />
Batch Types 29, 61<br />
Counted Average 29, 61<br />
IMO PSPC 30, 61<br />
Normal 29, 61<br />
Battery / Batteries<br />
Condition 5, 61<br />
Fitting 5<br />
Life of 61<br />
Powered 11<br />
Precautions 74<br />
Specification 68<br />
75<br />
Beep Volume 6, 61<br />
Bluetooth<br />
Data Output 12<br />
Downloading data 32, 40<br />
PIN Code 39<br />
USB Adaptor 72<br />
BS 3900-C5-6B 74<br />
BS 3900-C5-6A 74<br />
BS 5411-11 74<br />
BS 5411-3 74<br />
BS 5599 74<br />
C<br />
Calibration 8, 53<br />
Accessories 73<br />
Adjustment / Procedure; Model E 53<br />
Adjustment / Procedure; Model B, S & T 54<br />
Certificates 74<br />
Lock 20, 56, 60<br />
Memories 19, 24<br />
Methods 16, 53<br />
Testing 55<br />
Validating 55<br />
Warning 20, 60<br />
Certification 74<br />
Character Size 10<br />
Coated <strong>Thickness</strong> St<strong>and</strong>ards 73<br />
Coefficient of Variation 13, 59<br />
D<br />
Daily Alarm 16, 61<br />
Data Collection Methods 17, 23<br />
Date <strong>and</strong> Time 15<br />
Delete Readings 23, 61<br />
Dimensions 68<br />
DIN 50981 74<br />
DIN 50984 74<br />
Display 9<br />
Brightness 11<br />
Reading Size 10<br />
Rotating 12<br />
Specification 68<br />
www.elcometer.com
R<br />
ISO 1461 74<br />
Downloading Data<br />
via Bluetooth 12, 32, 40<br />
ISO 19840<br />
ISO 2063<br />
74<br />
74<br />
via ElcoMaster 2.0 12, 32, 40 ISO 2360 74<br />
via USB 12, 32, 40 ISO 2808-6A 74<br />
E<br />
ECCA T1 74<br />
ISO 2808-6B<br />
ISO 2808-7C<br />
74<br />
74<br />
ElcoMaster 2.0 32 ISO 2808-7D 74<br />
<strong>Elcometer</strong> Index Value (EIV) 13, 59 ISO 2808-12 74<br />
Emergency Light Mode 11 ISO Calibration Method 19, 60<br />
EN 13523-1 74 L<br />
Error Codes 62 Language Selection 6, 11<br />
F<br />
Factory Calibration 18, 53<br />
Limits<br />
Live <strong>Gauge</strong> Readings<br />
14, 21, 59, 60<br />
48<br />
Firmware Updates 12, 58 Lowest Reading 13, 59<br />
Fixed Batch Size 30 M<br />
Foil Sets 73 Maintenance 74<br />
G<br />
<strong>Gauge</strong><br />
About 3<br />
Mean<br />
Memory<br />
Menu Structure<br />
13<br />
21<br />
63<br />
Accessories 72 N<br />
Error Codes 62 NF T30-124 74<br />
Features 11 P<br />
Firmware Updates 12, 58 Probe<br />
Icons 59 Connection 5<br />
Maintenance 74 Scale Range 69<br />
Memory 21 Technical Specification 69<br />
Menu Structures 63 R<br />
Overview 4 Reading, taking a 7<br />
Technical Specifications 68 Reading Display 9<br />
Warranty 11, 68 Reading Rate 11<br />
Welcome Screen 22, 57 Rotating Display 12<br />
H<br />
High Limit 14, 59, 60<br />
Rough / 2 Point Calibration Method<br />
S<br />
17, 53, 60<br />
Highest Reading 13, 59 Scale Ranges 69<br />
I<br />
Icons 59<br />
Setting Limits<br />
Shims<br />
21<br />
73<br />
Immediate Mode 23 Smooth Calibration Method 17, 53, 60<br />
IMO MSC.215(82) 74 Software, ElcoMaster 2.0 32<br />
IMO MSC.244 (83) 74 SSPC PA2 74<br />
IMO PSPC<br />
About 14, 61, 67<br />
SSPC PA2 Calibration Method<br />
St<strong>and</strong>ards, Coated <strong>Thickness</strong><br />
19, 60<br />
73<br />
Batch Type 30, 61<br />
www.elcometer.com 76<br />
en
R<br />
en<br />
St<strong>and</strong>ards 74<br />
Statistics 13<br />
Swedish Calibration Method 19, 60<br />
Switching On / Off 6<br />
T<br />
Technical Specifications 68<br />
Test Certificates 74<br />
Time <strong>and</strong> Date 15<br />
Trend Graph 15<br />
Two Point Calibration Method 17, 53, 60<br />
Two Year <strong>Gauge</strong> Warranty 11, 68<br />
U<br />
Units, Selecting 6<br />
US Navy NSI 009-32 74<br />
US Navy PPI 63101-000 74<br />
W<br />
Welcome Screen 22, 57<br />
Weight 68<br />
Wrist Harness, Fitting 6<br />
Z<br />
Zero Calibration Method 17, 53, 60<br />
Zero Offset Calibration Method 17, 53, 60<br />
Zero Test Plates 73<br />
77<br />
www.elcometer.com
R<br />
www.elcometer.com<br />
ENGLAND<br />
<strong>Elcometer</strong> Limited<br />
Edge Lane<br />
Manchester M43 6BU<br />
Tel: +44 (0)161 371 6000<br />
Fax: +44 (0)161 371 6010<br />
e-mail: sales@elcometer.com<br />
www.elcometer.com<br />
USA<br />
<strong>Elcometer</strong> Inc<br />
1893 Rochester Industrial Drive<br />
Rochester Hills Michigan 48309<br />
Tel: +1 248 650 0500<br />
Toll Free: 800 521 0635<br />
Fax: +1 248 650 0501<br />
e-mail: inc@elcometer.com<br />
www.elcometer.com<br />
ASIA & THE FAR EAST<br />
<strong>Elcometer</strong> (Asia) Pte Ltd<br />
896 Dunearn Rd<br />
Sime Darby Centre #03-09<br />
Singapore 589472,<br />
Tel: +65 6462 2822<br />
Fax: +65 6462 2860<br />
e-mail: asia@elcometer.com<br />
www.elcometer.com<br />
JAPAN<br />
<strong>Elcometer</strong> KK<br />
7F Toranomon MT40 Bldg. 5-13-1<br />
Toranomon, Minato-ku<br />
Tokyo 105-0001<br />
Tel: +81 (0)3-4530-9714<br />
Fax: +81 (0)3-4530-9713<br />
email: jp_info@elcometer.com<br />
www.elcometer.co.jp<br />
BELGIUM<br />
<strong>Elcometer</strong> SA<br />
Rue Vallée 13<br />
B-4681 Hermalle /s Argenteau<br />
Tel: +32 (0)4 379 96 10<br />
Fax: +32 (0)4 374 06 03<br />
e-mail: be_info@elcometer.com<br />
www.elcometer.be<br />
FRANCE<br />
<strong>Elcometer</strong> Sarl<br />
97 Route de Chécy<br />
45430 BOU<br />
Tel: +33 (0)2 38 86 33 44<br />
Fax: +33 (0)2 38 91 37 66<br />
e-mail: fr_info@elcometer.com<br />
www.elcometer.fr<br />
GERMANY<br />
<strong>Elcometer</strong> Instruments GmbH<br />
Ulmer Strasse 68<br />
D-73431 Aalen<br />
Tel: +49(0)7361 52806 0<br />
Fax: +49(0)7361 52806 77<br />
e-mail: de_info@elcometer.de<br />
www.elcometer.de<br />
THE NETHERLANDS<br />
<strong>Elcometer</strong> NL<br />
<strong>New</strong>tonlaan 115<br />
3584 BH Utrecht<br />
Tel: +31 (0)30 210.7005<br />
Fax: +31 (0)30 210.6666<br />
email: nl_info@elcometer.com<br />
www.elcometer.com