


Create successful ePaper yourself
Turn your PDF publications into a flip-book with our unique Google optimized e-Paper software.
Alessio Cavatore has designed a<br />
The Lord of The Rings mini-game<br />
recreating the epic struggle between<br />
Saruman the White and Gandalf<br />
the Grey.<br />
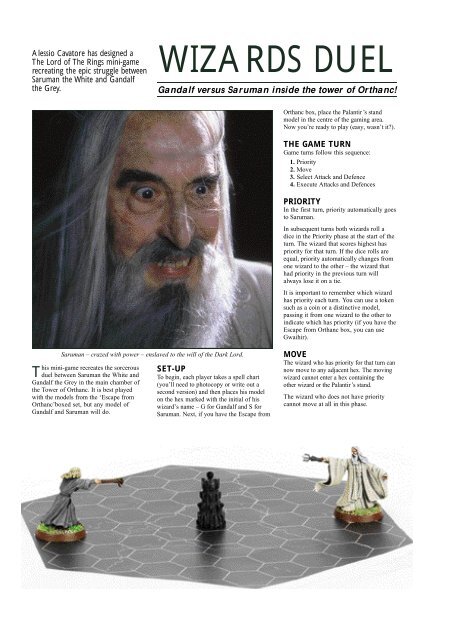
Saruman – crazed with power – enslaved to the will of the Dark Lord.<br />
his mini-game recreates the sorcerous<br />
Tduel between Saruman the White and<br />
Gandalf the Grey in the main chamber of<br />
the Tower of Orthanc. It is best played<br />
with the models from the ‘Escape from<br />
Orthanc’boxed set, but any model of<br />
Gandalf and Saruman will do.<br />
<strong>WIZARDS</strong> <strong>DUEL</strong><br />
Gandalf versus Saruman inside the tower of Orthanc!<br />
SET-UP<br />
To begin, each player takes a spell chart<br />
(you’ll need to photocopy or write out a<br />
second version) and then places his model<br />
on the hex marked with the initial of his<br />
wizard’s name – G for Gandalf and S for<br />
Saruman. Next, if you have the Escape from<br />
Orthanc box, place the Palantir ’s stand<br />
model in the centre of the gaming area.<br />
Now you’re ready to play (easy, wasn’t it?).<br />
THE GAME TURN<br />
Game turns follow this sequence:<br />
1. Priority<br />
2. Move<br />
3. Select Attack and Defence<br />
4. Execute Attacks and Defences<br />
PRIORITY<br />
In the first turn, priority automatically goes<br />
to Saruman.<br />
In subsequent turns both wizards roll a<br />
dice in the Priority phase at the start of the<br />
turn. The wizard that scores highest has<br />
priority for that turn. If the dice rolls are<br />
equal, priority automatically changes from<br />
one wizard to the other – the wizard that<br />
had priority in the previous turn will<br />
always lose it on a tie.<br />
It is important to remember which wizard<br />
has priority each turn. You can use a token<br />
such as a coin or a distinctive model,<br />
passing it from one wizard to the other to<br />
indicate which has priority (if you have the<br />
Escape from Orthanc box, you can use<br />
Gwaihir).<br />
MOVE<br />
The wizard who has priority for that turn can<br />
now move to any adjacent hex. The moving<br />
wizard cannot enter a hex containing the<br />
other wizard or the Palantir ’s stand.<br />
The wizard who does not have priority<br />
cannot move at all in this phase.
SELECT ATTACK<br />
AND DEFENCE<br />
Now both wizards secretly choose an<br />
Attack and a Defence from their spell<br />
chart. This can be done by placing a token<br />
such as a dice on one Attack box and one<br />
Defence box of your spell chart. Make<br />
sure you do this behind the cover of a<br />
small screen to stop your opponent from<br />
seeing your selections.<br />
Magical Attacks are made of two<br />
components: Push and Crush. Push moves<br />
the enemy wizard away (a horizontal<br />
telekinetic blast), while Crush damages the<br />
target by flattening him on the floor (a<br />
vertical telekinetic blast). Each Attack is<br />
made of different proportions of these two<br />
components, representing the magic blast<br />
coming at different angles (see the spell<br />
chart). For example, a spell can Push 1 and<br />
Crush 2, or it can Push 3 and Crush 0, and<br />
so on.<br />
Defences can completely stop only one of<br />
the two components (cancelling all Push<br />
or all Crush), or protect the wizard against<br />
both, but to a lesser degree (-1 Push and<br />
-1 Crush).<br />
The Palantir: If a wizard is in a hex<br />
adjacent to the Palantir ’s stand and his<br />
opponent isn’t, he benefits from the<br />
precognitive powers of the Seeing Stone.<br />
This means that his opponent must tell<br />
him one of the Magical Attacks that has<br />
NOT been selected this turn before he<br />
makes his choice of Defence. If both<br />
wizards are adjacent to the Palantir’s<br />
stand, the powers cancel out and there is<br />
no special effect.<br />
EXECUTE ATTACKS AND<br />
DEFENCES<br />
Both players remove their screens<br />
simultaneously, revealing their Magical<br />
Attacks and Defences, and they must<br />
loudly shout the magic word attached to<br />
the chosen Attack (this is very important,<br />
according to Alessio – Ed).<br />
Starting with the wizard with priority,<br />
compare the Attack chosen with the<br />
Defence chosen by his opponent. Modify<br />
the Push and Crush components of the<br />
Attack with the protection offered by the<br />
Defence and then apply the result. Each<br />
point of Push that makes it through the<br />
opponent’s Defence moves him one hex<br />
away in a direction chosen by the attacker<br />
(see the diagrams overleaf) and each point<br />
of Crush that makes it through the<br />
opponent’s Defence causes a Wound.<br />
If a wizard is Pushed into an obstacle (ie,<br />
cannot complete a Push back movement<br />
because of a wall or the Palantir’s stand)<br />
the wizard suffers a number of Wounds<br />
equal to the number of hexes he should<br />
have moved back, regardless of how<br />
many hexes he has moved before hitting<br />
the obstacle.<br />
Let’s see a couple of examples:<br />
1. Gandalf chooses an Attack with<br />
Push 2/Crush 1, and Saruman chooses the No<br />
Push Defence. The result is that Saruman is<br />
Crushed for 1 point of damage, but he’s not<br />
Pushed at all. At the same time Saruman has<br />
chosen a 3 Push/0 Crush Attack and Gandalf has<br />
chosen a<br />
-1 Push/-1 Crush Defence. This will result in<br />
Gandalf being Pushed back two hexes and<br />
suffering no Crush damage.<br />
2. Gandalf chooses an Attack with Push 0/Crush<br />
3, and Saruman chooses the No Crush Defence.<br />
The result is that Saruman is not affected at all!<br />
At the same time Saruman has chosen a 3 Push/0<br />
Crush Attack and Gandalf has chosen a<br />
-1 Push/-1 Crush Defence. This will result in<br />
Gandalf being pushed back two he xes and<br />
suffering no Crush damage. This time Gandalf is<br />
standing one hex away from the wall and so he<br />
cannot complete his movement away from<br />
Saruman. He is therefore slammed a gainst the<br />
wall and suffers 2 Wounds.<br />
WINNING THE GAME<br />
When one wizard loses his last Wound, he<br />
is knocked out, allowing his opponent to<br />
takes his staff away and win the game!<br />
This happens immediately, so if a wizard<br />
loses priority and the opponent’s Attack<br />
causes him to lose his last Wound, he<br />
won’t be able to complete his Attack. This<br />
effectively means that the game cannot end<br />
in a draw.<br />
Gandalf the Grey<br />
56
EXAMPLES OF PUSHING BACK<br />
Normally a successful Push allows the attacker to<br />
move back the defender in a straight line in any of<br />
the three hexes ‘behind’him (see diagrams 1 and 2).<br />
Note that sometimes it will happen that the two<br />
models are positioned so that the number of hexes<br />
‘behind’the defender is reduced to only two (see<br />
diagram 3).<br />
Diagram 1<br />
Diagram 2<br />
Diagram 3<br />
<strong>WIZARDS</strong>’ <strong>DUEL</strong> SPELL CHART<br />
WOUNDS<br />
5<br />
ATTACKS DEFENCES<br />
WHACK!<br />
3 PUSH 0 CRUSH<br />
SLAM!<br />
2 PUSH 1 CRUSH<br />
BANG!<br />
1 PUSH 2 CRUSH<br />
SMASH!<br />
0 PUSH 3 CRUSH<br />
STOP!<br />
NO PUSH<br />
NO!<br />
NO CRUSH<br />
SHIELD!<br />
-1 PUSH -1 CRUSH<br />
1 2 3 4<br />
6 7 8 9 10<br />
11 12 13 14 15<br />
Defeat<br />
Permission granted to photocopy for personal use only. © Copyright Games Workshop Ltd 2002.<br />
Saruman the White, leader of the Order of Wizards.
G<br />
GANDALF<br />
<strong>WIZARDS</strong>’ <strong>DUEL</strong>
