REMstar LX
REMstar LX
REMstar LX

Create successful ePaper yourself
Turn your PDF publications into a flip-book with our unique Google optimized e-Paper software.
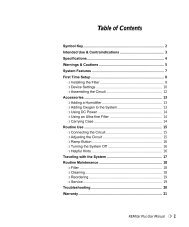
TABLE OF CONTENTS<br />
Introduction & Contraindications ............................................... 2<br />
Specifications ............................................................................... 3<br />
Warnings & Cautions ................................................................... 4<br />
Unpacking the System................................................................. 5<br />
System Features .......................................................................... 6<br />
First Time Setup ........................................................................... 8<br />
Checking the Voltage ................................................................ 9<br />
Installing the Filters ................................................................... 9<br />
Power Cord ............................................................................. 10<br />
Assembling the Circuit ............................................................ 11<br />
Accessories ................................................................................ 13<br />
Humidifier ................................................................................ 13<br />
Adding Oxygen to the System ................................................. 13<br />
DC Power System ................................................................... 14<br />
Carrying Case ......................................................................... 14<br />
Routine Use ................................................................................ 15<br />
Connecting the Circuit ............................................................. 15<br />
Adjusting the Circuit ................................................................ 15<br />
Ramp Button ........................................................................... 16<br />
Turning the System Off ........................................................... 16<br />
Helpful Hints ............................................................................ 16<br />
Traveling with the System ......................................................... 17<br />
Routine Maintenance ................................................................. 19<br />
Filters ...................................................................................... 19<br />
Fuses ...................................................................................... 20<br />
Cleaning .................................................................................. 21<br />
Reordering .............................................................................. 21<br />
Service .................................................................................... 22<br />
Troubleshooting ......................................................................... 23<br />
Warranty ...................................................................................... 25<br />
Summary ..................................................................................... 27<br />
1
INTRODUCTION<br />
Intended Use<br />
The <strong>REMstar</strong> <strong>LX</strong> and <strong>REMstar</strong> Plus <strong>LX</strong> CPAP Systems are for the treatment<br />
of adult Obstructive Sleep Apnea (OSA) only. The <strong>REMstar</strong> Plus <strong>LX</strong><br />
and the <strong>REMstar</strong> <strong>LX</strong> deliver CPAP (Continuous Positive Airway Pressure)<br />
therapy. Your home care provider will make the correct pressure settings.<br />
The <strong>REMstar</strong> Plus <strong>LX</strong> device has a time meter that records the number of<br />
hours the System is in use. The <strong>REMstar</strong> <strong>LX</strong> device does not.<br />
When prescribed by your physician, the ramp function allows you to lower<br />
the pressure when you are trying to fall asleep. The air pressure will<br />
gradually increase until your prescription pressure is reached. You also have<br />
the option of not using the ramp feature at all.<br />
Several accessories are available to make your OSA treatment with the<br />
<strong>REMstar</strong> <strong>LX</strong> CPAP System as convenient and comfortable as possible and<br />
to ensure that you receive the safe, effective therapy prescribed for you.<br />
IMPORTANT!<br />
Read and understand the entire user’s manual before operating this<br />
System. If you have any questions concerning the use of this System,<br />
contact your home care provider or doctor.<br />
Contraindications<br />
Studies have shown that the following pre-existing conditions may<br />
contraindicate the use of positive airway pressure therapy for some patients:<br />
• Bullous Lung Disease • Pneumocephalus<br />
• Pneumothorax<br />
• Pathologically Low Blood Pressure<br />
• Pneumocephalus has been reported in a patient using nasal<br />
Continuous Positive Airway Pressure. Caution should be used when<br />
prescribing CPAP for susceptible patients such as those with: cerebral<br />
spinal fluid (CSF) leaks, abnormalities of the cribriform plate, prior<br />
history of head trauma, and/or pneumocephalus.<br />
(Chest 1989; 96:1425-1426)<br />
The use of positive airway pressure therapy may be temporarily<br />
contraindicated if you exhibit signs of a sinus or middle ear infection.<br />
Contact your physician if you have any questions concerning your therapy.<br />
2
Specifications<br />
Device Size<br />
Dimensions:<br />
Weight:<br />
10.00" x 5.50" x 4.75" (25x14x12 cm)<br />
< 5 lb. (2.27 kg)<br />
Product Use,<br />
Transport, and<br />
Storage<br />
Power<br />
Requirements<br />
IMPORTANT!<br />
Operation<br />
Transport & Storage<br />
Temperature: 41 - 104° F (5 - 40° C) -4 - 140° F (-20 - 60° C)<br />
Humidity: 30 - 75% Non-condensing 15 - 95% Non-condensing<br />
Atmospheric Pressure: 76.7 - 102 kPascals 50 - 102 kPascals<br />
The electrical installation of the relevant room must comply with<br />
IEC requirements.<br />
100-120 VAC / 230-240 VAC, 50/60 Hz, 1.0 A max.<br />
12 VDC, 3 A DC max.<br />
Type of protection against electric shock: Class II Equipment<br />
Degree of protection against electric shock: Type BF Applied Part<br />
Degree of protection against harmful ingress of water: Ordinary<br />
Equipment (IPXO)<br />
Mode of Operation: Continuous<br />
Device Fuses:<br />
Line Voltage<br />
Fuse Type<br />
115 VAC (100-120 VAC) T 800 mA, 250 V, 5 x 20 mm<br />
230 VAC (230-240 VAC) T 315 mA, 250 V, 5 x 20 mm<br />
DC Cord Fuse (not included): 3 A, Time Delay, Type MDL<br />
EMC Interference: Meets CISPR II, Class B Emissions Requirements<br />
Use only Respironics fuses supplied by your home care provider.<br />
Symbol Key<br />
Pressure ON / OFF<br />
Ramp<br />
DC Power<br />
Type BF Applied Part<br />
Fuse<br />
Class II (Double Insulated)<br />
!<br />
Attention, consult<br />
accompanying documents<br />
0123<br />
European CE Declaration of Conformity<br />
3
WARNINGS & CAUTIONS<br />
WARNING!<br />
Indicates the<br />
possibility for<br />
injury to the user<br />
or the operator.<br />
• This device is intended for adult use only.<br />
• This device is not intended for life support.<br />
• All CPAP devices have the potential to induce rebreathing of exhaled air.<br />
To reduce this potential, observe the following:<br />
- Use only Respironics circuit accessories<br />
- Do not wear the mask and headgear for more than a few minutes<br />
while the unit is not operating<br />
- Do not block or try to seal the vent holes in the exhalation port<br />
As with most CPAP devices: At low CPAP pressures, the air flow through<br />
the exhalation port may not be enough to clear all of the exhaled gas (CO 2<br />
)<br />
from the mask. You may breathe in some of the air that you have exhaled.<br />
• Under certain conditions, the temperature of the air flow from this device<br />
can be as much as 18° F (10° C) higher than the air temperature in the<br />
room. Caution should be exercised if the room temperature is warmer than<br />
90° F (32° C).<br />
• This equipment is not suitable for use in the presence of a flammable<br />
anesthetic mixture with air or with oxygen or nitrous oxide.<br />
• To avoid electrical shock, disconnect the electrical supply before changing<br />
the fuses. For continued protection against risk of fire, replace fuses with<br />
those of the exact same type and rating only.<br />
• The instructions in this manual are not intended to supersede established<br />
medical protocols.<br />
• Contact your doctor if symptoms of sleep apnea recur.<br />
4<br />
CAUTION!<br />
Indicates the<br />
possibility of damage<br />
to the device.<br />
• U.S. federal law restricts this device to sale by or on the order of a physician.<br />
• The voltage must be set for proper line voltage<br />
(e.g., North America - 115 V, Europe - 230 V).<br />
• Should the noise level of the <strong>REMstar</strong> <strong>LX</strong> change to include unusual or harsh<br />
sounds during operation, discontinue use and contact your home care provider.<br />
• Discontinue using the <strong>REMstar</strong> <strong>LX</strong> if any of the parts are damaged.<br />
Replace any damaged parts before continuing use.<br />
• Tobacco smoke may cause tar build-up within the <strong>REMstar</strong> <strong>LX</strong> that may result<br />
in the <strong>REMstar</strong> <strong>LX</strong> malfunctioning.<br />
• The <strong>REMstar</strong> <strong>LX</strong> is powered when the cord is connected to the main supply.<br />
The Pressure On/Off button enables/disables the blower only.<br />
• The <strong>REMstar</strong> <strong>LX</strong> must be positioned on its base for proper operation.<br />
Additional warnings and cautions are located throughout this<br />
manual as they apply.
UNPACKING THE SYSTEM<br />
After unpacking the System, check to make sure you have everything shown here:<br />
Note: <strong>REMstar</strong> Plus <strong>LX</strong> devices are equipped with a time meter. <strong>REMstar</strong> <strong>LX</strong> devices are not.<br />
<strong>REMstar</strong> <strong>LX</strong><br />
Filter<br />
Cap<br />
Optional<br />
Ultra-Fine<br />
Filter<br />
User<br />
Manual<br />
Pollen<br />
Filters<br />
Power<br />
Cord<br />
IMPORTANT!<br />
If any of the above parts are missing, contact your home care provider.<br />
Some <strong>REMstar</strong> <strong>LX</strong> Systems may also include one or more of the<br />
following accessories:<br />
• 6 ft. (1.83 m) Flexible Tubing<br />
• Exhalation Port<br />
• Nasal Mask<br />
• Humidifier<br />
• Carrying Case<br />
5
SYSTEM FEATURES<br />
AC Power<br />
Connector<br />
Filter Cap<br />
AC Voltage<br />
Selector<br />
DC Power<br />
Connector<br />
Time<br />
Meter<br />
Signal<br />
Light<br />
Pressure & Elevation<br />
Display<br />
Ramp<br />
Button<br />
Pressure<br />
On / Off Button<br />
Air Outlet<br />
6
SYSTEM FEATURES<br />
AC Power Connector.......... Connect the AC power cord here.<br />
AC Voltage Selector ............ This switch is used to select the AC voltage<br />
(115V or 230V)<br />
Air Outlet ............................ Connect flexible tubing here.<br />
DC Power Connector.......... Connect the optional DC power cord here.<br />
Filter Cap & Filters ............ The pollen filter screens out normal<br />
household dust and pollens. This must be in<br />
place at all times when the <strong>REMstar</strong> <strong>LX</strong> is<br />
operating. An optional, ultra-fine filter is<br />
also included for more complete filtration of<br />
very fine particles. (filters not shown)<br />
Fuse Compartment ............. This holds the AC fuses. Fuses must be<br />
changed if you change the voltage setting for<br />
travel (115 V / 230 V).<br />
Pressure On / Off<br />
Button ................................ This button turns the air flow on or off.<br />
Power Cord ......................... Type H05VV-F. (not shown)<br />
Pressure & Elevation<br />
Display ............................... Displays the pressure and elevation settings.<br />
Ramp Button ....................... This button decreases the pressure to the<br />
minimum pressure setting. When pressed,<br />
the pressure delivered will drop to 4 cm H 2 O<br />
and then gradually increase to the prescribed<br />
pressure over the prescribed time period.<br />
Signal Light ......................... The green light signals when the <strong>REMstar</strong><br />
<strong>LX</strong> is powered, with the blower turned off.<br />
Time Meter .......................... (<strong>REMstar</strong> Plus <strong>LX</strong> only) Displays the total<br />
operation time, including up to 200 hours of<br />
factory testing time. Provides resolution to<br />
1/10 hour. Operates only when the airflow is<br />
turned on.<br />
Medical Product Note: For ease at airport security stations, there is a<br />
note on the bottom of the <strong>REMstar</strong> <strong>LX</strong> stating<br />
that it is medical equipment. It may help if you<br />
also take this manual with you when you travel.<br />
7
FIRST TIME SETUP<br />
WARNING!<br />
Do not use the <strong>REMstar</strong> <strong>LX</strong> CPAP System until an appropriate<br />
professional adjusts the settings!<br />
To use the system, you may need the following accessories in order to<br />
assemble the circuit. Contact your home care provider to order these<br />
accessories. These items are not packaged with some of the Systems<br />
because of the multiple sizes and types available.<br />
• Flexible Tubing -Respironics 6 ft. (1.83 m) flexible tubing with a<br />
smooth inner lumen and a 22 mm inner diameter<br />
• Exhalation Port (e.g., Whisper Swivel ® II or equivalent)<br />
Note: This is not required if you are using a mask<br />
with a built-in exhalation port.<br />
• Headgear<br />
• Nasal Mask or other equivalent interface<br />
To determine which circuit accessories are best for you, consult with<br />
your doctor or home care provider.<br />
CAUTION!<br />
CAUTION!<br />
IMPORTANT!<br />
If the <strong>REMstar</strong> <strong>LX</strong> has been exposed to either very hot or very cold<br />
temperatures, allow it to adjust to room temperature (approximately<br />
2 hours) before beginning setup.<br />
When operating the <strong>REMstar</strong> <strong>LX</strong> System, make sure bedclothes,<br />
curtains, or other items are not blocking the filter cap openings or the<br />
vents on the <strong>REMstar</strong> <strong>LX</strong>. Make sure the <strong>REMstar</strong> <strong>LX</strong> is away from<br />
heating equipment (e.g., forced air vents, radiators).<br />
Large elevation changes will affect the pressure being delivered<br />
by the <strong>REMstar</strong> <strong>LX</strong>. Refer to the ”Traveling with the System”<br />
section if you relocate or travel to areas with a significantly higher or<br />
lower elevation.<br />
8
FIRST TIME SETUP<br />
Checking<br />
the Voltage<br />
1. Verify the voltage selection. Make sure the voltage selector switch<br />
on the back of the unit is set correctly (e.g., United States and<br />
Canada: 115V).<br />
Note: If you change the voltage setting for travel, the fuses must<br />
also be changed.<br />
AC Voltage<br />
Selector<br />
Installing<br />
the Filters<br />
2. Install the filters in the back of the <strong>REMstar</strong> <strong>LX</strong>.<br />
The pollen filter must be in place at all times when the <strong>REMstar</strong> <strong>LX</strong> is<br />
operating. The white ultra-fine filter is optional and can be used in<br />
addition to the pollen filter. The ultra-fine filter is recommended for<br />
people who are sensitive to tobacco smoke or other small particles.<br />
a. Place one of the pollen filters over the ultra-fine filter. Or, if you<br />
are not using the ultra-fine filter, simply place the pollen filter into<br />
the filter area on the back of the <strong>REMstar</strong> <strong>LX</strong>. An extra pollen filter<br />
is included for your convenience.<br />
b. Attach the filter cap. Position the opening on the side of the cap so<br />
that it is facing away from the bedside. Insert the cap’s bottom tabs<br />
into the openings below the filter area. Press down on the cap’s top<br />
tabs and insert them into the openings above the filter area.<br />
9
FIRST TIME SETUP<br />
Power Cord<br />
3. Connect the power cord.<br />
Plug the socket end of the<br />
power cord into the AC<br />
power cord connector on the<br />
back of the <strong>REMstar</strong> <strong>LX</strong> and<br />
the pronged end of the power<br />
cord into an electrical outlet.<br />
IMPORTANT!<br />
CAUTION!<br />
CAUTION!<br />
An international plug adapter may also be required to make<br />
your power cord compatible with the electrical outlet of the<br />
country you are in. If further assistance is required, contact<br />
Respironics International Customer Service department at<br />
1-800-345-6443 (US and Canada) or 1-412-731-2100.<br />
Do not use a voltage converter. It may cause damage to the<br />
<strong>REMstar</strong> <strong>LX</strong>. Use only Respironics approved power cords. Inspect<br />
the power cord often for any signs of damage. Replace a damaged<br />
cord immediately.<br />
The <strong>REMstar</strong> <strong>LX</strong> is activated when the power cord is connected. The<br />
Pressure On/Off button only turns the blower on/off.<br />
4. Verify the elevation setting. (The air flow must be turned off.)<br />
Press the ramp button. The elevation setting will be displayed<br />
while the ramp button is depressed.<br />
LO = less than 2,500 ft.<br />
M = 2,500 - 5,000 ft.<br />
HI = 5,001 - 7,500 ft.<br />
*over 7,500 ft. = Contact your home care provider to have<br />
your pressure setting adjusted.<br />
To change the elevation setting, press the ramp button and hold it<br />
down. While holding the ramp button down, press and release the<br />
pressure on/off button. Release the ramp button.<br />
10<br />
IMPORTANT!<br />
DO NOT use the <strong>REMstar</strong> <strong>LX</strong> if the display is erratic. Contact your<br />
home care provider for further instructions.
FIRST TIME SETUP<br />
Assembling<br />
the Circuit<br />
WARNING!<br />
5. Assemble the circuit. To use the System, you will need the<br />
following accessories in order to assemble the recommended<br />
circuit.<br />
• 6 ft. (1.83 m) Flexible Tubing<br />
• Nasal Mask with Exhalation Port<br />
• Headgear<br />
If the <strong>REMstar</strong> <strong>LX</strong> is used for multiple persons (e.g., rental<br />
devices) a low-resistance, main flow bacteria filter should be<br />
installed in-line between the <strong>REMstar</strong> <strong>LX</strong> and the circuit tubing.<br />
Appropriate diagnostic pressures must be determined when a<br />
bacteria filter and other optional circuit accessories are in place.<br />
a. Connect the flexible tubing to the air outlet on<br />
the front of the <strong>REMstar</strong> <strong>LX</strong>.<br />
Rotating<br />
Connector<br />
Whisper<br />
Swivel II<br />
Vent Holes<br />
Flexible<br />
Tubing<br />
11
FIRST TIME SETUP<br />
Assembling<br />
the Circuit<br />
b. If you are using a mask with a built-in<br />
exhalation port (e.g., Respironics Monarch ®<br />
Mini Mask), connect the mask’s connector to<br />
the flexible tubing.<br />
Mask's<br />
Connector<br />
Flexible<br />
Tubing<br />
If you are using a mask with a<br />
separate exhalation port:<br />
• Connect the exhalation port to<br />
the end of the flexible tubing.<br />
• Position the exhalation port so<br />
that the vented air is blowing<br />
away from your face.<br />
• Connect the mask’s connector to<br />
the exhalation port.<br />
Mask's<br />
Connector<br />
Exhalation<br />
Port<br />
Note: The graphic to the right shows<br />
two different types of Whisper<br />
Swivel exhalation ports. Both<br />
ports are interchangeable, but<br />
Flexible<br />
Tubing<br />
the one shown on the right is a newer model. Respironics<br />
will no longer manufacture the port shown on the left.<br />
WARNING!<br />
WARNING!<br />
The exhalation port is designed to exhaust CO 2 from the circuit.<br />
Continuous flow is required for safe operation. Do not block or<br />
otherwise try to seal the air openings on the exhalation port.<br />
If you are using a full face mask (i.e., a mask covering both your<br />
mouth and your nose), the mask must be equipped with a safety<br />
(entrainment) valve.<br />
12
ACCESSORIES<br />
Contact your home care provider for additional information on the<br />
accessories available for the <strong>REMstar</strong> <strong>LX</strong> System.<br />
Adding a Humidifier<br />
WARNING!<br />
CAUTION!<br />
CAUTION!<br />
Humidifiers are available from your home care provider. The<br />
humidifiers may reduce nasal dryness and irritation by adding moisture<br />
to the air flow.<br />
For safe operation, the humidifier must always be positioned below the<br />
circuit connection at the mask and the air outlet on the <strong>REMstar</strong> <strong>LX</strong><br />
unit. The humidifier must be level for proper operation.<br />
When using a humidifier, always disconnect the humidifier tubing<br />
from the <strong>REMstar</strong> <strong>LX</strong> System when it is turned off. DO NOT use a<br />
room humidifier within six feet (1.83 m) from the <strong>REMstar</strong> <strong>LX</strong>.<br />
Moisture can build up in the System and cause damage. Follow the<br />
instructions included with the humidifier.<br />
When using a heated humidifier, avoid using the high temperature<br />
setting which may cause water to collect in the tubing.<br />
Adding Oxygen<br />
to the System<br />
WARNING!<br />
WARNING!<br />
When using supplemental oxygen with the <strong>REMstar</strong> <strong>LX</strong>, a Respironics<br />
Pressure Valve (Part Number 302418) must be placed in-line with the<br />
patient circuit. Oxygen may be added at the mask connection. Please<br />
note the warnings listed below.<br />
When using oxygen with the <strong>REMstar</strong> <strong>LX</strong> System, turn the<br />
<strong>REMstar</strong> <strong>LX</strong> on before turning the oxygen on. Turn the oxygen off<br />
before turning the <strong>REMstar</strong> <strong>LX</strong> off. This will prevent oxygen<br />
accumulation in the <strong>REMstar</strong> <strong>LX</strong>.<br />
Oxygen accelerates fires. Keep the <strong>REMstar</strong> <strong>LX</strong> and the oxygen<br />
container away from heat, open flames, or other sources of ignition.<br />
DO NOT smoke in the area near the <strong>REMstar</strong> <strong>LX</strong> or the oxygen.<br />
13
ACCESSORIES<br />
Using a DC<br />
Power System<br />
CAUTION!<br />
CAUTION!<br />
You can also use the <strong>REMstar</strong> <strong>LX</strong> in a stationary recreational vehicle,<br />
boat or motor home with a 12 volt DC power source. The <strong>REMstar</strong> <strong>LX</strong><br />
should not be operated while the vehicle is in motion. Contact your<br />
home care provider for additional information.<br />
Only use the Respironics DC Power System available from your<br />
home care provider. Use of any other system may cause damage to<br />
the <strong>REMstar</strong> <strong>LX</strong> or your vehicle.<br />
DC Power is not intended to be used as battery back-up. DO NOT<br />
connect the DC Power System while the <strong>REMstar</strong> <strong>LX</strong> is operating<br />
on AC power. System damage may occur.<br />
Carrying Case<br />
The carrying case holds the <strong>REMstar</strong> <strong>LX</strong> and accessories. When<br />
traveling by airplane, the carrying case is for carry-on luggage only.<br />
Never check the <strong>REMstar</strong> <strong>LX</strong> through the baggage department.<br />
14
ROUTINE USE<br />
Connecting<br />
the Circuit<br />
1. Connect the circuit. Before each use, examine the flexible tubing for any<br />
damage or debris. If necessary, clean the tubing to remove the debris.<br />
Replace any damaged tubing.<br />
a. Connect the mask to the headgear, following the instructions included<br />
with the headgear. Press the Pressure On/Off button on the top of the<br />
<strong>REMstar</strong> <strong>LX</strong> to turn the air flow ON.<br />
When the Pressure<br />
On/Off button is<br />
depressed, the<br />
pressure and altitude<br />
settings will be<br />
displayed briefly for<br />
you to verify.<br />
Pressure<br />
On/Off<br />
Button<br />
b.Put on the mask and headgear, and breathe normally through your nose.<br />
Adjusting<br />
the Circuit<br />
2. Adjust the circuit.<br />
a. Lie down on your bed and adjust the flexible tubing so it is<br />
free to move if you turn in your sleep.<br />
b.Adjust the mask and headgear until you have a comfortable fit<br />
and there are no air flow leaks into your eyes.<br />
When the air flow is on, the green signal light will go out.<br />
15
ROUTINE USE<br />
Using the<br />
Ramp Button<br />
Pressing the Ramp button will reduce<br />
the air pressure when you are trying<br />
to fall asleep. The air pressure will<br />
gradually increase until your prescription<br />
pressure is reached. You<br />
also have the option of not using the<br />
ramp feature at all.<br />
Ramp<br />
Button<br />
CAUTION!<br />
Turning the<br />
System OFF<br />
3. Press the Ramp button on the top<br />
of the <strong>REMstar</strong> <strong>LX</strong>. You can use<br />
the Ramp button as often as you<br />
wish during the night. (NOTE: After<br />
the first activation, each subsequent ramp<br />
will be for one-half of the set ramp time.)<br />
When using a humidifier, you must disconnect the humidifier tubing<br />
from the <strong>REMstar</strong> <strong>LX</strong> System when the air flow is turned off. Moisture<br />
can build up in the System and cause damage to it.<br />
4. Press the Pressure On/Off<br />
button on the top of the<br />
<strong>REMstar</strong> <strong>LX</strong> to turn the air<br />
flow OFF.<br />
Pressure<br />
On/Off<br />
Button<br />
Helpful Hints<br />
• If you want to talk after putting on the mask, use the Ramp<br />
button to reduce the pressure. This will make talking easier.<br />
• Make sure that bedding, curtains, or other items are not blocking<br />
the filter or vents of the <strong>REMstar</strong> <strong>LX</strong>. Air must flow freely around<br />
the <strong>REMstar</strong> <strong>LX</strong> for the System to work properly.<br />
• If the air flow from the <strong>REMstar</strong> <strong>LX</strong> feels cold, reposition the<br />
circuit tubing so that it runs under your bed covers to reduce heat<br />
loss while you sleep.<br />
16
TRAVELING WITH THE SYSTEM<br />
Packing<br />
the System<br />
When traveling, the optional carrying case is for carry-on luggage<br />
only. The carrying case will not protect the System if it is put through<br />
checked baggage.<br />
Security Stations<br />
For ease at security stations, there is a note on the bottom of the<br />
<strong>REMstar</strong> <strong>LX</strong> stating that it is medical equipment. It may be helpful<br />
to bring this manual along with you to help security personnel understand<br />
the <strong>REMstar</strong> <strong>LX</strong>.<br />
Checking the<br />
Power Cord<br />
Changing the<br />
Voltage and Fuses<br />
If you are traveling to a country with a line voltage different than the<br />
one you are currently using, an international plug adapter may be<br />
required to make your power cord compatible with the power outlets of<br />
the country to which you are traveling.<br />
If you need a plug adapter, you<br />
will probably need to change<br />
the voltage setting<br />
(115 V or 230 V) and the fuses.<br />
Change the voltage setting and<br />
install the appropriate fuses into<br />
the <strong>REMstar</strong> <strong>LX</strong> before traveling.<br />
Contact your home care provider<br />
to order fuses. (See the<br />
instructions for changing the fuses<br />
in the “Routine Maintenance”<br />
section.)<br />
Contact Respironics International Customer Service department at<br />
1-800-345-6443 (in the U.S. and Canada) or 1-412-731-2100 for more<br />
information.<br />
Line Voltage:<br />
Fuse Type:<br />
115 VAC (100-120 VAC) T 800 mA, 5 x 20 mm<br />
230 VAC (230-240 VAC) T 315 mA, 5 x 20 mm<br />
CAUTION!<br />
Do not use a voltage converter. It may cause damage to the<br />
<strong>REMstar</strong> <strong>LX</strong>.<br />
17
TRAVELING WITH THE SYSTEM<br />
Changes in<br />
Elevation<br />
Elevation changes can affect the pressure being delivered by the<br />
<strong>REMstar</strong> <strong>LX</strong>. At elevations less than 2,500 ft. (762 m), the <strong>REMstar</strong> <strong>LX</strong><br />
should be set to the low setting. In areas with elevations between 2,500 ft.<br />
and 5,000 ft. the <strong>REMstar</strong> <strong>LX</strong> should be set to the medium setting. In areas<br />
with elevations of 5,000 ft. or higher, the <strong>REMstar</strong> <strong>LX</strong> should be set to the<br />
high setting.<br />
To verify the elevation setting:<br />
1. Make sure the <strong>REMstar</strong> <strong>LX</strong> is plugged in and the air flow is turned OFF.<br />
2. Press the ramp button. The elevation setting will be displayed while the<br />
ramp button is depressed.<br />
LO - less and 2,500 ft.<br />
M - 2,500 - 5,000 ft.<br />
Hi - over 5,000 ft.<br />
To change the elevation setting:<br />
1. Make sure the <strong>REMstar</strong> <strong>LX</strong> is plugged in and the air flow is turned OFF.<br />
2. Press the ramp button and hold it down. While holding the ramp button<br />
down, press and release the pressure on/off button. Release the ramp<br />
button.<br />
3. Verify the elevation setting. Press the ramp button. The elevation setting<br />
will be displayed while the ramp button is depressed.<br />
18
ROUTINE MAINTENANCE<br />
Cleaning and<br />
Replacing<br />
the Filters<br />
CAUTION!<br />
The gray pollen filter should be cleaned at least once every two weeks<br />
under normal usage and replaced with a new one every six months.<br />
The white ultra-fine filter is disposable and should be replaced after<br />
30 nights of use or sooner if it appears dirty. DO NOT clean the ultrafine<br />
filter.<br />
Operating the <strong>REMstar</strong> <strong>LX</strong> with a dirty filter may keep the system<br />
from working properly and damage the <strong>REMstar</strong> <strong>LX</strong>.<br />
1. Remove the filter cap by gently pressing down on the two latches<br />
on the top of the filter cap.<br />
2. Change the filters.<br />
a. Remove the pollen filter by gently pulling around the edges of<br />
the filter. Rinse the filter in a steady stream of running water.<br />
Squeeze out the water and repeat. Air dry on a rack for 8 to 12<br />
hours or in a clothes dryer for 15 to 20 minutes.<br />
If you are using the white ultra-fine filter, and it appears dirty,<br />
discard the filter and replace it with a new one.<br />
b. Place the white ultra-fine filter under the clean pollen filter.<br />
Insert the filter(s) into the filter area on the back of the<br />
<strong>REMstar</strong> <strong>LX</strong>.<br />
CAUTION!<br />
Never install a wet filter into the <strong>REMstar</strong> <strong>LX</strong>. We recommend<br />
that you clean the filter in the morning and alternate using the two<br />
pollen filters provided with the System to ensure enough drying<br />
time for the cleaned filter.<br />
3. Replace the filter cap.<br />
19
ROUTINE MAINTENANCE<br />
Changing<br />
the Fuses<br />
CAUTION!<br />
WARNING!<br />
If the <strong>REMstar</strong> <strong>LX</strong> does not turn ON when the power cord is plugged in,<br />
the fuses may need to be replaced. The fuses are located in the<br />
back of the <strong>REMstar</strong> <strong>LX</strong> above the power cord connector.<br />
If you change the voltage setting, the fuses must be changed.<br />
Unplug the <strong>REMstar</strong> <strong>LX</strong> before changing the fuses. Use only<br />
Respironics fuses supplied by your home care provider.<br />
1. Remove the fuse holder by releasing the small tabs on the sides of the<br />
holder. You may need a small screwdriver to help remove the holder.<br />
2. Replace the old fuses with new fuses of the same type and rating. Use<br />
only Respironics fuses supplied by your home care provider. Always<br />
replace both fuses.<br />
Line Voltage:<br />
Fuse Type:<br />
115 VAC (100-120 VAC) T 800 mA, 5 x 20 mm<br />
230 VAC (230-240 VAC) T 315 mA, 5 x 20 mm<br />
3. Insert the fuse holder back into the <strong>REMstar</strong> <strong>LX</strong> and snap into place.<br />
20
ROUTINE MAINTENANCE<br />
Cleaning<br />
the System<br />
WARNING!<br />
To avoid electrical shock, unplug the <strong>REMstar</strong> <strong>LX</strong> before cleaning.<br />
Do not immerse the <strong>REMstar</strong> <strong>LX</strong> into any fluids.<br />
1. Disconnect the flexible tubing from the <strong>REMstar</strong> <strong>LX</strong>. Gently wash the<br />
flexible tubing and the tubing swivel in a solution of warm water<br />
and a mild detergent. Rinse thoroughly. Air dry.<br />
2. Wipe the outside of the <strong>REMstar</strong> <strong>LX</strong> with a cloth slightly dampened with<br />
water and a mild detergent. Let the <strong>REMstar</strong> <strong>LX</strong> dry before plugging in<br />
the power cord.<br />
3. Inspect the <strong>REMstar</strong> <strong>LX</strong> and all circuit parts for any damage after<br />
cleaning. Replace any damaged parts.<br />
Reordering<br />
Contact your home care provider to order accessories or replacement filters<br />
and fuses.<br />
21
ROUTINE MAINTENANCE<br />
Service<br />
WARNING!<br />
The <strong>REMstar</strong> <strong>LX</strong> System does not require routine servicing.<br />
• If symptoms of sleep apnea recur, contact your physician.<br />
• If you think the <strong>REMstar</strong> <strong>LX</strong> is not performing properly or is not<br />
delivering the correct air pressure, contact your home care provider.<br />
• If the noise level of the <strong>REMstar</strong> <strong>LX</strong> has changed to include<br />
unusual or harsh sounds during operation, contact your home care<br />
provider or Respironics for instructions on having the <strong>REMstar</strong> <strong>LX</strong><br />
serviced.<br />
If the <strong>REMstar</strong> <strong>LX</strong> malfunctions, contact your home care provider<br />
immediately. Never attempt to open the <strong>REMstar</strong> <strong>LX</strong>’s enclosure.<br />
MAINTENANCE RECORD<br />
Filter(s) Replaced<br />
Mask Replaced<br />
Pressures Checked<br />
Hours on Time Meter<br />
(<strong>REMstar</strong> Plus <strong>LX</strong> only)<br />
22
TROUBLESHOOTING<br />
The table below lists common problems you may have with the <strong>REMstar</strong> <strong>LX</strong> System and possible<br />
solutions to those problems. If none of the corrective actions solve the problem, contact your home<br />
care provider.<br />
Problem<br />
Solutions<br />
Sore or dry eyes<br />
Readjust the headgear. Contact your home care provider<br />
to be fitted for a different mask style or size.<br />
Redness on your face where<br />
the mask contacts your skin<br />
Loosen the headgear. Check the mask’s spacer to see that it<br />
is in good condition. Use a barrier between your skin and the mask,<br />
such as 3M’s Microfoam tape, Squibb's Duoderm or Hollister's<br />
Restore. If you are using Respironics’ Contour Nasal Mask, try<br />
adding a Comfort Flap ® mask accessory. Contact your home care<br />
provider to be fitted for a different mask style or size.<br />
Contact your doctor if the problem persists.<br />
Dryness or burning sensation<br />
in your throat or nose<br />
Consult with your doctor or home care provider about using a<br />
humidifier with the <strong>REMstar</strong> <strong>LX</strong>. If you are using a nasal mask, you<br />
may want to also use a chin strap to help keep your mouth<br />
closed during the night.<br />
Nasal, sinus, or ear pain<br />
You may have a sinus infection or middle ear infection.<br />
Stop using the <strong>REMstar</strong> <strong>LX</strong> and contact your doctor.<br />
The pressure being<br />
delivered feels different<br />
Check the elevation setting to be sure it is set to your elevation.<br />
Change the elevation setting if necessary. If the elevation setting<br />
is correct, contact your home care provider or Respironics, Inc.<br />
for directions on having the <strong>REMstar</strong> <strong>LX</strong> serviced. Please have the<br />
<strong>REMstar</strong> <strong>LX</strong>’s serial number ready when you call.<br />
23
TROUBLESHOOTING<br />
Problem<br />
The air flow from the<br />
<strong>REMstar</strong> <strong>LX</strong> seems warm.<br />
Solutions<br />
Replace or clean the filter. Make sure the <strong>REMstar</strong> <strong>LX</strong> is away from<br />
bedding or curtains that could block the flow of air around the <strong>REMstar</strong><br />
<strong>LX</strong>. Make sure the <strong>REMstar</strong> <strong>LX</strong> is away from heating equipment (e.g.,<br />
forced air vents, radiators).<br />
The <strong>REMstar</strong> <strong>LX</strong> is<br />
making a faint humming<br />
sound when the air flow is<br />
turned off.<br />
This is a normal characteristic of the <strong>REMstar</strong> <strong>LX</strong>. If the humming<br />
sound is significantly louder than it usually is, contact your home care<br />
provider or Respironics for directions on having the <strong>REMstar</strong> <strong>LX</strong><br />
serviced. Please have the <strong>REMstar</strong> <strong>LX</strong>’s serial number ready when<br />
you call.<br />
The noise level of the<br />
<strong>REMstar</strong> <strong>LX</strong> has changed<br />
to include unusual or<br />
harsh sounds during<br />
operation.<br />
Contact your home care provider or Respironics for directions<br />
on having the <strong>REMstar</strong> <strong>LX</strong> serviced. Please have the <strong>REMstar</strong> <strong>LX</strong>’s<br />
serial number ready when you call.<br />
The <strong>REMstar</strong> <strong>LX</strong> will not<br />
turn on.<br />
Make sure that the <strong>REMstar</strong> <strong>LX</strong> is plugged into a working outlet.<br />
Replace the <strong>REMstar</strong> <strong>LX</strong>’s fuses if the green signal light does not come<br />
on. Verify that the correct voltage has been selected (i.e., if your<br />
electrical line is 115 V you must use the 115 V voltage setting). Press<br />
the Pressure On/Off button. If the new fuses blow out, contact your<br />
home care provider. If you are using a DC battery, the battery may need<br />
to be recharged or replaced or the fuses may need to be replaced.<br />
The <strong>REMstar</strong> Plus <strong>LX</strong> has<br />
hours recorded on the time<br />
meter when it is delivered.<br />
The <strong>REMstar</strong> Plus <strong>LX</strong> is tested at the factory prior to shipment. It is<br />
normal for up to 200 hours of testing time to be recorded on the<br />
<strong>REMstar</strong> Plus <strong>LX</strong>.<br />
24
LIMITED WARRANTY<br />
Respironics, Inc. ® warrants that the <strong>REMstar</strong> ® <strong>LX</strong> CPAP device shall be<br />
free from defects of workmanship and materials and will perform in<br />
accordance with the product specifications for a period of two (2) years<br />
from the date of sale by Respironics, Inc. to the dealer. If the product fails<br />
to perform in accordance with the product specifications, Respironics,<br />
Inc. will repair or replace, at its option, the defective material or part.<br />
Respironics, Inc. will pay customary freight charges from Respironics,<br />
Inc. to the dealer location only. This warranty does not cover damage<br />
caused by accident, misuse, abuse, alteration and other defects not<br />
related to material or workmanship.<br />
RESPIRONICS, INC. DISCLAIMS ALL LIABILITY FOR ECONOMIC<br />
LOSS, LOSS OF PROFITS, OVERHEAD OR CONSEQUENTIAL<br />
DAMAGES WHICH MAY BE CLAIMED TO ARISE FROM ANY<br />
SALE OR USE OF THIS PRODUCT. SOME STATES DO NOT<br />
ALLOW THE EXCLUSION OR LIMITATION OF INCIDENTAL OR<br />
CONSEQUENTIAL DAMAGES, SO THE ABOVE LIMITATION OR<br />
EXCLUSION MAY NOT APPLY TO YOU.<br />
THIS WARRANTY IS GIVEN IN LIEU OF ALL OTHER EXPRESS<br />
WARRANTIES. IN ADDITION, ANY IMPLIED WARRANTIES,<br />
INCLUDING ANY WARRANTY OF MERCHANTABILITY OR<br />
FITNESS FOR THE PARTICULAR PURPOSE ARE LIMITED TO TWO<br />
YEARS. SOME STATES DO NOT ALLOW LIMITATIONS ON HOW<br />
LONG AN IMPLIED WARRANTY LASTS, SO THE ABOVE<br />
LIMITATION MAY NOT APPLY TO YOU. THIS WARRANTY GIVES<br />
YOU SPECIFIC LEGAL RIGHTS, AND YOU MAY ALSO HAVE<br />
OTHER RIGHTS WHICH VARY FROM STATE TO STATE.<br />
To exercise your rights under this warranty, contact your local,<br />
authorized Respironics, Inc. dealer or Respironics, Inc. at 1001<br />
Murry Ridge Lane, Murrysville, Pennsylvania 15668,<br />
1-800-345-6443 or 1-412-731-2100.<br />
25
LIMITED WARRANTY<br />
The <strong>REMstar</strong> <strong>LX</strong> and <strong>REMstar</strong> Plus <strong>LX</strong> CPAP devices carry a two-year<br />
warranty. A warranty/comment card should be included with this<br />
manual for your completion. If it is not, contact Respironics’ Warranty<br />
Administrator at 1-800-666-2901 or 1-412-731-2100 to register your<br />
equipment and receive a FREE package of ultra-fine filters.<br />
For Information on Sleep Disorders Contact:<br />
American Sleep Apnea Association<br />
2025 Pennsylvania Ave. N.W., Suite 905<br />
Washington D.C. 20006<br />
Telephone: 1-202-293-3650<br />
National Sleep Foundation<br />
1367 Connecticut Ave. N.W., Suite 200<br />
Washington D.C. 20036<br />
Telephone: 1-202-785-2300<br />
26
SUMMARY<br />
This summary is not intended to replace the complete user instructions. The entire manual<br />
should be read and understood before operating the <strong>REMstar</strong> <strong>LX</strong> System.<br />
Step 1 Check that the correct voltage setting has been<br />
selected (e.g., N. America - 115 V, Europe - 230 V).<br />
Change the voltage setting and fuses, if necessary.<br />
AC Voltage<br />
Selector<br />
Step 2 Plug the power cord into the<br />
AC power cord connector<br />
and an electrical outlet.<br />
Step 3 Press the ramp button to verify that<br />
the correct elevation setting has been selected.<br />
To change the elevation setting, press the ramp button<br />
and hold it down. While holding the ramp button down,<br />
press and release the pressure on/off button. Release the<br />
ramp button.<br />
Ramp<br />
Button<br />
27
SUMMARY<br />
Step 4 Connect the flexible tubing,<br />
exhalation port, and mask.<br />
Adjust the mask and headgear.<br />
Mask<br />
Exhalation<br />
Port<br />
Flexible<br />
Tubing<br />
Step 5 Turn the air flow on or off by<br />
pressing the Pressure On/Off<br />
button.<br />
Pressure<br />
On/Off<br />
Button<br />
When the Pressure On/Off button<br />
is pressed, the pressure and<br />
altitude settings will be displayed<br />
briefly for you to verify.<br />
Step 6 (Optional) Press the Ramp<br />
button to reduce the pressure.<br />
Ramp<br />
Button<br />
28
IMPORTANT!<br />
Fill in the information below when you receive<br />
the <strong>REMstar</strong> ® <strong>LX</strong> or <strong>REMstar</strong> Plus <strong>LX</strong> CPAP System.<br />
<strong>REMstar</strong> <strong>LX</strong> Serial No.: (Located on the bottom of the <strong>REMstar</strong> <strong>LX</strong>)<br />
System Prescribed for:<br />
Date of Purchase or Rental:<br />
Pressure Setting: cm H 2 O<br />
Mask Type:<br />
Mask Size:<br />
Comfort Flap ® Nasal Mask Accessory: yes no<br />
If you have any questions concerning the System, contact:<br />
• Home Care Company:<br />
Telephone Number:<br />
• Doctor:<br />
Telephone Number:<br />
• Respironics, Inc.<br />
1001 Murry Ridge Lane<br />
Murrysville, Pennsylvania<br />
15668-8550 U.S.A.<br />
Customer Service<br />
Telephone Number: 1-800-345-6443 or 1-412-731-2100<br />
<strong>REMstar</strong> <strong>LX</strong>, and <strong>REMstar</strong> Plus <strong>LX</strong> CPAP Systems are the subject of U.S. patent #5,239,995.<br />
Other patents pending. <strong>REMstar</strong> <strong>LX</strong>, Whisper Swivel, Monarch, GoldSeal, Spectrum, Plateau,<br />
Oasis, and Comfort Flap are trademarks of Respironics, Inc.<br />
© Respironics, Inc. 1998