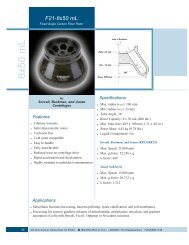
User manual - DJB Labcare
User manual - DJB Labcare
User manual - DJB Labcare

You also want an ePaper? Increase the reach of your titles
YUMPU automatically turns print PDFs into web optimized ePapers that Google loves.
1. MANUFACTURER<br />
For more information about the ALC PK120<br />
centrifuge, please contact:<br />
ALC<br />
170 Marcel Drive<br />
Winchester, VA 22602<br />
Telephone (540) 869-8623<br />
Toll Free (800) 556-2323<br />
Fax (540) 869-0693<br />
1.1 Safety Devices and Notices<br />
To ensure operator safety the centrifuge has<br />
the following electrical and mechanical<br />
characteristics :<br />
• The centrifuge will not start unless the lid is<br />
locked.<br />
• The lid cannot be opened during<br />
centrifugation.<br />
• The centrifuge has electronic self-diagnosis<br />
capability; any possible electrical system<br />
malfunctions are displayed digitally. At the<br />
same time, the centrifuge is disabled to<br />
prevent unsafe operation of the machine.<br />
• The centrifuge is equipped with an<br />
automatic load imbalance safety device.<br />
• The case of the centrifuge is armored, and<br />
the reinforced bowl is made of AISI 304<br />
stainless steel.<br />
• The lid is supported by a strong, dependable<br />
gas spring that holds the lid open until the<br />
operator actively closes it.<br />
• The electrical main has a bipolar switch.<br />
• Ground connection resistance, applied<br />
voltage and leakage current are tested and<br />
certified.<br />
• The centrifuge is equipped with identification<br />
plates and operating instructions.<br />
2. INSTALLATION<br />
2.1 Transport, Packaging, Lifting<br />
The centrifuge is shipped in<br />
special packaging to protect it<br />
from possible harm.<br />
Due to the weight of the machine,<br />
proper handling equipment (e.g.:<br />
pallet jack or fork lift) must be used. The<br />
handling equipment should comply with<br />
current regulations, and should only be used<br />
by properly trained individuals.<br />
1. The centrifuge should be stored and<br />
transported under the following conditions:<br />
a) Ambient temperature -20°C to +50°C.<br />
b) Relative humidity up to 90% and not<br />
exceeding the dew point.<br />
2. After the centrifuge is unpacked, the<br />
contents of the package should be carefully<br />
compared to the items on the packing list.<br />
3. Retain the packaging until the centrifuge<br />
has been tested.<br />
2.2 Installation<br />
The machine should be installed in a room<br />
free of dust and moisture. Place the centrifuge<br />
on a bench top rigid and strong enough to<br />
comfortably support its weight.<br />
IMPORTANT:<br />
AT LEAST 2 PEOPLE ARE REQUIRED TO<br />
LIFT THE CENTRIFUGE FROM THE PALLET<br />
AND PLACE IT ON THE BENCH.<br />
WARNING:<br />
LEAVE 12 INCHES OF FREE SPACE ON<br />
EACH SIDE OF AND BEHIND THE<br />
MACHINE TO FACILITATE PROPER<br />
VENTILATION.<br />
1
2.3 Power Source Wiring<br />
Check main lines and frequency:<br />
They must correspond to the<br />
values shown on the instrument<br />
identification label.<br />
PK120 230V:<br />
230 V + 5% - 10% 50 Hz (1 phase + ground)<br />
PK120 120V:<br />
120 V + 5% - 10% 60 Hz (1 phase + ground)<br />
WARNING:<br />
ENSURE THAT THE POWER SOURCE IS<br />
PROPERLY GROUNDED.<br />
The centrifuge is equipped with R.F.I. filters.<br />
The manufacturer declines all responsibility<br />
for any damages due to improper grounding<br />
of the machine.<br />
2.4 Environmental conditions<br />
- Indoor use.<br />
- Temperature: 5°C to + 40°C.<br />
- Maximum relative humidity: 80% for<br />
temperatures up to 31°C decreasing linearly<br />
to 50% relative humidity at 40°C.<br />
2.5 Lid Unlock<br />
1. Turn the centrifuge on (switch is on<br />
the left side of the unit).<br />
2. Check the lid indicator on the display panel.<br />
The light should be on indicating that the rotor<br />
is stationary and that the lid can be opened.<br />
3. Pull the lever on the top right side of the<br />
machine to open the lid.<br />
WARNING:<br />
BEFORE PROCEEDING TO THE<br />
INSTALLATION OPERATION, IT IS<br />
IMPORTANT TO TURN THE CENTRIFUGE<br />
OFF.<br />
4. After opening the lid, remove any possible<br />
packaging around the spindle. Unscrew the<br />
rotor nut from the top of the spindle. Carefully<br />
clean the inside of the centrifugation chamber<br />
removing any packaging residue. Because of<br />
the turbulence caused by centrifugation, solid<br />
particles accidentally left in the chamber could<br />
create excessive wear of the bowl and rotor.<br />
2.6 Emergency Lid Unlock<br />
In the event of power failure, the lid can be<br />
opened using the special tools supplied with<br />
the centrifuge. The centrifuge must be<br />
unplugged before starting this procedure.<br />
1. Remove the nylon screw in the hole on the<br />
right side of the centrifuge as identified below.<br />
2. Insert the unlocking tool, keeping the blade<br />
horizontal (figure a).<br />
3. Lift the unlocking tool while simultaneously<br />
pulling the lever (figure b).<br />
Latch Lever<br />
Unlocking Tool<br />
figure a<br />
figure b<br />
2
4. After the lid is open, replace the nylon screw.<br />
WARNING:<br />
SHOULD THE POWER FAIL DURING<br />
CENTRIFUGATION, WAIT AT LEAST 40<br />
MINUTES FOR THE ROTOR TO STOP<br />
TURNING. OPEN THE LID CAUTIOUSLY<br />
AND OBSERVE THE ROTOR; IF IT IS STILL<br />
ROTATING, CLOSE THE LID AND WAIT 10<br />
MINUTES MORE BEFORE REPEATING THE<br />
OPERATION.<br />
2.7 Inspection<br />
Before installation, the rotating equipment<br />
should be thoroughly inspected for corrosion<br />
and dirt (see 6.3). The rotor and spindle should<br />
be clean and undamaged. These accessories<br />
should be wiped clean before each use. Any<br />
failure to follow the above advice may have<br />
serious consequences for the safety of the<br />
appliance. Corrosion can lead to stress<br />
fatigue, which will eventually weaken the rotor<br />
and may lead to disruption and severe<br />
damage to the centrifuge. If visible signs of<br />
corrosion or anomalies in the rotor or buckets<br />
are present, do not use the affected<br />
accessories. Contact an authorized service<br />
provider for assistance.<br />
2.8 Fitting the Rotor to the Drive Shaft<br />
- Remove the rotor fixing shaft nut.<br />
- Check the cleanliness of the shaft and<br />
the rotor.<br />
- Place the rotor on the shaft .<br />
- Secure the rotor on the shaft by turning<br />
the fixing nut clockwise.<br />
- Tug on the rotor to make sure that it is<br />
secure.<br />
WARNING:<br />
BE SURE THAT THE ROTOR IS LOCKED<br />
BEFORE STARTING THE CENTRIFUGE.<br />
2.9 Removal of the Rotor<br />
To remove the rotor from the motor shaft :<br />
Using the wrench supplied, unlock the shaft<br />
nut. Remove the nut and lift the rotor with both<br />
hands.<br />
3
3. SPECIFICATIONS<br />
3.1 Dimensions and weight<br />
Height x Width x Depth: ......................... 14.8 x 15.7 x 18.9 in (37.5 x 40 x 48 cm)<br />
Net Weight:............................................ 88 lbs. (40 kg)<br />
3.2 Centrifugation characteristics<br />
Max. allowable capacity: ........................ with swing-out rotor<br />
with fixed-angle rotor<br />
Max. Allowable density: ......................... 1200 Kg/ m 3<br />
Max. allowable weight:........................... 0.912 Kg<br />
Max. speed: ........................................... with swing-out rotor<br />
with fixed-angle rotor<br />
Max. RCF at tip:..................................... with swing-out rotor<br />
with fixed-angle rotor<br />
4 x 190 ml<br />
6 x 50 ml<br />
4000 rpm<br />
6000 rpm<br />
2879 x g<br />
4507 x g<br />
Set temperature: .................................... Ta + ∆T<br />
Max. noise: ............................................ < 62 dBA<br />
3.3 Electrical characteristics<br />
Nominal operating voltage: .................... 230V + 5% - 10% 50 Hz<br />
120V + 5% - 10% 60 Hz<br />
Current................................................... 3.8A (@ 230V)<br />
7.6A (@ 120V)<br />
Max power (steady state): ..................... 350 W<br />
3.4. Specifications<br />
• Microprocessor controlled<br />
• 5 program memory, direct recall<br />
• Set/reading speed 300 - 6000 rpm (in steps of 10 rpm or 100 rpm); accuracy: +/- 20 rpm<br />
• 5 acceleration profiles<br />
• 5 deceleration profiles<br />
• Set timer 1 min. up to 99 min. + ∞<br />
• Electronic imbalance detector<br />
• Direct drive<br />
• Brushless induction motor<br />
4
4. DESCRIPTION OF PERFORMANCE<br />
4.1 Functional principles<br />
The ALC PK120 centrifuge is designed for<br />
laboratory use. It will separate the components<br />
of fluids into layers of varying density by<br />
subjecting them to high forces. Swing out<br />
rotors can carry a greater load than fixed angle<br />
rotors. The larger the diameter of a rotor, with<br />
accessories, the greater its load capacity and<br />
the lower its maximum speed. Relative<br />
Centrifugal Force (RCF) generated by a rotor<br />
is directly proportional to its sedimentation<br />
useful radius and to the value of its speed<br />
squared.<br />
4.1.1 Drive system<br />
A three phase asynchronous motor drives the<br />
rotating equipment. The rotor is contained in<br />
a sealed, armor plated centrifugation chamber.<br />
4.1.2 Lid interlock safety system<br />
The centrifuge is equipped with an interlock<br />
system that prevents opening of the centrifuge<br />
lid when the rotor is spinning. The centrifuge<br />
will not operate until the lid is closed and<br />
latched in place. The lid remains latched until<br />
the rotor stops spinning. NOTE: If a power<br />
failure occurs, access to the samples in the<br />
centrifuge is possible. For this it is necessary<br />
to use a special tool. Follow the emergency<br />
lid unlock procedure found in Section 2.6.<br />
4.1.3 Imbalance Sensor<br />
The centrifuge is equipped with a load<br />
imbalance detector. In case of excessive<br />
imbalance the machine stops automatically.<br />
The display reads “IMbAL” – this message will<br />
disappear once the lid has been opened to<br />
balance the load (see Section 5.10).<br />
Imbalance tolerance depends upon the rotor<br />
in use. Carefully balance the sample load to<br />
avoid actuating the imbalance detection<br />
system.<br />
5
4.2 Rotors - Performance<br />
4.2.1 Rotors - Table<br />
Type of<br />
Equipment<br />
Load<br />
Capacity<br />
Composition<br />
a<br />
Rotating Head<br />
catalog #<br />
Eq.<br />
Composition<br />
Bucket<br />
catalog #<br />
Sealing cap<br />
catalog #<br />
Accessories<br />
Kit catalog #<br />
Useful<br />
max<br />
radius<br />
0-E24<br />
4 X 190 ml<br />
0º<br />
- 90º<br />
11200082<br />
----<br />
11172517<br />
CYTOKIT<br />
11200084<br />
0.161<br />
0-E17<br />
2 X 3<br />
microplates<br />
0º<br />
- 90º 11200085<br />
----<br />
SMP KIT<br />
11172616<br />
----<br />
0.115<br />
F-E6<br />
30<br />
X 15 ml<br />
40º<br />
11200087<br />
----<br />
----<br />
----<br />
0.135<br />
A-E10<br />
6 x 50 ml<br />
conical<br />
40º<br />
11200088<br />
----<br />
----<br />
----<br />
0.112<br />
A-E12<br />
20<br />
x 2.0/1.5 ml<br />
45º<br />
11200089<br />
----<br />
----<br />
----<br />
0.078<br />
4.2.2 Performance<br />
Type of<br />
equipment<br />
Max. speed<br />
(rpm)<br />
Max RCF<br />
(xg)<br />
0-E24<br />
4000<br />
2879<br />
0-E17<br />
3000<br />
1157<br />
F-E6<br />
4000<br />
2414<br />
A-E10<br />
6000<br />
4507<br />
A-E12<br />
6000<br />
3122<br />
6
4.3 RCF Calculation<br />
radius<br />
xg<br />
RPM<br />
Total separating force applied to a sample in<br />
a centrifuge depends on the duration of the<br />
centrifuge run and on the RCF (relative<br />
centrifuge force) applied to the sample. RCF<br />
is generally calculated in units x gravity (x g).<br />
The diagram above allows you to graphically<br />
calculate RCF by drawing a line from the<br />
centrifugal radius (on left) to the speed (on<br />
right). The value of the RCF (xg) applied to<br />
the sample is approximated by the value at<br />
the point where the line crosses the “xg” axis<br />
(center).<br />
Centrifugal radius is defined as the distance<br />
from the axis of rotation to the point on the<br />
sample at which you wish to measure the RCF.<br />
This point is generally the tip of the sample<br />
farthest from the axis of rotation. By popular<br />
convention, this distance is measured in units<br />
of millimeters.<br />
EXAMPLE<br />
To find the RCF value (xg) applied to a sample<br />
in a rotor/bucket/accessory system with a<br />
centrifugal radius of 100 mm (0.1m) and<br />
rotating at 3000 RPM, place a ruler on the<br />
scale joining the point marked 100 on the left<br />
with the point marked 3000 on the right. At<br />
the point where the line crosses the center<br />
scale (xg), the corresponding value is<br />
approximately 1,000. In this example, the<br />
outer tip of the sample is subjected to RCF =<br />
1,000 x g<br />
7
The following functions represent the<br />
mathematical relationship between RCF (xg),<br />
centrifugal radius (r) and speed (rpm). When<br />
the accuracy of the graphical method<br />
described above is not satisfactory, these<br />
functions can be used to obtain more accurate<br />
results.<br />
RCF (units x g) = 1.118 · 10 -6 · n 2 · r where n = RPM<br />
n =<br />
rcf<br />
1,118 * 10 -6 * r<br />
r = radius in millimeters<br />
4.4 Processing & control interface<br />
8
1. Speed display (units of rpm) When the<br />
machine is stopped, this field displays the<br />
set speed. When the machine is running<br />
and the numbers are constant, this field<br />
displays actual speed. When the machine<br />
is running and the numbers are flashing,<br />
this field displays set speed.<br />
2. SET rpm keys : These keys are<br />
used for increasing or decreasing speed<br />
settings.<br />
3. Time display (units of minutes) When<br />
the machine is stopped, this field displays<br />
the set centrifugation time. When the<br />
machine is running, the remaining<br />
centrifugation time is displayed; when the<br />
time is set at “HOLD” (continuous<br />
operation), the display shows elapsed<br />
time.<br />
8. SOFT acceleration key This key is used<br />
to set low acceleration rate (illuminated<br />
LED indicates “on”). The acceleration rate<br />
can also be more precisely programmed<br />
to one of 5 acceleration profiles.<br />
9. GREEN LED: This indicator flashes during<br />
the acceleration and the deceleration<br />
phases. It is constant when actual speed<br />
equals set speed.<br />
10.YELLOW LED: When this indicator is<br />
illuminated the lid can be opened. It comes<br />
on when the rotor is stationary.<br />
11.Five PROGRAM KEYS: for quick<br />
programming and recall of 5 profiles.<br />
13.Five LED indicators next to program<br />
keys: When a program is selected, its<br />
corresponding LED is illuminated.<br />
4. Set minutes keys : These keys<br />
are used for increasing or decreasing time<br />
settings.<br />
5. STOP key Pressing this key stops the<br />
centrifuge <strong>manual</strong>ly. When pressed<br />
simultaneously with key N o . 12, it toggles<br />
the password protection of the programs<br />
in memory.<br />
6. START key Pressing this key starts the<br />
centrifugation cycle.<br />
7. SOFT deceleration key This key is used<br />
to set low braking rate (illuminated LED<br />
indicates “on”). The braking rate can also<br />
be more precisely programmed to one of<br />
5 deceleration profiles.<br />
9
5. OPERATION PROCEDURE<br />
5.0 Instructions for the operator<br />
1. As a precautionary measure, the operator<br />
should remain with the centrifuge until it<br />
reaches the set speed.<br />
2. The operator should also return to the<br />
centrifuge immediately upon completion of<br />
the run.<br />
5.1 Power Switch - Cover Unlock<br />
1. When the centrifuge is turned on (switch<br />
is located on the left side of the centrifuge)<br />
both the centrifuge and the refrigeration<br />
circuit are connected to the main circuit.<br />
2. When the rotor is stationary and the LED<br />
is on, it is possible to unlock the lid. The<br />
mechanical latch on the upper right panel<br />
of the centrifuge opens the lid when it is<br />
pulled toward the front.<br />
5.2 Loading balance<br />
5.2.1 All rotating equipment is dynamically<br />
balanced prior to shipment. For swinging<br />
bucket rotors, reference numbers and marks<br />
on the buckets correspond to matching marks<br />
on the rotor. Buckets should be positioned on<br />
the rotor so that the numbers on the buckets<br />
correspond to the same numbers on the rotor<br />
itself (eg. bucket #2 positioned in rotor position<br />
#2, see fig. 1).<br />
5.2.2. For fixed angle rotors with carriers, all<br />
carriers must be inserted into the rotor before<br />
starting the run. This holds true even when<br />
partial loads are being processed (see fig. 2).<br />
5.2.3 Because buckets and carriers are prebalanced,<br />
the buckets should never be<br />
weighed, but only their contents (adapters,<br />
tubes, etc.).<br />
5.2.4 To correctly distribute the load, tubes<br />
and adapters should be placed so that the load<br />
is symmetrically distributed with respect to the<br />
axis of rotation. (see fig. 3)<br />
5.2.5 For partial loads of swing-out rotating<br />
equipment tubes should also be symmetrically<br />
distributed with respect to the rotational axis<br />
of the swinging bucket. (see fig. 4).<br />
5.2.6 When liquids with densities higher than<br />
1.2 gm/ml must be processed, the max. rpm<br />
should be reduced according to the following<br />
formula:<br />
Allowed rpm = max. rpm * (1.2/New density)<br />
5.2.7 When closing the lid, lower it pressing<br />
on the front edges until the hook in the lid clicks<br />
into the lid lock mechanism. The centrifuge<br />
will only operate when the lid is completely<br />
closed and locked. NOTE: Tubes should be<br />
balanced within ± 2 grams to facilitate the best<br />
possible sample separation.<br />
NO<br />
YES<br />
180˚<br />
figure 3<br />
1<br />
1 2<br />
2<br />
correct<br />
incorrect<br />
figure 1 figure 2<br />
figure 4<br />
10
5.3 Centrifuge Operation<br />
INTRODUCTION: The control interface of the<br />
PK120 is designed to make centrifuge<br />
operation as simple as possible. All of the<br />
buttons are dedicated to specific functions.<br />
Because of this, centrifuge operators do not<br />
need extensive training to understand the<br />
system. This section is designed to educate<br />
and prepare the user to use the PK120. The<br />
following centrifugation parameters can be set<br />
by the operator:<br />
a) Speed in rpm (300 rpm up to 6,000 rpm).<br />
b) Centrifugation time (1 min up to 99 min + ∞)<br />
c) Temperature (-10°C to +40°C)<br />
d) Acceleration (5 profiles)<br />
e) Braking (5 profiles)<br />
The microprocessor allows the centrifuge to<br />
be operated in MANUAL or in PROGRAM<br />
operative mode.<br />
5.3.1 MANUAL Operative Mode<br />
Manual operative mode is active when none<br />
of the five programs is activated. When the<br />
centrifuge is in <strong>manual</strong> mode, none of the<br />
LED’s next to the program keys are<br />
illuminated. In <strong>manual</strong> mode, all of the<br />
parameters can be changed regardless if the<br />
centrifuge is running or on stand-by. For<br />
example: The user approaches the centrifuge<br />
wishing to operate it in <strong>manual</strong> mode. The LED<br />
indicator next to Program #3 is illuminated.<br />
To put the centrifuge into Manual mode, the<br />
user presses the button corresponding to<br />
Program #3 once. The LED goes off, indicating<br />
that the centrifuge is now in Manual mode.<br />
5.3.2 PROGRAM Operative Mode<br />
Up to 5 programs can be stored in the memory<br />
of the PK120. To set or change programs,<br />
follow this procedure:<br />
• Make sure that the centrifuge is in<br />
MANUAL mode (all LED indicators next<br />
to program buttons are off).<br />
• Set all parameters for your desired<br />
program. The display numbers will blink<br />
for about three seconds after you are done<br />
programming.<br />
• Before the numbers stop blinking, press<br />
the program button for the program<br />
number under which you wish to store the<br />
protocol. This will save the newly-created<br />
program.<br />
• To select a program, press the button<br />
corresponding to the program number that<br />
you wish to recall.<br />
5.4 Setting Centrifugation Parameters<br />
5.4.1 Default Condition<br />
The centrifuge is always in the same operative<br />
mode as at the time of its last use. When the<br />
centrifuge is idle the display reads:<br />
°C- Real temperature in the centrifugation<br />
chamber<br />
rpm - set speed<br />
min - set time<br />
11
5.4.2 Acceleration<br />
The ALC PK120 control system allows the<br />
user to set acceleration rates in two different<br />
ways. The first method involves a simple<br />
choice between high or low acceleration rates.<br />
High acceleration (LED off)<br />
Low acceleration (LED on)<br />
The system also allows for a more<br />
rigorous choice with 5 possible<br />
profiles. This method is as follows:<br />
1. Press the (with LED on) for 3 sec.<br />
(The rpm-display shows “ACL” flashing<br />
and a number between 1 and 5)<br />
2. With acceleration key still pressed, use the<br />
SET rpm keys to select an<br />
acceleration curve between 1 and 5.<br />
5.4.3. Braking<br />
The PK120 control system allows the user to<br />
set braking rates in two different ways. The<br />
first method involves a simple choice between<br />
high or low braking rates.<br />
High braking rate (LED off)<br />
Low braking rate (LED on)<br />
The system also allows for a more<br />
rigorous choice with 5 possible<br />
profiles. This method is as follows:<br />
1. Press (with led on) for 3 sec.<br />
(The rpm-display shows “dCL” flashing<br />
and a number between 0 and 4).<br />
2. With deceleration key still pressed, use the<br />
SET rpm keys to select a braking<br />
curve between 0 and 4 (0 = inertial<br />
braking).<br />
SET<br />
rpm<br />
RAPID DECELERATION<br />
2000<br />
RAPID ACCELERATION<br />
5 4 3 2 1<br />
4 3 2 1 0<br />
soft soft min.<br />
figure 5.4 Acceleration & Braking<br />
12
5.4.4. Setting speed and time values<br />
- When you touch one of the SET keys<br />
, the corresponding display will start<br />
to flash.<br />
- When the display flashes, it is possible to<br />
change the selected parameter using the<br />
SET keys.<br />
SET speed 300 to 6000<br />
rpm (see 4.2 for rotor<br />
speed ratings).<br />
2. To restore “MANUAL MODE”, press the<br />
selected program key; the LED<br />
corresponding to the program key goes off<br />
and it is possible to create a new program.<br />
5.6 Protecting a program<br />
1. To protect a program, press the<br />
LOCK PROG key (STOP)<br />
simultaneously with the program<br />
key when saving the program.<br />
2. To cancel the program protection, press<br />
the LOCK PROG key (STOP)<br />
simultaneously with the program key.<br />
SET time<br />
1 to 99 min + hold<br />
5.7 Starting the centrifuge<br />
BASIC CONDITION: Lid closed<br />
1.Press “START” key.<br />
3 seconds after changes are complete, the<br />
display stops flashing. This confirms the new<br />
SET values.<br />
5.5 Storing a program in memory<br />
BASIC CONDITION: Centrifuge stationary<br />
and “MANUAL” Operative Mode.<br />
1. To store the SET parameters<br />
press one of the program keys<br />
between 1 and 5 while the display<br />
is still flashing (within three<br />
seconds of the last button<br />
operation). The LED next to the<br />
program key will light up, confirming<br />
that the program has been<br />
memorized. NOTE: It is not possible<br />
to set a program with time set to<br />
“HOLD”: if you try to put a “HOLD”<br />
program into memory, the timer<br />
display will continue flashing; you<br />
must enter a determinate time value.<br />
In MANUAL OPERATIVE MODE<br />
and in PROGRAM MODE, the<br />
centrifuge will accelerate to the set<br />
speed. When the run time is<br />
elapsed, the centrifuge will brake to<br />
a stop.<br />
- During the run time the speed display<br />
shows actual values. The time display<br />
shows remaining run time. If the time<br />
setting is “HOLD”, the time display shows<br />
elapsed run time.<br />
- The green LED on the left side of the<br />
control panel flashes while the rotor is<br />
accelerating and remains constantly<br />
illuminated while the rotor is at set speed.<br />
NOTE: if set speed is higher than the<br />
maximum speed of the rotor, the green LED<br />
will continue flashing (see 5.10 SET). In this<br />
case, the program should be corrected as<br />
soon as possible.<br />
13
2. During the run in “MANUAL” MODE To<br />
read and change set values, press the<br />
SET cursors:<br />
- The display starts to flash and shows the<br />
set values for 3 seconds.<br />
- While the display is flashing it is possible<br />
to change the set values.<br />
- During a run in MANUAL mode it is<br />
possible to change the deceleration<br />
3. During the run in “PROGRAM” MODE,<br />
it is possible to display set values by<br />
pressing the corresponding SET cursors.<br />
It is not possible to change the<br />
programmed values.<br />
5.8 Stopping the centrifuge<br />
Once the pre-set time has elapsed,<br />
the centrifuge automatically stops<br />
the rotor at a rate determined by the<br />
deceleration setting.<br />
Pressing at any time will cause the<br />
centrifuge to stop the rotor. NOTE: Automatic<br />
braking will occur under conditions of load<br />
imbalance, power failure, error or breakdown.<br />
In all cases the relevant code will appear on<br />
the message display.<br />
5.9 Messages - Alarms<br />
The microprocessor displays error messages<br />
to indicate errors, malfunctions or breakdowns.<br />
The messages are expressed with the<br />
following codes.<br />
End Appears at the end of every<br />
centrifugation cycle after the rotor comes<br />
to a stop. The message disappears when<br />
the lid is opened or when any key is<br />
pressed.<br />
Lid Appears when the (start button) is<br />
pressed and the lid is not locked. The “LID”<br />
message is accompanied by an audible<br />
signal. This message will disappear when<br />
the lid is locked.<br />
IMbAL Appears when the load is unbalanced.<br />
The message is accompanied by an<br />
audible signal. The centrifuge stops to<br />
allow the user to rebalance the load (5.2).<br />
The message disappears when the lid is<br />
opened.<br />
MAInS Appears when a power failure occurs.<br />
The centrifuge decelerates and the system<br />
shuts down. When power is restored, the<br />
message reappears. It remains on the<br />
display until the next operation is started.<br />
SET Appears when set speed is higher than<br />
the maximum rated speed of the rotor. The<br />
message disappears when the centrifuge<br />
is stopped or when the parameter is<br />
corrected in Manual Operative Mode.<br />
E01-E09 Messages ‘E0..’ (e.g. E01) together<br />
with an acoustic alarm indicate failure<br />
conditions. The ‘E04’ message will appear<br />
on the display after a power failure, in this<br />
case wait for the rotor head to stop before<br />
opening the lid. In the other cases contact<br />
ALC Customer Service.<br />
14
6. HAZARDS, PRECAUTIONS AND USE<br />
LIMITATIONS<br />
6.1Dangerous operations - work<br />
conditions to avoid<br />
• Using the centrifuge if it has not been<br />
properly installed.<br />
• Fitting the rotor on the drive shaft<br />
incorrectly or placing the buckets on the<br />
rotor incorrectly.<br />
• Leaning on the machine.<br />
• Placing dangerous objects in the area of<br />
the centrifuge.<br />
• Moving or shifting the machine during<br />
centrifugation.<br />
• Using the centrifuge with rotors and/or<br />
buckets showing corrosion, wear marks<br />
and/or cracking.<br />
• Using the centrifuge with rotors and/or<br />
accessories not approved by the<br />
manufacturer.<br />
• Using the centrifuge in explosive<br />
environments or with explosive samples or<br />
chemical materials subject to violent<br />
reaction.<br />
• Running an Unbalanced load which<br />
causes excessive vibration of the<br />
centrifuge.<br />
in the “max. rpm” column of the<br />
performance table (see 4.2.2).<br />
• Using old accessories on a new machine.<br />
• Using tubes and/or bottles not suited for<br />
centrifugation.<br />
• Spinning samples of densities higher than<br />
allowed for the given speed.<br />
• Alteration of and/or tampering with the<br />
electronic and mechanical parts of the<br />
centrifuge.<br />
6.2 EN 61010-2-020 STANDARD<br />
The En 61010-2-020 standard relative to<br />
laboratory centrifuges recommends that the<br />
user:<br />
- Mark out a clearance envelope 300 mm<br />
around the centrifuge or establish special<br />
procedures for the non entry of all persons<br />
or all dangerous materials into this space<br />
during the operation of the centrifuge.<br />
- Provide an emergency stop switch<br />
enabling the main power source to be cut<br />
in the case of malfunction. The switch<br />
should be placed at a safe distance from<br />
the centrifuge, preferably in a different<br />
room from that in which the centrifuge is<br />
situated.<br />
• Running a rotor without its full complement<br />
of buckets or carriers, even for partial<br />
loads.<br />
• Leaving the appliance exposed to the<br />
elements (rain, sun, etc.).<br />
• Exceeding the maximum speed indicated<br />
15
6.3 Rotor and accessory precautions<br />
6.3.1 Corrosion information<br />
ALC rotors are made of aluminium alloy and<br />
are designed to operate at their rated RCF<br />
for many years. With careful use they will<br />
resist corrosion, lowering the possibility of<br />
excessive imbalance, disruption and<br />
subsequent damage to the instrument. The<br />
primary conditions for the initiation of<br />
corrosion exist in every laboratory during daily<br />
use of the centrifuge. For this reason it is<br />
essential that due care and attention be paid<br />
to inspection and cleaning.<br />
CHEMICAL CORROSION<br />
This corrosion is characterized by chemical<br />
reactions due to the existence of any<br />
electrolytic liquid on the surface of the<br />
equipment. If these substances are allowed<br />
to remain on the surface corrosion will almost<br />
certainly occur. The first sign of this type of<br />
corrosion is a discoloration or pitting of the<br />
anodized surface.<br />
Acidic and alkaline solutions sustaining their<br />
pH level will also create corrosion of<br />
aluminium equipment. Chlorides, which are<br />
present in salts (human skin secretions are a<br />
common source!), are among the most<br />
aggressive and harmful substances<br />
commonly found in the laboratory.<br />
Chemical products that cause corrosion do<br />
not necessarily originate from broken tubes.<br />
For example, they could come from:<br />
•·<br />
Chemical vapors present in the laboratory<br />
which condense on the centrifuge and its<br />
accessories.<br />
• Corrosive liquids originating from overfilled<br />
uncapped tubes (the liquid overflows<br />
during centrifugation)<br />
• Inserts, adapters, racks and bottles with<br />
exteriors soiled by a chemical product or<br />
poorly rinsed after decontamination (with<br />
bleach, for example).<br />
NOTE: If the products are very corrosive,<br />
simple rinsing is insufficient. Residual traces<br />
dissolve little by little with the humidity present<br />
in the bottom of the rotor pocket.<br />
BEWARE of the presence of solid particles<br />
beneath tubes, inserts, racks or adapters.<br />
These particles are crushed by the centrifugal<br />
force and penetrate the protective, anodized<br />
layer of buckets and rotors, thus creating<br />
pathways for corrosion.<br />
STRESS CORROSION<br />
This term relates to the phenomenon of<br />
accelerated corrosion due to the effect of<br />
centrifugal force when a corrosive chemical is<br />
in contact with the alloy. From the time when<br />
the aluminium alloy has been attacked by<br />
chemicals, stress corrosion begins to appear.<br />
As it occurs on a microscopic scale it is even<br />
more dangerous than macroscopic corrosion<br />
since it is invisible to the naked eye.<br />
During centrifugation chemicals responsible for<br />
corrosion are also subjected to very high<br />
forces, which push them against the alloy. This<br />
close contact facilitates the chemical reaction<br />
which occurs much faster than it does in a<br />
static situation. Moreover, centrifugal force is<br />
directional. Because of this, corrosion under<br />
stress creates, with a very small amount of<br />
corrosive product, straight microscopic<br />
fissures. Each centrifugation run allows the<br />
chemical to migrate further and further.<br />
Fissures or cracks, although microscopic, are<br />
a flaw in the metal, breaking the cohesion of<br />
the material. As one weak link in a chain allows<br />
the chain to break, so the microfissures break<br />
the chain of resistance of the accessory to<br />
centrifugal force. Because accessories are<br />
designed with high safety factors, rupture does<br />
not occur as soon as the first microfissures<br />
are produced.<br />
Depending on the location of the fissure,<br />
disruption may occur before it reaches the<br />
external surface of the accessory. The fissure<br />
creates a weakness, which makes the<br />
accessory less and less resistant to<br />
mechanical fatigue. The corrosion caused by<br />
16
a small amount of corrosive product does not<br />
disrupt the accessory but makes it<br />
mechanically weaker and weaker until<br />
disruption occurs due to both centrifugal force<br />
and fatigue.<br />
WARNING:<br />
BECAUSE STRESS CORROSION IS<br />
LARGELY INVISIBLE, IT IS ESSENTIAL THAT<br />
ROTATING EQUIPMENT BE SCRUTINISED<br />
REGULARLY PAYING PARTICULAR<br />
ATTENTION TO SUSCEPTIBLE PARTS SUCH<br />
AS THE BOTTOM OF POCKETS, THE OUTER<br />
EDGES AND THE BASE OF THE ROTATING<br />
EQUIPMENT.<br />
If decontamination procedures require the use<br />
of warming (eg. autoclave) the rotating<br />
equipment should always be completely<br />
disassembled before being subjected to heat.<br />
They should also be completely disassembled<br />
prior to external chemical cleaning. Seals,<br />
tubes and plastic components should be<br />
decontaminated with the method most suitable<br />
for them, which might not be the same as for<br />
the rotating equipment.<br />
Note that the black color on the surface of the<br />
rotating equipment will be gradually washed<br />
out if the rotor is regularly autoclaved or<br />
bleached. This does not necessarily denote<br />
degradation of the anodized surface.<br />
WARNING:<br />
ANY PART WHICH HAS BEEN SUBJECTED<br />
TO TEMPERATURES ABOVE 130°C MUST<br />
BE DISCARDED.<br />
STRESS CORROSION<br />
6.3.2 Contamination hazards<br />
CHEMICAL CORROSION<br />
ALC centrifuges are likely to be used in<br />
laboratories where hazardous substances are<br />
frequently present.<br />
WARNING:<br />
THE USER HAS THE RESPONSIBILITY<br />
FOR CARRYING OUT APPROPRIATE<br />
DECONTAMINATION PROCEDURES.<br />
USERS SHOULD BE AWARE OF THE<br />
INTERNATIONALLY RECOGNIZED<br />
“LABORATORY BIOSAFETY MANUAL”,<br />
WHICH GIVES INFORMATION ON<br />
DECONTAMINATES, THEIR USE,<br />
DILUTIONS, PROPERTIES AND<br />
POTENTIAL APPLICATIONS. IF<br />
HAZARDOUS MATERIAL IS SPILLED ON<br />
OR INSIDE THE APPLIANCE, CLEAN<br />
THE APPLIANCE AND ITS DRAIN HOSE<br />
USING APPROPRIATE METHODS.<br />
WARNING:<br />
IF YOU HAVE A DOUBT ABOUT A<br />
PARTICULAR CLEANING METHOD,<br />
PLEASE CONTACT ALC TO VERIFY THAT<br />
THE PROPOSED METHOD DOES NOT<br />
DAMAGE THE APPLIANCE.<br />
ALC makes no claims as to the effectiveness<br />
of proprietary brands of decontaminating<br />
solutions.<br />
17
7. ROUTINE MAINTENANCE<br />
fig. 7.1<br />
CAUTION:<br />
During maintenance<br />
operations, ALWAYS<br />
disconnect the centrifuge<br />
from the main power<br />
source (fig. 7.1).<br />
7.1 Rotating Equipment and<br />
Centrifugation Chamber Cleaning<br />
Regular cleaning of rotors and of the<br />
centrifugation chamber is vital to maintain<br />
good working conditions. The operator must<br />
wear proper protective equipment during the<br />
cleaning (mask, gloves, etc.). It is also<br />
important to verify the integrity of biosafety<br />
components when they are used. The user<br />
should always inspect the condition of seals<br />
and lids prior to using them. Do not clean<br />
them with materials that damage silicone and<br />
polycarbonate. Ideally, rotors should be<br />
washed after every run (at least weekly) in<br />
warm water containing a few drops of mild (not<br />
alkaline) detergent (domestic liquid soap is<br />
ideal). ROTORS MUST BE WASHED EVERY<br />
TIME SPILLAGE OCCURS. Do not forget to<br />
wash the core of the rotating head that comes<br />
into contact with the drive spindle. Each rotor<br />
pocket (and bucket for swing-out rotors) must<br />
be washed thoroughly using a small nylon<br />
brush. Once the rotor has been removed, it is<br />
easy to clean the centrifugation chamber and<br />
gaskets. Use warm water with non- alkaline<br />
detergent. Do not use corrosive solvents.<br />
Once the rotor is clean, rinse it with running<br />
water, preferably distilled. Dry the rotor with a<br />
soft absorbent non-woven cloth or tissue. The<br />
equipment can be dried with a cloth or with a<br />
hair dryer. DO NOT USE METAL WIRE<br />
BRUSHES and MAKE CERTAIN THAT<br />
ROTOR SLOTS AND BUCKETS ARE WELL-<br />
DRIED (fig. 7.2). NEVER LEAVE damp rotors<br />
on a metal surface (particularly stainless steel)<br />
because an electrochemical reaction could<br />
take place with the aluminium or magnesium<br />
in the rotor. For swing-out rotors, be sure to<br />
clean the dirty grease from the studs and<br />
replace it with a small amount of fresh grease.<br />
This will ensure that the buckets swing freely.<br />
The majority of imbalance problems arise from<br />
the failure of the user to clean and grease the<br />
studs. Never apply grease if studs and<br />
balancing slots have not been carefully<br />
cleaned (fig. 7.3 a/b). Use only the same<br />
kind of greases furnished in the rotor<br />
packaging.<br />
\<br />
fig. 7.2<br />
fig. 7.3<br />
18
7.2 Exterior cleaning<br />
For correct cleaning, a light domestic-use<br />
detergent is recommended. A mixture of 50%<br />
isopropyl alcohol and water is also suggested<br />
because it will not damage the labels.<br />
7.3 Fuses<br />
There are two fuses in the power supply line.<br />
They are located in the power receptacle<br />
under the line cord. (see fig. 7.4)<br />
Fuse Specifications:<br />
230V(50-60HZ)<br />
120V (60HZ)<br />
5 x 20 mm TA4/250V<br />
5 x 20 mm TA6.3/120V<br />
WARNING:<br />
BEFORE PROCEEDING TO CHANGE THE<br />
FUSES, DISCONNECT THE CENTRIFUGE<br />
FROM THE MAIN POWER SOURCE.<br />
Do not attempt to replace blown fuses until a<br />
service engineer has determined the cause<br />
of the failure.<br />
fig. 7.4<br />
19
8. OPERATOR’S NOTES<br />
date<br />
20
9. CERTIFICATE of DECONTAMINATION and CLEANING<br />
(For your convenience, use a copy of this page)<br />
Read the instructions below carefully before sending an instrument, or parts of it, to<br />
ALC Technical Service.<br />
MR / MRS (NAME) ______________________________________________________<br />
ESTABLISHMENT ______________________________________________________<br />
DEPARTMENT _________________________________________________________<br />
ADDRESS ________________________________ POST / ZIP CODE ____________<br />
CITY _____________________ STATE / COUNTRY _________________________<br />
CERTIFIES the cleaning and decontamination of the following:<br />
CENTRIFUGE _____________________________ SERIAL N° __________________<br />
ROTOR __________________________________ SERIAL N° __________________<br />
ROTOR __________________________________ SERIAL N° __________________<br />
ACCESSORY - Description ___________________ SERIAL N° __________________<br />
ACCESSORY - Description ___________________ SERIAL N° __________________<br />
NATURE of contamination<br />
_____________________________________________________________________<br />
_____________________________________________________________________<br />
Decontamination PROCEDURE USED<br />
_____________________________________________________________________<br />
_____________________________________________________________________<br />
Decontamination CERTIFIED by:<br />
Mr / Mrs. __________________<br />
Date _____________________<br />
Institution:_________________________________<br />
Signature:_________________________________<br />
When an instrument, or parts of it, comes back after demonstration and requires servicing by Technical Service<br />
personnel, the following procedure must be followed to ensure safety:<br />
n Clean the instrument and decontaminate it.<br />
n Complete this Decontamination Certificate with all the information required.<br />
n Attach this Certificate to the instrument (or accessory) before sending it to ALC.<br />
Technical Service personnel will not accept instruments without this Decontamination Certificate.<br />
21
Warranty<br />
ALC warrants its products against defects in material or in workmanship when used<br />
under appropriate conditions and in accordance with appropriate operating instructions for a<br />
period of no less than one (1) year from the date of delivery of the products.<br />
The sole obligation of ALC shall be to repair or replace at our option, FOB factory or<br />
locally, without charge, any part(s) that prove defective within the warranty period, provided<br />
that the customer notifies ALC promptly and in writing of any such defect. Compensation for<br />
labor by other than ALC employees will not be our obligation. Part(s) replacement does not<br />
constitute an extension of the original warranty period.<br />
ALC makes no warranty of merchantability, fitness for a particular purpose, or any<br />
other warranty, express or implied, as to the design, sale, installation, or use of its products,<br />
and shall not be liable for consequential damages resulting from the use of its products.<br />
ALC will not assume responsibility for unauthorized repairs or failure as a result of<br />
unauthorized repairs, replacement, or modifications made negligently or otherwise improperly<br />
made or performed by persons other than ALC employees or authorized representatives.<br />
While our personnel are available to advise customers concerning general application<br />
of all manufactured products, oral representations are not warranties with respect to particular<br />
application and should not be relied upon if inconsistent with product specification or the<br />
terms stated herein.<br />
In any event, the terms and conditions continued in ALC, formal sales contracts shall<br />
be controlling; and any changes must be in writing and signed by an authorized executive of<br />
ALC.<br />
All defective components will be replaced without charge for one (1) year from the date<br />
of delivery. There will be no charge for labor if the apparatus is returned to the factory prepaid.<br />
Conditions and qualifications of the warranty statement shall prevail at all times.<br />
22