
You also want an ePaper? Increase the reach of your titles
YUMPU automatically turns print PDFs into web optimized ePapers that Google loves.
METRO 0.5 to 1.5<br />
Maintenance and repair 9<br />
Adjusting discharge flap (METRO H** only)<br />
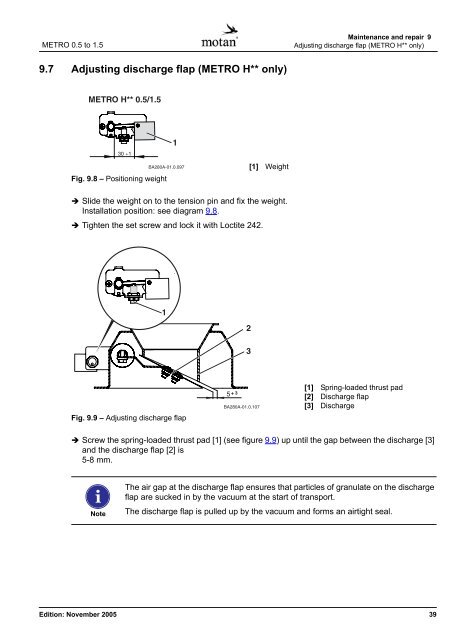
9.7 Adjusting discharge flap (METRO H** only)<br />
Fig. 9.8 – Positioning weight<br />
[1] Weight<br />
Slide the weight on to the tension pin and fix the weight.<br />
Installation position: see diagram 9.8.<br />
Tighten the set screw and lock it with Loctite 242.<br />
Fig. 9.9 – Adjusting discharge flap<br />
[1] Spring-loaded thrust pad<br />
[2] Discharge flap<br />
[3] Discharge<br />
Screw the spring-loaded thrust pad [1] (see figure 9.9) up until the gap between the discharge [3]<br />
and the discharge flap [2] is<br />
5-8 mm.<br />
Note<br />
The air gap at the discharge flap ensures that particles of granulate on the discharge<br />
flap are sucked in by the vacuum at the start of transport.<br />
The discharge flap is pulled up by the vacuum and forms an airtight seal.<br />
Edition: November 2005 39