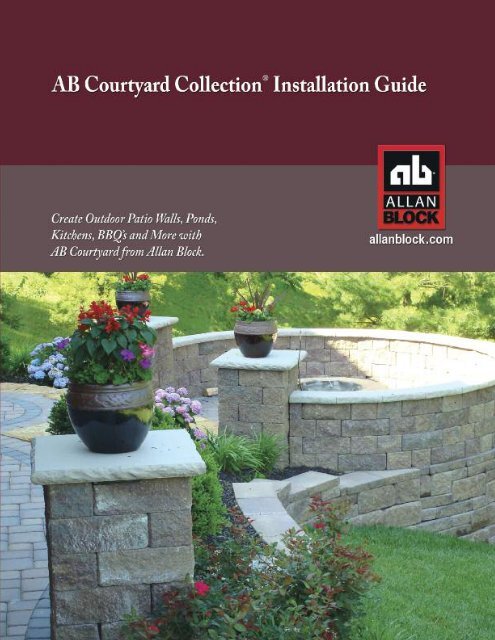
AB Courtyard Collection - Allan Block
AB Courtyard Collection - Allan Block
AB Courtyard Collection - Allan Block

Create successful ePaper yourself
Turn your PDF publications into a flip-book with our unique Google optimized e-Paper software.
<strong>AB</strong> <strong>Courtyard</strong> <strong>Collection</strong> ®<br />
The <strong>AB</strong> <strong>Courtyard</strong> <strong>Collection</strong> is a durable, versatile and a costeffective<br />
way to bring value into your landscaping. This two-sided<br />
free standing wall system’s unique design can be used in many<br />
different applications. Check out the projects shown here or visit<br />
our website for more ways to enhance your outdoor living space.<br />
Visit allanblock.com.<br />
For over twenty years <strong>Allan</strong> <strong>Block</strong> has been bringing innovative<br />
products to the landscape community. We can provide quality<br />
and performance to any project with our line of products. You<br />
can be confident you are making the right choice with any <strong>Allan</strong><br />
<strong>Block</strong> product.<br />
Visit our website at allanblock.com to find information about<br />
Going Green with <strong>Allan</strong> <strong>Block</strong> or to locate your closest <strong>AB</strong> distributor<br />
for pricing, availability, color selections and much more.
2-7, 30-33 Project Ideas and Photography<br />
8 Product Profile<br />
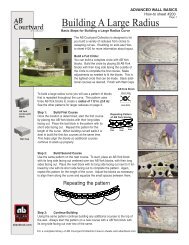
10 Build an <strong>AB</strong> <strong>Courtyard</strong> Wall Panel<br />
12 Build an <strong>AB</strong> <strong>Courtyard</strong> Post/Pillar<br />
14 Build Walls and Posts/Pillars Together<br />
16 Build Curved Walls<br />
18 Building with Corners<br />
20 Ending Wall Panels<br />
15, 19, 21 Modifying / Splitting <strong>Block</strong>s<br />
Weekend Projects<br />
24 Patio Enclosure<br />
24 Fire Pit<br />
25 Garden Bench<br />
25 Backyard Couch<br />
26 Outdoor Kitchen<br />
26 BBQ Grilling Station<br />
27 Below Ground Pond<br />
27 Above Ground Pond<br />
28 Entry Monument with Planter<br />
28 Entry Monument<br />
29 Compost Bin<br />
29 Light Post<br />
9 Estimating Charts<br />
For a complete library of installation videos, detailed instructions,<br />
estimating tools, photo gallery, and much more visit our website<br />
at allanblock.com.<br />
Download the estimating tool for<br />
FREE at allanblock.com.<br />
Visit allanblock.com.<br />
Patio Enclosures Page 24<br />
Firepits Page 24<br />
Bench and Couch Seating Page 25<br />
Kitchen and Grill Surrounds Page 26<br />
1
2 Visit allanblock.com.<br />
The <strong>AB</strong> <strong>Courtyard</strong> <strong>Collection</strong> patio wall system will enhance<br />
the beauty of your front or backyard landscaping. Use the walls<br />
and posts/pillars to add privacy or separation between landscape<br />
elements. The timeless beauty and the simplicity of use make<br />
this a product of choice.
Use the <strong>AB</strong> <strong>Courtyard</strong> <strong>Collection</strong> to create beautiful patio<br />
enclosures. Design with flowing curves or create structured areas<br />
to give your new outdoor room a gracious and spacious feel. A<br />
built-in benefit is the additional seating that is now available when<br />
entertaining family and friends.<br />
Visit allanblock.com.<br />
3
<strong>AB</strong> <strong>Courtyard</strong> <strong>Collection</strong> provides unlimited possibilities for creating<br />
formal or casual settings. Available in a classic look of <strong>Courtyard</strong><br />
as well as a weathered look of Old Country <strong>Courtyard</strong>, offering a<br />
timeless design, look and feel with the most versatility.<br />
4 Visit allanblock.com.
The <strong>AB</strong> <strong>Courtyard</strong> <strong>Collection</strong> is made of materials that are<br />
environmentally friendly and are available in a wide range of colors<br />
to match your home and landscape.<br />
Visit allanblock.com.<br />
5
Use the <strong>AB</strong> <strong>Courtyard</strong> <strong>Collection</strong> to create your own<br />
outdoor patio, kitchen and grilling area. Design your<br />
own or use our weekend projects to build your own<br />
custom surroundings. Let your imagination run wild.<br />
6 Visit allanblock.com.
<strong>AB</strong> <strong>Courtyard</strong> Weekend Projects<br />
The <strong>AB</strong> <strong>Courtyard</strong> <strong>Collection</strong> can enhance your landscape in just<br />
a weekend. Check out the ideas on pages 24-29 or be inspired to<br />
create something unique for your personal space. With the versatility<br />
of the system, any design or idea is possible.<br />
Patio Enclosure<br />
Page 24<br />
Garden Bench<br />
Page 25<br />
Outdoor Kitchen<br />
Page 26<br />
Below Ground<br />
Pond/Water Feature<br />
Page 27<br />
Entry Monument<br />
with Planter<br />
Page 28<br />
Compost Bin<br />
Page 29<br />
Visit allanblock.com.<br />
Fire Pit<br />
Page 24<br />
Backyard Couch<br />
Page 25<br />
BBQ Grilling Station<br />
Page 26<br />
Above Ground<br />
Pond/Water Feature<br />
Page 27<br />
Entry Monument<br />
Page 28<br />
Light Post<br />
Page 29<br />
7
8<br />
Te <strong>AB</strong> <strong>Courtyard</strong> <strong>Collection</strong> ®<br />
The <strong>AB</strong> <strong>Courtyard</strong> <strong>Collection</strong> is a two-sided free standing wall<br />
system that has 3 main components plus caps - the <strong>AB</strong> Dublin block,<br />
the <strong>AB</strong> York block and the Corner <strong>Block</strong>. With these blocks, you<br />
can build any wall panel or post/pillar project that will compliment<br />
any landscape. For an added element, blend the <strong>AB</strong> Dublin and<br />
<strong>AB</strong> York together to create patterned wall panels.<br />
<strong>AB</strong> Dublin <strong>Block</strong><br />
The <strong>AB</strong> Dublin block is an angled block<br />
available in left and right angles. There<br />
are two raised rings on the top of the<br />
block, these interlock the blocks together<br />
so adhesive is not needed.<br />
Raised<br />
Rings<br />
16.5 in (420 mm)<br />
Height: 6.0 in (150 mm)<br />
Weight: 39 lbs (18 kg)<br />
7.0 in<br />
(175 mm)<br />
For starting or ending walls at posts/pillars, from an existing structure<br />
or when building corners the blocks must be modified to obtain one<br />
straight edge. There are three locations where the <strong>AB</strong> Dublin blocks<br />
may be modified. These units will need to be split or cut at a quarter<br />
(1/4), half (1/2) or three quarter (3/4) length.<br />
Some units are produced with marks at these locations for ease of locating<br />
the cut line, but any of the <strong>AB</strong> Dublin blocks can be modified<br />
to obtain one straight edge. See page 15 for information on how to<br />
modify blocks.<br />
Splitting or Cutting Locations for the <strong>AB</strong> Dublin<br />
1/2 length - 8.25 in. (210 mm)<br />
16.5 in (420 mm)<br />
Modify the block down the<br />
center of the large circle.<br />
1/4 length - 4.25 in. (110 mm)<br />
3/4 length - 12.25 in. (310 mm)<br />
The measurements shown<br />
here are for reference only.<br />
3/4 length - 12.25 in. (310 mm)<br />
1/4 length - 4.25 in. (110 mm)<br />
Modify the blocks down the center of the raised rings.<br />
Raised<br />
Rings<br />
<strong>AB</strong> York <strong>Block</strong><br />
The <strong>AB</strong> York block is a tapered block,<br />
with a long and a short side. Creating<br />
curves with this shape is simple, and<br />
for straight walls, just rotate every<br />
other block.<br />
Visit allanblock.com.<br />
Raised<br />
Ring<br />
Splitting or Cutting Locations for the <strong>AB</strong> York<br />
<strong>AB</strong> York blocks are split in half down the center of the raised<br />
ring when modifying. Some units are produced with marks at this<br />
location for ease of locating the cut line but any of the <strong>AB</strong> York units<br />
can be modified at these locations to obtain one straight edge.<br />
Note: Te <strong>AB</strong> Dublin and <strong>AB</strong> York can be installed upside down when<br />
the opposite angle is needed during construction. Tis should typically<br />
only be done on the top course.<br />
Corner <strong>Block</strong><br />
The Corner <strong>Block</strong> is an angled block. The block has no designated<br />
top or bottom; flipping it over creates the opposite angle. Use the<br />
Corner <strong>Block</strong> to create corners in a wall, step down or end a wall, create<br />
a post/pillar within a wall or as a free-standing landscape accent.<br />
The <strong>AB</strong> Dublin and <strong>AB</strong> York<br />
blocks are used to create this<br />
wall panel. Where they meet<br />
the post /pillar (Corner <strong>Block</strong>s)<br />
they will need to be split, to<br />
form a straight edge and create<br />
a finished look.<br />
See page 15 for information on<br />
how to modify blocks.<br />
7.5 in. (190 mm)<br />
9.0 in (230 mm)<br />
Height: 6.0 in (150 mm)<br />
Weight: 20 lbs (9 kg)<br />
15.0 in (380 mm)<br />
7.0 in<br />
(175 mm)<br />
1/2 length - 4.5 in. (115 mm) The measurements shown here are<br />
for reference only. This example is<br />
using the long side of the <strong>AB</strong> York.<br />
Modify the block down the<br />
center of the raised ring.<br />
15.5 in (400 mm)<br />
Height: 6.0 in (150 mm)<br />
Weight: 42 lbs (19 kg)<br />
Split<br />
blocks<br />
7.0 in<br />
(175 mm)
Working with <strong>AB</strong> Dublin and <strong>AB</strong> York<br />
Two <strong>AB</strong> Dublins<br />
with different angles will<br />
not line up, creates a gap.<br />
Textures<br />
The <strong>AB</strong> <strong>Courtyard</strong> <strong>Collection</strong> is<br />
available in two different textures, the<br />
Classic Cut Stone look of <strong>Courtyard</strong><br />
and the Tumbled Old World look of<br />
Old Country <strong>Courtyard</strong>. Check<br />
with your local <strong>AB</strong> Distributor for<br />
color selection and availability.<br />
Patterns<br />
Using the <strong>AB</strong> York and the <strong>AB</strong> Dublin together in random patterns<br />
will create an added dimension and style to any project.<br />
Estimating<br />
Use the simple charts below to calculate the block quantity for<br />
your project or visit allanblock.com to download an easy to use<br />
estimating tool to calculate all the materials that are needed for<br />
your project.<br />
Approximate<br />
Wall Height<br />
1 course 6 in. (150 mm)<br />
2 courses 12 in. (300 mm)<br />
3 courses 18 in. (450 mm)<br />
4 courses 24 in. (600 mm)<br />
5 courses 30 in. (750 mm)<br />
Wall Caps Needed<br />
Number of <strong>AB</strong> Dublin <strong>Block</strong>s Needed<br />
Wall Length<br />
4 ft 5 ft 8 ft 12 ft 20 ft<br />
1.2 m 1.5 m 2.4 m 3.7 m 6.1 m<br />
3 4 6 9 15<br />
6 8 12 18 30<br />
9 12 18 27 45<br />
12 16 24 36 60<br />
15 20 30 45 75<br />
6 8 12 18 30<br />
For wall panels using <strong>AB</strong> York blocks, just double the numbers above.<br />
The <strong>AB</strong> <strong>Courtyard</strong> <strong>Collection</strong> is not to be used for retaining wall<br />
applications. For estimating more detailed projects with a combination<br />
of block sizes, curved or straight walls, see the estimating<br />
tools at allanblock.com or contact your local <strong>AB</strong> Distributor.<br />
Slide <strong>AB</strong> Dublin<br />
down and install an<br />
<strong>AB</strong> York block between.<br />
<strong>Courtyard</strong> Old Country <strong>Courtyard</strong><br />
Visit allanblock.com.<br />
9.25 in. (235 mm)<br />
7 in. (180 mm)<br />
10 in.<br />
(250 mm)<br />
Patterned Wall<br />
24 in. (610 mm)<br />
allanblock.com<br />
Number of Corner <strong>Block</strong>s Needed for Posts/Pillars<br />
Approximate<br />
Number of Posts/Pillars<br />
Post/Pillar Height 1 2 3 4 5<br />
2 courses 12 in. (300 mm)<br />
3 courses 18 in. (450 mm)<br />
4 courses 24 in. (600 mm)<br />
5 courses 30 in. (750 mm)<br />
6 courses 36 in. (900 mm)<br />
Post Caps Needed<br />
Wall Caps Post Caps<br />
Height: 3.5 in (90 mm)<br />
Weight: 22 lbs (10 kg)<br />
8 16 24 32 40<br />
12 24 36 48 60<br />
16 32 48 64 80<br />
20 40 60 80 100<br />
24 48 72 96 120<br />
2 4 6 8 10<br />
Height: 3.0 in (75 mm)<br />
Weight: 70 lbs (32 kg)<br />
12 in.<br />
(305 mm)<br />
9<br />
<strong>AB</strong> <strong>Courtyard</strong> <strong>Collection</strong>
10<br />
Building an<br />
<strong>AB</strong> <strong>Courtyard</strong><br />
Wall Panel<br />
INSTALLING ON EXISTING PATIOS OR PAVEMENT<br />
Step 1: Layout<br />
Determine the location of the wall panel on the existing surface. To ensure that the placement<br />
of the wall is straight, and in the location desired, use a string line. Go to Step 5.<br />
INSTALLING ON SOIL<br />
Step 1: Layout<br />
Determine the location of the wall panel and lay the first course of block to determine<br />
the shape of the wall and to establish where to dig the trench. <strong>AB</strong> Dublin, <strong>AB</strong> York or<br />
both blocks together can be used for the base course. See page 16 when building with<br />
curves and page 18 if corners will be needed. The <strong>AB</strong> <strong>Courtyard</strong> <strong>Collection</strong> can be used<br />
to retain two courses of soils, see page 22 for more information.<br />
Step 2: Build Foundation*<br />
Mark the location of the wall with a<br />
shovel, remove the blocks and dig a level<br />
trench 3 in. deep and 7 in. wide (75 mm<br />
x 180 mm).<br />
3 in.<br />
(75 mm)<br />
7 in. (180 mm)<br />
Step 3: Fill<br />
Place 3 in. (75 mm) of base rock in the trench and compact using a hand tamper. See<br />
page 13 for information on proper base rock materials.<br />
*NOTE:<br />
The soil beneath the foundation pad must be a good quality compactable material. If<br />
soft soils are encountered, they will need to be removed and replaced with additional<br />
base rock. A good foundation will ensure a stable wall for years to come.<br />
Step 4: Level<br />
Level the base rock. We recommend using a 2x4 and a level to ensure the entire base is<br />
level. Make any adjustments as needed by adding or removing the base rock.<br />
Visit allanblock.com.
Offset the<br />
block seams<br />
Step 5: Build<br />
Install the first two courses of block at the same time, tamping<br />
and leveling into place. Place 3-5 blocks in the trench, level,<br />
then place 3-5 blocks on the second course. Installing the<br />
first two courses at the same time will ensure that the blocks<br />
line up properly. The raised rings on the top of the blocks<br />
lock the courses together by fitting into the blocks above.<br />
Helpful Tips:<br />
<strong>AB</strong> Dublin - Install the same angled block one after another, to switch to the other angled<br />
<strong>AB</strong> Dublin, place an <strong>AB</strong> York block in between. (see photos at right).<br />
<strong>AB</strong> York - For a straight panel, rotate every other block to create a straight section. For a<br />
curved panel, place the short side of the block facing the inside of the curve.<br />
Additional Information:<br />
If taller walls are desired, additional construction information to ensure stability can be<br />
found on How-to sheet #150 at allanblock.com.<br />
If building your wall panel with posts/pillars, interlock them together for added stability.<br />
For more information see How-to sheet #230 at allanblock.com.<br />
Built on existing patio Built on soil<br />
Step 6: Continue Building<br />
Continue stacking courses of blocks in the pattern you have chosen until the desired height<br />
is achieved. Remember to offset the block seams on each course of blocks from the course<br />
below. See the Helpful Tips below for additional information.<br />
Step 7: Finish<br />
Finish the wall with Wall Caps. On straight sections alternate the direction of<br />
the Wall Cap. On curved walls, place the short side of the caps on the inside of the curve.<br />
Secure the Wall Caps in place with a bead of masonry adhesive along both sides of the<br />
raised rings and along the side of each Wall Cap.<br />
Visit allanblock.com.<br />
Helpful Tip:<br />
Two <strong>AB</strong> Dublins<br />
with different angles will<br />
not line up, creates gap.<br />
Slide <strong>AB</strong> Dublin<br />
down and install an<br />
<strong>AB</strong> York block between.<br />
allanblock.com<br />
11<br />
Build a Wall Panel
12<br />
Building an<br />
<strong>AB</strong> <strong>Courtyard</strong><br />
Post/Pillar<br />
INSTALLING ON EXISTING PATIOS OR PAVEMENT<br />
Step 1: Layout<br />
Determine the location and placement of the post/pillar on the existing surface. Go to<br />
Step 5.<br />
INSTALLING ON SOIL<br />
Step 1: Layout<br />
Determine the location of the post/pillar<br />
and lay the first course of block to establish<br />
where to dig the foundation pad.<br />
Step 2: Build Foundation*<br />
Mark the location of the post/pillar with<br />
a shovel, remove the blocks and dig a<br />
hole 24 in. square and 4 in. deep (600<br />
mm x 100 mm).<br />
4 in.<br />
(100 mm)<br />
24 in. (600 mm)<br />
Step 3: Fill<br />
Place 4 in. (100 mm) of base rock in the hole and compact using a hand tamper. See page<br />
13 for information on proper base rock materials.<br />
*NOTE:<br />
The soil beneath the foundation pad must be a good quality compactable material. If<br />
soft soils are encountered, they will need to be removed and replaced with additional<br />
base rock. A good foundation will ensure a stable post/pillar for years to come.<br />
Step 4: Level<br />
Level the foundation pad. Make any adjustments as needed by adding or removing the<br />
base rock.<br />
Visit allanblock.com.
Offset the<br />
block<br />
seams<br />
Step 5: Build<br />
Install the first course with 4 Corner <strong>Block</strong>s with the long<br />
sides facing out. Square up the blocks, tamp into place<br />
and level.<br />
Step 6: Continue Building<br />
Continue stacking courses, alternating<br />
between the patterns shown to offset<br />
the seams from the course below until<br />
the desired height is achieved. Do not<br />
stack the blocks up using only one pattern<br />
(seams should not create a straight<br />
line the full height of the post/pillar).<br />
Built on existing foundation Built on soil<br />
Pattern A Pattern B<br />
Long<br />
sides<br />
facing<br />
out<br />
Step 7: Finish<br />
Finish the post/pillar with two Post<br />
Caps. Secure the Post Caps in place with a bead of masonry adhesive along the outside<br />
edge of the top course of Corner <strong>Block</strong>s and then set the Post Caps in place.<br />
Additional Information:<br />
If taller posts/pillars are desired, additional construction information to ensure stability<br />
is available on How-to sheet #140 at allanblock.com.<br />
Base Rock Materials when Building on Soil<br />
Using the proper materials to create the base foundation for the panels<br />
and post/pillars is important when building on soil. We recommend using<br />
a compactible base rock material that is gravel in varying sizes of angular<br />
or smooth aggregates similar to the wall rock used in retaining walls or a<br />
road/ paver base type material.<br />
Visit allanblock.com.<br />
allanblock.com<br />
Wall Rock Road/Paver Base<br />
13
14<br />
Building<br />
<strong>AB</strong> <strong>Courtyard</strong><br />
Walls and<br />
Posts/Pillars<br />
Together<br />
Offset the<br />
block seams<br />
Split block with split<br />
side against post/pillar<br />
Install the next block<br />
on first course<br />
Split block with split side<br />
against post/pillar<br />
Split blocks with split side facing<br />
out to meet up with next post/pillar<br />
Step 1: Layout<br />
Determine the location of the first post/pillar. Install the post/pillar using Corner <strong>Block</strong>s<br />
with the long sides facing out. Align and level each course to desired height. Alternate the<br />
blocks per course to offset the seams from the blocks below. Make adjustments as needed.<br />
For proper construction on soil, see page 10 for wall panels and page 12 for posts/pillars.<br />
Step 2: Begin Panel<br />
The first and the last block of every course of wall panel between the posts/pillars will be a<br />
split block. Using a split block allows the panel to be flush with the post/pillar. If a standard<br />
angled block shape is used there will be a gap where the panel meets up with the post/pillar.<br />
Split an <strong>AB</strong> Dublin to achieve a quarter (1/4) and three-quarter (3/4) length piece to start<br />
the first course. Place the quarter (1/4) piece with the split side against the center of the<br />
post/pillar to start the first course followed by the next full block. Use the three-quarter (3/4)<br />
length piece to complete the end of this course where it will meet up with the next post/pillar.<br />
We recommend installing the first two courses of the wall panel at the same time to ensure<br />
proper alignment.<br />
Location of<br />
1st post/pillar<br />
1/2<br />
length<br />
piece<br />
1/4<br />
length<br />
piece<br />
Split a <strong>AB</strong> Dublin<br />
Split a <strong>AB</strong> Dublin<br />
1/2<br />
length<br />
piece<br />
3/4<br />
length<br />
piece<br />
Location of<br />
2nd post/pillar<br />
Step 3: Second Course<br />
On the next course, split an <strong>AB</strong> Dublin at the half (1/2) length to start this course. Place<br />
one half of this block with the split side against the post/pillar. Again, save the other half<br />
of this piece for the end of this course. To aid in fitting the split blocks, try flipping them<br />
over so the raised rings are down.<br />
Step 4: Build Panel<br />
With the first two courses started, continue building the wall panel in the chosen pattern.<br />
Build to the location of the next post/pillar. At the end of each section place the remaining<br />
split blocks (the 3/4 and 1/2 length pieces) on each course that was used to start the course.<br />
Visit allanblock.com.
Finish wall panel to desired height.<br />
Install Post and Wall Caps<br />
Modifying <strong>Block</strong>s<br />
Step 5: Additional Posts/Pillars<br />
At the end of the wall panel, install the next post/pillar as<br />
previously done. Place the Corner <strong>Block</strong>s with the long sides<br />
facing out. Install additional courses until the desired height<br />
is achieved. Alternate the blocks to offset the seams from the<br />
blocks below.<br />
Step 6: Continue Building<br />
With both posts/pillars built, continue stacking the courses<br />
of the wall panel to the desired height. Alternate the type of<br />
split block for each course as you go.<br />
The <strong>AB</strong> <strong>Courtyard</strong> <strong>Collection</strong> blocks come with a built in angle, by splitting the blocks at a<br />
quarter (1/4), half (1/2) or three-quarter (3/4) length, you create a straight side to the block.<br />
See page 8 for detailed information as to where the blocks are to be cut or split to fit properly. The<br />
straight side that is created with splitting is needed when meeting up with a flat surface or<br />
when building curves within a wall panel. You can modify the blocks using a hammer and<br />
chisel when splitting or a saw with a masonry blade when cutting the block. Some of the<br />
blocks are produced with pre-marked splitting notches for ease of locating the cut line, but<br />
any of the blocks can be modified.<br />
SAFETY FIRST<br />
Always wear safety glasses when splitting or cutting block. A dust mask and ear protection<br />
is recommended when cutting block.<br />
Hammer and Chisel<br />
Use a hammer and chisel, tap around the entire block in the same location where the split<br />
is needed to create a quarter (1/4), half (1/2) or three-quarter (3/4) length piece. Then strike<br />
the chisel with more force in the score line to break the block.<br />
Saw Option<br />
Use a circular saw to score around the entire block in the same location where the split is needed<br />
to create a score line to create a score line for the quarter (1/4), half (1/2) or three-quarter (3/4)<br />
length piece. Then with a hammer and chisel, tap around the score line until the block splits. A<br />
masonry saw or a metal chop saw can also be used to make a complete cut through the block,<br />
eliminating the use of the hammer and chisel.<br />
Corner <strong>Block</strong>s<br />
The Corner <strong>Block</strong>s can be cut or split using the same process described above.<br />
For more information see How-to sheet #210 at allanblock.com.<br />
Step 7: Finish<br />
Finish the wall with Wall and Post Caps. Secure the Wall Caps in place with a bead of<br />
masonry adhesive along both sides of the raised rings and along the side of each Wall<br />
Cap. Before installing the Post Caps, place a bead of adhesive along the outside edge of<br />
the top course of Corner <strong>Block</strong>s. Set the Post Caps in place.<br />
Additional Information:<br />
If taller walls and posts/pillars are desired, additional construction information to ensure<br />
stability is available on How-to sheet #140 & #150 at allanblock.com.<br />
Added stability for the wall can be achieved by interlocking the walls and posts/pillars<br />
together. For more information see How-to sheet #230 at allanblock.com.<br />
Visit allanblock.com.<br />
allanblock.com<br />
15<br />
Build Walls & Posts/Pillars
16<br />
Building<br />
Curved Walls<br />
with<br />
<strong>AB</strong> <strong>Courtyard</strong><br />
Split block<br />
with split<br />
side facing in<br />
<strong>AB</strong> York block<br />
with long side<br />
facing out<br />
Build a Curve<br />
The <strong>AB</strong> <strong>Courtyard</strong> <strong>Collection</strong> is designed to let you easily build curved and serpentine<br />
walls. Simply install the <strong>AB</strong> York blocks with the long side of the block facing the outside<br />
of the curve. When building curved walls it is best to build the first two courses at the<br />
same time. This helps align the blocks so additional courses continue to stack properly.<br />
If building on soil, see page 10 to ensure a proper foundation is installed.<br />
Build a Circle<br />
It takes 28 <strong>AB</strong> York blocks to make a complete<br />
circle. Install the <strong>AB</strong> York blocks with<br />
the long side of the block facing the outside<br />
of the circle. A pre-designed diameter for<br />
the circle is 81 in. (2.0 m). See How-to<br />
sheet #200 at allanblock.com for larger<br />
curves and radii.<br />
Build a Curve in a Wall Panel<br />
Step 1: Make Adjustments<br />
Before beginning the curve check to make<br />
sure both courses are angled correctly. Both<br />
courses need to be parallel with each other<br />
and angled toward the direction of the<br />
curve. If one block is angled the opposite<br />
direction, remove the last block and slide<br />
the entire course over one block to correct.<br />
Direction of<br />
Curve<br />
80 in<br />
(2.0 m)<br />
Courses must be parallel<br />
Step 2: Start of the Curve<br />
On the first course, install an <strong>AB</strong> York block by placing the long side of the block facing<br />
the outside of the curve. On the second course, where the wall changes from a curve to a<br />
straight section, an <strong>AB</strong> Dublin will need to be split in a half (1/2) length to be used at the<br />
transition. This transition piece will be needed on every other course. See page 15 or<br />
How-to sheet #210 for information on splitting blocks.<br />
Visit allanblock.com.
Split block<br />
with split side<br />
facing out<br />
Centered over<br />
course below<br />
with long<br />
ends facing out<br />
Step 3: Build the Curve<br />
With the curve started, stack additional courses using the<br />
<strong>AB</strong> York block and placing all of the blocks with their long<br />
sides facing the outside of the curve.<br />
Step 4: End of the Curve<br />
To change the direction back to a straight wall, on the first<br />
allanblock.com<br />
course at the end of the curve, turn the <strong>AB</strong> York block around<br />
so the short side of the block is facing the outside of the curve. On the second course use<br />
the other <strong>AB</strong> Dublin half (1/2) length piece with the split side facing out and toward the<br />
next section of the wall panel.<br />
Step 5: Additional Courses<br />
Repeat this same process as described in Steps 2-4 for any additional courses. Every odd<br />
numbered course will be laid out exactly the same with block layout and where the split<br />
blocks will be used. The same is true for all even numbered courses.<br />
Step 6: Finishing<br />
Finish the wall with Wall Caps. On curved walls, place the long end of the Wall Caps<br />
facing the outside of the curve. For proper alignment, start capping the wall at the curve<br />
and place the Wall Cap centered over two <strong>AB</strong> York blocks with their long ends facing<br />
out. To transition the Wall Caps back to a straight section, alternate the direction of the<br />
Wall Cap. Secure the Wall Caps in place with a bead of masonry adhesive along both<br />
sides of the raised rings and along the side of each Wall Cap.<br />
Additional Information:<br />
Larger radii can be built using one of the repeating pre-set patterns. For more information<br />
see How-to sheet #200 at allanblock.com.<br />
Visit allanblock.com.<br />
17<br />
Build Curved Walls
18<br />
Building<br />
Corners with<br />
<strong>AB</strong> <strong>Courtyard</strong><br />
Build a Corner<br />
The <strong>AB</strong> <strong>Courtyard</strong> <strong>Collection</strong> is designed to let you easily make corners using the Corner<br />
<strong>Block</strong>. Splitting blocks will be required on every course. See page 15 or How-to sheet<br />
#210 for information on splitting.<br />
Step 1: Layout<br />
Walls that have corners in the design will need to be built starting at the corner. Determine<br />
the location of the corner and place a Corner <strong>Block</strong>. Installing the first two courses<br />
at the same time will ensure proper alignment of the entire project.<br />
Step 2: Build the Corner<br />
Split an <strong>AB</strong> Dublin to achieve a quarter (1/4)<br />
and three-quarter (3/4) length piece. Place the<br />
split end against the Corner <strong>Block</strong> to create the<br />
corner, see Pattern A. Splitting the block creates<br />
a straight edge so there will not be a gap<br />
where the blocks meet. An <strong>AB</strong> York split to<br />
create a half (1/2) length block will also work.<br />
Step 3: Second Course<br />
On this course, alternate the position of the<br />
Corner <strong>Block</strong> to face the opposite direction of<br />
the one on the first course, see Pattern B. Use<br />
the remaining split piece and place it with the<br />
split side against the corner to finish the corner.<br />
Step 4: Continue Building<br />
Build the remaining wall out in both directions<br />
in the pattern chosen. Use the above process<br />
for any additional courses or corners in the<br />
project. To aid in fitting the split blocks, try<br />
flipping them over so the raised rings are down.<br />
Split an <strong>AB</strong> Dublin to create a 1/4<br />
and 3/4 length piece<br />
Pattern A<br />
Corner<br />
<strong>Block</strong><br />
Pattern B<br />
1/4<br />
length<br />
piece<br />
Visit allanblock.com.<br />
3/4<br />
length<br />
piece<br />
3/4<br />
length<br />
piece<br />
1/4<br />
length<br />
piece<br />
Use the large<br />
piece on one<br />
course, use the<br />
smaller piece<br />
on the next<br />
course.
Slide blocks<br />
down to match<br />
Modifying Wall Caps for Corners<br />
Capping a Corner<br />
Step 1: Wall Caps First Direction<br />
Finish the corner with Wall Caps. Starting at the corner,<br />
place the first two Wall Caps following the wall in the same<br />
direction. Place the first Wall Cap with the long end facing<br />
the outside of the wall. Alternate the direction of the second<br />
Wall Cap for a straight wall.<br />
Cutting Caps for the Corner (Optional)<br />
Finishing the corner with Wall Caps can be done as shown above, or by modifying<br />
the cap slightly gives the corner a more refined look.<br />
Step 1: Mark and Cut Caps<br />
Using a tape measure and straight edge, mark the cut line on two cap blocks<br />
as shown. Use a masonry saw with a dry cutting diamond blade to make a<br />
complete cut.<br />
Step 2: Place Caps on Corner<br />
Place the cut caps on the corner as shown. Continue stacking additional caps<br />
out from the corner.<br />
Step 3: Finish<br />
Secure the Wall Caps in place with a bead of masonry adhesive along both sides<br />
of the raised rings and along the side of each Wall Cap.<br />
SAFETY FIRST<br />
Always wear safety glasses when splitting or cutting block. A dust mask and<br />
ear protection is recommended when cutting block.<br />
Step 2: Wall Caps Second Direction<br />
Next place a Wall Cap on the other side of the corner. Place the short end of the Wall<br />
Cap facing the outside of the wall. Make adjustments to the first two Wall Caps to ensure<br />
they line up properly at the corner.<br />
Step 3: Finish<br />
Secure the Wall Caps in place with a bead of masonry adhesive along both sides of the<br />
raised rings and along the side of each Wall Cap.<br />
Visit allanblock.com.<br />
Scrap<br />
Piece<br />
Step 1<br />
2 in.<br />
(50 mm)<br />
Step 2<br />
allanblock.com<br />
Cut 10 in.<br />
8 in.<br />
Line (250 mm) (200 mm)<br />
1 2<br />
2<br />
1<br />
9 in.<br />
(230 mm)<br />
Cut Sides Placed<br />
Face-to-Face<br />
Scrap<br />
Piece<br />
19<br />
Build Corners
20<br />
Ending Wall<br />
Panels with<br />
<strong>AB</strong> <strong>Courtyard</strong><br />
Wall Cap against<br />
Corner <strong>Block</strong>.<br />
Gap at end of wall<br />
to give the wall an<br />
additional step down<br />
The <strong>AB</strong> <strong>Courtyard</strong> <strong>Collection</strong> is designed to let you easily step down or end the walls in<br />
a number of ways. You can also end a wall panel at a post/pillar, see page 14 for more information.<br />
Use Corner <strong>Block</strong>s to End the Wall<br />
Option 1:<br />
Step 1: Place Corner <strong>Block</strong>s as the last block so that the blocks step back on each course<br />
to give the wall a finished look.<br />
Step 2: Secure the Wall Caps in place with a bead of masonry adhesive along both sides<br />
of the raised rings and along the side of each Wall Cap.<br />
Use Corner <strong>Block</strong>s for a Gradual Step Down<br />
Option 2:<br />
This option may require cutting a Wall Cap to fill a gap on each course.<br />
Step 1: Place blocks on each course to end the wall in the look you want. The larger the<br />
space between courses, the longer the staggered look will be.<br />
Step 2: Place Wall Caps on the panel with the cap tight against the Corner <strong>Block</strong> that is<br />
ending the course above.<br />
Step 3: If the gap at the end of the wall is not the look you desire, slide the entire course<br />
of caps to the end of the wall, measure the gap and cut a Wall Cap to fit. See Option 3 or<br />
How-to sheet #210 for information on splitting and cutting blocks.<br />
Step 4: Secure the Wall Caps in place with a bead of masonry adhesive along both sides<br />
of the raised rings and along the side of each Wall Cap.<br />
Visit allanblock.com.
Measure and mark<br />
for the Wall Cap<br />
Line up<br />
Wall Caps<br />
and end<br />
of course<br />
Modified<br />
Wall Cap<br />
Fill in gap with<br />
a cut Wall Cap<br />
Use Extra Wall Caps for a Staggered Look<br />
Option 3:<br />
This option requires cutting a Wall Cap to fill a gap on each<br />
course.<br />
Step 1: Place blocks on each course to end the wall in the<br />
look you want. The larger the space between courses, the<br />
longer the staggered look will be.<br />
Modifying Wall Caps for Wall Panels<br />
Step 1: Score the top and bottom of the block with a circular saw with a masonry blade.<br />
Step 2: Using a hammer and chisel, score the bottom of the block in notched area.<br />
Step 3: Score the top with a chisel on the outer edges only. Strike harder blows in the scored<br />
area to split the block. Do not score over the notch as the block will split the wrong way.<br />
SAFETY FIRST<br />
Always wear safety glasses when splitting or cutting block. Dust masks and ear protection<br />
are recommended when cutting block.<br />
Step 2: Place Wall Caps on the panel with the Wall Cap even with the course below.<br />
This will leave a gap where a Wall Cap will need to be measured and cut to fit. See below<br />
or How-to sheet #210 for information on splitting and cutting blocks.<br />
Step 3: Once the cut blocks are installed, place another Wall Cap where the course steps<br />
down to give the end a finished look.<br />
Step 4: Secure the Wall Caps in place with a bead of masonry adhesive along both sides<br />
of the raised rings and along the side of each Wall Cap.<br />
Visit allanblock.com.<br />
Step 1<br />
Step 2<br />
Step 3<br />
allanblock.com<br />
Score<br />
edges<br />
only<br />
21<br />
Ending Wall Panels
22<br />
Retaining Soil<br />
using<br />
<strong>AB</strong> <strong>Courtyard</strong><br />
Step 1: Layout<br />
Determine the location of the wall panel and lay the first course of block to determine<br />
the shape of the wall and to establish where to dig the trench. <strong>AB</strong> Dublin, <strong>AB</strong> York or<br />
both blocks together can be used for the base course. See page 16 when building with<br />
curves and page 18 if corners will be needed.<br />
Step 2: Build Foundation*<br />
Mark the location of the wall with a shovel, remove the blocks, sod and other surface materials.<br />
Dig a level trench 8 in. deep and 12 in. wide (200 mm x 300 mm). On sloped<br />
sites, “step up” the base when it gets more than 6 in. (150 mm) deep, see page 23 for more<br />
information.<br />
Level site<br />
Step 3: Fill<br />
Place 6 in. (150 mm) of base rock in the trench and<br />
compact using a hand tamper. See page 13 for information<br />
on proper base rock materials.<br />
*NOTE:<br />
The soil beneath the foundation pad must be a good<br />
quality compactable material. If soft soils are encountered,<br />
they will need to be removed and replaced with<br />
additional base rock. A good foundation will ensure<br />
a stable wall for years to come.<br />
Step 4: Level<br />
Level the base rock. We recommend using a 2x4<br />
and a level to ensure the entire base is level.<br />
Make any adjustments as needed by adding or<br />
removing base rock.<br />
Step 5: Build<br />
Place 3-5 blocks in the trench, with the raised rings facing up, leveling each block as you go.<br />
The raised rings on the top of the blocks lock the courses together. Using base rock, fill the<br />
block openings. Sweep the top of the blocks and install 3-5 blocks of the 2nd course.<br />
Installing the first two courses at the same time will ensure that the blocks line up properly.<br />
Visit allanblock.com.<br />
8 in. (200 mm)<br />
8 in. (200 mm)<br />
12 in. (300 mm)<br />
12 in. (300 mm)<br />
6 in.<br />
(150 mm)<br />
Sloped site<br />
6 in.<br />
(150 mm)
Install base rock<br />
in top of block openings<br />
Offset the<br />
block seams<br />
Compact soils with a hand<br />
tamper behind block<br />
Step 6: Build Next Section<br />
Install the next section of the base course, leveling each block<br />
as you go. Fill all the block openings for the first and second<br />
course with base rock, then sweep the top of the blocks clean.<br />
Install the next section of the second course of blocks, offsetting<br />
the block seams from the course below then install base<br />
rock in the block openings. Use these steps, continue building<br />
the first and second course in sections for the length of the<br />
wall. See the Helpful Tips on page 11 about block placement.<br />
Step 7: Wall Caps<br />
Finish the wall with Wall Caps. On straight sections alternate the direction of the Wall<br />
Cap. On curved walls, place the short side of the caps on the inside of the curve. Secure<br />
the Wall Caps in place with a bead of masonry adhesive along both sides of the raised<br />
rings and along the side of each Wall Cap. Completing the entire <strong>AB</strong> <strong>Courtyard</strong> wall<br />
prior to backfilling the retained soil is recommended.<br />
Step 8: Backfilling and Compaction<br />
With the <strong>AB</strong> <strong>Courtyard</strong> wall finished and Wall Caps glued in place, backfill 6 in. (150 mm)<br />
of soil behind the block up to the top of the first course. Use a hand tamper to carefully<br />
compact soil thoroughly. Install another 6 in. (150 mm) of soil up to the top of the second<br />
course, again use a hand tamper to compact soil in place.<br />
<strong>AB</strong> <strong>Courtyard</strong> can be built taller than two courses, but only a maximum height of two<br />
block courses can be used to retain soil. For added stability options, see How-To Sheet<br />
#150 or to retain soil taller than shown here, see our Retaining Walls Installation guide<br />
for walls up to 6 ft. (1.8 m) tall using our retaining wall products at allanblock.com.<br />
Create a planting area Create a patio wall<br />
Visit allanblock.com.<br />
Pavers<br />
Stepping Up the Base Course<br />
Building Step-Ups into the Slope<br />
This can be easily done, by extending the base trench into the slope far enough to bury<br />
one block for each step up that is needed. Then continue with Step 3 and fill trench with<br />
base rock and compact to create a solid foundation.<br />
Grade<br />
Base Trench<br />
Buried <strong>Block</strong><br />
Step Up<br />
allanblock.com<br />
23<br />
Retaining Soil
24<br />
<strong>AB</strong> Weekend Projects<br />
Patio Enclosure<br />
In no time you can be sitting on your patio and enjoying your new<br />
living space. For an added touch, install lighting features.<br />
To build a Patio Enclosure you will need <strong>AB</strong> York,<br />
<strong>AB</strong> Dublin, <strong>AB</strong> Corners, and Post and Wall Caps. See Howto<br />
Sheet #260 for complete details.<br />
Step 1 - Measure existing patio and mark approximate location<br />
of posts/pillars, wall panels and openings to exit patio.<br />
Step 2 - Starting at the corner, install 2 courses at a time.<br />
Step 3 - Build out in both directions to the next post/pillar<br />
locations.<br />
Step 4 - Build posts/pillars and continue with any additional<br />
wall panels.<br />
Step 5 - Build additional courses.<br />
Step 6 - Install Wall and Post Caps.<br />
Fire Pit<br />
In just a few hours, you can be sitting in front of a roaring fire, with<br />
your feet up, enjoying the evening. Using just one block shape and<br />
Wall Caps from the <strong>AB</strong> <strong>Courtyard</strong> <strong>Collection</strong>, you can add a beautiful<br />
accent to your landscape.<br />
To build a Fire pit you will need <strong>AB</strong> York blocks and Wall<br />
Caps. See How-to Sheet #360 for complete details.<br />
Step 1 - Determine location and mark out with a shovel.<br />
Step 2 - Remove sod and dig trench for foundation.<br />
Step 3 - Prepare foundation pad and level.<br />
Step 4 - Install <strong>AB</strong> York blocks and Wall Caps.<br />
Step 5 - Install decorative rock.<br />
Step 6 - Place metal fire ring, wood and enjoy!<br />
Visit allanblock.com/projects for complete installation details.
Garden Bench<br />
This project stacks up in no time. Just stack the <strong>AB</strong> Corner <strong>Block</strong> up<br />
in the pre-set patterns per course, place the Post Caps and a seating<br />
material and you are done.<br />
To build an Outdoor Bench you will need <strong>AB</strong> Corners and<br />
Post Caps. See How-to Sheet #320 for complete details.<br />
Step 1 - Determine location and mark out with a shovel.<br />
Step 2 - Remove sod and dig hole for each side.<br />
Step 3 - Prepare foundation pads and level.<br />
Step 4 - Build first post/pillar following pattern.<br />
Step 5 - Build second post/pillar following pattern.<br />
Step 6 - Install Post Caps and seating material.<br />
Backyard Couch<br />
Do you entertain guests in your backyard or patio and wish you had<br />
more seating? This couch option is what you need. Stack up the<br />
blocks in the preset patterns; add caps and seating material and you<br />
are all set.<br />
To build a Backyard Couch you will need <strong>AB</strong> York,<br />
<strong>AB</strong> Dublin, <strong>AB</strong> Corners and Wall Caps. See How-to Sheet<br />
#350 for complete details.<br />
Step 1 - Determine layout and location.<br />
Step 2 - Install first 3 courses with preset pattern.<br />
Step 3 - Install next 3 courses with altered pattern.<br />
Step 4 - Install Wall Caps.<br />
Step 5 - Install seating and armrest material.<br />
Visit allanblock.com/projects for complete installation details.<br />
allanblock.com<br />
25<br />
Weekend Projects
26<br />
<strong>AB</strong> Weekend Projects<br />
Outdoor Kitchen<br />
By following the pre-set patterns, this kitchen goes up quickly. Adjustments<br />
can be made to accommodate larger grill sizes, or a longer<br />
counter top space to allow for shelving or a refrigerator.<br />
To build an outdoor kitchen you will need <strong>AB</strong> York,<br />
<strong>AB</strong> Dublin, <strong>AB</strong> Corners, Wall Caps and a counter top material.<br />
See How-to Sheet #341 for complete details.<br />
Step 1 - Determine layout and location.<br />
Step 2 - Layout the first course, splitting blocks as needed.<br />
Step 3 - Layout the next 5 courses per the pattern, splitting<br />
blocks as needed.<br />
Step 4 - Install the top course following the pattern. This<br />
course needs to be installed with the raised rings<br />
down to allow placement of the Wall Caps and the<br />
counter top material.<br />
Step 5 - Install Wall Caps and chosen counter tops;<br />
secure with adhesive.<br />
Step 6 - Move the grill into place and you are ready to<br />
entertain in style.<br />
BBQ Grilling Station<br />
By following the patterns for each course, your BBQ Grilling Station<br />
will be ready for use in no time. For a quick installation, build it on<br />
an existing patio area; information on building on alternative foundations<br />
is available at allanblock.com.<br />
To build a BBQ Grilling Station you will need <strong>AB</strong> York,<br />
<strong>AB</strong> Dublin, <strong>AB</strong> Corners, Wall Caps and counter top material.<br />
See How-to Sheet #290 for complete details.<br />
Step 1 - Determine layout and location.<br />
Step 2 - Build first post/pillar following pattern.<br />
Step 3 - Build back wall panel.<br />
Step 4 - Build 2nd post/pillar.<br />
Step 5 - Build additional courses.<br />
Step 6 - Install Counter tops and Wall Caps.<br />
Visit allanblock.com/projects for complete installation details.
Below Ground Pond/Water Feature<br />
To create a low profile accent to your yard or garden, add a below<br />
ground pond with the <strong>AB</strong> <strong>Courtyard</strong> <strong>Collection</strong>. You can be enjoying<br />
your new surroundings before the weekend is over.<br />
To build a Below Ground Pond you will need <strong>AB</strong> York blocks<br />
and Wall Caps. See How-to Sheet #310 for complete details.<br />
Step 1 - Determine location and mark out with a shovel.<br />
Step 2 - Remove sod and dig hole for foundation.<br />
Step 3 - Prepare foundation pad and level.<br />
Step 4 - Install temporary course of blocks for placement.<br />
Step 5 - Remove blocks and install flexible pond liner.<br />
Step 6 - Reinstall blocks.<br />
Step 7 - Backfill blocks and liner.<br />
Step 8 - Install top course of blocks and Wall Caps.<br />
Step 9 - Add decorative rock, fountain and water.<br />
Above Ground Pond/Water Feature<br />
Easily enhance your flower garden with a beautiful water feature.<br />
With no special tools you can complete this quickly for a dramatic<br />
new look.<br />
To build an Above Ground Pond you will need <strong>AB</strong> York blocks<br />
and Wall Caps. See How-to Sheet #280 for complete details.<br />
Step 1 - Determine location and mark out with a shovel.<br />
Step 2 - Remove sod and dig trench for foundation.<br />
Step 3 - Prepare foundation pad and level.<br />
Step 4 - Install 3 courses of blocks.<br />
Step 5 - Install pond liner.<br />
Step 6 - Install Wall Caps.<br />
Step 7 - Install water feature and water.<br />
Visit allanblock.com/projects for complete installation details.<br />
27<br />
Weekend Projects
28<br />
<strong>AB</strong> Weekend Projects<br />
Entry Monument with Planter<br />
In just a weekend you can create a beautiful plantable entry monument<br />
that will give your yard great curb appeal.<br />
To build an Entry Monument with a planter you will need<br />
<strong>AB</strong> York, <strong>AB</strong> Dublin, <strong>AB</strong> Corners, Post and Wall Caps. See<br />
How-to Sheet #370 for complete details.<br />
Step 1 - Determine location and mark out with a shovel.<br />
Step 2 - Remove sod or top soil and dig trench.<br />
Step 3 - Prepare foundation pad and level.<br />
Step 4 - Install 1st course of block following preset pattern.<br />
Step 5 - Install additional courses of back wall and posts/pillars.<br />
Step 6 - Install caps.<br />
Entry Monument<br />
Add instant curb appeal to your entryway in just a weekend.<br />
For a dramatic look, add lighting or plantings to the top of the<br />
posts/pillars or decorate for the different seasons.<br />
To build an eye catching Entry Monument you will need<br />
<strong>AB</strong> York, <strong>AB</strong> Corners, and Post and Wall Caps. See How-to<br />
Sheet #300 for complete details.<br />
Step 1 - Determine location and mark out with a shovel.<br />
Step 2 - Remove sod and dig trench for foundation.<br />
Step 3 - Prepare foundation pad and level.<br />
Step 4 - Install <strong>AB</strong> York blocks following pre-set pattern.<br />
Step 5 - Install Wall and Post Caps.<br />
Visit allanblock.com/projects for complete installation details.
Compost Bin<br />
Go green and help the environment with your own compost bin. Recycle<br />
your yard waste and household degradable garbage. Using the<br />
pre-set pattern makes this project a snap.<br />
To build a Compost Bin you will need <strong>AB</strong> York, <strong>AB</strong> Dublin,<br />
<strong>AB</strong> Corners and Wall Caps. See How-to Sheet #380 for<br />
complete details.<br />
Step 1 - Determine location and mark out with a shovel.<br />
Step 2 - Remove sod or top soil and dig trench.<br />
Step 3 - Prepare foundation pad and level.<br />
Step 4 - Install and level 1st course of block. Check for<br />
square.<br />
Step 5 - Install additional courses following pattern.<br />
Step 6 - Install Wall Caps and secure with adhesive.<br />
Step 7 - Build and install cover, improve your environment.<br />
Light Post<br />
Illuminate your entryway or landscape with a light post. The additional<br />
light will accent your surroundings and make a great impression<br />
with your guests.<br />
To build a Light Post you will need <strong>AB</strong> Corners and Post<br />
Caps. See How-to Sheet #170 for complete details.<br />
Step 1 - Determine location and mark out with a shovel.<br />
Step 2 - Run electrical wiring per code.<br />
Step 3 - Prepare foundation pad and level.<br />
Step 4 - Build 1st course of post/pillar, level and adjust.<br />
Step 5 - Install additional courses to desired height.<br />
Step 6 - Modify and install Post Caps to allow for wiring.<br />
Step 7 - Install light fixture.<br />
Visit allanblock.com/projects for complete installation details.<br />
allanblock.com<br />
29<br />
Weekend Projects
Create an outdoor space that is comfortable and elegant for<br />
entertaining family and friends. Use the <strong>AB</strong> <strong>Courtyard</strong> <strong>Collection</strong><br />
to create an environment that works with your home and lifestyle.<br />
30 Visit allanblock.com.
Use <strong>AB</strong> <strong>Courtyard</strong> to create a new personal living space right in<br />
your backyard. Easily incorporate custom gates, counter tops,<br />
natural stone or pavers as beautiful accents for even more style.<br />
Visit allanblock.com.<br />
31
32 Visit allanblock.com.<br />
Raised Patios using <strong>Allan</strong> <strong>Block</strong> Retaining Walls<br />
The <strong>Allan</strong> <strong>Block</strong> line of retaining wall products and the<br />
<strong>AB</strong> <strong>Courtyard</strong> <strong>Collection</strong> work perfectly together. By using<br />
the same product you will find matching colors and styles, so<br />
your project will look like a masterpiece.
Fencing or Screening<br />
The <strong>AB</strong> <strong>Courtyard</strong> <strong>Collection</strong> can be used to build privacy into<br />
your landscape. Install a gate to your patio, or railings on top for<br />
added screening.<br />
Lighting<br />
Lighting can be added to posts/pillars and wall panels. By making<br />
a few modifications to allow for wiring and the fixture, you<br />
can illuminate your outdoor activities and entertaining with style.<br />
Visit allanblock.com.<br />
33
© 2012-2011, 2009 <strong>Allan</strong> <strong>Block</strong> Corporation, Bloomington, MN<br />
952-835-5309-phone, 952-835-0013-fax<br />
Patents Pending Worldwide • DOC. #L0590 - 0912<br />
Printed on<br />
Paper with 10%<br />
Recycled Fiber