

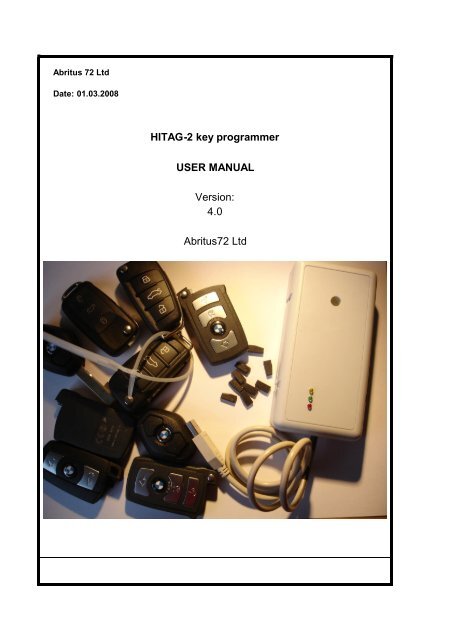
HITAG-2 key programmer USER MANUAL Version: 4.0 Abritus72 Ltd
HITAG-2 key programmer USER MANUAL Version: 4.0 Abritus72 Ltd
HITAG-2 key programmer USER MANUAL Version: 4.0 Abritus72 Ltd

You also want an ePaper? Increase the reach of your titles
YUMPU automatically turns print PDFs into web optimized ePapers that Google loves.
Abritus 72 <strong>Ltd</strong><br />
Date: 01.03.2008<br />
<strong>HITAG</strong>-2 <strong>key</strong> <strong>programmer</strong><br />
<strong>USER</strong> <strong>MANUAL</strong><br />
<strong>Version</strong>:<br />
<strong>4.0</strong><br />
<strong>Abritus72</strong> <strong>Ltd</strong>
<strong>HITAG</strong>-2 KEY PROGRAMMER <strong>USER</strong> <strong>MANUAL</strong><br />
Document number 1<br />
Date: 01-03-2008<br />
Date Sym Description ´new rev.<br />
23-Feb-2006 id Initial Release 1.0<br />
03-Nov-2006 id Changes in document according applied new software version 2.1 2.0<br />
08-Nov-2006 id Changes in document according applied new software version 2.2 2.1<br />
01-Mar-2007 id Adapted to version 3.0 of the software 3.0<br />
01-Mar-2008 id Adapted to <strong>key</strong> <strong>programmer</strong> software, changed name of the document <strong>4.0</strong><br />
<strong>Version</strong> 3.0 2
<strong>HITAG</strong>-2 KEY PROGRAMMER <strong>USER</strong> <strong>MANUAL</strong><br />
Document number 1<br />
Date: 01-03-2008<br />
1 INTRODUCTION.................................................................................................................................................... 4<br />
2 HARDWARE REQUIREMENTS .......................................................................................................................... 5<br />
3 INSTALLATION ..................................................................................................................................................... 5<br />
4 USING OF PROGRAMMER ................................................................................................................................. 6<br />
5 NOTES ABOUT <strong>HITAG</strong>-2 TRANSPONDERS.................................................................................................... 8<br />
6 EXTENDED KEY MEMORY................................................................................................................................ 9<br />
7 GENERATION/PROGRAMMING OF KEYS BY DUMP OF THE EEPROM OF IMMOBILIZER ......... 10<br />
<strong>Version</strong> 3.0 3
<strong>HITAG</strong>-2 KEY PROGRAMMER <strong>USER</strong> <strong>MANUAL</strong><br />
Document number 1<br />
Date: 01-03-2008<br />
1 INTRODUCTION<br />
<strong>HITAG</strong>-2 <strong>programmer</strong> is device <strong>programmer</strong> intended for programming of <strong>HITAG</strong>-2 transponders compatible<br />
with PHILIPS PCF7936 transponders. It can be used for reading/programming of following type transponders:<br />
<br />
<br />
<br />
<br />
<br />
<br />
<br />
PCF7936<br />
PCF7941<br />
PCF7942<br />
PCF7944<br />
PCF7945<br />
PCF7946<br />
Compatible with mentioned above<br />
Programmer supports both modes – PASSWORD and CIPHER mode.<br />
Fig.1 PCF7936 transponder<br />
<strong>Version</strong> 3.0 4
<strong>HITAG</strong>-2 KEY PROGRAMMER <strong>USER</strong> <strong>MANUAL</strong><br />
Document number 1<br />
Date: 01-03-2008<br />
2 HARDWARE REQUIREMENTS<br />
· IBM compatible PC running Windows 95/98/ME/2000/NT4/XP<br />
· VGA display card (800x600)<br />
· two USB ports<br />
3 INSTALLATION<br />
First you need to connect DONGLE (The blue USB device) to USB port of your PC.<br />
- Windows ask you for location of drivers for dongle and you choose - "Dongle Driver USB" folder.<br />
Now you need to install PROGRAMMER drivers. It is placed in the folder<br />
“Programmer_Driver_USB”.<br />
If you using Windows XP/NT/VISTA simply start program “\<strong>HITAG</strong>-2<br />
<strong>programmer</strong>\Programmer_Driver_USB\WIN_NT_XP_VISTA\Executable 2.02.04\ CDM<br />
2.02.04.exe” and when installation is done connect interface to your second USB port. Interface<br />
will be automatically detected.<br />
If you using WINDOW98 need to connect interface and when WINDOWS98 ask you for the driver<br />
to select “\CAN Trace\Interface_Driver_USB\WIN_98\R10906”.<br />
<strong>Version</strong> 3.0 5
<strong>HITAG</strong>-2 KEY PROGRAMMER <strong>USER</strong> <strong>MANUAL</strong><br />
Document number 1<br />
Date: 01-03-2008<br />
4 USING OF PROGRAMMER<br />
Now you can start software of your <strong>programmer</strong> “HT2.exe” appears following screen:<br />
Fig.3 Main screen of the program<br />
<strong>Version</strong> 3.0 6
<strong>HITAG</strong>-2 KEY PROGRAMMER <strong>USER</strong> <strong>MANUAL</strong><br />
Document number 1<br />
Date: 01-03-2008<br />
Put transponder/<strong>key</strong> on it place (refer Fig.4)<br />
Fig.4 transponder/<strong>key</strong> place<br />
Before reading or programming of transponder you must choice working mode of transponder<br />
PASSWORD or CIPHER mode.<br />
Take into account that transponders can be read or program if you know PASSWORD of<br />
transponder (PASSWORD/ CRYPTO WORDS LO+HI).<br />
We have 9 different buttons for reading (“Read All” and 8 “R” separate for each page of<br />
transponder) and also 8 buttons for programming (“Write All” and 7 “W” for each programmable<br />
page of transponder).<br />
Bellow is example – content from <strong>key</strong> of BMW E60 – PCF7945:<br />
<strong>Version</strong> 3.0 7
<strong>HITAG</strong>-2 KEY PROGRAMMER <strong>USER</strong> <strong>MANUAL</strong><br />
Document number 1<br />
Date: 01-03-2008<br />
Buttons can be used for reading of separate page from transponder. Button can be<br />
used for programming of only one page.<br />
“Read All” and “Write All” read and program all pages of transponder.<br />
Button “Quick Read” is similar to button “Read All” but reading content of transponder without<br />
additional checks whether reading is correct. This button is useful when we adjusting antenna<br />
setting of our <strong>programmer</strong>.<br />
Adjusting can be done when reading some transponder using button “Quick Read” and change<br />
factor to 2,3,4,5,6 and s.o. until is reached best reading (i.e. each attempt for reading leads to<br />
results like previous).<br />
While manufactory <strong>programmer</strong>s are adjusted to have best factor “4” but deviation are possible<br />
depends of your working place and PCB where is assembled your transponder (number great than<br />
7936).<br />
5 NOTES ABOUT <strong>HITAG</strong>-2 TRANSPONDERS<br />
Please before programming of some transponder refer corresponding documents which describes features of<br />
transponder.<br />
Transponder must be programmed very carefully because some bits from configuration of transponder can be<br />
programmed only once which leads to partial reading or programming of transponder.<br />
Additionally changing of password/ISK must be documented always to allow following reading or programming.<br />
<strong>Version</strong> 3.0 8
<strong>HITAG</strong>-2 KEY PROGRAMMER <strong>USER</strong> <strong>MANUAL</strong><br />
Document number 1<br />
Date: 01-03-2008<br />
6 EXTENDED KEY MEMORY<br />
In the main screen of your <strong>programmer</strong> is available possibility to read/program internal <strong>key</strong><br />
memory of BMW <strong>key</strong>s (models E6x, E7x..).<br />
<strong>Version</strong> 3.0 9
<strong>HITAG</strong>-2 KEY PROGRAMMER <strong>USER</strong> <strong>MANUAL</strong><br />
Document number 1<br />
Date: 01-03-2008<br />
7 GENERATION/PROGRAMMING OF KEYS BY DUMP OF THE EEPROM OF<br />
IMMOBILIZER<br />
1. Put <strong>key</strong>/transponder on <strong>programmer</strong> and check that you can read it<br />
2. Load corresponding dump (from CASx, EWS2, EWS3 or KESSY)<br />
3. Select <strong>key</strong> number which you want to be generated<br />
4. Press button “Generate <strong>key</strong> data”<br />
5. When <strong>key</strong> is programmed save immobilizer’s dump and program it back in immobilizer<br />
Note:<br />
Because EWS3,EWS4 using PIT transponder (not <strong>HITAG</strong>-2) you need to program with<br />
different <strong>programmer</strong> some of transponders “EWSx_<strong>key</strong>0.bin”, “EWSx_<strong>key</strong>1.bin”,<br />
EWS4 supports up to 4 <strong>key</strong>s<br />
<strong>Version</strong> 3.0 10


