save these instructions - INTEX ++
save these instructions - INTEX ++
save these instructions - INTEX ++

You also want an ePaper? Increase the reach of your titles
YUMPU automatically turns print PDFs into web optimized ePapers that Google loves.
(94IO) "ISO" KAYAK (TYPE IIIB) ENGLISH 7.5” X 10.3” 03/28/2012<br />
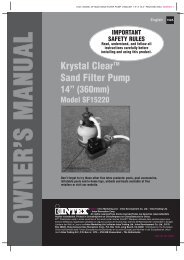
Inflating Instructions<br />
Before starting, locate a clean area free of stones or other sharp objects. Unroll the kayak so it is laid<br />
out flat, and locate your pump.<br />
Use a hand or foot operated air pump to inflate the boat. Do not use high-pressure air compressors.<br />
Adults should inflate the chambers following the numerical sequence marked on the valves. It is very<br />
important to follow the numerical sequence; failure to do so will result in an improperly inflated boat.<br />
Fill each chamber until it is stiff to the touch but NOT hard. Use the enclosed ruler to check the main<br />
chamber for proper inflation. DO NOT OVER INFLATE. Fill with cold air only.<br />
IMPORTANT: Air temperature and weather condition do affect the internal air pressure of inflatable<br />
products. In cold weather the product will lose some pressure due to the fact that the air will contract.<br />
If this occurs, you may want to add a little air to the product. However, in hot weather, the air will<br />
expand. You must let some air out to prevent the product from failing due to overpressure.<br />
How to Use Boston Valve:<br />
1. Double valve cap (valve lets air in, not out).<br />
2. Quick deflation cap.<br />
3. Unscrew Double valve cap.<br />
4. Insert output end of air pump into valve and fill. Do not over inflate or use high pressure<br />
compressor.<br />
5. To deflate: unscrew quick-deflation cap. CAUTION: Double valve does not operate when this cap<br />
is off. Do not unscrew this cap while boat or inflatable is in water.<br />
94A<br />
3<br />
1 2<br />
4<br />
5<br />
Seat Installation (Certain Models):<br />
1. Inflate each seat cushion slowly to about 75% of its capacity.<br />
2. Attach the seat cushion hinge to the hinge on the kayak. Repeat the<br />
connection on the other side and for all seats. See Fig A.<br />
3. Finish inflating the seat cushions slowly until it is firm to the touch but<br />
NOT hard. DO NOT OVER INFLATE!<br />
4. To disassemble the seats, deflate the seats first and reverse the<br />
installation procedures.<br />
5. Some seat cushions after inflation are tuck in directly into the fore, mid or aft locations of the<br />
kayak cockpit.<br />
Fig A<br />
SAVE THESE INSTRUCTIONS<br />
Page 6