MSDS - Danville Materials
MSDS - Danville Materials
MSDS - Danville Materials

You also want an ePaper? Increase the reach of your titles
YUMPU automatically turns print PDFs into web optimized ePapers that Google loves.
TURBO TEMP 2<br />
MATERIAL SAFETY DATA SHEET<br />
D A N V I L L E<br />
PROVISIONAL COMPOSITE<br />
SECTION VIII - EXPOSURE CONTROLS/PERSONAL PROTECTION<br />
Respiratory: None<br />
Eye Protection: Safety goggles<br />
Gloves: Surgical, rubber/PVC gloves<br />
Other Clothing and Equipment: Face Mask<br />
Ventilation: None required, local exhaust recommended<br />
SECTION IX - PHYSICAL AND CHEMICAL PROPERTIES<br />
Vapor Pressure: Negligible<br />
Vapor Density: >1<br />
Evaporation Rate: 1<br />
Appearance and Odor: Tooth colored paste, slight odor<br />
SECTION X - STABILITY AND REACTIVITY<br />
Stable (x) Unstable ( )<br />
Conditions to Avoid: Heat in excess of 25 O C, direct sunlight or intense light.<br />
Incompatibility: Free radical initiators, oxidizing agents<br />
Hazardous Decomposition Products: Acrylic smoke<br />
Hazardous Polymerization: May occur ( ) Will not occur (x)<br />
SECTION XI - TOXICOLOGICAL INFORMATION<br />
Carcinogens: None known.<br />
SECT ION XII : ECOLOGICAL INFORMATION<br />
This material contains hazardous components. Allow materials to<br />
cure prior to disposal.<br />
SECTION XII : DISPOSAL CONSIDERATIONS<br />
Dispose of safely in accordance with local, state, and federal regulations.<br />
SECTION XIV : TRANSPORT INFORMATION<br />
Stable under normal conditions of use, transportation, and storage.<br />
SECTION XV: REGULATORY INFORMATION<br />
n/a<br />
SECTION XVI : OTHER INFORMATION<br />
None<br />
The data and information given in this msds are accurate on the date of preparation. It<br />
does not indicate any warranty or representation. We disclaim all liability relating to<br />
use of this material since this is beyond our control.<br />
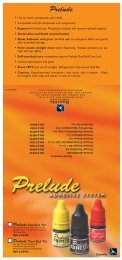
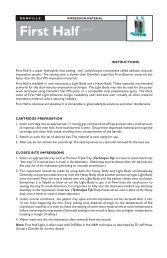
TurboTemp 2 TM<br />
INSTRUCTIONS<br />
Turbo Temp 2 TM is a unique 4:1, syringeable bis-acryl composite for temporary restorations. Turbo<br />
Temp is fast and accurate, especially when used in conjunction with a quality vinyl polysiloxane<br />
impression material such as Star VPS (available from <strong>Danville</strong> <strong>Materials</strong>).<br />
TURBO TEMP KIT<br />
Turbo Temp comes in a 76 gm automix cartridge. Ten waste-saver tips are included per kit. (Extra<br />
tips 10/pk, Order No. 90162, 50/pk, Order No. 90163).<br />
Turbo Temp cartridges are designed to fit on a new style automix<br />
gun Order No. 90176.<br />
It is important not to remove the cap on the cartridge until use.<br />
After use, leave the used tip on the cartridge. The hardened resin<br />
in the tip acts as a cap until the next use.<br />
IMMEDIATELY PRIOR TO USE<br />
Remove cap and eject about a pea size quantity of material out of<br />
the bare cartridge end. Eject slowly until steady flow exudes from<br />
both compartments. Wipe off the end (without cross mixing) and<br />
install the mixing tip.<br />
BEFORE THE PREP<br />
Make initial impression. Place some flexible vinyl polysiloxane (Star<br />
VPS Monophase recommended) on a posterior type bite tray and<br />
have patient close. Stiff heavy body materials must be avoided, as<br />
once removed, they do not go back well into undercuts. Alginate<br />
will also serve as a less satisfactory alternative.<br />
An inexpensive bite tray is recommended for the initial impression. The small bite tray requires less<br />
impression material.<br />
PREP AND FINAL IMPRESSION<br />
Cut preparation. Take a final impression for the lab. Use a triple tray. Dual viscosity vinyl polysiloxane<br />
impression materials are recommended.<br />
AFTER THE PREP<br />
Once the prep and the lab impression have been completed, you are ready to make the temporary.<br />
Working time is only 30 to 40 seconds. Set time is 1-1/2 minutes after placement in mouth and full<br />
hardness is 3 to 4 minutes. Inject Turbo Temp into the prep areas of the preliminary impression.<br />
Use care to avoid trapping air bubbles. Have patient close on tray. Choose cementation technique<br />
A or B.<br />
D A N V I L L E<br />
M A T E R I A L S<br />
3420 FOSTORIA WAY STE. A-200 SAN RAMON, CALIFORNIA 94583 USA<br />
PHONE 800/827-7940 FAX 925/973-0764<br />
90346 REV E<br />
A. Cementation Method (Recommended Technique)<br />
1. Remove the tray 1-3/4 to 2 minutes after the mix was injected. The temporary will be retained<br />
in the tray and will be slightly flexible. Break off the excess material around the temp while it is<br />
still in the impression. This excess should be thin and flexible and can be trimmed easily with an<br />
amalgam carver.
TURBO TEMP 2 PROVISIONAL COMPOSITE TURBO TEMP 2 MATERIAL SAFETY DATA SHEET<br />
2. Immediately reset the temp in the mouth and wait 1 or 2 more minutes for the completion of cure.<br />
3. Remove again, wait 4-5 minutes, and pop the temp out of impression.<br />
4. Trim margins with a diamond (it is now rigid).<br />
5. Cement in place, using a non-eugenol temporary cement.<br />
B. Non-Cementation Method<br />
1. Leave Turbo Temp in the mouth during the initial insertion for 2 ½ minutes. It will shrink to fit.<br />
It is recommended to cut an escape route in the facial surface of the impression. This will allow<br />
excess Turbo Temp to escape, thereby reducing flashing.<br />
2. Remove impression from mouth; the temporary should remain in the mouth.<br />
3. Trim excess with the scalpel blade or a diamond bur if necessary.<br />
Note: Some non-cemented Turbo Temp restorations may turn dark after two weeks. To avoid this,<br />
either place permanent restoration within two weeks or cement the temporary restoration.<br />
Turbotemp 2 bridge fabrication:<br />
Three units is the recommended maximum span. To add strength the proximals of posteriors, the<br />
connector areas should be modified to add bulk, prior to taking the preliminary impression. In the<br />
posterior, both buccal and lingual can be modified. In the anterior, most of the modification would be<br />
done on the lingual to preserve esthetics. The preferred block-out material is Ultradent Blue Bolckout,<br />
but soft wax can also be used.<br />
MATERIAL SAFETY DATA<br />
SECTION 1 - PRODUCT IDENTIFICATION<br />
Company Name: <strong>Danville</strong> <strong>Materials</strong><br />
3420 Fostoria Way Suite A-200<br />
San Ramon, CA 94583<br />
Phone (925)973-0710<br />
Fax: (925) 973-0764<br />
Prepared: December 19, 2011<br />
SECTION II - HAZARD(S) IDENTIFICATION<br />
OSHA Permissible Exposure Limits: None<br />
Other Exposure Limit Used: None<br />
ACGIH Threshold Exposure Limit: None<br />
Chronic, Other: None<br />
SECTION III - COMPOSITION/INFORMATION ON INGREDIENTS<br />
Hazardous component % by weight:<br />
Multifunctional Methacrylates 30-40<br />
Malyonlurea Derivative Trace<br />
Silica Filler 45-50<br />
Polyvinyl esters 5-10<br />
Reinforcement can also be used in addition:<br />
Take the preliminary impression. Then place a piece of Ribbond or some other fibers, from mesial to<br />
distal, using cured flowable composite to hold it on preps. The entire piece of reinforcement should<br />
be infused with flowable composite. A figure 8 configuration might be considered. No bonding is used<br />
so that the reinforcement will be retrievable with the temporary restoration. In the usual manner,<br />
form the Turbotemp 2 over the reinforcement. Do not disturb the oxygen inhibited outer layer on<br />
the flowable so the Turbotemp 2 will adhere directly to it.<br />
Trouble Shooting<br />
• When starting with a new cartridge, discard the first pea size amount dispensed through the mixing<br />
tip to ensure even mixing.<br />
• Do not remove the mixing tip after each use. Wait until ready to use it again, then install new<br />
tip. This will prevent catalyst contamination possibly resulting in a plug.<br />
• Mount the mixing tip in proper alignment. Note that the tips are notched to indicate the proper<br />
alignment on the cartridge. By forcing the tip, it can be mounted backwards, resulting in non-setting<br />
mixes. (The two sides of the mixing tip have different size bores.)<br />
• A slightly gummy air inhibited layer will remain on the hardened surface of the temporary. This<br />
layer allows bubble and margin defects to be minimized by directly bonding with a flowable composite<br />
such as StarFlow. The layer is easily removed with ethyl alcohol.<br />
• Exposure to temperatures below 74 0 F will extend the setting time of Turbo Temp. Set times are<br />
based on room temperature material. Refrigeration greatly retards set times.<br />
• Normally there is no need for occlusal adjustments if vinyl polysiloxane is used.<br />
• Before placing a new mix tip, extrude a small amount of material to insure both sides are flowing.<br />
Waste a pea size amount of material immediately before use to insure a full mix.<br />
90346 REV E<br />
SECTION IV - FIRST AID MEASURES<br />
Primary Routes of Exposure: Skin, ingestion<br />
Signs of Exposure: Severe skin or eye irritation, redness or burning sensation.<br />
Ingestion may cause nausea.<br />
Medical Conditions Generally Aggravated by Exposure: Allergies to methacrylates.<br />
First Aid Procedures: For Skin - Wash off infected area with soap and water. For<br />
Ingestion -Seek medical advice, carry container with label and <strong>MSDS</strong>. For Eyes - Rinse<br />
immediately with plenty of water and consult physician .<br />
SECTION V - FIRE-FIGHTING MEASURES<br />
Flash Point: >100 O C<br />
Extinguishing Media: Carbon dioxide, foam, dry chemical<br />
Special Fire Fighting Procedures: None<br />
Flammable limits: ND<br />
Unusual Fire and Explosion Hazards: Polymerizes upon heating.<br />
SECTION VI - ACCIDENT RELEASE MEASURES<br />
None<br />
SECTION VII - HANDLING AND STORAGE<br />
Spill Management: Use absorbent to collect the material. Wash contaminated surfaces with<br />
soap and water.