

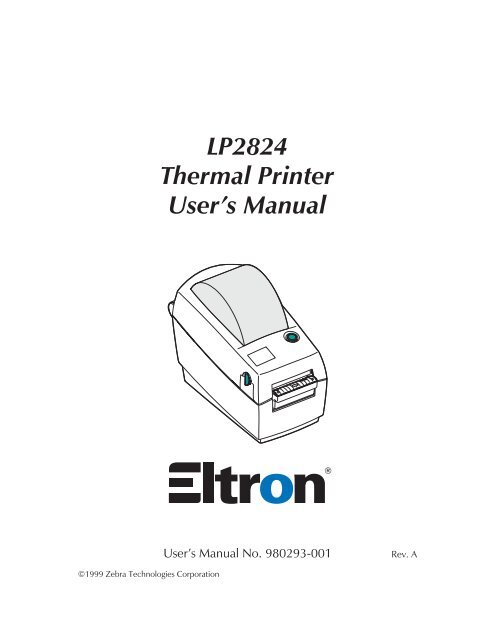
LP2824 Thermal Printer User's Manual
LP2824 Thermal Printer User's Manual
LP2824 Thermal Printer User's Manual

Create successful ePaper yourself
Turn your PDF publications into a flip-book with our unique Google optimized e-Paper software.
<strong>LP2824</strong><br />
<strong>Thermal</strong> <strong>Printer</strong><br />
User’s <strong>Manual</strong><br />
User’s <strong>Manual</strong> No. 980293-001<br />
Rev. A<br />
©1999 Zebra Technologies Corporation
FOREWORD<br />
This manual provides installation and operation information for the <strong>LP2824</strong> series printers, manufactured<br />
by Zebra Technologies Corporation, Camarillo, California.<br />
COPYRIGHT NOTICE<br />
This document contains information proprietary to Zebra Technologies Corporation. This document<br />
and the information contained within is copyrighted by Zebra Technologies Corporation and<br />
may not be duplicated in full or in part by any person without written approval from Zebra Technologies<br />
Corporation. While every effort has been made to keep the information contained within current<br />
and accurate as of the date of publication, no guarantee is given or implied that the document<br />
is error-free or that it is accurate with regard to any specification. Zebra Technologies Corporation<br />
reserves the right to make changes, for the purpose of product improvement, at any time.<br />
TRADEMARKS<br />
<strong>LP2824</strong> is a service mark and Eltron is a registered trademark of Zebra Technologies Corporation.<br />
Windows and MS-DOS are registered trademarks of Microsoft Corp. All other marks are trademarks<br />
or registered trademarks of their respective holders.<br />
<strong>LP2824</strong> <strong>Thermal</strong> <strong>Printer</strong>s<br />
European Council Directive Compliance to Standards<br />
89/336/EEC EMC Directive EN 55022-A, CISPR 22 RF Emissions control<br />
92/31/EE EMC Directive EN 50082-1 IEC 801<br />
Immunity to Electromagnetic<br />
Disturbances<br />
FCC - DECLARATION OF CONFORMITY:<br />
Model: <strong>LP2824</strong> conforms to the following specification:<br />
FCC Part 15, Subpart B, Section 15.107(a) and Section 15.109(a) Class B digital device<br />
Supplemental Information:<br />
This device complies with Part 15 of the FCC Rules. Operation is subject to the following Two Conditions:<br />
(1) This device may not cause harmful interference , and (2) this device must accept any<br />
interference received, including interference that may cause undesired operation.<br />
INDUSTRY CANADA NOTICE:<br />
This device complies with Industry Canada ICS-003 class B requirements.<br />
Cet equipement est conforme a l’ICS-003 classe B de la norm Industrielle Canadian<br />
ii<br />
980293-001 Rev. A
WARRANTY INFORMATION<br />
We Need To Hear From You!<br />
To Establish Your Warranty Period And Provide Access To Technical Support,<br />
Send Us Your Product Registration Card Today!<br />
Zebra Technologies Corporation warrants the mechanism, control electronics and power supply,<br />
under normal use and service, to be free from defects in material and workmanship for a period of<br />
twelve (12) months from the date of purchase by the end user. Zebra Technologies Corporation<br />
warrants the print head, under normal use and service, to be free from defects in material and workmanship<br />
for a period of ninety (90) days or 30KM of printing (whichever occurs first) from the date<br />
of purchase by the end user. Proof of purchase or product registration is required. If proof of purchase<br />
or product registration cannot be established, shipment date to the original buyer (dealer or<br />
distributor) will be used to establish the warranty period.<br />
Failure to exercise caution to protect the equipment from electrostatic discharge damage, adverse<br />
temperature and humidity conditions or physical abuse may void the warranty. Failure to use only<br />
Eltron brand approved media may void the warranty. Zebra Technologies Corporation will, at its<br />
option, repair or replace the equipment or any parts which are determined to be defective within<br />
this warranty period, and which are returned to Zebra Technologies Corporation F.O.B. factory of<br />
origin.<br />
The warranty set forth above is exclusive and no other warranty, whether written or oral, is expressed<br />
or implied. Zebra Technologies Corporation specifically disclaims the implied warranties of<br />
merchantability and fitness for a particular purpose.<br />
RETURN MATERIALS AUTHORIZATION<br />
Before returning any equipment to Zebra for in warranty or out of warranty repair, contact Repair<br />
Administration for a Return Materials Authorization (RMA) number. Repack the equipment in the<br />
original packing material and mark the RMA number clearly on the outside. Ship the equipment,<br />
freight prepaid, to the address listed below:<br />
Zebra Eltron Repair Administration, USA<br />
1001 Flynn Road<br />
Camarillo, CA. 93012<br />
Phone: +1 (805) 579-1800<br />
FAX: +1 (805) 579-1808<br />
Label <strong>Printer</strong>s:<br />
Card <strong>Printer</strong>s:<br />
Zebra Technologies, Europe<br />
Zebra Technologies, Europe<br />
Zebra House<br />
Zone Indutrielle, Rue d'Amsterdam<br />
The Valley Centre, Gordon Road<br />
44370 Varades, France<br />
High Wycombe Phone: +33 (0) 240 097 070<br />
Buckinghamshire HP13 6EQ, UK FAX: +33 (0) 240 834 745<br />
Phone: +44 (0) 1494 472872<br />
FAX: +44 (0) 1494 450103<br />
980293-001 Rev. A iii
SHOCK HAZARD WARNING:<br />
The printer and power supply should never be operated in a<br />
location where either one can get wet. Personal injury could<br />
result.<br />
MEDIA WARNING:<br />
Always use high quality Eltron approved labels, tags and<br />
transfer ribbons. If adhesive backed labels are used that DO<br />
NOT lay flat on the backing liner, the exposed edges may stick<br />
to the label guides and rollers inside the printer, causing the<br />
label to peel off from the liner and jam the printer. Eltron<br />
approved supplies can be ordered from your ELTRON dealer.<br />
For the name of a dealer in your area, call the nearest Eltron<br />
office (located on the back of this manual).<br />
RELOADING HINT:<br />
If you should run out of labels while printing, DO NOT turn the<br />
power switch OFF (0) while reloading or data loss may result.<br />
The printer will automatically a new label roll is loaded.<br />
STATIC DISCHARGE:<br />
The discharge of electrostatic energy that accumulates on the<br />
surface of the human body or other surfaces can damage or<br />
destroy the print head or electronic components used in this<br />
device.<br />
DO NOT TOUCH the print head or the electronic components<br />
under the top cover.<br />
THERMAL PRINTING:<br />
The print head becomes hot while printing. To protect from<br />
damaging the print head and risk of personal injury, avoid<br />
touching the print head. Use only the cleaning pen to perform<br />
maintenance.<br />
iv<br />
980293-001 Rev. A
TABLE OF CONTENTS<br />
Installation and Operation . . . . . . . . . . . . . . . . . 1<br />
Unpacking Your <strong>Printer</strong> . . . . . . . . . . . . . . . . . . . . 2<br />
Getting To Know Your <strong>Printer</strong> . . . . . . . . . . . . . . . . . 3<br />
Installation . . . . . . . . . . . . . . . . . . . . . . . . . . . 4<br />
AutoSense Gap Sensor Adjustment . . . . . . . . . . . . . . 8<br />
Label Dispenser Option . . . . . . . . . . . . . . . . . . . . 10<br />
Using Fan-Fold Media . . . . . . . . . . . . . . . . . . . . . 11<br />
Appendix A - Troubleshooting . . . . . . . . . . . . . . . . 13<br />
Other Support Resources . . . . . . . . . . . . . . . . . . . 15<br />
Serial Interface Cable Wiring. . . . . . . . . . . . . . . . . . 16<br />
Cash Drawer Cable Wiring . . . . . . . . . . . . . . . . . . 17<br />
Parallel Interface Cable Wiring . . . . . . . . . . . . . . . . . 18<br />
Cleaning the Print Head . . . . . . . . . . . . . . . . . . . . 19<br />
Appendix B - Accessories . . . . . . . . . . . . . . . . . . 20<br />
980293-001 Rev. A v
vi<br />
980293-001 Rev. A
1<br />
Installation and Operation<br />
This section provides information on the<br />
installation and operation of the printer.<br />
The printer is a low cost, desktop direct thermal<br />
printer. The printer is specifically designed for<br />
printing labels, tags or continuous receipts (with<br />
or without bar codes) from any DOS, Windowsor<br />
ASCII-based compatible host.<br />
980293-001 Rev. A 1
Installation and Operation<br />
Unpacking Your <strong>Printer</strong><br />
User Documentation<br />
&Software<br />
2 980293-001 Rev. A
Installation and Operation<br />
Getting To Know<br />
Your <strong>Printer</strong><br />
980293-001 Rev. A 3
Installation and Operation<br />
Installation<br />
The following steps will guide you through the<br />
installation of the printer and software.<br />
Step ➊ Attach Power Supply To The <strong>Printer</strong><br />
Power OFF<br />
Check Voltage<br />
Plug in<br />
Power<br />
Module<br />
Plug in<br />
Power<br />
Cord<br />
Plug Power Cord<br />
into a Suitable<br />
AC Outlet<br />
See the SHOCK HAZARD WARNING on page<br />
iv.<br />
4 980293-001 Rev. A
Installation and Operation<br />
Step ➋ Attach Interface Cable<br />
Power OFF<br />
The printer has either a parallel interface or a<br />
serial interface (with optional RJ-11 connector).<br />
Parallel Interface<br />
RJ-11 Interface<br />
(Optional)<br />
Serial Interface<br />
For additional information on serial cable wiring,<br />
refer to Appendix A.<br />
980293-001 Rev. A 5
Installation and Operation<br />
Step ➌ Load Labels<br />
Power ON<br />
MOVIE<br />
Open Cover<br />
Adjust Holders<br />
1.0 inch<br />
2.5 cm<br />
MOVIE<br />
1.5 inch<br />
3.8 cm<br />
6 980293-001 Rev. A
Installation and Operation<br />
Load Labels - continued<br />
Install Roll<br />
Thread Through<br />
Guides<br />
Close Cover<br />
Tap Feed Button<br />
If the indicator remains dark, see Appendix A -<br />
Troubleshooting.<br />
980293-001 Rev. A 7
Installation and Operation<br />
Step ➍ AutoSense Gap Sensor Adjustment<br />
Perform this procedure when loading a new<br />
roll. If your printer has the label dispenser<br />
option, turn OFF the label taken sensor.<br />
Power OFF<br />
MOVIE<br />
Hold<br />
Feed Button<br />
Power ON<br />
8 980293-001 Rev. A
AutoSense Gap Sensor Adjustment - continued<br />
Installation and Operation<br />
When Indicator<br />
Flashes, Release<br />
Feed Button<br />
<strong>Printer</strong> Advances<br />
Media and Prints<br />
Status Summary<br />
Note: <strong>Printer</strong> is in<br />
diagnostic dump mode<br />
4 MO3351F 16 V3.21<br />
Serial port : 96,N,8,1<br />
Image buffer size:245K<br />
Fmem:000,0K,019.9K avl<br />
Gmem:000K,0241K avl<br />
Emem:000K,0241K avl<br />
I8,0,001 rY<br />
S2 D8 R016,000 ZT UN<br />
q800 Q1029,025<br />
Option:<br />
04 08 13<br />
now in DUMP<br />
Tap Feed Button<br />
To Begin Normal<br />
Operation<br />
Note: <strong>Printer</strong> prints<br />
“out of DUMP”<br />
If the indicator remains orange or red, see the<br />
troubleshooting steps.<br />
980293-001 Rev. A 9
Installation and Operation<br />
Label Dispenser Option<br />
Open Door<br />
MOVIE<br />
Use a Stylus to<br />
Switch On the<br />
Label Taken Sensor<br />
Remove Several<br />
Labels<br />
Push Liner<br />
Through Slot<br />
Close Door<br />
10 980293-001 Rev. A
Installation and Operation<br />
Using Fan-Fold Media<br />
Open Guides to<br />
Width of Media<br />
Lock Guides<br />
in Place<br />
Insert Media<br />
Thread Media<br />
Through Guides<br />
980293-001 Rev. A 11
Installation and Operation<br />
Step ➎ Install Software<br />
Start your computer and follow the installation<br />
instructions on the compact disc (CD).<br />
12 980293-001 Rev. A
Appendix A - Troubleshooting<br />
Problem<br />
Does not light when power<br />
switch is turned to ON (I)<br />
position.<br />
Lights GREEN, but printer<br />
will not print.<br />
Blinks GREEN-RED-RED.<br />
Lights AMBER.<br />
Blinks RED.<br />
Lights RED.<br />
Blinks GREEN-AMBER.<br />
Lights AMBER-RED.<br />
<strong>Printer</strong> appears to be<br />
working (media is being fed<br />
out), but nothing is printed.<br />
Printing is faded or poor<br />
quality.<br />
STATUS Indicator<br />
Solution or Reason<br />
1. Check power connections from A.C.<br />
outlet to power supply to printer.<br />
1. Check interface cable connections from<br />
computer to printer.<br />
2. Make sure top cover is locked closed.<br />
1. Operator has paused the printer during<br />
a batch job. Tap the FEED button to<br />
continue.<br />
1. <strong>Printer</strong> has encountered a syntax or<br />
command error.<br />
1. The optional cover open sensor is active.<br />
Press top cover to close and lock.<br />
1. Media is out. Reload a new source of<br />
media so printer can continue printing.<br />
2. Power-up failure.<br />
1. AutoSense in process. Wait until printer<br />
dispenses a status report.<br />
1. Download in process.<br />
Operation<br />
1. Verify that the labels are the correct<br />
type (direct thermal).<br />
2. Check that the roll is loaded with the direct<br />
thermal side facing up.<br />
3. Clean the print head with cleaning pen.<br />
4. Ensure top cover is locked closed.<br />
1. Clean the print head with cleaning pen.<br />
2. Adjust print speed/darkness in software.<br />
980293-001 Rev. A 13
Appendix A - Troubleshooting<br />
Problem<br />
Prints only partial label or<br />
skips a label.<br />
Printing stops and STATUS<br />
indicator lights ORANGE or<br />
RED.<br />
Solution or Reason<br />
1. Perform AutoSense gap sensor<br />
adjustment on page 8.<br />
2. Label caught on print head.<br />
3. Print head is not properly latched.<br />
4. Possible software problem. Check the<br />
printer memory configuration. Refer to<br />
the EPL2 Programming manual.<br />
1. Perform AutoSense gap sensor adjustment<br />
on page 8.<br />
2. Possible problem with label stock. Use<br />
only Eltron approved labels and tags.<br />
3. Possible label jam.<br />
4. Insufficient memory for label size. Check<br />
the printer memory configuration.<br />
5. Possible software problem. Refer to the<br />
EPL2 Programming manual.<br />
14 980293-001 Rev. A
Appendix A - Troubleshooting<br />
Other Support<br />
Resources<br />
The first troubleshooting reference source is the<br />
table on the previous page. Next, contact the<br />
dealer where you purchased your printer.<br />
Zebra Technologies also provides a variety of<br />
information and user support services:<br />
• Internet:<br />
http://www.eltron.com<br />
ftp: //ftp.eltron.com<br />
e-mail:<br />
Label <strong>Printer</strong>s: techsup@eltron.com<br />
Card <strong>Printer</strong>s: cardsup@eltron.com<br />
Europe: eurosup@eltron.com<br />
Singapore: asiasup@eltron.com<br />
Latin America: latinsup@eltron.com<br />
• Customer Service: +1 (800) 344 4003<br />
For the name of a dealer in your area.<br />
• Technical Support FAX:<br />
USA: +1 (805) 579 1808<br />
Asia: +65 84 20 366<br />
Europe: +44 (0) 1189 895 762<br />
Latin America: +1 (847) 584 2725<br />
For your assistance and support with Eltron<br />
printers and software.<br />
980293-001 Rev. A 15
Appendix A - Troubleshooting<br />
Serial Interface<br />
Cable Wiring<br />
The figure below displays the cable wiring<br />
required to use the printer's RS-232 serial<br />
interface.<br />
Host<br />
N/C<br />
RxD<br />
TxD<br />
DTR<br />
GND<br />
DSR<br />
RTS<br />
CTS<br />
RI<br />
DB-9<br />
Pin #<br />
1<br />
2<br />
3<br />
4<br />
5<br />
6<br />
7<br />
8<br />
9<br />
DB-9<br />
Pin #<br />
1<br />
2<br />
3<br />
4<br />
5<br />
6<br />
7<br />
8<br />
9<br />
<strong>Printer</strong><br />
Female DB-9 to Male DB-9<br />
Cable P/N 300017-006 (6') or 300017-010 (10')<br />
+5 Volts*<br />
TxD<br />
RxD<br />
N/C<br />
GND<br />
RDY<br />
N/C<br />
RDY<br />
N/C<br />
Host<br />
N/C<br />
RxD<br />
TxD<br />
DTR<br />
GND<br />
DSR<br />
RTS<br />
CTS<br />
RI<br />
DB-25<br />
Pin #<br />
8<br />
3<br />
2<br />
20<br />
7<br />
6<br />
4<br />
5<br />
22<br />
DB-9<br />
Pin #<br />
1<br />
2<br />
3<br />
4<br />
5<br />
6<br />
7<br />
8<br />
9<br />
FemaleDB-25toMaleDB-9<br />
Cable P/N 300018-006 (6')<br />
<strong>Printer</strong><br />
+5 Volts*<br />
TxD<br />
RxD<br />
N/C<br />
GND<br />
RDY<br />
N/C<br />
RDY<br />
N/C<br />
*+5 volts at 150 mA for external device (e.g. KDU or scanner)<br />
16 980293-001 Rev. A
Appendix A - Troubleshooting<br />
Cash Drawer<br />
Cable Wiring<br />
The figure below displays the pin assignments<br />
for the printer's retail cash drawer interface. Refer<br />
to the cash draw manufacturer's documentation<br />
for proper drawer wiring.<br />
RJ-11<br />
Pin No.<br />
1<br />
2<br />
3<br />
4<br />
5<br />
6<br />
PRINTER<br />
SGND<br />
/SDRV1<br />
/Sense<br />
+24V*<br />
/SDRV2<br />
LGND<br />
Male RJ-11<br />
*+24 volts D.C. at no greater than 1.5 amps.<br />
980293-001 Rev. A 17
Appendix A - Troubleshooting<br />
Parallel Interface<br />
Cable Wiring<br />
The figure below displays the cable wiring<br />
required to use the printer's Centronics parallel<br />
interface.<br />
HOST<br />
STROBE<br />
DATA 0<br />
DATA 1<br />
DATA 2<br />
DATA 3<br />
DATA 4<br />
DATA 5<br />
DATA 6<br />
DATA 7<br />
ACK/<br />
BUSY<br />
PAPER ERR.<br />
READY<br />
INIT<br />
ERROR/<br />
N/A<br />
N/A<br />
N/A<br />
SIG. GND<br />
SIG. GND<br />
SIG. GND<br />
SIG. GND<br />
SIG. GND<br />
SIG. GND<br />
SIG. GND<br />
DB-25<br />
Pin No.<br />
1<br />
2<br />
3<br />
4<br />
5<br />
6<br />
7<br />
8<br />
9<br />
10<br />
11<br />
12<br />
13<br />
14<br />
15<br />
16<br />
17<br />
18<br />
19<br />
20<br />
21<br />
22<br />
23<br />
24<br />
25<br />
Centronics<br />
Pin No.<br />
1<br />
2<br />
3<br />
4<br />
5<br />
6<br />
7<br />
8<br />
9<br />
10<br />
11<br />
12<br />
13<br />
14<br />
15<br />
16<br />
17<br />
18<br />
19<br />
20<br />
21<br />
22<br />
23<br />
24<br />
25<br />
FemaleDB-25toMaleCentronics<br />
(Cable)<br />
PRINTER<br />
STROBE<br />
DATA 0<br />
DATA 1<br />
DATA 2<br />
DATA 3<br />
DATA 4<br />
DATA 5<br />
DATA 6<br />
DATA 7<br />
ACK/<br />
BUSY<br />
PAPER ERR.<br />
READY<br />
INIT<br />
ERROR/<br />
N/A<br />
N/A<br />
+5V<br />
SIG. GND<br />
SIG. GND<br />
SIG. GND<br />
SIG. GND<br />
SIG. GND<br />
SIG. GND<br />
+5 volts at 300 mA for external device (e.g. KDU or scanner)<br />
18 980293-001 Rev. A
Appendix A - Troubleshooting<br />
Cleaning the<br />
Print Head<br />
Rub Cleaning Pen<br />
Across Dark Area<br />
of Print Head<br />
When you load new media, you can also clean<br />
the print head.<br />
MOVIE<br />
Wait One Minute<br />
Before Closing<br />
<strong>Printer</strong><br />
Do Not Clean Roller<br />
980293-001 Rev. A 19
Appendix B - Accessories<br />
Appendix B - Accessories<br />
Accessories available for the printer are listed<br />
below. Always refer to the ELTRON part number<br />
when placing an order. For the name of an<br />
Eltron brand dealer in your area, call: 1(805)<br />
579-1800 or the nearest Zebra Technologies<br />
office (located on the back of this manual).<br />
Description<br />
Parallel Interface Cable, 6’<br />
Parallel Interface Cable, 10’<br />
Serial Interface Cable, 6’ (DB-9 to DB-9)<br />
Serial Interface Cable, 10’ (DB-9 to DB-9)<br />
Serial Interface Cable, 6’ (DB-25 to DB-9)<br />
Power Rewinder, 120V<br />
Power Rewinder, 230V<br />
Create-A-Label 3 Software for Windows<br />
Keyboard Display Unit<br />
User’s <strong>Manual</strong> (this manual)<br />
Programmer’s <strong>Manual</strong><br />
Part Number<br />
300016-006<br />
300016-010<br />
300017-006<br />
300017-010<br />
300018-006<br />
103284-001<br />
103284-002<br />
105524-001<br />
120180-001<br />
980293-001<br />
980009-001<br />
Software and Documentation CD 105551-001<br />
20 980293-001 Rev. A
World Wide Offices:<br />
Zebra Technologies Corporation<br />
Eltron Products<br />
1001 Flynn Road<br />
Camarillo, CA 93012-8706 USA<br />
Phone: +1 (805) 579 1800<br />
FAX: +1 (805) 579 1808<br />
e-mail: sales@eltron.com<br />
Zebra Technologies, Europe<br />
Zebra House<br />
The Valley Centre, Gordon Road, High Wycombe<br />
Buckinghamshire HP13 6EQ, UK<br />
Phone: +44 (0) 1494 472872<br />
FAX: +44 (0) 1494 450103<br />
e-mail: eurosales@eltron.com<br />
Zebra Technologies, France<br />
50 rue Marcel Dassault<br />
92100 Boulogne-Billancourt<br />
France<br />
Phone: +33 (0) 1 55 20 93 93<br />
FAX: +33 (0) 1 55 20 93 99<br />
e-mail: eurosales@eltron.com<br />
Zebra Technologies, Latin America<br />
6175 NW 153rd Street #121<br />
Miami Lakes, FL 33014<br />
Phone: +1 (305) 558 8470<br />
FAX: +1 (305) 558 8485<br />
e-mail: latinsales@eltron.com<br />
Zebra Technologies, Asia/Pacific<br />
1 Sims Lane #06-11<br />
Singapore 387355<br />
Phone: +65 84 20 322<br />
FAX: +65 84 20 366<br />
e-mail: asiasales@eltron.com<br />
980293- 001A
