SURGICAL TRAY INSERTION - Optident
SURGICAL TRAY INSERTION - Optident
SURGICAL TRAY INSERTION - Optident

You also want an ePaper? Increase the reach of your titles
YUMPU automatically turns print PDFs into web optimized ePapers that Google loves.
<strong>INSERTION</strong><br />
SUCCESS<br />
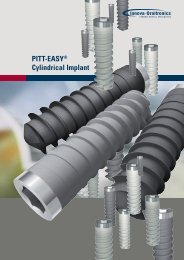
<strong>SURGICAL</strong> <strong>TRAY</strong> PITT-EASY ®<br />
<strong>INSERTION</strong><br />
PATENTED<br />
PROSTHETIC VARIETY<br />
STEP-BY-STEP<br />
Surgical Tray – Instructions<br />
PITT-EASY
PITT-EASY ®<br />
Surgical Tray – Instructions
Surgical Tray – Instructions<br />
PITT-EASY ®<br />
Contents<br />
4<br />
5<br />
6<br />
11<br />
12<br />
15<br />
8<br />
14<br />
15<br />
General information<br />
The Implant pack<br />
The Pitt-Easy Surgical Tray<br />
The Color Guide system<br />
The Implant Surgery<br />
Prior to the Implantation<br />
During the surgery<br />
After the Implantation<br />
The Tray<br />
Poster of the contents<br />
Additional instruments<br />
Treatment sequence in short<br />
<br />
Dear Implantology Assistant,<br />
it will probably be a pleasure and a<br />
great deal of responsibility for you, to<br />
reliably assist at a modern implantology<br />
treatment.<br />
To facilitate this for all assistant<br />
personnel, we provide this special<br />
guidance for the Pitt-Easy system.<br />
On the following pages you will find<br />
detailed instructions on how and in which<br />
order to use the instruments contained<br />
in the tray. These instructions serve as<br />
an active guide during the forthcoming<br />
implantations.<br />
The numberings in the text refer to the<br />
illustrated tray on the poster (pages 8/9).<br />
Text marked with * refers to optionally<br />
available burs and instruments for Pitt-<br />
Easy implants.<br />
We wish you success!
PITT-EASY ®<br />
Surgical Tray – Instructions<br />
General Information<br />
The gamma-sterilized Implant Double Pack<br />
<br />
The gamma-sterilized Implant<br />
Double Pack consists of<br />
outside carton, blister pack<br />
and acrylic vial and guarantees<br />
a sterility of 5 years.<br />
Upon ordering a Pitt-Easy<br />
Implant (please see the ordering<br />
instructions on the back) the<br />
implant will be delivered in a<br />
solid outer packing.<br />
The lateral label informs you<br />
about all the important data of<br />
the implant, as for example<br />
order number, length,<br />
diameter, surface, expiration<br />
date and lot number (the lot<br />
number is important for<br />
possible returns or claims).<br />
After you have opened the<br />
outer packing you can place<br />
the extra labels on your<br />
patient file and the implant<br />
passport.<br />
The Instructions for Use are<br />
an important information for<br />
the dentist.<br />
The blister pack contains the<br />
acrylic vial in which you will<br />
find the sterile implant and the<br />
cover screw.<br />
The cap of the acrylic vial<br />
consists of two parts. The<br />
upper colored part indicates<br />
the diameter (color guide<br />
system, see page 6), the lower<br />
transparent part of the cap<br />
contains the implant which is<br />
mounted on a titanium pin.<br />
Inside the cap is the cover<br />
screw which can be removed<br />
by pulling off the colored part.<br />
Tip: Remove the cover screw<br />
only after the implant has<br />
been inserted.
Surgical Tray – Instructions<br />
PITT-EASY ®<br />
The PITT-EASY ® Surgical Tray – complete for all four diameters<br />
The ring-shaped silicone cap<br />
sealing and the textile filter<br />
element with quick sealing<br />
allow a sterility of up to 6<br />
weeks.<br />
The solid stable casing made<br />
of hard anodized aluminum is<br />
saving space and ensures an<br />
optimal drying.<br />
The Surgical Tray contains all<br />
instruments like drills, keys<br />
and accessories which are<br />
necessary for an implantation.<br />
The inserts (made of silicone)<br />
keep the instruments safe in<br />
their position during use of the<br />
tray.<br />
For cleaning and maintenance<br />
of the tray and the instruments<br />
please follow the procedure<br />
in the enclosed Instructions<br />
„Preparation of Medical Devices”.<br />
Important: After cleaning,<br />
please sort the instruments<br />
back into the corresponding<br />
inserts for sterilization of the<br />
tray.<br />
<br />
l Important<br />
We recommend to exchange the textile<br />
filter prior to each sterilization. You can<br />
order corresponding spare filters. Just<br />
call us.
PITT-EASY ®<br />
Surgical Tray – Instructions<br />
The Color Guide System<br />
The Surgical Tray contains silicone inserts,<br />
which are used as a color guide<br />
system for the different diameters of the<br />
Pitt-Easy System.<br />
Diameter Color Color marking<br />
<br />
Ø 3.25 mm<br />
Ø 3.75 mm<br />
Ø 4.00 mm<br />
Ø 4.90 mm<br />
green<br />
yellow<br />
red<br />
blue<br />
All instruments in green<br />
inserts apply to implants with<br />
a diameter of 3.25 mm.<br />
All instruments in yellow<br />
inserts apply to implants with<br />
a diameter of 3.75 mm.<br />
All instruments in red inserts<br />
apply to implants with a<br />
diameter of 4.00 mm.<br />
Instruments which are set<br />
up in a non-marked neutral<br />
area, can be applied for all<br />
diameters.<br />
Non-lettered neutral areas<br />
are reserved for individual<br />
instruments (e.g. please see<br />
“Course of Treatment” for the<br />
instruments marked with a *,<br />
page 12 ff).<br />
All instruments in blue inserts<br />
apply to implants with a<br />
diameter of 4.90 mm.
Surgical Tray – Instructions<br />
PITT-EASY ®
PITT-EASY ®<br />
Surgical Tray – Instructions<br />
PITT-EASY ®<br />
Initial Drills<br />
1 2 3 4<br />
IP Drill<br />
16 mm<br />
Pilot Drill<br />
8 mm<br />
Twist Drill<br />
8–16 mm<br />
Cali<br />
Drill<br />
Final Precision Drills<br />
<br />
6 7 8 9<br />
Ø .5<br />
8–16 mm<br />
Ø .75<br />
8–16 mm<br />
Ø .00<br />
8–16 mm<br />
Inters<br />
Drill,<br />
Cortical Drills<br />
11 12 13<br />
Ø .5 Ø .75 Ø .00<br />
Instruments<br />
15 16 17 18<br />
Finger Key<br />
Ø 0 mm<br />
Hexagonal Insert for<br />
finger key and ratchet<br />
long Ø .5/.75 mm<br />
Hexagonal Insert for<br />
finger key and ratchet<br />
long Ø .00/.90/6.50 mm<br />
Hexag<br />
for co<br />
Ø .5<br />
23 24 25 26<br />
Bur<br />
Extension<br />
Hexagonal Insert<br />
short<br />
Hexagonal Insert<br />
short<br />
Hexag<br />
for co<br />
Ø .00
Surgical Tray – Instructions<br />
PITT-EASY ®<br />
5 30 31<br />
ber<br />
Depth<br />
Gauge<br />
pace<br />
Ø .5<br />
10 32 33<br />
Ø .90<br />
8–1 mm<br />
<br />
14 34 35<br />
Ø .90<br />
19 20 21 22<br />
onal Insert<br />
ntra-angle<br />
/.75 mm<br />
Hex Key<br />
long<br />
Direction Indicators<br />
27 28 29<br />
onal Insert<br />
ntra-angle<br />
/.90/6.50 mm<br />
Hex Key<br />
short<br />
Key Sleeve<br />
Ø 10 mm
PITT-EASY ®<br />
Surgical Tray – Instructions<br />
10
Surgical Tray – Instructions<br />
PITT-EASY ®<br />
The Implant Surgery<br />
Prior to Implantation<br />
The drilling instruments for<br />
Pitt-Easy implants are used<br />
with the reduced handpiece<br />
– these are handpieces with a<br />
green ring.<br />
For the forthcoming surgery<br />
please prepare the following:<br />
• sterilized Surgical Tray<br />
• Panoramic X-ray on the<br />
display<br />
• X-ray indicator<br />
(Magnification 1:1/ 1:1.25/<br />
1:1.40 Order No. 90047)<br />
• OP-instruments in the order<br />
of surgery, covered sterile<br />
• Precooled saline solution<br />
• Sterile contra-angle<br />
handpiece with green ring<br />
• Selection of Pitt-Easy<br />
implants<br />
Also please have ready:<br />
Sterile pads, suction system,<br />
Bone-Collector, electro<br />
surgical device, suture<br />
material, X-ray films, ointment<br />
for the lips etc.<br />
X-ray indicator<br />
For the selection of the implant<br />
lengths and diameters, for placing onto<br />
the panoramic X-ray<br />
11
PITT-EASY ®<br />
Surgical Tray – Instructions<br />
Course of Treatment during Surgery<br />
12<br />
First of all the covering gingiva<br />
will be opened with a scalpel.<br />
Then the mucosa and the<br />
periosteum will be carefully<br />
detached with the raspatorium<br />
in order to expose the bone.<br />
Attached granulation tissue<br />
will be removed with a sharp<br />
spoon excavator.<br />
If necessary the Crestotom*<br />
can be used. The Crestotom is<br />
a razor-sharp instrument<br />
which is used to smoothen the<br />
alveolar bone and to remove<br />
any attached soft tissue from<br />
the jaw bone ridge.<br />
The next instruments to be<br />
used are the Initial Perforation<br />
Drill (1) to perforate the<br />
cortical bone plate, and the<br />
Pilot Drill (2) with which the<br />
implantologist will determine<br />
the insertion direction.<br />
To be followed by the Twist<br />
Drill (3). The Twist-Drill has a<br />
diameter of 2 mm and is used to<br />
enlargen the bone preparation.<br />
In case more than one implant<br />
is inserted, the Direction Indicators<br />
(20 – 22) are necessary.<br />
This Direction Indicator has<br />
two different ends (2 and 3<br />
mm diameter) and facilitates<br />
the parallel preparation.<br />
After use of the Twist Drill,<br />
the Direction Indicators are<br />
placed with the small 2 mm<br />
side into the bur channels in<br />
order to check the parallelism.<br />
Next is the 2 Caliber Drill (4),<br />
which extends the bone<br />
preparation to 3 mm by the<br />
upper part of the milling shaft<br />
which has a diameter of 3 mm.<br />
The lower guiding shaft has a<br />
diameter of 2 mm.<br />
l Please note<br />
If the technician has prepared a Drilling Guide for Pitt-Easy implants (Order No. 90317),<br />
the use of the IP Drill and the Pilot Drill is not necessary.<br />
For the depth preparation, the implantologist uses in this case the Twist Drill Special*<br />
(Order No. 90009).<br />
* Instruments for individual addition are not supplied with the surgical tray.
Surgical Tray – Instructions<br />
PITT-EASY ®<br />
In order to check the parallelism the implantologist<br />
can now use once more the<br />
Direction Indicators (20 – 22) (this time<br />
he will use the 3 mm side) and check<br />
parallelism again.<br />
The center ring has a diameter of<br />
3.5 mm and serves as a guide for the<br />
implant diameter to be used.<br />
The graduated (8 – 16 mm) Depth Gauge<br />
(5) should be applied to measure the<br />
drilling depth at any time after using the<br />
Twist Drill.<br />
Now the implantologist is going to select<br />
the final implant diameter(s) and<br />
length(s).<br />
In order to smoothly widen the bone<br />
preparation gradually, the dentist starts<br />
with the green Final Precision Drill (6).<br />
Please continue to hand over the next<br />
larger Final Precision Drill or the<br />
Interspace Drill respectively:<br />
l Important<br />
Just take the implant acrylic vial out of<br />
the blister pack, which was chosen by the<br />
implantologist.<br />
Example: Insertion of an implant<br />
with a diameter of 4.90 mm:<br />
1. Final Precision Drill,<br />
Ø 3.25 mm (6)<br />
2. Final Precision Drill,<br />
Ø 3.75 mm (7)<br />
3. Final Precision Drill,<br />
Ø 4.00 mm (8)<br />
4. Interspace Drill,<br />
Ø 4.25 mm (9)<br />
5. Final Precision Drill,<br />
Ø 4.90 mm (10)<br />
The Cortical Drills marked<br />
with 2 rings (11/12/13/14) are<br />
used in case of a compact<br />
cortical substance.<br />
Optional: For insertion of one<br />
or more 6.50 mm Pitt-Easy<br />
implants, additional drills<br />
should be used for a careful<br />
step by step widening of the<br />
bone preparation:<br />
• Interspace-Drill*, Ø 5.10 mm<br />
• Interspace-Drill*, Ø 5.60 mm<br />
and<br />
• Final-Precision-Drill*,<br />
graduated from 8–14 mm<br />
• Cortical Drill*, for cortical<br />
bone<br />
13<br />
The implant has to remain in the vial<br />
until the insertion, the cover screw has to<br />
stay in the cap until the insertion.<br />
* Instruments for individual addition are not supplied with the surgical tray.
PITT-EASY ®<br />
Surgical Tray – Instructions<br />
Additional Instruments<br />
14<br />
When the implantologist has finished the<br />
depth preparations, he will now insert<br />
the implant.<br />
Just open the acrylic vial by taking off<br />
the two-part cap completely.<br />
Tip: The caps can be easily removed by<br />
holding the lower transparent part.<br />
l Important!<br />
Please take care to perform the bone preparation only<br />
with sharp drills. We recommand to use a drill no more<br />
than 15 times.<br />
The implantologist will now perform the<br />
first 2 – 3 insertion rotations of the<br />
implant with the cap of the vial until the<br />
implant finds retention in bone, and then<br />
he simply takes the cap off the implant.<br />
Now the implantologist will need a Finger<br />
Key (15) and one of the Hexagonal<br />
Inserts (16/17 or 24/25) in order to insert<br />
the implant to be level with the alveolar<br />
crest.<br />
In the Surgical Tray you will find additional<br />
instruments which the dentist may<br />
request to use:<br />
(23) The Bur Extension required for<br />
access in narrow spaces<br />
(19/27) The Hex Key, hex 1.70 mm diameter,<br />
to tighten or to remove the<br />
implant cover screw, the gingiva<br />
former, the impression posts. The<br />
hex key can be used manually<br />
and with a ratchet with the<br />
(28) Sleeve Key<br />
(16) Hexagonal Insert long, for finger<br />
key, Ø 3.25 mm and 3.75 mm,<br />
(17) Hexagonal Insert long, for finger<br />
key, Ø 4.00, 4.90 and 6.50 mm<br />
(24) Hexagonal Insert short, for finger<br />
key, Ø 3.25 and 3.75 mm<br />
(25) Hexagonal Insert short, for finger<br />
key, Ø 4.00, 4.90 and 6.50 mm<br />
Important! A ratchet* cannot perform the<br />
required forward and backward rotations<br />
and should not be used for the insertion<br />
of the Pitt-Easy implants.<br />
(18) Hexagonal Insert for contraangle,<br />
Ø 3.25 and 3.75 mm<br />
(26) Hexagonal Insert for contraangle,<br />
Ø 4.00, 4.90 and 6.50 mm.<br />
*The ratchet is not included in the supply<br />
of the surgical tray.
Surgical Tray – Instructions<br />
PITT-EASY ®<br />
After the Implantation<br />
The actual insertion of the<br />
implant is completed now.<br />
In order to tighten the implant<br />
Cover Screw it is necessary<br />
to keep the Hexagon Wrench<br />
(19/27) (Hex diameter 1.70 mm)<br />
ready as well as the pertaining<br />
implant Cover Screw<br />
which originally was in the<br />
cap of the acrylic vial (please<br />
see “The gamma-sterilized<br />
Implant Double Pack”, page 4).<br />
As an alternative the implantologist<br />
needs the Hexagon<br />
Wrench (19/27) (Hex diameter<br />
1.70 mm) to insert the Gingiva<br />
Former as a single phase<br />
insertion method.<br />
If only one Pitt-Easy implant is<br />
inserted, the dentist will place<br />
the Cover Screw or the<br />
Gingiva Former and suture the<br />
site immediately.<br />
For suturing please keep the<br />
needle holder, suture forceps,<br />
titanium tweezers, scissors,<br />
suture material, etc. ready.<br />
Tip: After the implantation<br />
keep a large cooling compress<br />
available and hand over to the<br />
patient for the first few days.<br />
l<br />
Sequence of Instruments<br />
in the Course of Treatment<br />
1. IP Drill and Pilot Drill (1, 2)<br />
2. Twist Drill (3)<br />
3. Direction Indicators (20 – 22)<br />
4. 2 Caliber Drill (4)<br />
5. Depth Gauge (5)<br />
6. Final Precision Drills or Interspace-Drill (6 – 10)<br />
7. Implants**<br />
8. Finger Key (15) and Hexagonal Insert for ratchet<br />
(16/17 or 24/25)<br />
9. Hexagonal Insert for contra-angle (18 or 26)<br />
10. Hex Key, Ø 1,70 mm (19 or 27) for cover screw and<br />
gingiva former**<br />
11. Bur Extension (23)<br />
12. Needle holder, scissors, titanium tweezers, suture<br />
material, etc.**<br />
13. Cooling compress**<br />
14. Panoramica X-ray post-op**<br />
15. Temporary denture**<br />
**not incl. in the tray<br />
15
Please do not hesitate to call us if you have more questions.<br />
We also appreciate additional suggestions to these instructions.<br />
Phone +49 421 43939-0<br />
To place your order for a Pitt-Easy Implant more quickly and<br />
safely, we explain our order number to you as follows:<br />
3 75 12<br />
ø Length<br />
ORALTRONICS ® Dental Implant Technology GmbH<br />
Herrlichkeit 4 · 28199 Bremen · Germany<br />
Phone +49 421 43939-0 · Fax +49 421 443936<br />
www.oraltronics.com · info@oraltronics.com<br />
06-0172: 06/07 · HDS 1-27