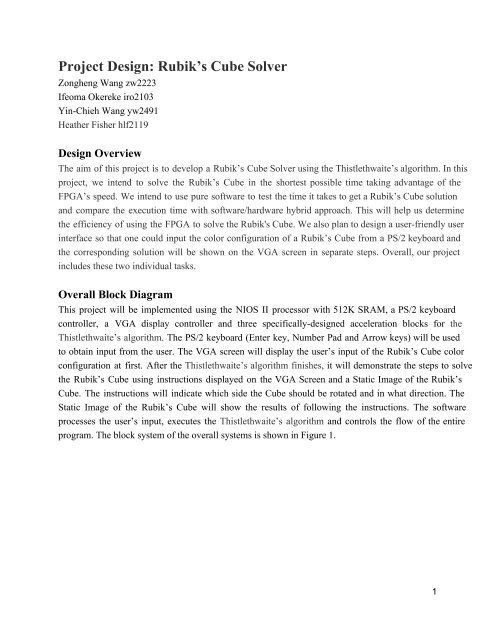
Project Design: Rubik's Cube Solver
Project Design: Rubik's Cube Solver
Project Design: Rubik's Cube Solver

You also want an ePaper? Increase the reach of your titles
YUMPU automatically turns print PDFs into web optimized ePapers that Google loves.
<strong>Project</strong> <strong>Design</strong>: Rubik’s <strong>Cube</strong> <strong>Solver</strong><br />
Zongheng Wang zw2223<br />
Ifeoma Okereke iro2103<br />
YinChieh Wang yw2491<br />
Heather Fisher hlf2119<br />
<strong>Design</strong> Overview<br />
The aim of this project is to develop a Rubik’s <strong>Cube</strong> <strong>Solver</strong> using the Thistlethwaite’s algorithm. In this<br />
project, we intend to solve the Rubik’s <strong>Cube</strong> in the shortest possible time taking advantage of the<br />
FPGA’s speed. We intend to use pure software to test the time it takes to get a Rubik’s <strong>Cube</strong> solution<br />
and compare the execution time with software/hardware hybrid approach. This will help us determine<br />
the efficiency of using the FPGA to solve the <strong>Rubik's</strong> <strong>Cube</strong>. We also plan to design a userfriendly user<br />
interface so that one could input the color configuration of a Rubik’s <strong>Cube</strong> from a PS/2 keyboard and<br />
the corresponding solution will be shown on the VGA screen in separate steps. Overall, our project<br />
includes these two individual tasks.<br />
Overall Block Diagram<br />
This project will be implemented using the NIOS II processor with 512K SRAM, a PS/2 keyboard<br />
controller, a VGA display controller and three specificallydesigned acceleration blocks for the<br />
Thistlethwaite’s algorithm. The PS/2 keyboard (Enter key, Number Pad and Arrow keys) will be used<br />
to obtain input from the user. The VGA screen will display the user’s input of the Rubik’s <strong>Cube</strong> color<br />
configuration at first. After the Thistlethwaite’s algorithm finishes, it will demonstrate the steps to solve<br />
the Rubik’s <strong>Cube</strong> using instructions displayed on the VGA Screen and a Static Image of the Rubik’s<br />
<strong>Cube</strong>. The instructions will indicate which side the <strong>Cube</strong> should be rotated and in what direction. The<br />
Static Image of the Rubik’s <strong>Cube</strong> will show the results of following the instructions. The software<br />
processes the user’s input, executes the Thistlethwaite’s algorithm and controls the flow of the entire<br />
program. The block system of the overall systems is shown in Figure 1.<br />
1
Figure 1: HighLevel Block Diagram of RCS<br />
Memory Analysis<br />
Based on the tests done using valgrind on a modern computer, 30946 bytes memory are needed in the<br />
Thistlethwaite’s algorithm. Since the Altera DE2 board provides a 512 Kbytes SRAM, it is more than<br />
enough for this project. The reason why we chose to use the SRAM for the Thistlethwaite’s algorithm is<br />
straightforward. SRAM guarantees minimal overhead in data transmission and storage and it supports a<br />
simple interface to implement.<br />
For most of the hardware components, we decided to store their own data in onchip block RAMs,<br />
since the amount of data they need to store is very limited and we also want to make the entire system<br />
faster. When the screen displays the current user’s input, the only data it needs to store is the 54 colors<br />
from the 6 surfaces of Rubik’s cube, based on which it could draw the current user’s input. Since for a<br />
3*3*3 Rubik’s <strong>Cube</strong>, there are only six different colors. Then we could encode the color in three bits.<br />
Thus, we could store five colors in a half word. Overall, an 11*16 RAM is about enough to store 54<br />
colors for the VGA controller. When displaying the solution demo on the screen, we decide to use<br />
software to aid the demo. In fact, when the user enters the stage of showing the solution, the software<br />
must have finished the Thistlethwaite’s algorithm already. Therefore, this is no computation or memory<br />
2
urden for the software. Then allocating some new jobs for the software increases the overall utilization<br />
of resources. As for the three acceleration blocks, they basically perform data rewiring, bit<br />
manipulations or simple computations, and thus no memory concerns are necessary for them.<br />
Critical Path<br />
Due to the fact that the Rubik’s <strong>Cube</strong> solver is originally a pure software problem, and we intend to<br />
transform it into one that is solved by a hybrid software and hardware system, the critical path of our<br />
project lies in the execution of the Thistlethwaite’s algorithm. We would ignore the overall critical path of<br />
the entire system since the Thistlethwaite’s algorithm can only start after the user’s input is completed,<br />
which could take as long as possible. Similarly, after the Thistlethwaite’s algorithm works out a solution,<br />
the solution demonstration will start. This only serves as a nice user interface rather than the core task of<br />
our accelerating purpose.<br />
The Thistlethwaite’s algorithm itself is rather complicated based on a mathematical theory called group<br />
theory. Therefore, in our design, we will only discuss the critical path of the acceleration block. The<br />
acceleration block includes three individual functions, and the software chooses which function to run.<br />
For each function it runs, the software uses the data transmitted from the Avalon bus. The cycle function<br />
involves three RAM data swaps, the twist function involves addition and mod operations and the<br />
permtonum function involves six comparisons and a lookup table.<br />
Detailed <strong>Design</strong> of Each Peripheral<br />
Acceleration Block<br />
According to the test result of gprof, we discover that three functions in the Thistlethwaite’s algorithm<br />
take about 75%80% of the execution time. These three functions are tiny ones which mainly involve<br />
holding and modifying the current state of the cube. Each time the Thistlethwaite’s algorithm is<br />
performed, these functions are executed about two million times. Therefore, it is essential for us to<br />
design an acceleration block for them. The three functions are described below:<br />
char *perm="AIBJTMROCLDKSNQPEKFIMSPRGJHLNTOQAGCEMTNSBFDHORPQ"<br />
// Use macro to swap items instead of classic routine with pointers for the sole reason of brevity<br />
#define SWAP(a,b) TEMP=a;a=b;b=TEMP;<br />
// number 65='A' is often subtracted to convert char ABC... to number 0,1,2,...<br />
#define CHAROFFSET 65<br />
// Cycles 4 pieces in array p, the piece indices given by a[0..3].<br />
void cycle(char*p, char*a){<br />
3
}<br />
SWAP(p[*aCHAROFFSET], p[a[1]CHAROFFSET]);<br />
SWAP(p[*aCHAROFFSET], p[a[2]CHAROFFSET]);<br />
SWAP(p[*aCHAROFFSET], p[a[3]CHAROFFSET]);<br />
In this function, three swaps are performed. From the main function of the Thistlethwaite’s algorithm, we<br />
find that the char*a is always passed with the global character array char *perm, except with different<br />
offset. For example, cycle(pos, perm+8) is equal to<br />
SWAP(pos[2], pos[11]);<br />
SWAP(pos[2], pos[3]);<br />
SWAP(pos[2], pos[10]);<br />
Therefore, the cycle function basically swaps some data of the array char*p. Furthermore, from the<br />
main function we can tell as well char*p is only passed with char pos[20] and ori[20]. Therefore, we<br />
decide to store these two arrays plus char *perm, which takes 88 bytes in total. The macro<br />
CHAROFFSET is purely used for software convenience and is entirely unnecessary for hardware<br />
design. Therefore the block diagram is as shown in Figure 2.<br />
Figure 2: Block Diagram for cycle<br />
In Figure 2, the controller can receive an unsigned integer of 6 bits, indicating the start point of the array<br />
perm, plus one bit indicating the target array ori or pos. After fetching the indices, the controller will read<br />
data from ori/pos at corresponding indices and swap their data with the help of a 16 bit register.<br />
// twists ith piece a+1 times.<br />
void twist(int i,int a){<br />
i=CHAROFFSET;<br />
4
}<br />
ori[i]=(ori[i]+a+1)%val[i];<br />
For the twist function, we only apply it to perm array. Note this RAM is shared within the entire<br />
acceleration block.<br />
Figure 3: Block Diagram for twist<br />
In Figure 3, the controller can receive two unsigned integer of 8 bits, put in a half word, indicating the<br />
start point of the array ori and val. After fetching the data based on the indices, the controller will<br />
perform the computation (ori[i]+a+1)%val[i] and write back the result.<br />
// convert permutation of 4 chars to a number in range 0..23<br />
int permtonum(char* p){<br />
int n=0;<br />
int a, b;<br />
for (a=0; a
if (p[2] < p[1]) n++;<br />
if (p[3] < p[1]) n++;<br />
n *= 2;<br />
if (p[3] < p[2]) n++;<br />
}<br />
return n;<br />
Figure 4: Block Diagram for permtonum<br />
In Figure 4, the controller can receive one unsigned integer of 5 bits, put in a half word, indicating the<br />
start point of the array pos that permtonum function is expected to run. Since only four pieces of data<br />
need to be compared with each other, we decide to build a lookup table to determine n. For example,<br />
if the result of the six comparisons above is 110101, then from the table you will find 15 for n. This is<br />
fast, simple and it saves us some shift registers/adders or multipliers. Finally the controller will save the<br />
value of n, waiting for the software to read.<br />
VGA<br />
The RCS VGA Controller will generate signals that will display the six sides of the Rubik’s <strong>Cube</strong> as six<br />
separate squares on the VGA Screen, similar to what Figure 5 illustrates. These squares will enable the<br />
user input the current configuration of the Rubik’s <strong>Cube</strong>. After the Rubik’s <strong>Cube</strong> has been solved, the<br />
VGA Controller will generate signals that will display the steps to solve the Rubik’s cube. Each step will<br />
include a static image of the 3D Rubik’s <strong>Cube</strong>, the instructions on how to rotate the cube, and options<br />
to move from one step to the other.<br />
6
Figure 5: Six different sides of an unsolved Rubik’s <strong>Cube</strong><br />
PS/2 Keyboard<br />
Input from the user will be obtained via the PS/2 Keyboard. Numbers 19 on the Number Pad of the<br />
Keyboard will be used to select individual boxes of each side of the Rubik’s cube. The arrow keys will<br />
be used to move from 1 side of the Rubik’s <strong>Cube</strong> to next. Figure 6 shows which number each box<br />
represents. When the user presses key 1, the box marked 1 in figure 6 will be selected and the color<br />
will change. As long as the user keeps pressing key 1, the color of box 1 will keep changing through the<br />
six colors of the Rubik’s cube. When the user has inputted all the six sides of the cube, the Enter key is<br />
pressed and this starts the computation process.<br />
Figure 6: Rubik’s <strong>Cube</strong> Side showing each box and the number it represents<br />
We will use the PS/2 Keyboard Controller provided in Lab 2 to handle the keystrokes from the user.<br />
SRAM<br />
We will use the 512 Kbytes SRAM on the Altera DE2 board with the Controller provided in the Lab 3.<br />
7
Milestones<br />
Milestone 1:<br />
Hardware:<br />
<strong>Design</strong> the layout of the user interface<br />
Implement the VGA controller for the user input part<br />
Integrate the system with the SRAM and PS/2 keyboard controllers<br />
Software:<br />
Write the algorithm for transforming the input from the user into Mike Reid’s <strong>Cube</strong> <strong>Solver</strong> format<br />
Test the Thistlethwaite’s algorithm on Altera DE2 Board with only NIOS II processor and SRAM<br />
Milestone 2:<br />
Hardware:<br />
Finish the acceleration block<br />
Implement the Keyboard controller part that receives input color configurations from the user<br />
Integrate the system with all the components so that the modified algorithm can run<br />
Software:<br />
Modify and optimize the Thistlethwaite’s algorithm and show the solution through printf<br />
Integrate the algorithm with acceleration blocks<br />
Compare the speed of solving a cube between pure software systems and hybrid software and<br />
hardware system<br />
Milestone 3:<br />
Hardware:<br />
Implement the VGA controller for solution demonstration part<br />
Software:<br />
Implement the algorithm that coordinates with hardware to show solution demonstration<br />
8