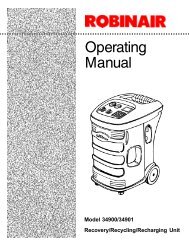
Robinair 75650 Coolant Recycler - NY Tech Supply
Robinair 75650 Coolant Recycler - NY Tech Supply
Robinair 75650 Coolant Recycler - NY Tech Supply

You also want an ePaper? Increase the reach of your titles
YUMPU automatically turns print PDFs into web optimized ePapers that Google loves.
Drain & Fill<br />
Procedures/<br />
Heater Hose<br />
Access<br />
Process<br />
1. Follow steps 1 - 14 from the Drain &<br />
Fill Procedures/Conventional<br />
Method section (pages 8-11).<br />
2. Using pinch-off pliers, pinch off the<br />
heater hose on both sides of the tee.<br />
Remove the tee cap and connect the<br />
quick connect nipple (female) to the<br />
tee. Remove the pinch-off pliers<br />
between the tee and the heater core<br />
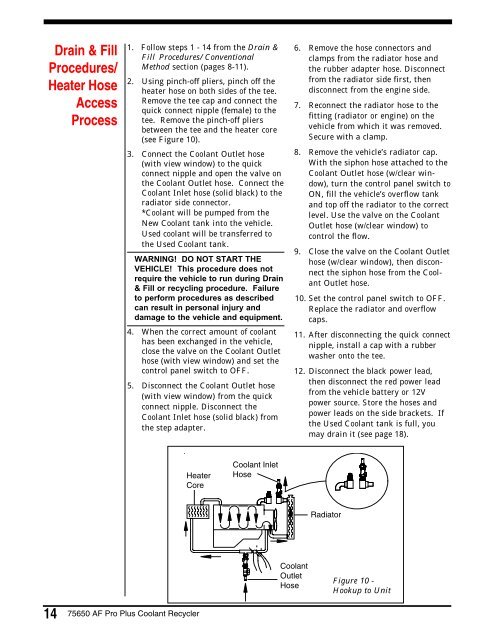
(see Figure 10).<br />
3. Connect the <strong>Coolant</strong> Outlet hose<br />
(with view window) to the quick<br />
connect nipple and open the valve on<br />
the <strong>Coolant</strong> Outlet hose. Connect the<br />
<strong>Coolant</strong> Inlet hose (solid black) to the<br />
radiator side connector.<br />
*<strong>Coolant</strong> will be pumped from the<br />
New <strong>Coolant</strong> tank into the vehicle.<br />
Used coolant will be transferred to<br />
the Used <strong>Coolant</strong> tank.<br />
WARNING! DO NOT START THE<br />
VEHICLE! This procedure does not<br />
require the vehicle to run during Drain<br />
& Fill or recycling procedure. Failure<br />
to perform procedures as described<br />
can result in personal injury and<br />
damage to the vehicle and equipment.<br />
4. When the correct amount of coolant<br />
has been exchanged in the vehicle,<br />
close the valve on the <strong>Coolant</strong> Outlet<br />
hose (with view window) and set the<br />
control panel switch to OFF.<br />
5. Disconnect the <strong>Coolant</strong> Outlet hose<br />
(with view window) from the quick<br />
connect nipple. Disconnect the<br />
<strong>Coolant</strong> Inlet hose (solid black) from<br />
the step adapter.<br />
6. Remove the hose connectors and<br />
clamps from the radiator hose and<br />
the rubber adapter hose. Disconnect<br />
from the radiator side first, then<br />
disconnect from the engine side.<br />
7. Reconnect the radiator hose to the<br />
fitting (radiator or engine) on the<br />
vehicle from which it was removed.<br />
Secure with a clamp.<br />
8. Remove the vehicle’s radiator cap.<br />
With the siphon hose attached to the<br />
<strong>Coolant</strong> Outlet hose (w/clear window),<br />
turn the control panel switch to<br />
ON, fill the vehicle’s overflow tank<br />
and top off the radiator to the correct<br />
level. Use the valve on the <strong>Coolant</strong><br />
Outlet hose (w/clear window) to<br />
control the flow.<br />
9. Close the valve on the <strong>Coolant</strong> Outlet<br />
hose (w/clear window), then disconnect<br />
the siphon hose from the <strong>Coolant</strong><br />
Outlet hose.<br />
10. Set the control panel switch to OFF.<br />
Replace the radiator and overflow<br />
caps.<br />
11. After disconnecting the quick connect<br />
nipple, install a cap with a rubber<br />
washer onto the tee.<br />
12. Disconnect the black power lead,<br />
then disconnect the red power lead<br />
from the vehicle battery or 12V<br />
power source. Store the hoses and<br />
power leads on the side brackets. If<br />
the Used <strong>Coolant</strong> tank is full, you<br />
may drain it (see page 18).<br />
Heater<br />
Core<br />
<strong>Coolant</strong> Inlet<br />
Hose<br />
Radiator<br />
<strong>Coolant</strong><br />
Outlet<br />
Hose<br />
Figure 10 -<br />
Hookup to Unit<br />
14<br />
<strong>75650</strong> AF Pro Plus <strong>Coolant</strong> <strong>Recycler</strong>