Technical Manual Series 3000 MkII Gas Detector - Merkantile
Technical Manual Series 3000 MkII Gas Detector - Merkantile
Technical Manual Series 3000 MkII Gas Detector - Merkantile

You also want an ePaper? Increase the reach of your titles
YUMPU automatically turns print PDFs into web optimized ePapers that Google loves.
SERIES <strong>3000</strong> MKII TECHNICAL MANUAL<br />
S3KMKIIMAN_MAN0878_Issue 1_01-10<br />
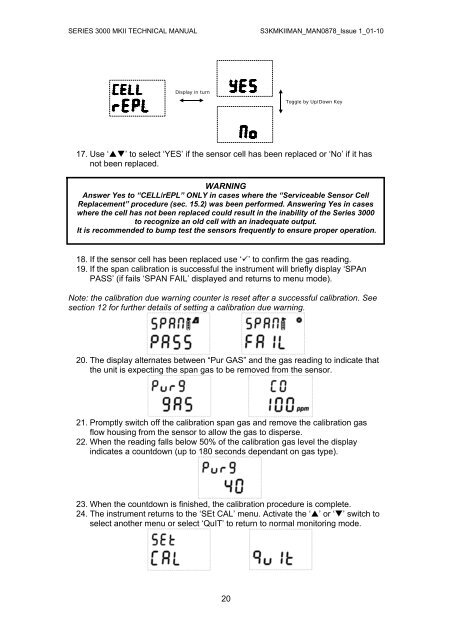
Display in turn<br />
Toggle by Up/Down Key<br />
17. Use ‘’ to select ‘YES’ if the sensor cell has been replaced or ‘No’ if it has<br />
not been replaced.<br />
WARNING<br />
Answer Yes to “CELL/rEPL” ONLY in cases where the “Serviceable Sensor Cell<br />
Replacement” procedure (sec. 15.2) was been performed. Answering Yes in cases<br />
where the cell has not been replaced could result in the inability of the <strong>Series</strong> <strong>3000</strong><br />
to recognize an old cell with an inadequate output.<br />
It is recommended to bump test the sensors frequently to ensure proper operation.<br />
18. If the sensor cell has been replaced use ‘’ to confirm the gas reading.<br />
19. If the span calibration is successful the instrument will briefly display ‘SPAn<br />
PASS’ (if fails ‘SPAN FAIL’ displayed and returns to menu mode).<br />
Note: the calibration due warning counter is reset after a successful calibration. See<br />
section 12 for further details of setting a calibration due warning.<br />
20. The display alternates between “Pur GAS” and the gas reading to indicate that<br />
the unit is expecting the span gas to be removed from the sensor.<br />
21. Promptly switch off the calibration span gas and remove the calibration gas<br />
flow housing from the sensor to allow the gas to disperse.<br />
22. When the reading falls below 50% of the calibration gas level the display<br />
indicates a countdown (up to 180 seconds dependant on gas type).<br />
23. When the countdown is finished, the calibration procedure is complete.<br />
24. The instrument returns to the ‘SEt CAL’ menu. Activate the ‘’ or ‘’ switch to<br />
select another menu or select ‘QuIT’ to return to normal monitoring mode.<br />
20