

Reebokfitness.info T3.2 Treadmill - Reebok Fitness Equipment
Reebokfitness.info T3.2 Treadmill - Reebok Fitness Equipment
Reebokfitness.info T3.2 Treadmill - Reebok Fitness Equipment

Create successful ePaper yourself
Turn your PDF publications into a flip-book with our unique Google optimized e-Paper software.
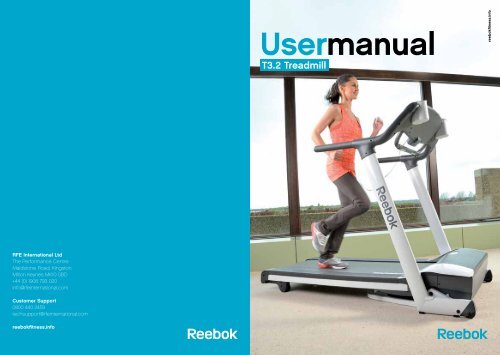
Usermanual<br />
<strong>T3.2</strong> <strong>Treadmill</strong><br />
reebokfitness.<strong>info</strong><br />
RFE International Ltd<br />
The Performance Centre<br />
Maidstone Road, Kingston<br />
Milton Keynes MK10 0BD<br />
+44 (0) 1908 793 020<br />
<strong>info</strong>@rfeinternational.com<br />
Customer Support<br />
0800 440 2459<br />
techsupport@rfeinternational.com<br />
reebokfitness.<strong>info</strong><br />
RFE4489_RE013411_<strong>T3.2</strong> TREADMILL UMFINAL.indd 1-1 28/06/2010 11:41
Welcome from<br />
<strong>Reebok</strong> <strong>Fitness</strong><br />
Contents<br />
<strong>T3.2</strong> <strong>Treadmill</strong><br />
01<br />
reebokfitness.<strong>info</strong><br />
Thank you for choosing <strong>Reebok</strong>. Before you get<br />
started, please read these instructions carefully.<br />
If you experience any difficulties, our support<br />
team will be happy to help – or check out our<br />
website at reebokfitness.<strong>info</strong><br />
Important note:<br />
Consult your doctor before starting any exercise programme. If you feel any sickness, chest<br />
pain, dizziness or breathlessness during your training, stop exercising and consult your<br />
doctor immediately.<br />
If you have any further queries please contact our customer support team on the details<br />
provided either at the foot of this page or on the back of the manual.<br />
Parts . . . . . . . . . . . . . . . . . . . . . . . . . . . . . . . . . . . . . . . . . . . . . . . . . . . . . . . . 02<br />
Assembly. . . . . . . . . . . . . . . . . . . . . . . . . . . . . . . . . . . . . . . . . . . . . . . . . . . . 04<br />
Precautions. . . . . . . . . . . . . . . . . . . . . . . . . . . . . . . . . . . . . . . . . . . . . . . . . . 08<br />
Functions . . . . . . . . . . . . . . . . . . . . . . . . . . . . . . . . . . . . . . . . . . . . . . . . . . . .10<br />
Correct Use . . . . . . . . . . . . . . . . . . . . . . . . . . . . . . . . . . . . . . . . . . . . . . . . . . 11<br />
Warm Up . . . . . . . . . . . . . . . . . . . . . . . . . . . . . . . . . . . . . . . . . . . . . . . . . . . . 12<br />
Computer . . . . . . . . . . . . . . . . . . . . . . . . . . . . . . . . . . . . . . . . . . . . . . . . . . . .13<br />
Maintenance . . . . . . . . . . . . . . . . . . . . . . . . . . . . . . . . . . . . . . . . . . . . . . . . 24<br />
Troubleshooting . . . . . . . . . . . . . . . . . . . . . . . . . . . . . . . . . . . . . . . . . . . . . 26<br />
Parts ID. . . . . . . . . . . . . . . . . . . . . . . . . . . . . . . . . . . . . . . . . . . . . . . . . . . . . . 28<br />
Limited Warranty . . . . . . . . . . . . . . . . . . . . . . . . . . . . . . . . . . . . . . . . . . . . 36<br />
Model name: <strong>Reebok</strong> <strong>T3.2</strong> <strong>Treadmill</strong><br />
Serial number: . . . . . . . . . . . . . . . . . . . . . . . . . . . . . . . . . . . . . . . . . . . . . . . . .<br />
These details can be found on the underside of your product.<br />
Customer Support<br />
0800 440 2459<br />
techsupport@rfeinternational.com<br />
RFE4489_RE013411_<strong>T3.2</strong> TREADMILL UMFINAL.indd 1-1 28/06/2010 11:41
Parts<br />
<strong>T3.2</strong> <strong>Treadmill</strong><br />
02<br />
Customer Support 0800 440 2459<br />
<strong>T3.2</strong> <strong>Treadmill</strong><br />
03<br />
reebokfitness.<strong>info</strong><br />
Checking The Parts<br />
Before you begin, please check all parts are present and undamaged. If you are<br />
missing any parts, please call our Technical Support team on the number at the<br />
top of this page.<br />
208 x 2<br />
137 x 1 104 x 1<br />
275 x 2<br />
276 x 2 246 x 2 130 x 1<br />
Blister Pack<br />
809 x 2<br />
M8x30<br />
810 x 2<br />
M8x18<br />
806 x 4 A x 1 B x 1<br />
M8x45 5mm<br />
802 x 8<br />
M4x15mm<br />
807 x 4 808 x 4<br />
8mm 8mm<br />
Silicone Oil x 1<br />
C x 4<br />
RFE4489_RE013411_<strong>T3.2</strong> TREADMILL UMFINAL.indd 2-3 28/06/2010 11:41
Assembly<br />
04<br />
05<br />
<strong>T3.2</strong> <strong>Treadmill</strong><br />
Customer Support 0800 440 2459<br />
<strong>T3.2</strong> <strong>Treadmill</strong><br />
reebokfitness.<strong>info</strong><br />
Uprights<br />
Handlebars<br />
1. Remove the treadmill from the box.<br />
4. Rotate console until it is in an appropriate position for use.<br />
2. Lift the uprights to the unfolded position and secure using 2 x 810 bolts.<br />
3. Insert 2 x 809 bolts into the base of the uprights and cover with 2 x 246 caps.<br />
5. Push one handlebar (208) into the left hand side of the console support frame.<br />
6. Secure the handlebar using 2 x 806 bolts, 2 x 807 spring washers and 2 x 814 washers.<br />
7. Repeat for the right hand handlebar.<br />
You will require:<br />
You will require:<br />
246 x 2 810 x 2 809 x 2 806 x 4 208 x 2 807 x 4 814 x 4<br />
RFE4489_RE013411_<strong>T3.2</strong> TREADMILL UMFINAL.indd 4-5 28/06/2010 11:41
Assembly<br />
06<br />
07<br />
<strong>T3.2</strong> <strong>Treadmill</strong><br />
Customer Support 0800 440 2459<br />
<strong>T3.2</strong> <strong>Treadmill</strong><br />
reebokfitness.<strong>info</strong><br />
8. Clip the handlebar covers over the handlebars and secure using 4 x 802 screws.<br />
9. Repeat for the other handlebar.<br />
You will require:<br />
Inserting The Cup Holders<br />
10. Insert the left hand cup holder (137) into the left hand side of the console housing.<br />
11. Insert the right hand cup holder (104) into the right hand side of the console housing.<br />
You will require:<br />
802 x 8 275 x 2 276 x 2<br />
137 x 1 104 x 1<br />
RFE4489_RE013411_<strong>T3.2</strong> TREADMILL UMFINAL.indd 6-7 28/06/2010 11:41
Precautions<br />
08<br />
09<br />
<strong>T3.2</strong> <strong>Treadmill</strong><br />
Customer Support 0800 440 2459<br />
<strong>T3.2</strong> <strong>Treadmill</strong><br />
reebokfitness.<strong>info</strong><br />
These instructions are intended to provide important <strong>info</strong>rmation for use and<br />
maintenance of the equipment as well as for your personal safety. Keep this<br />
user manual in a safe place for future reference.<br />
WARNING!<br />
This product is made for home use only and tested up to a maximum body<br />
weight of 130 kilograms.<br />
RFE International Ltd. assumes no responsibility for personal injury or<br />
property damage sustained by or through the use of this equipment. It is<br />
the responsibility of the owner to ensure that all users of this equipment are<br />
adequately <strong>info</strong>rmed of all warnings and precautions.<br />
SCOPE<br />
• Maximum user weight of 130kg.<br />
• This product is designed for physical exercise by adults. This product is not<br />
suitable for use by persons under 14 years of age.<br />
• Never allow more than one person on the equipment at a time.<br />
ENVIRONMENT<br />
• Ensure that those present are aware of possible hazards e.g. moveable<br />
parts during training.<br />
• Ensure that sufficient space is available to use the product.<br />
• Please ensure that liquids or perspiration are wiped off the product.<br />
• This product is designed to be used and stored indoors. Do not store the<br />
product outside, or in damp/ dusty environments.<br />
• The product is made for home use only. Warranty and manufacturer’s<br />
liability do not extend to any product or damage to the product caused by<br />
commercial use.<br />
USER HEALTH<br />
• Consult your doctor before starting any exercise programmes to receive<br />
advice on the optimal training.<br />
• Ensure the product is on a flat, level surface with at least 0.5m of clear<br />
area surrounding the product.<br />
• incorrect/excessive training can cause health injuries.<br />
• If you feel sickness, chest pain, fits of dizziness or breathlessness during<br />
your training, immediately stop the training and consult your doctor.<br />
PRODUCT PREPARATION<br />
• Ensure that training only starts after correct assembly, adjustment and<br />
inspection of the product.<br />
• Follow the steps of the assembly instructions carefully.<br />
• Only use suitable tools for assembly and ask for assistance<br />
if necessary.<br />
• Only use original <strong>Reebok</strong> parts as delivered (see checklist).<br />
SAFETY CHECKS (Before Every Use)<br />
• Tighten all adjustable parts to prevent sudden movement while training.<br />
• Tighten all nuts and bolts.<br />
• Check that the tension knob is secure.<br />
• Ensure the product is on a flat, level surface.<br />
• Do not use the product without shoes or with loose shoes.<br />
• Be aware of non-fixed or moving parts whilst mounting or dismounting<br />
the product.<br />
• Do not wear loose or poorly fitting clothing that may become trapped<br />
in the product.<br />
RFE4489_RE013411_<strong>T3.2</strong> TREADMILL UMFINAL.indd 8-9 28/06/2010 11:41
Functions<br />
10<br />
Correct Use<br />
11<br />
<strong>T3.2</strong> <strong>Treadmill</strong><br />
Customer Support 0800 440 2459<br />
<strong>T3.2</strong> <strong>Treadmill</strong><br />
reebokfitness.<strong>info</strong><br />
Fold<br />
Transport<br />
1. Lift the treadmill deck until you hear a click.<br />
The click will confirm the treadmill deck is locked into its folded position.<br />
2. Engage the castor wheel if required.<br />
1. Fold up the treadmill as per the above instructions.<br />
2. Tilt treadmill forwards until transport wheel engages.<br />
3. Manoeuvre the treadmill to desired location.<br />
4. Depress foot lever to disengage transport lever.<br />
5. Ensure treadmill is level.<br />
6. Unfold as per the above instructions.<br />
Correct Use<br />
We recommend you use your treadmill<br />
in the following way:<br />
Unfold<br />
1. Press the lever on the top of the castor wheel to release it.<br />
2. Unfold the treadmill deck by pressing the lever on the damper,<br />
and allow if to fall to the ground.<br />
The soft drop mechanism will assist you with lowering the deck.<br />
WARNING!<br />
Stand to one side whilst the treadmill is lowered.<br />
3. Once the deck is flat on the floor, stand on the running deck and wobble the side<br />
handlebar to ensure the upright tubes have locked into place correctly.<br />
RFE4489_RE013411_<strong>T3.2</strong> TREADMILL UMFINAL.indd 10-11 28/06/2010 11:41
Warm Up<br />
12<br />
Computer<br />
13<br />
<strong>T3.2</strong> <strong>Treadmill</strong><br />
Customer Support 0800 440 2459<br />
<strong>T3.2</strong> <strong>Treadmill</strong><br />
reebokfitness.<strong>info</strong><br />
Warming Up<br />
It is important to warm up before exercising to prepare your body for the workout it<br />
is about to do. The first phase of a warm up is to increase your heart rate and get<br />
blood pumping around your body faster. Choose an activity which will warm up<br />
the same muscles you are going to use during your workout.<br />
1. 5-10 minutes heart rate raising activity<br />
2. Static stretching<br />
3. Workout<br />
Stretches<br />
A<br />
B<br />
C<br />
F<br />
G<br />
Hold each stretch for about 30 seconds. Stretching should not hurt; only stretch<br />
your muscles to as far as is comfortable. If you have a tight or previously injured<br />
muscle stretch the affected muscle group within the warm up. Do not perform<br />
any sudden movements while warming up.<br />
D<br />
E<br />
Computer Functions:<br />
A – Incline Up/Down Button<br />
B – Stop/Enter Button<br />
Calf<br />
Stretch<br />
Hamstring<br />
Stretch<br />
Groin<br />
Stretch<br />
C – Mode Button<br />
D – Express Incline Buttons<br />
E – Express Speed Buttons<br />
Side<br />
Stretch<br />
Quad<br />
Stretch<br />
Arm<br />
Stretch<br />
Cool Down<br />
Following your workout you should carry out a cool down. This should gradually<br />
bring your heart rate back to a resting level. To do a cool down perform an activity<br />
of your choice at a low intensity e.g. a steady 5 minute jog. This should be followed<br />
by static stretches, similar to those in the warm up. Again, hold each stretch for<br />
30 seconds.<br />
F – Speed Up/Down Buttons<br />
G – Start Button<br />
RFE4489_RE013411_<strong>T3.2</strong> TREADMILL UMFINAL.indd 12-13 28/06/2010 11:41
Computer<br />
14<br />
15<br />
<strong>T3.2</strong> <strong>Treadmill</strong><br />
Customer Support 0800 440 2459<br />
<strong>T3.2</strong> <strong>Treadmill</strong><br />
reebokfitness.<strong>info</strong><br />
Preset Programmes<br />
Your <strong>T3.2</strong> treadmill has 8 preset programs:<br />
Time (P1)<br />
A programme where you can workout for a set amount of time.<br />
Distance (P2)<br />
A programme where you can workout for a set distance.<br />
Calories (P3)<br />
A programme where you can workout until you have burnt a set number<br />
of calories.<br />
15 Minute Preset Speed (P4)<br />
A programme with 7 level options giving you a 15 minute workout at varied<br />
inclines and speeds.<br />
30 Minute Preset Speed (P5)<br />
A programme with 7 level options giving you a 30 minute workout at varied<br />
inclines and speeds.<br />
45 Minute Preset Speed (P6)<br />
A programme with 7 level options giving you a 45 minute workout at varied<br />
inclines and speeds.<br />
Weight Loss (P7)<br />
A programme with 7 level options, intended for a medium intensity workout over<br />
varied inclines and speeds.<br />
Heart Rate Control (P8)<br />
A programme where the treadmill automatically adjusts the incline and speed of<br />
your workout according to your heart rate.<br />
Quick Start<br />
To exercise without any preset programme:<br />
• Insert the safety key into the front of the console, and attach to the<br />
users waistband.<br />
• Turn the power on. Press button and the treadmill belt will begin to move.<br />
Safety Key<br />
The safety key must be inserted into the front of the console in order to operate the<br />
treadmill. Always insert the safety key and attach the clip to your clothing waistband<br />
before beginning your workout. If you should encounter problems and need to stop<br />
the treadmill quickly, simply pull on the cord (removing the safety key from the console).<br />
To continue your workout turn the power switch to off, set the speed to stop and then<br />
reinsert the safety key into the console.<br />
WARNING!<br />
During any programme, you can override the speed by pressing SPEED and<br />
buttons. You can also override the incline using the INCLINE and buttons.<br />
Alternatively, press or pull out the safety key.<br />
RFE4489_RE013411_<strong>T3.2</strong> TREADMILL UMFINAL.indd 14-15 28/06/2010 11:41
Computer<br />
16<br />
17<br />
<strong>T3.2</strong> <strong>Treadmill</strong><br />
Customer Support 0800 440 2459<br />
<strong>T3.2</strong> <strong>Treadmill</strong><br />
reebokfitness.<strong>info</strong><br />
Time Programme (P1)<br />
1. With P1 flashing on the right hand side<br />
of the screen, Press to select.<br />
2. Set your target time using SPEED<br />
and buttons. Press to select.<br />
3. Press to begin your workout.<br />
Distance Programme (P2)<br />
1. With P2 flashing on the right hand side<br />
of the screen, Press to select.<br />
2. Set your target distance using<br />
SPEED and buttons.<br />
Press to select.<br />
3. Press to begin your workout.<br />
Level 1<br />
Level 3<br />
Level 5<br />
Level 2<br />
Level 4<br />
Level 6<br />
Calories Programme (P3)<br />
1. With P3 flashing on the right hand side<br />
of the screen, Press to select.<br />
2. Set your target calories to burn using<br />
SPEED and buttons.<br />
Press to select.<br />
3. Press to begin your workout.<br />
Level 7<br />
15 Minutes Preset Speed (P4)<br />
1. With P4 flashing on the right hand side<br />
of the screen, Press to select.<br />
2. Set your target time using<br />
SPEED and buttons. Press to select.<br />
3. Now select your level.<br />
(See right for the 7 different levels using<br />
SPEED and buttons).<br />
4. Confirm your level selection by<br />
pressing to select.<br />
5. Press to begin your workout.<br />
RFE4489_RE013411_<strong>T3.2</strong> TREADMILL UMFINAL.indd 16-17 28/06/2010 11:41
Computer<br />
18<br />
19<br />
<strong>T3.2</strong> <strong>Treadmill</strong><br />
Customer Support 0800 440 2459<br />
<strong>T3.2</strong> <strong>Treadmill</strong><br />
reebokfitness.<strong>info</strong><br />
30 minute Program (P5)<br />
Level 4<br />
1. With P5 flashing on the right hand side<br />
of the screen, press to select.<br />
2. Set your level using<br />
SPEED and buttons.<br />
3. Press to begin your workout.<br />
Level 1<br />
Level 5<br />
Level 2<br />
Level 6<br />
Level 3<br />
Level 7<br />
RFE4489_RE013411_<strong>T3.2</strong> TREADMILL UMFINAL.indd 18-19 28/06/2010 11:41
Computer<br />
20<br />
21<br />
<strong>T3.2</strong> <strong>Treadmill</strong><br />
Customer Support 0800 440 2459<br />
<strong>T3.2</strong> <strong>Treadmill</strong><br />
reebokfitness.<strong>info</strong><br />
45 Minute Programme (P6)<br />
Level 4<br />
1. With P6 flashing on the right hand side<br />
of the screen, press to select.<br />
2. Set your level using<br />
SPEED and buttons.<br />
3. Press to begin your workout.<br />
Level 5<br />
Level 1<br />
Level 6<br />
Level 2<br />
Level 7<br />
Level 3<br />
RFE4489_RE013411_<strong>T3.2</strong> TREADMILL UMFINAL.indd 20-21 28/06/2010 11:41
Computer<br />
<strong>T3.2</strong> <strong>Treadmill</strong><br />
22<br />
Customer Support 0800 440 2459<br />
<strong>T3.2</strong> <strong>Treadmill</strong><br />
23<br />
reebokfitness.<strong>info</strong><br />
Weight Loss Programme (P7)<br />
1. With P7 flashing on the right hand side<br />
of the screen, press to select.<br />
2. Set your level using<br />
SPEED and buttons.<br />
Level Min.Speed Max. Speed Min. Incline Max. Incline<br />
L1 3.2/2.0 5.6/3.5 0 4<br />
L2 4.0/2.5 6.4/4.0 1 5<br />
L3 4.8/3.0 7.2/4.5 2 6<br />
L4 5.6/3.5 8.0/5.0 3 7<br />
L5 6.4/4.0 8.8/5.5 4 8<br />
L6 7.2/4.5 9.6/6.0 5 9<br />
L7 8.0/5.0 10.4/6.5 6 10<br />
3. Press to begin your workout.<br />
If you want to change the level during program P5, P6 or P7<br />
press button. The level will flash on the screen. Use the<br />
SPEED and buttons to adjust the level and select the<br />
option you want using the button. Press to continue<br />
working out.<br />
Heart Rate Control (P8)<br />
1. With P8 flashing on the right hand side<br />
of the screen, press to select.<br />
2. Set your target time using SPEED and<br />
buttons (the default is 60.00 minutes).<br />
Press to confirm your choice.<br />
3. Now, the target heart rate will be flashing in the pulse window.<br />
Adjust this value using the SPEED and buttons, and select<br />
the value using button.<br />
To calculate your target heart rate use the following rule:<br />
• Deduct your age from 220 e.g. for a 35 year old person, their<br />
maximum heart rate (MHR) is 220 – 35 = 185 beats per minute<br />
• Decide the percentage of your MHR you want to work at e.g. 85%<br />
As a guide:<br />
50-70% MHR = Health/Fat Burning<br />
70 – 80% MHR = <strong>Fitness</strong>/Bodyshaping<br />
80 – 90% MHR = High intensity performance<br />
• Multiply your maximum heart rate by the percentage value<br />
e.g. 185 x 0.85 = 157bpm<br />
4. Press to begin your 3 minute warm up. Keep your hands on<br />
the pulse sensors at all times during this workout to monitor<br />
your pulse correctly.<br />
During the warm up the only buttons that will function are the button<br />
to pause the workout or to restart. The warm up will continue until<br />
your heart rate reaches your target heart rate zone, up to a maximum<br />
of 9 minutes. During this time the incline and speed will be adjusted at<br />
30 second intervals to try and get you warmed up to your target heart<br />
rate. If, after 9 minutes you have not reached your target heart rate<br />
“FAIL” will show on the screen, and you should review the level setting<br />
you selected.<br />
If you see a “P” flashing in the pulse window, the treadmill is unable to<br />
detect your pulse. The computer checks your pulse every 30 seconds<br />
and without a reading is unable to alter the speed to ensure you continue<br />
working within your target heart rate zone.<br />
Once the warm up is completed, and your heart rate is at your target<br />
level, you will begin the Heart Rate Control Programme. The treadmill will<br />
continue to monitor your pulse every 30 seconds. The treadmill will adjust<br />
the incline level of your workout to try and keep you working at your target<br />
heart rate (between 0 and 15%). If you are running at 15% incline on a given<br />
speed, and still not working at your desired heart rate then the speed will<br />
increase by 0.5mph or 0.8 km/h at 30 second intervals until you reach<br />
your target zone.<br />
RFE4489_RE013411_<strong>T3.2</strong> TREADMILL UMFINAL.indd 22-23 28/06/2010 11:41
Maintenance<br />
<strong>T3.2</strong> <strong>Treadmill</strong><br />
24<br />
Customer Support 0800 440 2459<br />
reebokfitness.<strong>info</strong><br />
Proper maintenance is very important to ensure your equipment is always in top<br />
working condition. Improper maintenance could cause damage or shorten the life<br />
of your equipment as well as exceeding the warranty coverage.<br />
1. Ensure the running belt lubrication is checked and carried out (when required).<br />
This is likely to be every 4 weeks of use, or 20 hours.<br />
2. Check periodically (4 weeks) that the running belt is centered and has not<br />
moved to one side. In this instance stop the machine and carry out the belt<br />
adjustment (directions in the troubleshooting section).<br />
3. To ensure all components of the machine (including the frame) are in a good<br />
condition please ensure any perspiration or dust is wiped clean on a regular<br />
basis. This can be done by using a soft, damp cloth. Please don’t use<br />
detergents as this may affect the colouring or operation of the components.<br />
4. To ensure correct operation the machine must be stored in a dry, indoor<br />
environment at all times.<br />
5. Inspect and tighten all parts of the machine regularly. Any worn parts must<br />
be replaced immediately. Pay particular attention to nuts, bolts, screws<br />
and washers.<br />
enjoy<br />
The new <strong>Reebok</strong> Performance Series combines innovative<br />
design and ultimate functionality in a unique line of products.<br />
Product shown: T7.8 LE <strong>Treadmill</strong>.<br />
RFE4489_RE013411_<strong>T3.2</strong> TREADMILL UMFINAL.indd 24-25 28/06/2010 11:41
Troubleshooting<br />
26<br />
27<br />
<strong>T3.2</strong> <strong>Treadmill</strong><br />
Customer Support 0800 440 2459<br />
<strong>T3.2</strong> <strong>Treadmill</strong><br />
reebokfitness.<strong>info</strong><br />
Q How do I lubricate my treadmill deck<br />
A At the back of the running deck / machine (opposite end to the computer)<br />
on each side there are two Allen head bolts. Turn these bolts anticlockwise<br />
five full turns to release the belt tension. Lift the edge of the treadmill running<br />
belt approximately 30 to 40cm from the front roller. Apply 10ml of silicone oil<br />
under the running belt, from front to back and across the width of the running<br />
deck. Tighten the bolts five turns, clockwise, to add tension to the belt.<br />
WARNING!<br />
Do not over lubricate the running belt, as this will cause the running belt<br />
to slip. After application power your treadmill up to 6mph or 10 Km/h for<br />
5 to 10 minutes. Wipe any excess oil away. If necessary, repeat for a<br />
further 10 minutes.<br />
Q I have just ordered my treadmill and there are some parts missing can<br />
you help<br />
A Yes, if you are missing parts from your new machine these can be ordered<br />
on our helpline 0800 440 2459. When you call we will require your full<br />
address, the part numbers (you require) from the user manual that and<br />
your machine serial number.<br />
Q How long is my warranty on my treadmill<br />
A All <strong>Reebok</strong> treadmills come with a manufacturers warranty this varies on<br />
each machine, this should be printed in your manual, if you have any<br />
questions regarding your warranty please don’t hesitate to contact our<br />
helpline 0800 440 2459.<br />
Q How often should I lubricate my treadmill deck<br />
A The running belt has been adjusted properly by the factory. However<br />
transportation, uneven flooring or other unpredicted reasons could cause the<br />
belt to shift off centre resulting in the belt rubbing with the plastic side rail or<br />
end caps and possibly causing damage. To adjust the belt back to its correct<br />
position, use the tension bolts at the back of the deck in the following way:<br />
1. If your belt tends to move to the right, rotate the right tension bolt clockwise.<br />
We recommend adjustments of 1 circle at a time, and follow with a test. If your<br />
belt continues to move to the right, simply adjust the left belt tension bolt by<br />
turning it 1 circle counter-clockwise, follow with a test.<br />
2. If your belt tends to move to the left, rotate the left tension bolt clockwise 1<br />
circle at a time, and follow with a test. If the belt continues to move to the left,<br />
simply adjust the right tension bolt counterclockwise.<br />
3. If your belt appears to be loose, simply tighten both bolts evenly 1 circle.<br />
4. If it appears tight, simply loosen both bolts evenly 1 circle.<br />
WARNING!<br />
Run your <strong>Treadmill</strong> for 5 – 10 minutes after adjusting the belt<br />
Q What is the safety key for and where does it go<br />
A The safety key is a red plastic key that should be inserted into the front of the<br />
computer when using the treadmill, this is an automatic cut off so if you have<br />
any problems or get into any difficulties you can pull the key out to stop the<br />
machine. The treadmill will not work without this key being inserted.<br />
Q My treadmill is out of the warranty can you still help me<br />
A Yes we can still help, we have a large network of engineers that cover 98% of<br />
the British Isles and can provide replacement parts. For a quote on parts or<br />
engineer call out please contact our helpline on 0800 440 2459.<br />
Q Can I keep my equipment in my garage<br />
A We advise to keep the equipment indoors, away from moisture and dust.<br />
Do not store the product outside, or in damp or dusty environments.<br />
Q Is there a maximum user weight for my treadmill<br />
A There is a maximum user weight with all our treadmills this varies on each<br />
machine, this should be printed in your manual, if you have any questions<br />
regarding the user weight, please don’t hesitate to contact our<br />
helpline 0800 440 2459.<br />
Q Why is there a black dust starting to appear under my treadmill<br />
A Occasionally a black dust can start to appear under your treadmill this<br />
is due to normal wear and tear. You can remove the dust easily with a<br />
vacuum cleaner. If you want to keep the dust away from the floor we would<br />
recommend for you to place your treadmill on a protective mat.<br />
RFE4489_RE013411_<strong>T3.2</strong> TREADMILL UMFINAL.indd 26-27 28/06/2010 11:41
Parts ID<br />
28<br />
29<br />
<strong>T3.2</strong> <strong>Treadmill</strong><br />
Customer Support 0800 440 2459<br />
<strong>T3.2</strong> <strong>Treadmill</strong><br />
reebokfitness.<strong>info</strong><br />
Diagram 1<br />
T32-401 Motor Hood x 1<br />
T32-466 25.6x25x41.6xR17 Cover - Lower x 1<br />
T32-402 Motor Hood Decorate Cover - Left x 1<br />
T32-467 Elevation Support Tube Fix Holder x 1<br />
T32-449 Motor Hood Decorate Cover - Right x 1<br />
T32-468 54x24x10 Power Cable Cover x 1<br />
T32-461 Elevation Support Tube x 1<br />
T32-462 Ø22 Round End Cap x 2<br />
T32-463 20x26x46 End Cap x 2<br />
T32-369 Incline Motor x 1<br />
T32-444 Incline Motor Sleeve x 1<br />
T32-337 Transformer x 1<br />
T32-336 Relay Board x 1<br />
T32-411 Control Board x 1<br />
T32-442 Soft Drop Shock Holder x 1<br />
T32-413 Soft Drop Shock x 1<br />
T32-355 Soft Drop Locker x 1<br />
T32-334 Soft Drop Locker Spring x 1<br />
T32-354 22.5x28.2x22 Nylon Brushing x 1<br />
T32-417 DC Motor x 1<br />
T32-435 220J-6 Driving Belt x 1<br />
T32-464 Motor Holder x 1<br />
T32-433 Motor Cover - Lower x 1<br />
T32-431 Side Decorate Cover - Left x 1<br />
T32-425 Side Decorate Cover - Right x 1<br />
T32-430 Elevation Motor Cover x 1<br />
T32-465 25.6x29.5x41.6xR17 Cover - Upper x 2<br />
T32-428 Elevation Motor Cover - Left x 1<br />
T32-429 Elevation Motor Cover - Right x 1<br />
T32-802 M4x15 Screw x 6<br />
T32-807 8x14x2 Spring Washer x 6<br />
T32-811 M10x40 Allen Bolt x 3<br />
T32-812 M10 Nylon Nut x 7<br />
T32-821 M10x67 Allen Bolt x 1<br />
T32-822 10.5x20x2 Washer x 3<br />
T32-823 M10x33 Allen Bolt x 1<br />
T32-824 M8x65 Allen Bolt x 1<br />
T32-338 M8 Nylon Nut x 3<br />
T32-826 8.5x16.5x1.5 Washer x 6<br />
T32-850 M8x20 Allen Screw x 4<br />
T32-851 M10x115 Bolt x 1<br />
T32-853 M8x48 Bolt x 1<br />
T32-854 M8x85x20 Motor Holder Fix Bolt x 1<br />
T32-855 9x35x8 Curve Washer x 2<br />
T32-856 8x26x11 PU Cushion x 1<br />
T32-834 M8x14 Screw x 2<br />
T32-844 Plastic Insert x 4<br />
RFE4489_RE013411_<strong>T3.2</strong> TREADMILL UMFINAL.indd 28-29 28/06/2010 11:41
Parts ID<br />
30<br />
31<br />
<strong>T3.2</strong> <strong>Treadmill</strong><br />
Customer Support 0800 440 2459<br />
<strong>T3.2</strong> <strong>Treadmill</strong><br />
reebokfitness.<strong>info</strong><br />
Diagram 2<br />
T32-101 Computer x 1<br />
T32-109 Safety Key Base x 1<br />
Diagram 3<br />
T32-278 Console Support Frame x 1<br />
T32-246 Upright Fix Bolt Cap x 2<br />
T32-139 Console Housing Upper x 1<br />
T32-130 Safety Key X 1<br />
T32-254 Upright - Left x 1<br />
T32-801 M3x14 Screw x 14<br />
T32-137 Water bottle holder-left x 1<br />
T32-801 M3x14 x 14<br />
T32-253 Upright - Right x 1<br />
T32-802 M4x15 Screw x 65<br />
T32-104 Water bottle holder-right x 1<br />
T32-134 Console Housing Lower x 1<br />
T32-106 Safety Key Base Holder x 1<br />
T32-802 M4x15 x 65<br />
T32-841 M4x16 x 6<br />
T32-820 M4.2x11 x 4<br />
T32-275 Handlebar Cover - Left x 2<br />
T32-276 Handlebar Cover - Right x 2<br />
T32-274 Hand Pulse Sensor Cover - Upper x 1<br />
T32-207 Hand Pulse Sensor Cover - Lower x 1<br />
T32-208 Handlebar x 2<br />
T32-266 OD36-37x3x3D5MM Foam Grip x 2<br />
T32-210 OD38.1 Handlebar End Cap x 2<br />
T32-846 M6x15 Screw x 2<br />
T32-847 M6 Nut x 2<br />
T32-806 M8x45 Bolt x 4<br />
T32-807 8x14x2 Spring Washer x 6<br />
T32-814 8x20.5x2 Curve Washer x 4<br />
T32-809 M8x30 Allen Bolt x 2<br />
T32-810 M8x18 Allen Bolt x 2<br />
RFE4489_RE013411_<strong>T3.2</strong> TREADMILL UMFINAL.indd 30-31 28/06/2010 11:41
32<br />
33<br />
<strong>T3.2</strong> <strong>Treadmill</strong><br />
Customer Support 0800 440 2459<br />
<strong>T3.2</strong> <strong>Treadmill</strong><br />
reebokfitness.<strong>info</strong><br />
Diagram 4<br />
T32-559 L-1100MM Side Rail x 2<br />
T32-621 Main Frame x 1<br />
T32-623 OD30xID9xT2.0 Cushion x 1<br />
T32-859 M6x55 Allen Screw x 2<br />
T32-502 445x2668x1.6 Running Belt x 1<br />
T32-620 Front Roller Shaft x 1<br />
T32-624 ID15xOD75x34 Transport Wheel x 1<br />
T32-860 6.5x12.6x1.25 Screw x 3<br />
T32-556 Left Rear End Cap - Inside x 1<br />
T32-555 Right Rear End Cap - Inside x 1<br />
T32-550 Left Rear End Cap - Outer x 1<br />
T32-547 Right Rear End Cap - Outer x 1<br />
T32-560 9.2x17x32 Side Rail Guider x 8<br />
T32-508 1170x642x16 (TR310) Running Deck x 1<br />
T32-617 Front Roller x 1<br />
T32-615 Rear Roller Shaft x 1<br />
T32-614 Rear Roller x 1<br />
T32-622 OD30x25 Frame Crash Cushion x 1<br />
T32-607 Rear Transport Wheel Cover - Left x 1<br />
T32-612 Rear Transport wheel cover-right x 2<br />
T32-625 50x30 End Cover x 1<br />
T32-626 Main Frame Cross Bar x 1<br />
T32-613 ABS Frame Lower Cover x 1<br />
T32-843 M4x19 Screw x 16<br />
T32-857 M8x30 Screw x 10<br />
T32-858 M6x65 Allen Screw x 1<br />
T32-544 M6x10 Screw x 2<br />
T32-861 6.4x18x1.5 Washer x 2<br />
T32-862 M10x32 Cap Head Bolt x 1<br />
T32-839 M4x12 Screw x 15<br />
RFE4489_RE013411_<strong>T3.2</strong> TREADMILL UMFINAL.indd 32-33 28/06/2010 11:42
Parts ID<br />
34<br />
35<br />
<strong>T3.2</strong> <strong>Treadmill</strong><br />
Customer Support 0800 440 2459<br />
<strong>T3.2</strong> <strong>Treadmill</strong><br />
reebokfitness.<strong>info</strong><br />
Diagram 3<br />
T32-374 Base Frame x 1<br />
T32-377 25x28x30 Elliptical Tube Cushion x 2<br />
T32-305 Base Frame Transport Wheel Locker x 1<br />
T32-802 M4x15 Screw x 65<br />
T32-303 Base Frame Transport Wheel Holder x 1<br />
T32-811 M10x40 Allen Bolt x 3<br />
T32-306 Base Frame Transport Wheel x 1<br />
T32-370 2.0xØ14x4 Spring x 1<br />
T32-375 OD28x12 Round Cushion x 4<br />
T32-345 Power Plate Holder x 1<br />
T32-343 Power Plate x 1<br />
T32-333 Power Cord Plug x 1<br />
T32-365 Electronic Protector x 1<br />
T32-332 Power Switch x 1<br />
T32-339 Frame Front Transport Wheel Holder x 2<br />
T32-376 ID19xOD66x24 Transport Wheel x 2<br />
T32-812 M10 Nylon Nut x 7<br />
T32-813 Ø8x36 Transport Axle x 2<br />
T32-825 M8-C Clipper x 1<br />
T32-848 Ø6x11.5 Fixed Bolt x 2<br />
T32-849 M6-C Clipper x 2<br />
T32-816 M5x14 Screw x 6<br />
T32-832 M10x53 x 1<br />
T32-828 M3x8 x 2<br />
T32-827 M4.2x11 Screw x 4<br />
T32-852 M16x80 Bolt x 2<br />
N.B. All given quantities are for the complete, assembled product.<br />
RFE4489_RE013411_<strong>T3.2</strong> TREADMILL UMFINAL.indd 34-35 28/06/2010 11:42
Limited Warranty<br />
<strong>T3.2</strong> <strong>Treadmill</strong><br />
36<br />
Customer Support 0800 440 2459<br />
Performance<br />
range<br />
reebokfitness.<strong>info</strong><br />
RFE International Ltd warrants products to be free from defective workmanship<br />
and materials, under normal use and service conditions, for the period of 2 years<br />
from the date of purchase. Details of these service conditions can be found within<br />
the product’s user manual.<br />
In order to validate warranty dates, a proof of purchase is required. This warranty<br />
only extends to the original purchaser and will only be covered in the country the<br />
machine was purchased.<br />
RFE’s obligation under this warranty is limited to replacing or repairing, at RFE’s<br />
discretion, the product through one of its authorised service centres. All repairs for<br />
which warranty claims are made must be pre-authorised by RFE.<br />
This warranty does not extend to any defect caused by abuse, misuse, additions,<br />
modifications or repairs not provided by an RFE authorised service centre.<br />
Products used for commercial or rental purposes and/or used as store display<br />
models are not covered by this warranty. This product is designed for<br />
home use.<br />
No other warranty beyond that specifically set forth above is authorised by RFE.<br />
RFE is not responsible or liable for indirect, special or consequential damages<br />
arising out of or in connection with the use or performance of the product or<br />
damages with respect to any economic loss, loss of property, loss of revenues<br />
or profits, loss of enjoyment or use, costs of removal, installation or other<br />
consequential damages of whatsoever nature.<br />
We advise that your product is kept in a room with a constant environment;<br />
preventing your product from being exposed to extremes in temperature,<br />
heat, humidity and moisture. Guidance on the correct storage of equipment is<br />
contained within the product’s user manual.<br />
PLEASE RETAIN YOUR RECEIPT AS PROOF OF PURCHASE.<br />
Your statutory rights remain unaffected.<br />
C5.8e LE Crosstrainer<br />
B5.8 LE Bike<br />
cycle<br />
<strong>Reebok</strong> products are recyclable. At the end of its useful life please dispose of<br />
this <strong>Reebok</strong> product correctly and safely at a local refuse site.<br />
CV Mat<br />
For more <strong>info</strong>rmation visit<br />
www.reebokfitness.<strong>info</strong><br />
RFE4489_RE013411_<strong>T3.2</strong> TREADMILL UMFINAL.indd 36-37 28/06/2010 11:42

