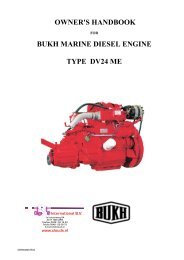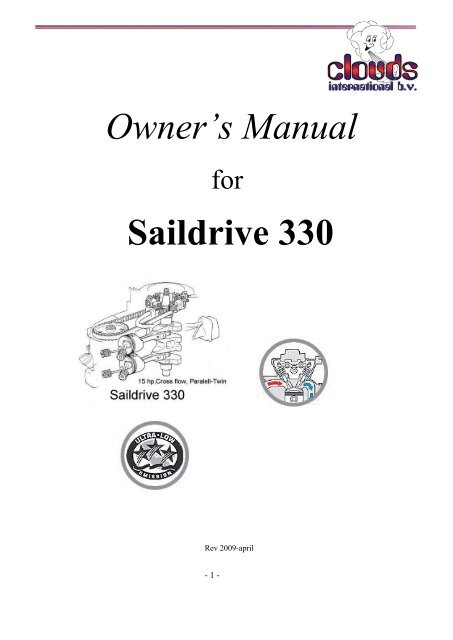
Owner's Manual Saildrive 330 - CLOUDS.NL
Owner's Manual Saildrive 330 - CLOUDS.NL
Owner's Manual Saildrive 330 - CLOUDS.NL

Create successful ePaper yourself
Turn your PDF publications into a flip-book with our unique Google optimized e-Paper software.
Owner’s <strong>Manual</strong><br />
Assembly and for Installation<br />
Instructions<br />
<strong>Saildrive</strong> <strong>330</strong><br />
for<br />
<strong>Saildrive</strong> <strong>330</strong><br />
Rev 2009-april<br />
- 1 -
Table of Contents:<br />
1. Safety Information<br />
2. Operating Instructions and Handling<br />
3. Maintenance/Service/Storage<br />
4. Technical data<br />
5. Declaration of conformity<br />
6. Electrical Schematic<br />
Certain information regarding operation and specifications of the four-stroke<br />
Parsun F15 (Outboard) has been taken from Parsun Owners <strong>Manual</strong>.<br />
Some changes and additions have been made, where differences occur, and are<br />
noted in this manual.<br />
The entire drive unit including gearshift lever, water pump, electrical systems,<br />
carburetors, performance and exhaust system is the same as specifications for the<br />
four-stroke Parsun F15 (Outboard).<br />
Use applicable Parts & Service as defined for the four-stroke Parsun F15FW Outboard.<br />
- 2 -
1. Safety information<br />
For your own safety and the safety of others, please observe the following:<br />
• Read this manual in its entirety before mounting or operating your engine.<br />
Be sure you understand each item before operating.<br />
• Be sure you know how the motor works and you understand its operation,<br />
especially how to quickly stop the engine in case of an emergency.<br />
• Always watch carefully for swimmers while the motor is running. When a<br />
swimmer is near you, shift into neutral and/or shut off the engine. Stop the<br />
engine immediately if someone falls overboard.<br />
• Do not make modifications on the engine. Modifications could damage the<br />
engine or make it unsafe to use.<br />
• This product emits exhaust gases containing carbon monoxide -- a colorless,<br />
odorless gas -- that may cause brain damage or death when inhaled.<br />
Symptoms include nausea, dizziness and drowsiness. Keep the cockpit and<br />
cabin areas well ventilated. Avoid blocking exhaust outlets.<br />
• Gasoline is highly flammable, and its vapors are flammable and explosive.<br />
Ensure there are no gas fumes or leaking fuel before starting the engine.<br />
• Stop the engine before refueling. Refuel in a well-ventilated area. Do not<br />
smoke. Make sure there is not an open fire or sparks nearby as gasoline is<br />
very flammable and explosive.<br />
• Never overfill the gas tank. Take care not to spill gasoline. If gasoline spills,<br />
wipe it up immediately with dry rags. Make sure the fuel filler cap is tightly<br />
closed after refueling.<br />
• To clear out the engine area of any fumes, ALWAYS run the fan to ventilate<br />
the engine room for at least 4 minutes before starting the engine.<br />
• If you smell gasoline in the engine area, do not start or operate the engine.<br />
The smell of may indicate a leak has occurred and must be repaired<br />
immediately.<br />
- 3 -
2. Operating Instructions<br />
Pre-operation checks:<br />
• Check the engine oil level. Remove oil dipstick and wipe it clean. Be sure<br />
to completely insert the dipstick into the dipstick guide and remove it again.<br />
Be sure the level falls between the upper and lower marks. Fill with oil if<br />
below the lower mark, or drain to the specified level if it is about the upper<br />
mark.<br />
• Open the cooling water sea-cock (located on the engine's STBD side)<br />
• Check to be sure you have plenty of fuel for your trip. Make sure there are no<br />
fuel leaks or gasoline fumes. Make sure the fuel lines are tight. Make sure the<br />
fuel tank is positioned to avoid leakage or contact with sharp objects.<br />
• Check throttle and gear shift lever for proper operation. Controls should<br />
work smoothly, without binding or unusual free play. Look for loose or<br />
damaged connections. Check operation of the starter and stop switches. Turn<br />
the central switch (the main battery switch) to the on position.<br />
• Run the engine fan for at least 4 minutes before starting the engine.<br />
Starting the Engine:<br />
• Put the gearshift lever in neutral position.<br />
• Turn the main switch to the ”ON” position.<br />
• Open the throttle slightly (without shifting) using the throttle lever. After<br />
the engine starts, return the throttle to the original position.<br />
• When the engine is cold, press in on the key switch to operate the remote<br />
choke control. It will automatically return to the normal position when you<br />
remove your hand. It’s not necessary to use the choke when starting a warm<br />
engine.<br />
- 4 -
• Turn the key switch to the ”START” position for a maximum of 5 seconds.<br />
Immediately after the engine starts, release the key to allow it to return to its<br />
original ”ON” position.<br />
• If the engine does not start within 5 seconds, wait at least 15 seconds before<br />
trying to start it again. Caution! Never push the starter switch while the<br />
engine is running; this can damage the starter motor.<br />
• After starting the engine, allow it to idle for 3 minutes to warm up. Failure to<br />
do so may shorten the life of the engine.<br />
• Check that the low-oil-pressure warning indicator goes off after starting the<br />
engine. If the low oil light does not go off after the engine starts, turn off the<br />
engine.<br />
• Check for a steady flow of water from the cooling water telltale tube.<br />
• Check that the water pump is pumping water through the cooling passages<br />
and that the engine is running normally and that cooling water is coming out<br />
through the exhaust outlet.<br />
Emergiency start of the engine (if magnapullstart is out of order):<br />
• In an emergency, the engine can be started manually with the aid of the<br />
starting rope located in the tool kit<br />
• Remove the top cowling (protective plastic hood) (10 mm socket is needed)<br />
• Insert the knotted end of the emergency starter rope into the notch in the<br />
flywheel rotor and wind the rope around the flywheel several turns<br />
clockwise. Pull the rope slowly until resistance is felt, then give a strong<br />
pull straight out of the crank to start the engine. Repeat if necessary. The<br />
engine can be started without battery power.<br />
- 5 -
Periodically check when underway:<br />
• For efficient fuel economy and long engine life the engine not be driven<br />
with full throttle for long periods of time.<br />
• Frequently check that the low oil pressure light is off.<br />
• Check to see if there is a steady flow of water from the cooling water pilot<br />
hole (telltale tube).<br />
• The engine sounds like it’s running normally (a loud exhaust noise can<br />
indicate the something is wrong with the cooling system).<br />
Shifting:<br />
• Pulling the gearshift lever forwards puts the engine in forward gear so<br />
that the boat moves ahead. Pulling the gearshift lever backwards puts the<br />
engine in reverse to move the boat astern.<br />
• Warning! Shifting may only be done at low speed and on idle RPM.<br />
Damaged gear-clutch is always caused by hush handling and is not covered by any<br />
warranty.<br />
• While sailing, the gear should be in forward or reverse. (If you have a fixed<br />
prop, the neutral position provides the least drag.)<br />
Warning systems:<br />
• If the oil pressure drops too low, the low-oil-pressure warning indicator will<br />
light and the buzzer will sound.<br />
(Cooling system check is “water pilot” hole (telltale tube)).<br />
Stopping the Engine:<br />
• Before stopping the engine, first let it cool off for a few minutes at idle or<br />
low speed. Stop the engine by turning the ignition key to the ”OFF” position.<br />
Remove the key if the boat will be left unattended.<br />
• Close the cooling water sea-cock and fuel tank valves.<br />
• Turn off the central switch (to the battery).<br />
• Check before you leave the boat that no water leaks have occurred.
- 6 -
3. Maintenance.<br />
General Service:<br />
• Be sure to turn off the engine when you perform maintenance unless<br />
otherwise specified.<br />
• Service and maintain the engine according to Parsun’s general maintenance<br />
schedule.<br />
• Most maintenance can be performed by the owner.<br />
• Certain services or repairs should be done by an authorized Parsun Marine<br />
dealership. Certain specialty parts not available from Parsun can be ordered<br />
from Your local dealer or Nykopings Marinkonvertering AB; www.saildrive.se<br />
• Service/repairs/parts and warranty claims* should be directed to Your local dealer.<br />
An engine can be returned complete<br />
Boatbuilders for service repair contact your local dealer.<br />
• *Costs for hauling out, engine removal/re-installation or associated damage,<br />
freight expense, damage caused by poor handling, lack of service, grounding,<br />
or other circumstances outside our control will not be reimbursed.<br />
Before Launching:<br />
• Paint the outdrive with non-copper based anti-fouling paint and check the<br />
glue joint of the rubber gaskets.<br />
Note: A copper based anti-fouling paint will cause severe corrosion of<br />
the aluminium saildrive!<br />
Winterizing:<br />
When not using your engine for long periods of time, several important procedures<br />
must be performed to prevent excessive damage.<br />
1. Change the oil in the engine and gearbox.<br />
2. Remove the prop or blades. Also take out thermostat, run the engine with the gear<br />
housing immersed in a bucket containing 50% anti freeze for approximately 3 minutes.<br />
Caution! The water level must be a least 50 mm above the dividing plane to<br />
ensure that the water-pump does not run dry.<br />
- 7 -
3. Before turning off the engine, oil should be sprayed into the carburetor to<br />
inhibit rust on the engine’s valves.<br />
4. Remove the gear housing (every other year)<br />
5. Check the impeller (every other year) and the water pump housing rubber<br />
gasket for damage.<br />
NOTE: If pieces from a damaged impeller get into the system, all hoses and<br />
the entire cooling system must be cleaned.<br />
6. Grease the drive shaft splines with grease and reattach the gear housing.<br />
Drain the carburetor. Drain and clean the fuel filters and water separators.<br />
Check fuel tank for water and dirt.<br />
7. Clean the outside of the engine and outdrive. Touch-up paint on the outdrive<br />
with a 2-part epoxy and then spray with WD-40 or equivalent.<br />
- 8 -
- 9 -
Engine oil check/change:<br />
• Check the oil level each time the engine is used. Use the recommended type<br />
SAE 10W30 or SAE10W40 premium API grade (SE, SF, SG, SH, SJ) oil.<br />
Note: Running the engine with too little/ too much oil or using poor quality oil can<br />
result in serious engine damage.<br />
• Remove oil fill cap and pump out the oil while the engine is still warm.<br />
• Fill the crankcase with recommended oil. Check the oil level. Fill to the<br />
upper level mark. Oil capacity during oil change is 1.0 liter<br />
excluding the oil filter.<br />
• Reinstall oil cap.<br />
• Start the engine to make sure there are no leaks and the low oil pressure light<br />
goes off. Re-check the oil level.<br />
Gear oil check/change:<br />
• Remove the level plug to see if oil flows out. If no oil comes out, then inject<br />
oil to fill through the drain-plug hole until the oil starts to flow out (through<br />
the level plug hole).<br />
• Use the recommended Hypoid SAE #90 motor gear oil. Gear oil capacity is<br />
0.25 liters.<br />
Note: If there is water in the oil, the water will flow out first when the drain<br />
plug is removed or the oil may be milky in color.<br />
Caution! If water is detected in the oil, the unit should be inspected by an<br />
authorized Parsun dealership.<br />
• Reinstall the level plug. Tighten the drain plug securely.<br />
• Lubricate more frequently when used in salt water.<br />
- 10 -
Spark Plug Service:<br />
Fuse:<br />
• Proper fuse is 15 amps<br />
• The fuse contained in the retainer in front of the starter motor can be easily<br />
disassembled.<br />
• If the fuse is broken, the battery will not charge.<br />
• Before replacing the fuse, check the electrical system to fine the reason the<br />
fuse failed.<br />
- 11 -
4. Technical Data<br />
Engine:<br />
Engine Type<br />
Bore x Stroke/Compression Ratio<br />
Displacement<br />
Ignition/Pre-ignition System<br />
Spark Plug (NGK)<br />
Spark Plug gap<br />
Starting System<br />
Carburetor<br />
Valve Clearance (cold) IN<br />
Valve Clearance (cold) EX<br />
Alternator Output<br />
Drive Unit:<br />
Gear Positions<br />
Gear Ratio<br />
Propeller axle output<br />
RPM max<br />
Idling Speed (in neutral)<br />
Fuel and Oil:<br />
Recommended Fuel<br />
Engine oil type SAE<br />
Lubrication System<br />
Oil Sump Volume (excluding oil filter)<br />
Gear oil<br />
Warning Systems:<br />
Low Oil Pressure Warning<br />
Cooling system<br />
Weight:<br />
Corrosion Protection:<br />
4-stroke, Cross Flow, Parallel Twin<br />
59 x 59 mm (2.32 x 2.32 in.) / 9:3:1<br />
323 cc (19.71 cu. in.)<br />
CDI/Electronic<br />
DPR6EA-9<br />
0.8-0.9 mm<br />
Electronic with key and choke/<strong>Manual</strong><br />
Single, 3-star rating<br />
0.15-0.25 mm<br />
0.20-0.30 mm<br />
80 W – 12V/10.0 A (for battery DC)<br />
Forward-Neutral-Reverse<br />
2.08 :1<br />
11.0 kW<br />
4,500 RPM<br />
950 RPM<br />
Min 89 octane, lead-free<br />
SAE10W30 or SAE10W40<br />
Wet sump, spin-on filter<br />
1.0 L<br />
Hypoid gear oil SAE#90<br />
Light / Buzzer<br />
Water pilot/Telltale tube<br />
50 kg<br />
Water Intake & Pump in Drive Leg<br />
All underwater parts Epoxy Coated<br />
Internal & External Anodes (Zincs)<br />
- 12 -
List of components, engine<br />
1. Zink, engine block 2. Carb. drain 3. Idle adjustment screw<br />
4. Carb. inlet 5. RPM lever 6. Gear shift lever (with shock-spring)<br />
7. Seacock 8. Engine identification no. 9. Safety stop bolts<br />
10. Olil dipstick/Filling hole 11.Fuelpump 12. Zink<br />
13. Zink gearhouse 14. Oil level plug 15. Cooling intake<br />
16. Oli drain plug/filling plug 17. Position of impeller 18. Drain plug for vinter storage<br />
19. Oil pump 20. Ignition coil 21. Cap engine oil<br />
22. Spark plugs 23. Oil filter 24. Thermostat housing<br />
25. Oil pressure sensor 26. (-) Earth 27. (+) 12 V<br />
28. Starter engine 29. Connection oil warn. system 30. Multiconnector för panel<br />
31. 10mm bolt for cover 32. Link for gear-rod 33. Bracket for control wires<br />
34. Exhaust pipe D= 30mm 35. Fuse 15-20Amp<br />
Engine identification number<br />
The identification number (8) is engraved on the engine block below the dip-stick .<br />
The gear do not have an identification number.
6. Declaration of Conformity<br />
Nyköpings Marinkonvertering AB<br />
Bagaregatan 37<br />
611 30 Nyköping<br />
DECLARATION OF CONFORMITY<br />
We hereby declare under our own responsibility – that the product <strong>Saildrive</strong> <strong>330</strong> is constructed and built to<br />
comply with EEC directives concerning Inboard Petrol Engines according to European Standard EN ISO<br />
15584:2001.<br />
Output power Type Year of construction<br />
11 kW <strong>Saildrive</strong> <strong>330</strong> 2008<br />
(propeller shaft) (Parsun F15FW engine)<br />
This product must be installed in a sail yacht or motor yacht before customer use and final compliance with<br />
EEC directives.<br />
The installer/shipyard must fulfil his obligations before customer use, regarding all relevant EEC directives<br />
regarding e.g.;<br />
- European Standard EN ISO 15584:2001 (Inboard Petrol Engines).<br />
- European Standard EN ISO 10088:2001(Permanently installed fuel systems and fixed<br />
fuel tanks).<br />
- ISO/DIS 78 40 (Small Craft Fire resistant fuel hoses)<br />
Nyköpings Marinkonvertering AB, 2008-12-15<br />
Per Hagström<br />
Stefan Kindeborg Christer Sandström
Declaration of Conformity for Recreational Craft Propulsion Engines<br />
With the requirements of Directive 94/25/EC, as amended by Directive 2003/44/EC<br />
To be completed by manufacturer of outboard engines/inboard engines or stern drives with integral exhaust<br />
Name of manufacturer: Nyköpings Marinkonvertering AB<br />
Adress: Bagaregatan 37<br />
Town: Nyköping Post Code: S-611 30 Country: Sweden<br />
Name of Notified body for exhaust emission assessment (Parsun): VCA Headquarters, 1 Eastgate Office Center, Eastgate Road,<br />
Bristol, BS5 6XX United Kingdom<br />
Module used for exhaust emission assessment: Annex 1, Module B<br />
Description of Engine and essential requirements<br />
●Inboard engine ●Unleaded petrol ●4-stroke<br />
Identification of engine covered by this Declaration of Conformity:<br />
Engine model: <strong>Saildrive</strong> <strong>330</strong> (Outboard Parsun 15FW converted to inboard engine <strong>Saildrive</strong> <strong>330</strong>) and<br />
CE-label on engine control panel.<br />
Engine identification no. is engraved on the engine crankcase, starboard side.<br />
Engine family: Base engine Parsun 15FW, 11,0 kW<br />
Product no. 323G- Serial no.0100001-<br />
Standard used:<br />
EN ISO 8178<br />
Noise Emissions: See vessel manufacturer ”Declaration of Conformity”<br />
We declare on behalf of the engine manufacturer that the engine will meet the exhaust emission requirements of Directive 94/25/EC as<br />
amended by Directive 2003/44/EC when installed in a recreational craft, in accordance with the engine manufacturer`s supplied<br />
installation instructions and manual and that this engine must be put into service until the recreational craft into which it is to be<br />
installed has been declared in conformity with the relevant provisions of the above mentioned Directive.<br />
Per Hagström Stefan Kindeborg Christer Sandström<br />
CEO Engineer Logistics<br />
Nyköpings Marinkonvertering AB<br />
2008-12-04<br />
Engine No. 323_______________________<br />
To be filled in by the engine installer!
Instrument panel SD<strong>330</strong>MkII<br />
(Emergency light (8) is routed to the panel by a black and red cable)<br />
Main engine diagram SD<strong>330</strong>MkII