You also want an ePaper? Increase the reach of your titles
YUMPU automatically turns print PDFs into web optimized ePapers that Google loves.
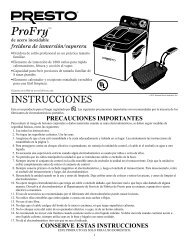
tank and the other hand on the silver part of the filter basket holder, Fig. B1. Then pull the filter<br />
basket holder away from the coffee maker (clockwise) until it is completely open, Fig. B2. Lift<br />
the filter basket out of the basket holder using the filter basket handle, Fig. C. After washing,<br />
replace filter basket in filter basket holder, fitting the tab on the basket in the slot toward the<br />
back of the basket holder, Fig. C.<br />
Prior to brewing your first pot of coffee, or if the coffee maker has not been used for a long<br />
period of time, it is suggested that you brew water only, to thoroughly rinse the appliance. To<br />
do this, follow the brewing instructions below, except do not use a paper filter or ground coffee<br />
and fill water tank only to the 8 cup level. Discard heated water.<br />
Brewing <strong>Coffee</strong><br />
1. Place the coffee maker on a flat, level surface and plug into a standard AC outlet.<br />
2. Remove the 10-cup carafe from the warming plate and fill the carafe with the desired amount of cold water.<br />
3. Open the hinged lid on the coffee maker’s water tank (see Fig. A) and pour the water into the tank. Fill to the desired level<br />
and close the hinged lid. To assure best flavor, make at least two cups at a time.<br />
4. Open the filter basket holder as shown in Figs. B1 and B2. With the handle in the lifting position (Fig. C), slip a #4 coneshaped<br />
paper filter into the filter basket. Using your hand, push down on the center of the paper filter until it is fully seated<br />
in the basket. Then lower the basket handle so that a portion of the filter paper is tucked under the handle.<br />
5. Add the desired amount of ground coffee to the filter. For best results, we recommend coffee ground for use with drip<br />
coffee makers. The chart on the next page provides suggested amounts of ground coffee. Because individual preferences<br />
vary, you may adjust the amount you use to suit your taste.<br />
Amount of Ground <strong>Coffee</strong><br />
Cups of Brew mild medium roBust<br />
10 4 Tablespoons 8 Tablespoons 13 Tablespoons<br />
8 3 Tablespoons 7 Tablespoons 10 Tablespoons<br />
6 2 1 ⁄2 Tablespoons 5 Tablespoons 8 Tablespoons<br />
4 2 Tablespoons 3 1 ⁄2 Tablespoons 5 Tablespoons<br />
2 1 1 ⁄2 Tablespoons 2 Tablespoons 4 Tablespoons<br />
*one cup = 4.5 ounces brewed coffee<br />
6. Push the filter basket holder back to its closed position directly below the black top.<br />
7. Place the carafe on the warming plate. Be sure the carafe lid is on.<br />
NOTE: Always remember to center the carafe on the warming plate before turning the unit ON, otherwise brewed<br />
coffee may flow onto the warming plate or counter.<br />
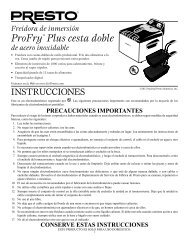
8. FOR IMMEDIATE bREWING, press the AUTO ON/OFF button TWICE, see Fig. D. The green ON indicator light will<br />
come on indicating the coffee is brewing. It will take approximately 8 minutes to brew 10 cups of coffee.<br />
(FOR DElAyED bREWING, set the programmable timer following the instructions below.)<br />
Using pause and serve: This feature temporarily holds brewed coffee in the filter basket when the carafe is removed, so<br />
you can pour a cup of coffee before the entire pot is brewed.<br />
Note: While you are pouring a cup, coffee continues to brew. The<br />
filter basket will hold about a minute’s worth of brewed coffee which<br />
provides sufficient time to pour several cups. After that, to prevent<br />
damage to the unit, the basket is designed to overflow. Therefore, you<br />
must be sure to replace the carafe on the warming plate as soon as<br />
you have finished pouring.<br />
9. Once the brewing cycle is complete, the coffee maker will keep the coffee<br />
hot for two hours and then it will automatically shut off.<br />
10. If you do not want to use the keep warm feature, press the AUTO ON/OFF<br />
button once to turn the coffee maker off. The green ON indicator light<br />
will go out to show that the cofffee maker has been turned off.<br />
3<br />
Fig. D Display window<br />
Fig. C<br />
Filter basket<br />
handle<br />
Tab<br />
Slot<br />
Indicator<br />
lights