
You also want an ePaper? Increase the reach of your titles
YUMPU automatically turns print PDFs into web optimized ePapers that Google loves.
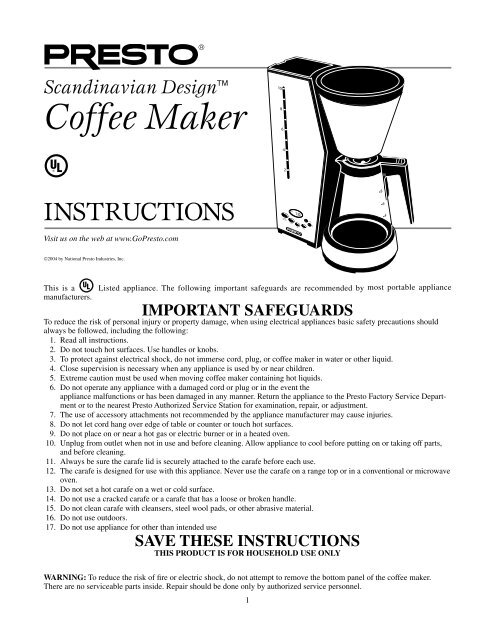
Scandinavian Design<br />
<strong>Coffee</strong> <strong>Maker</strong><br />
InstructIons<br />
Visit us on the web at www.Go<strong>Presto</strong>.com<br />
©2004 by National <strong>Presto</strong> Industries, Inc.<br />
®<br />
This is a Listed appliance. The following important safeguards are recommended by most portable appliance<br />
manufacturers.<br />
IMPORTANT SAFEGUARDS<br />
To reduce the risk of personal injury or property damage, when using electrical appliances basic safety precautions should<br />
always be followed, including the following:<br />
1. Read all instructions.<br />
2. Do not touch hot surfaces. Use handles or knobs.<br />
3. To protect against electrical shock, do not immerse cord, plug, or coffee maker in water or other liquid.<br />
4. Close supervision is necessary when any appliance is used by or near children.<br />
5. Extreme caution must be used when moving coffee maker containing hot liquids.<br />
6. Do not operate any appliance with a damaged cord or plug or in the event the<br />
appliance malfunctions or has been damaged in any manner. Return the appliance to the <strong>Presto</strong> Factory Service Department<br />
or to the nearest <strong>Presto</strong> Authorized Service Station for examination, repair, or adjustment.<br />
7. The use of accessory attachments not recommended by the appliance manufacturer may cause injuries.<br />
8. Do not let cord hang over edge of table or counter or touch hot surfaces.<br />
9. Do not place on or near a hot gas or electric burner or in a heated oven.<br />
10. Unplug from outlet when not in use and before cleaning. Allow appliance to cool before putting on or taking off parts,<br />
and before cleaning.<br />
11. Always be sure the carafe lid is securely attached to the carafe before each use.<br />
12. The carafe is designed for use with this appliance. Never use the carafe on a range top or in a conventional or microwave<br />
oven.<br />
13. Do not set a hot carafe on a wet or cold surface.<br />
14. Do not use a cracked carafe or a carafe that has a loose or broken handle.<br />
15. Do not clean carafe with cleansers, steel wool pads, or other abrasive material.<br />
16. Do not use outdoors.<br />
17. Do not use appliance for other than intended use<br />
SAVE THESE INSTRUCTIONS<br />
THIS PRODUCT IS FOR HOUSEHOlD USE ONly<br />
WARNING: To reduce the risk of fire or electric shock, do not attempt to remove the bottom panel of the coffee maker.<br />
There are no serviceable parts inside. Repair should be done only by authorized service personnel.<br />
1
ElECTRICAl CORD INSTRUCTIONS<br />
A short power cord is provided to reduce the risk resulting from becoming entangled in or tripping over a longer cord. An<br />
extension cord may be used if care is exercised in its use.<br />
If an extension cord is used, the marked electrical rating of the extension cord should be at least as great as the electrical rating<br />
of the appliance. The extension cord should be arrranged so that it will not drape over the countertop or tabletop where it<br />
can be pulled on by children or tripped over accidentally.<br />
Polarized Plug: As a safety feature, this appliance has a polarized plug (one blade is wider than the other). This plug will<br />
only fit in a polarized outlet one way. If the plug does not fit fully in the outlet, reverse the plug. If it still does not fit, contact<br />
a qualified electrician. Do not attempt to defeat this safety feature.<br />
<strong>Coffee</strong> <strong>Maker</strong><br />
Features<br />
Patented top heating element—<br />
This heating element, not<br />
found in other drip coffee makers,<br />
reheats the water just before it<br />
reaches the coffee grounds. This<br />
assures the water is at the perfect<br />
temperature to maximize the extraction<br />
of beneficial flavors for<br />
a full, rich brew. And it speeds<br />
brewing —10 cups in about 8<br />
minutes.<br />
Advanced technology keepwarm<br />
element —After brewing,<br />
this element heats the carafe to<br />
keep the brewed coffee serving<br />
hot. While most other drip<br />
coffee makers use a keep-warm<br />
element that cycles on and off,<br />
this unit uses a special Positive<br />
Temperature Coefficient (PTC)<br />
heater. It stays on continually<br />
and automatically varies its wattage<br />
as necessary to maintain the<br />
optimum serving temperature and preserve the coffee flavor.<br />
Pause and serve— This feature temporarily holds brewed coffee in the filter basket when the carafe is removed, so you can<br />
pour a cup of coffee before the entire pot is brewed.<br />
Automatic shut-off — The <strong>Presto</strong> ® <strong>Coffee</strong> <strong>Maker</strong> will keep your coffee warm for 2 hours after it is brewed, then it will<br />
automatically turn off.<br />
Programmable digital clock/timer —This timer allows you to preset the desired brewing time up to 24 hours in advance.<br />
Easy-to-see water level indicator— To assure accurate filling, as you pour water into the tank, you will notice a little red<br />
ball will rise to indicate the exact water level.<br />
Before First Use<br />
Water tank<br />
Water level<br />
indicator<br />
Display window<br />
for programmable<br />
digital clock/timer<br />
Hinged<br />
lid<br />
To assure proper operation, read and follow the instructions<br />
carefully.<br />
Wash the carafe, carafe lid, and removable filter basket (Fig. A)<br />
in the dishwasher (top rack) or wash in warm, sudsy water and<br />
rinse thoroughly. When placing carafe in the dishwasher, be sure<br />
there is enough clearance to avoid breakage.<br />
To remove the filter basket, you will first need to open the filter<br />
basket holder. Do this by placing one hand on the top of the water<br />
2<br />
10-cup<br />
Carafe<br />
AUTO and ON<br />
indicator lights Fig. A<br />
Filter basket<br />
handle<br />
Swing-out filter basket holder<br />
Removable<br />
filter basket<br />
Carafe lid<br />
Nonstick warming plate<br />
Carafe markings<br />
Fig. B1 Fig. B2<br />
Water<br />
outlet
tank and the other hand on the silver part of the filter basket holder, Fig. B1. Then pull the filter<br />
basket holder away from the coffee maker (clockwise) until it is completely open, Fig. B2. Lift<br />
the filter basket out of the basket holder using the filter basket handle, Fig. C. After washing,<br />
replace filter basket in filter basket holder, fitting the tab on the basket in the slot toward the<br />
back of the basket holder, Fig. C.<br />
Prior to brewing your first pot of coffee, or if the coffee maker has not been used for a long<br />
period of time, it is suggested that you brew water only, to thoroughly rinse the appliance. To<br />
do this, follow the brewing instructions below, except do not use a paper filter or ground coffee<br />
and fill water tank only to the 8 cup level. Discard heated water.<br />
Brewing <strong>Coffee</strong><br />
1. Place the coffee maker on a flat, level surface and plug into a standard AC outlet.<br />
2. Remove the 10-cup carafe from the warming plate and fill the carafe with the desired amount of cold water.<br />
3. Open the hinged lid on the coffee maker’s water tank (see Fig. A) and pour the water into the tank. Fill to the desired level<br />
and close the hinged lid. To assure best flavor, make at least two cups at a time.<br />
4. Open the filter basket holder as shown in Figs. B1 and B2. With the handle in the lifting position (Fig. C), slip a #4 coneshaped<br />
paper filter into the filter basket. Using your hand, push down on the center of the paper filter until it is fully seated<br />
in the basket. Then lower the basket handle so that a portion of the filter paper is tucked under the handle.<br />
5. Add the desired amount of ground coffee to the filter. For best results, we recommend coffee ground for use with drip<br />
coffee makers. The chart on the next page provides suggested amounts of ground coffee. Because individual preferences<br />
vary, you may adjust the amount you use to suit your taste.<br />
Amount of Ground <strong>Coffee</strong><br />
Cups of Brew mild medium roBust<br />
10 4 Tablespoons 8 Tablespoons 13 Tablespoons<br />
8 3 Tablespoons 7 Tablespoons 10 Tablespoons<br />
6 2 1 ⁄2 Tablespoons 5 Tablespoons 8 Tablespoons<br />
4 2 Tablespoons 3 1 ⁄2 Tablespoons 5 Tablespoons<br />
2 1 1 ⁄2 Tablespoons 2 Tablespoons 4 Tablespoons<br />
*one cup = 4.5 ounces brewed coffee<br />
6. Push the filter basket holder back to its closed position directly below the black top.<br />
7. Place the carafe on the warming plate. Be sure the carafe lid is on.<br />
NOTE: Always remember to center the carafe on the warming plate before turning the unit ON, otherwise brewed<br />
coffee may flow onto the warming plate or counter.<br />
8. FOR IMMEDIATE bREWING, press the AUTO ON/OFF button TWICE, see Fig. D. The green ON indicator light will<br />
come on indicating the coffee is brewing. It will take approximately 8 minutes to brew 10 cups of coffee.<br />
(FOR DElAyED bREWING, set the programmable timer following the instructions below.)<br />
Using pause and serve: This feature temporarily holds brewed coffee in the filter basket when the carafe is removed, so<br />
you can pour a cup of coffee before the entire pot is brewed.<br />
Note: While you are pouring a cup, coffee continues to brew. The<br />
filter basket will hold about a minute’s worth of brewed coffee which<br />
provides sufficient time to pour several cups. After that, to prevent<br />
damage to the unit, the basket is designed to overflow. Therefore, you<br />
must be sure to replace the carafe on the warming plate as soon as<br />
you have finished pouring.<br />
9. Once the brewing cycle is complete, the coffee maker will keep the coffee<br />
hot for two hours and then it will automatically shut off.<br />
10. If you do not want to use the keep warm feature, press the AUTO ON/OFF<br />
button once to turn the coffee maker off. The green ON indicator light<br />
will go out to show that the cofffee maker has been turned off.<br />
3<br />
Fig. D Display window<br />
Fig. C<br />
Filter basket<br />
handle<br />
Tab<br />
Slot<br />
Indicator<br />
lights
To Set Clock<br />
1. Refer to Fig. D. Plug coffee maker into outlet. Until the time is set, “PM 12:00” will flash in the display window.<br />
2. Press the HR button until the correct a.m. or p.m. hour is displayed. Then press the MIN button until the correct minute is<br />
displayed.<br />
3. The clock is now set and will keep time as long as the unit is plugged in.<br />
Programming the <strong>Coffee</strong> <strong>Maker</strong> for Delayed Brewing<br />
Note: You must first set the clock if you want to use the timer feature. If you plan to use delayed brewing regularly, it is recommended<br />
you leave the unit plugged in, so you do not need to reset the clock and programmed time before each use.<br />
1. Prepare the coffee maker for brewing as described in steps 1 through 7 beginning on page 3.<br />
2. Make sure the correct time of day is set. If it is not, follow the instructions this on page.<br />
3. Be sure the AUTO ON/OFF button is off, Fig. D. (Neither the red AUTO or green ON indicator light should be lit.)<br />
4. Hold down the PROG button, Fig. D. The word “BREW” will appear in the display window. While continuing to press<br />
the PROG button, press the HR button until the desired hour you want the coffee maker to begin brewing your coffee is<br />
displayed. Then press the MIN button until the desired minute is displayed. Now release the PROG button.<br />
5. Once you release the PROG button, the clock time will be displayed again and the word “BREW” will disappear. To<br />
confirm the time the coffee maker is set to begin brewing, press the PROG button once and the programmed time will be<br />
displayed.<br />
6. Press the AUTO ON/OFF button once. “AUTO” will be displayed in the window and the red AUTO indicator light will come<br />
on. Your coffee maker is now set to automatically start brewing at the selected time.<br />
7. If you would like to change the programmed time, press the AUTO ON/OFF button twice to turn the unit off. Then, repeat<br />
steps 4 through 6.<br />
8. Once you’ve reached the programmed time, the green ON light on the coffee maker will come on, indicating brewing has<br />
begun, and the red AUTO light will go off. During brewing the clock time will always be displayed.<br />
9. You can press the AUTO ON/OFF button once at any time to stop the brewing cycle.<br />
10. If you would like to brew coffee at the same time each day, simply set up the coffee maker for brewing and press the<br />
AUTO ON/OFF button once. you will need to repeat this step each day. As long as the coffee maker was not unplugged<br />
after the last use or your household did not lose power, the programmed time will be stored in the memory. Press the PROG<br />
button and the programmed time will be displayed. If the programmed time is not correct, adjust it to the desired time following<br />
step 4 above.<br />
Cleaning<br />
1. Turn coffee maker off. Allow to cool before cleaning.<br />
2. Pull the filter basket holder open. Then, using the handle on the filter basket (see Fig. C, page 3), lift the basket out of the<br />
basket holder and empty the coffee grounds.<br />
2. Wash the carafe, carafe lid, and filter basket in the dishwasher (top rack) or wash in warm, sudsy water and rinse. When<br />
placing the carafe in the dishwasher, be sure there is enough clearance to avoid breakage. Do not clean the carafe with<br />
cleansers, steel wool pads, or other abrasive material.<br />
3. Wipe the filter basket holder, the water outlet area (see Fig. B2, page 2), and the exterior housing of the coffee maker with<br />
a damp cloth to clean. Do not immerse coffee maker in water or any other liquid.<br />
4. Depending on the hardness of your local water supply, periodically you may need to do a more thorough cleaning to remove<br />
mineral deposits that have built up inside the water tank. When you notice an increase in the brewing time, this is a sign that<br />
there may be mineral deposit buildup. You will need to descale the coffee maker. Follow the instructions on the following<br />
page.<br />
4
DESCAlING INSTRUCTIONS:<br />
It is not unusual in drip coffee makers for mineral deposits to build up in the unit. It is caused by minerals commonly found in water.<br />
Every few months, it is recommended that you follow these steps to remove any mineral deposits that may have formed.<br />
1. Fill the water tank to the 6-cup level with undiluted white vinegar.<br />
2. Place a paper filter in the filter basket.<br />
3. Place the carafe on the warming plate and turn the unit ON. When about 3 cups have brewed through, turn the unit off and<br />
let it sit for 15 minutes. Note: You may notice some sputtering as the vinegar is running through. This is normal.<br />
4. Turn unit back on and allow the rest of the vinegar to fill the carafe. Discard vinegar.<br />
5. After descaling the coffee maker, thoroughly rinse the appliance before brewing coffee. Do this by brewing WATER ONLY<br />
twice before brewing coffee.<br />
Note: Commercial coffee maker cleansers can also be used to clean the coffee maker. Follow the manufacturer’s instructions.<br />
Questions and Answers<br />
Since I use bottled water, can I pour it directly from the bottle into the water tank without using the carafe?<br />
Yes. To assure accurate filling, however, you will need to watch the water level indicator. As you pour, a little red ball in the<br />
indicator will rise to indicate the water level.<br />
After I use the carafe to fill the water tank with cold water, the carafe remains cold. Will this cause the brewed coffee<br />
to be cooler?<br />
Any temperature drop is usually negligible because the warming plate begins to heat the carafe as soon as the coffee maker is<br />
turned on. If the water is quite cool, it may have a very slight effect on the temperature of the brewed coffee, especially if you<br />
are only brewing a few cups. If this concerns you, after filling the water tank, you may want to rinse the carafe with warm water<br />
before placing it on the warming plate.<br />
When I use the pause and serve feature, I notice one or two drips. Is this normal?<br />
Like most other drip coffee makers, you may see a few drops when you remove the carafe during the brewing process. Most<br />
drips can be avoided by removing the carafe very slowly.<br />
I notice it taking longer to brew coffee than when I first got my coffee maker. Why?<br />
Brewing time can increase due to the buildup of mineral deposits in your coffee maker. These deposits are caused by minerals<br />
in the water and the amount of buildup varies from one area to another. You should remove these deposits periodically by<br />
“descaling” your coffee maker. Follow the instructions at the top of this page.<br />
I wanted to make 10 cups of coffee but, after brewing, the coffee level doesn’t come up to the 10 cup mark as indicated<br />
on the carafe. Why?<br />
The markings on the carafe indicate how much water is needed to brew 10 cups of coffee and are provided to aid in the filling<br />
of the water tank. As is typical of all drip coffee makers, the amount of brewed coffee is less than the amount of water poured<br />
into the water tank due to the retention of some water in the coffee grounds.<br />
Why can’t I program a time? Nothing happens when I push the buttons.<br />
This will occur if the coffee maker is already in the AUTO mode (the red AUTO light will be on). Push the AUTO ON/OFF<br />
button twice to turn the coffee maker off. You should now be able to program a time.<br />
5