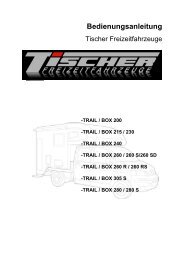
Operating instructions - Tischer Freizeitfahrzeuge
Operating instructions - Tischer Freizeitfahrzeuge
Operating instructions - Tischer Freizeitfahrzeuge

You also want an ePaper? Increase the reach of your titles
YUMPU automatically turns print PDFs into web optimized ePapers that Google loves.
<strong>Operating</strong> <strong>instructions</strong><br />
<strong>Tischer</strong> <strong>Freizeitfahrzeuge</strong><br />
-TRAIL / BOX 200<br />
-TRAIL / BOX 215 / 230<br />
-TRAIL / BOX 240<br />
-TRAIL / BOX 260 / 260 S/260 SD<br />
-TRAIL / BOX 260 R / 260 RS<br />
-TRAIL / BOX 305 S<br />
-TRAIL / BOX 280 / 280 S
1 Preface<br />
Dear customer,<br />
Welcome as new owner of a <strong>Tischer</strong> TRAIL camper cabin. We are excited to welcome you as one of<br />
our customers.<br />
Your camper cabin can offer you a particular broad usage spectrum far beyond the limits of a<br />
traditional camper cabin. The cabin with sound and state-of-the-art technology guaranties good<br />
quality, highest stability and a long service life.<br />
As a start, please carefully read the entire operating <strong>instructions</strong>.<br />
For build-in units (heater, cooking place, toilet, refrigerator, etc.), the respective operating manuals and<br />
operating <strong>instructions</strong> are decisive.<br />
Please observe the information in the respective <strong>instructions</strong> in order to avoid unnecessary<br />
malfunctions.<br />
If you resale or loan the cabin, please provide these operating <strong>instructions</strong> and the build-in units to the<br />
new owner or renter.<br />
We wish you many relaxing leisure and vacation days with your camper cabin and always a safe drive.<br />
Your <strong>Tischer</strong>-Team<br />
Imprint<br />
Reprinting, reproduction or translation, in whole or in part, is not permissible without the written<br />
permission of <strong>Tischer</strong> GmbH <strong>Freizeitfahrzeuge</strong>. All statutory copyrights are explicitly reserved to<br />
<strong>Tischer</strong> GmbH <strong>Freizeitfahrzeuge</strong>.<br />
If modifications are made without written permission by <strong>Tischer</strong> GmbH <strong>Freizeitfahrzeuge</strong>, any warranty<br />
or guarantee obligations of the <strong>Tischer</strong> GmbH <strong>Freizeitfahrzeuge</strong> for damage and defects caused by<br />
the unauthorized modification shall be voided.<br />
Furthermore, <strong>Tischer</strong> GmbH <strong>Freizeitfahrzeuge</strong> shall not be liable for damage subsequently caused by<br />
the unauthorized modification.<br />
<strong>Tischer</strong> GmbH <strong>Freizeitfahrzeuge</strong> Tel.: +49 (0) 9342 / 8159<br />
Frankenstraße 3 Fax: +49 (0) 9342 / 5089<br />
D-97892 Kreuzwertheim E-mail: tischer.trail@t-online.de<br />
Industriegebiet Wiebelbach<br />
Internet: www.tischer-trail.de<br />
Leisure vehicles operating <strong>instructions</strong> Edition 3/2011<br />
2 of 90
Table of contents<br />
1 Preface ................................................................................................................ 2<br />
2 Safety information ............................................................................................. 6<br />
2.1 Use of symbols ........................................................................................................ 6<br />
2.2 General safety information ...................................................................................... 6<br />
2.3 Road safety ............................................................................................................. 6<br />
2.4 Danger of fire .......................................................................................................... 6<br />
2.5 In case of fire........................................................................................................... 6<br />
3 Raising and lowering the cabin ........................................................................ 7<br />
3.1 Lowering the cabin (200 to 260 RS and 305 S only) ................................................ 7<br />
3.2 Power supply........................................................................................................... 8<br />
3.3 Lowering the cabin (280 / 280 S only) ....................................................................11<br />
3.4 Raising the cabin (200 to 260 RS and 305S only) ..................................................12<br />
3.5 Raising the cabin (280 / 280 S only) .......................................................................16<br />
3.6 Connecting electrical supports (special equipment) ................................................19<br />
3.7 Picking up the cabin (200 to 260 RS and 305 S) ....................................................24<br />
3.8 Picking up the cabin (280 / 280 S only) ..................................................................27<br />
3.9 Lowering the cabin using electrical supports (special equipment)...........................29<br />
3.10 Securing the cabin (200 to 260 RS and 305 S only) ...............................................35<br />
3.11 Securing the cabin (280 / 280 S only) .....................................................................36<br />
4 Battery............................................................................................................... 38<br />
4.1 General safety information for battery handling ......................................................38<br />
4.2 Battery (200 to 260 RS and 305 S only) .................................................................39<br />
4.3 Battery (280 / 280 S only) .......................................................................................39<br />
5 Living/Operation .............................................................................................. 40<br />
5.1 Important information .............................................................................................40<br />
5.2 Entry door ..............................................................................................................40<br />
5.3 Door blind ...............................................................................................................42<br />
5.4 Screen door ...........................................................................................................43<br />
5.5 Step .......................................................................................................................44<br />
5.6 Electrical step (special equipment) .........................................................................45<br />
5.7 Heating/Ventilation 215 to 305S (special equipment for 200) .................................45<br />
5.8 Heating/Ventilation (215 to 305 S with L equipment only) .......................................46<br />
5.9 Gas cylinder compartment door..............................................................................47<br />
5.10 Waste-holding tank door (215 to 305 S with L equipment only) ..............................49<br />
3 of 90
5.11 Water tank (215 to 305 S with L equipment only) ...................................................50<br />
5.12 Passage way door (280 S special equipment) ........................................................51<br />
5.13 Side windows .........................................................................................................51<br />
5.14 Combination blind ..................................................................................................54<br />
5.15 Curtains ..................................................................................................................56<br />
5.16 Skylight ..................................................................................................................57<br />
5.17 Panorama skylight (special equipment) ..................................................................59<br />
6 Furniture ........................................................................................................... 62<br />
6.1 Table (200 to 260 RS only) .....................................................................................62<br />
6.2 Table (280 / 280 RS and 305 S only) .....................................................................64<br />
6.3 Cabinets .................................................................................................................65<br />
7 Electrical equipment ........................................................................................ 67<br />
7.1 Lighting ..................................................................................................................67<br />
7.2 Board control system PC100 (standard equipment, 200 not supported) .................69<br />
7.3 Board control system PC200 (special equipment, 200 not supported) ....................69<br />
7.4 Entrance light (special equipment) .........................................................................70<br />
8 Awning (special equipment) ........................................................................... 71<br />
8.1 Support struts .........................................................................................................72<br />
8.2 Support struts (awnings only, which do not exceed the length of the cabin) ...........73<br />
9 Kitchen .............................................................................................................. 74<br />
9.1 Kitchen light ...........................................................................................................74<br />
9.2 Hob cover ...............................................................................................................75<br />
9.3 Extending the working area (special equipment) ....................................................75<br />
9.4 Gas hob .................................................................................................................76<br />
9.5 Refrigerator ............................................................................................................76<br />
10 Sanitary installation ......................................................................................... 77<br />
10.1 Fresh water supply (standard equipment) ..............................................................77<br />
10.2 Fresh water supply (215 to 260 and 305 S with L equipment only) .........................77<br />
10.3 Fresh water supply (280 /280 S with L equipment only) .........................................78<br />
10.4 Waste water tank (215 to 260 RS and 305 S only) .................................................79<br />
10.5 Waste water tank (280 / 280 S only) .......................................................................79<br />
10.6 Cassette Porta Potti (215 to 280 S and 305 S with L equipment only) ....................81<br />
10.7 Sink (215 to 305 S only) .........................................................................................82<br />
10.8 Sink (280 / 280 S only) ...........................................................................................83<br />
10.9 Shower cabin (280 / 280 RS and 305 S only) .........................................................84<br />
10.10 Bathroom skylight ...............................................................................................85<br />
4 of 90
11 Gas supply ........................................................................................................ 86<br />
11.1 Gas test ..................................................................................................................88<br />
12 Troubleshooting ............................................................................................... 89<br />
12.1 Trouble shooting of the electrical supports .............................................................89<br />
5 of 90
2 Safety information<br />
2.1 Use of symbols<br />
Caution<br />
Type and source of danger<br />
• Refers to information, which must be complied with in order to<br />
avoid any endangerment of persons.<br />
Attention<br />
Type and source of danger<br />
• Refers to information, which must be complied with in order to<br />
avoid any damage to or destruction of material.<br />
Note<br />
• Explaining description to the respective chapters.<br />
2.2 General safety information<br />
The oxygen in the cabin interior is consumed by breathing or operation of the gas cooker or other<br />
build-in units. For this reason, skylights with forced ventilation are installed.<br />
Danger of suffocation due to increased carbon dioxide content. Keep the forced ventilation<br />
unobstructed.<br />
2.3 Road safety<br />
Ensure that no persons are in the cabin while driving.<br />
In front of underpasses, tunnels or similar, the overall vehicle height must be observed.<br />
During winter time keep the cabin roof free from snow and ice prior to departure.<br />
If accessories or special equipment is installed, vehicle dimensions, weight and handling may change.<br />
2.4 Danger of fire<br />
Keep combustible materials away from heating and cooking appliances.<br />
Lamps may become hot. If the lamp is switched on, the safety distance to combustible objects must<br />
always be 30 cm. Fire hazards exist!<br />
2.5 In case of fire<br />
Evacuate all vehicle passengers.<br />
Switch off the electrical supply and pull off the mains plug.<br />
Close the main cut-off valve on the gas cylinder.<br />
Alert others and call the fire brigade.<br />
Fight the fire if possible without taking any risk.<br />
6 of 90
3 Raising and lowering the cabin<br />
3.1 Lowering the cabin (200 to 260 RS and 305 S only)<br />
(The work steps are explained on the example of the right cabin side. Repeat the work steps<br />
analogously for the left side).<br />
Opening the flaps to the turnbuckles<br />
Remove the seat cushion from the left seat bench and insert key 1 into lock cylinder 2 of the flap. Turn<br />
key 1 clockwise.<br />
Press both lock cylinders 2 until the flap unlocks.<br />
Caution<br />
Risk of injuries<br />
• Secure the flap against closing.<br />
Open flap 1. The turnbuckles and the power supply of the vehicle are located under flap 1. The vehicle<br />
power supply is only located on the right side of the cabin.<br />
7 of 90
3.2 Power supply<br />
Disconnecting the power supply of the vehicle<br />
Note<br />
• Please observe the information in chapter Battery.<br />
Turn the locking mechanism of 13-pin plug 1 counterclockwise and pull off plug 1.<br />
Connecting an external power supply<br />
Open the flap of power socket 1. In the direction of travel, power socket 1 can be found on the left side<br />
on the outer wall.<br />
.<br />
8 of 90
Connecting the power supply cable<br />
Press fastener 1 of your external power supply cable 2. Insert the plug into the power socket.<br />
9 of 90
Loosening the cabin fastening (turnbuckles)<br />
Pull cotter pin 1 from turnbuckle 2.<br />
.<br />
Turn loop 3 until front turnbuckle 2 can be disengaged.<br />
Loosen the rear turnbuckle. Close the flaps accessing the turnbuckles.<br />
The cabin is now detached from the vehicle and can be lifted.<br />
10 of 90
3.3 Lowering the cabin (280 / 280 S only)<br />
Loosening the cabin fastening<br />
Use enclosed crank 1 to loosen and unscrew the fastening screws.<br />
Completely unscrew fastening screws 1 with washers 2.<br />
Disconnecting the power supply<br />
The plug connection is located on the left side of the vehicle.<br />
Turn the locking mechanism of 13-pin plug 1 counterclockwise and pull the plug out of power socket 2.<br />
11 of 90
3.4 Raising the cabin (200 to 260 RS and 305S only)<br />
Mounting the front crank supports and electrical supports (special equipment)<br />
Remove front support 1 from transport holder 3. Open tube lynch pin 2.<br />
Insert front support 1 into the adapter on the cabin.<br />
12 of 90
Mounting the support struts<br />
Fold support strut 1 upwards.<br />
Secure support strut 1 to threaded bolt 2 on the inner side of the cabin outer wall by screwing wing nut<br />
3 on tight.<br />
Preparing the crank supports<br />
Loosen cotter pin 1. Pull bolt 2 out of attachment part 3. Secure attachment part 3 using one hand.<br />
Pull attachment part 3 out of the support until the suitable hole and insert bolt 2 through the support<br />
and attachment part 3. Insert cotter pin 1 into bolt 2.<br />
Place one of pads 4 under every support.<br />
13 of 90
Raising the cabin using the crank supports<br />
Attention<br />
Risk of damage<br />
• Make sure to never raise the rear of the cabin higher than the front.<br />
This could result in the alcove resting on the roof of your carrier<br />
vehicle.<br />
• Start raising the cabin using the front supports.<br />
Insert crank 1 into adapter 2 and turn the crank clockwise until the support touches the ground.<br />
Raise the cabin by alternately extending all four supports by a few turns.<br />
First extend the front supports followed by the rear supports.<br />
14 of 90
Note<br />
• If the cabin is parked for an extensive period of time without the<br />
carrier vehicle, it is recommended to retract the supports a bit. The<br />
cabin is more stable on retracted supports.<br />
Completely raise the cabin by the means of all four supports. Now drive in a straight line out from<br />
under the cabin.<br />
15 of 90
3.5 Raising the cabin (280 / 280 S only)<br />
Attention<br />
Risk of damage<br />
• In case of vehicles with air suspension, the air suspension must be<br />
completely lowered.<br />
Mounting the front crank supports<br />
Remove front crank support 2 from the stowage box and insert it into the adapter on the cabin.<br />
Fold support strut 3 up and secure it to the cabin using wing screw 1.<br />
16 of 90
Raising the cabin using the crank supports<br />
Attention<br />
Risk of damage<br />
• Make sure to never raise the rear of the cabin higher than the front.<br />
This could result in the alcove resting on the roof of your carrier<br />
vehicle.<br />
• Start raising the cabin using the front supports.<br />
Insert crank 1 into adapter 2 and turn the crank clockwise until the support touches the ground.<br />
Raise the cabin by alternately extending all four supports by a few turns.<br />
17 of 90
Note<br />
• If the cabin is parked for an extensive period of time without the<br />
carrier vehicle, it is recommended to retract the supports a bit. The<br />
cabin is more stable on retracted supports.<br />
Completely raise the cabin by the means of all four supports. Now drive in a straight line out from<br />
under the cabin.<br />
18 of 90
3.6 Connecting electrical supports (special equipment)<br />
In case of electrical supports, connect the plugs of the front supports.<br />
Preparing electrical supports (special equipment)<br />
The rear supports are already assembled ready for use.<br />
Loosen cotter pin 1. Pull bolt 2 out of attachment part 3. Secure attachment part 3 using one hand.<br />
Pull attachment part 3 out of the support until the suitable hole and insert bolt 2 through the support<br />
and attachment part 3. Insert cotter pin 1 into bolt 2.<br />
Place one of pads 4 under every support.<br />
19 of 90
Raising the cabin using electrical supports (special equipment)<br />
Attention<br />
Risk of damage<br />
• Make sure to never raise the rear of the cabin higher than the front.<br />
This could result in the alcove resting on the roof of your carrier<br />
vehicle.<br />
• Start raising the cabin using the front supports.<br />
• Use the option to extend all supports at the same time.<br />
Note<br />
• It is optionally possible to operate the electrical supports using a<br />
wireless remote control.<br />
In case of cabins with electrical supports, insert plug 1 of remote control 3 into bushing 2 in the interior<br />
next to the entry door. Position yourself such that you have a clear view of the cabin. The length of<br />
remote control cable 3 is sufficient to walk around the cabin.<br />
20 of 90
Key assignment of the remote control<br />
Legend:<br />
1 Status LED: Green Remote control operation<br />
Orange Remote control in sleep mode, safety deactivation<br />
Red Remote control error<br />
2 Special function keys<br />
Note<br />
• In case of problems with the Happijac, read chapter<br />
Troubleshooting at the end of the operating <strong>instructions</strong>.<br />
21 of 90
Legend:<br />
1 Extend left front support 6 Extend all supports at the same time<br />
2 Extend right front support 7 Extend left rear support<br />
3 Retract left front support 8 Extend right rear support<br />
4 Retract right front support 9 Retract left rear support<br />
5 Retract all supports at the same time 10 Retract right rear support<br />
22 of 90
Functions<br />
Attention<br />
Risk of damage<br />
• Make sure to never raise the rear of the cabin higher than the front.<br />
This could result in the alcove resting on the roof of your carrier<br />
vehicle.<br />
• Start raising the cabin using the front supports.<br />
• Use the option to extend all supports at the same time.<br />
Press keys 1, 2, 7 or 8 of your Happijac remote control and hold them in order to individually extend<br />
the supports.<br />
Every support must touch the ground.<br />
Press and hold key 6 of your Happijac remote control. The cabin is raised on all four supports at the<br />
same time.<br />
Alternatively, using the special function keys:<br />
Press key 1 twice and hold it in order to extend both supports on the left side.<br />
Press key 2 twice and hold it in order to extend both supports on the right side.<br />
Press key 3 twice and hold it in order to retract both supports on the left side.<br />
Press key 4 twice and hold it in order to retract both supports on the right side.<br />
Note<br />
• If the cabin is parked for an extensive period of time without the<br />
carrier vehicle, it is recommended to retract the supports a bit. The<br />
cabin is more stable on retracted supports.<br />
Completely raise the cabin by the means of all four supports. Now drive in a straight line out from<br />
under the cabin.<br />
23 of 90
3.7 Picking up the cabin (200 to 260 RS and 305 S)<br />
Attention<br />
Risk of damage<br />
• A second person is required as banksman.<br />
Completely raise the cabin by the means of all four supports. Now reverse in a straight line under the<br />
cabin.<br />
The wooden guides 1 of the cabin must be positioned as accurately as possible above corresponding<br />
profiles 2 of the loading area. The wooden guides 1 are accurately adapted to profiles 2 of the loading<br />
area of your carrier vehicle.<br />
24 of 90
Stop the vehicle as soon as the clearance between the rear wall of your carrier vehicle and sponge<br />
rubber 1 of the cabin is maximum 3 cm.<br />
Lowering the cabin using the crank supports<br />
Lower the cabin by turning the crank supports counterclockwise. First retract the rear supports<br />
followed by the front supports.<br />
Attention<br />
Risk of damage<br />
• Make sure to never raise the rear of the cabin higher than the front.<br />
This could result in the alcove resting on the roof of your carrier<br />
vehicle.<br />
• Start lowering the cabin using the rear supports.<br />
Once the supports are completely retracted, loosen cotter pin 1, pull out bolt 2 and insert attachment<br />
part 3 into the support. Stow pads 4 in the vehicle.<br />
25 of 90
Removing the front crank supports and electrical supports (special equipment)<br />
Caution<br />
Risk of injuries<br />
• Make sure that tube lynch pin 2 is closed.<br />
Remove front supports 1 from the cabin and insert them into transport holder 3.<br />
26 of 90
3.8 Picking up the cabin (280 / 280 S only)<br />
Attention<br />
Risk of damage<br />
• In case of vehicles with air suspension, the air suspension may<br />
only be inflated, once the cabin rests completely on the vehicle.<br />
Attention<br />
Risk of damage<br />
• A second person is required as banksman.<br />
Picking up the cabin<br />
Completely raise the cabin by the means of all four supports. Now reverse in a straight line under the<br />
cabin.<br />
The front guide of the cabin must rest on the loading area.<br />
Cabin guides<br />
Wooden guides 1 and 2 are exactly adapted to the loading area of your carrier vehicle.<br />
27 of 90
Lowering the cabin using the crank supports<br />
Attention<br />
Risk of damage<br />
• Make sure to never raise the rear of the cabin higher than the front.<br />
This could result in the alcove resting on the roof of your carrier<br />
vehicle.<br />
• Start raising the cabin using the front supports.<br />
• Use the option to extend all supports at the same time.<br />
Lower the cabin by turning the crank supports counterclockwise. First retract the rear supports<br />
followed by the front supports.<br />
Once the supports are completely retracted, loosen cotter pin 1, pull out bolt 2 and insert attachment<br />
part 3 into the support. Stow pads 4 in the vehicle.<br />
Removing the front crank supports<br />
Unscrew wing screw 1 on the cabin and fold support 3 down. Pull crank support 2 out of the holder<br />
and store crank support 2 in the stowage space.<br />
28 of 90
3.9 Lowering the cabin using electrical supports (special equipment)<br />
Attention<br />
Risk of damage<br />
• Make sure to never raise the rear of the cabin higher than the front.<br />
This could result in the alcove resting on the roof of your carrier<br />
vehicle.<br />
• Start lowering the cabin using the rear supports.<br />
Note<br />
• It is optionally possible to operate the electrical supports using a<br />
wireless remote control.<br />
Insert plug 1 of remote control 3 into bushing 2 next to the entry door and position yourself such that<br />
you have a clear view of the cabin.<br />
29 of 90
Key assignment of the remote control<br />
Legend:<br />
1 Status LED: Green Remote control operation<br />
Orange Remote control in sleep mode, safety deactivation<br />
Red Remote control error<br />
2 Special function keys<br />
Note<br />
• In case of problems with the Happijac, read chapter<br />
Troubleshooting at the end of the operating <strong>instructions</strong>.<br />
30 of 90
Legend:<br />
1 Extend left front support 6 Extend all supports at the same time<br />
2 Extend right front support 7 Extend left rear support<br />
3 Retract left front support 8 Extend right rear support<br />
4 Retract right front support 9 Retract left rear support<br />
5 Retract all supports at the same time 10 Retract right rear support<br />
31 of 90
Functions<br />
Attention<br />
Risk of damage<br />
• Make sure to never raise the rear of the cabin higher than the front.<br />
This could result in the alcove resting on the roof of your carrier<br />
vehicle.<br />
• Start lowering the cabin using the rear supports.<br />
• Use the option to extend all supports at the same time.<br />
Press keys 1, 2, 7 or 8 of your Happijac remote control and hold them in order to individually extend<br />
the supports.<br />
Every support must touch the ground.<br />
Press and hold key 6 of your Happijac remote control. The cabin is raised on all four supports at the<br />
same time.<br />
Alternatively, using the special function keys:<br />
Press key 1 twice and hold it in order to extend both supports on the left side.<br />
Press key 2 twice and hold it in order to extend both supports on the right side.<br />
Press key 3 twice and hold it in order to retract both supports on the left side.<br />
Press key 4 twice and hold it in order to retract both supports on the right side.<br />
Once the supports are completely retracted, loosen cotter pin 1, pull out bolt 2 and insert attachment<br />
part 3 into the support. Stow pads 4 in the vehicle.<br />
32 of 90
Removing the front crank supports and electrical supports (special equipment)<br />
Caution<br />
Risk of injuries<br />
• Make sure that tube lynch pin 2 is closed.<br />
Remove front supports 1 from the cabin and insert them into transport holder 3.<br />
33 of 90
Disconnecting the external power supply of the cabin<br />
Press fastener 1 of plug 2. Pull plug 2 off from the cabin.<br />
Connecting the power supply of the cabin (200 to 260 RS and 305 S only)<br />
Attention<br />
Risk of accidents<br />
• Check the lighting system prior to departure.<br />
Lift the cover flap of the 13-pin socket and insert 13-pin plug 1. Turn plug 1 clockwise.<br />
Aligning the cabin<br />
Sideways: With the help of a second person, push against the side wall on the opposite side of the<br />
cabin in order to move the cabin into the desired direction. The wooden guides on the cabin floor<br />
support you in this effort.<br />
Lengthwise: With the help of a second person, you can move the cabin forward by pushing against<br />
the rear of the cabin.<br />
34 of 90
3.10 Securing the cabin (200 to 260 RS and 305 S only)<br />
Attention<br />
Risk of accidents<br />
• Re-tighten the turnbuckles after driving approx. 50 km.<br />
Now, insert the four turnbuckles 2 into the holding lugs of the cabin and the carrier vehicle and tighten<br />
them hand-tight. Secure the turnbuckles against unwanted loosening using cotter pins 1.<br />
35 of 90
3.11 Securing the cabin (280 / 280 S only)<br />
Screwing in the fastening screws<br />
Screw in fastening screws 1 with washers 2 through the loading area into the cabin<br />
Tighten fastening screws 1.<br />
Attention<br />
Risk of accidents<br />
• Re-tighten the fastening screws after driving approx. 50 km.<br />
Tighten the fastening screws using enclosed hand crank 1.<br />
36 of 90
Connecting the power supply of the cabin (280 / 280 S only)<br />
Insert 13-pin plug 1 into socket 2 and turn the locking mechanism of 13-pin plug 1 clockwise.<br />
37 of 90
4 Battery<br />
4.1 General safety information for battery handling<br />
Caution<br />
Risk of explosion due to battery gases<br />
• In closed battery compartments oxyhydrogen gas may be<br />
generated. Increased caution after battery charging using a<br />
charger.<br />
• Due to permanent consumers, which cannot be switched off,<br />
sparks may be generated when disconnecting the batteries. These<br />
sparks may ignite the gas. Vent the battery compartment prior to<br />
disconnecting the batteries.<br />
• Avoid short circuits due to reverse polarity or storing of metal<br />
objects (keys, pliers, etc.) on the battery terminals.<br />
Caution<br />
Risk of injuries<br />
• Only have trained specialist personnel work on the electrical<br />
system.<br />
Attention<br />
Risk of discharge<br />
• The battery of the carrier vehicle is charged with 2 Ampere via the<br />
230 Volt charger.<br />
Note<br />
• The manufacturer (Banner) provides the following information<br />
regarding the longest possible battery service life: The battery must<br />
be charged in intervals of 3 weeks for at least 48 hours using the<br />
230 Volt charger integrated into the cabin.<br />
38 of 90
4.2 Battery (200 to 260 RS and 305 S only)<br />
Battery 2 is located under the centre seat bench. 230 Volt charger 1, visible from the outside, is<br />
located directly next to it.<br />
4.3 Battery (280 / 280 S only)<br />
Battery 1 is located under the left seat bench. 230 Volt charger 2 is integrated into the stowage space.<br />
Caution<br />
Risk of fire<br />
• Do not cover 230 Volt charger 2 in the storage space during the<br />
charging process. The charger heats up during operation.<br />
39 of 90
5 Living/Operation<br />
5.1 Important information<br />
Doors<br />
Together with the cabin, you receive two keys with stamped in key number. Please write down this key<br />
number. In case of loss, you can reorder keys from us indicating this key number and the serial<br />
number of the camper cabin. The serial number of the camper cabin can be found at the front right on<br />
the type plate on the outer wall.<br />
Note<br />
• We deliver our camper cabins applying the master key principle,<br />
i.e., both enclosed keys open all cabin doors.<br />
Side windows<br />
Attention<br />
Risk of damage<br />
• The side windows consist of acrylic glass and may not be treated<br />
with de-icing spray or an ice scraper.<br />
• Acrylic glass is fine-pored and can fog up under extreme air<br />
humidity. The condensation disappears in dry air.<br />
5.2 Entry door<br />
Opening from the outside<br />
1<br />
2<br />
T0142<br />
Unlock the entry door lock using key 1. For this purpose, turn key 1 a quarter turn clockwise. Pull grab<br />
handle 2 and open the entry door.<br />
40 of 90
Closing from the outside<br />
1<br />
2<br />
T0143<br />
Push the door closed using grab handle 2. Lock the entry door lock using key 1. For this purpose, turn<br />
key 1 a quarter turn counterclockwise.<br />
Opening from the inside<br />
1<br />
Press lever 1 down until the door is unlocked.<br />
T0145<br />
Closing from the inside<br />
1<br />
Pull the door shut and pull lever 1 upwards until the door is locked.<br />
T0144<br />
41 of 90
5.3 Door blind<br />
Closing<br />
1 1<br />
Pull blind 1 down using the handle in the centre and hook it in the frame.<br />
T0139<br />
Opening<br />
1 1<br />
Unhook blind 1 and have it slowly slide upwards.<br />
T0140<br />
42 of 90
5.4 Screen door<br />
Closing<br />
1<br />
T0141<br />
Slide screen door 1 on the frame outward.<br />
Opening<br />
1<br />
T0146<br />
Slide screen door 1 on the frame inward.<br />
Note<br />
• The screen door cannot be locked.<br />
43 of 90
5.5 Step<br />
Folding the step out<br />
Caution<br />
Risk of injuries<br />
• Spring force pushes the step outward when the step is pulled out.<br />
Pull step 1 outward. Step 1 latches automatically.<br />
Folding the step in<br />
Push step 1 inward. Step 1 latches automatically.<br />
44 of 90
5.6 Electrical step (special equipment)<br />
Folding the step in or out<br />
Actuate button 1 at the entrance in order to fold the step in or out.<br />
5.7 Heating/Ventilation 215 to 305S (special equipment for 200)<br />
Note<br />
• For an exact description of the operation, refer to the enclosed<br />
operating <strong>instructions</strong> by Truma.<br />
In the direction of travel, the operating element of heating/ventilation 1 is located below the interior<br />
lighting switch, on the left or right, on the furniture element.<br />
45 of 90
5.8 Heating/Ventilation (215 to 305 S with L equipment only)<br />
Note<br />
• For an exact description on how to operate the Truma Combi 4,<br />
refer to the enclosed Combi 4E operating <strong>instructions</strong> by Truma.<br />
(<strong>Operating</strong> element 1) = Special equipment<br />
In the direction of travel, operating element 2 is located on the left, on the furniture element.<br />
Using energy selection switch 1, you can select between gas, electricity and mixed operation.<br />
Using operating element 3, you can select the water heater and heating functions.<br />
46 of 90
5.9 Gas cylinder compartment door<br />
Opening<br />
Unlock the lock of the gas cylinder compartment door using the key. For this purpose, turn the key a<br />
quarter turn counterclockwise. Turn the extended lock a quarter turn counterclockwise and open the<br />
gas cylinder compartment door.<br />
47 of 90
Closing<br />
Firmly press against the gas cylinder compartment door and turn the handle a quarter turn clockwise<br />
at the same time. Now, lock the lock by turning the key a quarter turn clockwise and pushing in the<br />
lock.<br />
48 of 90
5.10 Waste-holding tank door (215 to 305 S with L equipment only)<br />
Opening<br />
Insert the key into the upper lock of the waste-holding tank door. Turn the key a quarter turn clockwise.<br />
The lower lock cannot the locked. Now push in both locks.<br />
Closing<br />
Note<br />
• You can find further information in chapter Sanitary installation<br />
and in the enclosed manufacturer's instruction by Dometic.<br />
Firmly push against the waste-holding tank door. Lock the door by turning the key a quarter turn<br />
counterclockwise.<br />
49 of 90
5.11 Water tank (215 to 305 S with L equipment only)<br />
Opening the locking cap<br />
Unlock the lock of locking cap 1 using the key. For this purpose, turn the key a quarter turn<br />
counterclockwise. Push in the locking cap and turn it a quarter turn counterclockwise at the same time.<br />
Closing the locking cap<br />
Attention<br />
Risk of damage<br />
• Make sure that the pressure pump is never switched on when the<br />
water tank is empty. This may cause damage to the pressure<br />
pump.<br />
Note<br />
• You can find further information in chapter Sanitary installation<br />
Insert locking cap 1 into the filler neck and turn it a quarter turn clockwise. In order to lock it, turn the<br />
key a quarter turn clockwise.<br />
50 of 90
5.12 Passage way door (280 S special equipment)<br />
Camper cabin TRAIL 280 / 280 S can be optionally ordered with a passage way to the driver's cabin.<br />
The door can be unhinged to keep the passage way permanently open. If the cabin is mounted on the<br />
vehicle, the door can be unhinged and hinged as well.<br />
5.13 Side windows<br />
Attention<br />
Risk of damage<br />
• Prior to departure, make sure that the side windows are properly<br />
closed. Make sure that the ventilation position is not selected.<br />
Opening side windows<br />
In order to open the side windows, press button 1 and turn handle 2 upward a quarter turn at the same<br />
time.<br />
Repeat the work step for both side handles 1.<br />
51 of 90
Swivel side window 1 outward.<br />
The latching positions can be perceived by audible clicking. You can latch the window in three<br />
positions. The window in the alcove provides two latching positions.<br />
52 of 90
Closing side windows<br />
In order to close side windows 1, swivel side window 1 outward to the maximum opening angle and<br />
close it slowly. Now turn the key a quarter turn downward.<br />
Closing the side windows in ventilation position<br />
In order to close the side windows in ventilation position, the grip of handle 2 must engage over the<br />
narrow side 1 of the frame.<br />
53 of 90
5.14 Combination blind<br />
A combination blind with screen and sunshade is integrated into the window.<br />
Closing the screen<br />
Pull screen 1 down on the handle in the centre of the blind. The handle of screen 1 latches in handle 2<br />
of the sunshade.<br />
Opening the screen<br />
Press handle 1 of the screen together and guide it upward.<br />
The screen can be connected with the sunshade in any position.<br />
54 of 90
Closing the sunshade<br />
Guide the sunshade upward using handle 3 and latch it in one of nine possible positions 4. The screen<br />
can be connected with the sunshade in any position.<br />
Opening the sunshade<br />
Press handle 3 together on the left and right side and guide the sunshade out of the latching.<br />
55 of 90
5.15 Curtains<br />
Except the window in the alcove, the living room windows are fitted with curtains 1. Curtains 1 are<br />
guided in an aluminium rail. The passage to the alcove is fitted with curtains as well, which can be<br />
closed.<br />
56 of 90
5.16 Skylight<br />
Attention<br />
Risk of damage<br />
• Prior to departure, make sure that the skylights are properly closed.<br />
Depending on the model, the cabin is equipped with one, two or three skylights, which are fitted with<br />
screen and sunshade as well.<br />
Opening the skylight<br />
Press button 1 inward and pull handle bar 2 down- and backward. You can latch the skylight in three<br />
positions.<br />
The figure shows the position, in which the skylight is the farthest open.<br />
57 of 90
In the second position 2 you can latch the handle bar by adjusting pin 1. For this purpose, guide the<br />
handle bar into the second position 2 and press down pin 1.<br />
Closing the skylight<br />
In order to close the skylight, guide the handle bar upward-forward until it latches.<br />
In order to close the skylight from the second position, pull pin 1 up and guide the handle bar<br />
backward.<br />
Closing and opening the screen<br />
In order to close screen 1 slide it from the right to the left.<br />
In order to open screen 1 slide it from the left to the right.<br />
58 of 90
Closing and opening the sunshade<br />
In order to close sunshade 2 slide it from the left to the right.<br />
In order to open the sunshade slide it from the right to the left.<br />
Note<br />
• In strong sunlight the shade blind (sunshade) may only be closed<br />
2/3 and the skylight must be moved into ventilation position.<br />
• For an exact description of the operation, refer to the enclosed<br />
operating <strong>instructions</strong> by Dometic/Seitz.<br />
5.17 Panorama skylight (special equipment)<br />
Opening the panorama skylight (ventilation position)<br />
Note<br />
• Using the crank, it is possible to completely open the panorama<br />
skylight in the ventilation position as well.<br />
Press handles 1 inward and open panorama skylight 2 upward until it latches in the ventilation<br />
position.<br />
59 of 90
Unfold crank 1 and turn the crank counterclockwise in order to open the panorama skylight.<br />
Closing the panorama skylight<br />
Turn the crank clockwise until the panorama skylight rests on the frame. Next, continue turning for<br />
another 2 ½ revolutions. Fold in crank 1. Firmly pull the panorama skylight shut using both handles in<br />
order to close the panorama skylight using the handles.<br />
Closing and opening the screen<br />
In order to close the screen slide it from the left to the right. In order to open screen 1 slide it from the<br />
right to the left. Latch screen 1 on handle 2 of the sunshade.<br />
60 of 90
Closing and opening the sunshade<br />
In order to close sunshade 2 slide it from the right to the left. Latch sunshade 2 on handle 1 of the<br />
screen.<br />
In order to open the sunshade slide it from the left to the right.<br />
Note<br />
• In strong sunlight the shade blind (sunshade) may only be closed<br />
2/3 and the skylight must be moved into ventilation position.<br />
• For an exact description of the operation, refer to the enclosed<br />
operating <strong>instructions</strong> by Dometic/Seitz.<br />
61 of 90
6 Furniture<br />
6.1 Table (200 to 260 RS only)<br />
Tabletop and table leg are stored under the mattresses. It is possible to place the table top between<br />
the seat benches and thus, create an additional place to sleep.<br />
Table assembly and disassembly<br />
Insert table leg 1 into adapter 2 on the cabin floor.<br />
Now attach tabletop 1 onto table leg 2.<br />
By rotating tabletop 1 the table can be used for two or four persons.<br />
62 of 90
Additional place to sleep<br />
Remove the cushions from the left and right seat benches 2. Place table top 1 across the outer edges<br />
of seat benches 2.<br />
Now place all four cushions lengthwise on the tabletop and seat benches.<br />
63 of 90
6.2 Table (280 / 280 RS and 305 S only)<br />
Collapsing the table<br />
In order to collapse table 2 pull locking mechanism 1 upward and fold table 2 backward and down.<br />
Additional place to sleep<br />
Place enclosed board 2 between the seat benches and slide lowered table 1 between the seat<br />
benches.<br />
Next, the seat cushions can be spread out as sleeping area.<br />
64 of 90
6.3 Cabinets<br />
The following type of handles is installed on all cabinet doors and drawers in the interior.<br />
Its functionality is described using a cabinet door as example.<br />
Opening cabinet doors<br />
Push button 1 in the centre of handle 2 and have the handle extend.<br />
Swing the cabinet door upward using extended handle 1.<br />
65 of 90
Closing cabinet doors<br />
Close the cabinet door and push button 1 in the centre of handle 2 until it latches.<br />
66 of 90
7 Electrical equipment<br />
Fuses<br />
The 220 Volt system is protected with 16 A circuit breaker 1.<br />
Fuse box 2 with circuit breaker 1 and PRCD (portable residual current circuit breaker) is<br />
accommodated in the cabinet close to the heater.<br />
7.1 Lighting<br />
Ceiling lights (without board control system)<br />
In the direction of travel, the switches for the ceiling spots are located on the left side on the furniture<br />
element.<br />
Left switch 1 switches the right ceiling light and vice versa.<br />
67 of 90
Reading light<br />
A swivel-mounted reading light is installed in the alcove above the window. Press switch 1 in order to<br />
switch it on or off.<br />
68 of 90
7.2 Board control system PC100 (standard equipment, 200 not supported)<br />
1 Vehicle battery monitoring button 5 Water pump switch<br />
2 Display panel 6 Fresh water tank monitoring button<br />
3 Awning light switch 7 Consumer battery monitoring button<br />
4 Consumer main switch<br />
The electrical system of the cabin is switched on using main switch 4. Only after that all other electrical<br />
consumers can be switched on. Heater Truma Combi 4 is equipped with a continuous function.<br />
The panel of the board control system can be found in the interior on the right side of the entry door.<br />
Water tank and battery status are indicated via the board control system.<br />
External lighting can be switched on or off via the board control system.<br />
7.3 Board control system PC200 (special equipment, 200 not supported)<br />
Note<br />
• For an exact description of the operation of both variants, refer to<br />
the enclosed operating <strong>instructions</strong> by CBE.<br />
69 of 90
7.4 Entrance light (special equipment)<br />
Switch 1 for the entrance light is located on the right side of the entry door.<br />
70 of 90
8 Awning (special equipment)<br />
Crank 1 for the awning is located in the interior next to the entry door.<br />
Extending the awning<br />
In order to extend awning 1 insert the crank into adapter 2 and turn the crank to extend the awning.<br />
71 of 90
Retracting the awning<br />
Caution<br />
Risk of injury due to independent extending of the awing<br />
• Please observe that right plastic indicator 3 is not visible if the<br />
awning is completely retracted.<br />
In order to retract awning 1, insert the crank into adapter 2 and turn the crank to retract the awning.<br />
8.1 Support struts<br />
Follow <strong>instructions</strong> 1 on the supporting struts in order to install the supports.<br />
72 of 90
8.2 Support struts (awnings only, which do not exceed the length of the<br />
cabin)<br />
Follow <strong>instructions</strong> 1 on the supporting struts in order to install the supports.<br />
The supporting struts are inserted into respective holders on the vehicle.<br />
Supporting the awning<br />
In order to insert strut 3, slide locking mechanism 1 of holder 2 upward, insert the strut and slide<br />
locking mechanism 1 downward again.<br />
73 of 90
9 Kitchen<br />
9.1 Kitchen light<br />
Switch 1 for the kitchen light is located directly on the lamp.<br />
• Position 1 = light is off.<br />
• Position 2 = light is on.<br />
74 of 90
9.2 Hob cover<br />
In order to fold down the cover for the hob, hold cover 2, loosen locking mechanism 1 and fold down<br />
cover 2. In order to fold the cover up, proceed in reverse order.<br />
9.3 Extending the working area (special equipment)<br />
In order to unfold the working area extension 1, lift working area 1 and pivot support 2 to the left. In<br />
order to fold working area 1 down, proceed in reverse order.<br />
75 of 90
9.4 Gas hob<br />
Initial operation<br />
Caution<br />
Danger to life<br />
• The gas hob may no be used for heating purposes.<br />
• When operating the gas hob, skylight(s) and ventilation (windows)<br />
must be open.<br />
Note<br />
• Observe chapter Gas supply prior to using the gas hob.<br />
Depress gas tap 1 of the desired burner and turn it counterclockwise into the centre position at the<br />
same time. Ignite the gas and hold gas tap 1 depressed for an additional approx. 10 seconds, until the<br />
safety pilot is heated.<br />
9.5 Refrigerator<br />
Note<br />
• For an exact description of the operation, refer to the enclosed<br />
operating <strong>instructions</strong> by Dometic.<br />
Depending on the model, the refrigerator is integrated into the left or the right side of the furniture<br />
element (in the direction of travel).<br />
76 of 90
10 Sanitary installation<br />
10.1 Fresh water supply (standard equipment)<br />
By default the cabin is equipped with two fresh water tanks 2 with 15 litres capacity each. An electrical<br />
submersible pump 1 pumps water to the tapping points in kitchen and bathroom.<br />
10.2 Fresh water supply (215 to 260 and 305 S with L equipment only)<br />
When L equipment is configured, the cabin is equipped with one fresh water tank with 80/97 litres<br />
capacity. A pressure pump pumps water to the tapping points.<br />
Water tank 1 is located under the centre seat bench and is filled by hose from the outside via a filler<br />
neck (see chapter Water tank). The tank is equipped with an overflow to the outside. In order to clean<br />
the tank, open cleaning opening 2 (screw plug).<br />
77 of 90
10.3 Fresh water supply (280 /280 S with L equipment only)<br />
When L equipment is configured, the cabin is equipped with one fresh water tank with 80/97 litres<br />
capacity. A pressure pump pumps water to the tapping points.<br />
Water tank 2 is located under the left seat bench and is filled by hose from the outside via a filler neck<br />
(see chapter Water tank). The tank is equipped with an overflow to the outside. In order to clean the<br />
tank, open cleaning opening 1 (screw plug).<br />
Attention<br />
Risk of damage<br />
• If there is a risk of frost, respectively if the cabin is parked outdoors<br />
during wintertime, please remember to empty water tank and water<br />
system.<br />
• Water freezing in the system may result in damage to the system!<br />
IMPORTANT IN CASE OF RISK OF FROST DAMAGE: When<br />
emptying the water system, adjust the mixer taps to the centre<br />
position between "hot" and "cold" and open them.<br />
• For 215 to 260 RS 280 / 280 S and 305 S vehicles, the shower<br />
hose is to be pulled out and held up in order to enable draining. NO<br />
CLAIM UNDER GUARANTEE IN CASE OF FROST DAMAGE!<br />
When the cabin is parked for an extended period of time, we recommend to pump the water via the<br />
taps into the waste water tank and to empty this tank via the drain cock.<br />
78 of 90
10.4 Waste water tank (215 to 260 RS and 305 S only)<br />
Attention<br />
Risk of environmental pollution<br />
• Environmental protection regulations and campsite guidelines must<br />
always be observed, when disposing of waste water! Waste water<br />
may not enter the soil.<br />
Waste water tank 2 is located in the rear left at the transition to the rear end. Waste water tank 2 has a<br />
capacity of 48 litres. All waste water from kitchen sink, washbasin and shower are routed through<br />
hoses into this waste water tank 2.<br />
Waste water tank 2 is emptied by opening drain cook 1 fitted on the tank. If there is a risk of frost, an<br />
antifreeze agent should be added to waste water tank 2. As an alternative, we also offer an "insulated<br />
and heated waste water tank" as an option. In case of extended periods of non-use, waste water<br />
tank 2 should be completely emptied.<br />
10.5 Waste water tank (280 / 280 S only)<br />
Waste water tank 2 is located in the rear left at the transition to the rear end. Waste water tank 2 has a<br />
capacity of 45 litres. All waste water from kitchen sink, washbasin and shower are routed through<br />
hoses into this waste water tank 2.<br />
Waste water tank 2 is emptied by opening drain cook 1 fitted on the tank. If there is a risk of frost, an<br />
antifreeze agent should be added to waste water tank 2. In case of extended periods of non-use,<br />
waste water tank 2 should be completely emptied.<br />
79 of 90
Cleaning the waste water tank<br />
In order to clean waste water tank 1, you can open cleaning opening 2 via the rear stowage space and<br />
clean waste water tank 1.<br />
80 of 90
10.6 Cassette Porta Potti (215 to 280 S and 305 S with L equipment only)<br />
When L equipment is configured, the cabin is equipped with a “Cassette Porta Potti” toilet. This toilet<br />
consists of two main parts, a built-in toilet and a waste-holding tank removable from the outside.<br />
For flushing, the toilet is directly supplied from the fresh water tank.<br />
Note<br />
For information regarding the following points<br />
• Preparation for use<br />
• Operation<br />
• Emptying the waste-holding tank<br />
• Cleaning and maintenance<br />
• Winterising the system<br />
please refer to the enclosed operating <strong>instructions</strong> of the toilet<br />
manufacturer Dometic.<br />
Caution<br />
Risk of environmental pollution<br />
• Waste may only be disposed of at suitable disposal stations.<br />
Environmental protection regulations are to be strictly followed.<br />
81 of 90
10.7 Sink (215 to 305 S only)<br />
Sink<br />
Attention<br />
Component damage<br />
• Prior to folding down the sink, the mixer tap must be turned<br />
completely to the right towards the outer wall.<br />
In order to fold down sink 1, turn lever 2 a quarter turn clockwise.<br />
Shower head (215 to 260RS with L equipment)<br />
The shower head can be pulled out of the mixer tap.<br />
82 of 90
10.8 Sink (280 / 280 S only)<br />
Mixer tap<br />
Attention<br />
Component damage<br />
• Prior to folding down the sink, the mixer tap must be turned<br />
completely to the right towards the outer wall.<br />
Turn mixer tap 1 completely to the right.<br />
Sink<br />
In order to fold down sink 1, turn lever 2 a quarter turn clockwise.<br />
83 of 90
10.9 Shower cabin (280 / 280 RS and 305 S only)<br />
A separate shower cabin is installed in the cabin, which can be closed with respective doors 2 as<br />
splash guard.<br />
In order to close the doors, turn lever 3 a quarter turn to the left or right and pull the doors shut.<br />
Shower head 4 can be supplied via a separate mixer tap 1.<br />
Attention<br />
Risk of damage<br />
• If there is a risk of frost, respectively if the cabin is parked outdoors<br />
during wintertime, please remember to empty water tank and water<br />
system.<br />
• Water freezing in the system may result in damage to the system!<br />
IMPORTANT IN CASE OF RISK OF FROST DAMAGE: When<br />
emptying the water system, adjust the mixer taps to the centre<br />
position between "hot" and "cold" and open them.<br />
• For 280 / 280S and 305S vehicles, the shower hose is to be pulled<br />
out and held up in order to enable draining. NO CLAIM UNDER<br />
GUARANTEE IN CASE OF FROST DAMAGE!<br />
84 of 90
10.10 Bathroom skylight<br />
Opening and closing the bathroom skylight<br />
Fold down screen 1 by pulling on handle 2. Grab handle bars 3 of the skylight and press handles 4<br />
inward. Now the skylight can be opened upward. In order to close the skylight, firmly pull the skylight<br />
on handles 4 downward, until the skylight latches. Fold the screen up, until it latches.<br />
Bathroom light<br />
Push switch 1 to the left to switch the light on and to the right to switch it off.<br />
85 of 90
11 Gas supply<br />
Caution<br />
Risk of explosion<br />
• Modifications to build-in units, the gas system or the electrical<br />
system may only be performed by authorized specialist personnel.<br />
A separate compartment is provided in the kitchen block on the right side in order to store two gas<br />
cylinders of 5 kg each. The gas cylinder compartment can only be accessed from the outside via a<br />
lockable door.<br />
In the cabin a gas system according to regulations is installed, with pressure regulator and safety<br />
valve, cylinder racks and shut-off valves for individual consumers.<br />
Using the SecuMotion pressure regulator (30 mb), one gas cylinder each can be connected for the<br />
operation of the following appliances:<br />
• Cooker<br />
• Heater (standard equipment)<br />
• Heater / hot water (L equipment)<br />
• Refrigerator.<br />
SecuMotion pressure regulator 1<br />
Quick-action stop valve 2<br />
86 of 90
87 of 90
Prior to using gas appliances, open gas cylinder valve 4 first, followed by pressing valve 3. As the last<br />
step, press and hold quick-action stop valve 2 on pressure regulator SecuMotion 1 for at least<br />
3 seconds.<br />
88 of 90
12 Troubleshooting<br />
12.1 Trouble shooting of the electrical supports<br />
Symptom Possible causes Remedy<br />
As soon as the<br />
remote control is<br />
connected, one<br />
or several<br />
supports<br />
automatically<br />
extend or retract.<br />
LED does not<br />
light up, when<br />
the remote<br />
control is<br />
connected.<br />
Control unit error.<br />
Plug is not properly<br />
inserted.<br />
Battery almost or<br />
completely discharged.<br />
Fuse(s) blown.<br />
Disconnect remote control,<br />
wait for 15 seconds and connect it<br />
again.<br />
If the problem continues to exist,<br />
contact your Happijac dealer.<br />
Check the plug connection.<br />
Check battery and recharge as<br />
necessary.<br />
Replace fuse(s).<br />
LED illuminates<br />
red during<br />
operation.<br />
LED illuminates<br />
yellow during<br />
operation.<br />
Main switch switched off /<br />
main fuse blown.<br />
Battery voltage too low in<br />
order to move several<br />
supports at the same<br />
time.<br />
Control unit error.<br />
System is in sleep mode.<br />
Switch main switch on / replace<br />
main fuse.<br />
Move supports individually until<br />
battery is recharged.<br />
Disconnect remote control, wait for<br />
15 seconds and connect it again.<br />
Press buttons 5 and 6 at the same<br />
time to reset the system.<br />
89 of 90
<strong>Tischer</strong> GmbH <strong>Freizeitfahrzeuge</strong> Tel.: +49 (0) 9342 / 8159<br />
Frankenstraße 3 Fax: +49 (0) 9342 / 5089<br />
D-97892 Kreuzwertheim E-mail: tischer.trail@t-online.de<br />
Industrial area Wiebelbach<br />
Internet: www.tischer-trail.de<br />
Leisure vehicles operating <strong>instructions</strong> Edition 04/2009<br />
90 of 90