Owner Manual - AVR 158 (English EU) - Harman Kardon
Owner Manual - AVR 158 (English EU) - Harman Kardon
Owner Manual - AVR 158 (English EU) - Harman Kardon

Create successful ePaper yourself
Turn your PDF publications into a flip-book with our unique Google optimized e-Paper software.
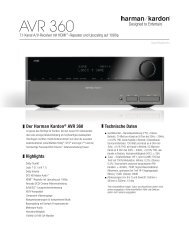
<strong>AVR</strong> <strong>158</strong><br />
Rear-Panel Connectors, continued<br />
Radio Aerial connectors: connect the included AM and FM aerials to their respective<br />
terminals for radio reception.<br />
HDMI Monitor Out connector: If your tV has an hdMI connector and you have hdMI or<br />
component video source devices, use an hdMI cable (not included) to connect it to the<br />
AVr’s hdMI Monitor out connector.<br />
Notes on using the HDMI Monitor Out connector:<br />
• when connecting a dVI-equipped display to the hdMI Monitor out connector, use<br />
an hdMI-to-dVI adapter and make a separate audio connection.<br />
• Make sure the hdMI-equipped display is hdcp-compliant. If it isn’t, do not connect<br />
it via hdMI; use an analogue video connection instead and make a separate audio<br />
connection.<br />
HDMI Input connectors: the hdMI (high-definition Multimedia Interface ® ) feature is<br />
a connection for transmitting digital audio and video signals between devices. If your<br />
source devices have hdMI connectors, using them will provide the best possible video<br />
and audio performance quality. Since the hdMI cable carries both digital video and<br />
digital audio signals, you do not have to make any additional audio connections for<br />
devices you connect via hdMI connections. See connect Your Source devices, on page<br />
13, for more information.<br />
Composite Video Monitor Out connector: If your tV or video display does not have<br />
an hdMI connector, or if your tV does have an hdMI connector but you are connecting<br />
some source devices with only composite video connectors, use a composite video<br />
cable (not included) to connect the AVr’s composite Video Monitor out connector to your<br />
tV’s composite video input connector.<br />
DVD Component Video Input connector: If your blu-ray disc or dVd player does<br />
not have an hdMI connector but does have a component video connector, using the<br />
component video connector will provide superior video performance. You will also need<br />
to make an audio connection from the player to the AVr.<br />
Digital Audio Input connectors: If your non-hdMI source devices have digital outputs,<br />
connect them to the AVr’s digital audio connectors. NOTE: Make only one type of<br />
digital connection (hdMI, optical or coaxial) from each device. See connect Your Source<br />
devices, on page 13, for more information.<br />
Rear-Panel Connectors, continued<br />
Video 2 Out connector: connect an analogue video recorder’s video input connector to<br />
the AVr’s Video 2 out connector. You can record any composite video input signal. NOTE:<br />
to record the audio and video from the source device, connect the AVr’s Video 2 out<br />
Analogue output connectors to the analogue video recorder’s audio inputs.<br />
Composite Video Input connectors: use composite video connectors for video source<br />
devices that don’t have hdMI or component video connectors. You will also need to<br />
make an audio connection from the source device to the AVr. See connect Your Source<br />
devices, on page 13, for more information.<br />
Subwoofer connector: connect this jack to a powered subwoofer with a line-level<br />
input. See connect Your Subwoofer, on page 13, for more information.<br />
Analogue Audio Input/Output connectors: use the AVr’s Analogue Audio Input/output<br />
connectors for source devices that don’t have hdMI or digital audio connectors. use the<br />
Video 2 out and tape out connectors to connect to the audio inputs of a Vcr and tape<br />
deck. See connect Your Source devices, on page 13, for more information.<br />
Speaker connectors: use two-conductor speaker wire to connect each set of terminals<br />
to the correct speaker. See connect Your Speakers, on page 13, for more information.<br />
Main Power switch: this mechanical switch turns the AVr’s power supply on or off. It is<br />
usually left on and cannot be turned on or off using the remote control.<br />
12V Trigger connector: this connector provides 12V dc whenever the AVr is on. It can<br />
be used to turn on and off other devices such as a powered subwoofer.<br />
AC Input connector: After you have made all other connections, plug the supplied Ac<br />
power cord into this receptacle and into an unswitched wall outlet.<br />
7<br />
ENGLISH