Owner Manual - AVR 158 (English EU) - Harman Kardon
Owner Manual - AVR 158 (English EU) - Harman Kardon
Owner Manual - AVR 158 (English EU) - Harman Kardon

You also want an ePaper? Increase the reach of your titles
YUMPU automatically turns print PDFs into web optimized ePapers that Google loves.
<strong>AVR</strong> <strong>158</strong><br />
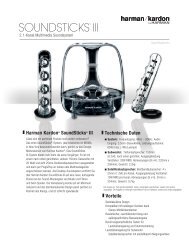
Front-Panel Controls, continued<br />
Power indicator: this led has three possible modes:<br />
• led is off: Indicates that the AVr is unplugged or the rear-panel Main power switch<br />
is off.<br />
• led glows amber: Indicates that the AVr is in the Standby mode.<br />
• led glows white: Indicates that the AVr is turned on.<br />
IMPORTANT NOTE: If the protect message ever appears on the AVr’s front-panel<br />
Message display, turn off the AVr and unplug it from the Ac outlet. check all speaker<br />
wires for a possible short circuit (the “+” and “–” conductors touching each other<br />
or both touching the same piece of metal). If a short circuit is not found, bring the<br />
unit to an authorised harman kardon service centre for inspection and repair before<br />
using it again.<br />
IR sensor: this sensor receives infrared (Ir) commands from the remote control. It is<br />
important to ensure that the sensor is not blocked.<br />
Set button: press this button to select the currently highlighted menu item.<br />
Message display: Various messages appear in this two-line display in response to<br />
commands and changes in the incoming signal. In normal operation, the current source<br />
name appears on the upper line, while the surround mode is displayed on the lower line.<br />
when the on-screen display menu system (oSd) is in use, the current menu settings<br />
appear.<br />
Surround-Mode Select buttons: After you have selected the desired surround-mode<br />
category, press these buttons to select a specific mode within the category, such as to<br />
change from dolby ® pro logic ® II Movie mode to logic 7 ® Movie mode. Surround-mode<br />
availability depends on the nature of the source input signal, i.e., digital versus analogue,<br />
and the number of channels encoded within the signal.<br />
Volume knob: turn this knob to raise or lower the volume.<br />
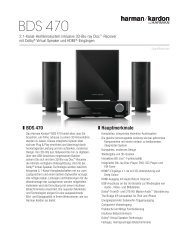
Front-Panel Controls, continued<br />
Power button: press this button to turn the AVr on or to place it in the Standby mode.<br />
Tuning Mode button: this button toggles between manual (one frequency step at a<br />
time) and automatic (seeks frequencies with acceptable signal strength) tuning mode. It<br />
also toggles between stereo and mono modes when an FM station is tuned in.<br />
Channel Level Control button: press this button to activate the channel-level adjustment<br />
feature. After pressing this button, use the up/down buttons to select the channel for<br />
adjustment and use the left/right buttons to adjust the channel’s level.<br />
Digital Input button: press this button to change the audio input for the current source.<br />
use the left/right buttons to cycle through the available inputs. Although you can assign<br />
any digital audio input to any source, the analogue audio inputs are all permanently<br />
dedicated to the source with which they are labeled.<br />
Left/Right buttons: use these buttons to navigate the AVr’s menus.<br />
Up/Down buttons/Tuning buttons: use these buttons to navigate the AVr’s menus.<br />
when the radio is the active source, use these buttons to tune stations according to the<br />
setting of the tuning Mode button (see above).<br />
Surround-Mode Category button: press this button to select a surround-sound<br />
category. each press changes the surround-mode category: Auto Select, Virtual, Stereo,<br />
Movie, Music and Video game. to change the specific surround-sound mode within the<br />
category, use the Surround Mode Select buttons. See Audio processing and Surround<br />
Sound, on page 20, for more information on surround modes.<br />
Headphone jack: connect a 1/4" stereo headphone plug to this jack for private<br />
listening.<br />
Source Select buttons: press these buttons to select the active source.<br />
USB port: You can use this port to perform software upgrades that may be offered in<br />
the future. do not connect a storage device, a peripheral product or a pc here, unless<br />
instructed to do so as part of an upgrade procedure.<br />
Aux Analogue Audio Input connector: connect an auxiliary source component that<br />
will be used only temporarily, such as a camcorder, portable music player or game<br />
console, here.<br />
5<br />
ENGLISH