spark plug (k3- ve )
spark plug (k3- ve )
spark plug (k3- ve )

You also want an ePaper? Increase the reach of your titles
YUMPU automatically turns print PDFs into web optimized ePapers that Google loves.
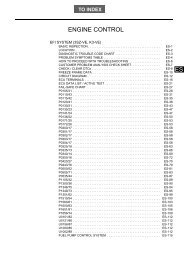
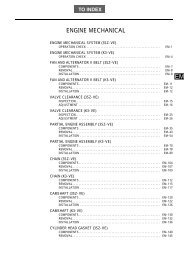
TO INDEX<br />
ENGINE<br />
IGNITION<br />
IGNITION SYSTEM (3SZ-VE)<br />
OPERATION CHECK . . . . . . . . . . . . . . . . . . . . . . . . . . . . . . . . . . . . . . . . .<br />
LOCATION. . . . . . . . . . . . . . . . . . . . . . . . . . . . . . . . . . . . . . . . . . . . . . . . . .<br />
IGNITION SYSTEM (K3-VE)<br />
OPERATION CHECK . . . . . . . . . . . . . . . . . . . . . . . . . . . . . . . . . . . . . . . . .<br />
LOCATION. . . . . . . . . . . . . . . . . . . . . . . . . . . . . . . . . . . . . . . . . . . . . . . . . .<br />
CAM POSITION SENSOR (3SZ-VE)<br />
COMPONENTS . . . . . . . . . . . . . . . . . . . . . . . . . . . . . . . . . . . . . . . . . . . . . .<br />
REMOVAL . . . . . . . . . . . . . . . . . . . . . . . . . . . . . . . . . . . . . . . . . . . . . . . . . .<br />
INSTALLATION . . . . . . . . . . . . . . . . . . . . . . . . . . . . . . . . . . . . . . . . . . . . . .<br />
INSPECTION . . . . . . . . . . . . . . . . . . . . . . . . . . . . . . . . . . . . . . . . . . . . . . . .<br />
CAM POSITION SENSOR (K3-VE)<br />
COMPONENTS . . . . . . . . . . . . . . . . . . . . . . . . . . . . . . . . . . . . . . . . . . . . . .<br />
REMOVAL . . . . . . . . . . . . . . . . . . . . . . . . . . . . . . . . . . . . . . . . . . . . . . . . . .<br />
INSTALLATION . . . . . . . . . . . . . . . . . . . . . . . . . . . . . . . . . . . . . . . . . . . . . .<br />
INSPECTION . . . . . . . . . . . . . . . . . . . . . . . . . . . . . . . . . . . . . . . . . . . . . . . .<br />
CRANK POSITION SENSOR (3SZ-VE)<br />
COMPONENTS . . . . . . . . . . . . . . . . . . . . . . . . . . . . . . . . . . . . . . . . . . . . . .<br />
REMOVAL . . . . . . . . . . . . . . . . . . . . . . . . . . . . . . . . . . . . . . . . . . . . . . . . . .<br />
INSTALLATION . . . . . . . . . . . . . . . . . . . . . . . . . . . . . . . . . . . . . . . . . . . . . .<br />
INSPECTION . . . . . . . . . . . . . . . . . . . . . . . . . . . . . . . . . . . . . . . . . . . . . . . .<br />
CRANK POSITION SENSOR (K3-VE)<br />
COMPONENTS . . . . . . . . . . . . . . . . . . . . . . . . . . . . . . . . . . . . . . . . . . . . . .<br />
REMOVAL . . . . . . . . . . . . . . . . . . . . . . . . . . . . . . . . . . . . . . . . . . . . . . . . . .<br />
INSTALLATION . . . . . . . . . . . . . . . . . . . . . . . . . . . . . . . . . . . . . . . . . . . . . .<br />
INSPECTION . . . . . . . . . . . . . . . . . . . . . . . . . . . . . . . . . . . . . . . . . . . . . . . .<br />
SPARK PLUG (3SZ-VE)<br />
INSPECTION . . . . . . . . . . . . . . . . . . . . . . . . . . . . . . . . . . . . . . . . . . . . . . . .<br />
SPARK PLUG (K3-VE)<br />
INSPECTION . . . . . . . . . . . . . . . . . . . . . . . . . . . . . . . . . . . . . . . . . . . . . . . .<br />
IG-1<br />
IG-2<br />
IG-3<br />
IG-4<br />
IG-5<br />
IG-6<br />
IG-7<br />
IG-8<br />
IG-9<br />
IG-10<br />
IG-11<br />
IG-12<br />
IG-13<br />
IG-14<br />
IG-14<br />
IG-14<br />
IG-15<br />
IG-16<br />
IG-16<br />
IG-16<br />
IG-17<br />
IG-18<br />
IG
IG<br />
IG–1<br />
IGNITION SYSTEM (3SZ-VE)<br />
ENGINE<br />
IGNITION - IGNITION SYSTEM (3SZ-VE)<br />
OPERATION CHECK<br />
1. PERFORM SPARK TEST<br />
(a) Check for diagnostic trouble codes. (See page ES-8)<br />
NOTICE:<br />
If a DTC is detected, perform the troubleshooting procedures<br />
for the corresponding DTC.<br />
(b) Perform the <strong>spark</strong> test.<br />
(1) Remo<strong>ve</strong> the air cleaner assembly.<br />
(2) Disconnect the connector from the ignition coil.<br />
(3) Remo<strong>ve</strong> the ignition coil.<br />
(4) Remo<strong>ve</strong> the <strong>spark</strong> <strong>plug</strong>.<br />
(5) Install the <strong>spark</strong> <strong>plug</strong> to the ignition coil and connect the<br />
connector.<br />
(6) Disconnect all connectors of the fuel injector assembly.<br />
(7) Ground the <strong>spark</strong> <strong>plug</strong>.<br />
(8) Make sure that <strong>spark</strong>s occur when the engine is cranking.<br />
NOTICE:<br />
• Be sure to ground the hexagonal part or the thread<br />
of the ground electrode of the <strong>spark</strong> <strong>plug</strong>.<br />
• If the ignition coil has been dropped or struck,<br />
replace it.<br />
• Do not crank the engine for more than 2 seconds.<br />
(9) Connect the connector of the fuel injector assembly.<br />
(10) Install the <strong>spark</strong> <strong>plug</strong>s.<br />
Torque: 20 N*m (204 kgf*cm)<br />
(11) Install the ignition coils.<br />
Torque: 7.5 N*m (76 kgf*cm)<br />
(12) Connect the connector to the ignition coil.<br />
(13) Check for diagnostic trouble codes.
LOCATION<br />
IGNITION - IGNITION SYSTEM (3SZ-VE)<br />
IG–2<br />
IGNITION COIL ASSEMBLY<br />
CAMSHAFT POSITION SENSOR<br />
IG<br />
CRANKSHAFT POSITION SENSOR<br />
SPARK PLUG<br />
A137728J01
IG<br />
IG–3<br />
IGNITION SYSTEM (K3-VE)<br />
ENGINE<br />
IGNITION - IGNITION SYSTEM (K3-VE)<br />
OPERATION CHECK<br />
1. PERFORM SPARK TEST<br />
(a) Check for diagnostic trouble codes. (See page ES-8)<br />
NOTICE:<br />
If a DTC is detected, perform the troubleshooting procedures<br />
for the corresponding DTC.<br />
(b) Perform the <strong>spark</strong> test.<br />
(1) Remo<strong>ve</strong> the air cleaner assembly.<br />
(2) Disconnect the connector from the ignition coil.<br />
(3) Remo<strong>ve</strong> the ignition coil.<br />
(4) Remo<strong>ve</strong> the <strong>spark</strong> <strong>plug</strong>.<br />
(5) Install the <strong>spark</strong> <strong>plug</strong> to the ignition coil and connect the<br />
connector.<br />
(6) Disconnect all connectors of the fuel injector assembly.<br />
(7) Ground the <strong>spark</strong> <strong>plug</strong>.<br />
(8) Make sure that <strong>spark</strong>s occur when the engine is cranking.<br />
NOTICE:<br />
• Be sure to ground the hexagonal part or the thread<br />
of the ground electrode of the <strong>spark</strong> <strong>plug</strong>.<br />
• If the ignition coil has been dropped or struck,<br />
replace it.<br />
• Do not crank the engine for more than 2 seconds.<br />
(9) Connect the connector of the fuel injector assembly.<br />
(10) Install the <strong>spark</strong> <strong>plug</strong>s.<br />
Torque: 20 N*m (204 kgf*cm)<br />
(11) Install the ignition coils.<br />
Torque: 7.5 N*m (76 kgf*cm)<br />
(12) Connect the connector to the ignition coil.<br />
(13) Check for diagnostic trouble codes.
LOCATION<br />
IGNITION - IGNITION SYSTEM (K3-VE)<br />
IG–4<br />
IGNITION COIL ASSEMBLY<br />
CAMSHAFT POSITION SENSOR<br />
IG<br />
CRANKSHAFT POSITION SENSOR<br />
SPARK PLUG<br />
A137728J01
IG–5<br />
IGNITION - CAM POSITION SENSOR (3SZ-VE)<br />
CAM POSITION SENSOR (3SZ-VE)<br />
ENGINE IGNITION<br />
COMPONENTS<br />
AIR CLEANER ASSEMBLY<br />
T=7.5{76}<br />
T=18{184}<br />
T=7.5{76}<br />
CAMSHAFT POSITION SENSOR<br />
IG<br />
T=7.5{76}<br />
AIR CLEANER HOSE NO. 1<br />
TIGHTENING TORQUE<br />
A139037J01
IGNITION - CAM POSITION SENSOR (3SZ-VE)<br />
IG–6<br />
REMOVAL<br />
1. REMOVE AIR CLEANER HOSE NO. 1 (See page CO - 15)<br />
2. REMOVE AIR CLEANER ASSEMBLY (See page EM - 146)<br />
3. REMOVE CAM POSITION SENSOR<br />
(a) Remo<strong>ve</strong> the bolt, then remo<strong>ve</strong> the wire harness clamp.<br />
A138814<br />
(b)<br />
Disconnect the connector.<br />
IG<br />
A138817<br />
(c)<br />
(d)<br />
Remo<strong>ve</strong> the bolt, then remo<strong>ve</strong> the wire harness clamp.<br />
Disconnect the connector.<br />
A138988
IG–7<br />
IGNITION - CAM POSITION SENSOR (3SZ-VE)<br />
(e)<br />
Remo<strong>ve</strong> the bolt, then remo<strong>ve</strong> the cam position sensor.<br />
INSTALLATION<br />
1. INSTALL CAM POSITION SENSOR<br />
(a) Apply a light coat of engine oil to the O-ring.<br />
A138990<br />
IG<br />
(b)<br />
(c)<br />
Using a priset torque wrench, install the cam position sensor<br />
with the bolt.<br />
Torque: 7.5 N*m (76 kgf*cm)<br />
NOTICE:<br />
Be careful that the O-ring is not cracked or pinched when<br />
installing it to the cylinder head.<br />
Connect the connector.<br />
A138990
IGNITION - CAM POSITION SENSOR (3SZ-VE)<br />
IG–8<br />
(d)<br />
Install the wire harness clamp with the bolt.<br />
A138988<br />
(e)<br />
Install the wire harness clamp with the bolt.<br />
IG<br />
A138817<br />
(f)<br />
(g)<br />
Install the wire harness clamp with the bolt.<br />
Connect the connector.<br />
2. INSTALL AIR CLEANER ASSEMBLY (See page EM - 167)<br />
3. INSTALL AIR CLEANER HOSE NO. 1 (See page CO - 19)<br />
INSPECTION<br />
A138814<br />
1. INSPECT CAM POSITION SENSOR<br />
(a) Using a tester, measure the resistance between the connector<br />
terminals.<br />
Standard:<br />
1850 to 2450 Ω (20°C)<br />
2 1<br />
A105341J05
IG–9<br />
IGNITION - CAM POSITION SENSOR (K3-VE)<br />
CAM POSITION SENSOR (K3-VE)<br />
ENGINE IGNITION<br />
COMPONENTS<br />
AIR CLEANER ASSEMBLY<br />
T=7.5{76}<br />
T=18{184}<br />
T=7.5{76}<br />
CAMSHAFT POSITION SENSOR<br />
IG<br />
T=7.5{76}<br />
AIR CLEANER HOSE NO. 1<br />
TIGHTENING TORQUE<br />
A139037J01
IGNITION - CAM POSITION SENSOR (K3-VE)<br />
IG–10<br />
REMOVAL<br />
1. REMOVE AIR CLEANER HOSE NO. 1 (See page CO-22)<br />
2. REMOVE AIR CLEANER ASSEMBLY (See page EM-173)<br />
3. REMOVE CAM POSITION SENSOR<br />
(a) Remo<strong>ve</strong> the bolt, then remo<strong>ve</strong> the wire harness clamp.<br />
A138814<br />
(b)<br />
Disconnect the connector.<br />
IG<br />
A138817<br />
(c)<br />
(d)<br />
Remo<strong>ve</strong> the bolt, then remo<strong>ve</strong> the wire harness clamp.<br />
Disconnect the connector.<br />
A138988
IG–11<br />
IGNITION - CAM POSITION SENSOR (K3-VE)<br />
(e)<br />
Remo<strong>ve</strong> the bolt, then remo<strong>ve</strong> the cam position sensor.<br />
INSTALLATION<br />
1. INSTALL CAM POSITION SENSOR<br />
(a) Apply a light coat of engine oil to the O-ring.<br />
A138990<br />
IG<br />
(b)<br />
(c)<br />
Using a pri set torque wrench, install the cam position sensor<br />
with the bolt.<br />
Torque: 7.5 N*m (76 kgf*cm)<br />
NOTICE:<br />
Be careful that the O-ring is not cracked or pinched when<br />
installing it to the cylinder head.<br />
Connect the connector.<br />
A138990
IGNITION - CAM POSITION SENSOR (K3-VE)<br />
IG–12<br />
(d)<br />
Install the wire harness clamp with the bolt.<br />
A138988<br />
(e)<br />
Install the wire harness clamp with the bolt.<br />
IG<br />
A138817<br />
(f)<br />
(g)<br />
Install the wire harness clamp with the bolt.<br />
Connect the connector.<br />
2. INSTALL AIR CLEANER ASSEMBLY (See page EM-194)<br />
3. INSTALL AIR CLEANER HOSE NO. 1 (See page CO-26)<br />
INSPECTION<br />
A138814<br />
1. INSPECT CAM POSITION SENSOR<br />
(a) Using a tester, measure the resistance between the connector<br />
terminals.<br />
Standard:<br />
1850 to 2450 Ω(20°C)<br />
2 1<br />
A105341J05
IG–13<br />
IGNITION - CRANK POSITION SENSOR (3SZ-VE)<br />
CRANK POSITION SENSOR (3SZ-VE)<br />
ENGINE IGNITION<br />
COMPONENTS<br />
IG<br />
ENGINE UNDER COVER<br />
T=7.5{76}<br />
T=5.4{55} ×11 CRANKSHAFT POSITION SENSOR<br />
TIGHTENING TORQUE<br />
A136972J01
IGNITION - CRANK POSITION SENSOR (3SZ-VE)<br />
IG–14<br />
REMOVAL<br />
1. REMOVE ENGINE UNDER COVER<br />
2. REMOVE CRANK POSITION SENSOR<br />
(a) Disconnect the connector.<br />
(b)<br />
Remo<strong>ve</strong> the bolt, then remo<strong>ve</strong> the crank position sensor.<br />
INSTALLATION<br />
1. INSTALL CRANK POSITION SENSOR<br />
(a) Apply a light coat of engine oil to the O-ring.<br />
A137749<br />
A137749<br />
(b) Install the crank position sensor with the bolt.<br />
Torque: 7.5 N*m (76 kgf*cm)<br />
NOTICE:<br />
Be careful that the O-ring is not cracked or pinched when<br />
installing it to the cylinder head.<br />
(c) Connect the connector.<br />
2. INSTALL ENGINE UNDER COVER (See page CO-26)<br />
INSPECTION<br />
IG<br />
2<br />
1<br />
1. INSPECT CRANK POSITION SENSOR<br />
(a) Check the resistance.<br />
(1) Using a tester, measure the resistance between the connector<br />
terminals.<br />
Standard:<br />
1850 to 2450 Ω (20°C)<br />
A133584
IG–15<br />
IGNITION - CRANK POSITION SENSOR (K3-VE)<br />
CRANK POSITION SENSOR (K3-VE)<br />
ENGINE IGNITION<br />
COMPONENTS<br />
IG<br />
ENGINE UNDER COVER<br />
T=7.5{76}<br />
T=5.4{55} ×11 CRANKSHAFT POSITION SENSOR<br />
TIGHTENING TORQUE<br />
A136972J01
IGNITION - CRANK POSITION SENSOR (K3-VE)<br />
IG–16<br />
REMOVAL<br />
1. REMOVE ENGINE UNDER COVER<br />
2. REMOVE CRANK POSITION SENSOR<br />
(a) Disconnect the connector.<br />
(b)<br />
Remo<strong>ve</strong> the bolt, then remo<strong>ve</strong> the crank position sensor.<br />
INSTALLATION<br />
1. INSTALL CRANK POSITION SENSOR<br />
(a) Apply a light coat of engine oil to the O-ring.<br />
A137749<br />
A137749<br />
(b)<br />
(c)<br />
Install the crank position sensor with the bolt.<br />
Torque: 7.5 N*m (76 kgf*cm)<br />
NOTICE:<br />
Be careful that the O-ring is not cracked or pinched when<br />
installing it to the cylinder head.<br />
Connect the connector.<br />
2. INSTALL ENGINE UNDER COVER (See page EM-195)<br />
INSPECTION<br />
IG<br />
2<br />
1<br />
1. INSPECT CRANK POSITION SENSOR<br />
(a) Check the resistance.<br />
(1) Using a tester, measure the resistance between the connector<br />
terminals.<br />
Standard:<br />
1850 to 2450 Ω(20°C)<br />
A133584
IG–17<br />
IGNITION - SPARK PLUG (3SZ-VE)<br />
SPARK PLUG (3SZ-VE)<br />
ENGINE IGNITION<br />
INSPECTION<br />
1. INSPECT SPARK PLUG<br />
(a) Inspect <strong>spark</strong> <strong>plug</strong> gap.<br />
NOTICE:<br />
• Because an iridium <strong>plug</strong> is used, do not adjust the gap<br />
of the <strong>spark</strong> <strong>plug</strong> except when using a new <strong>plug</strong> (when<br />
the <strong>ve</strong>hicle was dri<strong>ve</strong>n 1000 km or less).<br />
• Do not damage the iridium tip.<br />
Standard<br />
Manufacturer<br />
Type<br />
Specified Value<br />
(mm)<br />
Maximum (mm)<br />
NGK IKR7C 0.8-0.9 1.1<br />
IG<br />
(b)<br />
(c)<br />
If the gap is larger than the maximum, replace the <strong>spark</strong> <strong>plug</strong><br />
because the iridium tip is worn out.<br />
NOTICE:<br />
Because a long-reach <strong>plug</strong> is used, be sure to replace the<br />
<strong>plug</strong> with the specified <strong>plug</strong>.<br />
Clean the <strong>spark</strong> <strong>plug</strong>.<br />
NOTICE:<br />
Do not clean the <strong>spark</strong> <strong>plug</strong> as it may damage the iridium<br />
tip.Howe<strong>ve</strong>r, if the <strong>plug</strong> is extremely dirty due to smoke<br />
damage or for other reasons, the <strong>spark</strong> <strong>plug</strong> may be<br />
cleaned for <strong>ve</strong>ry short time (less than 20 seconds) using a<br />
<strong>spark</strong> <strong>plug</strong> cleaner. In order to pre<strong>ve</strong>nt damage to the electrode,<br />
do not exceed 20 seconds.
IGNITION - SPARK PLUG (K3-VE)<br />
IG–18<br />
SPARK PLUG (K3-VE)<br />
ENGINE IGNITION<br />
INSPECTION<br />
1. CHECK SPARK PLUG<br />
(a) Inspect <strong>spark</strong> <strong>plug</strong> gap.<br />
Standard<br />
Manufacturer Type Specified Value (mm)<br />
NGK BKR6EY-11 1.0-1.1<br />
DENSO K20R-U11 1.0-1.1<br />
(b)<br />
(c)<br />
(d)<br />
(e)<br />
Inspect for smoke damage or excessi<strong>ve</strong> burning on the <strong>spark</strong><br />
<strong>plug</strong>.<br />
Check the <strong>plug</strong> gap using a <strong>plug</strong> gap gauge.<br />
If the gap is larger than the maximum, replace the <strong>spark</strong> <strong>plug</strong><br />
because the iridium tip is worn out.<br />
Clean the <strong>spark</strong> <strong>plug</strong>.<br />
IG<br />
TO INDEX<br />
TO NEXT SECTION