erp expense module - SugarForge
erp expense module - SugarForge
erp expense module - SugarForge

Create successful ePaper yourself
Turn your PDF publications into a flip-book with our unique Google optimized e-Paper software.
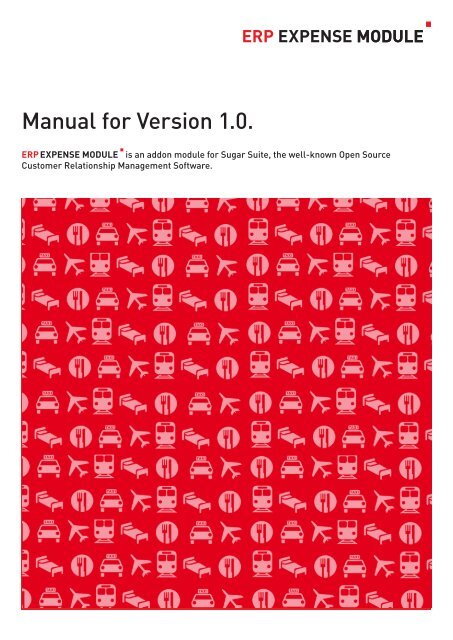
<strong>erp</strong> EXPENSE <strong>module</strong><br />
Manual for Version 1.0.<br />
<strong>erp</strong> EXPENSE <strong>module</strong> is an addon <strong>module</strong> for Sugar Suite, the well-known Open Source<br />
Customer Relationship Management Software.
<strong>erp</strong> EXPENSE <strong>module</strong><br />
table of contents<br />
1. Introduction<br />
1.1 serie a GmbH – Software and Consulting 03<br />
1.2 What will be covered in this manual 03<br />
1.3 What is <strong>erp</strong> <strong>expense</strong> <strong>module</strong> 03<br />
2. Expenses Datafields<br />
2.1 Master Data 04<br />
2.2 Receipts 04<br />
2.3 List view 04<br />
2.3.1 Mass Update 05<br />
2.3.2 Export 05<br />
2.4 Duplicate <strong>expense</strong> 05<br />
2.5 Delete <strong>expense</strong> 05<br />
2.6 Expense Detail View 05<br />
2.7 Create <strong>expense</strong> 05<br />
2.8 Import components 06<br />
2.8.1 Step 0 06<br />
2.8.2 Step 1 06<br />
2.8.3 Step 2 06<br />
2.8.4 Step 3 06<br />
2.8.5 Please Note 06<br />
3. Templates<br />
3.1 How to customize the OO template - step 1 07<br />
3.2 How to customize the OO template - step 2 07<br />
3.3 How to customize the OO template - step 3 07<br />
3.4 How to customize the OO template - step 4 07<br />
4. Installation<br />
4.1 Step 1 – Download 08<br />
4.2 Step 2 – Unzip! 08<br />
4.3 Step 3 – Switch to Administration 08<br />
4.4 Step 4 – Switch to Module Loader 08<br />
4.5 Step 5 – Module Loader 08<br />
4.6 Step 6 – Install from local file 09<br />
4.7 Step 7 – Browsing the files 09<br />
4.8 Step 8 – Uploading 09<br />
4.9 Step 9 – Module Loader 09<br />
4.10 Step 10 – Installation 09<br />
4.11 Step 11 – Switching back to Module Loader 09<br />
4.19 Step 12 – Check installed Modules 10<br />
4.20 Step 13 – Administration 10<br />
4.21 Step 14 – Switch to repair <strong>module</strong> 10<br />
4.22 Step 15 – Repair Module 10<br />
4.23 Step 16 – Installation complete 10<br />
5. Deinstallation<br />
5.1 Step 1 – Switching to Administration 11<br />
5.2 Step 2 – Switching to Module Loader 11<br />
5.3 Step 3 – Module Loader 11<br />
5.4 Step 4 – Uninstallation 11<br />
5.5 Step 5 – Switch to Module Loader 11<br />
5.6 Step 6 – Complete 11<br />
6. Legal<br />
6.1 Contact 12<br />
6.2 License 12<br />
<strong>erp</strong> EXPENSE <strong>module</strong> _manual<br />
2
<strong>erp</strong> EXPENSE <strong>module</strong><br />
1. Introduction<br />
Welcome to the manual of <strong>erp</strong> EX-<br />
PENSE <strong>module</strong> , Version 1.0. <strong>erp</strong><br />
EXPENSE <strong>module</strong> is an addon <strong>module</strong><br />
for Sugar Suite Open Source, the<br />
well-known Open Source Customer<br />
Relationship Management Software,<br />
developed by serie a GmbH software<br />
and consulting.<br />
The <strong>module</strong> is fully integrated into<br />
Sugar Suite and uses all common<br />
features like search function, studio,<br />
export / import and teams. With the<br />
aid of studio, you are able to completely<br />
redesign the interface without<br />
programming, and adapt master data<br />
to your requirements. <strong>erp</strong> EXPENSE<br />
<strong>module</strong> enables comprehensive customization<br />
of virtually every detail.<br />
Whether you have licensed the<br />
software or are starting a demo, this<br />
manual will help you to get the most<br />
out of our <strong>expense</strong> tracking software.<br />
1.1 serie a GmbH – Software<br />
and Consulting<br />
Founded in 1998, serie a GmbH is at<br />
the forefront of Open Source software<br />
and internet technologies, providing<br />
products and services like consulting,<br />
software engineering and system<br />
management. By working for years<br />
with affiliated groups and upper sized<br />
businesses, serie a listened to the<br />
wants, needs, and complaints of business<br />
people who hoped to develop or<br />
improve their businesses. Through<br />
that feedback and expert knowledge,<br />
serie a designed individual solutions<br />
and products that helped companies<br />
in many ways.<br />
1.2 What will be covered in this<br />
manual<br />
This manual is intended for the end<br />
user and admin of the Inventory<br />
Module, and covers the installation<br />
guide and manual. If information on<br />
the installation of the application is<br />
required, please read the installationguide<br />
at 4.0. If information on the<br />
handling of the application is required,<br />
please read the manual at 2.0.<br />
If you have any questions which are<br />
not covered in this manual please<br />
visit the forums at www.sugarforge.<br />
org/forum/group_id=333<br />
1.3 What is <strong>erp</strong> EXPENSE<br />
<strong>module</strong><br />
<strong>erp</strong> EXPENSE <strong>module</strong> is a comprehensive<br />
and affordable <strong>expense</strong><br />
tracking software for managing and<br />
tracking employee <strong>expense</strong>s within<br />
Sugar Suite. The solution gives you<br />
an easy way to gather and organize<br />
information about all <strong>expense</strong>s: travel<br />
<strong>expense</strong>s, accommodation <strong>expense</strong>s,<br />
meal <strong>expense</strong>s, entertainment <strong>expense</strong>s<br />
and will help you organize,<br />
track and report your <strong>expense</strong>s. <strong>erp</strong><br />
EXPENSE <strong>module</strong> is easy to use<br />
and very intuitive. For example, the<br />
destination field: The field features a<br />
autocomplete function and selects all<br />
entries from the database to generate<br />
a selecable repertory of destinations.<br />
<strong>erp</strong> EXPENSE <strong>module</strong> consists of<br />
two areas: Expense master data and<br />
receipts. The unlimited amount of receipts<br />
are summated in the detailview<br />
and listview.<br />
Expense reports will be exported to<br />
.pdf or .odt, the native Open Office dataformat.<br />
You can customize the look<br />
and feel of the <strong>expense</strong> report without<br />
programming within your Open Office<br />
template in an easy wysiwyg way. If<br />
you like to export via PDF and want to<br />
customize your report, have a look at<br />
FPDF (http://www.fpdf.org/).<br />
<strong>erp</strong> EXPENSE <strong>module</strong> is multilingual<br />
(english and german) and<br />
ready for international deployment.<br />
The currency is directly linked to the<br />
sugar user account.<br />
<strong>erp</strong> EXPENSE <strong>module</strong> _manual<br />
3
<strong>erp</strong> EXPENSE <strong>module</strong><br />
2. EXPENSES DATAFIeLDs<br />
With <strong>erp</strong> EXPENSES <strong>module</strong> you<br />
are able to register <strong>expense</strong>s into<br />
sugarcrm.<br />
The <strong>module</strong> has ready-made master<br />
data, but is changeable (the set and<br />
layout) within the studio.<br />
Receipts are dedicated and totalized<br />
within <strong>expense</strong>s. You can view the<br />
sum up at the bottom of the <strong>expense</strong><br />
and in the listview.<br />
2.1 Master Data<br />
> No (auto)<br />
> AIM (input)<br />
> Serial-No. (input)<br />
> Amount (automatically<br />
calculated)<br />
> Country (pull down)<br />
> Destination (AJAX autocomplete)<br />
> Date from (input)<br />
> Date to (input)<br />
> Time from (input)<br />
> Time to (input)<br />
> Description (text area)<br />
> Assigned to (select)<br />
2.3 List view<br />
The list view is costumizable<br />
via the studio. Try the advanced<br />
search or the saved search &<br />
layout.<br />
The destination field has got some<br />
extrapower with our AJAX autocomplete<br />
function. The function checks all<br />
your destination entries and provides<br />
usefull choices.<br />
2.2 Receipts<br />
> No (input)<br />
> Description (input)<br />
> Category (input)<br />
> Amount (input)<br />
<strong>erp</strong> EXPENSE <strong>module</strong> _manual<br />
4
<strong>erp</strong> EXPENSE <strong>module</strong><br />
2.3.1 Mass Update<br />
Mass Updates are a nice way of updating<br />
many records at once. Just check<br />
the checkbox of the data and choose a<br />
Mass Update field below the list.<br />
2.6 Expense detail view<br />
You will get to the detail view after you have clicked on a record in the list view.<br />
The detail view will show all fields of the record.<br />
You can do Mass Updates on:<br />
> Assigned to<br />
> Date to<br />
> Date from<br />
> Team<br />
> Country<br />
2.3.2 Export<br />
Export selected records, the current<br />
page or the entire list to csv comma<br />
delimited files.<br />
2.4 Duplicate <strong>expense</strong><br />
2.7 Create <strong>expense</strong><br />
You´ll see the “duplicate“ button at<br />
the top of the components form. Use<br />
it and you´ll get a duplicate of the<br />
component.<br />
2.5 Delete <strong>expense</strong><br />
Select “Create Expense“ and you will see the create <strong>expense</strong> screen.<br />
You will see the “delete“ button at the<br />
top of the components form. When<br />
using “delete“, you will be asked if you<br />
are sure of deleting this record. Now<br />
you have two choices: “Yes“ is going to<br />
delete the record. “No“ will cancel the<br />
process, and brings you back to the<br />
list view.<br />
Complete the form and save. Now you´ll have a new <strong>expense</strong>. You can see the<br />
<strong>expense</strong> in the list view.<br />
<strong>erp</strong> EXPENSE <strong>module</strong> _manual<br />
5
<strong>erp</strong> EXPENSE <strong>module</strong><br />
2.8 Import <strong>expense</strong>s<br />
changed. You have to have these fields<br />
serie a digitale medien und systeme GmbH Angebot | 05.03.07<br />
in your data file.<br />
serie This feature a digitale is intended medien for und automated systeme GmbH file processing. You will have the possibility<br />
Import of importing components<br />
an external datafile (made in excel etc.) to the <strong>module</strong>. Use 2.8.5 Please Note<br />
Angebot | 05.03.07<br />
3.8<br />
Salesforce files, comma delimited files or tab delimited files to import your data<br />
You<br />
into<br />
will<br />
sugar<br />
have<br />
suite.<br />
various choices of importing data to the inventory <strong>module</strong>. Use Salesforce You won´t files, comma<br />
3.8 be able to import exported<br />
delimited Import files components<br />
or tab delimited files to import your data into sugar suite.<br />
ERP INVENTORY MODULE data files.<br />
You will have various choices of importing data to the inventory <strong>module</strong>. Use Salesforce<br />
2.8.1 Step Please files, import comma files from other ERP<br />
3.8.1 delimited Step files 0 or tab delimited files to import your data into sugar suite.<br />
INVENTORY MODULE installations via<br />
You will find the link on the leftside of the screen.<br />
You will find the link on the leftside of the screen.<br />
database (phpmyadmin etc.)<br />
3.8.1 Step 0<br />
You will find the link on the leftside of the screen.<br />
2.8.2 Step 1<br />
3.8.2 Step 1<br />
Choose the data source.<br />
3.8.2 Step 1<br />
Choose the data source<br />
3.8.3 Step 2<br />
Upload 2.8.3 Step the data. 2<br />
3.8.3 Step 2<br />
Upload the data.<br />
Browse<br />
serie a digitale medien und systeme GmbH Angebot | 05.03.07<br />
2.8.4 Step 3<br />
3.8.4 Step 3<br />
Map the fields of your data file to the fields of the <strong>module</strong>. As you know, you can<br />
Map the fields of your data file to the fields of the <strong>module</strong>. As you know, you can change the fields of the<br />
change inventory the <strong>module</strong> fields in the of the admin inventory / studio. <strong>module</strong> in the admin / studio.<br />
Important: The The fields fields „Name“ “Aim“, and “Assigned „Category“ cannot to“, „Date be changed. from“ and You have „Date to to“ have cannot this fields be in you data<br />
file.<br />
<strong>erp</strong> EXPENSE <strong>module</strong> _manual<br />
Hermes Logistik GmbH & Co. KG Inventory Components | Seite 10<br />
6<br />
Hermes Logistik GmbH & Co. KG Inventory Components | Seite 10
<strong>erp</strong> EXPENSE <strong>module</strong><br />
3. TEmplatES<br />
One of the finest things about <strong>erp</strong><br />
EXPENSE <strong>module</strong> is the varity of<br />
choices to export the <strong>expense</strong> report.<br />
People who don´t have programming<br />
skills can use a Open Office template<br />
and change the <strong>expense</strong> template in a<br />
wysiwyg way. Just upload the template<br />
to the documents <strong>module</strong>, fill out<br />
the form in the <strong>expense</strong> <strong>module</strong>, press<br />
„odt. export“ and you are ready to go.<br />
There is also a pdf export. If you have<br />
experience in php just look at<br />
http://fpdf.org and checkout the possibilities<br />
of complelty redesigning the<br />
template. It is really easy to change<br />
text and logo inside the template. Just<br />
look into the ExportPDF.php and change<br />
what has to be changed.<br />
3.1 How to customize the OO template - step 1<br />
Open the Open Office file: <strong>expense</strong>s_template.odt. in Open Office<br />
3.2 How to customize the OO template - step 2<br />
You are now able to completly redesign the template. You just have to keep<br />
fields with the predefined fieldnames because here, <strong>erp</strong> EXPENSE <strong>module</strong><br />
fills in the data. Please refer to the Open Office manual to get a grip on designing<br />
.odt files.<br />
3.3 How to customize the OO template - step 3<br />
Save the file under the name: <strong>expense</strong>_template.odt. The filename has to stay,<br />
because the <strong>module</strong> identifies this name within the document <strong>module</strong><br />
3.4 How to customize the OO template - step 4<br />
After uploading the file to Sugar CRMs Documents <strong>module</strong>, go back to your<br />
<strong>expense</strong>s. You will now see a new button with the name „.odt export“. Press the<br />
button and get your <strong>expense</strong>s report.<br />
<strong>erp</strong> EXPENSE <strong>module</strong> _manual<br />
7
<strong>erp</strong> EXPENSE <strong>module</strong><br />
4. Installation<br />
This section is intended for the system<br />
administrator or installer of<br />
the application. Please check the sugar<br />
suite administration guide to get<br />
info on upgrading and rebuilding data<br />
for previous versions of the <strong>module</strong>.<br />
<strong>erp</strong> EXPENSE <strong>module</strong> v1.0 can be<br />
easily installed in a minute and should<br />
be loaded through SugarCRM‘s Module<br />
Loader. The <strong>module</strong> was developed<br />
with SugarCRM 4.5.1 but should<br />
install on any 4.5.1* installation.<br />
> Install from Sugar Exchange<br />
Load the package direct, within<br />
SugarCRM, inside the <strong>module</strong><br />
loader. If you do so jump to 4.9<br />
on this document and install container.zip<br />
first!<br />
> Install from local File<br />
Load the package from you local<br />
harddrive. If this is your choice, start<br />
the Installationmanual at 4.1<br />
4.1 Step 1- Download<br />
Download <strong>erp</strong> EXPENSE <strong>module</strong> .<br />
4.2 Step 2 - Unzip!<br />
serie a digitale medien und systeme GmbH Angebot | 19.03.07<br />
serie a digitale medien und systeme GmbH Angebot | 19.03.07<br />
4.3 Step 3 – Switch to Administration<br />
2.0.3 Step 3 – Switch to Administration<br />
2.0.3 Push Step the 3 Admin – Switch button to Administration to open the administration.<br />
Push the admin button to open the administration (bitte ADMIN einkreisen)<br />
Push the admin button to open the administration (bitte ADMIN einkreisen)<br />
4.4 Step 4 – Switch to Module Loader<br />
2.0.4 Step 4 – Switch to Module Loader<br />
2.0.4 Step 4 – Switch to Module Loader<br />
Click on Module Loader.<br />
Click on Module Loader. (bitte Module Loader einkreisen)<br />
Click on Module Loader. (bitte Module Loader einkreisen)<br />
4.5 Step 5 – Module Loader<br />
serie a digitale medien und systeme GmbH Angebot | 19.03.07<br />
2.0.5 The system Step 5 – displays Module Loader the <strong>module</strong> loader with all installed <strong>module</strong>s and all “available-but-not-installed“<br />
<strong>module</strong>s. Click the “Install from local file“<br />
The system displays the <strong>module</strong>loader with all installed <strong>module</strong>s and all „available-but-not-installed“ <strong>module</strong>s<br />
flag.<br />
Click the „Install from Local File“ flag.<br />
The Package contains <strong>expense</strong>s.zip,<br />
licences.txt and <strong>expense</strong>s_template.<br />
odt.<br />
<strong>erp</strong> EXPENSE <strong>module</strong> _manual<br />
Hermes Logistik GmbH & Co. KG Installation | Seite 7<br />
Hermes Logistik GmbH & Co. KG Installation | Seite 7<br />
8
4.6 Step 6 – Install from local file<br />
2.0.6 Step 6 – Install from local file<br />
<strong>erp</strong> EXPENSE <strong>module</strong><br />
serie a digitale medien und systeme GmbH<br />
4.10 Step 10 - Installation<br />
2.0.10 Step 10 - Installation<br />
serie a digitale medien und systeme GmbH<br />
Browse<br />
serie a digitale medien und systeme GmbH Angebot | 19.03.07<br />
2.0.10 Step 10 - Installation<br />
2.0.7 Step 7 – Browsing the files<br />
Click „Commit“ to install the <strong>module</strong>. Click Click “Commit“ „Cancel“ to to install cancel the the <strong>module</strong>.<br />
Click “Cancel“ to cancel the<br />
installation.<br />
Click the “Browse“ button..<br />
...and select the file: container.zip. Container.zip is located within the ERP_INVENTORY_MODULE_V1.0.zip<br />
2.0.11 Step 11 – Switching back installation. to Module Loader<br />
you opened at step 1.<br />
4.7 Step 7 – Browsing the files<br />
Click „Commit“ to install 4.11 the Step <strong>module</strong>. 11 – Click Switching „Cancel“ to cancel the<br />
...and select the file: <strong>expense</strong>.zip. Expense.zip is located within the<br />
back to Module Loader<br />
2.0.8 <strong>erp</strong> EXPENSE Step 8 - Uploading<br />
<strong>module</strong> _V1.0.zip you opened at step 1. 2.0.11 Step 11 – Switching back to Module Loader<br />
Click the „Browse“ button.. (bitte Durchsuchen in „Browse“ ändern)<br />
4.8 Step 8 - Uploading<br />
The Log displays the installtion log. Push the „Back to Module Loader“ button to<br />
loader<br />
2.0.12 Step 12 – Check installed Modules<br />
Upload the file.<br />
4.9 Step 9 – Module Loader<br />
Browse<br />
The Log displays the The installtion Log displays log. Push the installtion the „Back to Module Lo<br />
loader<br />
log. Push the “Back to Module<br />
Loader“ button to get back to the<br />
2.0.12 Step 12 – Check <strong>module</strong> installed loader. Modules<br />
Sugar Hermes Suites Logistik <strong>module</strong> GmbH & Co. panel KG displays all uploaded <strong>module</strong>s. Push the Install<br />
Installation | Seite 8<br />
Button of the <strong>module</strong> to start the installation<br />
Now you´ll see the installed container <strong>module</strong> in the installed <strong>module</strong>s panel. Th<br />
Upload the file. (Bitte Durchsuchen in Browse Ändern) running yet. You have to install the inventory.zip now! Click the „Install from loca<br />
installation.<br />
2.0.9 Step 9 – Module Loader<br />
2.0.13 Step 13 – Install from local file<br />
Now you´ll see the installed container <strong>module</strong> in the installed mo<br />
running yet. You have to install the inventory.zip now! Click the „In<br />
installation.<br />
2.0.13 Step 13 – Install from local file<br />
Click „Browse“.. (bitte Durchsuchen in „Browse“ ändern)<br />
Hermes Logistik GmbH & Co. KG<br />
<strong>erp</strong> EXPENSE <strong>module</strong> _manual<br />
Click „Browse“.. (bitte Durchsuchen in „Browse“ ändern) 9<br />
Sugar Suites <strong>module</strong> panel displays all uploaded <strong>module</strong>s. Push the Hermes Install Logistik Button GmbH to & start Co. KGthe installation
2.0.11 Step 11 – Switching back to Module Loader<br />
ep 19 – Check installed Modules<br />
<strong>erp</strong> inventory <strong>module</strong><br />
The Log displays the installtion log. Push the „Back to Module Loader“ button to get back to the <strong>module</strong><br />
loader<br />
4.12 Step 12 – Check installed Modules<br />
2.0.12 Step 12 – Check installed Modules<br />
4.16 Step 16 - Installation complete<br />
Once this process is done, the <strong>module</strong><br />
is ready to go.<br />
Now you´ll see the installed container <strong>module</strong> in the installed <strong>module</strong>s panel.<br />
The <strong>module</strong> is not up and running yet. Please rebuild audit, repair relationsships<br />
displays the<br />
and<br />
installed<br />
upgrade<br />
container<br />
files with<br />
and<br />
the<br />
inventory<br />
repair <strong>module</strong>.<br />
<strong>module</strong> within the installed panel. The <strong>module</strong>s<br />
t up and running. Please rebuild audit, repair relationsships and upgrade files with the repair<br />
Now you´ll see the installed container <strong>module</strong> in the installed <strong>module</strong>s panel. The <strong>module</strong> is not up and<br />
running yet. You have to install the inventory.zip now! Click the „Install from local file“ flag and switch back to<br />
4.13 Step 13 – Administration<br />
installation.<br />
ep 20 – Administration<br />
2.0.13 Step 13 – Install from local file<br />
serie a digitale medien und und systeme GmbH Angebot Angebot | | 19.03.07 19.03.07<br />
n push Once the admin again push button the to Admin open the button administration to open the administration.<br />
2.0.21 Step 21 21 – Switch to to repair <strong>module</strong><br />
4.14 Step 14 – Switch to repair <strong>module</strong><br />
Click „Browse“.. (bitte Durchsuchen in „Browse“ ändern)<br />
Hermes Logistik GmbH & Co. KG Installation | Seite 10<br />
stik GmbH & Co. KG Installation | Seite 12<br />
Switch to to repaircenter with with clicking on on „Repair“<br />
2.0.22 4.15 Step 1522 22 - - - Repair Module<br />
Please upgrade studio, rebuild extensions, rebuild audit, repair database (execute<br />
sql), rebuild rebuild audit. relationships Click the rebuild and (pro audit only) link. upgrade teams.<br />
Please the link.<br />
2.0.23 Step 23 23 – Rebuild Audit<br />
ERP INVENTORY MODULE I manual 10
<strong>erp</strong> EXPENSE <strong>module</strong><br />
ale medien und systeme GmbH Angebot | 19.03.07<br />
llation<br />
5. Deinstallation<br />
– Switching to Administration<br />
serie a digitale medien und systeme GmbH Angebot | 19.03.07<br />
2.1 Deinstallation<br />
in button to open the administration<br />
serie a digitale medien und systeme GmbH<br />
5.1 Step 1 – Switching to Administration<br />
5.5 Step 5 – Switch to Module<br />
– Switching<br />
2.1.1 Step<br />
to<br />
1<br />
Module<br />
– Switching<br />
Loader<br />
to Administration<br />
Loader<br />
Now you´ll see the installed container <strong>module</strong> in the installed <strong>module</strong>s panel.<br />
Push the admin Admin button to open the administration.<br />
2.1.2 5.2 Step Step 2 2 – – Switching to to Module Loader<br />
Once uninstallation is complete, push Once the „Back uninstallation to Module is complete, Loader“ Button push for swit<br />
loader.<br />
the “Back to Module Loader“ Button<br />
for switching back to <strong>module</strong> loader.<br />
5.6 Step 5 – Deinstallation<br />
complete<br />
le Loader<br />
Module Loader<br />
Deinstallation is now completed. You<br />
can delete the <strong>module</strong> now.<br />
Click on Module Loader.<br />
Click on Module Loader<br />
2.1.3 5.3 Step Step 3 3 Module Module Loader Loader<br />
2.1.6 Step 6 Module Loader<br />
The System displays the installed <strong>module</strong>s within the <strong>module</strong> loader. Push the<br />
isplays the installed moduls within the <strong>module</strong> loader. Push the button called „uninstall“ to<br />
button called “Uninstall“ to initialise the process. In contrast to the installation<br />
rocess. In contrast to the installation process, the order of the uninstallation process does not<br />
process, the order of the uninstallation process does not matter.<br />
Uninstallation 5.4 Step 4 Uninstallation<br />
mit“ link to uninstall or cancel the uninstallation with the „cancel“ button<br />
The Click System the “Commit“ displays link the to installed uninstall moduls or cancel within the the uninstallation <strong>module</strong> loader. with Push the the button called „uninstall“ to<br />
initialise “Cancel“ the button process. In contrast to the installation process, the order of the uninstallation process does not<br />
matter.<br />
2.1.4 Step 4 Uninstallation<br />
Click the „Commit“ link to uninstall or cancel the uninstallation with the „cancel“ button<br />
<strong>erp</strong> EXPENSE <strong>module</strong> _manual<br />
Switch to Module Loader<br />
11
<strong>erp</strong> EXPENSE <strong>module</strong><br />
6. Legal<br />
6.1 Contact<br />
Please visit http://www.sugarforge.<br />
org/projects/<strong>erp</strong> or contact us at:<br />
info@seria-a.de<br />
http://www.serie-a.de is the company<br />
home page of the serie a GmbH.<br />
6.2 License<br />
Please read the LICENSE.txt or<br />
LICENSE.xhtml in the sources or<br />
check about info in the Extension.<br />
If you need a different license, please<br />
contact us at: meijerink@serie-a.de.<br />
You can contact the main developer<br />
and owner of the extension at<br />
meijerink@serie-a.de<br />
serie a<br />
software and consulting<br />
Founded in 1998, serie a GmbH is at the forefront of Open Source software<br />
and internet technologies, providing products and services like consulting,<br />
software engineering and system management. By working for years<br />
with affiliated groups and upper sized businesses, serie a listened to the<br />
wants, needs, and complaints of business people who hoped to develop or<br />
improve their businesses. Through that feedback and expert knowledge,<br />
serie a designed individual solutions and products that helped companies<br />
in many ways.<br />
You can contact the main developer and owner of the extension at<br />
meijerink@serie-a.de.<br />
12