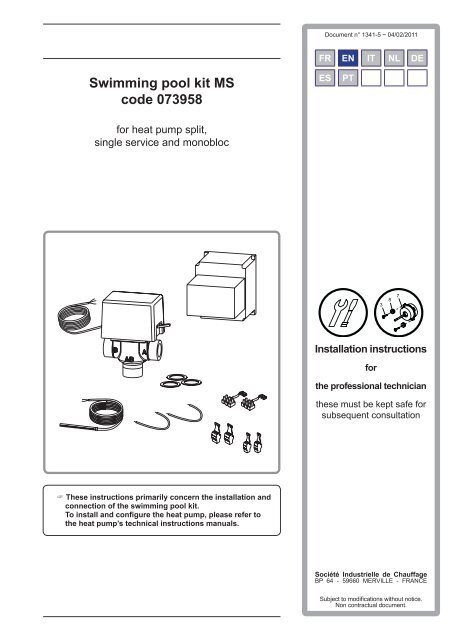
Swimming pool kit MS code 073958 - Atlantic-comfort.com
Swimming pool kit MS code 073958 - Atlantic-comfort.com
Swimming pool kit MS code 073958 - Atlantic-comfort.com

You also want an ePaper? Increase the reach of your titles
YUMPU automatically turns print PDFs into web optimized ePapers that Google loves.
Document n° 1341-5 ~ 04/02/2011<br />
FR EN IT NL DE<br />
<strong>Swimming</strong> <strong>pool</strong> <strong>kit</strong> <strong>MS</strong><br />
<strong>code</strong> <strong>073958</strong><br />
ES<br />
PT<br />
for heat pump split,<br />
single service and monobloc<br />
3<br />
8<br />
7<br />
Installation instructions<br />
for<br />
the professional technician<br />
these must be kept safe for<br />
subsequent consultation<br />
" " These instructions primarily concern the installation and<br />
connection of the swimming <strong>pool</strong> <strong>kit</strong>.<br />
To install and configure the heat pump, please refer to<br />
the heat pump’s technical instructions manuals.<br />
Société Industrielle de Chauffage<br />
BP 64 - 59660 MERVILLE - FRANCE<br />
Subject to modifications without notice.<br />
Non contractual document.
<strong>Swimming</strong> <strong>pool</strong> <strong>kit</strong><br />
Contents<br />
Description of the unit . . . . . . . . . . . . . . . . . . . . . . . . . . . . . . . . . . . . . . . . . . . . 3<br />
Package. . . . . . . . . . . . . . . . . . . . . . . . . . . . . . . . . . . . . . . . . . . . . . . . . . . . . . . . . . . . . . . . . . . . . . . . . . . . . . . . . . . 3<br />
Scope of application . . . . . . . . . . . . . . . . . . . . . . . . . . . . . . . . . . . . . . . . . . . . . . . . . . . . . . . . . . . . . . . . . . . . . . . . . 3<br />
Specifications . . . . . . . . . . . . . . . . . . . . . . . . . . . . . . . . . . . . . . . . . . . . . . . . . . . . . . . . . . . . . . . . . . . . . . . . . . . . . . 3<br />
Operating principle . . . . . . . . . . . . . . . . . . . . . . . . . . . . . . . . . . . . . . . . . . . . . . . . . . . . . . . . . . . . . . . . . . . . . . . . . . 3<br />
Installation instructions . . . . . . . . . . . . . . . . . . . . . . . . . . . . . . . . . . . . . . . . . . . 4<br />
Fitting the regulator . . . . . . . . . . . . . . . . . . . . . . . . . . . . . . . . . . . . . . . . . . . . . . . . . . . . . . . . . . . . . . . . . . . . . . . . . . 4<br />
Hydraulic connections . . . . . . . . . . . . . . . . . . . . . . . . . . . . . . . . . . . . . . . . . . . . . . . . . . . . . . . . . . . . . . . . . . . . . . . . 5<br />
Distribution valve . . . . . . . . . . . . . . . . . . . . . . . . . . . . . . . . . . . . . . . . . . . . . . . . . . . . . . . . . . . . . . . . . . . . . . . 5<br />
<strong>Swimming</strong> <strong>pool</strong> return sensor . . . . . . . . . . . . . . . . . . . . . . . . . . . . . . . . . . . . . . . . . . . . . . . . . . . . . . . . . . . . . . . . . . 5<br />
Electrical connections . . . . . . . . . . . . . . . . . . . . . . . . . . . . . . . . . . . . . . . . . . . . . . . . . . . . . . . . . . . . . . . . . . . . . . . . 6<br />
If 1 heating circuit . . . . . . . . . . . . . . . . . . . . . . . . . . . . . . . . . . . . . . . . . . . . . . . . . . . . . . . . . . . . . . . . . . . . . . 6<br />
In the case of 2 heating circuits (With 2 nd circuit <strong>kit</strong>) . . . . . . . . . . . . . . . . . . . . . . . . . . . . . . . . . . . . . . . . . . . . . . . . . 7<br />
Parametering . . . . . . . . . . . . . . . . . . . . . . . . . . . . . . . . . . . . . . . . . . . . . . . . . . . . . . . . . . . . . . . . . . . . . . . . . . . . . . . 7<br />
Pre-utilization check . . . . . . . . . . . . . . . . . . . . . . . . . . . . . . . . . . . . . . . . . . . . . . . . . . . . . . . . . . . . . . . . . . . . . . . . . 7<br />
Spare parts . . . . . . . . . . . . . . . . . . . . . . . . . . . . . . . . . . . . . . . . . . . . . . . . . . . . . . 8<br />
- 2 -<br />
Installation instructions "1341 - EN"
<strong>Swimming</strong> <strong>pool</strong> <strong>kit</strong><br />
1 Description of the unit<br />
1.1 Package<br />
1 package : <strong>Swimming</strong> <strong>pool</strong> <strong>kit</strong>.<br />
On receipt, before you fit anything, it is essential that<br />
you check the elements received and search for any<br />
damage caused during transport.<br />
1.2 Scope of application<br />
The control of swimming <strong>pool</strong> heating requires the<br />
installation of the swimming <strong>pool</strong> <strong>kit</strong> and the swimming<br />
<strong>pool</strong> exchanger.<br />
This <strong>kit</strong> is only <strong>com</strong>patible with a heat pump fitted<br />
with a regulator version 1.2 (or higher). The software<br />
version can be seen on line 6220 (level : Engineer ;<br />
menu : Configuration)<br />
In the case of a lower version, the regulator must be<br />
changed.<br />
1.3 Specifications<br />
1.4 Operating principle<br />
The “ON/OFF” button on the swimming <strong>pool</strong>’s<br />
exchanger enables the user to heat the <strong>pool</strong> with the<br />
heat pump or not.<br />
In the "On" position : The heat pump heats the swimming<br />
<strong>pool</strong>. The filtration circulation pump is operating.<br />
In the "Off" position : The heat pump does not heat<br />
the swimming <strong>pool</strong>. The filtration circulation pump is<br />
operating.<br />
Remark : If the filtration circulation pump is stopped, the<br />
heat pump is not authorised to heat the swimming <strong>pool</strong>.<br />
The heat pump must fulfil the heating requirements in<br />
the follow order of precedence :<br />
--The production of domestic hot water (DHW).<br />
--Heating the swimming <strong>pool</strong>.<br />
--Heating the house.<br />
Power absorbed<br />
Supply voltage<br />
Flow/return diameter (male)<br />
5 W<br />
230V - 50Hz<br />
26x34 mm<br />
Installation instructions "1341 - EN" - 3 -
<strong>Swimming</strong> <strong>pool</strong> <strong>kit</strong><br />
2 Installation instructions<br />
2.1 Fitting the regulator<br />
Fastening the regulator in the swimming <strong>pool</strong><br />
exchanger’s electric box.<br />
figure 1 - Regulator fastening<br />
- 4 -<br />
Installation instructions "1341 - EN"
<strong>Swimming</strong> <strong>pool</strong> <strong>kit</strong><br />
2.2 Hydraulic connections<br />
The connection must <strong>com</strong>ply with good trade practice<br />
according to local building regulations.<br />
The appliance must be connected to the installation<br />
with union connectors and shut-off valves to facilitate<br />
its removal.<br />
2.2.1 Distribution valve<br />
Carefully <strong>com</strong>ply with the direction for fitting the<br />
distribution valve.<br />
--Channel AB : Inlet from the heat pump.<br />
--Channel A : Flow to the swimming <strong>pool</strong>.<br />
--Channel B : Outlet to the heating circuit (or to the DHW<br />
distribution valve).<br />
""<br />
Do not position the servomotor under the valve.<br />
yes yes yes no<br />
figure 2 - Positioning of the distribution valve<br />
2.3 <strong>Swimming</strong> <strong>pool</strong> return sensor<br />
Place the sensor in the housing for the return sensor<br />
from the swimming <strong>pool</strong> exchanger. Please refer to the<br />
instructions supplied with the swimming <strong>pool</strong> exchanger <strong>kit</strong>.<br />
Config. 5<br />
Config. 7<br />
AB<br />
A<br />
B<br />
Distribution valve<br />
(Boiler connection)<br />
Config. 1<br />
Config. 2<br />
M<br />
Ch<br />
AB<br />
B<br />
A<br />
M<br />
<strong>Swimming</strong> <strong>pool</strong> <strong>kit</strong><br />
Distribution<br />
valve<br />
(<strong>Swimming</strong> <strong>pool</strong>)<br />
AB<br />
A<br />
B<br />
Distribution<br />
valve<br />
(DHW)<br />
M<br />
Config. 2<br />
Config. 4<br />
Config. 7<br />
Config. 8<br />
Config. 3<br />
Config. 4<br />
Config. 6<br />
Config. 8<br />
Heating<br />
circulation pump<br />
Direct heating<br />
circulation pump<br />
(CC2)<br />
<strong>Swimming</strong> <strong>pool</strong><br />
exchanger<br />
<strong>Swimming</strong><br />
<strong>pool</strong><br />
return<br />
sensor<br />
Filtration<br />
circulation pump<br />
<strong>Swimming</strong> <strong>pool</strong><br />
Heating<br />
circuit<br />
Config. 1<br />
Config. 3<br />
Config. 5<br />
Config. 6<br />
figure 3 - Installation of the swimming <strong>pool</strong> <strong>kit</strong> in the heating system<br />
Configuration<br />
Upstream<br />
<strong>Swimming</strong><br />
<strong>pool</strong> <strong>kit</strong><br />
Downstream<br />
Config. 1<br />
1 heating circuit.<br />
Heating circulation pump<br />
Heating circuit<br />
Config. 2<br />
1 heating circuit and DHW tank.<br />
Heating circulation pump<br />
DHW Distribution<br />
valve<br />
Config. 3<br />
2 heating circuits.<br />
Direct heating circulation pump<br />
(without mixing valve)<br />
Heating circuit<br />
Config. 4<br />
2 heating circuits and DHW tank.<br />
Config. 5<br />
Boiler connection and 1 heating circuit.<br />
Direct heating circulation pump<br />
(without mixing valve)<br />
Distribution valve<br />
(Boiler connection)<br />
Distribution<br />
valve<br />
(<strong>Swimming</strong><br />
<strong>pool</strong>)<br />
DHW Distribution<br />
valve<br />
Heating circuit<br />
Config. 6<br />
Boiler connection and 2 heating circuits.<br />
Direct heating circulation pump<br />
(without mixing valve)<br />
Heating circuit<br />
Config. 7<br />
Boiler connection, 1 heating circuit and DHW tank.<br />
Distribution valve<br />
(Boiler connection)<br />
DHW Distribution<br />
valve<br />
Config. 8<br />
Boiler connection, 2 heating circuits and DHW tank.<br />
Direct heating circulation pump<br />
(without mixing valve)<br />
DHW Distribution<br />
valve<br />
Installation instructions "1341 - EN" - 5 -
<strong>Swimming</strong> <strong>pool</strong> <strong>kit</strong><br />
2.4 Electrical connections<br />
Ensure that the general electrical power supply has<br />
been cut off before starting any repair work.<br />
The electrical installation must be conducted in<br />
accordance with the prevailing regulations.<br />
The electrical connections must only be made when all<br />
the other fitting operations have been <strong>com</strong>pleted (fixing,<br />
assembly, etc.).<br />
""<br />
Do not place the sensor lines and the sector<br />
supply lines in parallel in order to avoid<br />
interferences due to voltage points in the sector<br />
supply.<br />
Make the following connections :<br />
• 1 - Connect the supply from the AVS regulator to the<br />
hydraulic unit or electric panel.<br />
Use a 3-contact connector.<br />
• 2 - Connect the distribution valve to connector QX23.<br />
Use a 3-contact connector.<br />
• 3 - Connect the swimming <strong>pool</strong> return sensor to<br />
terminals M and BX21.<br />
Use a 2-contact connector.<br />
Distribution<br />
valve<br />
2<br />
QX23<br />
BN<br />
GNYE<br />
BU<br />
M<br />
N<br />
S T N L<br />
QX23 N QX22 N QX21 N L<br />
Electric<br />
L N panel<br />
or<br />
4 6 8<br />
Hydraulic<br />
unit<br />
terminals<br />
N<br />
1<br />
Regulator AVS<br />
of the swimming <strong>pool</strong> <strong>kit</strong><br />
L<br />
2.4.1 If 1 heating circuit (see figure 4)<br />
• 4 - Connect the Start/Stop contact to H2 and M on<br />
the regulator swimming <strong>pool</strong> AVS Kit.<br />
Use a 2-contact connector. Use both cables.<br />
Interconnection between<br />
RVS hydraulic unit<br />
and AVS swimming <strong>pool</strong> <strong>kit</strong><br />
• 5 - Use the pre-cabled bundles :<br />
--On X50 for the regulator AVS (<strong>Swimming</strong> <strong>pool</strong> <strong>kit</strong>) ;<br />
--On X50 for the regulator RVS (Hydraulic unit).<br />
• 6 - Connect the two pre-cabled bundles to a standard<br />
telephone 3 x 0.5mm² shielded cable.<br />
AVS regulator BUS address<br />
• 7 - <strong>Swimming</strong> <strong>pool</strong> <strong>kit</strong> regulator (AVS) : Position the<br />
jumpers on the address .<br />
4<br />
1 2 3 4 5 6<br />
"Start/Stop"<br />
switch<br />
M H2 M BX22 M BX21 1<br />
1 2<br />
ON<br />
1 2<br />
n n n<br />
X50 2<br />
X30<br />
1 2<br />
M H2 M BX21 X50<br />
3<br />
T°<br />
WH<br />
BN<br />
GN<br />
<strong>Swimming</strong> <strong>pool</strong><br />
return sensor<br />
5<br />
6<br />
WH<br />
BN<br />
GN<br />
ON<br />
WH<br />
BN<br />
GN<br />
1 2<br />
adress <br />
Interconnection<br />
RVS/AVS<br />
5<br />
7<br />
Regulator RVS<br />
of the heat pump<br />
(hydraulic unit)<br />
X50<br />
Colour <strong>code</strong><br />
BN Brown<br />
BU Blue<br />
GN Green<br />
GNYE Green / yellow<br />
WH White<br />
figure 4 - Electrical connections (1 heating circuit)<br />
- 6 -<br />
Installation instructions "1341 - EN"
<strong>Swimming</strong> <strong>pool</strong> <strong>kit</strong><br />
2.4.2 In the case of 2 heating circuits (With 2 nd circuit <strong>kit</strong>)<br />
(see figure 5)<br />
• 4 - Connect the Start/Stop contact to H2 and M on<br />
the regulator 2 nd circuit AVS Kit.<br />
Use a 2-contact connector and a shielded cable<br />
2 x 0,5mm², telephone cable type.<br />
Interconnection between AVS (2 nd circuit <strong>kit</strong>) and AVS<br />
(<strong>Swimming</strong> <strong>pool</strong> <strong>kit</strong>)<br />
The swimming <strong>pool</strong> <strong>kit</strong> is connected to the regulator<br />
from the 2 nd circuit <strong>kit</strong>.<br />
• 5 - Use the pre-cabled bundles :<br />
--On X50 for the regulator AVS (<strong>Swimming</strong> <strong>pool</strong> <strong>kit</strong>) ;<br />
--On X30 (or X50) for the regulator AVS (2 nd circuit <strong>kit</strong>).<br />
• 6 - Connect the two pre-cabled bundles to a standard<br />
telephone 3 x 0.5mm² shielded cable.<br />
The regulator for the 2 nd circuit <strong>kit</strong> is connected to the<br />
hydraulic unit’s regulator (Please refer to the instructions<br />
supplied with the 2 nd circuit <strong>kit</strong>).<br />
AVS regulator BUS address<br />
• 7 - <strong>Swimming</strong> <strong>pool</strong> <strong>kit</strong> regulator (AVS) : Position the<br />
jumpers on the address .<br />
• 8 - 2 nd circuit <strong>kit</strong> regulator (AVS) : Position the jumpers<br />
on the address .<br />
2.5 Parametering<br />
Switch on the swimming <strong>pool</strong> function :<br />
Set the parameter 6046 to "<strong>Swimming</strong> <strong>pool</strong> release"<br />
(Menu : Installation configuration).<br />
List of the swimming <strong>pool</strong>’s function lines<br />
Line Function<br />
Setting<br />
or<br />
setting range<br />
2030<br />
Frost protection plant<br />
(appears only when the line 6046 = Off<br />
"<strong>Swimming</strong> <strong>pool</strong> release")<br />
2056<br />
Setpoint source heating<br />
(<strong>Swimming</strong> <strong>pool</strong> temperature setpoint)<br />
8...35 °C<br />
6046 Function input H2<br />
16: <strong>Swimming</strong><br />
<strong>pool</strong> release<br />
6047 Contact type H2<br />
Normallyopened<br />
contact<br />
(NO)<br />
6048<br />
Value of the H2 contact function<br />
(minimum heat pump flow instruction<br />
in swimming <strong>pool</strong> mode)<br />
45 °C<br />
2.6 Pre-utilization check<br />
For checks and <strong>com</strong>missioning,<br />
--Please refer to the manual provided with the heat<br />
pump.<br />
--Please refer to the instructions supplied with the 2 nd<br />
circuit <strong>kit</strong>.<br />
Remark : In manual position (troubleshooting), the valve<br />
is in the intermediate position serving channels A and B<br />
at the same time.<br />
1 2 3 4 5 6<br />
"Start/Stop"<br />
switch<br />
8<br />
Regulator AVS<br />
of the 2 nd circuit <strong>kit</strong><br />
ON<br />
1 2<br />
adress <br />
M H2 M BX22 M BX21 1<br />
Distribution<br />
valve<br />
1 2<br />
ON<br />
1 2<br />
BN<br />
GNYE<br />
BU<br />
S T N L<br />
QX23 N QX22 N QX21 N L<br />
M H2 M BX22 M BX21 1<br />
1 2<br />
ON<br />
n n n<br />
X50 2<br />
X30<br />
1 2<br />
M BX21 X50<br />
n n n<br />
X50 2<br />
X30<br />
1 2<br />
H2<br />
X30 ou X50<br />
QX23<br />
M<br />
2<br />
T°<br />
M<br />
N<br />
WH<br />
BN<br />
GN<br />
figure 5 - Electrical connections (2 heating circuits)<br />
1 2<br />
<strong>Swimming</strong> <strong>pool</strong><br />
return sensor<br />
Electric<br />
L N panel<br />
4 6 8 or<br />
Hydraulic<br />
unit<br />
terminals<br />
Regulator AVS<br />
of the swimming <strong>pool</strong> <strong>kit</strong><br />
4<br />
3<br />
5<br />
N<br />
6<br />
1<br />
L<br />
WH<br />
BN<br />
GN<br />
WH<br />
BN<br />
GN<br />
Colour <strong>code</strong><br />
BN<br />
BU<br />
GN<br />
GNYE<br />
WH<br />
adress <br />
ON<br />
1 2<br />
Interconnection<br />
AVS/AVS<br />
5<br />
7<br />
Brown<br />
Blue<br />
Green<br />
Green / yellow<br />
White<br />
Installation instructions "1341 - EN" - 7 -
3 Spare parts<br />
When ordering spare parts, specify the appliance type and<br />
serial number, the name of the part and the part number.<br />
Qty =Total quantity on the appliance.<br />
Nr. Code Designation . . . . . . . . . . . . . . . . . . . . . Type. Qty<br />
1 102161 Regulator . . . . . . . . . . . . . . . . . . . . . . . . . . . . . . .01<br />
2 110819 Connector . . . . . . . . . . . . . . . . . . . . . . . . . . . . . .01<br />
3 110835 Connector . . . . . . . . . . . . . . . . . . . . . . . . . . . . . .02<br />
4 110838 Connector . . . . . . . . . . . . . . . . . . . . . . . . . . . . . .01<br />
5 110839 Pre-cabled bundles . . . . . . . . . . . . . . . . . . . . . . .02<br />
6 142735 Seal . . . . . . . . . . . . . . . . . . . . . . . . . . . .26x34 . .03<br />
7 188244 Distribution valve . . . . . . . . . . . . . . . . . . .MUT . .01<br />
8 198748 Sensor . . . . . . . . . . . . . . . . . . . . .QAZ 36.522 . .01<br />
7<br />
1<br />
6<br />
6<br />
5<br />
5<br />
8 2 4 3<br />
3<br />
figure 6 - Spare parts (<strong>Swimming</strong> <strong>pool</strong> <strong>kit</strong>)<br />
Complies with :<br />
- low voltage directive 73/23/CEE, under standard EN60335-1,<br />
- electromagnetic <strong>com</strong>patibility Diretive 89/336/CEE.<br />
This appliance is marked with this symbol. This means that electrical and electronic products shall not be mixed with general household waste.<br />
European Community countries(*), Norway, Iceland and Liechtenstein should have a dedicated collection system for these products.<br />
Do not try to dismantle the system yourself as this could have harmful effects on your health and on the environment.<br />
The dismantling and treatment of refrigerant, oil and other parts must be done by a qualified installer in accordance with relevant local and national regulations.<br />
This appliance must be treated at a specialized treatment facility for re-use, recycling and other forms of recovery and shall not be disposed of in the municipal<br />
waste stream.<br />
Please contact the installer or local authority for more information.<br />
* subject to the national law of each member state<br />
Date of installation :<br />
Contact of your heating technician or your after-sales service.<br />
Société Industrielle de Chauffage<br />
SATC - BP 64 - 59660 MERVILLE - FRANCE<br />
RC Dunkerque - Siren 440 555 886<br />
Subject to modifications without notice. Non contractual document.