KP22 ì¸ë„ќ지.indd - LG Electronics
KP22 ì¸ë„ќ지.indd - LG Electronics
KP22 ì¸ë„ќ지.indd - LG Electronics

You also want an ePaper? Increase the reach of your titles
YUMPU automatically turns print PDFs into web optimized ePapers that Google loves.
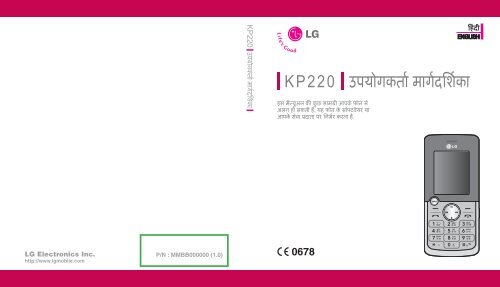
<strong>KP22</strong>0 उपयोगकता मागदिशका<br />
K P 2 2 0<br />
इस मैयुअल क कु छ सामी आपके फ़ोन स<br />
अलग हो सकती है, यह फ़ोन के सॉटवेयर या<br />
आपके सवा दाता पर िनभर करता है.<br />
हंदी<br />
ENGLISH<br />
उपयोगकता मागदिशका<br />
<strong>LG</strong> <strong>Electronics</strong> Inc.<br />
http://www.lgmobile.com<br />
P/N : MMBB000000 (1.0)<br />
0678
Bluetooth QDID B013652
हंदी<br />
<strong>KP22</strong>0<br />
उपयोगकता मागदिशका<br />
इस मैयुअल क कु छ सामी आपके फ़ोन स<br />
अलग हो सकती है, यह फ़ोन के सॉटवेयर या<br />
आपके सवा दाता पर िनभर करता है.
वषय सू ची<br />
वषय सू ची<br />
सामाय जानकारी 4<br />
बैटरी देखभाल 4<br />
पहु ँच कोस 4<br />
देखभाल और रख-रखाव 5<br />
महवपण सु रा जानकारी 6<br />
आपातकालीन कॉस 9<br />
आपका फ़ोन 10<br />
टडबाय मोड 12<br />
ारंिभक जानकारी 13<br />
िसम काड और बैटरी थापत करना 13<br />
बैटरी चाज करना 13<br />
फ़ोन बं द और चाल करना 14<br />
कॉल फ़ं शस 15<br />
आने वाली कॉल का उर देना या उस<br />
िनरत करना 15<br />
कॉल तीा 15<br />
कॉल वकप के िलए युियाँ 16<br />
इनपुट वधी 17<br />
फ़ं शस क सू ची 19<br />
ाउज़र 21<br />
वैप 21<br />
डेटा खाता 24<br />
कॉल इितहास 25<br />
सभी कॉल 25<br />
छू टी कॉस 25<br />
डायल क गई कॉल 25<br />
ा कॉस 26<br />
कॉल लॉग हटाएँ 26<br />
कॉल समय 26<br />
कॉल लागत 26<br />
पाय सं देश गणक 27<br />
GPRS गणक 27<br />
उपकरण 28<br />
कैलडर 28<br />
टू डू 28<br />
अलाम 29<br />
वव घड़ी 29<br />
कैयलटर 30<br />
इकाई परवतक 30<br />
मु ा परवतक 30<br />
वाय 30<br />
STK 31<br />
2
मटीमीडया 32<br />
खे ल और अनयोग 32<br />
कैमरा 34<br />
छव यअर 35<br />
वीिडयो रकॉडर 36<br />
वीडयो लयर 38<br />
सं गीत लयर 38<br />
वाइस रकॉडर 40<br />
मेलोडी कं पोज़र 41<br />
FM रेडयो 42<br />
FM रकॉड शेयल कर 43<br />
सं देश सवा 44<br />
पाय सं देश (SMS) 44<br />
मटीमीडया सं देश (MMS) 47<br />
चैट 52<br />
वॉइस मेल सवर 53<br />
सारण सं देश 54<br />
मेरा सामान 55<br />
ोफ़ाइल 56<br />
ोफ़ाइल सय करने के िलए 56<br />
ोफ़ाइल सं पादत करने के िलए 57<br />
सं पक 58<br />
खोज 58<br />
नया सं पक 58<br />
कॉलर समू ह 59<br />
पीड डायल 60<br />
अितर नबर 60<br />
कॉपी 60<br />
हटाएँ 60<br />
मू व 60<br />
सटं स 61<br />
सटं स 62<br />
समय व दनांक 62<br />
डले 62<br />
फ़ोन 63<br />
कॉल 64<br />
लटू थ 66<br />
नेटवक 70<br />
सु रा 71<br />
फैटरी सटं स पुनथापत कर 72<br />
समया िनवारण 73<br />
आपातकालीन कॉस 76<br />
सहायक उपकरण 77<br />
तकनीक डेटा 78<br />
वषय सू ची<br />
3
सामाय जानकारी<br />
सामाय जानकारी<br />
बैटरी देखभाल<br />
आपका फ़ोन एक रचाज क जा सकने<br />
वाली बैटरी स चलता है.<br />
► बैटरी को सैकड़ बार चाज और<br />
डचाज कया जा सकता है फर<br />
भी अतत: यह ख़म हो जाएगी. जब<br />
ऑपरेटं ग समय (टॉक-टाइम और<br />
टडबाय टाइम) प प स सामाय<br />
स बहुत कम है, तब आपको एक नई<br />
बैटरी खरीदनी चाहए.<br />
► उपयोग म न आने पर चाजर को लग<br />
स िनकाल द, और बैटरी को एक साह<br />
स अिधक तक चाजर स कनेट न<br />
रख, यक अिधक चाज करने स<br />
इसका जीवनकाल कम हो सकता है.<br />
► अिधक चाज करने स इसका<br />
जीवनकाल कम हो सकता है, और<br />
उपयोग म न आने पर, पण प स<br />
चाज बैटरी अपने आप डचाज हो<br />
सकती है.<br />
► तापमान क अिधकता स आपक बैटरी<br />
क चाज करने क मता भावत हो<br />
सकती है.<br />
► कभी भी कसी ितत चाजर या<br />
बैटरी का उपयोग न कर.<br />
► बैटरी का उपयोग इसके िनद उेय<br />
के िलए ही कर.<br />
► अिधक तापमान स आपक बैटरी क<br />
चाजग मता भावत होगी.<br />
► बैटरी को गम या ठं डे थान पर न<br />
छोड़, जैस गमी या सदी के समय म<br />
कार म.<br />
► बैटरी को शॉट-सकट न कर. टिमनस<br />
के शॉट-सकट होने स बैटरी या कनेट<br />
कया गया ऑबजे ट ितत हो<br />
सकता है.<br />
► बैटरय को थानीय िनयम के<br />
अनसार न कर. हमेशा रीसायकल<br />
कर. बैटरय को आग म न न कर.<br />
सहायक उपकरण क देखभाल<br />
आपका फ़ोन एक ईयर फ़ोन और <strong>LG</strong><br />
टडड 18-पन चाजर के साथ पैक कया<br />
गया है<br />
► के वल फ़ोन के िनमाता ारा वीकृ त<br />
सहायक उपकरण और चाजग<br />
डवाइसस का ही योग कजये,<br />
अयथा आपके वाय और सं पि<br />
को नकसान का ख़तरा हो सकता है.<br />
► इयरफ़ोन और हेडफ़ोन स अयिधक<br />
विन के दबाव स वण सं बं धी<br />
नकसान हो सकता है.<br />
4
पहु ँच कोस<br />
PIN कोड<br />
PIN (पसनल आइडटफ़के शन नबर)<br />
कोड आपके िसम काड को अनािधकृ त<br />
उपयोग स बचाता है. सामायत: आपक<br />
िसम के साथ PIN कोड आता है.<br />
नोट<br />
► आप अपने सवा दाता स पासवड ा<br />
कर सकत ह.<br />
► यद आप लगातार तीन बार गलत PIN<br />
कोड दज करत ह, तो आपको PUK कोड<br />
दज करना पड़ सकता है.<br />
गए PIN2 कोड को बदलने के िलए PUK<br />
कोड क आवयकता होती है.<br />
नोट<br />
► आपको अपने सवा दाता स पासवड ा<br />
करना होगा.<br />
► यद आप लगातार तीन बार गलत PIN2<br />
कोड दज करत ह, तो आपको PUK2<br />
कोड दज करना होगा.<br />
► यद आप लगातार दस बार गलत PUK<br />
कोड दज करत ह, तो SIM काड का<br />
उपयोग नहीं कया जा सके गा. नए काड<br />
के िलए अपने सवा दाता स सं पक कर.<br />
सामाय जानकारी<br />
PIN2 कोड<br />
SIM काड के साथ PIN2 कोड आ सकता<br />
है. कु छ फ़ं शन, जैस टैरफ़ सट कर के<br />
िलए PIN2 समथन क आवयकता है.<br />
नोट<br />
आपको अपने सवा दाता स पासवड ा<br />
करना होगा.<br />
PUK<br />
लॉक कए गए PIN कोड को बदलने के<br />
िलए PUK (पसनल अनलॉकं ग क)<br />
कोड क आवयकता होती है. लॉक कए<br />
फ़ोन कोड<br />
फ़ोन कोड, फ़ोन को अनिधकृ त उपयोग<br />
स बचाता है. जब आप फ़ोन खरीदत ह,<br />
तब यह चाल नहीं होता है. आप फ़ोन कोड<br />
(0000) को कसी भी चार स आठ अक के<br />
यिगत कोड म बदल सकत ह.<br />
देखभाल और रख-रखाव<br />
अपने मोबाइल फ़ोन का उपयोग करने स<br />
पहल यह जानकारी पढ़. आपका मोबाइल<br />
फ़ोन एक उच परकृ त इलॉिनक<br />
डवाइस है. अपना फ़ोन, बैटरी, चाजर या<br />
अय सहायक सामी का उपयोग करत<br />
समय, कृ पया पहल इस पढ़.<br />
5
सामाय जानकारी<br />
सामाय जानकारी<br />
6<br />
उपाद देखभाल<br />
► अपने मोबाइल फ़ोन और इसके सभी<br />
भाग को छोटे बच क पहु ँच स<br />
दर रख.<br />
► अपने मोबाइल फ़ोन को सू खा रख.<br />
► अपने मोबाइल फ़ोन को अयिधक<br />
गम या ठं डे तापमान म रखने स बच.<br />
► अपने मोबाइल फ़ोन को जलती<br />
िसगरेट, आग क लपट या कसी<br />
गरम ोत के पास रखने स बच.<br />
► इस डसअसबल करने का यास न<br />
कर. ऐसा कये जाने पर डवाइस<br />
ितत हो सकती है.<br />
► इस न िगराएँ , इस पर चोट न कर<br />
या न हलाएँ . असावधानी स उपयोग<br />
करने पर आतरक सकट बोस टू ट<br />
सकत ह.<br />
► अपने मोबाइल फ़ोन पर रंग न लगाएँ ,<br />
यक रंग स ईयरफ़ोन, माइोफ़ोन<br />
या कसी चल भाग म बाधा आ<br />
सकती है और सामाय उपयोग बं द<br />
हो सकता है.<br />
► अपने मोबाइल फ़ोन का सु रत<br />
उपयोग कर, इस साफ और धू ल मु <br />
थान पर रख<br />
► एं टीना के ितत होने पर फ़ोन<br />
का उपयोग न कर. यद ितत<br />
एं टीना वचा के सं पक म आता है, तो<br />
हो सकता है वचा कु छ झलस जाए.<br />
ितत एं टीना को बदलने के िलए<br />
कृ पया <strong>LG</strong> के कसी अिधकृ त सवा<br />
के स सपक कर.<br />
► फ़ोन के चाल होने पर अनावयक प<br />
स एं टीना पश न कर. एं टीना स सं पक<br />
होने पर कॉल गुणवा भावत होती<br />
है और हो सकता है इसस फ़ोन को<br />
आवयक पावर तर स अिधक पर<br />
चलाना पड़े और टॉक और टडबाय<br />
टाइम कम हो सकता है.<br />
► फ़ोन को वैस ही पकड़, जैस अय<br />
टेलीफ़ोन को बात करत समय पकड़त<br />
ह. सीधे माइोफ़ोन स बात करत<br />
समय, एं टीना को ऊपर क ओर एव<br />
कं धे स ऊपर रख. यद एं टीना ऊँ चा/<br />
नीचा हो सकता है, तो कॉल के दौरान<br />
इस ऊँ चा रखना चाहए.<br />
महवपण सु रा जानकारी<br />
रेडयो वसी मता<br />
आपका मोबाइल फ़ोन एक रेडयो<br />
ांसिमटर और रसीवर है. जब फ़ोन चाल<br />
होता है, तब यह रेडयो वसी (RF)<br />
मता ा और ांसिमट करता है. आपके<br />
पास मोबाइल फ़ोन का जो कार है, उसके<br />
आधार पर, यह विभन वसी ेणय
पर काय करता है और सामायत: उपयोग<br />
क जाने वाली मॉयलशन तकनीक पर<br />
काय करता है. जब आप अपने फ़ोन का<br />
उपयोग करत ह, तब आपक कॉल का<br />
बं धन करने वाली णाली उस पावर<br />
तर को िनयं त करती है, जस तर पर<br />
आपका फ़ोन ांसिमट करता है.<br />
विश अवशोषण दर (SAR)<br />
जानकारी.<br />
आपके फ़ोन को रेडयो तरंग के<br />
एसपोज़र के िलए लागू सु रा<br />
आवयकताओ के अनपालन के िलए<br />
बनाया गया है. यह आवयकता वैािनक<br />
अययन के साविधक और गहन<br />
मू यांकन ारा वैािनक सं गठन पर<br />
आधारत है. इन दशािनदश म आयु<br />
और वाय पर यान दए बना सभी<br />
यिय क सु रा सु िनित करने के<br />
िलए बनाई ग सु रा सीमाएँ शािमल ह.<br />
► रेडयो तरंग सं पक दशािनदश विश<br />
अवशोषण दर, या SAR के प म<br />
पहचाने जाने वाली मापन इकाई का<br />
उपयोग करत ह. उपयोग कए गए<br />
सभी वसी बड म इस उचतम<br />
माणत ऊजा तर पर ांसिमट<br />
करने वाल फ़ोन के साथ मानककृ त<br />
पित का उपयोग करके SAR का<br />
परीण कया जाता है.<br />
► वैस तो कई <strong>LG</strong> फ़ोन मॉडल के SAR<br />
तर म िभनता हो सकती है, कं तु<br />
उन सभी को रेडयो तरंग स सं पक के<br />
िलए सं ब दशािनदश को परा करने<br />
के िलए बनाया गया है.<br />
► नॉन-आयोनाइिज़ं ग रेडएशन<br />
ोटेशन (ICNIRP) पर अतराीय<br />
सिमित ारा अनशिसत SAR सीमा,<br />
जो (10) ाम टय स अिधक पर<br />
औसतन 2W/kg है.<br />
► कान पर उपयोग के िलए Sporton<br />
ारा जाँचा गया इस मॉडल फ़ोन का<br />
उचतम SAR मान 0.913 W/kg<br />
(10g) है और शरीर के सपक मे<br />
0.793 W/kg (10g) होता है.<br />
इंिटयट ऑफ़ इलकल एं ड<br />
इलॉिनस इंजीिनयस (IEEE) ारा<br />
अनशिसत SAR सीमा, जो एक (1)<br />
ाम टय पर औसतन 1.6 W/का<br />
है, वीकार करने वाल देश/ के<br />
िनवािसय के िलए SAR डेटा जानकारी.<br />
इलॉिनक डवाइस<br />
अिधकतर आधिनक इलॉिनक उपकरण<br />
RF ऊजा स, सु रत होत ह. फर भी, हो<br />
सकता है क कु छ इलॉिनक उपकरण<br />
आपके वायरलस फ़ोन के RF िसगनल के<br />
ित सु रत न ह, अत:<br />
7<br />
सामाय जानकारी
सामाय जानकारी<br />
सामाय जानकारी<br />
► अनमित िलए बना िचकसा<br />
उपकरण के पास अपने मोबाइल<br />
फ़ोन का उपयोग न कर.<br />
पेसमेकर<br />
इलाट कए गए कु छ काडएक<br />
पेसमेकर और िचकसकय प स<br />
इलाट कए गए अय उपकरण क<br />
काय णाली को मोबाइल फ़ोन भावत<br />
कर सकत ह. पेसमेकर म सं भावत<br />
हतप स बचने के िलए, पेसमेकर<br />
िनमाता हड-हेड वायरलस फ़ोन और<br />
पेसमेकर के बीच यनतम 20 समी (6<br />
इंच) क दरी बनाए रखने क अनशसा<br />
करत ह. ये अनशसा वायरलस तकनीक<br />
शोध ारा क गई वतं शोध और उनक<br />
अनशसाओ के अनप ह.<br />
पेसमेकर वाल यि:<br />
► फ़ोन चाल होने पर फ़ोन को अपने<br />
पेसमेकर स हमेशा 20 समी (6 इंच)<br />
दर रख;<br />
► फ़ोन को सीने के पास वाली जे ब म<br />
न रख;<br />
► हतप क सं भावना को कम करने के<br />
िलए पेसमेकर के वपरीत दशा वाल<br />
कान का उपयोग कर.<br />
► यद आपको कसी भी कारण स यह<br />
सं देह हो क हतप हो रहा है, तो<br />
फ़ोन को तुरंत बं द कर द.<br />
वण सु वधाएँ<br />
मोबाइल फ़ोन ारा कु छ वण सु वधाएँ<br />
बािधत हो सकती ह. ऐसी बाधा आने पर,<br />
आप अपने सवा दाता स सलाह ल सकत<br />
ह, या वकप के बारे म चचा के िलए<br />
ाहक सवा लाइन पर कॉल कर सकत ह.<br />
वायुयान<br />
► वमान म वेश स पव अपना मोबाइल<br />
फ़ोन बं द कर.<br />
► वमान म वमानकमी क<br />
अनमित के बना मोबाइल फ़ोन का<br />
योग न कर<br />
सं चार णाली ारा होने वाला हतप<br />
रोकने के िलए, वमान म उड़ान के दौरान<br />
अपने फ़ोन का उपयोग न कर.<br />
8
सं भावत प स वफोट वाल<br />
वातावरण<br />
सं भावत प स वफोट वाल कसी भी<br />
वातावरण म अपना फ़ोन बं द कर द और<br />
सभी सं के त और िनदश का पालन कर.<br />
ऐसा बहुत कम होता है, कं तु आपका फ़ोन<br />
या इसक सहायक सामी स िचगारी<br />
उपन हो सकती है.<br />
ऐस म िचगारी वफोट या आग<br />
का कारण हो सकती है, परणामवप<br />
शारीरक चोट लग सकती या यहाँ तक<br />
क मयु हो सकती है. सं भावत प स<br />
वफोट वाल वातावरण असर प प<br />
स िचहत होत ह, कं तु हमेशा नहीं.<br />
इसम शािमल है धन भराने वाल<br />
, जैस पेोल टेशन, नाव के डेक<br />
क िनचली मजल, धन या रसायन<br />
थानांतरण या सं हण सु वधाएँ , और<br />
ऐस जहाँ हवा म रसायन या कण,<br />
जैस अनाज, धू ल, या धातु चण शािमल<br />
ह; और ऐसा कोई भी जहाँ आपको<br />
सामायत: अपने वाहन का इंजन बं द<br />
रखने क सलाह दी जाती है.<br />
वाहन चालन<br />
जन म आप गाड़ी चलात ह, वहाँ<br />
मोबाइल फ़ोन के उपयोग स सं बं िधत<br />
कानन और िनयम को जाँच ल. यद<br />
आप वाहन चलात समय अपने फ़ोन का<br />
उपयोग करने वाल ह, तो कृ पया:<br />
► वाहन चलाने पर परा यान द<br />
► हस का उपयोग कर. कई देश के<br />
कानन के अनसार वाहन चलात समय<br />
हस होना आवयक है.<br />
► यद वाहन चलात समय आवयक हो,<br />
तो कॉल करने या उसका उर देने स पहल<br />
वाहन को सड़क के कनारे लगाएँ .<br />
RF मता स मोटर वाहन क कु छ<br />
इलॉिनक णािलय, जैस कार<br />
टीरयो, सु रा उपकरण आद को<br />
भावत कर सकत ह, इसके अितर,<br />
कु छ वाहन िनमाता मोबाइन फ़ोन के<br />
उपयोग को तब तक अनमित नहीं देत,<br />
जब तक क उनके वाहन के बाय एं टीना<br />
वाल हस कट स इंटालशन समिथत<br />
न हो. आपका मोबाइल फ़ोन आपके वाहन<br />
क इलॉिनक णाली को भावत नहीं<br />
करेगा, यह सु िनित करने के िलए अपने<br />
वाहन िनमाता के ितिनिध स सं पक कर.<br />
सामाय जानकारी<br />
9
आपका फ़ोन<br />
आपका फ़ोन<br />
िमनी USB<br />
डल<br />
नेवगेशन क<br />
यज़क क<br />
बा सॉट क<br />
वाता क/हाँ क<br />
दा सॉट क<br />
पावर चाल/कॉल समा कर<br />
* क<br />
# क<br />
माइोफ़ोन<br />
ईयरफ़ोन जैक और<br />
िमनी USB<br />
वॉयम क<br />
कैमरा क<br />
10<br />
माइो SD
1. साइड क – वॉयम<br />
कॉल के दौरान, ईयरपीस वॉयम<br />
समायोजत करता है.<br />
2. साइड क – कैमरा Q<br />
DSC मोड म साइड क का उपयोग<br />
छव कैचर करने के िलए कया<br />
जाता है.<br />
3. सॉट क <<br />
LCD क िनचली पं ि म वतमान<br />
फ़ं शन दिशत होत ह. मु य मेन और<br />
फ़ोनबुक का उपयोग तदनसार कर.<br />
4. टॉक/हाँ क S<br />
फ़ोन नबर डायल करके फ़ोन कॉल<br />
करने के िलए या कोई फ़ोन कॉल लने<br />
के िलए.<br />
5. पावर चाल/कॉल समा क<br />
E<br />
• कॉल के दौरान कोई कॉल समाि<br />
के िलए<br />
• या पावर चाल/बं द के उपयोग के<br />
िलए.<br />
6. नेवगेशन क<br />
टडबाय मोड म,इन पर वरत पहु ँच<br />
के िलए<br />
• ऊपर वाली क: सं देश लखन<br />
• बायीं क: ोफाइल<br />
• दायीं क: शॉटकट<br />
• नीच वाली क: सं पक सू ची<br />
7. सं या क<br />
सं या या वण इनपुट करने के िलए<br />
आपका फ़ोन<br />
11
आपका फ़ोन<br />
आपका फ़ोन<br />
टडबाय मोड<br />
मु य डल म, आपको िथित पटी पर<br />
कई िच दखाई दे सकत ह. िच के अथ<br />
नीच बताए गए ह:<br />
आपके वतमान थान पर<br />
सयलर नेटवक क िसगनल<br />
मता.<br />
बैटरी चाज तर.<br />
फोन अवरोिधत<br />
फ़ोन सामाय ोफ़ाइल म है<br />
फ़ोन मीटं ग ोफ़ाइल म है<br />
फ़ोन बाहर ोफ़ाइल म है<br />
फ़ोन कं पन ोफ़ाइल म है<br />
फ़ोन मौन ोफ़ाइल म है<br />
फ़ोन हेडसट ोफ़ाइल म है<br />
अलाम घड़ी चाल है<br />
आप रोिमग म है.<br />
आने वाली कॉल छू टने पर.<br />
एक या अिधक सं देश ा.<br />
आपक सभी कॉल अय नबर पर<br />
अतरत क गई ह.<br />
लटू थ<br />
चैट म 1<br />
चैट म 2<br />
पीकर चाल है<br />
आप इंटरनेट पर ह<br />
12
ारंिभक जानकारी<br />
िसम काड और बैटरी थापत<br />
करना<br />
फ़ोन का उपयोग करने स पहल िसम<br />
काड डालना और बैटरी चाज करना<br />
आवयक है.<br />
► सभी छोटे िसम कास को नहे बच<br />
क पहु ँच स दर रख.<br />
► िसम काड का उपयोग करत समय,<br />
डालत या िनकालत समय सावधान<br />
रह, यक खरच लगने या मु ड़ने स<br />
िसम काड और इसके सं पक आसानी स<br />
ितत हो सकत ह.<br />
► िसम काड थापत करत समय/<br />
िनकालत समय, हमेशा यह सु िनित<br />
कर क फ़ोन बं द है.<br />
1. पीछे का कवर िनकालने के िलए कवर<br />
के ऊपरी हस पर नॉब को दबाएँ (1)<br />
और बैटरी को ऊपर उठाएँ (2).<br />
(1)<br />
2. िसम काड (3) और बैटरी (4) डाल और<br />
खसकाएँ .<br />
(3)<br />
(4)<br />
A<br />
बैटरी चाज करना<br />
अपने फ़ोन का उपयोग करने के पहल,<br />
पहली बार आपको बैटरी परी तरह चाज<br />
करना होगी.<br />
1. ैवल एडाटर क लीड स अपने फ़ोन<br />
के िनचल भाग वाल सॉके ट को कनेट<br />
कर (A).<br />
ारंिभक जानकारी<br />
(2)<br />
A<br />
(A)<br />
2. कसी AC वॉल आउटलट स चाजर<br />
कनेट कर.<br />
13
ारंिभक जानकारी<br />
ारंिभक जानकारी<br />
नोट<br />
► चाजर के कनेट होने पर आप फ़ोन का<br />
उपयोग कर सकत ह.<br />
► बैटरी के कमज़ोर होने पर जब डल<br />
पर “ ” दखाई देता है, तब आपको<br />
एक चतावनी विन सु नाई देगी. बैटरी के<br />
बहुत कमज़ोर होने पर डल पर जब<br />
“ ” दखाई देता है, तब यह अपने आप<br />
बं द हो जाती है.<br />
► यद फ़ोन PIN कोड माँगता है, तो<br />
PIN कोड दज करे, और पु करने के<br />
िलए < बा सॉट क (LSK) दबाएँ .<br />
नोट<br />
जब वायरलस फ़ोन का उपयोग िनषेध हो,<br />
या जब यह बाधा या खतरे का कारण बन<br />
सकता हो, तब फ़ोन चाल न कर.<br />
फ़ोन बं द और चाल करना<br />
► E क दबाकर रख.<br />
नोट<br />
► िसम काड ठक तरह स डाल जाने पर भी,<br />
यद फ़ोन पर “िसम डाल” दखाई देता है,<br />
तो अपने नेटवक ऑपरेटर या सवा दाता<br />
स सं पक कर.<br />
► आप बना िसम काड के भी फ़ोन का<br />
उपयोग कर सकत ह. काय करने<br />
योय फ़ं शन म, फ़ोन कॉल के िलए<br />
डायल करने और फ़ोन कॉल ा करने<br />
को छोड़कर मटीमीडया, ोफ़ाइल,<br />
उपकरण एव समय और दनांक शािमल<br />
हगे.<br />
14
कॉल फ़ं शस<br />
यह आपके फ़ोन पर समिथत कॉिलग<br />
सवा के बारे म जानकारी देता है.<br />
कॉल करना<br />
टडबाय मोड म, कोड सहत नबर<br />
दज कर, S क दबाएँ .<br />
सं पक स कॉल करना<br />
1. टडबाय मोड म, सं पक म जाने के<br />
िलए > दा सॉट क (RSK) दबाएँ ,<br />
वरत खोज स एक नाम चुन और<br />
कॉल करने के िलए S क दबाएँ .<br />
2. आप मेन भी दबा सकत ह और कॉल<br />
करने के िलए सं पक सबमेन म वेश<br />
कर सकत ह.<br />
3. या, आप तज़ी स कॉल करने के िलए<br />
वरत खोज सबमेन म वेश करने के<br />
िलए नेवगेशन क दबा सकत ह.<br />
अतराीय कॉल करना<br />
1. अतराीय कॉल के िलए, अतराीय<br />
उपसग (वण +) हेतु 0 क थोड़ी देर<br />
तक दबाएँ .<br />
2. देश कोड, कोड और फ़ोन नबर<br />
दज कर.<br />
3. कॉल करने के िलए S दबाएँ .<br />
आने वाली का उर देना या उस<br />
िनरत करना<br />
आने वाली कॉल का उर देने के िलए<br />
कॉल का उर देने के िलए S दबाएँ .<br />
आने वाली कॉल िनरत करने के िलए<br />
कॉल िनरत करने के िलए E दबाएँ .<br />
कॉल तीा<br />
एक कॉल चाल होने पर आप कसी दसरी<br />
आने वाली कॉल का उर दे सकत ह.<br />
1. कॉल के दौरान, कॉल होड करने के<br />
िलए, वकप मेन म वेश करने हेतु<br />
< बा सॉट क (LSK) दबाएँ .<br />
कॉस कॉल करना<br />
एक स अिधक कॉल चाल होने पर आप<br />
कॉस कॉल कर सकत ह<br />
1. पहल सहभागी को कॉल कर.<br />
2. नई कॉल करना म बताए अनसार कॉल<br />
के दौरान दसरे सहभागी को कॉल कर.<br />
3. < LSK दबाएँ और कॉस का<br />
चयन कर. इसस कास कॉस म<br />
शािमल होत ह.<br />
कॉल फ़ं शस<br />
15
कॉल फ़ं शस<br />
कॉल फ़ं शस<br />
4. नए सहभािगय को कॉस कॉल स<br />
कनेट रहने क अनमित देने के िलए<br />
चरण 2 और 3 दोहराएँ .<br />
5. वकप दबाएँ और कॉल समा करने<br />
के िलए सभी समा कर का चयन<br />
कर. या E दबाएँ .<br />
6. कसी भी कॉल (सहभागी) को वकप<br />
क दबाकर और एकल समा कर<br />
का चयन करके डकनेट कया जा<br />
सकता है.<br />
कॉल वकप के िलए युियाँ<br />
वकप दबाकर कसी भी एकल कॉलर<br />
पर कॉल कनेट क जा सकती है सय<br />
कॉल के दौरान जब आप वकप दबात<br />
ह, तब आप नीच सू चीब फ़ं शन पाएँ गे:<br />
1. होड: कॉल चाल रखता है<br />
2. समा: कॉल समा करता है.<br />
3. नई कॉल: कसी सय कॉल के<br />
दौरान नई कॉल करता है.<br />
4. सं पक: सं पक मेन के िलए शॉटकट.<br />
5. पाय सं देश: सं देश मेन के िलए<br />
शॉटकट.<br />
6. वॉइस रकॉडर: कसी सय फ़ोन<br />
कॉल के दौरान आपका वातालाप<br />
रकॉड करने के िलए.<br />
7. यट चाल / बं द: वातालाप के दौरान<br />
कॉल यट करने के िलए चाल / बं द<br />
पर सट करता है.<br />
8. DTMF: DTMF (यअल टोन मटी-<br />
वसी) टोन डायिलग िसटम के<br />
िलए चाल/बं द सट करता है.<br />
9. पुना: होड क गई कॉल फर स<br />
कनेट करता है<br />
10. सभी पुना: होड क गई सभी<br />
कॉल फर स कनेट करता है.<br />
11. वैप: होड और सय कॉल के बीच<br />
वच करता है.<br />
12. कॉस: बहु-प वातालाप करता है.<br />
13. थानातरण: कांस कॉल को<br />
थानांतरत करता है.<br />
14. एकल समा: कांस कॉल म स एक<br />
समा कर.<br />
15. सभी समा: बहु-प कॉल समा<br />
कर.<br />
16. हस-/हस-हेड: बहु-प कॉल<br />
के समय हस या हेड म स एक<br />
चुनने के िलए.<br />
17. पिलट: बहु-प कॉल िनरत करने<br />
के िलए.<br />
16
इनपुट वधी<br />
आप पारंपरक पित या पवाभास माट<br />
इनपुट का उपयोग करके पाठ दज कर<br />
सकत ह. आपका फ़ोन अज़ी और हंदी<br />
का समथन करने के िलए बनाया गया है.<br />
इनपुट वधी का चयन करने के<br />
िलए<br />
पाठ दज करत समय, वकप दबाएँ और<br />
इनपुट वधी का चयन कर.<br />
इनपुट वधी बदलने का तज़ तरीका<br />
► इनपुट वधी बदलने के िलए #<br />
दबाएँ<br />
एक पेस देने के िलए<br />
T9Abc म,पेस देने के िलए आप 0<br />
का उपयोग कर सकत ह.<br />
पारंपरक अेज़ी इनपुट<br />
आपका फ़ोन मटी-टेप फ़ं शन उपलध<br />
कराता है. उदाहरण के िलए, B अर<br />
दिशत करने के िलए दो बार 2 क<br />
दबाएँ , और C अर दिशत करने के<br />
िलए तीन बार दबाएँ .<br />
वण तािलका<br />
अेज़ी<br />
िबना िशट वाल<br />
क<br />
वण<br />
1 . , - ! ‘ @ :<br />
# $ / _ 1<br />
िशट वाल वण<br />
. , - ! ‘ @ :<br />
# $ / _ 1<br />
2 a b c 2 A B C 2<br />
3 d e f 3 D E F 3<br />
4 g h i 4 G H I 4<br />
5 j k l 5 J K L 5<br />
6 m n o 6 M N O 6<br />
7 p q r s 7 P Q R S 7<br />
8 t u v 8 T U V 8<br />
9 w x y z 9 W X Y Z 9<br />
0 0 0<br />
इनपुट वधी<br />
17
इनपुट वधी<br />
इनपुट वधी<br />
हंदी<br />
क<br />
1 ँ ं ः ् 1़<br />
वाल वण<br />
2 ा ि ी ु ू ृ अ आ इ ई उ ऊ ऋ 2<br />
3 े ै ॅ ो ौ ॉ ए ऐ ऍ ओ औ ऑ 3<br />
4 क ख ग घ ङ 4 क़ ख़ ग़<br />
5 च छ ज झ ञ 5 ज़<br />
6 ट ठ ड ढ ण 6 ड़ ढ़<br />
7 त थ द ध न 7 ऩ<br />
8 प फ ब भ म 8 फ़<br />
9 य र ल व श ष स ह 9 ळ ऱ ऴ य़<br />
0 0<br />
“T9” स टेट<br />
“T9” क दबाने क येक ृ ं खला के<br />
िलए, सामायत: उपयोग कए गए शद<br />
को पहचानने के िलए एक अतिनहत<br />
शदकोश का उपयोग करता है.<br />
चयिनत इनपुट वधी सू चना पटी म िच<br />
दखाएगी. वकप सू ची म आप अपने<br />
T9 इनपुट वधी को बं द या चाल करना<br />
चुन सकत ह.<br />
T9 Abc<br />
T9 माट Abc (अेज़ी माट<br />
मोड)<br />
T9 abc T9 माट abc<br />
T9 ABC T9 माट ABC<br />
123 सांियक<br />
Abc<br />
abc<br />
ABC<br />
मटीटेप Abc (अेज़ी)<br />
मटीटेप abc<br />
मटीटेप ABC<br />
123 सांियक<br />
T9अइ T9 माट हंदी (हंदी माट मोड)<br />
123 सांियक<br />
अआइ मटीटेप हंदी (हंदी)<br />
123 सांियक<br />
18
फ़ं शस क सू ची<br />
1. ाउज़र<br />
1.1. वैप<br />
1.2. डेटा खाता<br />
2. कॉल इितहास<br />
2.1. सभी कॉस<br />
2.2. छू टी कॉस<br />
2.3. डॉयल क ग<br />
कॉस<br />
2.4. ा कॉस<br />
2.5. कॉल लॉग हटाएँ<br />
2.6. कॉल समय<br />
2.7. कॉल लागत<br />
2.8. पाय सं देश गणक<br />
2.9. GPRS गणक<br />
3. उपकरण<br />
1. कैलडर<br />
2. टू डू<br />
3. अलाम<br />
4. वव घड़ी<br />
5. कैयलटर<br />
6. इकाई परवतक<br />
7. मु ा परवतक<br />
8. वाय<br />
9. STK<br />
4. मटीमीडया<br />
1. खे ल और अनयोग<br />
2. कैमरा<br />
3. छव यअर<br />
4. वीडयो रकॉडर<br />
5. वीडयो लयर<br />
6. सं गीत लयर<br />
7. वॉइस रकॉडर<br />
8. मेलॉडी बनाना<br />
9. FM रेडयो<br />
0. FM रकॉड शेयल<br />
5. सं देश सवा<br />
1. पाय सं देश (SMS)<br />
2. मटीमीडया सं देश<br />
(MMS)<br />
3. चैट<br />
4. वॉइस मेल सवर<br />
5. सं देश सारण<br />
6. मेरा सामान<br />
1. फ़ोन<br />
2. मेमोरी काड (यद<br />
microSD काड<br />
लगाया गया हो)<br />
फ़ं शस क सू ची<br />
19
फ़ं शस क सू ची<br />
फ़ं शस क सू ची<br />
7. ोफ़ाइल<br />
1. सामाय<br />
2. मीटं ग<br />
3. बाहर<br />
4. के वल कं पन<br />
5. हेडसट<br />
6. मौन<br />
7. लटू थ<br />
8. सं पक<br />
1. खोज<br />
2. नया सं पक<br />
3. कॉलर समू ह<br />
4. पीड डायल<br />
5. अितर नबर<br />
6. कॉपी<br />
7. हटाएँ<br />
8. मू व<br />
9. सटं स<br />
9. सटं स<br />
1. समय व दनांक<br />
2. डल<br />
3. फ़ोन<br />
4. कॉल<br />
5. लटू थ<br />
6. नेटवक<br />
7. सु रा<br />
8. फैटरी सटं स<br />
पुनथापत करे<br />
20
ाउज़र [Menu1]<br />
नीच बताई गई सवाएँ सवा दाता ारा<br />
समिथत ह. यद आप इनम स कसी एक<br />
सवा स कनेट नहीं हो सकत, तो आपको<br />
और जानकारी के िलए अपने सवा दाता<br />
स सं पक करना चाहए.<br />
वैप Menu 1.1<br />
आपका फ़ोन वेब ाउज़र का समथन<br />
करता है. आप कई सवाएँ जैस नवीनतम<br />
समाचार, मौसम, खे ल, और अय<br />
जानकारी ा कर सकत ह, साथ ही<br />
ई-मेल और अय इंटरनेट सवाओ का<br />
उपयोग कर सकत ह. ये सवाएँ वैप सवा<br />
दाताओ ारा बनाई और बं िधत क<br />
जाती है.<br />
वैप सवा उनके वैप प पर वायरलस<br />
माकअप लग् वेज (WML) का उपयोग<br />
करता है. आप अपने फ़ोन पर इंटरनेट वेब<br />
पेज नहीं देख सकत ह.<br />
नोट<br />
► वैप सवा सय करने के िलए, आपको<br />
अपने सवा दाता स सं पक करना होगा.<br />
► जब वायरलस फ़ोन का उपयोग िनषेध<br />
हो, या जब यह बाधा या खतरे का कारण<br />
बन सकता हो, तब फ़ोन चाल न कर.<br />
होमपेज (Menu 1.1.1)<br />
टडबाय मोड स ाउज़र पर पहु ँचने के<br />
िलए, वैप सवा पर जाएँ और होमपेज<br />
दबाएँ . कनेट होने पर, होमपेज दिशत<br />
होता है. सामी सवा दाता पर िनभर<br />
करती है.<br />
ाउज़र स बाहर िनकलने के िलए, E<br />
क दबाएँ .<br />
बुकमाक (Menu 1.1.2)<br />
कसी वेबसाइट पर तज़ी स पहु ँचने के<br />
िलए URL पता रत करने हेतु आप इस<br />
मेन का उपयोग कर सकत ह.<br />
आपका फ़ोन आपके वकप के िलए<br />
आपको िनन चयन भी दान करता है:<br />
► जाएँ : इसस आप वेबसाइट को िलक<br />
कर सकत ह<br />
► सं पादन: इसस आप URL पता<br />
सं पादत कर सकत ह<br />
► हटाएँ : इसस आप चयिनत बुकमाक<br />
हटा सकत ह.<br />
► सभी हटाएँ : इसस आप एक ही बार म<br />
सभी बुकमाक हटा सकत है.<br />
► बुकमाक जोड़: इसस आप URL पता<br />
जोड़ सकत ह.<br />
ाउज़र<br />
21
ाउज़र<br />
ाउज़र<br />
नवीनतम प (Menu 1.1.3)<br />
आप उन नवीनतम प को देख सकत<br />
ह जन पर आप जा चुके ह. चयिनत प<br />
कनेट करने के िलए जाएँ दबाएँ .<br />
पता दज कर (Menu 1.1.4)<br />
आप URL पता िलख सकत ह और पता<br />
दज करके परा का चयन कर सकत ह.<br />
जैस ही आप URL दज करत ह, आपका<br />
फ़ोन उसस कनेट हो जाता है. पता दज<br />
कए जाने के बाद, अगली बार कनेट<br />
करने के िलए आप URL का चयन कर<br />
सकत ह और ठक दबा सकत ह.<br />
सवा इनबॉस (Menu 1.1.5)<br />
आपका फ़ोन आपके सवा दाता ारा भेजे<br />
गए सवा सं देश ा करने म सम है.<br />
सवा सं देश हेडलाइन या सामी क सू चना<br />
होत ह, और उनम कसी वैप सवा का पता<br />
हो सकता है. आप अपने सवा दाता स<br />
नवीनतम समाचार या नई वैप सटं ग ा<br />
कर सकत ह.<br />
ा वैप पुश सं देश सवा इनबॉस म<br />
सं हत कया जाएगा. आप पुश सं देश<br />
को वीकार करने या हटाने के िलए<br />
वकप दबा सकत ह.<br />
सटं स (Menu 1.1.6)<br />
GPRS (जनरल पैके ट रेडयो सवस) एक<br />
ऐसी तकनीक है, जसका उपयोग मोबाइल<br />
नेटवक पर डेटा भेजने या ा करने के<br />
िलए कया जाता है. जो अनयोग GPRS<br />
का उपयोग करत ह, वे वैप सवाएँ , MMS<br />
और SMS सं देश सवा एव GPRS डायल-<br />
अप (जैस इंटरनेट और ई-मेल) ह. फ़ोन<br />
चाल करने पर, आप GPRS नेटवक पर<br />
अपने फ़ोन का वत: पं जीकरण सट कर<br />
सकत ह.<br />
वैप सटं ग<br />
► यद सवा दाता ारा सटं ग सट क<br />
गई है, आप तुरंत आरंभ कर सकत ह.<br />
► यद एसस ोफ़ाइल आपके सवा<br />
दाता ारा असाइन क गई ह, तो<br />
कसी ोफ़ाइल का चयन कर और उस<br />
सय कर.<br />
► अयथा, आप मैयुअली सटं ग दज<br />
कर सकत ह. उपयु सटं ग के िलए,<br />
अपने नेटवक ऑपरेटर या सवा दाता<br />
स सं पक कर.<br />
सवा सटं स मैयुअली दज कर<br />
1. वैप मेन म, सटं स म ोफ़ाइल<br />
सं पादत कर चुन, ठक दबाएँ .<br />
22
2. कोई ोफाइल चुन, ठक दबाएँ ,<br />
ोफाइल सपादत कर चुन, सटं ग<br />
आरंभ करने के िलए सं पादन दबाएँ .<br />
आप ोफाइल का नाम बदल सकत ह<br />
और आपको अपनी वैप सवस सटं ग<br />
के होमपेज, डेटा खाता, कनेशन,<br />
उपयोगकता नाम और पासवड म<br />
जानकारी देनी होती है. जानकारी ा<br />
करने के िलए, आपको अपने ऑपरेटर स<br />
सं पक करना होगा.<br />
नोट<br />
अिधकांा मामल म, इंटरनेट का उपयोग<br />
करने के िलए आपको के वल डफ़ॉट<br />
ोफ़ाइल म स कसी एक का उपयोग<br />
करना होगा. येक ऑपरेटर क सटं स<br />
अलग-अलग होती है. सही सटं ग और<br />
सावधानीपवक आगे बढ़ने के िलए कृ पया<br />
अपने ऑपरेटर या सवा दाता क सलाह ल.<br />
गलत सटं ग स कनेशन वफल हो जाएगा.<br />
वैप सटं स सय कर<br />
सभी वैप सटं ग (वैप सटं स फ़ं शन<br />
देख) पण करने के बाद, वैप ोफ़ाइल मोड<br />
म, कृ पया ोफ़ाइल सय कर चुन, तब<br />
ठक दबाएँ .<br />
ाउज़र वकप<br />
आप ाउज़र के िलए समयबा मान<br />
सट कर सकत ह. इसका उेय ाउज़र<br />
को वेबसाइट स कनेट करने स रोकना<br />
है जबक वेबसाइट िनधारत समय म<br />
ितया नहीं दे. साथ ही, ाउज़ करत<br />
समय आप छव बं द या चाल रखना चुन<br />
सकत ह.<br />
सवा सं देश सटं स<br />
आपके सवा दाता ारा भेजा गया सवा<br />
सं देश, सवा इनबॉस म रत कया<br />
जाता है, आप उस ा करना या न करना<br />
चुन सकत ह.<br />
कैश साफ़ कर<br />
आपके ारा उपयोग क गई सभी<br />
जानकारी या दनांक, आपके फ़ोन के<br />
कैश म सं हत क जाती है. कैश दनांक<br />
को के वल अथायी प स सं हत करने<br />
के िलए उपयोग कया जाने वाला फ़ाइल<br />
बफ़र है. इस वकप का चयन करके आप<br />
इितहास साफ़ कर सकत ह.<br />
ाउज़र<br />
23
ाउज़र<br />
ाउज़र<br />
24<br />
कु कज़ साफ़ कर<br />
यद आपका फ़ोन खो जाता है या चोरी<br />
होता है, तो गोपनीयता और सु रा वषय<br />
को यान म रखत हुए, हम आपको<br />
सं वेदनशील जानकारी वाली कु कज़ साफ़<br />
करने क सलाह दगे.<br />
ववसनीय माणप<br />
ाउज़ करत समय और आवयक होने पर<br />
ाउज़र म ववास सू ची जोड़त समय भी,<br />
आपके ववसनीय माणप को इंिगत<br />
करने के िलए इस फ़ं शन का उपयोग<br />
कया जाता है.<br />
डेटा खाता Menu 1.2<br />
इस फ़ोन के िनमाण के समय मु ख<br />
ऑपरेटस पर आधारत डफ़ॉट डेटा खात<br />
दान कए जात ह.<br />
आप GSM या GPRS के ारा वैप का<br />
उपयोग कर सकत ह.<br />
► इस सवा के िलए एनालॉग सं या या<br />
ISDN सं या जानकारी ा करने<br />
हेतु, आपको अपने ऑपरेटर स सं पक<br />
करना होगा.<br />
► इस सवा के िलए GPRS का APN<br />
ा करने हेतु, आपको अपने ऑपरेटर<br />
स सं पक करना होगा.<br />
GSM डेटा (Menu 1.2.1)<br />
डेटा खाता सटं स जैस: खाता नाम,<br />
सं या, उपयोगकता नाम, पासवड, लाइन<br />
कार, गित और DNS म परवतन के<br />
िलए दबाएँ .<br />
GPRS (Menu 1.2.2)<br />
डेटा खाता सटं स जैस: खाता नाम,<br />
APN, उपयोगकता नाम, पासवड और<br />
माणीकरण कार बदलने के िलए दबाएँ .
कॉल इितहास [Menu 2]<br />
आपका फ़ोन छू टी कॉल, ा कॉल और<br />
डायल क गई कॉल व आपक कॉस क<br />
अविध तथा कॉल क लागत स सं बं िधत<br />
जानकारी रत कर सकता है.<br />
नोट<br />
► कॉल सू ची के मेमोरी सीमा स अिधक<br />
होने पर, सबस पुरानी कॉल हटा दी<br />
जाती है.<br />
► छू टी, डायल क गई और ा कॉल हेतु,<br />
वरत समीा के िलए आप बात कर क<br />
S दबा सकत ह. जब आप कसी फ़ोन<br />
नबर का चयन करत ह, तब आपका फ़ोन<br />
उस हटाने, डायल करने, सं पादत करने,<br />
पाय सं देश भेजने या मटीमीडया<br />
सं देश भेजने के कई वकप दान<br />
करता है.<br />
सभी कॉल Menu 2.1<br />
आप अपने फ़ोन पर कु ल 120 वय<br />
के िलए सभी छू टी, डायल क गई और<br />
ा कॉल देख सकत ह. कु ल कॉल सं या<br />
दखाई जाएगी.<br />
छू टी कॉस Menu 2.2<br />
आप अपने फ़ोन पर अितम 40 छू टी कॉल<br />
देख सकत ह.<br />
छू टी कॉल देखने के िलए<br />
► कॉल इितहास मेन म, छू टी कॉस<br />
चुन, रकॉड देखने के िलए ठक दबाएँ .<br />
डायल क गई कॉल Menu 2.3<br />
आप अपने फ़ोन पर अितम 40 जाने<br />
वाली कॉल देख सकत ह.<br />
ा कॉल देखने के िलए<br />
► कॉल इितहास मेन म, डायल क गई<br />
कॉस चुन और रकॉड देखने के िलए<br />
ठक दबाएँ .<br />
आपका फ़ोन आपको वकप के प म<br />
िनन चयन दान करता है:<br />
► हटाएँ : आपको सू ची स नबर िमटाने<br />
क सु वधा देता है.<br />
► रत कर: आपको सं पक म नबर<br />
रत करन क सु वधा देता है.<br />
► डायल: आपको न पर दखाए गए<br />
नबर को कॉल करने क सु वधा देता है.<br />
► सं पादत कर: नबर सं पादत करने क<br />
सु वधा देता है.<br />
► SMS भेज: ीन म दखाए गए<br />
नबर पर पाय सं देश भेजने क<br />
सु वधा देता है.<br />
कॉल इितहास<br />
25
कॉल इितहास<br />
कॉल इितहास<br />
► MMS भेज: ीन म दखाए गए<br />
नबर पर मटीमीडया सं देश भेजने<br />
क सु वधा देता है.<br />
ा कॉस Menu 2.4<br />
आप अपने फ़ोन पर अितम 40 ा कॉल<br />
देख सकत ह.<br />
ा काल देखने के िलए<br />
► कॉल इितहास मेन म, ा कॉस<br />
चुन, रकॉड देखने के िलए ठक<br />
दबाएँ .<br />
कॉल लॉग हटाएँ Menu 2.5<br />
आप अपने फ़ोन स अपने कु छ कॉल<br />
रजटर हटा सकत ह.<br />
► छू टी कॉस/डायल क गई कॉस/ा<br />
कॉस/सभी हटाएँ .<br />
कॉल समय Menu 2.6<br />
आप अपने फ़ोन पर क गई कॉस और<br />
ा कॉस के िलए टाइमर देख सकत ह.<br />
कॉल इितहास मेन म, कॉल समय चुन<br />
और ठक दबाएँ .<br />
आपका फ़ोन आपके वकप के िलए<br />
िनन चयन दान करता है:<br />
► अितम कॉल समय: आपके वातालाप<br />
का अितम कॉल समय सू चीब करता है.<br />
► सभी भेजी गई: आपके ारा क गई<br />
कॉल के कु ल समय का योग करता है.<br />
► कु ल ा: आपके ारा ा क गई<br />
कॉल के कु ल समय का योग करता है.<br />
► सभी समय रीसट कर: समय गणक<br />
को शू य पर सट करता है.<br />
कॉल लागत Menu 2.7<br />
इस फ़ं शन स आप फ़ोन कॉल करत<br />
समय लागत जाँच सकत ह.<br />
आपका फ़ोन आपके वकप के िलए<br />
िनन चयन दान करता है:<br />
► अितम कॉल लागत: आपके ारा क<br />
गई अितम कॉल.<br />
► कु ल लागत: अभी तक आपके ारा क<br />
गई कॉल लागत का योग.<br />
26
► लागत रीसट कर: गणक रीसट करने<br />
के िलए.<br />
► अिधकतम शक: अिधकतम<br />
वीकृ त लागत सट करने के िलए.<br />
► ित इकाई मय: कॉल क इकाई<br />
लागत सट करने के िलए.<br />
पाय सं देश गणक Menu 2.8<br />
इस फ़ं शन स आप सं देश सं या जाँच<br />
सकत ह. यह एक गणक है. गणक पुन:<br />
ारंभ करने के िलए आप रीसट दबा<br />
सकत ह.<br />
► भजा: आपके ारा भेजे गए सं देश<br />
क सं या.<br />
► ा: आपके ारा ा कए गए सं देश<br />
क सं या.<br />
GPRS गणक Menu 2.9<br />
इस फ़ं शन स आप उपयोग कए गए<br />
GPRS पैके ट का डेटा आकार जाँच सकत<br />
ह.<br />
► अितम बार भजा हुआ: आपके ारा<br />
अितम बार भेजे गए सं देश का आकार.<br />
► अितम बार ा हुआ: आपके ारा<br />
अितम बार ा सं देश का आकार.<br />
► सभी भेजे : आपके ारा भेजे गए सं देश<br />
का कु ल आकार.<br />
► सभी ा: आपके ारा ा कए गए<br />
सं देश का कु ल आकार.<br />
► काउं टर रसट: गणक रीसट करने<br />
के िलए.<br />
कॉल इितहास<br />
27
उपकरण [Menu 3]<br />
उपकरण<br />
कैलडर Menu 3.1<br />
इस फ़ं शन स आप कैलडर म रत<br />
कए गए अपने शेयल और काय का ैक<br />
रख सकत ह. आप काय के बारे म याद<br />
दलाने के िलए अलाम का उपयोग भी<br />
कर सकत ह.<br />
कैलडर म पहली बार नोट या रमाइंडर<br />
बनाने के िलए<br />
1. उपकरण मेन म, कैलडर चुन, ठक<br />
दबाएँ<br />
2. कोई ितिथ चुन, वकप दबाएँ , काय<br />
देख चुन और ठक दबाएँ .<br />
3. जोड दबा के काय दज ़कर.<br />
4. बं द या चाल करने के िलए अलाम चुन<br />
और रिगग मोड का चयन कर. पण<br />
दबाएँ , तब काय रत करने के िलए<br />
हाँ व काय रत नहीं करने के िलए<br />
नहीं दबाएँ .<br />
आपका फ़ोन आपके वकप के िलए<br />
िनन चयन दान करता है:<br />
► देख: िनद दन म सं हत कए गए<br />
काय को देखने के िलए.<br />
► जोड़: िनद दन पर नया काय जोड़ने<br />
के िलए.<br />
► काय सं पादत कर: िनद दन म<br />
काय सं पादत करने के िलए.<br />
► काय हटाएँ : िनद काय हटाने के<br />
िलए.<br />
► सभी हटाएँ : सभी काय हटाने के िलए.<br />
► वीकैलडर भेज: पाठ सं देश,<br />
मटीमीडया सं देश, यटू थ स काय<br />
भेजने के िलए या िसफ ़फ़ाइल सहेजने<br />
के िलए.<br />
इिछत दनांक पर जाने के िलए, आप<br />
िनन काय कर सकत ह.<br />
1. उपकरण मेन म, कैलडर चुन और<br />
ठक दबाए<br />
2. वकप दबाएँ , दनांक पर जाएँ का<br />
चयन कर और ठक दबाएँ<br />
3. जस वष, माह और दन पर आप जाना<br />
चाहत ह, वह दज करके ठक दबाएँ .<br />
नोट<br />
पछल और अगल वष पर जाने के िलए<br />
आप सं या 1 और सं या 3 क दबा सकत<br />
ह. पछल और अगल माह पर जाने के<br />
िलए आप सं या 7 और सं या 9 क दबा<br />
सकत ह.<br />
28
टू डू Menu 3.2<br />
इस फ़ं शन स आप कैलडर वकप स<br />
जोड़े गए अपने सभी काय को सू चीब<br />
कर सकत ह. इस सु वधा के तहत आप<br />
वकप स काय को देख सकत ह,<br />
सं पादत कर सकत ह या हटा सकत ह.<br />
पहली बार उपयोग के िलए, आपको<br />
िनन चरण क आवयकता होगी:<br />
1. काय सची म नया काय जोड़ने के िलए<br />
जोड़ दबाएँ .<br />
2. समय, दनांक, नोट दज़ करके अपनी<br />
टू डू सू ची सं पादत कर.<br />
3. आप रमाइंडर के प म अलाम चाल<br />
करना चुन सकत ह और अलाम<br />
शेयल कर सकत ह.<br />
4. अततः अपनी टू डू सू ची दज़ रत<br />
करने के िलए के िलए “हाँ” का चयन<br />
कर. तब आपक टू डू सू ची सब-मेन<br />
म दखाई देगी और आपके कैलडर म<br />
हाइलाइट क जाएगी. आपका फ़ोन वैस<br />
ही वकप दान करता है, जैस ऊपर<br />
कैलडर म बताए गए ह.<br />
अलाम Menu 3.3<br />
इस फ़ं शन स आप िनद समय पर<br />
अलाम बजना सट कर सकत ह. फ़ोन बं द<br />
होने पर भी अलाम घड़ी काय करती है.<br />
1. उपकरण मेन म, अलाम चुन और<br />
ठक दबाएँ .<br />
2. आप अलाम समय के अिधकतम 3<br />
सट इनपुट कर सकत ह और सं पादत<br />
करने के िलए एक समय का चयन कर<br />
सकत ह.<br />
3. आपको hh:mm सट करने के िलए<br />
यमेरक क दबाकर अपना अलाम<br />
सट करने और एएम/पीएम बदलने के<br />
िलए < LSK सट करने क अनमित<br />
दी गई है.<br />
4. अपने रंिगं ग मोड के िलए एक बार/<br />
येक दन/दन चुनकर ठक दबाएँ .<br />
5. आप अपने फ़ोन या मेमोरी काड म<br />
सहेजी गई रंग टोन या MP3 गीत<br />
स ऑडयो वकप को अनकू िलत भी<br />
कर सकत ह. रसीवर एं टेना के प<br />
म लगाए गए हेडसट के साथ ऑडयो<br />
वकप के प म FM रेडयो भी सट<br />
कर सकत ह.<br />
नोट<br />
यद आपका समय फ़ॉमट 12 घं ट के प<br />
म सट कया गया हो, तो ही एएम/पीएम<br />
दखाए जाएँ गे. अिधक जानकारी के िलए,<br />
कृ पया प 48: सटं ग ➞ समय & दनांक<br />
➞ समय फ़ॉमट सट कर को देख.<br />
उपकरण<br />
29
उपकरण<br />
उपकरण<br />
वव घड़ी Menu 3.4<br />
नेवगेटर क बा या दा क का उपयोग<br />
करके आप कोई शहर चुन सकत ह. जब<br />
ॉस कोई िनित शहर इंिगत करता<br />
है, तब यह थानीय दनांक या समय<br />
दखाएगा. साथ ही, आप वदेशी के<br />
िलए डेलाइट सवग टाइम और पछल<br />
मेन म आपके ारा चयिनत गह नगर के<br />
प म सट कर को चाल/बं द करने के िलए<br />
आप वकप दबा सकत ह.<br />
नोट<br />
इस फ़ं शन म आपक सटं ग के अनसार<br />
सटं ग के समय और दनांक सब मेन म गह<br />
नगर भी बदल जाएगा.<br />
कैयलटर Menu 3.5<br />
कैयलटर सामाय कैयलटर काय<br />
जैस जोड़, घटाव, गुणा और भाग करता है.<br />
कैयलटर का उपयोग करने<br />
के िलए<br />
► उपकरण मेन म, कैलडर चुन, ठक<br />
दबाएँ .<br />
आपके वकप के िलए आपका फ़ोन<br />
िनन कं पोज़ मैपं ग दान करता है:<br />
► चौतरफा क ऊपर: + (जोड़)<br />
► चौतरफा क नीच: – (घटाव)<br />
► चौतरफा क बाएँ : x (गुणा)<br />
► चौतरफा दाएँ : ÷ (भाग)<br />
► सांियक # क: . (दशमलव)<br />
► सांियक * क: – (ऋणामक)<br />
► परणाम ा करने के िलए ठक<br />
दबाएँ .<br />
नोट<br />
इस कैयलटर क बुिमता सीिमत है,<br />
खास तौर पर भाग क लबी या म पणा ंक<br />
सं बं धी टयाँ आ सकती ह.<br />
इकाई परवतक Menu 3.6<br />
यह सु वधा भार या लबाई को विभन<br />
इकाइय म परवितत करने म आपक<br />
मदद करती है.<br />
भार परवतक स, आप पाउं ड या आउं स म<br />
दी इकाइय को कलो इकाई म परवितत<br />
कर सकत ह.<br />
30
लबाई परवतक स, आपको िनन वकप<br />
ा हगे:<br />
► कमी इकाइयाँ जो मील इकाइय म<br />
दी ग ह<br />
► मीटर इकाइयाँ जो याड या फीट<br />
इकाइय म दी गई ह<br />
► समी इकाइयाँ जो इंच इकाइय म दी<br />
गई ह.<br />
परवितत करने के िलए माा दज करने<br />
के बाद, परणाम ा करने के िलए<br />
“ठक” दबाएँ .<br />
मु ा परवतक Menu 3.7<br />
यह सु वधा आपके ारा दज क गई मु ा<br />
को िभन दर म परवितत करने म आपक<br />
मदद करती है. मा परवतक म, आपको<br />
विनमय दर डालना होगा और थानीय<br />
मा को वदेशी मा म बदलने के िलए<br />
रािश डालनी होगी.<br />
वाय Menu 3.8<br />
वाय वकप म BMI और मािसक<br />
च, ये दो सु वधाएँ ह.<br />
BMI (बॉडी मास इंडेस)<br />
(Menu 3.8.1)<br />
यह सु वधा आपक ऊँ चाई और भार के<br />
अनसार आपके शरीर म वसा क गणना<br />
करने म मदद करती है.<br />
मान या क गणना करने के िलए,<br />
आपको इसक आवयकता होगी<br />
1. नेवगशन क का उपयोग करके अपने<br />
िलग का चयन कर.<br />
2. सांियक क का उपयोग करके अपनी<br />
ऊँ चाई सटमीटर म और भार कलो म<br />
दज कर और “ठक” दबाएँ .<br />
3. अतत:, आपके BMI अनपात मान<br />
क गणना क जाएगी और परणाम<br />
दिशत होगा.<br />
मािसक च (Menu 3.8.2)<br />
यह सु वधा महला के मािसक च क<br />
गणना करने और िनन जानकारी दान<br />
करने म मदद करती है:<br />
► वतमान दनांक पर गभवती होने क<br />
सं भावना.<br />
► दनांक जनके दौरान गभवती होना<br />
सं भव है और अगली माहवारी क<br />
दनांक.<br />
उपकरण<br />
31
उपकरण<br />
उपकरण<br />
मािसक च जाँचने के िलए, आपको<br />
इसक आवयकता होगी<br />
1. अितम माहवारी क ारंभ दनांक<br />
दज कर<br />
2. मािसक च का औसत समय दज<br />
करके “ठक” क दबाएँ .<br />
3. वतृ त जानकारी ा करने के<br />
िलए, हाइलाइट दनांक म स एक का<br />
चयन कर और गभाधान क सं भावना<br />
दिशत करने के िलए ठक दबाएँ .<br />
नोट<br />
हो सकता है क परणाम आपक शारीरक<br />
िथितय के अनप न हो. यह के वल<br />
सं दभ है!<br />
STK सवा सट करने के िलए<br />
उपकरण मेन म, STK चुन, सवा स<br />
कनेट होने के िलए ठक दबाएँ .<br />
नोट<br />
► उपलधता के िलए, आपको अपने सवा<br />
दाता स सवा के िलए पं जीकरण क<br />
आवयकता होगी.<br />
► इन सवाओ के उपयोग म SMS भेजना<br />
शािमल हो सकता है, जसके िलए<br />
आपको शु क देना पड़ सकता है.<br />
STK Menu 3.9<br />
आपके फ़ोन म उपलध फ़ं शस के<br />
अलावा, आपका सवा दाता िसम काड<br />
ारा अितर अनयोग जैस मौसम या<br />
शेयर बाज़ार स सं बं िधत जानकारी दान<br />
कर सकता है.<br />
32
मटीमीडया [Menu 4]<br />
खे ल और अनयोग Menu 4.1<br />
खे ल (Menu 4.1.1)<br />
<strong>KP22</strong>0 के साथ 2 रचनामक खे ल दए<br />
गए ह.(लट'स हेव ू ट व द बॉबर) जस<br />
खे ल को आप खे लना चाह, उसका चयन<br />
करने के िलए आप नेवगेशन क का<br />
उपयोग कर सकत ह. तब गेम का चयन<br />
करने के िलए ठक दबाएँ . गेम म वेश<br />
करने के बाद, गेम आरंभ करने/ रकं ग<br />
जाँचने/ गेम िनदिशका पढ़ने/ गेम के<br />
कॉपीराइट के बारे म पढ़ने/ मेन वकप<br />
स गेम स बाहर िनकलने के िलए आप<br />
वकप मेन का उपयोग कर सकत ह.<br />
जब आप गेम म वेश करत ह, तब आरंभ<br />
म ही गेम सटं ग भी समायोजत कर<br />
सकत ह.<br />
फ़ोन वाल गेम िनन वकप तुत<br />
करत ह<br />
► खे ल आरंभ: गेम खे लना आरंभ कर<br />
► खे ल मदद: गेम के िलए खे ल<br />
िनयम दखाएँ<br />
► खे ल सटस:<br />
– पभिम सं गीत (BGM)<br />
– विन भाव<br />
– कं पन<br />
अनयोग (Menu 4.1.2)<br />
<strong>KP22</strong>0 जावा अनयोग का समथन<br />
करने के िलए डज़ाइन कया गया है.<br />
दो डफ़ॉट जावा गेम है, एव आप वैप या<br />
थानीय सवाओ स और भी जावा खे ल या<br />
अनयोग डाउनलोड और थापत कर<br />
सकत ह (मेरा सामान मे रत कर).<br />
थम बार उपयोग<br />
<strong>KP22</strong>0 म 2 डफ़ॉट जावा गेम ह.<br />
1. खे ल और अनयोग मेन पर जाएँ और<br />
जावा गेम खे लने के िलए अनयोग का<br />
चयन कर .<br />
2. गेम के नाम का चयन कर और गेम<br />
लॉच करने के िलए वकप दबाएँ ,<br />
सटं ग समायोजत कर या जावा गेम<br />
क जानकारी देख.<br />
उपयोगकता, वैप स भी जावा अनयोग<br />
डाउनलोड कर सकत ह.<br />
1. वैप स जावा अनयोग डाउनलोड करने<br />
के बाद, चलाने के िलए अनयोग का<br />
चयन कर.<br />
2. वैप स डाउनलोड कए गए कसी<br />
एक जावा अनयोग का चयन कर<br />
और लॉच करने के िलए वकप<br />
दबाएँ , अनयोग को अपडेट कर,<br />
सटं ग समायोजत कर, जावा गेम क<br />
जानकारी देख या अनयोग हटाएँ .<br />
मटीमीडया<br />
33
मटीमीडया<br />
मटीमीडया<br />
उपयोगकता मेरा समान फ़ोडर म जावा<br />
गेम या अनयोग रत कर सकता है.<br />
1. जावा अनयोग (.jad और .jar दोन)<br />
फ़ाइल को मेरा सामान पर रत कर.<br />
2. वकप दबाकर ये दो फ़ाइल थापत<br />
कर.<br />
3. थापत करने के बाद, रत कए<br />
गए जावा गेम या अनयोग, खे ल और<br />
अनयोग मेन के तहत दखाए जाएँ गे.<br />
4. कसी एक जावा अनयोग का चयन<br />
कर और लॉच करने के िलए वकप<br />
दबाएँ , सटं ग समायोजत कर,<br />
जानकारी देख या इस हटाएँ .<br />
नोट<br />
सामाय प स अनयोग चलाने और<br />
जावा गेम खे लने के िलए जावा MIDlet<br />
सु इस म .jad और .jar फ़ाइल वप होना<br />
आवयक है.<br />
अनयोग के वकप म यह शािमल है:<br />
1. लॉच कर: आपके ारा चयिनत जावा<br />
गेम या अनयोग को लॉच करने क<br />
सु वधा देता है.<br />
2. सटं ग: जावा अनयोग का उपयोग<br />
करत समय अनमित तर िनधारत<br />
करने क सु वधा देता है. अनमित तर<br />
“वीकृ ित द”, “हमेशा सं के त द”, और<br />
“कभी नहीं” ह.<br />
जावा अनयोग का उपयोग करत<br />
समय चार विभन अनमित<br />
कॉफगर क जा सकती है, जसम<br />
शािमल है:<br />
– नेटवक पहु ँच: नेटवक स कब<br />
कनेट होना है, यह िनणय लने<br />
क सु वधा देता है<br />
– वत: आमण: पुश SMS ारा<br />
वत: लॉच होना है या नहीं, यह<br />
िनणय लने क सु वधा देता है.<br />
– सं देश सवा: सं देश कैस ा<br />
करना/भेजना है, यह िनणय लने<br />
क सु वधा देता है.<br />
– रकॉडग: ऑडयो कैस रकॉड<br />
करना है, यह िनणय लने क<br />
सु वधा देता है.<br />
3. जानकारी: जावा गेम और अनयोग<br />
क जानकारी जैस: अनयोग का नाम,<br />
मेमोरी आकार, अनयोग सं करण,<br />
वे ता और अिधकृ त ोत का नाम<br />
जाँचने और पढ़ने क सु वधा देता है.<br />
34
4. हटाएँ : वैप स डाउनलोड कए गए या<br />
थानीय सवा स रत कए गए जावा<br />
खे ल और अनयोग हटाने क सु वधा<br />
देता है.<br />
नोट<br />
इस हडसट के डफ़ॉट जावा गेम को नहीं<br />
हटाया जा सकता.<br />
सटं स (Menu 4.1.3)<br />
1. नेटवक ोफ़ाइल: आपको ोफ़ाइल<br />
चनने और तब सय और सं पादत<br />
करने क सवधा देता है, जस जावा<br />
अनयोग सय/सं पादत करने के<br />
िलए उपयोग कया जाएगा.<br />
2. मेमोरी िथित: कु ल मेमोरी, उपयोग<br />
क गई और र मेमोरी बताता है.<br />
3. जानकारी: जावा, CLDC और MIDP<br />
सं करण क जानकारी दान करता है.<br />
कैमरा Menu 4.2<br />
आप फ़ोन के अतिनहत कैमरे स<br />
फ़ोटो लने के िलए और इसक सटं ग<br />
समायोजत करने के िलए इस फ़ोन का<br />
उपयोग कर सकत ह. आपका फ़ोन ैितज<br />
OSD कार ऑपरेशन शैली का समथन<br />
करता है और 128x160 छव आकार म<br />
के वल अनलब कार का समथन करता है.<br />
कैमरा लस फ़ोन के पीछे होता है, और<br />
फ़ोन का डल यफ़ाइंडर के प म<br />
काय करता है. यद कैमरा के िलए पया<br />
मेमोरी नहीं है, तो नए फ़ोटो लने हेतु कु छ<br />
थान र करने के िलए आपको पुराने<br />
फ़ोटो हटाने हगे या आप मेमोरी काड<br />
म फ़ोटोज़ रत करना चुन सकत ह.<br />
आपके वीडयो कैमरा सटं ग क िथित<br />
पवावलोकन मोड के शीष पर दिशत क<br />
जाएगी.<br />
नोट<br />
थानीय कानन का उलघन होने पर इस<br />
सु वधा का उपयोग न कर.<br />
कैमरे का उपयोग आरंभ करने<br />
के िलए<br />
1. मटीमीडया मेन म, कैमरा का चयन<br />
कर और ठक दबाएँ .<br />
2. अपनी कैमरा सटं ग को यिगत<br />
बनाने के िलए वकप दबाएँ , अयथा<br />
आप Q कैमरा क ( नीच दाएँ साइड<br />
क) दबाकर िच ल सकत ह.<br />
मटीमीडया<br />
35
मटीमीडया<br />
मटीमीडया<br />
36<br />
3. देर तक दबाकर िच ल सकत ह.<br />
ीन को ज़ू म इन/और आउट करने के<br />
िलए, कृ पया वॉयम क(दा ओर ऊपर<br />
2 साइड कु ं जयाँ) दबाएँ .<br />
नोट<br />
फ़ोटो मेरा सामान मेन के फ़ोटो नामक<br />
फ़ोडर म रत कया जाएगा. आप<br />
वकप सू ची स एबम का चयन करके भी<br />
िच देख सकत ह और आप छव यअर पर<br />
चल जाएँ गे.<br />
क क परभाषा<br />
< वकप /ठक / सहेज<br />
> वापस / हटाएँ<br />
Q कैचर कर<br />
ज़म इन / आउट<br />
कैमरा सट करने के िलए<br />
1. पवावलोकन मोड पर, आप “वकप”<br />
दबा सकत ह. सभी वकप ीन<br />
के िनचल भाग पर दखाई दगे, और<br />
आप सीधे पवावलोकन मोड स सटं ग<br />
समायोजत कर सकत ह और आपक<br />
सटं ग ीन के शष पर दिशत<br />
होगी.<br />
2. विभन कैमरा सटं स का चयन<br />
करने के िलए नेवगेशन क का<br />
उपयोग दा/बा ओर तथा अपनी<br />
ाथिमकता का चयन करने के िलए<br />
ऊपर/नीच करना.<br />
वकप सू ची म यह शािमल है:<br />
वीडयो कैमरा मोड: ठक दबाकर<br />
आप वीडयो कैमरा मोड पर जा<br />
सकत ह<br />
एबम मोड: ठक दबाकर आप<br />
िलए गए िच क समीा कर<br />
सकत ह<br />
छव आकार: 128x160, 160x128,<br />
320x240, 640x480, 1280x1024<br />
गुणवा: सामाय/िनन/उच<br />
टाइमर वलबत कर: समय बं द/5,<br />
10, 15 स<br />
सं हण: फ़ोन म रत कर/काड<br />
म रत कर<br />
शॉट जारी रख: 1 शॉट/3 शॉट/5<br />
शॉट/9 शॉट<br />
े म जोड़: बं द/े म1/े म 2/े म<br />
3/े म 4/े म 5 (के वल अनलब<br />
मोड म समथन)<br />
भाव सटं ग: भाव बं द/ेके ल/<br />
सीपया/सीपया हरा/सीपया<br />
नीला/रंग इनवट/धू सर इनवट/<br />
यामपट/वेतपट/कॉपर<br />
कावग/नीली कावग/<br />
एबॉसमट/कं ाट/के च
त सं तुलन: वतःWB/ डेलाइट/<br />
टं गटन/ ितदी/ लाउड/ उीि<br />
EV: EV-4/EV-3/EV-2/EV-1/<br />
EV 0/EV+1/EV+2/EV+3/<br />
EV+4<br />
ीन मोड: वत:/रा<br />
बडंग: 50/60 Hz<br />
विन: विन बं द/ विन 1/<br />
विन 2/ विन 3<br />
सटं स पुनथापत कर: इस<br />
वकप का चयन करके आप<br />
फैटरी सटं ग पुनथापत कर<br />
सकत ह.<br />
छव यअर Menu 4.3<br />
EMS, MMS, WAP और कैमरा क सभी<br />
छवय क यहाँ समीा क जा सकती<br />
ह और सं हण, फ़ोन या मेमोरी काड म<br />
िथत होता है. आप आपक छवय को<br />
सू ची या मैरस शैली म देखना चुन<br />
सकत ह.<br />
क क परभाषा<br />
वकप /ठक / सहेज<br />
< वापस / हटाएँ<br />
> कैचर कर<br />
आपका फ़ोन आपके वकप के िलए<br />
िनन चयन दान करता है:<br />
► देख: आपको मेरा सामान म रत<br />
कए गए िच देखने क सु वधा<br />
देता है.<br />
► ाउज़ टाइल: िच ाउज़ करने<br />
पर आपको शैली का चयन करने क<br />
सु वधा देता है.<br />
► अेषत कर: आपके िच को<br />
वॉलपेपर, ीन सवर, पावर चाल/बं द<br />
दशन, सं पक ID के प म अेषत<br />
करने या दसर को MMS ारा भेजने<br />
क सु वधा देता है.<br />
► नाम बदल: आपको फ़ाइल का नाम<br />
बदलने क सु वधा देता है.<br />
► हटाएँ : मेरा सामान के िच को हटाने<br />
क सु वधा देता है.<br />
► सभी फ़ाइल हटाएँ : एक ही बार म सभी<br />
िच हटाने क सु वधा देता है.<br />
► सॉट कर: आपके फ़ोटोज़ को नाम,<br />
कार, समय या आकार के आधार पर<br />
सॉट करने क सु वधा देता है.<br />
► सं हण: आपके िच को फ़ोन या<br />
मेमोरी काड म सं हत करना चुनने<br />
क सु वधा देता है.<br />
मटीमीडया<br />
37
मटीमीडया<br />
मटीमीडया<br />
38<br />
नोट<br />
MMS ारा िच भेजने पर, डफ़ॉट आकार<br />
300KB स अिधक नहीं हो सकता. हालाँक,<br />
MMS ारा िच भेजने का अिधकतम<br />
आकार आपके सवा दाता ारा िनधारत<br />
कया जाएगा.<br />
वीिडयो रकॉडर Menu 4.4<br />
आप बड-इन कैमरा ारा वीडयो िलप<br />
रकॉड कर सकत ह. आपक वीडयो<br />
रकॉडर सटं ग क िथित पवावलोकन<br />
मोड के शष पर दिशत क जाएगी.<br />
वीडयो रकॉडर का उपयोग ारंभ<br />
करने के िलए<br />
1. मटीमीडया मेन म, वीडयो रकॉडर<br />
का चयन कर और ठक दबाएँ .<br />
2. अपनी कैमरा सटं ग को यिगत<br />
बनाने के िलए वकप दबाएँ , अयथा<br />
आप Q कैमरा क ( नीच दाएँ साइड<br />
क) दबाकर िच ल सकत ह.<br />
3. रकॉडग रोकने और जारी रखने के<br />
िलए आप वरत कैमरा क Q और<br />
LSK < भी दबा सकत ह. रकॉडग<br />
बं द करने के िलए आप > RSK<br />
दबा सकत ह, तब िलप वत: मेरा<br />
सामान के वीडयो फ़ोडर मे रत<br />
कर दी जाएगी रकॉडंग के बाद, िलप<br />
आपक सटं ग के प म रत क<br />
जाएगी.<br />
4. आप वीडयो लयर स आपक वीडयो<br />
िलस क समीा कर सकत ह.<br />
नोट<br />
► वीडयो िलप वीडयो लयर मेन और<br />
मेरा सामान के वीडयो फ़ोडर म रत<br />
क जायेगी. आप वकप सू ची स वीडयो<br />
लयर स भी िलप देख सकत ह.<br />
► वॉयम साइड क (दा ओर ऊपर 2<br />
साइड कु ं जयाँ) ीन ज़ू म इन/ और<br />
आउट के प म काय करेगी.<br />
क क परभाषा<br />
< वापस/बं द कर<br />
> वकप<br />
Q रकॉड कर/रोक/ज़ारी रख<br />
वीडयो रकॉडर सट करने के िलए<br />
1. पवावलोकन मोड पर, आप “वकप”<br />
दबा सकत ह. सभी वकप ीन<br />
के िनचल भाग पर दखाई दगे, और<br />
आप सीधे पवावलोकन मोड स सटं ग<br />
समायोजत कर सकत ह और आपक<br />
सटं ग ीन के शष पर दिशत<br />
होगी.
2. विभन कैमरा सटं स के िलए<br />
नेवगेशन क दाय व बाएँ और आपक<br />
ाथिमकता का चयन करने के िलए ऊपर<br />
व नीच क का योग कर.<br />
वकप सू ची म यह शािमल है:<br />
कैमरा मोड: आप ठक दबाकर कैमरा<br />
मोड पर जा सकत ह.<br />
लयर मोड: आप ठक दबा कर<br />
बनाई गई वीडयो िलस क<br />
समीा कर सकत ह.<br />
रकॉड समय सीमा: कोई समय<br />
सीमा नहीं/ 15 सकं ड/ 30 सकं ड/ 60<br />
सकं ड<br />
फ़ाइल आकार क सीमा: कोई समय<br />
सीमा नहीं/95KB/195KB/295KB<br />
वीडयो गुणवा: उच/सामाय/<br />
िनन/अछा<br />
ऑडयो रकॉड कर: ऑडयो चाल/<br />
ऑडयो बं द<br />
सं हण: फ़ोन पर सहेज/काड पर<br />
सहेज<br />
भाव सटं ग: भाव बं द/ेके ल/<br />
सीपया/सीपया हरा/सीपया<br />
नीला/रंग इनवट/धू सर इनवट/<br />
यामपट/वेतपट/कॉपर<br />
कावग/नीली कावग/एबॉसमट/<br />
कं ाट/के च<br />
त सतुलन: वतःWB/ डेलाइट/<br />
टं गटन/ ितदी/ लाउड/<br />
उीि<br />
EV: EV-4/EV-3/EV-2/EV-1/<br />
EV 0/EV+1/EV+2/EV+3/EV+4<br />
रा मोड: वत:/रा<br />
बडंग: 50/60 Hz<br />
वप: 3GP/MP4<br />
सटं स पुनथापत कर: इस<br />
वकप का चयन करके आप फैटरी<br />
सटं ग पुनथापत कर सकत ह.<br />
वीडयो लयर Menu 4.5<br />
यह फ़ोडर फ़ोन स रत कए गए या<br />
PC स डाउनलोड कए गए वीडयोज़<br />
रत करता है. यह फ़ोन 176x144<br />
वीडयो आकार वाल .3GP और .MP4<br />
वप का समथन करता है.<br />
मटीमीडया<br />
39
मटीमीडया<br />
मटीमीडया<br />
40<br />
वीडयो चलाने के िलए<br />
(Menu 4.5.1)<br />
1. मटीमीडया मेन म, वीडयो लयर<br />
चुन, चलाई जाने वाली फ़ाइल का<br />
चयन कर.<br />
2. िनित वीडयो िलप का चयन करने<br />
के बाद, वकप और चलाएँ दबाएँ .<br />
आपका फ़ोन आपके वकप के िलए<br />
िनन चयन दान करता है:<br />
► चलाएँ : वीडयो सामी चलाने और<br />
देखने क सु वधा देता है.<br />
► अेषत कर: वीडयो को न सवर<br />
पर, पॉवर चाल दशन या पॉवर बं द<br />
दशन पर भेजने क सु वधा देता है.<br />
आप वीडयो िलप को सं पक को के<br />
प म भी अेषत कर सकत ह या<br />
MMS अथवा यटू थ ारा िम के<br />
साथ साझा कर सकत ह.<br />
► नाम बदल: वीडयो का नाम बदलने<br />
क सु वधा देता है.<br />
► हटाएँ : मेरा समान म रत क<br />
गई िलप को हटाने क सु वधा<br />
देता है.<br />
► सभी फ़ाइल हटाएँ : मेरा सामान के<br />
वीडयो फ़ोडर म रत क गई<br />
सभी वीडयो फ़ाइल हटाने क सु वधा<br />
देता है.<br />
► सॉट कर: वीडयो िलस को नाम,<br />
कार, समय या आकार के आधार पर<br />
सॉट करने क सु वधा देता है.<br />
► सं हण: वीडयो क मेमोरी और<br />
वप जाँचने और वीडयो िलप को<br />
फ़ोन या मेमोरी काड स चलाने क<br />
सु वधा देता है.<br />
सं गीत लयर Menu 4.6<br />
अपने हडसट म M कु ं जी दबाकर अपने<br />
पसददा गीत चलाने के िलए सं गीत लयर<br />
मोड म वेश के िलए डेडके टेड क के<br />
परणामवप <strong>KP22</strong>0 को MP3 फ़ॉमट<br />
समिथत सं गीत- ओरएं टेड फ़ोन के प<br />
म डज़ाइन कया गया है. सं गीत लयर<br />
तक पहु ँचने का दसरा राता मय मेन स<br />
है. आप USB या अय कनेशन स भी<br />
सं गीत सामी डाउनलोड कर सकत ह.<br />
सं गीत ैक को वचािलत प स पहचाने<br />
जाने और डफ़ॉट ल सची म जोड़ने<br />
के िलए उह मेरा सामान के मेरा सं गीत<br />
फ़ोडर म सहेजा जाना चाहए. आप<br />
हेडसट या लाउडपीकर स सं गीत सन<br />
सकत ह. सरल यज़र इंटरफ़े स आपक<br />
इछानसार आपको सं गीत लयर<br />
िनयं त करने के िलए बनाया गया है.
नोट<br />
ऑडयो लयर का उपयोग करत समय<br />
आप कॉल कर सकत ह या उसका उर दे<br />
सकत ह. कसी कॉल के दौरान, लबैक रोक<br />
दया जाता है.<br />
सं गीत चलाएँ<br />
चौतरफा<br />
नेवगेशन क<br />
U<br />
D<br />
L<br />
R<br />
ऑडयो ल फ़ं शन<br />
b सं गीत चलाएँ / ❙❙ रोक<br />
j बं द कर<br />
f अगल ैक पर जाएँ<br />
e पछल ैक पर जाएँ<br />
नोट<br />
आप साइड क ारा इस वॉयम +/– को<br />
समायोजत कर सकत ह.<br />
आपका सं गीत डेटाबेस अपने आप<br />
पहचाना जायेगा और यद “सू ची ख़ु द बने”<br />
चाल पे सट है तो डफॉट ल सची म<br />
जोड़ा जाएगा. ऑटो जे न क और सची का<br />
ववरण आगे दया गया है.<br />
नोट<br />
आपके मोबाइल फ़ोन को लाइट के दौरान<br />
सं गीत चलाने हेतु सम होने के िलए बनाया<br />
गया है. लाइट सु रा सावधानी क आपक<br />
सटं स बदलने के िलए आपको लाइट मोड<br />
पर जाना होता है.<br />
सटं ग<br />
सं गीत लयर मेन म, िनन सटं स का<br />
उपयोग करके आप सू ची बना सकत ह.<br />
– एक गाने का चयन कर और वकप<br />
दबाएँ .<br />
– वकप सू ची म, आपको यह िमलगा<br />
चलाएँ : तुरंत गाना चलाने क सु वधा<br />
देता है.<br />
ववरण: चयिनत गाने का चैनल,<br />
गुणवा, आकार और समय<br />
दखाता है.<br />
रंस म जोड़: चयिनत गाने को रंग<br />
टोन के प म जोड़ने क सु वधा<br />
देता है.<br />
जोड़: चयिनत गान को लिलट म<br />
जोड़ने क सु वधा देता है.<br />
िनकाल: चयिनत गान को लिलट<br />
स िनकालने क सु वधा देता है.<br />
मटीमीडया<br />
41
मटीमीडया<br />
मटीमीडया<br />
सभी िनकाल: लिलट के सभी गाने<br />
िनकालने क सु वधा देता है.<br />
सटं ग: फ़ोन या काड स आपक<br />
लिलट का चयन करने, सू ची ख़ु द<br />
बने चाल करने, कन बदलने,<br />
इवेलाइज़र ... आद क सु वधा<br />
देता है.<br />
नोट<br />
► यद “सू ची ख़ु द बने” बं द नहीं हो, तो<br />
जोड़, िनकाल और सभी िनकाल के<br />
वकप नहीं दखाए जाएँ गे.<br />
वॉइस रकॉडर Menu 4.7<br />
वॉइस रकॉडर आपके िलए वॉइस<br />
फ़ाइल बं िधत करने हेतु दान क ग<br />
कायमताओ वाला एक आसान विन<br />
रकॉडग उपकरण है.<br />
रकॉडग ारंभ करने के िलए<br />
(Menu 4.7.1)<br />
1. मटीमीडया मेन म, वॉइस रकॉडर<br />
चुन, ठक दबाएँ .<br />
2. वकप दबाएँ और रकॉड का चयन<br />
कर, उस ारंभ करने के िलए ठक चुन.<br />
नोट<br />
► रकॉडग के दौरान, आप कसी भी समय<br />
सॉट क दबाकर वॉइस रकॉडग रोक<br />
सकत ह या बं द कर सकत ह.<br />
► रेकॉडग के बाद, फाइल AMR, WAV<br />
और AWB वप म रत क जाती है.<br />
आपका फ़ोन आपके वकप के िलए<br />
िनन चयन दान करता है:<br />
► रकॉड: आपके फ़ोन कॉल या अय<br />
िथित म आपको विन रकॉड करने<br />
क सु वधा देता है.<br />
► चलाएँ : आपको रकॉड क गई विन<br />
चलाने क सु वधा देता है.<br />
► जोड़ : आपको उसी फ़ाइल म रकॉड<br />
करने क सु वधा देता है.<br />
► नाम बदल: आपको फ़ाइल का नाम<br />
बदलने क सु वधा देता है.<br />
► हटाएँ : आपको वॉइस रकॉडर म सहेजी<br />
गई फ़ाइल हटाने क सु वधा देता है.<br />
► सभी हटाएँ : आपको इस फ़ोडर म<br />
सहेजी गई सभी सामी हटाने क<br />
सु वधा देता है.<br />
► सटं ग: आपको आपका सं हण और<br />
फ़ाइल वप चुनने क सु वधा देता है.<br />
42
► अेषत कर: आपको फ़ाइल<br />
उपयोगकता ोफ़ाइल को अेषत<br />
करने या MMS अथवा यटू थ ारा<br />
िम के साथ साझा करने क सु वधा<br />
देता है.<br />
मेलोडी कं पोज़र Menu 4.8<br />
यह फ़ं शन आपको रंग िसग् नल या<br />
मेलोडी कं पोज़ करने क सु वधा देता है.<br />
कं पोज़ करना ारंभ करने<br />
के िलए (Menu 4.8.1)<br />
1. मटीमीडया मेन म, ठक दबाकर<br />
मेलोडी कं पोज़र चुन.<br />
2. आपक रंगटोन कं पोज़ करना ारंभ<br />
करने के िलए जोड़ का चयन कर.<br />
3. कं पोज़ कर लने के बाद, मेलोडी IMY<br />
वप म रत क जाएगी.<br />
क<br />
1 Do<br />
2 Re<br />
3 Mi<br />
4 Fa<br />
5 So<br />
6 La<br />
क परभाषा<br />
क<br />
क परभाषा<br />
7 Ti<br />
8 कं पन नोट<br />
9 बैकलाइट/LED नोट<br />
0 वराम<br />
वतमान सं गीत नोट को ती,<br />
#<br />
सामाय या मद पर कर.<br />
वतमान सं गीत नोट क बीट<br />
* लबाई बदल, बैकलाइट और LED<br />
के बीच का वतमान नोट भी बदल<br />
सं गीत नोट के ऑटेव को मद<br />
करने के िलए नेवगेशन क नीच.<br />
इसके अलावा, आप कं पन,<br />
बैकलाइट और LED अम कर<br />
सकत ह.<br />
वॉयम क ारा आप वा बदल<br />
सकत ह.<br />
4. मेलोडी कं पोज़ करने के दौरान, आप<br />
मेलोडी को वैयिकृ त कर सकत ह.<br />
आपका फ़ोन आपके वकप के िलए<br />
िनन चयन दान करता है:<br />
► चलाएँ : आपको आपके ारा बनाई गई<br />
मेलोडी सु नने क सु वधा देता है.<br />
► चलाने क गित: आपको चलाने क<br />
तीन िभन गितयाँ समायोजत करने<br />
क सु वधा देता है.<br />
मटीमीडया<br />
43
मटीमीडया<br />
मटीमीडया<br />
► वा का चयन कर: आपको इिछत<br />
वा का चयन करने क सु वधा<br />
देता है.<br />
► रत कर: आपको मेलोडी रत<br />
करन क सु वधा देता है<br />
आपके ारा कई मेलोडीज़ सहेजने पर<br />
आपका फ़ोन आपके वकप के िलए<br />
िनन चयन दान करता है.<br />
► चलाएँ : आपको आपके ारा बनाई गई<br />
मेलोडी सु नने क सु वधा देता है.<br />
► सं पादत कर: आपको चयिनत मेलोडी<br />
सं पादत करने क सु वधा देता है.<br />
► जोड़: आपको चयिनत मेलोडी म और<br />
रंगटोन जोड़ने क सु वधा देता है.<br />
► नाम बदल: आपको फ़ाइल का नाम<br />
बदलने क सु वधा देता है.<br />
► हटाएँ : आपको इस फ़ोडर म चयिनत<br />
मेलोडी हटाने क सु वधा देता है.<br />
► सभी फ़ाइल हटाएँ : आपको इस फ़ोडर<br />
म रत क गई सभी सामी हटाने<br />
क सु वधा देता है.<br />
► अेषत कर: आपको मेलोडी को रंग<br />
टोन के प म उपयोगकता ोफ़ाइल<br />
को अेषत करने या EMS या MMS<br />
या यटू थ ारा िम के साथ साझा<br />
करने क सु वधा देता है.<br />
FM रेडयो Menu 4.9<br />
यह सु वधा आपको कसी भी समय<br />
आपका पसददा रेडयो टेशन सु नने क<br />
सु वधा देती है.<br />
आपका फ़ोन आपके वकप के िलए<br />
िनन चयन दान करता है:<br />
► चैनल सू ची: चैनल नाम और वसी<br />
दज कर आपको 9 रेडयो टेशस<br />
बुकमाक करने क सु वधा देता है.<br />
► मैयुअल इनपुट: रेडयो टेशन<br />
वसी मैयुअली दज करने क<br />
सु वधा देता है.<br />
► ीसट वत: खोज: हर बार आगे या<br />
पीछे क दबाए बना आपको वत:<br />
रेडयो टेशन खोजने क सु वधा<br />
देता है.<br />
► सटं ग: पभिम ल, FM रेडयो क<br />
कन, फ़ाइल वप और सं हण<br />
बदलने क सु वधा देता है. आप रकॉड<br />
वप के प म AMR, WAV या<br />
AWB का चयन कर सकत ह<br />
► लाउड पीकर: रेडयो कायम को<br />
पीकर पर चलाने क सु वधा देता है.<br />
► रकॉड कर: आपका पसददा कायम<br />
रकॉड करने क सु वधा देता है.<br />
44
► आगे जोड़: आपके ारा रकॉड क गई<br />
फ़ाइल को जारी रखकर उसी फ़ाइल म<br />
और रकॉड करने क सु वधा देता है.<br />
► फ़ाइल सू ची: आपके ारा रकॉड कए<br />
गए रेडयो कायम सु नने क सु वधा<br />
देता है.<br />
नोट<br />
FM रेडयो उपयोग करने के िलए आपको<br />
ईयरफ़ोन लग-इन करना होगा.<br />
नोट<br />
पहल स शे ् यल रेडयो चैनल सट करत<br />
समय आपको एं टीना के प म हेडसट<br />
लगाना आवयक है.<br />
मटीमीडया<br />
FM रकॉड शेयल कर<br />
Menu 4.0<br />
यह फ़ोन आपको FM रेडयो के कायम<br />
पहल स शेयल करने क सु वधा देता<br />
है. आपक यिगत सटं ग के आधार<br />
पर आप 4 कायम रकॉड कर सकत ह.<br />
सटं ग के वकप म शािमल है: रकॉडग<br />
चाल/बं द करना, ी-शेयल क समय<br />
अविध सट करना, दन/साहक/मािसक/<br />
एक बार/ ितदन रकॉड करना, सू ची<br />
ारा या मैयुअली दज कर चैनल सट<br />
करना और फ़ाइल वप और सं हण<br />
सट करना.<br />
45
सं देश सवा [Menu 5]<br />
सं देश सवा<br />
46<br />
SMS (पाय सं देश) Menu 5.1<br />
आपके फ़ोन म वॉइस मेल सू चना सं देश<br />
और पाय सं देश क सवाएँ ह. वॉइस मेल<br />
और शॉट मैसज सवस (SMS) नेटवक<br />
सवाएँ ह. आपका फ़ोन िच या मेलोडीज़<br />
वाल पाय सं देश भेजने और ा करने<br />
क सु वधा भी देता है िच वाला सं देश<br />
कई पाठ सं देश स िमल कर बनता है,<br />
इसिलए िच वाला सं देश भेजने म एक<br />
पाय सं देश भेजने के शक स अिधक<br />
शक लग सकता है.<br />
सं देश पढ़ने के िलए<br />
आपको कोई सं देश ा होने पर, डल<br />
पर सू चक दखाई देगा. यद आपका<br />
इनबॉस भरा है, तो आपके कु छ पुराने<br />
सं देश हटाने हेतु याद दलाने के िलए एक<br />
पॉप-अप वडो दखाई देगी. अयथा,<br />
आपका सं देश िसम काड के बजाय फ़ोन म<br />
रत कर दया जाएगा.<br />
1. सं देश सवा मेन म, पाय सं देश<br />
(SMS) चुन, ठक दबाएँ और तब<br />
इनबॉस का चयन कर.<br />
2. ठक दबाकर पढ़ा जाने वाला सं देश चुन<br />
और सामी देख.<br />
नोट<br />
आपको ा हुआ सं देश डफ़ॉट सटं ग ारा<br />
िसम म रत कया जाएगा.<br />
जब आप सं देश पढ़त ह, आपका फ़ोन<br />
आपके वकप के िलए िनन चयन<br />
दान करता है.<br />
► उर: पाय सं देश भेजकर उर देने<br />
क सु वधा देता है.<br />
► हटाएँ : जारी सं देश को हटाने क<br />
सु वधा देता है.<br />
► सं पादन पाय सं देश सं पादत<br />
करने क सु वधा देता है.<br />
► अेषत कर: पाय सं देश अेषत<br />
करने क सु वधा देता है.<br />
► फ़ोन म कॉपी कर: चयिनत पाय<br />
सं देश क आपके फ़ोन म कॉपी करने<br />
बनाने क सु वधा देता है.<br />
► फ़ोन म भेज: चयिनत पाय सं देश<br />
को आपके फ़ोन म ल जाने क सु वधा<br />
देता है.<br />
► चैट: आपके फ़ोन पर सं देश भेजने वाल<br />
के साथ चैट करने क सु वधा देता है.<br />
► सभी हटाएँ : एक ही बार म सभी सं देश<br />
हटाने क सु वधा देता है.<br />
► सभी क कॉपी कर: सभी सं देश<br />
क एक ही बार म आपके फ़ोन पर<br />
ितिलप बनाने क सु वधा देता है.<br />
► सभी मू व कर: सभी सं देश एक ही बार<br />
म आपके फ़ोन पर ल जाने क सु वधा<br />
देता है.
► नबर का उपयोग कर: नबर को आपके<br />
सं पक म रत करन क सु वधा देता है.<br />
► URL का उपयोग कर: URL को<br />
आपके फ़ोन म रत करने क सु वधा<br />
देता है.<br />
► वतुएँ रत कर: वतुएँ आपके फ़ोन<br />
म रत करने क सु वधा देता है.<br />
: वह सं देश जो पढ़ा जा चुका है.<br />
: वह सं देश जो पढ़ा नहीं गया है.<br />
कोई सं देश िलखने के िलए<br />
1. सं देश सवा मेन म, पाय सं देश<br />
(SMS) चुन, ठक दबाएँ .<br />
2. सं देश िलख चुन, सं देश िलखने के िलए<br />
ठक दबाएँ .<br />
3. वकप सू ची स िनन फ़ं शस का<br />
चयन कर आप आपके सं देश को और<br />
िभन वशेष भाव स वैयिकृ त भी<br />
कर सकत ह, इनम शािमल ह<br />
− टेपलट उपयोग कर: शीता स<br />
िलखने के िलए आप डफ़ॉट<br />
टेपलट सिमिलत कर सकत ह.<br />
− वतुएँ सिमिलत कर: आप<br />
आपके पाय सं देश म िच,<br />
ऐिनमेशन, मेलोडी और विन<br />
सिमिलत कर सकत ह.<br />
− पाठ वपत कर: आप पाठ<br />
आकार, शैली, सं रेखण चुन सकत<br />
ह या नए अनछे द स ारंभ कर<br />
सकत ह.<br />
− इनपुट विध: आप इिछत इनपुट<br />
विध चुन सकत ह.<br />
नोट<br />
► नोट: सं देश फ़ं शन म वरत पहु ँच के<br />
िलए, आप टडबाय मोड म नेवगेशन क<br />
U का बायाँ ऊपरी भाग दबा सकत ह.<br />
► सामी िलखने के िलए, कृ पया प 13<br />
पर “इनपुट विध” देख.<br />
कोई सं देश भेजने के िलए<br />
1. सं देश सवा मेन म, पाय सं देश<br />
(SMS) चुन और ठक दबाएँ .<br />
2. सं देश िलख चुन, सं देश िलखना ारंभ<br />
करने के िलए ठक दबाएँ .<br />
3. िलखने के बाद, पण का चयन कर और<br />
फर वकप दबाएँ .<br />
नोट<br />
► िच सं देश फ़ं शन का उपयोग करने के<br />
िलए, आपके नेटवक ऑपरेटर या सवा<br />
दाता का समथन आवयक है. के वल वे<br />
फ़ोन िच सं देश ा और दिशत कर<br />
सकत ह जनम यह फ़ं शन होता है.<br />
सं देश सवा<br />
47
सं देश सवा<br />
सं देश सवा<br />
48<br />
► यह मोबाइल Nokia माट मैसज फ़ॉमट<br />
(WBMP सहत) का समथन नहीं करता,<br />
के वल *.ems फ़ॉमट का समथन करता है.<br />
आपका फ़ोन आपके भेजने के वकप के<br />
िलए िनन चयन दान करता है:<br />
► भेज: पाय सं देश तुरंत भेजने क<br />
सु वधा देता है.<br />
► सहेज और भेज: पाय सं देश<br />
सहेजने और भेजने क सु वधा<br />
देता है.<br />
► सहेज: सं देश सहेजने और उस<br />
बाद म भेजने क सु वधा देता है.<br />
► कई को भेज: कई सं पक को एक<br />
साथ भेजने क सु वधा देता है.<br />
सफलतापवक भेजे गए सं देश<br />
आउटबॉस म नहीं सं हत हगे.<br />
► समू ह ारा भेज: फ़ोन म आपके ारा<br />
समू हीकृ त कए गए समू ह को भेजने<br />
क सु वधा देता है.<br />
कपैड जानकारी<br />
क<br />
कसर मू व करे.<br />
वण<br />
* तीक सिमिलत कर.<br />
# इनपुट विध बदल.<br />
आउटबॉस (Menu 5.1.3)<br />
सं देश भेजने के बाद, सं देश आउटबॉस<br />
फ़ोडर म रत कया जाता है. आपको<br />
रत करन के िलए चुने गए सं देश<br />
को िनन वकप के साथ पढ़ने क<br />
अनमित है:<br />
► भेज: सं देश भेजने क सु वधा देता है.<br />
► सं पादत कर: रत कए गए सं देश<br />
सं पादत करने क सु वधा देता है.<br />
► हटाएँ : जारी सं देश को हटाने क<br />
सु वधा देता है.<br />
► फ़ोन म कॉपी कर: चयिनत पाय<br />
सं देश क आपके फ़ोन म ितिलप<br />
बनाने क सु वधा देता है.<br />
► फ़ोन म भेज:<br />
चयिनत पाय सं देश को आपके फ़ोन<br />
म ल जाने क सु वधा देता है.<br />
► सभी हटाएँ : एक ही बार म आपके<br />
फ़ोन के सभी सं देश हटाने क सु वधा<br />
देता है.<br />
► सभी कॉपी: सभी सं देश क एक ही बार<br />
म आपके फ़ोन पर ितिलप बनाने क<br />
सु वधा देता है.<br />
► सभी मू व: सभी सं देश एक ही बार म<br />
आपके फ़ोन पर ल जाने क सु वधा<br />
देता है.
► नबर उपयोग कर: नबर को आपके<br />
सं पक म रत करने क सु वधा<br />
देता है.<br />
► URL का उपयोग कर: URL को<br />
आपके फ़ोन म रत करने क सु वधा<br />
देता है.<br />
टेपलस (Menu 5.1.4)<br />
शी सं देश लखन के िलए आपके फ़ोन<br />
म कई डफ़ॉट टेपलस ह. आप इन<br />
टेपलस को सं पादत कर सकत ह या<br />
िमटा भी सकत ह और आपके शद म<br />
बदल सकत ह.<br />
सं देश सटं ग (Menu 5.1.5)<br />
आपका फ़ोन SMS सु वधा पर डफ़ॉट<br />
सटं ग सट करने क सु वधा देता है.<br />
1. सं देश सवा मेन म, पाय सं देश<br />
(SMS) चुन, ठक दबाएँ .<br />
2. सं देश सटं ग चुन, ठक दबाएँ .<br />
आपका फ़ोन िनन सटं स दान<br />
करता है:<br />
► ोफ़ाइल सटं ग: यद आपक िसम<br />
ारा एक स अिधक सं देश ोफ़ाइल क<br />
अनमित है, तो आप ोफ़ाइल अलग स<br />
सं पादत कर सकत ह.<br />
► सामाय सटं ग: आप वतरण रपट<br />
सम या अम करने का चयन कर<br />
सकत ह और यद आपके सवा के <br />
का कोई वापस उर देने का पथ है तो<br />
उस बदल सकत ह.<br />
► मेमोरी िथित: िसम और फ़ोन म<br />
आपक मेमोरी िथित जाँचने क<br />
सु वधा देता है<br />
► ाथिमक सं हण: आपका ाथिमक<br />
सं हण िसम या फ़ोन पर बदलने क<br />
सु वधा देता है.<br />
► बीयरर चुन: आपका ाथिमक धारक-<br />
GSM या GPRS चुनने क सु वधा<br />
देता है.<br />
MMS (मटीमीडया मैसज)<br />
Menu 5.2<br />
यह सु वधा आपको पाठ, विन और िच<br />
वाला सं देश भेजने देती है. नेटवक के<br />
आधार पर, आप ऐस इंटरनेट पत वाला<br />
पाय सं देश ा कर सकत ह जहाँ आप<br />
मटीमीडया सं देश देख सकत ह.<br />
आपका फ़ोन MMS फ़ं शन म िनन<br />
वप का समथन करता है.<br />
► िच: JPG, GIF और BMP.<br />
► विन: के लबल पोिलफ़ोिनक MIDI<br />
(SP-MIDI), i-Meldoy.<br />
सं देश सवा<br />
49
सं देश सवा<br />
सं देश सवा<br />
50<br />
नोट<br />
कसी कॉल, गेम, या GPRS डेटा पर कसी<br />
सय WAP कनेशन के दौरान आप<br />
मटीमीडया सं देश नहीं ा कर सकत.<br />
कोई MMS िलखने के िलए<br />
मटीमीडया सं देश सवा क उपलधता के<br />
िलए, कृ पया आपके नेटवक ऑपरेटर या<br />
सवा दाता स सं पक कर.<br />
1. सं देश सवा मेन म, मटीमीडया सं देश<br />
चुन और तब ठक दबाएँ .<br />
2. सं देश िलख चुन और फर ठक दबाएँ .<br />
3. जस नबर या ई-मेल ित(To),<br />
ितिलप(Cc), और गु ितिलप<br />
(Bcc) पर भेजना चाहत है वह जोड़.<br />
इसके बाद सं पादत कर दबाकर वषय<br />
और सामी सं पादत कर.<br />
4. सामी म, आप लाइड म पाठ,<br />
छव, ऑडयो और अनलग् नक जोड़<br />
सकत ह.<br />
नोट<br />
► सामी िलखने के िलए, आप “इनपुट<br />
विध” देख सकत ह.<br />
► िच सं देश फ़ं शन का उपयोग करने के<br />
िलए, आपके नेटवक ऑपरेटर या सवा<br />
दाता का समथन आवयक है.<br />
लाइस सं पादत करत समय आपका<br />
फ़ोन आपके वकप के िलए िनन चयन<br />
दान करता है:<br />
► परा: सं पादन प स बाहर िनकलने<br />
और सामी सं पादत कर प पर<br />
वापस जाने क सु वधा देता.<br />
► इनपुट विध: इनपुट विध बदलने क<br />
सु वधा देता है.<br />
► छव जोड़: आपके सं देश म एक छव<br />
फ़ाइल जोड़ने क सु वधा देता है.<br />
► ऑडयो जोड़: आपके सं देश म एक<br />
ऑडयो फ़ाइल जोड़ने क सु वधा<br />
देता है.<br />
► अनलग् नक जोड़: आपके सं देश म एक<br />
फ़ाइल अनलग् न करने क सु वधा<br />
देता है.<br />
सामी म पाठ जोड़ने के बाद, आपको<br />
िनन सहत और वकप दखाई दगे:<br />
► नई लाइड सिमिलत कर: आपके<br />
सं देश म एक अय लाइड सिमिलत<br />
करने क सु वधा देता है.<br />
► पवावलोकन: आपके ारा हाल ही म<br />
िलखी गई लाइड (लाइस) का<br />
पवावलोकन करने क सु वधा देता है.<br />
► लाइड समय: लाइडंग समय<br />
सं पादत करने क सु वधा देता है.
कोई MMS भेजने के िलए<br />
1. सं देश सवा मेन म, मटीमीडया सं देश<br />
चुन और तब ठक दबाएँ .<br />
2. सं देश िलख चुन और फर ठक दबाएँ .<br />
3. सं देश िलखने के बाद िनन चरण का<br />
पालन कर, के वल भेज, रत कर और<br />
भेज, ाप म रत कर, भेजने के<br />
वकप, या सं देश स बाहर िनकल हेतु<br />
परा का चयन कर.<br />
4. MMS सं पादत करने के िलए आप<br />
भेजने के वकप भी चुन सकत ह<br />
अयथा सं देश डफ़ॉट सटं ग ारा<br />
भेजा जाएगा.<br />
नोट<br />
► सामी िलखने के िलए, आप “इनपुट<br />
विध” देख सकत ह.<br />
► िच सं देश फ़ं शन का उपयोग करने के<br />
िलए, आपके नेटवक ऑपरेटर या सवा<br />
दाता का समथन आवयक है.<br />
आपका फ़ोन आपके वकप के िलए<br />
िनन चयन दान करता है:<br />
► के वल भेज: पाय सं देश तुरंत भेजने<br />
क सु वधा देता है.<br />
► रत कर और भेज: सं देश रत<br />
करने और तुरंत भेजने क सु वधा<br />
देता है.<br />
► ाप म रत कर: सं देश रत<br />
करने और उस बाद म भेजने क<br />
सु वधा देता है.<br />
► भेजने के वकप: माय अविध,<br />
वतरण रपोट, पठन रपोट और<br />
ाथिमता सहत भेजने के वकप को<br />
यिगत बनाने क सवधा देता है.<br />
► बाहर िनकल: आपके ारा िलखे गए<br />
सं देश को रत करना या नही रत<br />
करना चुनने क सु वधा देता है.<br />
कपैड जानकारी<br />
क<br />
*<br />
#<br />
वण<br />
कसर खसकाएँ .<br />
तीक सिमिलत<br />
कर.<br />
इनपुट विध<br />
बदल.<br />
इनबॉस (Menu 5.2.2)<br />
आपका फ़ोन ा हुए मटीमीडया सं देश<br />
को मटीमीडया सं देश मेन के इनबॉस<br />
फ़ोडर म रत करता है.<br />
ा हुए मटीमीडया सं देश पढ़ने के िलए<br />
1. सं देश मेन म, मटीमीडया सं देश चुन<br />
और तब ठक दबाएँ .<br />
सं देश सवा<br />
51
सं देश सवा<br />
सं देश सवा<br />
2. इनबॉस का चयन कर और फर<br />
ठक दबाएँ .<br />
3. सं देश चुन, सं देश देखने के िलए<br />
वकप दबाएँ .<br />
आपका फ़ोन आपके वकप के िलए<br />
िनन चयन दान करता है:<br />
► देख: तुरंत मटीमीडया सं देश देखने<br />
क सु वधा देता है.<br />
► गुण: मेिलग सू ची देखने क सु वधा<br />
देता है<br />
► उर द: ेषक को उर देने क सु वधा<br />
देता है.<br />
► सभी को उर द: समू ह को उर देने<br />
क सु वधा देता है.<br />
► अेषत कर: सं देश अेषत करने क<br />
सु वधा देता है.<br />
► हटाएँ : चयिनत सं देश को हटाने क<br />
सु वधा देता है.<br />
► सभी हटाएँ : सभी सं देश हटाने क<br />
सु वधा देता है.<br />
► नबर उपयोग कर: फ़ोन नबर डायल<br />
करने या रत करने क सु वधा<br />
देता है.<br />
आउटबॉस (Menu 5.2.3)<br />
न भेजे गए मटीमीडया सं देश,<br />
मटीमीडया सं देश मेन के आउटबॉस<br />
फ़ोडर म रत कए जाएँ गे. भेजे गए<br />
मटीमीडया सं देश, मटीमीडया सं देश<br />
मेन के आउट बॉस फ़ोडर म रत<br />
कए जात ह.<br />
आउटबॉस मटीमीडया सं देश देखने<br />
के िलए<br />
1. सं देश सवा म, मटीमीडया सं देश<br />
चुन, ठक दबाएँ , आउटबॉस चुन,<br />
चयन कर दबाएँ .<br />
2. सं देश चुन, देखने के िलए ठक दबाएँ .<br />
आपका फ़ोन आपके वकप के िलए<br />
िनन चयन दान करता है:<br />
► देख: तुरंत मटीमीडया सं देश देखने<br />
क सु वधा देता है.<br />
► गुण: मेिलग सू ची देखने क सु वधा<br />
देता है<br />
► दसरो को भेज: सं देश अय लोग को<br />
भेजने क सु वधा देता है.<br />
► हटाएँ : चयिनत सं देश को हटाने क<br />
सु वधा देता है.<br />
► सभी हटाएँ : सभी सं देश हटाने क<br />
सु वधा देता है.<br />
52
► नबर उपयोग कर: फ़ोन नबर डायल<br />
करने या रत करने क सु वधा<br />
देता है.<br />
ाप (Menu 5.2.4)<br />
आपका फ़ोन न भेजे गए मटीमीडया<br />
सं देश को मटीमीडया सं देश मेन के<br />
ाप फ़ोडर म रत करता है.<br />
न भेजे गए मटीमीडया सं देश पढ़ने<br />
के िलए<br />
1. सं देश सवा मेन म, मटीमीडया सं देश<br />
चुन और ठक दबाएँ .<br />
2. ाप का चयन कर और फर ठक<br />
दबाएँ .<br />
3. सं देश चुन, सं देश देखने के िलए<br />
वकप दबाएँ .<br />
आपका फ़ोन आपके वकप के िलए<br />
िनन चयन दान करता है:<br />
► देख: तुरंत मटीमीडया सं देश देखने<br />
क सु वधा देता है.<br />
► गुण: मेिलग सू ची देखने क सु वधा<br />
देता है.<br />
► भेज: सं देश भेजने क सु वधा देता है.<br />
► सं देश सं पादत कर: सं देश सं पादत<br />
करने क सु वधा देता है.<br />
► हटाएँ : चयिनत सं देश को हटाने क<br />
सु वधा देता है.<br />
► सभी हटाएँ : सभी सं देश हटाने क<br />
सु वधा देता है.<br />
► नबर उपयोग कर: फ़ोन नबर डायल<br />
करने या रत करने क सु वधा<br />
देता है.<br />
टेपलस (Menu 5.2.5)<br />
यह फ़ोन आपके मटीमीडया सं देश के<br />
िलए वरत व क सु वधा देता है.<br />
1. सं देश सवा मेन म, मटीमीडया सं देश<br />
का चयन कर और ठक दबाएँ .<br />
2. टेपलस का चयन कर, ठक दबाएँ ,<br />
एक टेपलट का चयन कर, वकप<br />
दबाएँ .<br />
3. मटीमीडया सं देश भेजने के िलए<br />
सं देश िलख चुन.<br />
4. सं देश भेजने या रत करन के िलए<br />
परा का चयन कर.<br />
आप लाइड पढ़ने के िलए य वकप<br />
और सं देश सामी पढ़ने और आकार के<br />
िलए गुण ारा टेपलट क सामी देख<br />
सकत ह.<br />
सं देश सवा<br />
53
सं देश सवा<br />
सं देश सवा<br />
MMS सटं ग (Menu 5.2.6)<br />
MMS सं देश भेजने के पहल, आपको<br />
MMS सटं ग पण करने क आवयकता<br />
होती है.<br />
1. सं देश सवा मेन म, मटीमीडया सं देश<br />
चुन और ठक दबाएँ .<br />
2. सं देश सटं ग का चयन कर और ठक<br />
दबाएँ .<br />
3. आपका फ़ोन आपके वकप के िलए<br />
िनन चयन दान करता है:<br />
► िलख: आप िनन वकप स आपका<br />
िलख वप सट कर सकत ह<br />
िनमाण: मु /ितबं िधत<br />
छव का आकार बदलना: 160x120/<br />
320x240/640x480/बं द<br />
वत: हतार: चाल/बं द<br />
► भेज:<br />
वैधता अविध: इस अविध तक<br />
आपके सं देश, सं देश के म<br />
सं हत रहता है.<br />
– समय क अविध के वकप म<br />
शािमल है: अिधकतम./1 घं टा/12<br />
घं टे/1 दन/1 साह<br />
वतरण रपट: यद आप सवा<br />
दाता स वतरण रपट ा करना<br />
या नहीं करना चाहत ह तो आप यह<br />
फ़ं शन चाल या बं द कर सकत ह.<br />
रपट पढ़: यद आप सवा दाता<br />
स रपट ा करना चाहत ह तो<br />
आप यह फ़ं शन चाल या बं द कर<br />
सकत ह.<br />
– ाथिमकता: आप सं देश<br />
ाथिमकता चुन सकत ह; वकप<br />
म सामाय, उच, और िनन<br />
शािमल है.<br />
– लाइड समय: आप आपक<br />
ाथिमकता के आधार पर लाइड<br />
समय सट कर सकत ह.<br />
– वतरण समय: समय क अविध<br />
के वकप म तुरंत/एक घं टा /<br />
12 घं टे / 24 घं टे म शािमल है<br />
► पुना कर:<br />
होम नेटवक: होम नेटवक के वकप<br />
म तकाल / वलबत / ितबं िधत<br />
शािमल है.<br />
रोिमग: रोिमग नेटवक के वकप<br />
म घर क तरह / जैसा/वलबत /<br />
ितबं िधत शािमल है.<br />
54
पठन रपट: रपट पढ़ने के वकप<br />
म अनरोध पर/भेज/कभी न भेज<br />
शािमल है.<br />
वतरण रपट.: पछल सं देश क<br />
वतरण रपस भेजने हेतु नेटवक<br />
स अनरोध करने के िलए आप यह<br />
फ़ं शन चाल या बं द कर सकत ह.<br />
► फटर कर:<br />
अनाम: अनाम के वकप म<br />
अनमित द/िनरत कर शािमल है.<br />
अिध. आकार: मटीमीडया सं देश<br />
के आकार के िलए.<br />
यावसाियक: वापन सटं ग के<br />
वकप म अनमित द/िनरत कर<br />
शािमल है.<br />
► सवर ोफ़ाइल: आप िनित नेटवक<br />
या सवा दाता ारा मटीमीडया<br />
सं देश ा कर सकत ह और भेज<br />
सकत ह. ोफ़ाइल ववरण सटं ग<br />
सय या सं पादत करने के िलए,<br />
ठक दबाएँ .<br />
► मेमोरी िथित: आप यह जाँच सकत<br />
ह क फ़ोन क आतरक मेमोरी का<br />
कतना ितशत र है और सं देश<br />
अब भी कस कार स िसम काड या<br />
फ़ोन क मेमोरी म सं हत कए जा<br />
सकत ह.<br />
नोट<br />
MMS सटं ग पण करने के िलए, आप<br />
आपके नेटवक सवा दाता स सं पक कर<br />
सकत ह.<br />
चैट Menu 5.3<br />
आप यहाँ स अपने िम के साथ चैट कर<br />
सकत ह. यहाँ 2 चैट म ह.<br />
चैट करने के पहल, आपको चैट म<br />
जानकारी म जाने क आवयकता होती है<br />
1. सं पादत कर दबाकर एक चिलत<br />
नाम बनाएँ .<br />
2. इसके बाद, सं पक स मोबाइल फ़ोन<br />
नबर या खोज दज कर.<br />
चैट ारंभ करने के िलए<br />
1. चैट म सटं ग के बाद, नया ारंभ<br />
कर दबाएँ .<br />
2. सं पादत कर दबाकर एक चिलत<br />
नाम बनाएँ .<br />
3. इसके बाद, आप उस यि को सं देश<br />
िलख सकत ह जसस आप चैट करना<br />
चाहत ह.<br />
4. िलखने के बाद, चैटं ग ारंभ करने के<br />
िलए भेज दबाएँ .<br />
सं देश सवा<br />
55
सं देश सवा<br />
सं देश सवा<br />
आपके चैट ारंभ करने पर आपका फ़ोन<br />
िनन चयन दान करता है.<br />
► भेज: आपके ारा िलखा गया सं देश<br />
भेजने क सु वधा देता है.<br />
► टेपलट उपयोग कर: आपके<br />
SMS टेपलट वकप म टेपलट<br />
सिमिलत करने क सु वधा देता है.<br />
► PHB नबर सिमिलत कर: आपके<br />
सं पक स फ़ोन नबर सिमिलत करने<br />
क सु वधा देता है.<br />
► PHB नाम सिमिलत कर: आपके<br />
सं पक स नाम सिमिलत करने क<br />
सु वधा देता है.<br />
► इनपुट विध: आपक इनपुट विध<br />
बदलने क सु वधा देता है.<br />
आपका फ़ोन चैटं ग के दौरान िनन चयन<br />
दान करता है,<br />
► उर द: उस यि ारा भेजे गए सं देश<br />
का उर देने क सु वधा देता है जसके<br />
साथ आप चैट करत ह.<br />
► नबर उपयोग कर: चैटर का नबर या<br />
चैटर ारा भेजा गया नबर रत करने<br />
क सु वधा देता है.<br />
► चैट साफ़ कर: आपका वातालाप साफ़<br />
करने क सु वधा देता है.<br />
► अथायी छोड़: चैट म अथायी प<br />
स छोड़ने क सु वधा देता है.<br />
► बाहर िनकल: इस चैट म स बाहर<br />
िनकलने क सु वधा देता है<br />
► चैट म जानकारी: आपके ारा सट<br />
क गई चैट म जानकारी पढ़ने क<br />
सु वधा देता है.<br />
नोट<br />
यद आप चैट म अथायी प स छोड़त<br />
ह, तो आप चैटं ग जारी या समा करना<br />
चुन सकत ह.<br />
वॉइस मेल सवर Menu 5.4<br />
यद आपका ऑपरेटर इस फ़ं शन का<br />
समथन करता है तो आपका फ़ोन शीता<br />
स आपको आपके वॉइस मेलबॉस का<br />
उपयोग करने क सु वधा देता है.<br />
आपका वॉइस मेल नबर आपके सवा<br />
दाता ारा दान कया जाएगा और फ़ोन<br />
म दखाया जाएगा. वॉइस मेल सबमेन म,<br />
आप पं ि 1 या 2 और वकप सू ची चुन<br />
सकत ह जसम शािमल है:<br />
1. सं पादत कर: वॉइस मेल पं ि 1 का<br />
नाम व नबर सं पादत करने क सु वधा<br />
देता है.<br />
56
2. वॉइस स कनेट कर: आपके वॉइस<br />
मेल बॉस स कनेट होने क सु वधा<br />
देता है.<br />
► टडबाय मोड म, आपके वॉइस मेल<br />
सवर तक सीधे पहु ँचने के िलए कु छ<br />
देर तक 1 दबाएँ .<br />
नोट<br />
इस फ़ं शन का उपयोग करने के िलए,<br />
आपको आपके सवा दाता स ा वॉइस<br />
सवर नबर दज करने क आवयकता हो<br />
सकती है.<br />
► भाषाएँ : आपको ा होने वाल<br />
सारत सं देश क भाषाएँ आप सट<br />
कर सकत ह.<br />
► चैनल सटं ग: आप चैनल सू ची स<br />
चैनल का चयन कर सकत ह या सू ची<br />
म ऐस नए चैनल जोड़ सकत ह जहाँ<br />
आप सं देश ा करना चाहत ह.<br />
सं देश सवा<br />
सारण सं देश Menu 5.5<br />
आपका फ़ोन यावसाियक सं देश ा<br />
करने क सु वधा देता है. आप ाि मोड,<br />
चाल या बं द कर सकत ह और आपक<br />
यिगत ाथिमकता के आधार पर कु छ<br />
अय सटं स सट कर सकत ह.<br />
आपका फ़ोन िनन चयन दान करता है:<br />
► ाि मोड: आपको ा हुए अितम<br />
सारत सं देश को ा करना या नहीं<br />
करना आप चुन सकत ह.<br />
► सं देश सू ची: आप “ठक” दबाकर सं देश<br />
पढ़ सकत ह या “वापस” दबाकर बाहर<br />
िनकल सकत ह<br />
57
मेरा सामान [Menu 6]<br />
मेरा सामान<br />
इस मेन म, आप आपक छवयाँ, फ़ोटो,<br />
रकॉडग् स और टोस बं िधत कर सकत<br />
ह. दो सं हण दखाए जाएँ गे:<br />
► मेमोरी काड<br />
आप आपके मेमोरी काड म रत<br />
क ग फ़ाइल जाँच सकत ह.<br />
► फ़ोन<br />
आप आपके फ़ोन म रत क ग<br />
फ़ाइल जाँच सकत ह.<br />
मेरा सामान देखना/यविथत करना<br />
ारंभ करने के िलए<br />
1. जब आप इस मेन म जात ह, तो आप<br />
फ़ोन कर सकत ह यद आप माइो<br />
SD काड डालत ह तो आपको मेमोरी<br />
काड नामक एक और वकप दखाई<br />
देगा.<br />
2. इिछत फ़ोडर पर ॉल कर और<br />
वकप दबाएँ वकप का चयन कर:<br />
खोल, फ़ोडर बनाएँ और वपत<br />
कर.<br />
3. जब आप उनम स कसी एक फ़ोडर<br />
(ऑडयो, छवयाँ, वीडयो, मेरा सं गीत,<br />
फ़ोटोज़, ा) का चयन करत ह तो<br />
आपका फ़ोन आपके वकप के िलए<br />
िनन चयन दान करता है.<br />
4. आप यह कर सकत ह<br />
► खोल: फ़ोडर खोलने क सु वधा<br />
देता है.<br />
► फ़ोडर बनाएँ : आपको नया<br />
फ़ोडर बनाने क सु वधा देता है.<br />
► नाम बदल: आपको फ़ाइल का<br />
नाम बदलने क सु वधा देता है.<br />
► हटाएँ : चयिनत फ़ाइल को हटाने<br />
क सु वधा देता है.<br />
► मब कर: फ़ाइल को नाम,<br />
कार, समय और आकार के<br />
आधार पर सॉट करने क सु वधा<br />
देता है.<br />
58
ोफ़ाइल [Menu 7]<br />
आप अलग-अलग वातावरण क िथितय<br />
म लागू करने के िलए िनन िभन<br />
ोफ़ाइल सट कर सकत ह.<br />
आपका फ़ोन 7 िभन ोफ़ाइल दान<br />
करता है, जनम शािमल ह:<br />
► सामाय: फ़ोन क डफ़ॉट सटं ग<br />
जैसी मानक ोफ़ाइल.<br />
► मीटं ग: रंग वॉयम िनन पर सट<br />
होती है और क टोन बं द कर दी<br />
जाती है.<br />
► बाहर: रंग और क टोन वॉयम ऊँ च<br />
तर पर सट कए जात ह.<br />
► के वल कं पन: रंग और क टोन<br />
वॉयम बं द कर दए जात ह और<br />
कं पन चाल कर दया जाता है.<br />
► हेडसट: हेडसट लग-इन के िलए<br />
ोफ़ाइल.<br />
► मौन: रंग वॉयम और कं पन बं द कर<br />
दए जात ह और के वल LED चाल<br />
होता है.<br />
► लटू थ: लटू थ के कनेट होने पर<br />
ोफ़ाइल.<br />
िच<br />
ोफ़ाइल मोड<br />
सामाय<br />
मीटं ग<br />
बाहर<br />
िच<br />
ोफ़ाइल मोड<br />
के वल कं पन<br />
मौन<br />
हेडसट<br />
लटू थ<br />
ोफ़ाइल सय करने के िलए<br />
1. ोफ़ाइल मेन म, ोफ़ाइल चुन और<br />
फर ठक दबाएँ .<br />
2. सय कर चुन और ठक दबाएँ .<br />
ोफ़ाइल सं पादत करने के<br />
िलए<br />
अपनी ाथिमकताएँ परी करने के िलए<br />
आप सामाय ोफ़ाइल सटग अनकू िलत<br />
कर सकत ह.<br />
1. ोफ़ाइल मेन म, ोफ़ाइल चुन और<br />
फर ठक दबाएँ .<br />
2. अनकू िलत कर चुन और ठक दबाएँ .<br />
आपका फ़ोन आपके वैयिकरण वकप<br />
के िलए िनन चयन दान करता है:<br />
► टोन सटअप: आपक पसं द क रंग<br />
टोन सट करने क सु वधा देता है<br />
ोफ़ाइल<br />
59
ोफ़ाइल<br />
ोफ़ाइल<br />
नोट<br />
कृ पया रंग वॉयम उच तर पर सट होने<br />
पर अपने कान क सु रा का यान रख.<br />
► वॉयम: रंग टोन और क टोन का<br />
वॉयम समायोजत करने क सु वधा<br />
देता है.<br />
► चतावनी कार: विभन चतावनी<br />
कार का चयन करने क सु वधा देता<br />
है जसम रंग, के वल कं पन, कं पन<br />
और रंग, कं पन फर रंग, के वल<br />
लाइट और एक बार बीप शािमल है.<br />
► इटेिलजट कॉल: रंग करने के पहल<br />
आपके फ़ोन को फ़ोन नबर बताने क<br />
सु वधा देता है.<br />
► रंग कार: कॉल आने पर वर को<br />
एकल रखने, दोहराने या बढ़ाने क<br />
सु वधा देता है.<br />
► अितर टोन: अय टोस चाल या<br />
बं द रखने क सु वधा देता है.<br />
► उर मोड: फ़ोन का उर देने का<br />
तरीका चुनने क सु वधा देता है.<br />
► िथित LED: कोई िसग् नल होने<br />
पर आपक िथित LED को सय<br />
या िनय करना चुनने क सु वधा<br />
देता है.<br />
60
सं पक [Menu 8]<br />
आपक फ़ोनबुक िसम काड क मेमोरी<br />
या फ़ोन क मेमोरी म रत क जाती है.<br />
आप कसी भी मेमोरी म रत करना भी<br />
चुन सकत ह.<br />
खोज Menu 8.1<br />
सं पक म रत कए गए नाम और नबस<br />
खोजने क सु वधा देता है.<br />
कोई नबर और नाम खोजने के िलए<br />
1. सं पक मेन म, सं पक यि का परा<br />
नाम या नाम का पहला वण िलख.<br />
सं पक सू ची वत: आपके ारा दज<br />
कए गए वण वाली सं पक सू ची पर<br />
चली जाएगी या मेल खाने वाला सं पक<br />
दखाया जाएगा.<br />
2. जस आप कॉल करना चाहत ह उसका<br />
चयन कर और S दबाकर कॉल<br />
ारंभ कर.<br />
नोट<br />
खोज मोड म, आप इनपुट विध को तज़ी स<br />
बदलने के िलए # क दबा सकत ह.<br />
आप वकप इनपुट विध बदलने या<br />
चयिनत फ़ोन नबर सं पादत करने के िलए<br />
भी दबा सकत ह.<br />
आपका फ़ोन व वकप के िलए<br />
िनन चयन दान करता है:<br />
► इनपुट वधी: डफ़ॉट इनपट भाषा<br />
चनने क सवधा देता है.<br />
► देख: सं पक यि क जानकारी पढ़ने<br />
क सु वधा देता है.<br />
► सं पादत कर: सं पक यि का नाम<br />
और फ़ोन नबर सं पादत करने क<br />
सु वधा देता है.<br />
► नया सं देश: आपको चयिनत सपक<br />
वाल यि को SMS या MMS भेजने<br />
क सु वधा देता है.<br />
► हटाएँ : चयिनत सं पक यि क<br />
जानकारी हटाने क सु वधा देता है.<br />
► नया सपक: फ़ोनबुक म नए सपक<br />
यि को जोड़ने क सवधा देता है.<br />
► कॉपी कर: सं पक यि क जानकारी<br />
क फ़ोन या िसम म ितिलप बनाने<br />
क सु वधा देता है. (इस पर िनभर<br />
करता है क आपने फ़ोन नबर कहाँ<br />
रत कया है)<br />
► मू व: चयिनत सं पक यि क<br />
जानकारी को फ़ोन या िसम म ल जाने<br />
क सु वधा देता है.<br />
सं पक<br />
61
सं पक<br />
सं पक<br />
► डुिलके ट: चयिनत सं पक यि क<br />
जानकारी का उसी मेमोरी सं हण म<br />
डुिलके ट बनाने क सु वधा देता है.<br />
► वी-काड भेज: चयिनत सं पक यि<br />
को वी_काड भेजने क सु वधा देता है.<br />
नया सं पक Menu 8.2<br />
सं पक म नया नाम और नबर जोड़ने क<br />
सु वधा देता है.<br />
सं पक म कोई फ़ोन नबर और नाम जोड़ने<br />
के िलए<br />
1. सं पक मेन म, नया सं पक चुन, ठक<br />
दबाएँ .<br />
2. िसम म या फ़ोन म का चयन करके<br />
और ठक दबाकर रत कर के िलए<br />
एक सं हण चुन.<br />
3. नाम िलख, ठक दबाएँ और नबर तं भ<br />
पर जाने के िलए नेवगेशन क का<br />
उपयोग कर, नबर िलख.<br />
4. आप यिगत सं पक का नाम, घर<br />
का नबर, कं पनी का नाम, ईमेल<br />
पता, कायालय का नबर, फ़ैस नबर,<br />
जमदन, छव, रंग टोन और कॉलर<br />
समू ह सं पादत भी कर सकत ह.<br />
नोट<br />
आपके फ़ोन म आप फ़ोन नबस क 500<br />
वयाँ रत कर सकत ह.<br />
कॉलर समू ह Menu 8.3<br />
फ़ोन म पाँच डफ़ॉट समू ह होत ह.<br />
आप िभन-िभन टोन/िच/ LED/<br />
वीडयो/सदय सची के साथ हर समह का<br />
नाम सपादत कर सकत ह.<br />
कॉलर समह के फ़ं शन स, आप इस<br />
सटग ारा एक ही समय म समू ह के सभी<br />
सदय को सदेश भज सकत ह.<br />
समू ह म कोई नाम जोड़ने के िलए<br />
1. सं पक मेन म, कॉलर समू ह चुन, ठक<br />
दबाएँ .<br />
2. कोई समू ह चुन, ठक दबाएँ .<br />
3. सदय सू ची चुन, ठक दबाएँ .<br />
4. जोड़ दबाएँ , फर आप सं पक म स चुन<br />
सकत ह.<br />
नोट<br />
► आपका फ़ोन 5 कॉलर समू ह दान करता<br />
है जनम शािमल ह: िम, परवार,<br />
वीआईपी, यवसाय व अय.<br />
62
► यद आप सपक को कॉलर प फ़ं शन<br />
म जोड़ना चाहत ह तो आपको सपक<br />
को फ़ोन म सहीत करना होगा न क<br />
SIM म.<br />
आपका फ़ोन आपके वकप के िलए<br />
िनन चयन दान करता है:<br />
► समू ह नाम: समू ह म िम, परवार,<br />
वीआईपी, यवसाय और अय<br />
शािमल ह.<br />
► रंग टोन: इस वशेष कॉल समू ह के<br />
िलए रंग टोन क ोफ़ाइल सट करने<br />
क सु वधा देता है<br />
► िच: समू ह के िलए कोई िच सट<br />
करने क सु वधा देता है.<br />
► िथित LED: कसी के ारा कॉल<br />
करने पर आपक LED लाइट को चाल<br />
या बं द रखना चुनने क सु वधा देता है.<br />
► वीडयो: समू ह के िलए कोई वीडयो<br />
िलप सट करने क सु वधा देता है.<br />
► सदय सू ची: िनद समू ह म कोई<br />
सदय जोड़ने क सु वधा देता है.<br />
पीड डायल Menu 8.4<br />
यद आप सं पक म रत कए गए नबर<br />
को पीड डायल क (2 स 9 तक)<br />
म स कसी एक को असाइन करत ह, तो<br />
आप टडबाय मोड म वह क कु छ देर<br />
दबाकर फ़ोन नबर को कॉल कर सकत ह.<br />
1. सं पक मेन म, पीड डायल चुन.<br />
2. पीड डायल वकप सम कर स<br />
पीड डायल चाल कर.<br />
3. नबर सट कर का चयन कर और<br />
आपक सं पक सू िचय स नबर सं पादत<br />
करने के िलए ठक दबाएँ .<br />
अितर नबर Menu 8.5<br />
आपक वयं क ाथिमकता के िलए<br />
अपना नबर, सवा डायल नबर और SOS<br />
नबर सं पादत करने क सु वधा देता है.<br />
नोट<br />
आपका सवा दाता आपक िसम म कु छ<br />
वशेष फ़ोन नबर ोाम कर सकता है.<br />
यद समथन न हो तो सवा डायल नबस को<br />
सं ाोिधत करना सं भव नहीं है.<br />
सं पक<br />
63
सं पक<br />
सं पक<br />
कॉपी Menu 8.6<br />
आप अपने फ़ोन डेटा क िसम स फ़ोन<br />
पर (या फ़ोन स िसम पर) कॉपी या<br />
थानांतरत कर सकत ह.<br />
1. सं पक मेन म, कॉपी का चयन कर.<br />
2. कोई आइटम िसम स सभी, फ़ोन स<br />
सभी या एक-एक करके चुन, और<br />
ठक दबाएँ .<br />
हटाएँ Menu 8.7<br />
आपका फ़ोन सं पक म सं हत सभी नबर<br />
और नाम हटाने क सु वधा देता है.<br />
1. सं पक मेन म, मू व का चयन कर.<br />
2. फ़ोन स सभी, िसम स सभी या एक-<br />
एक करके चुन, ठक दबाएँ .<br />
मू व Menu 8.8<br />
आपका फ़ोन सं पक म सं हत सभी नबस<br />
और नाम ल जाने क सु वधा देता है.<br />
1. सं पक मेन म, हटाएँ का चयन कर.<br />
2. फ़ोन स सभी, िसम स सभी, या एक-<br />
एक करके चुन, ठक दबाएँ .<br />
सटं स Menu 8.9<br />
आपके फ़ोन को यिगत बनाने के िलए<br />
आपका फ़ोन कई सटं ग वकप दान<br />
करता है, जनम शािमल ह<br />
1. कॉलर िच: कॉल करत समय आपके<br />
िम के िच ID के प म उसका फ़ोटो<br />
या कोई अय िच उपयोग करने क<br />
सु वधा देता है.<br />
2. कॉलर रंग टोन: आपक सं पक सू ची के<br />
कसी विश यि या कॉलर समू ह के<br />
िलए आने वाली रंग टोन को यिगत<br />
बनाने क सु वधा देता है.<br />
3. कॉलर वीडयो: आपक सं पक सू ची के<br />
कसी विश यि के िलए िनित<br />
वीडयो िलप उपयोग करने क<br />
सु वधा देता है.<br />
4. मेमोरी िथित: आप यह जाँच सकत<br />
ह क फ़ोन क आतरक मेमोरी का<br />
कतना ितशत र है और कतने<br />
नाम और नबर वयाँ अब भी िसम<br />
काड या फ़ोन क मेमोरी म सं हत<br />
कए जा सकत ह.<br />
5. ाथिमक सं हण: आप अपना<br />
ाथिमक सं हण फ़ोन, िसम या दोन<br />
म चुन सकत ह.<br />
64
6. फ़ीड: आप अपने डले पर दखाई<br />
जाने वाली सं पक जानकारी अनकू िलत<br />
कर सकत ह.<br />
7. मेरा वी-काड: आप अपनी वी-काड<br />
जानकारी सं पादत कर सकत ह और<br />
इस वकप स दसर के साथ साझा<br />
कर सकत ह.<br />
8. मानव विन सं के त: आपका फ़ोन<br />
0~9, * और # क स मानव<br />
विन चला सकता है. आप मानव<br />
विन कपैड टोन चाल या बं द करना<br />
चुन सकत ह.<br />
सं पक<br />
नोट<br />
आप www.lgmobile.com स PC सु इट<br />
उपकरण ा कर सकत ह. PC सु इट<br />
उपकरण स आप मोबाइल और िसम म<br />
सं हत आपक सं पक सू िचयाँ बं िधत कर<br />
सकत ह.<br />
65
सटं स [Menu 9]<br />
सटं स<br />
66<br />
समय व दनांक Menu 9.1<br />
यह फ़ं शन आपका गह नगर सट करने,<br />
आपके फ़ोन म सट समय व दनांक देखने<br />
और बदलने क सु वधा देता है. आप<br />
दनांक व समय ऑटो अपडेट करना भी<br />
चुन सकत ह.<br />
गह नगर सट कर (Menu 9.1.1)<br />
1. सटं ग मेन म, ऑटो अपडेट चुन,<br />
ठक दबाएँ<br />
2. “गह नगर सट कर” का चयन कर,<br />
ठक दबाएँ .<br />
3. सभी मु ख शहर फ़ोन म सू चीब ह.<br />
आपके चयन हेतु ऊपर/नीच ॉल<br />
करने के िलए आप नेवगेशन क का<br />
उपयोग कर सकत ह. या, ढूँ ढे जाने<br />
वाल गह नगर के चयन के िलए उसके<br />
पहल अर क “क” दबाएँ<br />
4. आपका गह नगर ढूँ ढने के बाद, समय<br />
व दनांक सबमेन पर वापस जाने के<br />
िलए ठक दबाएँ .<br />
समय व दनांक सट कर<br />
(Menu 9.1.2)<br />
1. सटं ग मेन म, समय व दनांक चुन,<br />
ठक दबाएँ .<br />
2. नवगशन और सांियक कु ं जयाँ और<br />
< LSK उपयोग करके और ठक<br />
दबाकर समय और दनांक सट कर.<br />
3. आप डेलाइट सवग चाल/बं द करना<br />
चुन सकत ह.<br />
समय वप सट कर<br />
(Menu 9.1.3)<br />
1. सटं ग मेन म, समय व दनांक चुन,<br />
ठक दबाएँ .<br />
2. वप सट कर चुन, ठक दबाएँ .<br />
3. समय व दनांक वप चुन, ठक<br />
दबाएँ .<br />
ऑटो अपडेट (Menu 9.1.4)<br />
यह फ़ं शन फ़ोन को वतमान समय <br />
के अनसार वत: समय व दनांक अतन<br />
करने हेतु सट करने के िलए है.<br />
1. सटं ग मेन म, ऑटो अपडेट चुन, ठक<br />
दबाएँ .<br />
2. ऑटो अपडेट फ़ं शन के िलए चाल या<br />
बं द का चयन कर.<br />
3. अतत:, अनरोध क पु करने के िलए<br />
हाँ चुन.
नोट<br />
नोट: दनांक व समय का ऑटो अपडेट<br />
अलाम घड़ी, कैलडर या अलाम नोस के<br />
िलए आपके ारा सट कया गया समय<br />
नहीं बदलता है. वे थानीय समय म होत<br />
ह. िनय करने स आपके ारा सट कए<br />
गए कु छ अलाम क समय सीमा समा हो<br />
सकती है.<br />
डले Menu 9.2<br />
यह फ़ं शन िनन वकप ारा आपक<br />
डले सटं ग यिगत बनाने क<br />
सु वधा देता है:<br />
► वॉलपेपर : िनय ीन पर दखाया<br />
गया वॉलपेपर बदलने क सु वधा<br />
देता है.<br />
1. सटं ग मेन म, डल चुन, ठक<br />
दबाएँ .<br />
2. वॉलपेपर चुनने के िलए, ठक<br />
दबाएँ .<br />
3. िसटम या उपयोगकता िनधारत<br />
चुन, ठक दबाएँ<br />
4. वॉलपेपर चुन, देख दबाएँ ,<br />
वॉलपेपर के प म चयन करने के<br />
िलए ठक दबाएँ .<br />
► ीन सवर: विभन ीन सवर<br />
चलाने क सु वधा देता है.<br />
1. ीन सवर चाल या बं द करने के<br />
वकप और 5 सकं ड स 1 िमनट<br />
के तीा समय के साथ आप<br />
ीन सवर क सटं ग अनकू िलत<br />
कर सकत ह. जब ीन सवर<br />
सय हो.<br />
2. सटं ग के बाद, आप िसटम या<br />
यज़र डफ़ाइन स ीन सवर<br />
का चयन कर सकत ह. दबाना<br />
कायवाई वॉलपेपर डल सटं ग<br />
के समान ही है.<br />
► पावर चाल/बं द दशन: यह फ़ोन<br />
आपको िसटम स, फ़ोन/काड मेमोरी<br />
स पावर-चाल/बं द ऐिनमेशन सट<br />
करने, या ऐिनमेशन अम करने<br />
क सु वधा देता है. समिथत वप<br />
MP4/3GP होगा.<br />
► LCD बैकलाइट: LCD क चमक और<br />
बं द होने का समय समायोजत करने<br />
क सु वधा देता है.<br />
► दनांक व समय दखाएँ : िनय<br />
ीन म दनांक व समय दखाने या<br />
नहीं दखाने क सु वधा देता है.<br />
सटं स<br />
67
सटं स<br />
सटं स<br />
68<br />
► अपना नबर दखाएँ : िनय ीन<br />
म दखाया गया आपका फ़ोन नबर<br />
सम/अम करने क सु वधा देता है.<br />
► मु ख प शॉटकट दखाएँ : आपको<br />
वरत पहु ँच के िलए 4 तरह के<br />
नेवगेशन कु ं जी डफ़ॉट फ़ं शन<br />
याद दलाने के िलए िनय मोड म<br />
आपको न शॉटकट सम/अम<br />
करने क अनमित देता है.<br />
► ऑपरेटर नाम दखाएँ : िनय ीन<br />
म आपके ऑपरेटर का नाम दखाना<br />
या नहीं दखाना चुनने क सु वधा<br />
देता है.<br />
फ़ोन Menu 9.3<br />
भाषा (Menu 9.3.1)<br />
यह फ़ोन आपको इस फ़ोन म दखाने<br />
के िलए कोई भाषा सट करने क सु वधा<br />
देता है.<br />
1. फ़ोन मेन म, भाषा चुन, ठक दबाए<br />
2. कोई भी भाषा चुन , ठक दबाएँ .<br />
अिभवादन पाठ (Menu 9.3.2)<br />
यह फ़ं शन डल म पावर चाल करने<br />
पर आने वाला सं देश दशाता है. आपके<br />
वागत नोट के िलए आप कोई भी सं देश<br />
सं पादत कर सकत ह.<br />
लाइट मोड (Menu 9.3.3)<br />
यद आप मोड को सामाय मोड के बजाय<br />
लाइट मोड पर बदलत ह, तो यह फ़ं शन<br />
लाइट के दौरान सं गीत लयर चलाने क<br />
सु वधा देता है. आप के वल सं गीत सू चीब<br />
कर सक गे.<br />
► सामाय मोड: GSM/GPRS नेटवक<br />
अब भी काय करता है जसका अथ है<br />
क आप कॉल कर सकत ह.<br />
► लाइट मोड: यद आप एयरलन<br />
म सं गीत सु नना चाहत ह तो GSM/<br />
GPRS सु रा कारण स अम कर<br />
दए जाएँ गे.<br />
► पावर चाल होने पर वेरी कर: आपके<br />
फ़ोन को कभी भी चाल करने पर<br />
आपको सामाय या लाइट मोड का<br />
चयन करना होगा.<br />
िमत सटं ग (Menu 9.3.4)<br />
यह फ़ं शन कोई भी िसग् नल ा होने<br />
पर आपको LED सू चक सम या अम<br />
करने क सु वधा देता है.<br />
शॉटकस (Menu 9.3.5)<br />
यह फ़ं शन आपको आपक शॉटकट सू ची<br />
सं पादत करने क सु वधा देता है यक<br />
यह आपक समपत क म स एक है.
कॉल Menu 9.4<br />
कॉलर ID (Menu 9.4.1)<br />
यह फ़ं शन कॉल करने या सं देश भेजने<br />
के दौरान आपका ID भेजने या छु पाने क<br />
सु वधा देता है. आपके फ़ोन म डफ़ॉट<br />
प स नेटवक ारा सट कर होता है<br />
जसका अथ है क आपका ID आपके सवा<br />
दाता ारा िनधारत कया जाता है.<br />
कॉल तीा (Menu 9.4.2)<br />
यह नेटवक सवा अय कॉल के दौरान<br />
कसी के ारा आप तक पहु ँचने का यास<br />
करने पर आपको सू िचत करने म सम<br />
करती है.<br />
1. सटं ग मेन म, कॉल चुन, ठक दबाएँ .<br />
2. कॉल तीा चुन, ठक दबाएँ , सय<br />
कर या िनय कर चुन और ठक<br />
दबाएँ .<br />
3. िथित जान का चयन कर आप यह<br />
देख सकत ह क यह फ़ं शन सय है<br />
या िनय है.<br />
कॉल डाइवट Menu 9.4.3)<br />
आप कॉल क िथित सट कर सकत ह<br />
जसस कॉस अय नबस पर डाइवट<br />
कए जात ह.<br />
कॉल डाइवट सट करने के िलए<br />
1. सटं ग मेन म, कॉल चुन, ठक दबाएँ .<br />
2. कॉल डाइवट चुन, ठक दबाएँ और तब<br />
कोई आइटम चुन, ठक दबाएँ .<br />
3. सय कर चुन, ठक दबाएँ .<br />
4. वह नबर दज कर जस पर आप डाइवट<br />
करना चाहत ह, ठक दबाएँ .<br />
आपका फ़ोन आपके वकप के िलए<br />
िनन डाइवट चयन दान करता है:<br />
► सभी वॉइस कॉल डाइवट कर: सभी<br />
वॉइस कॉस डाइवट क ग.<br />
► पहु ँच म न होने पर डाइवट कर: जब<br />
आप आपके सवा दाता के सवा <br />
म नहीं होत ह तब कॉस डाइवट क<br />
जाती ह.<br />
► अनरत होने पर डाइवट कर: कॉल<br />
का उर नहीं दए जाने पर कॉस<br />
डाइवट क जाती ह.<br />
► यत होने पर डाइवट कर: आपके<br />
फ़ोन के अय कॉस म यत होने<br />
पर कॉस डाइवट क जाती ह.<br />
► सभी डेटा कॉल डाइवट कर: सभी डेटा<br />
कॉल डाइवट क जाती ह.<br />
► सभी डाइवट र कर: ऊपर बताई ग<br />
सटं स र करता है.<br />
सटं स<br />
69
सटं स<br />
सटं स<br />
कॉल डाइवट सट करने के िलए<br />
1. सटं ग मेन म, कॉल चुन, ठक दबाएँ .<br />
2. कॉल डाइवट चुन, ठक दबाएँ और तब<br />
कोई आइटम चुन, ठक दबाएँ .<br />
3. सय कर चुन, ठक दबाएँ .<br />
4. वह नबर दज कर जस पर आप डाइवट<br />
करना चाहत ह, ठक दबाएँ .<br />
आपका फ़ोन आपके वकप के िलए<br />
िनन डाइवट चयन दान करता है:<br />
► सभी वॉइस कॉल डाइवट कर: सभी<br />
वॉइस कॉस डाइवट क ग.<br />
► पहु ँच म न होने पर डाइवट कर: जब<br />
आप आपके सवा दाता के सवा <br />
म नहीं होत ह तब कॉस डाइवट क<br />
जाती ह.<br />
► अनरत होने पर डाइवट कर: कॉल<br />
का उर नहीं दए जाने पर कॉस<br />
डाइवट क जाती ह.<br />
► यत होने पर डाइवट कर: आपके<br />
फ़ोन के अय कॉस म यत होने<br />
पर कॉस डाइवट क जाती ह.<br />
► सभी डेटा कॉल डाइवट कर: सभी डेटा<br />
कॉल डाइवट क जाती ह.<br />
► सभी डाइवट र कर: ऊपर बताई ग<br />
सटं स र करता है.<br />
कॉल रोधन (Menu 9.4.4)<br />
यह नेटवक सवा आपके फ़ोन पर आने<br />
वाली कॉस और जाने वाली कॉस<br />
ितबं िधत करने क सु वधा देती है.<br />
फ़ं शन का उपयोग करने के िलए रोधन<br />
पासवड आवयक होता है.<br />
► जाने वाली: सभी कॉल/अतराीय कॉल/<br />
घर के अलावा अतराीय कॉल रोिधत<br />
करने के िलए<br />
► आने वाली: सभी कॉल/रोिमग के समय<br />
रोिधत करने के िलए<br />
► सभी र कर: सभी कॉल रोधन सटं ग<br />
र करने के िलए (आपको रोधन<br />
पासवड दज करने क आवयकता<br />
होगी).<br />
► रोधन पासवड बदल: रोधन कॉल सट<br />
करने के िलए, आपस आपका कॉल<br />
रोधन पासवड दज करने के िलए कहा<br />
जाता है. यह मेन आपको आपका कॉल<br />
रोधन पासवड बदलने म सम करता<br />
है. डफ़ॉट पासवड सटं ग जानने के<br />
िलए, कृ पया आपके सवा ऑपरेटर स<br />
सं पक कर.<br />
70
लाइन बदल (Menu 9.4.5)<br />
यह फ़ोन लाइन 1 या 2 का चयन<br />
करने क एक नेटवक सवा है जो क<br />
ALS सटअप सबमेन स कॉल करने का<br />
सदयता नबर है.<br />
नोटस<br />
यद आप लाइन 2 का चयन करत ह कं तु<br />
इस नेटवक सवा क सदयता नहीं लत ह, तो<br />
आप कॉल नहीं कर पाएँ गे. हालाँक, चयिनत<br />
लाइन पर यान दए बना दोन लाइन क<br />
कॉस का उर दया जा सकता है.<br />
कॉल रमाइंडर (Menu 9.4.6)<br />
यह फ़ं शन आपको कसी कॉल के दौरान<br />
समय रमाइंडर सट करने क सु वधा देता है.<br />
1. सटं ग मेन म, ठक दबाएँ . इसके बाद,<br />
कॉल चुन, ठक दबाएँ .<br />
2. कॉल रमाइंडर चुन, ठक दबाएँ .<br />
3. कोई आइटम चुन, ठक दबाएँ .<br />
आपका फ़ोन आपके वकप के<br />
िलए िनन समय चतावनी के चयन<br />
दान करता है:<br />
– बं द<br />
– एकल<br />
– आविधक<br />
नोटस<br />
आविधक का यनतम समय कम स कम<br />
30 सकं ड है.<br />
कॉल समय दशन (Menu 9.4.7)<br />
यह फ़ं शन आपको डले पर दखाया<br />
जाने वाला कॉल समय सम/अम करने<br />
क सु वधा देता है.<br />
वत: रीडायल (Menu 9.4.8)<br />
यह फ़ं शन आपको वत: रीडायल सट<br />
करने क सु वधा देता है. चाल का चयन<br />
कर और आपका फ़ोन एक असफल कॉल<br />
यास के बाद कॉल कनेट करने के<br />
अिधक स अिधक दस यास करेगा.<br />
सीिमत उपयोगकता समू ह<br />
(Menu 9.4.9)<br />
यह फ़ं शन आपको सीिमत कॉल समू ह<br />
सट करने क सु वधा देता है. के वल<br />
विश समू ह का यि ही कॉल कर<br />
सकता है या उसक कॉल ही ा क जा<br />
सकती है.<br />
सटं स<br />
71
सटं स<br />
सटं स<br />
72<br />
लटू थ Menu 9.5<br />
आपका फ़ोन लटू थ तकनीक V1.2 के<br />
सं गत डज़ाइन कया गया है. लटू थ<br />
तकनीक इलॉिनक डवाइसज़ के बीच<br />
वायरलस कनेशन सम करती है.<br />
लटू थ कनेशन टीरयो सं गीत सु नने,<br />
छवयाँ, वीडयो, पाठ और vCard भेजने<br />
के िलए उपयोग कया जा सकता है.<br />
लटू थ तकनीक का उपयोग ारंभ<br />
करने के िलए<br />
पहली बार उपयोग करने पर आपको<br />
डवाइस के साथ लटू थ कनेटवटी सट<br />
करने क आवयकता होगी. सटं ग के<br />
बाद, आप िनित डवाइस कनेट कर<br />
लटू थ उपयोग कर सकगे.<br />
जब भी आपक लटू थ कनेटीवटी चाल<br />
होती है, तब िथित पटी पर दखाई<br />
देगा, कनेशन चाल होना दशाता है;<br />
लाल चे कसी के ारा BT डवाइस<br />
जाँचने का यास करने पर अय<br />
दशाता है.<br />
ऑडयो डवाइस जोड़ना<br />
1. सटं स मेन म, ठक दबाकर लटू थ<br />
का चयन कर.<br />
2. पहल आपको आपके उस फ़ोन और डवाइस<br />
क ल टू थ कनेटवटी चाल करनी होगी<br />
जस आप कनेट करना चाहत ह.<br />
3. चाल करने के बाद, ऑडयो डवाइस<br />
जाँच दबाएँ . आपका फ़ोन वत:<br />
डवाइस खोज लगा और उसस जु ड़<br />
जाएगा.<br />
4. जब भी आपका फ़ोन डवाइस स<br />
कनेट होता है, तो आपको सू िचत<br />
करने के िलए एक पॉप-अप सं देश<br />
आएगा.<br />
5. आपके फ़ोन को हेडसट स जोड़ने के<br />
िलए जोड़ दबाएँ .<br />
6. इसके बाद, आप BT हेडसट को<br />
ववास सू ची स जोड़ सकत ह और हाँ<br />
दबाकर हेडसट कनेट कर सकत ह.<br />
नोट<br />
► BT हेडसट उपयोग करने के पहल, कृ पया<br />
सु िनित कर क आपका डवाइस परा<br />
चाज है.<br />
► ववास सू ची म जोड़ा गया BT हेडसट<br />
मेरा डवाइस सची म दखाया जाएगा.<br />
भवय म, यद आप अपने मोबाइल<br />
फ़ोन को िनित BT हेडसट स कनेट<br />
करना चाहत ह, तो कनेशन के िलए<br />
आप मेरा डवाइस सची स चयन कर<br />
सकत ह.<br />
► आपके ारा कनेट क ग सभी सय<br />
डवाइसज़ सय डवाइस म दखाई<br />
जाएँ गी और आप कसी भी समय<br />
डकनेट दबा के डकनेट कर<br />
सकत ह.
w/BT डवाइस जोड़ना<br />
1. सटं स मेन म, ठक दबाकर लटू थ<br />
का चयन कर.<br />
2. मेरी डवाइस पर जाएँ और वकप<br />
दबाएँ .<br />
3. नए डवाइस क पछताछ कर, तब<br />
आपका फ़ोन अपने आप सभी BT<br />
डवाइस खोजे गा.<br />
w/BT डवाइस कनेट<br />
1. सटं स मेन म, ठक दबाकर लटू थ<br />
का चयन कर.<br />
2. मेरा डवाइस पर जाएँ और कनेट कए<br />
जाने वाल BT हेडसट का चयन कर.<br />
3. वकप दबाएँ और कनेट कर का<br />
चयन कर.<br />
4. BT हेडसट कनेट करने के बाद,<br />
आपका फ़ोन आपस कनेट क जाने<br />
वाली ोफ़ाइल के बारे म पछे गा (यह<br />
इस पर िनभर करेगा क आपका BT<br />
हेडसट कतने ोफ़ाइल का समथन<br />
करता है).<br />
मेरा डवाइस क आपके वकप सू ची म<br />
ये शािमल ह:<br />
► कनेट: BT तकनीक का समथन<br />
करने वाला डवाइस कनेट करने क<br />
सु वधा देता है.<br />
► नाम बदल: आपको डवाइस का नाम<br />
बदलने क सु वधा देता है.<br />
► हटाएँ : आपक ववास सू ची म<br />
चयिनत आइटस को हटाने क<br />
सु वधा देता है.<br />
► सभी हटाएँ : आपक ववास सू ची म<br />
सभी आइटस को हटाने क सु वधा<br />
देता है.<br />
► सवा सू ची: आपक ववास सू ची म<br />
आपके ारा जोड़े गए डवाइसज़ ारा<br />
समिथत ोफ़ाइल जाँचने क सु वधा<br />
देता है.<br />
► नई डवाइस क पछताछ दबाएँ : नया<br />
डवाइस खोजने क सु वधा देता है.<br />
आपके मोबाइल फ़ोन को मोडेम के प<br />
म उपयोग करने के िलए<br />
आपका फ़ोन नेटवक डायल अप करने के<br />
िलए मोडेम के प म उपयोग कया जा<br />
सकता है. यह फ़ं शन के वल PC समिथत<br />
लटू थ तकनीक ारा उपयोग कया जा<br />
सकता है. सटं ग के िलए आपको अपने<br />
सवा दाता स सं पक करना होगा.<br />
लटू थ कनेटवटी के उपयोग स डेटा<br />
भेजने के िलए<br />
1. भेजे जाने वाल ऑजे ट का चयन कर<br />
2. वकप दबाएँ और अेषत कर का<br />
चयन कर<br />
सटं स<br />
73
सटं स<br />
सटं स<br />
74<br />
3. लटू थ पर चुन, तब आपका फ़ोन<br />
डवाइस खोजे गा.<br />
4. उस डवाइस का चयन कर जसस<br />
आप साझा करना चाहत ह और इसके<br />
बाद भेज.<br />
लटू थ कनेटवटी के उपयोग स डेटा<br />
ा करने के िलए<br />
जब आप लटू थ ारा डेटा ा करत ह,<br />
तो आपस वीकार करने के बारे म पछने<br />
के िलए सू चना सं देश पॉप-अप होगा. यद<br />
आप सं देश ा करने का िनणय लत ह,<br />
तो ठक दबाएँ और डेटा मेरा सामान के<br />
ा फ़ोडर म रत कर दया जाएगा.<br />
आप FTP सटं स ारा आपके ा हुए<br />
डेटा का थान बदल भी सकत ह. इसम,<br />
आप<br />
1. साझा कए गए फ़ोडर का थान<br />
अनकू िलत कर सकत ह<br />
2. पण िनयं ण या के वल पढ़ने के िलए<br />
सहत पहु ँच अिधकार समायोजत कर<br />
सकत ह.<br />
PC स डेटा ा करने के िलए<br />
आप अपने फ़ोन ारा पीसी स फ़ाइल<br />
ाउज़ कर सकत ह और थानांतरत कर<br />
सकत ह. हडसट पर फ़ाइस थानांतरत<br />
करने के िलए आपके पीसी ारा लटू थ<br />
तकनीक का समथन आवयक है. कृ पया<br />
आपके पीसी पर दखाए जा रहे िनदश का<br />
पालन कर.<br />
1. सटं स मेन म, ठक दबाकर लटू थ<br />
का चयन कर.<br />
2. हडसट और पीसी दोन पर लटू थ<br />
चाल कर.<br />
3. पीसी ढूँ ढने के बाद सटअप के िलए<br />
पीसी पर दखाए जा रहे िनदश का<br />
पालन कर. कनेट कया गया पीसी<br />
मेरी डवाइस म जोड़ दया जाएगा.<br />
4. वकप दबाएँ और कनेट करने के<br />
िलए FTP ोफ़ाइल का चयन कर.<br />
5. तब, आप अपने हडसट पर पीसी स<br />
फाइल ाउज कर सकगे और कॉपी<br />
कर सकगे.<br />
टीरयो सं गीत सु नना<br />
1. सटं स मेन म, ठक दबाकर लटू थ<br />
का चयन कर<br />
2. यद आपने पहल स ही टीरयो लटू थ<br />
हैडसट जोड़ा है, तो कृ पया मेरा डवाइस<br />
पर जाएँ और कनेट करने के िलए<br />
आपका इिछत हैडसट चुन. यद<br />
आपने पहल कभी लटू थ हैडसट नहीं<br />
जोड़ा है, तो कृ पया पहल हैडसट जोड़.<br />
3. मेरी डवाइस पर जाएँ और कनेट<br />
करने के िलए इिछत BT हैडसट चुन.
4. वकप दबाएँ और कनेट करने के<br />
िलए A2DP ोफ़ाइल चुन.<br />
5. आप इस छोटे लटू थ हैडसट ारा<br />
समिथत ोफ़ाइल क सू ची देखगे.<br />
6. A2DP ोफ़ाइल चुन और कनेट<br />
करने के िलए LSK दबाएँ .<br />
आपक BT तकनीक सट करने के िलए<br />
आपक सटं ग सू ची म ये शािमल ह:<br />
► यता: अय डवाइसज़ ारा BT<br />
तकनीक समिथत डवाइसज़ खोजने<br />
का यास करने पर आप अपने फ़ोन<br />
क यता चाल या बं द करना चुन<br />
सकत ह.<br />
► डवाइस नाम बदल: आप अपना<br />
डवाइस बदल सकत ह जो क अय<br />
डवाइस म आपके फ़ोन का दिशत<br />
होने वाला नाम होता है.<br />
► माणीकरण: अय डवाइस ारा<br />
आपके फ़ोन स जु ड़ने का यास<br />
करने पर, उसस कनेट होने के<br />
िलए उस हमेशा आपक अनमित क<br />
आवयकता होगी.<br />
► ऑडयो पथ: यह फ़ं शन आपका<br />
ऑडयो पथ फ़ोन या BT हेडसट पर<br />
सट करने म आपक मदद करता है.<br />
► FTP सटं ग: आप अपने फ़ोन का<br />
साझा फ़ोडर और पहु ँच अिधकार<br />
अनकू िलत कर सकत ह.<br />
नोट<br />
आपके फ़ोन को अय मोड म ऑपरेट<br />
करना दुभावनापण सॉटवेयर स बचने<br />
का एक सु रत तरीका है. ऐस ोत स<br />
BT कनेटवटी वीकार न कर जन पर<br />
आपको ववास नहीं है.<br />
इसके बारे म<br />
आपको इसस अपनी डवाइस का नाम,<br />
BD पता, और समिथत सवा जानकारी<br />
िमल सकती है. आपका फ़ोन HSP<br />
(हैडसट –), HFP (हस-), SPP<br />
(िसरअल पट), DUN (डायल-अप<br />
नेटवकग), OPP, FTP (फ़ाइल ांसफ़र<br />
ोफ़ाइल) & A2DP (एडवांड ऑडयो<br />
डीयशन ोफाइल) सहत AVRCP_<br />
T लटू थ ोफाइल का समथन करता है.<br />
नेटवक Menu 9.6<br />
नेटवक चुन (Menu 9.6.1)<br />
आपका फ़ोन आपक नेटवक कनेटवटी<br />
के िलए 3 चयन दान करता है.<br />
सटं स<br />
75
सटं स<br />
सटं स<br />
► नई खोज: नेटवक का उपयोग करने<br />
स पहल आप हमेशा अपनी नेटवक<br />
कनेटवटी ताज़ा कर सकत ह.<br />
► नेटवक का चयन कर: यद आप<br />
मैयुअल मोड का चयन करत ह तो<br />
आपका फ़ोन नेटवक सू ची को सू चीब<br />
कर देगा.<br />
► चयन मोड: यह फ़ं शन आपको<br />
ऑपरेटर चयन मैयुअली या वत:<br />
करने म सम करता है.<br />
► वचािलत: मोड का चयन कर, फ़ोन<br />
आपके म उपलध सयलर<br />
नेटवस म स एक नेटवक का वत:<br />
चयन करता है और तब ठक दबाएँ .<br />
► मैयुअल मोड म, फ़ोन उपलध<br />
नेटवस क एक सू ची दखाएगा और<br />
यद इस नेटवक का आपके घरेल<br />
नेटवक ऑपरेटर के साथ रोिमग<br />
अनबं ध है तो आप इिछत नेटवक का<br />
चयन कर सकत ह.<br />
ाथिमक नेटवक (Menu 9.6.2)<br />
ाथिमक नेटवक तब उपयोग कया<br />
जाता है जब मोड वत: पर सट होता है.<br />
ाथिमक नेटवक सू ची के थान नबस<br />
खोज ाथिमकता दखात ह.<br />
आपके सवा दाता का नेटवक डल म<br />
दखाया जाएगा. यद आपका सवा दाता<br />
एक स अिधक नेटवक वकप दान<br />
करता है तो यह सु वधा आपके GSM/<br />
GPRS नेटवक का चयन करने म आपक<br />
मदद करती है. हालाँक, कृ पया सु िनित<br />
कर क आपने वदेश म याा के दौरान<br />
अतराीय रोिमग सवा लागू क है.<br />
आपका फ़ोन िनन वकप दान<br />
करता है:<br />
► सू ची स जोड़: वव के 300 स अिधक<br />
नेटवस स चयन कर नेटवक सू ची<br />
जोड़ने क सु वधा देता है.<br />
► नई बनाएँ : MCC/MNC दज कर<br />
और ाथिमकता समायोजत कर नई<br />
नेटवक सू ची बनाने क सु वधा देता है.<br />
► ाथिमकता बदल: आपक ाथिमक<br />
नेटवक सू ची क ाथिमकता बदलने<br />
क सु वधा देता है.<br />
► हटाएँ : चयिनत आइटम हटाने क<br />
सु वधा देता है.<br />
GPRS कनेशन (Menu 9.6.3)<br />
बदलने के िलए ठक दबाकर हडसट<br />
GPRS कनेशन िथित, “जब<br />
आवयकता हो / हमेशा” बदल सकता है.<br />
76
सु रा Menu 9.7<br />
िसम लॉक (Menu 9.7.1)<br />
यह फ़ं शन आपको कसी विश पन<br />
सया ारा SIM काड अव करने देता<br />
है. आपका फ़ोन खोने पर आपके SIM<br />
काड के उपयोग को रोकने के िलए यह<br />
सु वधा डज़ाइन क गई है.<br />
आप SIM लॉक फ़ं शन सय करने के<br />
िलए पन कोड इनपुट करके वच ऑन<br />
या ऑफ़ कर सकत ह.<br />
फोन लॉक (Menu 9.7.2)<br />
आपके फ़ोन को सु रत रखने हेतु फ़ोन<br />
लॉक फ़ं शन सय करने के िलए आप<br />
चाल या बं द कर सकत ह. यद आप फ़ोन<br />
लॉक चाल करत ह, तो अनरोध को चाल<br />
करने के िलए आपको पासवड दज करना<br />
होगा. डफ़ॉट पासवड “0000” है.<br />
वत: कपैड लॉक (Menu 9.7.3)<br />
इसस आपको ग ़लती स कोई क दबाने स<br />
बचने के िलए फ़ोन का कपैड लॉक करने<br />
क सु वधा िमलती है.<br />
सबमेन म, अितम क दबाने के बाद<br />
अम कए जाने के समय का चयन कर,<br />
तब ठक दबाएँ .<br />
सीिमत डायल (Menu 9.7.4)<br />
यह फ़ं शन के वल सीिमत डायिलग नबर (FDN)<br />
के नबस डायल करता है. सू ची के नबस रत<br />
करन और सं पादत करने के िलए, आपको PIN2<br />
कोड क आवयकता होती है.<br />
रोधन डायल (Menu 9.7.5)<br />
कसी ितबं िधत कॉल के िलए आप मोड<br />
को चाल और बं द कर सकत ह. हालाँक,<br />
आपको यह जाँचना होगा क आपक िसम<br />
इस फ़ं शन का समथन करती है या नहीं.<br />
पासवड बदल (Menu 9.7.6)<br />
► पन: इसस आपको पन नबर बदलने<br />
क सु वधा िमलती है.<br />
► PIN2: इसस आपको PIN2 नबर<br />
बदलने क सु वधा िमलती है.<br />
► फ़ोन लॉक: इसस आपको फ़ोन लॉक<br />
पासवड बदलने क सु वधा िमलती है.<br />
फैटरी सटं स पुनथापत<br />
कर Menu 9.8<br />
यह फ़ं शन आपको सं पण फ़ोन सटं ग को<br />
बनाए जात समय क मू ल सटं ग पर रीसट<br />
करने क सु वधा देता है. उपयोग करने के<br />
िलए सु रा कोड आवयक होता है.<br />
सटं स<br />
77
समया िनवारण<br />
समया िनवारण<br />
78<br />
समया<br />
टेलीफ़ोन चाल नहीं कया जा सकता<br />
बैटरी खाली<br />
बैटरी ठक स चाज नहीं होती है या<br />
कभी-कभी फ़ोन वयं बं द हो जाता है<br />
बैटरी का उपयोग समय कम हो जाता<br />
है<br />
चाजग ट — तापमान सीमा स<br />
अिधक है<br />
चाजग ट — ग ़लत चाजर<br />
चाजग ट — बैटरी ख़राब है<br />
चाजग ट — चाजग के समय कोई<br />
बैटरी िच नहीं दखाई देता<br />
फ़ोन कोड या पासवड भू ल गए<br />
PUK दज कर<br />
फ़ोन म नेटवक नहीं है<br />
आपने एक नबर दज कया है कं तु<br />
उस डायल नहीं कया गया था<br />
सं भावत हल<br />
कृ पया बैटरी िनकाल और वापस डाल और तब फ़ोन को<br />
चाल करने के िलए E दबाएँ .<br />
बैटरी चाज कर. डल म चाजग सू चक देख.<br />
फ़ोन और बैटरी पर चाजग क सतह को साफ़ नम कपड़े<br />
स पोछ.<br />
यद बैटरी का समय कम है, तो ऐसा उपयोगकता<br />
वातावरण, या अिधक कॉस, या कमज़ोर िसग् नस के<br />
कारण हो सकता है.<br />
सु िनित कर क परवेशी तापमान ठक है, कु छ देर<br />
तीा कर, और तब पुन: चाज कर.<br />
के वल मू ल <strong>LG</strong> सहायक सामी का उपयोग कर.<br />
बैटरी बदल.<br />
बैटरी खाली है या बहुत समय स उपयोग नहीं क गई है.<br />
बैटरी िच को ीन पर दखाई देने म कु छ समय लग<br />
सकता है.<br />
डफ़ॉट फ़ोन कोड “0000” है.<br />
पन कोड लगातार तीन बार ग ़लत दज कया गया है, और<br />
फ़ोन अब अवरोिधत हो गया है. आपके सवा दाता ारा<br />
दया गया PUK दज कर.<br />
नेटवक कनेशन चला गया है. सं भव है क आप कमज़ोर<br />
िसग् नल म ह. ल जाएँ और पुन: यास कर. आप ऐस<br />
वकप का उपयोग करने का यास कर रहे ह जसके िलए<br />
आपने अपने सवा दाता स सदयता नहीं ली है. और<br />
ववरण के िलए सवा दाता स सं पक कर.<br />
सु िनित कर क आपने S दबाया है. सु िनित कर क<br />
आप सही नेटवक सवा तक पहु ँच ह. सु िनित कर क<br />
आपने कोई जाने वाली कॉल रोधन वकप नहीं सट कया<br />
है. सु िनित कर क आपने कोड दज कर दया है.
समया<br />
आपका सं वाददाता आप तक नहीं पहु ँच<br />
सकता<br />
आपका सं वाददाता आपक आवाज़<br />
नहीं सु न सकता<br />
सं भावत हल<br />
सु िनित कर क आपका फ़ोन चाल है. S को एक सकं ड<br />
स अिधक दबाएँ . सु िनित कर क आप नेटवक सवा का<br />
उपयोग कर रहे ह. सु िनित कर क आपने कोई आने<br />
वाली रोधन वकप नहीं सट कया है.<br />
सु िनित कर क आपने लाउडपीकर बं द कर दया है.<br />
सु िनित कर क आपने अपना फ़ोन मु ँ ह के पास रखा है.<br />
माइोफ़ोन, फ़ोन के नीच िथत है.<br />
कॉल क ऑडयो गुणवा ख़राब है डल पर िसग् नल मता सू चक देख. पटय क<br />
सं या िसग् नल मता दशाती है. यद आप कसी भवन म<br />
ह, तो खड़क के पास आने का यास कर.<br />
सं पक व फर स देखने पर डायल<br />
कया गया कोई नबर नहीं है<br />
इंटरनेट/WAP का उपयोग नहीं कर<br />
सकता<br />
आपके फ़ोन पर MMS/िच सं देश का<br />
उपयोग नहीं कर सकता<br />
यद उपरो दशािनदश स आपक<br />
समया हल करने म मदद नहीं<br />
िमलती है<br />
नबर ठक स सं हत कया गया है यह सु िनित करने के<br />
िलए सं पक/खोज सु वधा का उपयोग कर. यद आवयकता<br />
हो, तो नबर फर स रत कर.<br />
आपक सदयता म डेटा मता शािमल नहीं है. सवा लागू<br />
करने के िलए आपको अपने सवा दाता स सं पक करना<br />
होगा.<br />
आपक सदयता म डेटा मता शािमल नहीं है. सवा लागू<br />
करने के िलए आपको अपने सवा दाता स सं पक करना<br />
होगा.<br />
आपके मोबाइल फ़ोन का मॉडल नबर और समया का<br />
प वणन नोट कर ल. मदद के िलए अपने फ़ोन डीलर या<br />
<strong>LG</strong> सवा क स सं पक कर.<br />
समया िनवारण<br />
79
आपातकालीन कॉस<br />
आपातकालीन कॉस<br />
महवपण<br />
कसी वायरलस फ़ोन के समान, यह<br />
फ़ोन रेडयो िसग् नस, वायरलस<br />
और लडलाइन नेटवस के साथ ही<br />
उपयोगकता ारा ोाम कए गए<br />
फ़ं शस के उपयोग स ऑपरेट होता<br />
है. इसके कारण, सभी िथितय म<br />
कनेशस क गारटी नहीं दी जा सकती.<br />
इसिलए, आपको महवपण सं चार<br />
(उदाहरणाथ, मेडकल आपातकालीन<br />
िथितयाँ) के िलए कभी भी पणत:<br />
वायरलस फ़ोन पर िनभर नहीं रहना<br />
चाहए.<br />
आपातकालीन कॉस सभी वायरलस<br />
फ़ोन स या िनित नेटवक सवाओ<br />
और/या फ़ोन सु वधाओ के उपयोग म<br />
होने पर सं भवत: नहीं लगाई जा सकती ह.<br />
थानीय सवा दाता स सं पक कर.<br />
80
सहायक उपकरण<br />
आपके मोबाइल फ़ोन के िलए विभन सहायक उपकरण ह. आप अपनी यिगत<br />
सं ेषण आवयकताओ के अनसार इन वकप का चयन कर सकत ह.<br />
मानक बैटरी<br />
बैटरी विनदश<br />
कार: 3.7V, 750<br />
mAh, लीिथयम<br />
ऑयन<br />
वाता समय#: 2.2 घटे तक<br />
(GSM PL 5)<br />
टडबाय समय#: 300 घटे तक (PG9)<br />
# िसम काड, नेटवक िथित, योग के तरीके ,<br />
सटं ग व परवेश के आधार पर चालन के समय<br />
म अतर आ सकता है<br />
हैडसट<br />
इसस हस काय<br />
करता है.<br />
ैवल एडॉटर<br />
इस चाजर स आप<br />
फ़ोन क बैटरी चाज<br />
कर सकत ह.<br />
डेटा के बल<br />
फ़ोन और पीसी म<br />
डेटा बदलने के िलए<br />
आप अपने फ़ोन को<br />
पीसी स कनेट कर<br />
सकत ह.<br />
नोट<br />
► हमेशा असली <strong>LG</strong> सहायक उपकरण का<br />
उपयोग कर.<br />
► यह करने म वफल होने स आपक वारंटी<br />
अमाय हो सकती है.<br />
► अलग-अलग म सहायक उपकरण<br />
अलग-अलग हो सकत ह; कृ पया अिधक<br />
जानकारी के िलए हमारी य सवा<br />
कं पनी या एजट स सं पक कर.<br />
सहायक उपकरण<br />
81
तकनीक डेटा<br />
तकनीक डेटा<br />
सामाय<br />
उपाद नाम : <strong>KP22</strong>0<br />
िसटम : GSM 900/ DCS 1800/ PCS 1900<br />
आस-पास का तापमान<br />
अिध : +55°C<br />
यन : -10°C<br />
82
Suppliers Details<br />
Name<br />
<strong>LG</strong> <strong>Electronics</strong> Inc<br />
Address<br />
<strong>LG</strong> Twin Tower 20,Yeouido-dong, Yeongdeungpo-gu Seoul, Korea 150-721<br />
Product Details<br />
Product Name<br />
E-GSM 900 / DCS 1800 / PCS 1900 Tri Band Terminal Equipment<br />
Model Name<br />
<strong>KP22</strong>0<br />
Trade Name<br />
<strong>LG</strong><br />
0681<br />
Applicable Standards Details<br />
R&TTE Directive 1999/5/EC<br />
EN 301 489-01 v1.6.1 / EN 301 489-07 v1.3.1 / EN 301 489-17 v1.2.1<br />
EN 60950-1 : 2001<br />
EN 50360/EN 50361 : 2001<br />
EN 301 511 V9.0.2<br />
EN 300 328 V1.7.1<br />
Supplementary Information<br />
The conformity f i to above b standardsd d is i verified d byb ETS.<br />
Declaration<br />
I hereby declare under our sole responsibility<br />
that the product mentioned above to which this<br />
declarationd l i relatesl complies withi h theh aboveb mentionedi d<br />
standards and Directives<br />
Name<br />
Seung Hyoun, Ji / Director<br />
Issued Date<br />
07. January. 2008<br />
European Standard Center<br />
<strong>LG</strong> <strong>Electronics</strong> Logistics and Services B.V.<br />
Veluwezoom 15, 1327 AE Almere, The Netherlands<br />
Tel : +31 - 36- 547 – 8940, Fax : +31 – 36 – 547 - 8794<br />
e-mail : jacob @ lge.com<br />
Signature of representative<br />
83
MEMO
MEMO
MEMO
MEMO
MEMO
English<br />
<strong>KP22</strong>0<br />
User Guide<br />
Some of contents in this manual may<br />
differ from your phone depending on<br />
the software of the phone or your<br />
service provider.
Contents<br />
Contents<br />
General information 4<br />
Battery care 4<br />
Access codes 4<br />
Care and Maintenance 5<br />
Important safety information 6<br />
Your phone 10<br />
Standby mode 12<br />
Getting Started 13<br />
Installing the SIM card and the<br />
battery 13<br />
Charging the battery 13<br />
Switching the phone on and off 14<br />
Making a call 15<br />
Answering or rejecting an incoming<br />
call 15<br />
Call waiting 15<br />
Making a conference call 15<br />
Call functions 15<br />
Tips for call options 16<br />
Input method 17<br />
Listing of Functions 19<br />
Browser 21<br />
WAP 21<br />
Data account 24<br />
Call history 25<br />
All calls 25<br />
Missed calls 25<br />
Dialled calls 25<br />
Received calls 26<br />
Delete call log 26<br />
Call Time 26<br />
Call cost 26<br />
Text message counter 27<br />
GPRS counter 27<br />
Tools 28<br />
Calendar 28<br />
To do 29<br />
Alarm 29<br />
World clock 30<br />
Calculator 30<br />
Unit converter 30<br />
Currency converter 31<br />
Health 31<br />
STK 32<br />
2
Multimedia 33<br />
Games & Apps 33<br />
Camera 35<br />
Image viewer 37<br />
Video recorder 37<br />
Video player 39<br />
Music player 40<br />
Setting 41<br />
Voice recorder 42<br />
Melody composer 42<br />
FM radio 44<br />
Schedule FM record 45<br />
Messaging 46<br />
Text messages (SMS) 46<br />
Multimedia Message (MMS) 50<br />
Chat 56<br />
Voice mail server 57<br />
Broadcast Message 57<br />
My stuff 59<br />
To start view/organizing the<br />
My stuff 59<br />
Profiles 60<br />
To activate the Profiles 60<br />
To edit the Profiles 60<br />
Contacts 62<br />
Search 62<br />
New contact 63<br />
Caller group 63<br />
Speed dial 64<br />
Extra number 64<br />
Copy 65<br />
Delete 65<br />
Move 65<br />
Settings 65<br />
Settings 67<br />
Time & Date 67<br />
Display 68<br />
Phone 69<br />
Call 69<br />
Bluetooth 72<br />
Network 76<br />
Security 77<br />
Restore factory settings 78<br />
Troubleshooting 79<br />
Emergency calls 81<br />
Accessories 82<br />
Technical data 83<br />
3<br />
Contents
General information<br />
General information<br />
Battery care<br />
Your phone is powered by a<br />
rechargeable battery.<br />
► The battery can be charged and<br />
discharged hundreds of times but<br />
it will eventually wear out. When<br />
the operating time (talk-time<br />
and standby time) is noticeably<br />
shorter than normal, you should<br />
buy a new battery at the time.<br />
► Unplug the charger when not in<br />
use, and don’t leave the battery<br />
connected to a charger for longer<br />
than a week, since overcharging<br />
may shorten its lifetime.<br />
► Overcharging may shorten its<br />
lifetime, and if left unused a fully<br />
charged battery may discharge<br />
itself over time.<br />
► Temperature extremes can<br />
affect the ability of your battery<br />
to charge.<br />
► Do not use any charger or<br />
battery that is damaged in any<br />
way.<br />
► Use the battery only for its<br />
intended purpose.<br />
► Extreme temperatures will affect<br />
the charging capacity of your<br />
battery.<br />
► Do not leave the battery in hot or<br />
cold places, such as in a car in<br />
summer or winter condition.<br />
► Do not short-circuit the battery.<br />
Short-circuiting the terminals<br />
may damage the battery or the<br />
connecting object.<br />
► Dispose of batteries according to<br />
local regulations. Always recycle.<br />
Do not dispose of batteries in<br />
a fire.<br />
Accessory care<br />
Your phone is embedded with one<br />
earphone and <strong>LG</strong> standard 18-pin<br />
travel chargers in the package.<br />
► Use only accessories and<br />
charging devices approved<br />
by the phone manufacturer<br />
otherwise you would risk serious<br />
damage to heath and property<br />
► Excessive sound pressure from<br />
earphones and headphones can<br />
cause hearing loss.<br />
4
Access codes<br />
PIN code<br />
The PIN (Personal Identification<br />
Number) code protects your SIM<br />
card against unauthorized. Your SIM<br />
card usually supplies the PIN code.<br />
Note<br />
► You may need to obtain the<br />
password from your service<br />
provider.<br />
► If you key in an incorrect PIN code<br />
three times in succession, you may<br />
need to key in PUK code.<br />
PIN2 code<br />
The PIN2 code may be supplied<br />
with the SIM card. Some functions<br />
will require PIN2 support, such Set<br />
tariff.<br />
Note<br />
You may need to obtain the password<br />
from your service provider.<br />
PUK<br />
The PUK (Personal Unblocking<br />
Key) code is required to change a<br />
blocked PIN code. The PUK code<br />
is required to change a blocked<br />
PIN2 code.<br />
Note<br />
► You may need to obtain the<br />
password from your service provider.<br />
► If you key in an incorrect PIN2 code<br />
three times in succession, you may<br />
need to key in PUK2 code.<br />
► If you key in an incorrect PUK code<br />
ten times in succession, the SIM<br />
card cannot be used anymore.<br />
Contact your service provider for a<br />
new card.<br />
Phone code<br />
Phone code protects the phone<br />
against unauthorized use. It is not<br />
on when you buy the phone. You<br />
can change the phone code (0000)<br />
to any four to eight-digit personal<br />
codes.<br />
General information<br />
5
General information<br />
General information<br />
6<br />
Care and Maintenance<br />
Read this information before using<br />
your mobile phone.<br />
Your mobile phone is a highly<br />
sophisticated electronic device.<br />
When using your phone, battery,<br />
charger or any accessory, please<br />
read this first.<br />
Product care<br />
► Keep your mobile phone and all<br />
its parts out of young children’s<br />
reach.<br />
► Keep your mobile phone dry.<br />
► Avoid exposing your mobile<br />
phone to extreme hot or cold<br />
temperatures.<br />
► Avoid placing your mobile phone<br />
close to lit cigarettes, naked<br />
flames or any heat source.<br />
► Do not attempt to disassemble<br />
it. Non-expert handling of the<br />
device may damage it.<br />
► Do not drop, knock or shake<br />
it. Rough handling can break<br />
internal circuit boards.<br />
► Do not paint your mobile phone<br />
as the paint could obstruct the<br />
earphone, microphone or any<br />
moveable parts and prevent<br />
normal use.<br />
► Treat your mobile phone with<br />
care, keep it in a clean and dust<br />
free place.<br />
► Do not use the phone if the<br />
antenna is damaged. If a<br />
damaged antenna contacts<br />
skin, it may cause a light burn.<br />
Please contact an <strong>LG</strong> Authorized<br />
Service Center to replace the<br />
damaged antenna.<br />
► Do not touch the antenna<br />
unnecessarily when the phone<br />
is switched on. Contact with<br />
the antenna affects call quality<br />
and may cause the phone to<br />
operate at a higher power level<br />
that needed and shorten talk and<br />
standby times.<br />
► Hold the phone as you speak<br />
to any other telephone. While<br />
speaking directly into the<br />
microphone, angle the antenna<br />
in a direction up and over your<br />
shoulder. If the antenna is<br />
extendable/retractable, it should<br />
be extended during the call.
Important safety<br />
information<br />
Radio frequency energy<br />
Your mobile phone is a radio<br />
transmitter and receiver. When<br />
the phone is turned on, it receives<br />
and transmits radio frequency<br />
(RF) energy. Depending on the<br />
type of mobile phone you posses,<br />
it operates on different frequency<br />
ranges and employs commonly<br />
used modulation techniques. The<br />
system that handles your call when<br />
you are using your phone controls<br />
the power level at which your phone<br />
transmits.<br />
Specific Absorption Rate<br />
(SAR) information.<br />
Your phone has been designed<br />
to comply with applicable safety<br />
requirement for exposure to radio<br />
waves. This requirement is based<br />
on scientific organizations through<br />
periodic and thorough evaluation of<br />
scientific studies. These guidelines<br />
include safety margins designed to<br />
assure this safety of all persons,<br />
regardless of age and health.<br />
► The radio wave exposure<br />
guidelines employ a unit of<br />
measurement known as the<br />
Specific Absorption Rate,<br />
or SAR. Tests for SAR are<br />
conducted using standardized<br />
method with the phone<br />
transmitting at this highest<br />
certified power level in all used<br />
frequency bands.<br />
► While there may be differences<br />
between the SAR levels of<br />
various <strong>LG</strong> phone models, they<br />
are all designed to meet the<br />
relevant guidelines for exposure<br />
to radio waves.<br />
► The SAR limit recommended by<br />
the international Commission<br />
on Non-Ionizing Radiation<br />
Protection (ICNIRP), which is<br />
2W/kg averaged over then (10)<br />
gram of tissue.<br />
► This highest SAR value for this<br />
model phone tested by SGS<br />
for use at the ear is 0.680 W/kg<br />
(10g) and when worn on the<br />
body is 0.794 W/kg (10g).<br />
► SAR data information for<br />
residents in countries/regions<br />
that have adopted the SAR limit<br />
recommended by the Institute<br />
7<br />
General information
General information<br />
General information<br />
8<br />
of Electrical and <strong>Electronics</strong><br />
Engineers (IEEE), which is<br />
1.6 W/kg averaged over one<br />
(1) gram of tissue.<br />
Electronic devices<br />
Most modern electronic equipment<br />
is shielded from RF energy.<br />
However, certain electronic<br />
equipment may not be shielded<br />
against the RF signals from your<br />
wireless phone, therefore:<br />
► Do not use your mobile phone<br />
near medical equipment without<br />
requesting permission.<br />
Pacemaker<br />
Mobile phones may affect the<br />
operation of some implanted cardiac<br />
pacemakers and other medically<br />
implanted equipment. Pacemaker<br />
manufacturers recommend that a<br />
minimum separation of 20 cm<br />
(6 inches) be maintained between<br />
a hand-held wireless phone and<br />
a pacemaker to avoid potential<br />
interference with the pacemaker.<br />
These recommendations are<br />
consistent with the independent<br />
research by and recommendations<br />
of Wireless Technology Research.<br />
Persons with pacemakers:<br />
► Should always keep the phone<br />
more than 20 cm (6 inches) from<br />
their pacemaker when the phone<br />
is switched on;<br />
► Should not carry the phone in a<br />
breast pocket;<br />
► Should use the ear opposite<br />
the pacemaker to minimize the<br />
potential for interference.<br />
► If you have any reason to<br />
suspect that interference is<br />
taking place, switch off your<br />
phone immediately.<br />
Hearing aids<br />
Some hearing aids might be<br />
disturbed by mobile phones. In<br />
the event of such disturbance, you<br />
may want to consult your service<br />
provider, or call the customer<br />
services line to discuss alternatives.<br />
Aircraft<br />
► Turn off your mobile phone<br />
before boarding any aircraft.<br />
► Do not use it on the ground
without crew permission.<br />
To prevent interference with<br />
communication systems, you must<br />
not use your mobile phone while the<br />
plane is in the air.<br />
Potentially explosive<br />
atmospheres<br />
Switch off your phone when in any<br />
area with a potentially explosive<br />
atmosphere and obey all signs<br />
and instructions. It is rare, but your<br />
phone or its accessories could<br />
generate sparks.<br />
Sparks in such areas could cause<br />
an explosion or fire resulting<br />
in bodily injury or even death.<br />
Areas with a potentially explosive<br />
atmosphere are often, but not<br />
always, clearly marked.<br />
They include fuelling areas, such as<br />
petrol station, below deck on boats,<br />
fuel or chemical transfer or storage<br />
facilities, and areas where the air<br />
contains chemicals or particles,<br />
such as grain, dust, or metal<br />
powders; and any other area where<br />
you would normally be advised to<br />
turn off your vehicle engine.<br />
Driving<br />
Check the laws and regulations<br />
on the use of mobile phones in<br />
the areas where you drive. If you<br />
are going to use your phone while<br />
driving, please:<br />
► Give full attention to driving<br />
► Use handsfree. Law in many<br />
countries requires vehicle<br />
handsfree.<br />
► Pull off the road and park before<br />
making or answering a call if<br />
driving conditions so require.<br />
RF energy may affect some<br />
electronic systems in motor<br />
vehicles such as car stereo, safety<br />
equipment etc. in addition, some<br />
vehicle manufacturers do not allow<br />
use of mobile phones, unless<br />
the installation is supported by<br />
a handsfree kit with an external<br />
antenna in their vehicles. Check<br />
with your vehicle manufacturer’s<br />
representative to be sure that your<br />
mobile phone will not affect the<br />
electronic systems in your vehicle.<br />
General information<br />
9
Your phone<br />
Your phone<br />
Mini USB<br />
Main display<br />
Navigation keys<br />
Music key<br />
Left soft key<br />
Talk key / Yes key<br />
Right soft key<br />
Power on/End call<br />
* key<br />
# key<br />
Microphone<br />
Earphone Jack &<br />
Mini USB<br />
Volume key<br />
Camera key<br />
10<br />
MicroSD slot
1. Side key – Volume<br />
During a call, adjusts the earpiece<br />
volume.<br />
2. Side key – Camera Q<br />
The side key is used to make<br />
image capture when in DSC<br />
mode.<br />
3. Soft keys <<br />
The current functions are<br />
displayed in the bottom line of<br />
LCD. Access main menu and<br />
phonebook accordingly.<br />
4. Talk/Yes key S<br />
To make phone call after dialling<br />
phone number or to pick up a<br />
phone call<br />
5. Power on / End call key E<br />
• To end a call<br />
• Or power on/off use.<br />
6. Navigation keys<br />
In standby mode, quick access to<br />
• Up key: Write Message<br />
• Left key: Profile<br />
• Right key: Shortcuts<br />
• Down key: Contact List<br />
7. Number key<br />
Input number or characters<br />
Your phone<br />
11
Your phone<br />
Your phone<br />
12<br />
Standby mode<br />
In the main display, you may see<br />
several icons shown on your status<br />
bar.<br />
The meaning of icons are explained<br />
below<br />
The signal strength of the<br />
cellular network at your<br />
current location.<br />
The battery charge level.<br />
Phone locked<br />
Phone is in general profile<br />
Phone is in meeting profile<br />
Phone is in outdoor profile<br />
Phone is in vibrate profile<br />
Phone is in Silent profile<br />
Phone is in Headset profile<br />
The alarm clock is to set on.<br />
You are in roaming.<br />
When missing the incoming<br />
call.<br />
Received one or several<br />
messages.<br />
All your calls are diverted to<br />
another number.<br />
Bluetooth<br />
Chat Room 1<br />
Chat Room 2<br />
Speaker turns on<br />
You are in the internet.
Getting Started<br />
Installing the SIM card<br />
and the battery<br />
You need to insert the SIM card and<br />
charge the battery before using the<br />
phone.<br />
► Keep all miniature SIM cards out<br />
of the reach of little children.<br />
► Be careful to handle, insert or<br />
remove the SIM card since the<br />
SIM card and its contacts can<br />
easily be damaged by scratched<br />
or bending.<br />
► Before installing/removing the<br />
SIM card, always make sure that<br />
the phone is switched off.<br />
1. Push the knob on top of cover to<br />
release the back cover (1) and lift<br />
the battery away (2).<br />
(1)<br />
2. Insert and slide the SIM card (3)<br />
and battery (4).<br />
(3)<br />
(4)<br />
A<br />
Charging the battery<br />
You must fully charge the battery<br />
before using your phone for the<br />
first time.<br />
1. Connect the lead from the travel<br />
adapter to the socket on the side<br />
of your phone (A).<br />
Getting Started<br />
(2)<br />
A<br />
(A)<br />
2. Connect the charger to an AC<br />
wall outlet.<br />
13
Getting Started<br />
Getting Started<br />
Note<br />
► You can use the phone while the<br />
charger is connected but charging<br />
is suspended during that time.<br />
► When the battery is weak indicated<br />
by “ ” on the display, you will<br />
hear a warning sound. When<br />
the battery becomes too weak<br />
indicated by “ ” on the display, it<br />
switched off automatically.<br />
► If the phone asks PIN code, key<br />
in the PIN code, and press <<br />
left soft key (LSK) to confirm.<br />
Note<br />
Do not switch the phone on when<br />
wireless phone use is prohibited or<br />
when it may cause interference or<br />
danger.<br />
Switching the phone on<br />
and off<br />
► Press and hold E key.<br />
Note<br />
► If the phone shows “Insert SIM”<br />
when SIM card is properly inserted,<br />
contact your network operator or<br />
service provider.<br />
► You can also use the phone without<br />
SIM card. The workable function<br />
would include multimedia, profiles,<br />
tools & time and date except<br />
the dialing out and receiving the<br />
phone call.<br />
14
Call functions<br />
This gives you the information<br />
about all calling services that are<br />
supported in your phone.<br />
Making a call<br />
In standby mode, key in the<br />
number, including the area code,<br />
press S key.<br />
Making a call from the Contacts<br />
1. In standby mode, press > right<br />
soft key (RSK) to enter Contacts,<br />
select one name from Quick<br />
Search, and follow by pressing<br />
S key to call.<br />
2. You could also press Menu<br />
and choose to enter Contacts<br />
submenu to make a call.<br />
3. Or, you can press navigation key<br />
down to enter Quick Search<br />
submenu to make a call quickly.<br />
Making an international call<br />
1. For international calls, long press<br />
0 key for the international prefix<br />
(character +).<br />
2. Key in the country code, area<br />
code and the phone number.<br />
3. Press S to call.<br />
Answering or rejecting an<br />
incoming call<br />
To answer the incoming call<br />
Press S to answer the call.<br />
To reject the incoming call<br />
Press E to reject the call.<br />
Call waiting<br />
You can answer another incoming<br />
call while you have a call in<br />
progress.<br />
1. During a call, press < left soft<br />
key (LSK) to enter option menu<br />
to hold a call.<br />
Making a conference call<br />
You can make conference call while<br />
you have multi calls in progress.<br />
1. Make a call to the first participant.<br />
2. Call the second participant as<br />
explained in Make a new call<br />
during a call.<br />
3. Press < LSK and select<br />
Conference. This joins the calls to<br />
the conference.<br />
Call functions<br />
15
Call functions<br />
Call functions<br />
16<br />
4. Repeat step 2 and 3 to allow new<br />
participants to be connected to the<br />
conference call.<br />
5. Press Options and select End<br />
all to end the call. Or press E.<br />
6. Any call (participant) can be<br />
disconnected by press Options<br />
and select End single.<br />
Tips for call options<br />
A call can be connected to any<br />
single caller by pressing Options<br />
key. When you press Options during<br />
active call, you would have following<br />
functions as listed in below:<br />
1. Hold: put a call on<br />
2. End: End a call.<br />
3. New call: make a new call<br />
during an active call.<br />
4. Contacts: shortcut to Contacts<br />
menu.<br />
5. Text message: shortcut to<br />
Messaging menu.<br />
6. Voice recorder: to record your<br />
conversation during an active<br />
phone call.<br />
7. Mute on/off: set On/ Off to mute<br />
the call during the conversation.<br />
8. DTMF: set On/Off for DTMF<br />
(Dual Tone Multi-Frequency)<br />
tone dialing system.<br />
9. Retrieve: reconnect a holding<br />
call<br />
10. Retrieve all: reconnect all<br />
holding call.<br />
11. Swap: switch between calls on<br />
hold and active.<br />
12. Conference: make a multi-party<br />
conversation.<br />
13. Transfer: transfer a call.<br />
14. End single: end one of<br />
conference call.<br />
15. End all: end a multi-party call.<br />
16. H-Free/H-Held: to choose either<br />
Hands free or held when multiparty<br />
call.<br />
17. Split: to suspend the multi-party<br />
call.
Input method<br />
You can key in text by using the<br />
traditional method or predictive<br />
smart input. Your phone is designed<br />
to support English and Hindi.<br />
To select input method<br />
When key in text, press Option and<br />
select Input method.<br />
Quick way to change input method<br />
► Short press # to change the<br />
input method.<br />
To insert a space<br />
In T9Abc, you could use 0 key to<br />
insert spaces.<br />
Traditional English input<br />
Your phone provides Multi-tap<br />
function. For example, press 2<br />
key twice to display the letter B,<br />
and press three times to display the<br />
letter C.<br />
Characters table<br />
English<br />
Key<br />
Unshifted Shifted<br />
Characters Characters<br />
1 . , - ! ‘ @ : # . , - ! ‘ @ : #<br />
$ / _ 1 $ / _ 1<br />
2 a b c 2 A B C 2<br />
3 d e f 3 D E F 3<br />
4 g h i 4 G H I 4<br />
5 j k l 5 J K L 5<br />
6 m n o 6 M N O 6<br />
7 p q r s 7 P Q R S 7<br />
8 t u v 8 T U V 8<br />
9 w x y z 9 W X Y Z 9<br />
0 0 0<br />
Input method<br />
17
Input method<br />
Input method<br />
Hindi<br />
Key<br />
Characters<br />
1 ँ ं ः ् 1़<br />
2 ा ि ी ु ू ृ अ आ इ ई उ ऊ ऋ 2<br />
3 े ै ॅ ो ौ ॉ ए ऐ ऍ ओ औ ऑ 3<br />
4 क ख ग घ ङ 4 क़ ख़ ग़<br />
5 च छ ज झ ञ 5 ज़<br />
6 ट ठ ड ढ ण 6 ड़ ढ़<br />
7 त थ द ध न 7 ऩ<br />
8 प फ ब भ म 8 फ़<br />
9 य र ल व श ष स ह 9 ळ ऱ ऴ य़<br />
0 0<br />
Text entry with “T9”<br />
“T9” uses a built-in dictionary to<br />
recognize the most commonly used<br />
word for every sequence of key<br />
presses.<br />
The selected input method will be<br />
shown the icon in the indication bar.<br />
You can choose to turn on or off<br />
your T9 input method in option list.<br />
T9 Abc<br />
T9 Smart Abc<br />
(English Smart mode)<br />
T9 abc T9 Smart abc<br />
T9 ABC T9 Smart ABC<br />
123 Numeric<br />
Abc<br />
abc<br />
ABC<br />
Multitap Abc (English)<br />
Multitap abc<br />
Multitap ABC<br />
123 Numberic<br />
T9अइ<br />
T9 Smart Hindi<br />
(Hindi Smart mode)<br />
123 Numeric<br />
अआइ Multitap Hindi (Hindi)<br />
123 Numeric<br />
18
Listing of Functions<br />
1. Browser<br />
1.1. WAP<br />
1.2. Data account<br />
2. Call history<br />
2.1. All calls<br />
2.2. Missed calls<br />
2.3. Dialled calls<br />
2.4. Received calls<br />
2.5. Delete call log<br />
2.6. Call time<br />
2.7. Call cost<br />
2.8. Text message<br />
counter<br />
2.9. GPRS counter<br />
3. Tools<br />
3.1. Calendar<br />
3.2. To do<br />
3.3. Alarm<br />
3.4. World clock<br />
3.5. Calculator<br />
3.6. Unit converter<br />
3.7. Currency<br />
converter<br />
3.8. Health<br />
3.9. STK<br />
4. Multimedia<br />
4.1. Games & Apps<br />
4.2. Camera<br />
4.3. Image viewer<br />
4.4. Video recorder<br />
4.5. Video player<br />
4.6. Music player<br />
4.7. Voice recorder<br />
4.8. Melody<br />
composer<br />
4.9. FM radio<br />
4.0. Schedule FM<br />
record<br />
5. Messaging<br />
5.1. Text message<br />
5.2. Multimedia<br />
Message<br />
5.3. Chat<br />
5.4. Voice mail<br />
server<br />
5.5. Broadcast<br />
Message<br />
Listing of Functions<br />
19
Listing of Functions<br />
Listing of Functions<br />
6. My stuff<br />
6.1. Phone<br />
6.2. Memory card<br />
(If microSD card<br />
is inserted)<br />
7. Profiles<br />
7.1. General<br />
7.2. Meeting<br />
7.3. Outdoor<br />
7.4. Vibrate only<br />
7.5. Headset<br />
7.6. Silent<br />
8. Contacts<br />
8.1. Search<br />
8.2. New contact<br />
8.3. Caller group<br />
8.4. Speed dial<br />
8.5. Extra number<br />
8.6. Copy<br />
8.7. Delete<br />
8.8. Move<br />
8.9. Settings<br />
9. Settings<br />
9.1. Time & Date<br />
9.2. Display<br />
9.3. Phone<br />
9.4. Call<br />
9.5. Network<br />
9.6. Security<br />
9.7. Restore factory<br />
settings<br />
20
Browser [Menu1]<br />
Services described in the following<br />
are supported by your service<br />
provider. If you cannot connect<br />
either one of those services, you<br />
can contact your service provider for<br />
further information.<br />
WAP Menu 1.1<br />
Your phones support Web Browser.<br />
You can obtain various services<br />
such as up-to date news, weather,<br />
sport, and other information as well<br />
as use e-mail and other Internet<br />
services. These services are<br />
designed and maintained by WAP<br />
service providers.<br />
The WAP service uses Wireless<br />
Markup Language (WML) on their<br />
WAP pages. You may not view the<br />
Internet web pages on your phone.<br />
Note<br />
► To activate WAP service, you<br />
may need to contact your service<br />
provider.<br />
► Do not switch on the phone when<br />
wireless phone use is prohibited<br />
or when it may cause interference<br />
or danger.<br />
Homepage (Menu 1.1.1)<br />
To access the browser from the<br />
standby mode, go to WAP in<br />
Service and press Homepage.<br />
Once connected, the homepage is<br />
displayed. The content depends on<br />
the service provider.<br />
To exit the browser, press E key.<br />
Bookmarks (Menu 1.1.2)<br />
You can use this menu to save<br />
URL addresses to quick access a<br />
website.<br />
Your phone also provides you for<br />
the following selections for your<br />
option.<br />
► Goto: Allow you to link the<br />
website.<br />
► Edit: Allow you to edit URL<br />
address.<br />
► Delete: Allow you to delete the<br />
selected bookmark.<br />
► Delete all: Allow you to delete all<br />
bookmarks at once.<br />
► Add bookmark: Allow you to<br />
add URL address.<br />
Browser<br />
21
Browser<br />
Browser<br />
Recent pages (Menu 1.1.3)<br />
You can view the recent pages you<br />
have visited. Press Goto to connect<br />
the selected page.<br />
Enter address (Menu 1.1.4)<br />
You can key in the URL address<br />
and enter the address followed by<br />
selecting Done. Your phone will<br />
connect the URL you just keyed in.<br />
After the address is entered, you<br />
may select the URL and press OK<br />
to connect next time.<br />
Service Inbox (Menu 1.1.5)<br />
Your phone is able to receive<br />
service message sent by your<br />
service provider. Service messages<br />
are notifications of headlines or<br />
content, and they may contain<br />
address of a WAP service. You can<br />
get updated news or new WAP<br />
settings from your service provider.<br />
The received WAP push message<br />
will be stored in the service<br />
inbox. You can press Option to<br />
either Accept or Delete the push<br />
message(s).<br />
Settings (Menu 1.1.6)<br />
GPRS (General Packet Radio<br />
Service) is a technology that is<br />
used for sending and receiving<br />
data over the mobile network. The<br />
applications that use GPRS are<br />
WAP services, MMS and SMS<br />
messaging and GPRS dial-up (such<br />
as Internet and e-mail). You can set<br />
the phone to automatically register<br />
to a GPRS network when you<br />
switch the phone on.<br />
WAP setting<br />
► If the settings have been made<br />
by the service provider, you may<br />
begin immediately.<br />
► If access profiles have been<br />
assigned by your service<br />
provider, select a profile and<br />
activate it.<br />
► Otherwise you may key in<br />
setting manually. For appropriate<br />
settings, contact your network<br />
operator or service provider.<br />
22
Key in the service settings<br />
manually<br />
1. In WAP menu, choose Edit<br />
profile in Settings, press OK.<br />
2. Choose a profile, press OK,<br />
choose Edit profile, press Edit<br />
to start setting.<br />
You can rename the profile and<br />
need to provide the information<br />
in Homepage, Data account,<br />
Connection, Username, and<br />
Password of your WAP service<br />
setting. To get the information, you<br />
may need to contact your operator.<br />
Note<br />
In most cases, you only need to use<br />
one of the default profiles to access<br />
the Internet. The settings are different<br />
from operator to operator. Please<br />
consult your operator or service<br />
provider for the correct settings and<br />
proceed with care. Wrong settings will<br />
cause the connection to fail.<br />
Activate WAP settings<br />
After you complete all WAP settings<br />
(see WAP settings function), in<br />
WAP Profile mode, please choose<br />
Activate profile, then press OK.<br />
Browser options<br />
You can set the timeout value for<br />
the browser. The purpose is to stop<br />
the browser connecting the website<br />
if the website does not respond<br />
within the timeout. Also, you can<br />
choose either On or Off the image<br />
while browsing.<br />
Service message settings<br />
You can choose either receive or<br />
not receive the service message<br />
which saved in the service inbox<br />
sent by your service provider.<br />
Clear cache<br />
The information or date you have<br />
accessed is all stored in the cache<br />
of the phone. A cache is a file buffer<br />
used to store date only temporarily.<br />
You can clear the history by<br />
selecting this option.<br />
Browser<br />
23
Browser<br />
Browser<br />
Clear cookies<br />
Under the consideration of privacy<br />
and security issue, we would<br />
suggest you to clear cookies which<br />
may contain sensitive information<br />
just in case your phone is<br />
misplaced, lost or stolen.<br />
Trusted certificates<br />
This function is to indicate your<br />
trusted certificate when browsing<br />
and also adding the trust list into the<br />
browser if needed.<br />
Data account Menu 1.2<br />
Default data accounts based<br />
on major operators at the time<br />
this phone is manufactured are<br />
provided.<br />
You can access WAP via GSM or<br />
GPRS.<br />
► To get the analogue number<br />
or ISDN number information,<br />
you may need to contact your<br />
operator for the service.<br />
► To get the access point of GPRS,<br />
you may need to contact your<br />
operator for the service.<br />
GSM data (Menu 1.2.1)<br />
Press Edit to change the data<br />
account settings, including: Account<br />
name, Number, User name,<br />
Password, Line Type, Speed and<br />
DNS.<br />
GPRS (Menu 1.2.2)<br />
Press Edit to change the data<br />
account settings, including: Account<br />
name, APN, User name, Password<br />
and Auth. type.<br />
24
Call history [Menu 2]<br />
Your phone can save information<br />
for missed, received and dialed<br />
calls, and the length and cost of<br />
your calls.<br />
Note<br />
► Once the call list exceeds the<br />
memory limitation, the oldest one<br />
is deleted.<br />
► For Missed, Dialled & Received<br />
calls, you can press talk key S to<br />
have a quick review. Your phone<br />
provides your several option to<br />
Delete, Save, Dial, Edit, Send text<br />
message or Send multimedia<br />
message if you select a certain<br />
phone number.<br />
All calls Menu 2.1<br />
Your phone allows you to view all<br />
your missed, dialed and received<br />
calls for 120 entries in total. The<br />
total number of calls will be showed.<br />
Missed calls Menu 2.2<br />
Your phone allows you to view the<br />
last 40 missed calls.<br />
To view missed calls<br />
► In Call history menu, choose<br />
Missed calls, press OK to view<br />
the records.<br />
Dialled calls Menu 2.3<br />
Your phone allows you to view the<br />
last 40 outgoing calls.<br />
To view received calls<br />
► In Call history menu, choose<br />
Dialled calls and press OK to<br />
view the records.<br />
Your phone provides the following<br />
selections for your option:<br />
► Delete: Allows you to erase the<br />
number from the list.<br />
► Save: Allows you to save the<br />
number in contacts.<br />
► Dial: Allows you to call the<br />
number that shown on the<br />
screen.<br />
► Edit: Allows you to edit the<br />
number.<br />
► Send text message: Allows you<br />
to send a text message to the<br />
number shown on the screen.<br />
Call history<br />
25
Call history<br />
Call history<br />
► Send multimedia message:<br />
Allows you to send a multimedia<br />
message to the number shown<br />
on the screen.<br />
Received calls Menu 2.4<br />
Your phone allows you to view the<br />
last 40 received calls.<br />
To view received calls<br />
► In Call history menu, choose<br />
Received calls, press OK to<br />
view the records.<br />
Delete call log Menu 2.5<br />
Your phone allows you to delete<br />
some of your call registers<br />
► Missed/Dialled/Received calls/<br />
Delete All<br />
Call Time Menu 2.6<br />
Your phone allows you to view the<br />
timers for calls made and received.<br />
1. In Call history menu, choose<br />
Call time and press OK.<br />
2. Choose an item, press OK to<br />
view the content.<br />
Your phone provides the following<br />
selections for your option:<br />
► Last call time: List out the last<br />
call time of your conversation.<br />
► Total sent: Sum of total time you<br />
have called out.<br />
► Total received: Sum of total call<br />
time you have received.<br />
► Reset all time: Reset the time<br />
counter to zero.<br />
Call cost Menu 2.7<br />
This function allows you to check<br />
the cost while making phone call.<br />
Your phone provides the following<br />
selections for your option:<br />
► Last call cost: Cost of last call<br />
you made<br />
► Total cost: cost of total calls you<br />
made so far<br />
► Reset cost: To reset the counter<br />
► Max cost: To set the max cost<br />
allowed<br />
► Price per unit: To set the unit<br />
cost of the call<br />
26
Text message counter<br />
Menu 2.8<br />
This function allows you to check<br />
the numbers of message. It is a<br />
counter. You may press reset to<br />
restart the counter.<br />
► Sent: The number of messages<br />
you sent<br />
► Received: The number of<br />
messages you received<br />
Call history<br />
GPRS counter Menu 2.9<br />
This function allows you to check<br />
the data size of GPRS packet you<br />
used.<br />
► Last sent: The size of the data<br />
you sent last.<br />
► Last received: The size of the<br />
data you received last.<br />
► All sent: The total size of the<br />
data you have sent.<br />
► All received: The total size of<br />
the data you have received.<br />
► Reset counter: To reset the<br />
counter<br />
27
Tools [Menu 3]<br />
Tools<br />
Calendar Menu 3.1<br />
This feature allows you to keep<br />
track of your schedule and tasks<br />
that are saved in calendar.You can<br />
also set alarm with the task for<br />
reminding.<br />
To make a note and reminder in<br />
Calendar first time<br />
1. In Tools menu, choose Calendar,<br />
press OK<br />
2. Choose a day, press Options,<br />
choose View tasks and press<br />
OK.<br />
3. Key-in the time and the note,<br />
followed by pressing Add.<br />
4. Choose Alarm to turn on or off<br />
and select ways of ringing, then<br />
press Done to either save or not<br />
to save the task.<br />
Your phone provides the following<br />
selections for your option:<br />
► View: To view the task that is<br />
stored in specified day.<br />
► Add: To add new task in<br />
specified day.<br />
► Edit task: To edit the task in<br />
specified day.<br />
► Delete task: To delete the<br />
specific task.<br />
► Delete all: To delete all tasks.<br />
► Send vCalendar: To send<br />
the task via the text message,<br />
the multimedia message, the<br />
bluetooth, or just save to file.<br />
To quick jump to the wish date,<br />
you may<br />
1. In Tools menu, choose Calendar<br />
and press OK.<br />
2. Press Options, select Jump to<br />
date and press OK.<br />
3. Key in year, month and day you<br />
wish to jump and press OK.<br />
Note<br />
You could press number 1 and<br />
number 3 key to go to previous and<br />
next year. You could also press<br />
number 7 and number 9 key to go to<br />
previous and next month.<br />
28
To do Menu 3.2<br />
This feature list out all your tasks<br />
you have added from calendar<br />
option. You can also view, edit or<br />
delete the tasks from the options<br />
under this feature.<br />
For first time use, you will need to<br />
do the following steps:<br />
1. Press Add to attach the new task<br />
in the Task List.<br />
2. Edit your to do list by entering<br />
time, date, note.<br />
3. You can choose to turn on the<br />
alarm as the reminder and<br />
schedule of alarm.<br />
4. Finally, select “Yes” to save<br />
your to-do list. Your to-do list will<br />
then be shown in this sub-menu<br />
and will be highlighted in your<br />
Calendar. Your phone provides<br />
the same options as Calendar<br />
described in the above.<br />
Alarm Menu 3.3<br />
This function allows you to set the<br />
alarm to ring at the time specified.<br />
The alarm clock works even when<br />
the phone is switched off.<br />
1. In Tools menu, choose Alarm and<br />
press OK.<br />
2. You may input at most 3 set of<br />
alarm time and select one time to<br />
edit.<br />
3. You are allowed to set your alarm<br />
by pressing numeric key to set<br />
hh:mm and < LSK to change<br />
am/pm.<br />
4. Choose Once/Everyday/Day for<br />
your ringing mode followed by<br />
pressing OK.<br />
5. You can also customize the<br />
audio option from ring tone or<br />
MP3 songs saved in your phone<br />
or memory card. FM radio can<br />
also set as the audio option with<br />
headset inserted as the receiver<br />
antenna.<br />
Note<br />
AM/PM will only show up if the time<br />
format is set to be 12 hours. For more<br />
information, please refer page 67:<br />
Settings ➞ Time & Date ➞ Set time<br />
format for more information.<br />
Tools<br />
29
Tools<br />
Tools<br />
World clock Menu 3.4<br />
You can pick up the city simply<br />
using left and right key of Navigator.<br />
When the cross point out certain<br />
city, it will show the local date and<br />
time. Also, you may press Options<br />
to turn on/off Daylight saving time<br />
for foreign region and Set as the<br />
home city you have selected in the<br />
pervious menu.<br />
Note<br />
Home city in Time & Date sub menu<br />
of Settings will be also changed<br />
according to your setting in this<br />
function.<br />
Calculator Menu 3.5<br />
The calculator performs simple<br />
mathematical functions such as<br />
addition, subtraction, multiplications<br />
and division.<br />
To use the calculator<br />
► In Tools menu, choose<br />
Calculator, press OK.<br />
Your phone provides the following<br />
compose mapping for your option:<br />
► Four way key Up: + (Addition)<br />
► Four way key Down: –<br />
(Subtraction)<br />
► Four way key Left:<br />
x (Multiplication)<br />
► Four way key Right: ÷ (Division)<br />
► Numeric # key: . (Point)<br />
► Numeric * key: – (Negative)<br />
► Press < LSK to get the result.<br />
Note<br />
This calculator has a limited accuracy<br />
so rounding errors may occur<br />
especially in long divisions<br />
Unit converter Menu 3.6<br />
This feature helps you to either<br />
convert the weight or length in<br />
different unit.<br />
With Weight converter, you can<br />
convert Kg units into Pound or<br />
Ounce units.<br />
30
With Length converter, you can<br />
have the following options:<br />
► Km units expressed in Mile units<br />
► Meter units expressed in Yard or<br />
Foot units.<br />
► Cm units expressed in Inch units.<br />
After enter the amount to be<br />
converted, press “OK” to find out<br />
the result.<br />
Currency converter<br />
Menu 3.7<br />
This feature helps you to convert<br />
the currency in different rate you<br />
have entered. Within Currency<br />
converter, you need to input the<br />
exchange rate and insert the<br />
amount to convert Local to Foreign<br />
currency.<br />
Health Menu 3.8<br />
There are two features in healthy<br />
option, which are BMI and<br />
Menstrual.<br />
BMI (Body Mass Index)<br />
(Menu 3.8.1)<br />
This function helps to calculate your<br />
body fat in relation to your height<br />
and weight.<br />
To calculate the BMI value process,<br />
you will need<br />
1. Select your gender by using<br />
navigation key.<br />
2. Enter your height in centimeters<br />
and weight in kilos by using the<br />
numeric keys and press “OK”.<br />
3. Finally, your BMI ratio value will<br />
be calculated and the result is<br />
displayed<br />
Menstrual (Menu 3.8.2)<br />
This feature helps to calculate lady’s<br />
menstrual cycle and provide the<br />
information including:<br />
► Probability of becoming pregnant<br />
on the current date<br />
► Period during which it is possible<br />
to become pregnant and date of<br />
next period.<br />
Tools<br />
31
Tools<br />
Tools<br />
To check the menstrual cycle, you<br />
will need<br />
1. Enter the starting date of the last<br />
period.<br />
2. Enter the average length of<br />
the menstrual cycle follow by<br />
pressing “OK” key.<br />
3. To get detail information, select<br />
one of the highlighted date and<br />
press OK to display pregnant<br />
probability.<br />
Note<br />
The result may not fit to your physical<br />
condition. This is only reference!<br />
To set the STK service<br />
In Tools menu, choose STK, press<br />
OK to connect the service.<br />
Note<br />
► For availability, you need to register<br />
for the services from your service<br />
provider.<br />
► Accessing these services may<br />
involve sending an SMS for which<br />
you may be charged.<br />
STK Menu 3.9<br />
In addition to the functions available<br />
in the phone, your service provider<br />
may offer additional applications<br />
such as weather or stock market<br />
information via the SIM card.<br />
32
Multimedia [Menu 4]<br />
Games & Apps Menu 4.1<br />
Games (Menu 4.1.1)<br />
<strong>KP22</strong>0 builds in 2 creative games<br />
(Let’s have FRUIT & The Bomber)<br />
for this product. You may use<br />
navigation key to select the games<br />
you would like to play. Then press<br />
OK to select the game. After<br />
entering the game, you may use the<br />
option menu to start game / check<br />
ranking / read game guide / read<br />
about copyright of game / exit the<br />
game from the menu option. You<br />
can also adjust the game setting at<br />
very beginning when you enter the<br />
game menu.<br />
The games in the phone offer the<br />
following option<br />
► Start game: Start to play the<br />
game<br />
► Game help: Show the play rule<br />
for the game<br />
► Game setting:<br />
– Background Music<br />
– Sound Effect<br />
– Vibration<br />
Applications (Menu 4.1.2)<br />
<strong>KP22</strong>0 is designed to support Java<br />
application. There are two default<br />
Java games, and you are allowed<br />
to download and install more Java<br />
games or applications from either<br />
WAP or local (saved in My stuffs<br />
folder).<br />
First time use<br />
There are two default Java games<br />
in <strong>KP22</strong>0.<br />
1. Go to Games & Apps menu and<br />
select Applications to play Java<br />
games.<br />
2. Select the name of game and<br />
press Options to launch the<br />
game, adjust the setting or view<br />
the information of Java game.<br />
User can also download Java<br />
application from WAP.<br />
1. After downloading the application<br />
from WAP, select Application to<br />
function.<br />
Multimedia<br />
33
Multimedia<br />
Multimedia<br />
34<br />
2. Select one of Java application<br />
downloaded from WAP and press<br />
Options to launch, update the<br />
application, adjust the setting,<br />
view the information, or delete<br />
the application.<br />
User can save Java games or<br />
applications to My stuff folder.<br />
1. Save the Java applications (both<br />
.jad & .jar) files to My stuff.<br />
2. Install these two files by pressing<br />
Options.<br />
3. After installing, the saved Java<br />
games or application will be<br />
shown under Games & Apps<br />
menu.<br />
4. Select one of Java applications<br />
and press Options to launch,<br />
adjust the setting, view the<br />
information, or delete it.<br />
Note<br />
Java MIDlet suit must contain .jad<br />
and .jar file format in order to function<br />
application or play Java games<br />
normally.<br />
Options of Application includes:<br />
1. Launch: Allows you to launch<br />
the Java game or application you<br />
have selected.<br />
2. Setting: Allows you to define<br />
the permission level when using<br />
Java applications. Permission<br />
levels are “ Allow”, “Prompt<br />
always”, and “Never”. There are<br />
four different permission can be<br />
configured when you are using<br />
Java application including:<br />
– Network access: allows you<br />
to decide when to connect the<br />
network.<br />
– Auto invocation: allows you to<br />
decide whether automatically<br />
launched by push SMS.<br />
– Messaging: allows you to<br />
decide how to receive/send<br />
message.<br />
– Recording: allows you to decide<br />
how to record audio.<br />
3. Information: Allows you to check<br />
and read the information of Java<br />
games and application including:<br />
name of application, memory<br />
size, application version, name of<br />
vendor and authorized source.
4. Delete: Allows you to delete<br />
Java games and application<br />
downloaded from WAP or saved<br />
from local.<br />
Note<br />
Default Java game of this handset can<br />
not be deleted.<br />
Settings (Menu 4.1.3)<br />
1. Network profiles: Allow you<br />
to select then activate or edit<br />
profile which will be used for Java<br />
application activate/edit.<br />
2. Memory status: Indicates the<br />
total memory, used and free<br />
memory.<br />
3. Information: Provides<br />
information of Java, CLDC and<br />
MIDP version.<br />
Camera Menu 4.2<br />
You can use this phone in taking<br />
photos with the phone’s built-in<br />
camera and adjust its settings.<br />
Your phone supports horizontal<br />
OSD type operation style and only<br />
supports vertical type in 128x160<br />
images size.<br />
The camera lens is on the back<br />
of the phone, and the display of<br />
the phone works as a viewfinder.<br />
If there’s not enough memory for<br />
camera, you need to delete old<br />
photos to free some spaces for new<br />
photos or you can choose to save<br />
photos in memory card.<br />
The status of your video camera<br />
setting will be displayed on the top<br />
of preview mode.<br />
Note<br />
Do not use this feature when it<br />
violates local laws.<br />
To start using Camera<br />
1. In Multimedia menu, select<br />
Camera and press OK.<br />
2. Press Options to personalize<br />
your camera setting otherwise<br />
you might take the picture by<br />
pressing Q camera key (right<br />
down side key).<br />
3. To zoom screen in and out,<br />
please press volume key (right up<br />
2 side keys).<br />
Multimedia<br />
35
Multimedia<br />
Multimedia<br />
Note<br />
The photo will be saved in the folder<br />
called Photo of My stuff menu. You<br />
can also view the picture from by<br />
selecting Album from option list and<br />
you will jump to Image viewer.<br />
Key definition<br />
< Option / Ok / Save<br />
> Back / Delete<br />
Q Capture<br />
Zoom in / out<br />
To setup the Camera<br />
1. On the preview mode, you can<br />
press “Options”. All options will<br />
be displayed in the bottom of<br />
screen, and you can adjust the<br />
setting through the preview mode<br />
directly and your setting will be<br />
displayed on the top of screen.<br />
2. Using Navigation key right/left to<br />
select different camera settings<br />
and up/down to select your<br />
preference.<br />
The options list including:<br />
Video Camera mode: You<br />
can jump to video camera<br />
mode by pressing OK<br />
Album mode: You can<br />
review pictures you have<br />
taken by pressing OK<br />
Image Size: 128x160,<br />
160x128, 320x240, 640x480,<br />
1280x1024<br />
Quality: Normal / Low / High<br />
Delay Timer: Time Off /<br />
5, 10, 15 secs.<br />
Storage: Save to Phone /<br />
Save to Card<br />
Continue Shot: 1 Shot /<br />
3 Shots / 5 Shots / 9 Shots<br />
Add Frame: Off / Frame 1 /<br />
Frame 2 / Frame 3 / Frame 4<br />
/ Frame 5 (only support in<br />
vertical mode)<br />
Effect Setting: Effect off /<br />
Grayscale / Sepia / Sepia<br />
Green / Sepia Blue / Color<br />
Invert / Gray Invert /<br />
Blackboard / Whiteboard /<br />
Copper Carving / Blue<br />
Carving / Embossment /<br />
Contrast & Sketch<br />
36
White Balance: Auto WB /<br />
Daylight / Tungsten /<br />
Fluorescent / Cloud/<br />
Incandescence<br />
EV: EV-4 / EV-3 / EV-2 / EV-1<br />
/ EV 0 / EV+1 /<br />
EV+2 / EV+3 / EV+4<br />
Scene Mode: Auto / Night<br />
Bonding: 50 / 60 Hz<br />
Sound: Sound off / Sound 1 /<br />
Sound 2 / Sound 3<br />
Restore settings: You can<br />
restore the factory setting by<br />
selecting this option.<br />
Image viewer Menu 4.3<br />
All images from EMS, MMS, WAP<br />
and camera could be reviewed from<br />
here and storage is located in either<br />
phone or memory card. You may<br />
choose to view your images in List<br />
or Matrix Style.<br />
Key definition<br />
Option / Ok / Save<br />
< Back / Delete<br />
> Capture<br />
Your phone provides the following<br />
selections for your option:<br />
► View: Allows you to view the<br />
pictures saved in My stuff.<br />
► Browse style: Allows you to<br />
select the style when you browse<br />
pictures.<br />
► Forward: Allows you to forward<br />
your pictures as wallpaper,<br />
screen saver, power on/off<br />
display, contact ID or send to<br />
others via MMS.<br />
► Rename: Allows you to rename<br />
the file.<br />
► Delete: Allows you to delete the<br />
pictures in the My stuff folder<br />
► Delete all files: Allows you to<br />
delete all pictures in once.<br />
► Sort: Allows you to sort your<br />
photos by name, type, time, or<br />
size.<br />
► Storage: Allows you to choose<br />
to store your pictures either in<br />
phone or memory card.<br />
Multimedia<br />
37
Multimedia<br />
Multimedia<br />
38<br />
Note<br />
Sending picture via MMS, the default<br />
size cannot be larger than 300KB.<br />
However, the maximum size of<br />
sending MMS will be determined by<br />
your service provider.<br />
Video recorder Menu 4.4<br />
You can record the video clip<br />
through build-in camera. The status<br />
of your video recorder setting will<br />
be displayed on the top of preview<br />
mode.<br />
To start using Video recorder<br />
1. In Multimedia menu, select Video<br />
recorder and press OK.<br />
2. Press Options to personalize<br />
your camera setting otherwise<br />
you might start recording by<br />
pressing Q camera key (right<br />
down side key).<br />
3. You can also press Q camera<br />
key and < LSK to pause and<br />
resume the recording. When<br />
you may press > RSK to stop<br />
recording, then the clip will be<br />
saved in the video folder of My<br />
stuff automatically.<br />
After recording, the clip will be<br />
saved as your setting.<br />
4. You may review your video clips<br />
from video player.<br />
Note<br />
► The video clip will be saved in<br />
Video player menu and Video<br />
folder in My stuff. You can also<br />
view the clip from Player from<br />
option list.<br />
► Volume Side key (right up 2 side<br />
keys) will be functioned as zoom<br />
screen in and out.<br />
Key definition<br />
< Back / Stop<br />
> Option and Record/Pause<br />
Q Record / Pause / Resume<br />
To setup the Video recorder<br />
1. On the preview mode, you can<br />
press “Options”. All options will<br />
be displayed in the bottom of<br />
screen, and you can adjust the<br />
setting through the preview mode<br />
directly and your setting will be<br />
displayed on the top of screen.
2. Using Navigation key right and<br />
left select different camera<br />
settings and up and down to<br />
select your preference.<br />
The options list including:<br />
Camera mode: You can jump<br />
to camera mode by pressing<br />
OK.<br />
Album mode: You can review<br />
video clips you have taken by<br />
pressing OK.<br />
Rec Time Limit. : No Time<br />
limit / 15 sec / 30 sec / 60 sec<br />
File Size Limit: No Size limit /<br />
95KB / 195KB / 295KB<br />
Video Quality: High / Normal<br />
/ Low / Fine<br />
Record Audio: Audio on /<br />
Audio off<br />
Storage: Save to Phone /<br />
Save to Card<br />
Effect Setting: Effect off /<br />
Grayscale / Sepia / Sepia<br />
Green / Sepia Blue / Color<br />
Invert / Gray Invert /<br />
Blackboard / Whiteboard /<br />
Copper Carving / Blue<br />
Carving / Embossment /<br />
Contrast / Sketch<br />
White Balance: Auto WB /<br />
Daylight / Tungsten /<br />
Fluorescent / Cloud /<br />
Incandescence<br />
EV: EV-4 / EV-3 / EV-2 / EV-1<br />
/ EV 0 / EV+1 / EV+2 / EV+3 /<br />
EV+4<br />
Night Mode: Auto / Night<br />
Banding: 50/60 Hz<br />
Format: 3GP / MP4<br />
Restore settings: You can<br />
restore the factory setting by<br />
selecting this option.<br />
Video player Menu 4.5<br />
This folder saves videos that are<br />
saved from phone or download from<br />
PC. This phone supports.3GP and<br />
.MP4 format with 176x144 video<br />
size.<br />
To play the video (Menu 4.5.1)<br />
1. In Multimedia menu, choose<br />
Video player, select the file you<br />
wish to play.<br />
2. After selecting a certain video<br />
clip, press Option and Play.<br />
Multimedia<br />
39
Multimedia<br />
Multimedia<br />
Your phone provides the following<br />
selections for your option:<br />
► Play: Allows you to play and<br />
view the video content.<br />
► Forward: Allows you to forward<br />
the video to screen saver, power<br />
on display or power off display.<br />
You can also forward the video<br />
clip to contacts as the caller ID or<br />
share with friend via MMS.<br />
► Rename: Allows you to rename<br />
the video file.<br />
► Delete: Allows you to delete the<br />
video file saved in My stuff.<br />
► Delete all files: Allows you to<br />
delete all video files saved in<br />
video folder of My stuff.<br />
► Sort: Allows you to sort the video<br />
clips by name, type, time, or size.<br />
► Storage: Allows you to check the<br />
video’s memory and format and<br />
play the video clip either from<br />
phone or memory card.<br />
Music player Menu 4.6<br />
<strong>KP22</strong>0 is designed to be a musicoriented<br />
phone supported MP3<br />
format as result in a dedicated key<br />
of entering the music player mode<br />
to play your favourite songs by<br />
pressing M key in your handset.<br />
The other path of accessing the<br />
music player is from the main<br />
menu. You also may download the<br />
music content via USB or other<br />
connection. Music tracks must to<br />
be saved in the My Music’s folder<br />
in the My stuff in order to be<br />
automatically detected and added<br />
into default play list. You may listen<br />
to the music by headset or loud<br />
speaker. The sophisticated user<br />
interface can enable you to control<br />
the music player as you wish.<br />
Note<br />
You can make or answer a call while<br />
using the audio player. During a call,<br />
the playback is paused.<br />
40
Play the music<br />
Four Ways<br />
Navigation Audio Play Function<br />
Key<br />
U<br />
D<br />
L<br />
R<br />
Note<br />
b Play / ❙❙ Pause music<br />
j Stop<br />
f Skip to next tracks<br />
e Skip to previous tracks<br />
Your can adjust this volume +/-<br />
through side keys.<br />
Your music database will be<br />
detected automatically and added<br />
into default play list if the “List auto<br />
gen” is set to be on. More List auto<br />
gen is explained in the next.<br />
Note<br />
Your mobile phone is designed to be<br />
able to play the music during flight.<br />
You have to go to Setting ➞ Phone<br />
➞ Flight mode to change your setting<br />
for flight security concern.<br />
Setting<br />
In the music player menu, you may<br />
press List to access the following<br />
setting.<br />
– Select one song and press<br />
Options.<br />
– In the option list, you will find<br />
Play: Allows you to play the<br />
song immediately.<br />
Detail: Shows the channel,<br />
quality, size and time of<br />
selected song.<br />
Add to rings: Allows you to add<br />
the selected song as ring tone.<br />
Add: Allows you to add the<br />
selected songs into play list.<br />
Remove: Allows you to remove<br />
the selected songs from play<br />
list.<br />
Remove all: Allows you to<br />
remove all songs in play list.<br />
Refresh list: Allows you to<br />
refresh the list if you have<br />
changed the name of song or<br />
remove certain songs from the<br />
Music folder.<br />
Multimedia<br />
41
Multimedia<br />
Multimedia<br />
Settings: Allows you to select<br />
your play list from phone<br />
or card, to turn on the auto<br />
gen., to change the skin,<br />
equalizer…etc.<br />
Note<br />
► The option of Add, Remove and<br />
Remove all won’t be showed if the<br />
List of auto gen is turned off.<br />
Voice recorder Menu 4.7<br />
Voice recorder is a simple<br />
sound recording tool provides<br />
functionalities for you to manage<br />
voice files.<br />
To start recording (Menu 4.7.1)<br />
1. In Multimedia menu, choose<br />
Voice recorder, press OK.<br />
2. Press Options and select<br />
Record, choose OK to start it.<br />
Note<br />
► During recording, you may pause<br />
or stop the voice recording anytime<br />
by pressing soft keys.<br />
► After recording, the file is saved as<br />
AMR and WAV format.<br />
Your phone provides the following<br />
selections for your option:<br />
► Record: Allows you to record the<br />
sound during your phone call or<br />
other situation.<br />
► Play: Allows you to play the<br />
recorded file.<br />
► Append: Allows you to record in<br />
the same file.<br />
► Rename: Allows you to rename<br />
a file name.<br />
► Delete: Allows you to delete the<br />
file saved in the voice recorder.<br />
► Delete all: Allows you to delete<br />
all content saved in this folder.<br />
► Settings: Allows you to choose<br />
your storage and file format.<br />
► Forward: Allows you to forward<br />
the file to user profile or share to<br />
friends via MMS.<br />
42
Melody composer<br />
Menu 4.8<br />
This function allows you to compose<br />
a ring signal or melody.<br />
To start composing<br />
(Menu 4.8.1)<br />
1. In Multimedia menu, choose<br />
Melody composer by pressing<br />
OK.<br />
2. Select Add to start composing<br />
your ring tone.<br />
3. After composing, the melody will<br />
be saved as IMY format.<br />
Key definition<br />
1 Do<br />
2 Re<br />
3 Mi<br />
4 Fa<br />
5 Sol<br />
6 La<br />
7 Ti<br />
8 Vibration note<br />
9 Backlight/LED note<br />
0 Rest<br />
Switch current musical note to<br />
#<br />
sharp, normal or flat stats<br />
Change the beat length of<br />
current musical note also<br />
*<br />
change current note between<br />
backlight and LED<br />
Navigation key down to flat<br />
one octave of musical note.<br />
Also, you can disable<br />
vibration, backlight and LED.<br />
You might change instrument<br />
through volume keys.<br />
4. During composing the melody,<br />
you may personalize the melody.<br />
Your phone provides the following<br />
selections for your option:<br />
► Play: Allows you to listen the<br />
melody you have made.<br />
► Play speed: Allows you to adjust<br />
the three different play speed.<br />
► Select instrument: Allows you to<br />
select your favourite instrument.<br />
► Save: Allows you to save the<br />
melody<br />
Your phone provides the following<br />
selections for your option when you<br />
have saved several melodies.<br />
Multimedia<br />
43
Multimedia<br />
Multimedia<br />
► Play: Allows you to listen the<br />
melody you have made.<br />
► Edit: Allows you to edit the<br />
selected melody.<br />
► Add: Allows you to compose one<br />
more melody.<br />
► Rename: Allows you to rename<br />
a file name.<br />
► Delete: Allows you to delete<br />
selected melody in this folder.<br />
► Delete all files: Allows you to<br />
delete all content saved in this<br />
folder.<br />
► Forward: Allows you forward<br />
the melody to user profile as ring<br />
tone or to share with friends by<br />
EMS or MMS<br />
FM radio Menu 4.9<br />
This feature allows you to listen to<br />
your favourite radio station anytime.<br />
Your phone provides the following<br />
selections for your option:<br />
► Channel list: Allows you to<br />
bookmark 9 radio stations by<br />
entering the channel name and<br />
frequency.<br />
► Manual input: Allows you to key<br />
in the radio station frequency<br />
manually.<br />
► Preset auto search: Allows you<br />
to auto search the radio station<br />
without pressing forward or<br />
backward key all the time.<br />
► Settings: Allows you to change<br />
the skin of FM radio. It will also<br />
allow you to select FM recording<br />
format. You could select record<br />
format as AMR or WAV and turn<br />
on/ off Background play function.<br />
► Loud speaker: Allows you to<br />
speaker out the radio program.<br />
► Record: Allows you to record<br />
your favor program.<br />
► Append: Allows you to resume<br />
the file you have recorded and<br />
continue to record at the same<br />
file.<br />
► File list: Allows you to listen<br />
to the radio program you have<br />
recorded.<br />
Note<br />
You have to plug-in the earphone in<br />
order to use the FM radio.<br />
44
Schedule FM record<br />
Menu 4.0<br />
This phone allows you to preschedule<br />
programs from FM radio.<br />
You are able to record 4 programs<br />
according to your personal setting.<br />
The option of settings including:<br />
to turn on/off recording, to set up<br />
time period of pre-scheduling, to<br />
record Days/Weekly/Monthly/Once/<br />
Everyday, to set up channel by<br />
listing or manually inputting and to<br />
set up file format and storage.<br />
Multimedia<br />
Note<br />
You must inset headset as the<br />
antenna when setting to pre-schedule<br />
radio channel.<br />
45
Messaging [Menu 5]<br />
Messaging<br />
46<br />
Text messages<br />
(SMS) Menu 5.1<br />
Your phone services voice mail<br />
notification messages and text<br />
messages. Voice mail and short<br />
message service (SMS) are network<br />
service. Your phone also allows you<br />
to send and receive text messages<br />
contain pictures or melodies. A<br />
message with pictures was made<br />
up of several text messages.<br />
Therefore, sending message<br />
with pictures may cost more than<br />
sending one text message.<br />
To read messages<br />
When you have received a<br />
message, the indicator will<br />
appear on the display. If your<br />
inbox is full, there will be a pop-up<br />
windows to remind you to delete<br />
some of your old messages.<br />
Otherwise, your message will be<br />
saved in the phone instead of SIM<br />
Card.<br />
1. In Messaging menu, choose<br />
Text message (SMS), press OK<br />
and then select Inbox.<br />
2. Choose one message you would<br />
like to read by pressing OK to<br />
view the content.<br />
Note<br />
The message you have received will<br />
be saved in SIM as default setting.<br />
When you read the message, your<br />
phone provides following selections<br />
for your options.<br />
► Reply: Allow you to reply by<br />
sending a text message.<br />
► Delete: Allow you to delete the<br />
message in progress.<br />
► Edit: Allow you to edit the text<br />
message.<br />
► Forward: Allow you to forward a<br />
text message.<br />
► Copy to phone: Allow you to<br />
copy the selected text message<br />
to your phone.<br />
► Move to phone: Allow you to<br />
move the selected text message<br />
to your phone.<br />
► Chat: Allow you to chat with the<br />
one sending message to your<br />
phone.
► Delete all: Allow you to delete all<br />
messages at once.<br />
► Copy all: Allow you to copy all<br />
messages to your phone at once.<br />
► Move all: Allow you to move all<br />
messages to your phone at once.<br />
► Use number: Allow you to save<br />
the number in your contacts.<br />
► Use URL: Allow you to save the<br />
URL in your phone.<br />
► Save objects: Allow you to save<br />
objects in your phone<br />
: The message that has been<br />
read.<br />
: The message that has not<br />
been read.<br />
To write a message<br />
1. In Messaging menu, choose<br />
Text message (SMS), press OK.<br />
2. Choose Write Message, press<br />
OK to write message.<br />
3. You can also personalize your<br />
message with more different<br />
special effect by selecting<br />
following functions in option list<br />
which are<br />
− Use template: You might<br />
insert default template for<br />
quick writing.<br />
− Insert object: You might<br />
insert picture, animation,<br />
melody and sound in your<br />
text message.<br />
− Format text: You might<br />
choose text size, style,<br />
alignment or start with new<br />
paragraph.<br />
− Input method: You might<br />
choose input method as you<br />
wish.<br />
Note<br />
► To quick access Message function,<br />
you can press upside navigation<br />
key U in standby mode.<br />
► To key in the content, please refer<br />
to “Input method“ in page 17.<br />
Messaging<br />
47
Messaging<br />
Messaging<br />
To send a message:<br />
1. In Messaging menu, choose<br />
Text message (SMS) and press<br />
OK.<br />
2. Choose Write message, press<br />
OK to start writing message.<br />
3. After finishing the writing, select<br />
Done following by pressing<br />
Options.<br />
Note<br />
► To use picture message function,<br />
your network operator or service<br />
provider support is necessary. Only<br />
phones that contain this function<br />
can receive and display picture<br />
messages.<br />
► This mobile doesn’t support Nokia<br />
smart message format (including<br />
WBMP), only support *.ems format.<br />
Your phone provides the following<br />
selections for your send option:<br />
► Send: Allow you to send a text<br />
message immediately.<br />
► Save: Allow you to save the<br />
message and send it later.<br />
► Send to many: Allow you to<br />
send many contacts at once.<br />
Successful sent messages will<br />
not be stored in outbox.<br />
► Send by group: Allow you to<br />
send a group you have grouped<br />
in the phone.<br />
Keypad information<br />
Key<br />
Character<br />
Shift the cursor.<br />
* Insert symbol.<br />
# Change input method.<br />
Outbox (Menu 5.1.3)<br />
After sending out the message, the<br />
message is saved in the outbox<br />
folder. You are allowed to read<br />
messages you have chosen to save<br />
with the following options:<br />
► Send: Allows you to send the<br />
message.<br />
► Edit: Allows you to edit the saved<br />
message.<br />
48
► Delete: Allows you to delete the<br />
message in progress.<br />
► Copy to phone: Allows you to<br />
copy the selected text message<br />
to your phone.<br />
► Move to phone: Allows you to<br />
move the selected text message<br />
to your phone.<br />
► Delete all: Allows you to delete<br />
all messages in your outbox at<br />
once.<br />
► Copy all: Allows you to copy all<br />
messages to your phone at once.<br />
► Move all: Allows you to move all<br />
messages to your phone at once.<br />
► Use number: Allows you to save<br />
the number in your Contacts.<br />
► Use URL: Allows you to save the<br />
URL in your phone.<br />
Templates (Menu 5.1.4)<br />
There are several default templates<br />
in your phone for quick message<br />
writing. You can also edit these<br />
templates and change to your<br />
words.<br />
Message settings (Menu 5.1.5)<br />
Your phone allows you to set up<br />
default setting on the SMS feature.<br />
1. In Messaging menu, choose Text<br />
message (SMS), press OK<br />
2. Choose Message settings, press<br />
OK.<br />
Your phone provides the following<br />
selections for your option:<br />
► Profile setting: If more than<br />
one message profile is allowed<br />
by your SIM, you may edit the<br />
profile separately.<br />
► Common setting: You may select<br />
whether to enable or disable and<br />
change your reply path of your<br />
service center if any.<br />
► Memory status: Allows you to<br />
check the memory status of<br />
the SMS in term of in SIM or in<br />
Phone.<br />
► Preferred storage: Allows you to<br />
change your preferred storage<br />
either SIM or phone.<br />
► Pref. bearer: Allows you to<br />
choose your preferred bearer-<br />
GSM or GPRS.<br />
Messaging<br />
49
Messaging<br />
Messaging<br />
50<br />
Multimedia<br />
Message (MMS) Menu 5.2<br />
The feature allows you to send the<br />
message that contain text, sound<br />
and a picture. Depending on the<br />
network, you may receive a text<br />
message that includes an Internet<br />
address where you can view the<br />
multimedia message.<br />
Your phone supports the following<br />
formats in MMS function.<br />
► Picture: JPG, GIF and BMP.<br />
► Sound: Scalable Polyphonic<br />
MIDI (SP-MIDI), i-Meldoy.<br />
Note<br />
You can’t receive multimedia<br />
messages during a call, a game or<br />
any active WAP connection over<br />
GPRS data.<br />
To write a MMS<br />
For availability to the multimedia<br />
messaging service, please contact<br />
your network operator or service<br />
provider.<br />
1. In Messaging menu, choose<br />
Multimedia message and then<br />
press OK<br />
2. Choose Write message followed<br />
by pressing OK.<br />
3. Add number or e-mail To, Cc, and<br />
Bcc you wish to send to. Then<br />
edit the subject and content by<br />
press Edit.<br />
4. In content, you are able to<br />
add text, image, audio and<br />
attachment in to the slide.<br />
Note<br />
► To key in the content, you can refer<br />
to “Input method”.<br />
► To use picture message function,<br />
your network operator or service<br />
provider support is necessary.<br />
Your phone provides the following<br />
selections for your option when<br />
editing the slides:<br />
► Done: Allows you to exit the<br />
editing page and go back to Edit<br />
content page.<br />
► Input method: Allows to you<br />
change the input method.
► Add image: Allows you to add<br />
an image file in your message.<br />
► Add audio: Allows you to add an<br />
audio file in your message.<br />
► Add attachment: Allows you to<br />
attach a file in your message.<br />
After adding text into the content,<br />
you will see more options showed<br />
including:<br />
► Insert new slide: Allow you<br />
to insert another slide in your<br />
message.<br />
► Preview: Allow you to preview<br />
the slide(s) you just wrote.<br />
► Slide timing: Allow you to edit<br />
the sliding time.<br />
To send a MMS<br />
1. In Messaging menu, choose<br />
Multimedia message and then<br />
press OK.<br />
2. Choose Write message followed<br />
by pressing OK.<br />
3. After writing the message<br />
following by the below steps,<br />
select Done to either Send<br />
only, Save and send, Save to<br />
drafts, Send options, or Exit the<br />
message.<br />
4. You can also choose the Send<br />
options to edit the MMS<br />
otherwise the message will be<br />
sent as default setting.<br />
Note<br />
► To key in the content, you can refer<br />
to “Input method “.<br />
► To use picture message function,<br />
your network operator or service<br />
provider support is necessary.<br />
Your phone provides the following<br />
selections for your option:<br />
► Send only: Allow you send a<br />
text message immediately.<br />
► Save and send: Allow you<br />
to save a message and send<br />
immediately.<br />
► Save to drafts: Allow you to<br />
save a message and send it<br />
later.<br />
Messaging<br />
51
Messaging<br />
Messaging<br />
52<br />
► Send options: Allow you to<br />
personalize the sending options<br />
including Valid period, Delivery<br />
report, Read report, and Priority.<br />
► Exit: Allow you to choose to<br />
save or not save the message<br />
you have written.<br />
Keypad information<br />
Key<br />
Character<br />
Shift the cursor.<br />
* Insert symbol.<br />
# Change input method.<br />
Inbox (Menu 5.2.2)<br />
Your phone saves the multimedia<br />
messages that have been received<br />
in the Inbox folder of the Multimedia<br />
messages menu.<br />
To read received multimedia<br />
messages<br />
1. In Message menu, choose<br />
Multimedia message and then<br />
press OK<br />
2. Select Inbox followed by<br />
pressing OK.<br />
3. Choose a message, press<br />
Option to view the message.<br />
Your phone provides the following<br />
selections for your option:<br />
► View: Allow you view<br />
a multimedia message<br />
immediately.<br />
► Properties: Allow you to view the<br />
mailing list<br />
► Reply: Allow you to reply the<br />
sender.<br />
► Reply to all: Allow you to reply<br />
the group.<br />
► Forward: Allow you to forward<br />
the message.<br />
► Delete: Allow you to delete the<br />
selected message.<br />
► Delete all: Allow you to delete<br />
the all message.<br />
► Use number: Allow you to either<br />
dial or save the phone number.<br />
Outbox (Menu 5.2.3)<br />
Multimedia messages that have<br />
been sent are saved in the Out box<br />
folder of the Multimedia messages<br />
menu. The multimedia messages<br />
that have error in sending will also
e saved in Outbox folder of the<br />
Multimedia messages menu.<br />
To view outbox multimedia<br />
messages<br />
1. In Messaging menu, choose<br />
Multimedia message, press OK,<br />
choose Outbox, press Select.<br />
2. Choose a message, press OK to<br />
view.<br />
Your phone provides the following<br />
selections for your option:<br />
► View: Allows you view<br />
a multimedia message<br />
immediately.<br />
► Properties: Allows you to view<br />
the mailing list.<br />
► Resend: Allows you to send the<br />
message to others.<br />
► Delete: Allows you to delete the<br />
selected message.<br />
► Delete all: Allows you to delete<br />
all messages.<br />
► Use number: Allows you to<br />
either dial or save the phone<br />
number.<br />
Draft (Menu 5.2.4)<br />
Your phone saves the multimedia<br />
messages that have not been sent<br />
in the Draft folder of the Multimedia<br />
messages menu.<br />
To read unsent multimedia<br />
messages<br />
1. In Messaging menu, choose<br />
Multimedia message and press<br />
OK.<br />
2. Select Drafts followed by<br />
pressing OK.<br />
3. Choose a message, press<br />
Option to view the message.<br />
Your phone provides the following<br />
selections for your option:<br />
► View: Allows you view<br />
a multimedia message<br />
immediately.<br />
► Properties: Allows you to view<br />
the mailing list.<br />
► Send: Allows you to send the<br />
message.<br />
► Edit message: Allows you to edit<br />
the message.<br />
Messaging<br />
53
Messaging<br />
Messaging<br />
► Delete: Allows you to delete the<br />
selected message.<br />
► Delete all: Allows you to delete<br />
all messages.<br />
► Use number: Allows you to<br />
either dial or save the phone<br />
number.<br />
Templates (Menu 5.2.5)<br />
This phone allows you to have a<br />
quick entry for your multimedia<br />
message.<br />
1. In Messaging menu, select<br />
Multimedia message and press<br />
OK.<br />
2. Select Templates, press OK,<br />
select a template, press Options.<br />
3. Choose Write message to send<br />
the multimedia message.<br />
4. Select Done to either send or<br />
save the message.<br />
You can view the content of<br />
template by View options to read<br />
the slide and Properties to read the<br />
message content and size.<br />
MMS settings (Menu 5.2.6)<br />
Before you send the MMS<br />
message, you need to finish MMS<br />
setting<br />
1. In Messaging menu, choose<br />
Multimedia message and press<br />
OK.<br />
2. Select Message settings and<br />
press OK.<br />
3. Your phone provides the following<br />
selections for your option:<br />
► Compose<br />
You can set your compose<br />
format form the following option<br />
Creation: Free/Restricted<br />
Image Resizing: 160x120 /<br />
320x240 / 640x480 / Off<br />
Auto Signature: On/Off<br />
► Send<br />
Valid period: This is the<br />
duration that your message is<br />
stored at the Message Center.<br />
– The duration option includes:<br />
Max / 1 hour / 12 hours / 1<br />
day / 1 week<br />
54
Delivery report: You can turn<br />
On or Off this function if you<br />
want to receive delivery report<br />
from service provider or not<br />
Read report: You can turn On<br />
or Off this function if you want<br />
to receive report from service<br />
provider.<br />
– Priority: You can choose<br />
message priority; the option<br />
includes Normal, High, and<br />
Low.<br />
– Slide timing: You can<br />
set slide timing by own<br />
preference.<br />
– Delivery time: The duration<br />
option includes Immediate<br />
/ In one hour / 12 hours / In<br />
24 hours<br />
► Retrieve:<br />
Home network: The option<br />
of home network includes<br />
Immediate / Delayed /<br />
Restricted<br />
Roaming: the option of<br />
roaming network includes<br />
As Home / Delayed / Restricted<br />
Read report: The option<br />
of read report includes On<br />
request / Send / Never send<br />
Delivery report: You can<br />
turn On or Off this function to<br />
request the network to send<br />
delivery reports of the past<br />
messages.<br />
► Filter:<br />
Anonymous: The option of<br />
anonymous includes Allow/<br />
Reject<br />
Max Size: To multimedia<br />
messages size<br />
Commercial: The option of<br />
advertisement setting includes<br />
Allow / Reject<br />
► Server profile: You may receive<br />
and send multimedia message<br />
through certain network or<br />
service provider. To activate or<br />
edit Profile detail setting, press<br />
OK.<br />
Messaging<br />
55
Messaging<br />
Messaging<br />
56<br />
► Memory status: You can check<br />
what percentage of the phone’s<br />
internal memory is unoccupied<br />
and still how messages can be<br />
stored in SIM card’s or Phone’s<br />
memory.<br />
Note<br />
To finish the MMS setting, you may<br />
contact with your network service<br />
operator.<br />
Chat Menu 5.3<br />
You can chat with friends through<br />
here. There are 2 chat rooms.<br />
Before chatting, you need to go to<br />
Chat room info to<br />
1. Create a nickname by pressing<br />
Edit.<br />
2. Then, input the mobile phone<br />
number or searching from<br />
Contacts.<br />
To start chatting<br />
1. After chat room setting, press<br />
Start new.<br />
2. Create a nickname by pressing<br />
Edit.<br />
3. Then, you are allowed to write<br />
message to the one you wish to<br />
chat.<br />
4. After finishing the writing, press<br />
Send to start chatting.<br />
Your phone provides the following<br />
selections when you start to chat<br />
► Send: Allows you to send the<br />
message you have written.<br />
► Use template: Allows you to<br />
insert the template in your SMS<br />
template option.<br />
► Insert PHB number: Allows you<br />
to insert phone number from your<br />
contacts.<br />
► Insert PHB name: Allows you to<br />
insert name from your contacts.<br />
► Input method: Allows you to<br />
change your input method.<br />
Your phone provides the following<br />
selections during chatting,<br />
► Reply: Allows you to reply the<br />
message sent by the one you<br />
chat with.
► Use number: Allows you to save<br />
the contact number of chatter or<br />
number sent by the chatter.<br />
► Clear chat: Allows you to clear<br />
your conversation.<br />
► Temp leave: Allows you to leave<br />
the chat room temporarily.<br />
► Quit: Allows you to quit this chart<br />
room.<br />
► Chat Room Info: Allows you<br />
read the chat room information<br />
you have set.<br />
Note<br />
If you happen to leave the chat<br />
room temporarily, you can choose to<br />
Resume or End of chatting.<br />
Voice mail server Menu 5.4<br />
Your phone allows you to access<br />
your voice mailbox with a quick<br />
way if your operator supports this<br />
function. Your voice mail number will<br />
be provided by your service provider<br />
and showed in the phone.<br />
In the Voice Mail submenu, you can<br />
choose line 1 or 2 and options list<br />
including:<br />
1. Edit: Allows you to edit name &<br />
number of voice mail line 1.<br />
2. Connect to voice: Allows you to<br />
connect the your voice mail box.<br />
► In standby mode, long press 1<br />
to access your voice mail server<br />
directly.<br />
Note<br />
To use this function, you may need<br />
to enter the voice server number<br />
obtained from your service provider.<br />
Broadcast Message<br />
Menu 5.5<br />
Your phone allows you to receive<br />
commercial message. You can<br />
either enable or disable the<br />
receiving mode and set some other<br />
settings based on your personal<br />
preference.<br />
Messaging<br />
57
Messaging<br />
Messaging<br />
Your phone provides the following<br />
selections:<br />
► Receive mode: You can choose<br />
to receive or not to receive the<br />
broadcast messages.<br />
► Message list: In message list,<br />
you can read messages by<br />
pressing “OK” or exit the by<br />
pressing “Back”<br />
► Languages: You can set up the<br />
languages of broadcast message<br />
you want to receive.<br />
► Channel setting: You can select<br />
channels from the channel list<br />
or add new channel where<br />
you want the messages to be<br />
received to the list. Then, select<br />
channel(s) from the select list.<br />
You are allowed to edit, add and<br />
delete it.<br />
58
My stuff [Menu 6]<br />
In this menu, you can manage<br />
images, photos, recordings and<br />
tones you had.<br />
There will be two storages showed:<br />
► Memory card<br />
You may check files saved in<br />
your memory card.<br />
► Phone<br />
You may check files saved in<br />
your phone.<br />
To start view/organizing the<br />
My stuff<br />
1. When you enter this menu, you<br />
may also see one more drive<br />
named memory card if you have<br />
inserted microSD card<br />
2. Scroll to the desired folder and<br />
press Option select options:<br />
Open, Create folder and<br />
Format.<br />
3. Your phone provides the following<br />
options when you select the one<br />
of those folders (Audio, Images,<br />
Video, My Music, Photos,<br />
Video, Received)<br />
4. You can<br />
► Open: Allows you to open the<br />
folder.<br />
► Create folder: Allows you to<br />
create new folder.<br />
► Rename: Allows you to<br />
rename the file. You can not<br />
rename the default folders.<br />
► Delete: Allows you to delete<br />
the selected file.<br />
► Sort: Allows you to sort the<br />
files by name, type, time and<br />
size.<br />
My stuff<br />
59
Profiles [Menu 7]<br />
Profiles<br />
60<br />
You can set following different<br />
profiles to adapt to different<br />
environment conditions. Your<br />
phone provides 6 different profiles,<br />
including:<br />
► General: Standard profile as<br />
phone defaults setting.<br />
► Meeting: Ring volume is set to<br />
be low and key tone is switched<br />
off.<br />
► Outdoor: Ring and key tone<br />
volume is set to be loud.<br />
► Vibrate only: Ring and key<br />
tone volume is set to be off and<br />
vibrator is switched on.<br />
► Headset: Profile for headset<br />
plug-in.<br />
► Silent: Ring volume and vibrator<br />
is set to be off and only LED is<br />
switched on<br />
► Bluetooth: Profile when<br />
Bluetooth is connected<br />
Icon<br />
Profile Mode<br />
General<br />
Meeting<br />
Outdoor<br />
Vibrate only<br />
Silent<br />
Headset<br />
Bluetooth<br />
To activate the Profiles<br />
1. In Profiles menu, choose a<br />
profile followed by pressing OK.<br />
2. Choose Activate and press OK.<br />
To edit the Profiles<br />
You can customize General profile<br />
settings to meet your preference.<br />
1. In Profiles menu, choose a<br />
profile followed by pressing OK.<br />
2. Choose Customize and press<br />
OK.<br />
Your phone provides the following<br />
selections for your personalize<br />
option:<br />
► Tone setup: Allows you to set<br />
ring tone depend on your favor.
Note<br />
Please be careful not to injure your<br />
ears when ring volume is set high.<br />
► Volume: Allows you to adjust the<br />
volume of ring tone and key tone.<br />
► Alert type: Allows you to select<br />
different alert type including<br />
Ring, Vibration only, Vibrate<br />
and Ring, Vibrate then ring,<br />
Light only and Beep once.<br />
► Intelligent Call: Allow your<br />
phone to have a phone number<br />
pronounced before ringing.<br />
► Ring type: Allows you to select<br />
single, repeat or ascending ring<br />
for incoming call.<br />
► Extra tone: Allows you to either<br />
on or off warning, error, camp on<br />
and connect tones.<br />
► Answer mode: Allows you to<br />
turn on/off the answer mode by<br />
pressing any key.<br />
► Status LED: Allows you to<br />
choose enable or disable your<br />
status LED if there is any signal.<br />
Profiles<br />
61
Contacts [Menu 8]<br />
Contacts<br />
Your phonebook is saved either in<br />
the SIM card’s memory or Phone’s<br />
memory. You can also choose to<br />
save in both memories.<br />
Search Menu 8.1<br />
Allow you to search names and<br />
numbers saved in the contacts.<br />
To search a number and a<br />
name<br />
1. In Contacts menu, key in full<br />
name or first character of contact<br />
person’s name. The contact list<br />
will automatically jump to the<br />
contact list with the character<br />
you have entered or the matched<br />
contact will be shown.<br />
2. Select the one you wish to call<br />
by pressing S to start making a<br />
call.<br />
Note<br />
In the search mode, you might press<br />
# key to quick change the input<br />
method.<br />
You can also press Options to<br />
change input method or edit the<br />
selected phone number.<br />
Your phone provides the following<br />
selections for Entry options:<br />
► Input method: Allow you to<br />
select the default input language.<br />
► View: Allows you to read the<br />
contact person’s information.<br />
► Edit: Allows you to edit name<br />
& phone number of the contact<br />
person.<br />
► New Message: Allow you to<br />
send either SMS or MMS to the<br />
selected contact person.<br />
► Delete: Allows you to delete<br />
the selected contact person’s<br />
information.<br />
► New contact: Allow you to add<br />
new contact person into the<br />
phonebook.<br />
► Copy: Allows you to copy the<br />
contact person’s information<br />
to phone or SIM. (depend on<br />
where you have saved the phone<br />
number)<br />
62
► Move: Allows you to move<br />
the selected contact person’s<br />
information to phone or SIM.<br />
► Duplicate: Allows you to<br />
duplicate the selected contact<br />
person’s information to the same<br />
memory storage.<br />
► Send vCard: Allows you to send<br />
vCard to the selected contact<br />
person.<br />
4. You may also edit the name,<br />
home number, company name,<br />
email address, office number,<br />
fax number, birthday, image,<br />
ring tone and caller group for<br />
individual contact.<br />
Note<br />
Your phone allows you to save 500<br />
entries of phone numbers.<br />
Contacts<br />
New contact Menu 8.2<br />
Allow you add new name and<br />
number in the contacts.<br />
To add a phone number and<br />
a name in contacts<br />
1. In Contacts menu, choose New<br />
contact, press OK.<br />
2. Choose To SIM or To phone,<br />
press OK.<br />
3. Key in the name, press OK and<br />
use navigation key to number<br />
column, key in the number.<br />
Caller group Menu 8.3<br />
There are five default groups in the<br />
phone. You can edit each group’s<br />
name with different tone/picture/<br />
LED/video/member list. With the<br />
function of caller group, you can<br />
send a message to all members of<br />
a group at the same time by this<br />
setting.<br />
To add a name in a Group<br />
1. In Contacts menu, choose<br />
Caller group, press OK.<br />
2. Choose a Group, press OK.<br />
63
Contacts<br />
Contacts<br />
3. Choose Member list, press OK.<br />
4. Press Add, then you may choose<br />
from Contacts.<br />
Note<br />
► Your phone provides 5 caller<br />
groups including: Friends, Family,<br />
VIP, Business & Others.<br />
► You need to store contacts into<br />
phone but not SIM if you want<br />
to add contacts into Caller group<br />
function.<br />
Your phone provides the following<br />
selections for your option:<br />
► Group name: Groups includes<br />
Friends, Family, VIP, Business<br />
and Others<br />
► Ring tone: Allows you to set<br />
the profile of ring tone for this<br />
particular call group.<br />
► Pictures: Allows you to set a<br />
picture for the group.<br />
► Status LED: Allows you to<br />
choose either turn on or off your<br />
LED light when someone calls.<br />
► Video: Allows you to set a video<br />
clip for the group.<br />
► Member list: Allows you to add<br />
a member in the specified group.<br />
Speed dial Menu 8.4<br />
If you assign the number to one of<br />
the speed dialing keys (from 2<br />
to 9) saved in the Contacts, you<br />
can call the phone number by long<br />
pressing the key in standby mode.<br />
1. In Contacts menu, Choose<br />
Speed dial.<br />
2. Turn on the Speed dial from<br />
Enable speed dial option.<br />
3. Select Set number and press<br />
OK to edit the number from your<br />
contact lists.<br />
Extra number Menu 8.5<br />
Allow you edit owner number,<br />
Service dial number and<br />
SOS number for your personal<br />
preference.<br />
64
Note<br />
Your service provider may program<br />
some special phone numbers into<br />
your SIM. It is not possible to modify<br />
the Service dial numbers if doesn’t<br />
support.<br />
Copy Menu 8.6<br />
You can copy and transfer your<br />
phone data from SIM to your phone<br />
(or from phone to SIM).<br />
1. In Contacts menu, select Copy.<br />
2. Choose an item All from SIM, All<br />
from phone or One by one, and<br />
press OK.<br />
Delete Menu 8.7<br />
Your phone allows you to delete all<br />
numbers and names stored in the<br />
Contacts.<br />
1. In Contacts menu, select Delete.<br />
2. Choose All from phone, All<br />
from SIM or One by one, press<br />
OK.<br />
Move Menu 8.8<br />
Your phone allows you to move all<br />
numbers and names stored in the<br />
contacts.<br />
1. In Contacts menu, select Delete.<br />
2. Choose All from phone, All<br />
from SIM or One by one, press<br />
OK.<br />
Settings Menu 8.9<br />
Your phone provides you various<br />
setting options to personalize your<br />
phone, including,<br />
1. Caller picture: Allows you to use<br />
your friend’s photo or any other<br />
picture as his/her picture ID when<br />
calling.<br />
2. Caller ring Tone: Allows you to<br />
personalize the incoming ring<br />
tone for specific person or caller<br />
group in your contact list.<br />
3. Caller video: Allows you to use<br />
certain video clip for specific<br />
person in your contact list.<br />
Contacts<br />
65
Contacts<br />
Contacts<br />
4. Memory status: You can check<br />
what percentage of the phone’s<br />
internal memory is unoccupied<br />
and how many name and number<br />
entries can still be stored in SIM<br />
card’s and Phone’s memory.<br />
5. Preferred storage: You can<br />
choose your preferred storage in<br />
phone, SIM or both.<br />
6. Fields: You may customize the<br />
contact information you want to<br />
show on your display.<br />
7. My vCard: You can edit your<br />
vCard information and share to<br />
others from this option.<br />
8. Human voice prompt: Your<br />
phone designed to able to play<br />
human voice for 0~9, * and #<br />
keys. You can choose either turn<br />
on or off the human voice keypad<br />
tone.<br />
Note<br />
You could get PC suite tool via www.<br />
wowlg.com. PC suite tool could let you<br />
to manage your contact lists stored in<br />
mobile and SIM<br />
66
Settings [Menu 9]<br />
Time & Date Menu 9.1<br />
This function allows you to set your<br />
home city, view and change the<br />
time and date set in your phone.<br />
You can also choose to auto update<br />
the date and time.<br />
Set home city (Menu 9.1.1)<br />
1. In Settings menu, choose Time<br />
& Date, press OK.<br />
2. Select “Set home city”, press OK.<br />
3. All major cities are listed in the<br />
phone. You may use navigation<br />
keys to scroll up/down for your<br />
selection. Or, pressing first<br />
character of home city you wish<br />
to find by numeric key for quick<br />
search.<br />
4. After finding your home city,<br />
press OK to back Time & Date<br />
submenu.<br />
Set time & date (Menu 9.1.2)<br />
1. In Settings menu, choose Time<br />
& Date, press OK.<br />
2. Set time & date by using<br />
navigation and numeric keys and<br />
< LSK followed by press OK.<br />
3. You can choose turn on/off<br />
daylight saving.<br />
Set time format (Menu 9.1.3)<br />
1. In Settings menu, choose Time<br />
& Date, press OK.<br />
2. Choose Set Format, press OK.<br />
3. Choose Time and Date format,<br />
press OK.<br />
Auto update (Menu 9.1.4)<br />
This function is to set the phone<br />
for updating the time and date<br />
automatically according to the<br />
current time zone.<br />
1. In Settings menu, choose Auto<br />
update, press OK.<br />
2. Select On or Off to have the auto<br />
update function.<br />
3. Finally, choose Yes to confirm the<br />
request.<br />
Note<br />
Auto update of date and time does<br />
not change the time you have set for<br />
the alarm clock, calendar or the alarm<br />
notes. They are in local time. Updating<br />
may cause some alarms you have set<br />
to expire.<br />
Settings<br />
67
Settings<br />
Settings<br />
Display Menu 9.2<br />
This feature allows you to<br />
personalize your display setting by<br />
following options:<br />
► Wallpaper: Allows you to change<br />
wallpaper showed on idle screen.<br />
1. In Settings menu, choose<br />
Display, press OK.<br />
2. Choose Wallpaper, press<br />
OK.<br />
3. Choose System or User<br />
define, press OK.<br />
4. Choose wallpaper, press<br />
View, press OK to select as<br />
wallpaper.<br />
► Screen saver: Allows you to play<br />
different screen saver.<br />
1. You may customize the<br />
screen saver’s setting with<br />
the option of turning on or<br />
off the screen saver and<br />
waiting time from 5 sec to 1<br />
min. when active the screen<br />
saver.<br />
2. After setting, you may select<br />
the screen saver either from<br />
System or User Define.<br />
The operation press is the<br />
same as Wallpaper display<br />
setting.<br />
► Power on/off display: This<br />
phone allows you to set the<br />
power-on/off animation from<br />
system, phone/card memory or<br />
disable animation. The support<br />
format will be MP4/3GP.<br />
► LCD backlight: Allows you to<br />
adjust LCD’s brightness and time<br />
of turning dark.<br />
► Show date and time: Allows you<br />
to show or not to show the date<br />
and time in the idle screen.<br />
► Show owner number: Allows<br />
you to enable/disable your phone<br />
number showed in the idle<br />
screen.<br />
► Show home shortcut: Allow<br />
you to enable/disable the screen<br />
shortcut in the idle mode to<br />
remind you 4-way navigation key<br />
default function for quick access.<br />
► Show operator name: Allows<br />
you to choose either show or not<br />
to show your operator’s name in<br />
the idle screen.<br />
68
Phone Menu 9.3<br />
Language (Menu 9.3.1)<br />
This phone allows you to set a<br />
language for the display in this<br />
phone.<br />
1. In Phone menu, choose<br />
Language, press OK,<br />
2. Choose a language, press OK.<br />
Greeting text (Menu 9.3.2)<br />
This function allows you to display<br />
the Greeting text when you power<br />
on the phone. You may edit any<br />
message for your welcome note.<br />
Flight mode (Menu 9.3.3)<br />
This function allows you to play the<br />
music player during flight journey, if<br />
you select the mode to Flight Mode<br />
instead of Normal Mode. In this<br />
mode you will be able to listen only<br />
the music.<br />
► Normal mode: GSM/GPRS<br />
network works which mean you<br />
can make a call.<br />
► Flight mode: GSM/GPRS will be<br />
disabled for security reason and<br />
you can use only phone music<br />
player .<br />
► Query when power on: You will<br />
need to select either Normal or<br />
Flight mode whenever power on<br />
your phone.<br />
Misc setting (Menu 9.3.4)<br />
This function allows you to enable<br />
or disable the LED indicator if there<br />
is any signal received.<br />
Shortcuts (Menu 9.3.5)<br />
This function allows you to edit your<br />
shortcut list since it is one of your<br />
dedicated keys.<br />
Call Menu 9.4<br />
Caller ID (Menu 9.4.1)<br />
This function allows you to either<br />
send or hide your ID during calling<br />
or sending out the message. By<br />
default your phone is set in Set by<br />
network which means your ID is<br />
determined by your service provider.<br />
Settings<br />
69
Setting<br />
Settings<br />
70<br />
Call waiting (Menu 9.4.2)<br />
This network service enables you to<br />
be informed when someone is trying<br />
to reach you during another call.<br />
1. In Setting menu, choose Call,<br />
press OK.<br />
2. Choose Call waiting, press OK,<br />
choose Activate or Deactivate<br />
and press OK.<br />
3. Select Query status may<br />
allow to you see this function is<br />
activated or deactivated.<br />
Call divert (Menu 9.4.3)<br />
You can set the call condition by<br />
which calls are diverted to another<br />
numbers.<br />
To Set call divert<br />
1. In Setting menu, choose Call,<br />
press OK.<br />
2. Choose Call Divert, press OK<br />
and then choose an item, press<br />
OK.<br />
3. Choose Activate, press OK.<br />
4. Enter the number you want to be<br />
diverted, press OK.<br />
Your phone provides the following<br />
divert selections for your option:<br />
► Divert all voice calls: All voice<br />
calls are diverted.<br />
► Divert if unreachable: Calls are<br />
diverted when you are not in a<br />
location covered by your service<br />
provider.<br />
► Divert if no answer: Calls are<br />
diverted when the call is not<br />
answered.<br />
► Divert if busy: Calls are diverted<br />
when your phone is engaged on<br />
other calls.<br />
► Divert all data calls: All data<br />
calls are diverted.<br />
► Cancel all diverts: Cancel the<br />
above settings.<br />
Call barring (Menu 9.4.4)<br />
This network service allows you to<br />
restrict incoming calls and outgoing<br />
calls from your phone. A barring<br />
password is required for using this<br />
function.<br />
► Outgoing calls: To bar All calls/<br />
International calls/ International<br />
call except home country
► Incoming calls: To bar All calls/<br />
When roaming<br />
► Cancel all: To cancel all the bar<br />
call setting (you will need to enter<br />
the barring password).<br />
► Change barring PW : To set<br />
barring call, you are asked<br />
to input your barring call<br />
password. This menu enables<br />
you to change your barring call<br />
password. To know the default<br />
password setting, please contact<br />
your service operator.<br />
Line switching (Menu 9.4.5)<br />
This is a network service to select<br />
phone line 1 or 2 that is subscriber<br />
number for making calls within ALS<br />
setup submenu.<br />
Note<br />
If you select Line 2 but not subscribe<br />
this networks service, you will not<br />
be able to make a call. However,<br />
calls on both lines can be answered<br />
regardless of the selected line.<br />
Call reminder (Menu 9.4.6)<br />
This function allows you to set a<br />
time reminder during a call.<br />
1. In Setting menu, press OK.<br />
Then, choose Call, press OK.<br />
2. Choose Call reminder, press<br />
OK.<br />
3. Choose an item, press OK.<br />
Your phone provides the<br />
following time alert selections<br />
for your option:<br />
– Off<br />
– Single<br />
– Periodic<br />
Note<br />
The minimum time of Periodic is 30<br />
seconds at least.<br />
Call time display (Menu 9.4.7)<br />
This function allows you to enable/<br />
disable the call time shown on<br />
display.<br />
Settings<br />
71
Settings<br />
Settings<br />
72<br />
Auto redial (Menu 9.4.8)<br />
This function allows you to set<br />
auto redial. Select On and your<br />
phone will make a maximum of ten<br />
attempts to connect the call after an<br />
unsuccessful call attempt.<br />
Closed user group (Menu 9.4.9)<br />
This function allows you to set the<br />
limited call group. Only the persons<br />
in the specific group are allowed to<br />
make and receive the calls.<br />
Bluetooth Menu 9.5<br />
Your phone is designed to compliant<br />
with Bluetooth technology V1.2.<br />
Bluetooth technology enables<br />
wireless connection between<br />
electronic devices. The Bluetooh<br />
connection can be used to listen to<br />
stereo music, send images, video,<br />
texts and vCard.<br />
To start using Bluetooth<br />
technology<br />
You will need to set up the<br />
Bluetooth connectivity with the<br />
device when first time using. After<br />
setting, you will be allowed to use<br />
Bluetooth by connecting with certain<br />
device. Whenever your bluetooth<br />
connectivity is power on, the status<br />
bar will show , represents<br />
connection on; transparent icon<br />
represents invisible when someone<br />
tries to detect BT device.<br />
To pair with BT Audio Device<br />
1. In Settings menu, select<br />
Bluetooth by pressing OK.<br />
2. You will have to power on the<br />
Bluetooth connectivity of your<br />
phone and the device you wish to<br />
connect first.<br />
3. After turning on, press Inquiry<br />
audio device. Your phone will<br />
automatically search and pair the<br />
device.<br />
4. Whenever your phone is<br />
connected with the device, there<br />
will be a pop-up the message to<br />
notify you.<br />
5. Press Bond to pair your phone<br />
w/ the headset.<br />
6. Then, you might add the BT<br />
headset to trust list and connect<br />
the headset by press Yes.
Note<br />
► Before using the BT headset,<br />
please make sure your device has<br />
been full charged.<br />
► The BT headset added to trust list<br />
would be shown in My device list.<br />
In the future, if you wish to connect<br />
you mobile phone with certain BT<br />
headset, you can select from My<br />
device list for connection.<br />
► All active devices you have<br />
connected will be shown in Active<br />
device and you can disconnect<br />
anytime by pressing Disc.<br />
To pair with BT Devices<br />
1. In Settings menu, select<br />
Bluetooth by pressing OK.<br />
2. Go to My device and press<br />
Options.<br />
3. Select Inquire new device, then<br />
your phone will automatically<br />
search all BT devices.<br />
To connect with BT Device<br />
1. In Settings menu, select<br />
Bluetooth by pressing OK.<br />
2. Go to My device and select the<br />
BT device you wish to connect.<br />
3. Press Options and select<br />
Connect.<br />
4. After connecting the BT device,<br />
your phone will ask you which<br />
profile you wish to connect (it will<br />
depend on how many profiles<br />
your BT device supported).<br />
You options list in My device<br />
including:<br />
► Connect: Allow you to connect<br />
the device supporting BT<br />
technology.<br />
► Rename: Allow you to rename<br />
the device’s name.<br />
► Delete: Allow you to delete the<br />
selected items in your trust list.<br />
► Delete all: Allow you to delete all<br />
items in your trust list.<br />
► Service list: Allow you to check<br />
the profiles supported by devices<br />
you have added into your trust<br />
list.<br />
► Inquire new device: Allow you<br />
to inquire new device(s).<br />
Settings<br />
73
Settings<br />
Settings<br />
74<br />
To use your mobile phone as<br />
modem<br />
Your phone can be used as modem<br />
for dialing up network. This function<br />
can only be used by PC supported<br />
Bluetooth technology. You will need<br />
to check with your service provider<br />
for setting.<br />
To send data using Bluetooth<br />
connectivity<br />
1. Select object your wish to send.<br />
2. Press Option and select Forward.<br />
3. Choose To Bluetooth, then your<br />
phone will search device.<br />
4. Select the device you would like<br />
to share following by sending<br />
action.<br />
To receive data using<br />
Bluetooth connectivity<br />
When you receive data through<br />
Bluetooth, notify message will be<br />
pop-up for asking if you are willing<br />
to accept. If you decided to receive<br />
the message, press OK and the<br />
data will be saved in Received<br />
folder of My stuff.<br />
You can also change your received<br />
data location through Setting ➝<br />
FTP Settings. In there, you can<br />
1. customized the Shared folder<br />
location<br />
2. adjust Access right which<br />
including Full control or Read<br />
only.<br />
To receive data from PC<br />
Your phone allows you to browse<br />
and transfer the file from PC. Your<br />
PC needs to support Bluetooth<br />
technology in order to transfer the<br />
files to handset. Please follow the<br />
instruction showed on your PC.<br />
1. In Settings menu, select<br />
Bluetooth by pressing OK.<br />
2. Turn on the Bluetooth in both<br />
handset and PC. Then, Inquiry<br />
device by pressing OK.<br />
3. After inquiring the PC and follow<br />
the instruction showed on PC<br />
to setup. Connected PC will be<br />
added into My device.<br />
4. Press Options and select FTP<br />
profile to connect.
5. Then, you will be able to browse<br />
and copy files from PC to your<br />
handset.<br />
To listen to stereo music<br />
1. In Settings menu, select<br />
Bluetooth by pressing OK.<br />
2. If you have already paired the<br />
stereo Bluetooth headset, please<br />
goto My device and select the<br />
headset you wish to connect. If<br />
the Bluetooth headset you never<br />
pair before, please pairing the<br />
headset first.<br />
3. Go to My device and select the<br />
BT headset you wish to connect.<br />
4. Press Options and select A2DP<br />
profile to connect.<br />
5. You would see the list of profiles<br />
supported by this particle<br />
Bluetooth headset.<br />
6. Select A2DP profile and press<br />
LSK to connect.<br />
To setup your BT technology<br />
Your setting list including:<br />
► Visibility: You may choose to<br />
turn on or off the visibility of<br />
your phone when other devices<br />
are trying to search devices<br />
supported BT technology.<br />
► Change device name: You can<br />
change your device which is your<br />
phone’s name displayed in other<br />
device.<br />
► Authentication: When other<br />
device is trying to pair your<br />
phone, it will always need your<br />
authorization to connect it.<br />
► Audio path: This function helps<br />
you to set if you wish to leave<br />
your audio path in phone or BT<br />
headset.<br />
► FTP settings: You can<br />
customize the shared folder and<br />
access right of your phone.<br />
Note<br />
Operating your phone in invisible<br />
mode is a safer way to avoid<br />
malicious software. Do not accept<br />
BT connectivity from sources you do<br />
not trust.<br />
Settings<br />
75
Settings<br />
Settings<br />
76<br />
About<br />
You may find out your device<br />
name, BD address, and supported<br />
service information in here. Your<br />
phone support Bluetooth profiles<br />
include HSP (headset-free), HFP<br />
(hands-free), SPP (serial port),<br />
DUN (dial-up networking), OPP,<br />
FTP (file transfer profile), A2DP<br />
(advanced audio distribution profile)<br />
and AVRCP.<br />
Network Menu 9.6<br />
Network selection (Menu 9.6.1)<br />
Your phone provides you 3<br />
selections for your network<br />
connectivity.<br />
► New search: You can always<br />
refresh your network connectivity<br />
before using network.<br />
► Select network: Your phone will<br />
list down the network list for your<br />
selection if you select Manual<br />
mode.<br />
► Selection mode:<br />
This function enables you to<br />
make operator selection by<br />
manual or automatically.<br />
► Select Automatic mode, the<br />
phone automatically selects<br />
one of the cellular networks<br />
available in your area and<br />
then press OK.<br />
► In Manual mode, the phone<br />
will show a list of available<br />
networks and you can select<br />
the desired network if this<br />
network has a roaming<br />
agreement with your home<br />
network operator.<br />
Preferred networks<br />
(Menu 9.6.2)<br />
Preferred networks is used<br />
when the mode has been set to<br />
Automatic. The location numbers<br />
in the preferred network list show<br />
the search priority. Your service<br />
provider’s network will be shown in<br />
the display. This feature helps you<br />
to select your GSM/GPRS network<br />
if your service provider does provide<br />
more than one network choice.<br />
However, please make sure you<br />
have applied the international<br />
roaming service when you are<br />
traveling abroad.
Your phone provides the following<br />
options:<br />
► Add from list: Allows you to add<br />
network list selecting from over<br />
300 networks in the worlds.<br />
► Create new: Allows you to<br />
create new network list by<br />
entering MCC/MNC and adjust<br />
the priority.<br />
► Change priority: Allows you<br />
to change the priority of your<br />
preferred network list.<br />
► Delete: Allows you to delete the<br />
select item.<br />
GPRS connection (Menu 9.6.3)<br />
The handset can change GPRS<br />
connection status, “When need /<br />
Always”, by press OK to switch.<br />
Security Menu 9.7<br />
SIM lock (Menu 9.7.1)<br />
This function allows you to lock<br />
the SIM card with a specific PIN<br />
number. The feature is designed to<br />
prevent the use of your SIM card if<br />
your phone becomes lost.<br />
You can switch on or off to activate<br />
the SIM lock function by inputting<br />
the PIN code.<br />
Phone Lock (Menu 9.7.2)<br />
This function allows you to lock or<br />
unlock your phone for protection<br />
purpose. You need to enter the<br />
password during unlock the phone.<br />
The default password is “0000”<br />
Auto keypad lock (Menu 9.7.3)<br />
This allows you to lock the phone’s<br />
keypad to prevent accidental key<br />
pressed.<br />
In submenu, select the time that<br />
after the last key press will be<br />
disabled, then press OK.<br />
Fixed dial (Menu 9.7.4)<br />
This function dials only the numbers<br />
in the fixed dialing number (FDN).<br />
To save and edit numbers on the<br />
list, you need the PIN2 code.<br />
Settings<br />
77
Settings<br />
Settings<br />
Barred dial (Menu 9.7.5)<br />
You can switch the mode on and off<br />
to have a restricted call. However,<br />
you need to check if your SIM<br />
supports this function or not.<br />
Change Password<br />
(Menu 9.7.6)<br />
► PIN: This allows you to change<br />
the PIN number.<br />
► PIN2: This allows you to change<br />
the PIN2 number.<br />
► Phone lock: This allows you to<br />
change the password.<br />
Restore factory settings<br />
Menu 9.8<br />
This function allows you to reset the<br />
entire phone setting to the original<br />
setting when it is produced. The<br />
security code is needed to access.<br />
78
Troubleshooting<br />
Problem<br />
Telephone cannot be switched on<br />
Battery empty<br />
The battery doesn’t charge properly<br />
or the phone sometimes turns<br />
itself off<br />
Usage time of battery becomes<br />
shorter<br />
Charging error – Temperature out<br />
of range<br />
Charging error – Wrong charger<br />
Charging error – Battery defective<br />
Charging error – No battery icon<br />
appears when charging<br />
Possible Solution<br />
Please take out and insert the battery once again then<br />
press E power on .<br />
Charge battery. Check charging indicator in the<br />
display.<br />
Wipe the charging contacts of both phone and battery<br />
with a clear soft cloth.<br />
If the battery charge time is shorter, it may be due<br />
to the user environment, or large volume of calls, or<br />
weak signals.<br />
Make sure the ambient temperature is right, wait for a<br />
while, and charge it again.<br />
Only use original <strong>LG</strong> accessories.<br />
Replace battery.<br />
The battery is empty or has not been used for a<br />
long time.It may take a while before the battery icon<br />
appears on the screen.<br />
Forget the phone code or password The default phone code is “0000”.<br />
Enter PUK<br />
Phone loses network<br />
The PIN code has been entered incorrectly three<br />
times in succession, and the phone is now blocked.<br />
Enter the PUK supplied by your service provider.<br />
The network connection has been lost. You may be<br />
in a weak signal area. Move and try again. You are<br />
trying to access an option for which you have no<br />
subscription with your service provider. Contact the<br />
service provider for further detail.<br />
Troubleshooting<br />
79
Troubleshooting<br />
Troubleshooting<br />
Problem<br />
You have entered a number but it<br />
was not dialled<br />
Your correspondent cannot reach<br />
you<br />
Your correspondent cannot hear<br />
you speaking<br />
The audio quality of the call is poor<br />
No number is dialled when you<br />
recall a Contacts entry<br />
Cannot use the Internet/WAP<br />
Cannot use MMS/picture messages<br />
on your phone<br />
If the above guidelines do not help<br />
you to solve the problem<br />
Possible Solution<br />
Be sure that you have pressed S.<br />
Be sure that you have accessed the right network<br />
service. Be sure that you have not set an outgoing call<br />
barring option.<br />
Be sure that you have entered the area code.<br />
Be sure that your phone is switched on. Press S<br />
for more than one second. Be sure that you are<br />
accessing the network service. Be sure that you have<br />
not set an incoming call barring option.<br />
Be sure that you have switched off the loudspeaker.<br />
Be sure that you are holding the phone close enough<br />
to your mouth. The microphone is located at the<br />
bottom of the phone.<br />
Check the signal strength indicator on the display<br />
. The number of bars indicates the signal<br />
strength. If you are in a building try to move closer to<br />
window side.<br />
Use the Contacts/Search feature to ensure the<br />
number has been stored correctly. Resave the<br />
number, if necessary.<br />
Your subscription does not include data capability.<br />
You will need to contact your service provider to apply<br />
the service.<br />
Your subscription does not include data capability.<br />
You will need to contact your service provider to apply<br />
the service.<br />
Take note of the model number of your mobile phone<br />
and a clear description of the problem. Contact your<br />
phone dealer or <strong>LG</strong> Service Center for help.<br />
80
Emergency calls<br />
Important<br />
This phone, like any wireless<br />
phone, operates using radio signals,<br />
wireless and landline networks as<br />
well as user programmed functions.<br />
Because of this, connections in all<br />
conditions cannot be guaranteed.<br />
Therefore, you should never rely<br />
solely upon any wireless phone<br />
for essential communications (e.g.<br />
medical emergencies) Emergency<br />
calls may not be possible on all<br />
wireless phone networks or when<br />
certain network services and/or<br />
phone features are in use. Check<br />
with local service provider.<br />
Emergency calls<br />
81
Accessories<br />
Accessories<br />
There are various accessories for your mobile phone. You can select these<br />
options according to your personal communication requirements.<br />
Standard Battery<br />
Headset<br />
Allows hands free<br />
operation.<br />
Travel Adapter<br />
This charger<br />
allows you to<br />
charge the<br />
Phone’s battery.<br />
Data cable<br />
You can connect<br />
your phone to<br />
PC to exchange<br />
the data between<br />
them.<br />
Note<br />
► Always use genuine <strong>LG</strong><br />
accessories.<br />
► Failure to do this may invalidate<br />
your warranty.<br />
► Accessories may be different in<br />
different regions; please check with<br />
our regional service company or<br />
agent for further enquires.<br />
82
Technical data<br />
General<br />
Product name : <strong>KP22</strong>0<br />
System : GSM 900/ DCS 1800/<br />
PCS 1900<br />
Ambient temperatures<br />
Max : +55°C<br />
Min : -10°C<br />
Technical data<br />
83
Suppliers Details<br />
Name<br />
<strong>LG</strong> <strong>Electronics</strong> Inc<br />
Address<br />
<strong>LG</strong> Twin Tower 20,Yeouido-dong, Yeongdeungpo-gu Seoul, Korea 150-721<br />
Product Details<br />
Product Name<br />
E-GSM 900 / DCS 1800 / PCS 1900 Tri Band Terminal Equipment<br />
Model Name<br />
<strong>KP22</strong>0<br />
Trade Name<br />
<strong>LG</strong><br />
0681<br />
Applicable Standards Details<br />
R&TTE Directive 1999/5/EC<br />
EN 301 489-01 v1.6.1 / EN 301 489-07 v1.3.1 / EN 301 489-17 v1.2.1<br />
EN 60950-1 : 2001<br />
EN 50360/EN 50361 : 2001<br />
EN 301 511 V9.0.2<br />
EN 300 328 V1.7.1<br />
Supplementary Information<br />
The conformity f i to above b standardsd d is i verified d byb ETS.<br />
Declaration<br />
I hereby declare under our sole responsibility<br />
that the product mentioned above to which this<br />
declarationd l i relatesl complies withi h theh aboveb mentionedi d<br />
standards and Directives<br />
Name<br />
Seung Hyoun, Ji / Director<br />
Issued Date<br />
07. January. 2008<br />
European Standard Center<br />
<strong>LG</strong> <strong>Electronics</strong> Logistics and Services B.V.<br />
Veluwezoom 15, 1327 AE Almere, The Netherlands<br />
Tel : +31 - 36- 547 – 8940, Fax : +31 – 36 – 547 - 8794<br />
e-mail : jacob @ lge.com<br />
Signature of representative<br />
84
MEMO
MEMO
MEMO
MEMO