Pyronix Conqueror User Guide - Lockmates
Pyronix Conqueror User Guide - Lockmates
Pyronix Conqueror User Guide - Lockmates
Create successful ePaper yourself
Turn your PDF publications into a flip-book with our unique Google optimized e-Paper software.
@<br />
1<br />
B<br />
D<br />
<br />
<br />
<br />
@<br />
1BD<br />
<br />
<br />
6 E5@B7B1==9>7CD1DEC5<br />
J>5 J>5 J>5<br />
! " # $<br />
5-5>DBI5H9D1-1335CC9-9==5491D5-=9DD54<br />
CD1DEC;5I*<br />
C<br />
5D<br />
C<br />
5D<br />
@ 2 C 2 9B55B>1=<br />
5<br />
PYRONIX LIMITED JULY 2000<br />
RINS 061 ISSUE-1<br />
®<br />
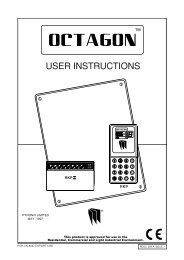
CONQUEROR<br />
USER INSTRUCTIONS<br />
3<br />
<br />
><br />
D13D*<br />
®<br />
CE@@<br />
4 1I<br />
J>5!<br />
J>5"<br />
J>5#<br />
J>5$<br />
D1=@5B<br />
@1<br />
A<br />
E<br />
5<br />
B<br />
<br />
B<br />
®<br />
RINS 049 ISSUE-1<br />
RDOC 280 issue 3
3\URQL[/LPLWHG<br />
3\URQL[+RXVH<br />
%UDLWKZHOO:D\<br />
+HOODE\5RWKHUKDP<br />
64
CONTENTS<br />
PAGE<br />
1. INTRODUCTION 4.<br />
2 FEATURES 4.<br />
3. FUNCTIONAL DESCRIPTION 5.<br />
3.1 OPERATING MODES 5.<br />
3.2 ENTRY / EXIT MODE 5.<br />
4. ZONES 6.<br />
4.1 ENGINEER PROGRAMMABLE ZONES 6.<br />
4.2 24 HOUR ZONES 6.<br />
5. CONTROLS AND FUNCTIONS 7.<br />
6. USER FACILITIES 8.<br />
6.1 FULL SETTING THE PANEL 8.<br />
6.2 PART SETTING THE PANEL 8.<br />
6.3 UNSETTING THE PANEL 8.<br />
6.4 ACTIVATING THE PERSONAL 8.<br />
ATTACK ALARM<br />
6.5 ACTIVATING THE FIRE ALARM 8.<br />
6.6 TURNING CHIME ON AND OFF. 8.<br />
6.7 RECALLING EVENT LOG 9.<br />
6.8 OMITTING ONE OR MORE ZONES 9.<br />
6.9 CLEARING THE EVENT LOG 9.<br />
6.10 CLEARING THE DISPLAY AFTER<br />
AN ACTIVATION 9.<br />
6.11 CHANGING THE USER CODE 10.<br />
6.12 SYSTEM TEST MODE 10.<br />
6.13 WALK TEST MODE 10.<br />
7. LED FUNCTIONS 10.<br />
8. TROUBLESHOOTING 11.<br />
9. USER QUICK REFERENCE GUIDES 13.<br />
14<br />
RINS 049 ISSUE-2<br />
3
1 INTRODUCTION<br />
The <strong>Conqueror</strong> is a full featured intruder alarm control panel, based around a microprocessor<br />
with 4 fully programmable zones and 2 dedicated '24-hour' zones (Personal<br />
Attack alarm and a System-Tamper alarm.). It is operated via a 16-key onboard keypad<br />
and has an arrangement of 8 LEDs to show the status of the system.<br />
All features are fully programmable and there are two levels of access to the system.<br />
These are:<br />
<strong>User</strong> & Engineer.<br />
The <strong>User</strong> level gives access to all setting and unsetting facilities, and also allows the<br />
changing of code numbers and testing of the system.<br />
The Engineer level gives total access to the system including the ability to reconfigure<br />
the system . The Engineer cannot, however, unset the system.<br />
2 FEATURES<br />
- 2 Access-Level Codes, both programmable<br />
- Easy-set facility<br />
- 4 Programmable alarm zones<br />
- 3 Set / Part Set modes<br />
- Configurable fire zone with unique alarm sound.<br />
- Personal Attack alarm zone<br />
- Tamper zone<br />
- 16 key backlit keypad<br />
- Dedicated Personal Attack key on keypad<br />
- Dedicated Fire alarm key on keypad<br />
- 8 LEDs for immediate indication of panel status<br />
- Walk Test facility<br />
- System Test Function<br />
- Built in sounder with volume control and software override<br />
- Separate Bell and Strobe lamp outputs<br />
- Zone omit facility on exit<br />
- Silent part set<br />
- 4 Event extended memory.<br />
NB your installation engineer will have programmed all the system features to ensure<br />
easy and convenient day to day use of your system. (see section "Engineer Programmable<br />
Zones".)<br />
9 USER QUICK REFERENCE GUIDE<br />
1.Unsetting.<br />
Enter<br />
<strong>User</strong> code<br />
Re enter to clear LEDs.<br />
2. Full set. Enter or<br />
(Silent on exit) <strong>User</strong> code (Full volume)<br />
3. Part set.<br />
a. Part set 1 (Downstairs) or<br />
b. Part set 2 (Upstairs) or<br />
NOTE. Part sets are silent on exit. Tones will be heard on entry.<br />
4. To activate the Personal Attack alarm enter<br />
5. To activate the Fire alarm enter<br />
6. Zone omit in exit mode.<br />
7. Chime facility<br />
8. Read Event Log Press any key to view next event.<br />
9. Clear Event Log<br />
10.Changing <strong>User</strong> code Old <strong>User</strong> code<br />
New <strong>User</strong> code<br />
New <strong>User</strong> code<br />
11.Enter System Test Mode All LEDs are switched on<br />
Press any The strobe is switched<br />
on.<br />
number Key The bell is switched on.<br />
to select next test The internal sounder is<br />
switched on.<br />
Enter to exit.<br />
12. Walk test All zones chime when activated.<br />
LEDs light when zones open.<br />
Enter to exit.<br />
RINS 049 issue-1<br />
4 13
5. Tamper Alarm activated sounding internal audible<br />
alarm. Panel unset / Day mode.<br />
Enter user code to clear internal audible alarm.<br />
Re-enter user code to clear TAMPER LED.<br />
Now try setting the system. If the system<br />
goes straight into an alarm condition contact<br />
the engineer.<br />
6. Mains Failure. Panel unset / Day mode.<br />
5<br />
CE@@5 !<br />
J>5 "<br />
J>5 #<br />
J>5 $<br />
D1=@5B<br />
@1 <br />
CE@@5 !<br />
J>5 "<br />
J>5 #<br />
J>5 $<br />
D1=@5B<br />
@1 <br />
Fullset / Partset<br />
At the time of setting the control panel, any one of three set modes<br />
can be selected. i.e<br />
Full set : Whole system armed; nobody on premises.<br />
Part set 1: Upstairs off, Downstairs armed.<br />
Part set 2: Upstairs armed, Downstairs off.<br />
The above are purely examples. The Engineer has the ability at<br />
the programming stage to configure all the circuits to the<br />
customer's exact requirements.<br />
3.2 Entry / Exit Mode<br />
7. Panel Waiting for Further Commands.<br />
Day LED will flash if you have started a<br />
function but not finished the sequence.<br />
Enter<br />
to terminate.<br />
7<br />
CE@@5 !<br />
J>5 "<br />
J>5 #<br />
J>5 $<br />
D1=@5B<br />
@1 <br />
Entry<br />
When the panel is set and an Entry / Exit zone is triggered the<br />
Entry / Exit timer will begin to count down. During this period<br />
an Entry / Exit tone (single repeated bleep) will be produced by<br />
the internal sounder and any zones which are programmed as<br />
Access zones will be ignored. If the user code is entered before<br />
the end of the count down period the panel will return to ‘day’<br />
mode. If the timer is allowed to elapse before the user code is<br />
entered the panel will go into an alarm state. In this case the<br />
system needs to be 'Unset'<br />
Exit<br />
With the panel in ‘day’ mode, if either the user code or an Easy-set<br />
key sequence is entered the Entry / Exit timer will begin. If all the<br />
Immediate zones are clear, then the Entry / Exit tone will be<br />
heard. Leave the protected area by the predetermined Entry / Exit route.<br />
As you trigger Access zones the tone will change<br />
temporarily to a repeated low tone. When all the zones are clear,<br />
the Entry / Exit tone will continue again until the end of the<br />
time-out period. The panel will then be set.<br />
12<br />
RINS 049 issue-1<br />
5
4 ZONES<br />
8 TROUBLESHOOTING<br />
4.1 Engineer Programmable Zones<br />
Entry / Exit<br />
Access<br />
This is a zone which allows limited-time access to the<br />
premises in order to set or unset the system.<br />
This is a zone which, on setting the panel, allows access<br />
to the Entry / Exit zone. However, if the panel is set and<br />
an Access zone is triggered before an Entry / Exit zone<br />
then an alarm will be generated immediately.<br />
KEY:<br />
= LED OFF<br />
=LED ON<br />
1. Panel set / on<br />
=LED FLASHING<br />
1<br />
CE@@5 !<br />
J>5 "<br />
J>5 #<br />
J>5 $<br />
D1=@5B<br />
@1 <br />
Immediate<br />
This is a zone which will, when entered create an alarm<br />
when the panel is set.<br />
2. Panel unset / off.<br />
Omitted<br />
If a zone is programmed as an Omitted zone by the<br />
Engineer, then it is ignored by the panel. Primarily used<br />
for Part set options. It also allows the user to continue to<br />
use the alarm system even if a fault has been discovered<br />
on one or more zones.<br />
2<br />
CE@@5 !<br />
J>5 "<br />
J>5 #<br />
J>5 $<br />
4.2 24 hour zones<br />
Personal<br />
Attack<br />
Tamper<br />
Fire<br />
Triggering of the Personal Attack (P.A) zone will always be cause a<br />
full alarm activation regardless of whether or not<br />
the panel is set.<br />
A tamper zone activation will only generate an internal<br />
alarm, if the panel is in Day mode. If a tamper fault is<br />
present and the panel is then set, the system will give a<br />
second internal alarm. Triggering of a tamper zone when<br />
the panel is set will always give an external as well as<br />
internal alarm<br />
Triggering the fire zone will only operate the internal<br />
sounder. A fire alarm is identified by a three note rising<br />
sound which is easily distinguished from all other tones.<br />
Zone 4 may be configured as a fire zone.<br />
3. Panel unset . Zone1, Zone 2, Zone 3 ,<br />
Zone 4 LEDs on.<br />
This shows an alarm has occured<br />
on Zones 1 to 4. Zone 2 was<br />
activated first. To clear alarm lights<br />
enter <strong>User</strong> code. If the LEDs do not<br />
clear call engineer.<br />
3<br />
D1= @5B<br />
@1 <br />
**The Fire Zone is intended as an extra feature to the Intruder Alarm system and must<br />
not be regarded as a total fire protection system**<br />
4. Personal attack activated.<br />
Enter <strong>User</strong> code to clear P.A light.<br />
Reset Personal Attack buttons if necessary.<br />
If the LED does not clear call the engineer.<br />
4<br />
CE@@5 !<br />
J>5 "<br />
J>5 #<br />
J>5 $<br />
D1=@5B<br />
@1 <br />
6<br />
RINS 049 issue-1<br />
11
6.11 Changing <strong>User</strong> Code<br />
Enter<br />
then <strong>User</strong> code - 3 Bleeps<br />
then New user code - 3 Bleeps<br />
then New user code again - 3 Bleeps<br />
The ‘DAY’ led will flash when this function is entered and an acknowledge tone will be<br />
sounded after each code has been entered. If an incorrect key is entered an error<br />
tone will be given and the function ended.<br />
6.12 System Test Mode<br />
Enter<br />
This function performs a number of tests which are listed below.<br />
The next test is selected by pressing any numeric key.<br />
To exit system test mode press the key again.<br />
Test<br />
1) All LED’s are switched on<br />
2) The strobe is switched on.<br />
3) The bell is switched on<br />
4) The internal sounder is switched on<br />
6.13 Walk Test Mode<br />
Enter<br />
When the walk test mode is enabled any activated zone will cause a chime and the<br />
LED display to indicate.<br />
To exit walk test mode press the Key again<br />
5 CONTROLS AND FUNCTIONS<br />
Volume Control<br />
This is only accessible when the front cover has been removed and will only affect<br />
the volume of the internal sounder together with any extension speakers. The volume<br />
control is overridden when the panel is in an alarm state, and also if the the panel has<br />
been set by the <strong>User</strong> code.<br />
Chime<br />
Chime function applies to ‘day’ mode only and if selected will cause the panel to<br />
generate a three-note sound when an entry/exit zone is triggered. This feature is to<br />
inform the occupants of the building that someone has entered.<br />
Latch<br />
The latch facility is designed to be used with intruder detectors fitted with a latch<br />
memory. This feature is very useful when more than one detector has to be wired to a<br />
particularzone as it will show which detectors were triggered if an alarm occured. If<br />
there has beenan alarm and latch memory was used, then when the panel is reset an<br />
LED indication will be given at the relevant detector(s). Resetting of latch memory<br />
requires the panel to be set again for not less than 5 seconds, and then unset.<br />
Auto Rearm<br />
After an alarm the panel will automatically reset itself when the bell timer has expired.<br />
Any zones which still remain triggered at that time will be omited automatically.<br />
Walk test<br />
The walk test function verifys that all the intruder detectors on the alarm system are<br />
functioning correctly. When the walk test mode is enabled any activated zone will<br />
cause a chime and the LED display to indicate<br />
7 LED FUNCTIONS<br />
Supply light on : Indicates there is mains on the system<br />
Day light on : Indicates the system is unset. (Day<br />
mode)<br />
Zone light on : Indicates an Alarm activation<br />
Tamper light on : Indicates a Tamper alarm<br />
P.A light on : Indicates a Personal Attack activation<br />
Tamper light flashing : Engineer mode<br />
10<br />
RINS 049 issue-1<br />
7
6 USER FACILITIES<br />
SHIFT<br />
PA (PERSONAL ATTACK)<br />
6.7 Recalling the Event Log.<br />
The event log can now be displayed at any time, when the <strong>Conqueror</strong> is unset. The<br />
event log is displayed by pressing,<br />
EASY-SET UP ARROW<br />
FIRE DOWN ARROW<br />
6.1 Full Setting the panel<br />
Enter either of the following:<br />
<strong>User</strong> Code<br />
By using this method, maximum volume of the entry / exit tone will be heard.<br />
or<br />
By using this method, no sounds will be emitted except for an acknowledge<br />
tone at the beginning and the end of the entry / exit time.<br />
6.2 Part setting the panel<br />
Part set 1 (eg downstairs only armed):<br />
Part set 2 (eg upstairs only armed):<br />
or both will give a silent setting<br />
Enter or both will give a silent setting<br />
6.3 Unsetting the panel<br />
The panel can be unset by entering the building via the entry / exit route and then<br />
keying the user code.<br />
6.4 Activating the Personal Attack Alarm (PA).<br />
To activate the personal attack alarm enter<br />
6.5 Activating the Fire Alarm.<br />
To activate the Fire Alarm enter<br />
6.6 Turning Chime On and Off (Panel must be in ‘day’ mode)<br />
Enter<br />
When the chime mode is selected a three note chime will be produced by the internal<br />
sounder and any extension speakers when an Entry / Exit zone is activated. The same<br />
key sequence can be used to turn off the chime facility.<br />
The 'Day' led will flash and event information from the latest alarm activation is<br />
displayed. Pressing any key will then show the previous event information. When all<br />
the four have been displayed the day led will stop flashing and another function can<br />
be selected.<br />
6.8 Omitting one or more zones<br />
If one or more zones are triggered whilst in exit mode a low pitched error tone will be<br />
produced. If any zones remain triggered at the end of the exit timer, the error tone will<br />
continue. Key in the <strong>User</strong> code. The display will show the zone(s) which remained<br />
triggered. Make a note of any triggered zones. Key in the <strong>User</strong> code which will clear<br />
the display.<br />
Check for any obvious reason for these zones to have been activated. This may<br />
simply be due to a monitored door or window being left open or a pet being left in a<br />
protected area. If the fault cannot be rectified it is possible to omit faulty zones, but this<br />
should only be used as a last resort if the building is to be left unoccupied.<br />
Example<br />
Set panel (error tone will be heard).<br />
Wait for the end of the exit timer.<br />
Error tone is still being produced.<br />
Key in the <strong>User</strong> code.<br />
Triggered zones will be displayed.<br />
Note triggered zones.<br />
Key in <strong>User</strong> code to clear display then investigate fault(s) if possible.<br />
Set panel again.<br />
then: Check the display if the zone(s) are not being triggered exit via normal<br />
route.<br />
or: If displays shows zones are as still being triggered:<br />
then enter:<br />
now enter: the number of the zone to be omitted (1 to 4)<br />
then: - Entry / Exit timer will start again.<br />
then: exit building by normal route.<br />
6.9 Clearing the Event Log.<br />
The <strong>User</strong> if allowed by the Engineer can clear the log. This is achieved by pressing,<br />
6.10 Clearing the display after an activation<br />
After an alarm condition enter the <strong>User</strong> code :<br />
This unsets the panel.The LEDs will display any activated zones.<br />
Enter <strong>User</strong> code again. This clears the display.<br />
8<br />
RINS 049 issue-1<br />
9


