Electrolux
Electrolux
Electrolux

You also want an ePaper? Increase the reach of your titles
YUMPU automatically turns print PDFs into web optimized ePapers that Google loves.
<strong>Electrolux</strong><br />
EFS - Dishwashing Systems Platform<br />
<strong>Electrolux</strong> Professional<br />
SERVICE MANUAL<br />
3.__<br />
TANK<br />
BOILER<br />
TANK<br />
3.__ BOILER<br />
TANK<br />
3.__ BOILER<br />
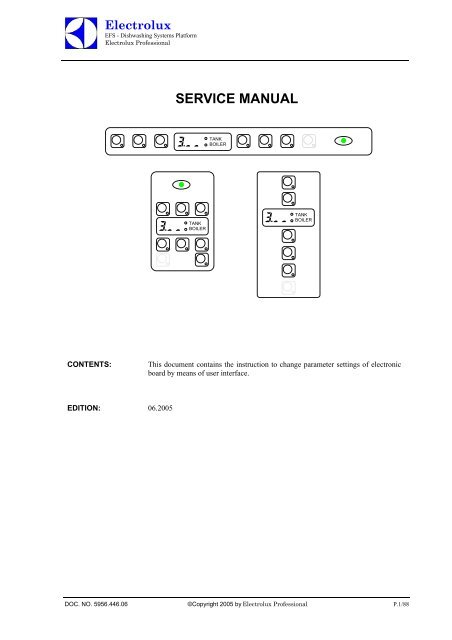
CONTENTS:<br />
This document contains the instruction to change parameter settings of electronic<br />
board by means of user interface.<br />
EDITION: 06.2005<br />
DOC. NO. 5956.446.06 ©Copyright 2005 by <strong>Electrolux</strong> Professional P.1/88
<strong>Electrolux</strong><br />
EFS – Dishwashing Systems Platform<br />
<strong>Electrolux</strong> Professional<br />
Electronic Dishwasher<br />
SERVICE MANUAL<br />
INDEX<br />
1. KEYBOARDS 3<br />
1.1 HOODTYPE Style 3<br />
1.2 UNDERCOUNTER Style 4<br />
2. MANUAL ACTIVATION OF DETERGENT AND RINSE AID DISPENSERS 5<br />
2.1 Detergent Dispenser Activation 5<br />
2.2 Rinse Aid Dispenser Activation 5<br />
3. RINSE PUMP MANUAL ACTIVATION 5<br />
4. DETERGENT AND RINSE AID DOSAGE 6<br />
GEn General Parameters 6<br />
5. COUNTERS 8<br />
Cnt Counters 8<br />
6. TEMPERATURE SETTING 9<br />
FAC Factory Parameters 8<br />
7. CYCLE SETTING 11<br />
CYCLE DIAGRAM<br />
CY1 Cycle 1 Parameters 13<br />
CY2 Cycle 2 Parameters 13<br />
CY3 Cycle 3 Parameters 13<br />
drn Drain/Cleaning Cycle Parameters 13<br />
8. OTHER PARAMETERS 14<br />
dPA Dishwashing Parameters 14<br />
ron Read Only Parameters 14<br />
HCP Communication and HACCP Parameters 14<br />
CFG Configuration Parameters 15<br />
dbG Parameters for automatic hood type dishwashers 16<br />
9. SPECIAL FEATURES 17<br />
9.1 RESIN REGENERATION CYCLE 17<br />
9.2 MEDICAL LINE DISHWASHER WITH DOOR/HOOD LOCK DEVICE 17<br />
9.3 DETERGENT AND RINSE AID LEVEL SENSORS ACTIVATION 17<br />
9.4 dISHWASHER WITH INCORPORATED CONTINUOUS WATER SOFTENER 18<br />
10. MAIN BOARD CONFIGURATION 19<br />
10.1 CODEProg. TABLE 19<br />
10.2 PROGRAMMING SHEETS 24<br />
11. DEFAULT VALUES 72<br />
12. USER INTERFACE AND MAIN BOARD CONNECTORS 75<br />
12.1 MAIN MALFUNCTIONS NOT DUE TO THE MAIN BOARD 75<br />
12.2 CONNECTORS LAYOUT 75<br />
13. ALARM MESSAGES AND TROUBLESHOOTING 82<br />
DOC. NO. 5956.446.06 ©Copyright 2005 by <strong>Electrolux</strong> Professional P.2/88
<strong>Electrolux</strong><br />
EFS – Dishwashing Systems Platform<br />
<strong>Electrolux</strong> Professional<br />
Electronic Dishwasher<br />
SERVICE MANUAL<br />
1. KEYBOARDS<br />
1.1. HOOD TYPE Style<br />
dEt<br />
<br />
<br />
Fig. 1.1<br />
Detergent dispenser<br />
Manual Activation.<br />
dEt<br />
<br />
<br />
rAi<br />
<br />
<br />
Fig. 1.2<br />
Rinse Aid Dispenser<br />
Manual Activation.<br />
rAi<br />
<br />
<br />
---<br />
<br />
<br />
Fig. 1.3<br />
Rinse Pump<br />
Manual Activation<br />
(used to EMPTY BOILER)<br />
---<br />
<br />
<br />
SETTING MODES:<br />
To enter into one setting mode (Fig.1.4, Fig.1.5) the appliance should be in stand-by: switch on the<br />
appliance, no cycles selected. Is useful keep door open to avoid start cycle in case of not<br />
simultaneously pressure of the two keys.<br />
<br />
GEn<br />
<br />
Fig. 1.4<br />
Enter into General Parameters<br />
(Hold down buttons for at least<br />
five seconds).<br />
GEn<br />
<br />
<br />
<br />
FAC<br />
<br />
Fig. 1.5<br />
Enter into Factory Parameters<br />
(Hold down buttons for at least<br />
five seconds).<br />
FAC<br />
<br />
<br />
888<br />
<br />
Fig. 1.6<br />
Next Parameter Family OR<br />
Increase Parameter Value<br />
(In setting mode only)<br />
888<br />
<br />
888<br />
<br />
Fig. 1.7<br />
Decrease Parameter Value<br />
(In setting mode only)<br />
888<br />
<br />
888<br />
<br />
Fig. 1.8<br />
Confirm Value and go<br />
to next Parameter<br />
(In setting mode only)<br />
888<br />
<br />
DOC. NO. 5956.446.06 ©Copyright 2005 by <strong>Electrolux</strong> Professional P.3/88
<strong>Electrolux</strong><br />
EFS – Dishwashing Systems Platform<br />
<strong>Electrolux</strong> Professional<br />
Electronic Dishwasher<br />
SERVICE MANUAL<br />
1.2. UNDERCOUNTER Style<br />
TANK<br />
dEt BOILER<br />
<br />
<br />
Fig.1.1<br />
Detergent dispenser<br />
Manual Activation<br />
TANK<br />
rAi BOILER<br />
<br />
<br />
Fig.1.2<br />
Rinse Aid Dispenser<br />
Manual Activation<br />
<br />
TANK<br />
--- BOILER<br />
<br />
Fig.1.3<br />
Rinse Pump<br />
Manual Activation<br />
(used to EMPTY BOILER)<br />
SETTING MODES:<br />
To enter into one setting mode (Fig.1.4, Fig.1.5) the appliance should be in stand-by: switch on the<br />
appliance, no cycles selected. Is useful keep door open to avoid start cycle in case of not<br />
simultaneously pressure of the two keys.<br />
<br />
TANK<br />
GEn BOILER<br />
<br />
Fig. 1.4<br />
Enter into General Parameters<br />
(Hold down buttons for at least five<br />
seconds).<br />
<br />
TANK<br />
FAC BOILER<br />
<br />
Fig. 1.5<br />
Enter into Factory Parameters<br />
(Hold down buttons for at least five<br />
seconds).<br />
TANK<br />
888 BOILER<br />
<br />
Fig.1.6<br />
Next Parameter Family<br />
OR<br />
Increase Parameter Value<br />
(in setting mode only)<br />
TANK<br />
888 BOILER<br />
<br />
Fig.1.7<br />
Decrease Parameter Value<br />
(In setting mode only)<br />
TANK<br />
888 BOILER<br />
<br />
Fig.1.8<br />
Confirm Value and go to next Parameter<br />
(in setting mode only)<br />
DOC. NO. 5956.446.06 ©Copyright 2005 by <strong>Electrolux</strong> Professional P.4/88
<strong>Electrolux</strong><br />
EFS – Dishwashing Systems Platform<br />
<strong>Electrolux</strong> Professional<br />
Electronic Dishwasher<br />
SERVICE MANUAL<br />
2. MANUAL ACTIVATION OF DETERGENT AND RINSE AID<br />
DISPENSERS<br />
When replacing detergents may be necessary activate the dispensers to fill hoses.<br />
2.1. Detergent Dispenser Activation<br />
dEt<br />
Switch on the dishwasher.<br />
Press and hold down CYCLE_2 and CYCLE INFINITE keys, after two 'beep' the detergent dispenser<br />
starts work for 20 sec.<br />
<br />
<br />
2.2. Rinse Aid Dispenser Activation<br />
rAi<br />
<br />
<br />
Switch on the dishwasher.<br />
Press and hold down CYCLE_1 and CYCLE INFINITE keys, after two 'beep' the rinse aid dispenser<br />
starts work for 40 sec.<br />
3. RINSE PUMP MANUAL ACTIVATION<br />
Use this function to empty the boiler (if the dishwasher is not to be used for a long time, for maintenance operation: ex. before replacing<br />
main board).<br />
<br />
---<br />
Switch on the dishwasher.<br />
Close the door and press and hold down DRAIN and CYCLE INFINITE keys. A buzzer signal indicates the<br />
rinse pump activation and the display shows three blinking lines. Three beeps indicate the cycle end.<br />
<br />
DOC. NO. 5956.446.06 ©Copyright 2005 by <strong>Electrolux</strong> Professional P.5/88
<strong>Electrolux</strong><br />
EFS – Dishwashing Systems Platform<br />
<strong>Electrolux</strong> Professional<br />
Electronic Dishwasher<br />
SERVICE MANUAL<br />
4. DETERGENT AND RINSE AID DOSAGE<br />
In this paragraph is explained how to set the working time for the detergent and rinse aid dispensers.<br />
For each dispenser there are two parameters: the initial time and the time during cycle execution.<br />
GEn<br />
General Parameters<br />
Sym. Parameter Description Unit Min Max<br />
dIn Initial Detergent Dosage (during filling tank) [s] 0 240 90<br />
rIn Initial Rinse Aid Dosage (starts when tank filled) [s] 0 180 10<br />
dEt Detergent Dosage During Cycle Execution (during wash phase) [s] 0 182(*) 8<br />
rAi Rinse Aid Dosage During Cycle Execution (when refilling boiler) [s] 0 62 (*) 4<br />
Factory<br />
Default<br />
How change the duration:<br />
• Switch OFF and switch ON the dishwasher;<br />
• Enter into the USER SETTING mode by pressing and hold down ON/OFF and CYCLE_1 keys for at least five seconds the display<br />
shows GEn (Fig.3.1);<br />
• Press CYCLE_INFINITE. The display shows alternatively the symbol dIn and the duration in seconds (Fig.3.2 and 3.3);<br />
NOTE: If User Interface v.3.00 tank led is on if value correspond to factory default (Default 1, HOOD TYPE).<br />
• Use CYCLE_1 key to decrease the duration and CYCLE_2 key to increase (Fig.3.3);<br />
• After settled the duration press CYCLE_INFINITE key to store value. The display shows the next parameter (Fig.3.4) and the<br />
corresponding value (Fig.3.5);<br />
• In the same way is possible to change the other duration; when finished switch OFF and switch ON.<br />
<br />
GEn<br />
<br />
<br />
Fig. 3.1<br />
Enter into User Mode<br />
(press for 5 sec).<br />
dIn<br />
90<br />
DEFAULT<br />
rIn<br />
24<br />
Fig. 3.2<br />
Initial detergent dosage<br />
<br />
<br />
<br />
Fig. 3.3<br />
Change duration.<br />
(Tank LED indicates default).<br />
Fig. 3.4<br />
Initial rinse aid dosage<br />
<br />
<br />
<br />
Fig. 3.5<br />
Change duration<br />
dEt<br />
8<br />
DEFAULT<br />
rAi<br />
7<br />
Fig. 3.6<br />
Cycle detergent dosage<br />
<br />
<br />
<br />
Fig. 3.7<br />
Change time activation<br />
(Tank LED indicates default)<br />
Fig. 3.8<br />
Cycle rinse aid dosage<br />
<br />
<br />
<br />
Fig. 3.9<br />
Change time activation<br />
DOC. NO. 5956.446.06 ©Copyright 2005 by <strong>Electrolux</strong> Professional P.6/88
<strong>Electrolux</strong><br />
EFS – Dishwashing Systems Platform<br />
<strong>Electrolux</strong> Professional<br />
Electronic Dishwasher<br />
SERVICE MANUAL<br />
(*) Note for external dispensers:<br />
• If DEt=181 the detergent dispenser works when WASHING PUMP is being activated; at the same time voltage<br />
is supplied between connectors L1 7 –L1 9 (main terminal box);<br />
• If dEt=182 the detergent dispenser works when LOADING EV is being activated to re-fill boiler level; at the<br />
same time voltage is supplied between connectors L1 7 –L1 9 (main terminal box);<br />
• If rAi= 61 the rinse aid dispenser works when LOADING EV is being activated to re-fill boiler level; at the same<br />
time voltage is supplied between connectors L1 8 –L1 9 (main terminal box);<br />
• If rAi= 62 the rinse aid dispenser works when WASHING PUMP is being activated; at the same time voltage is<br />
supplied between connectors L1 8 –L1 9 (main terminal box);<br />
- For electrical connections refer to electric diagram -<br />
Example<br />
Suppose there is connected an external detergent dispenser with a probe into the tank. A typical setting could be:<br />
DIn= 0<br />
the dispenser is not activated during filling tank;<br />
amount.<br />
DEt=181<br />
the dispenser is supplied during washing phase and the probe automatically dose the right detergent<br />
DOC. NO. 5956.446.06 ©Copyright 2005 by <strong>Electrolux</strong> Professional P.7/88
<strong>Electrolux</strong><br />
EFS – Dishwashing Systems Platform<br />
<strong>Electrolux</strong> Professional<br />
Electronic Dishwasher<br />
SERVICE MANUAL<br />
5. COUNTERS<br />
This Parameter Family collects cycle counters and water consumption counters.<br />
For water consumption counters a flow meter must be installed. See PPL (calibration parameter) into dPA section (§ Other Parameters).<br />
Cnt<br />
Counters<br />
Sym. Parameter Description Unit Min Max<br />
CYC<br />
Cycles performed counter.<br />
cYc<br />
nnc<br />
L<br />
Lit<br />
CYC symbol and two numbers blink consecutively. The cycle number is<br />
obtained by joining the two numbers. Ex. CYC → 10 → 042 means<br />
10042 cycles executed.<br />
Cycle counter (resettable).<br />
This counter is similar to CYC but is resettable by user (see rSt parameter<br />
below).<br />
Water Consumption. [present up to software version 3.12]<br />
Counts m 3 of water consumption.<br />
Water Consumption. [present up to software version 3.12]<br />
Counts litres of water consumption.<br />
The total consumption is given by adding nnc [m 3 ] and L [l] values.<br />
Water Consumption: resettable counter. [present up to software version 3.12]<br />
Counts the litres of water and is resettable by user (see rSt parameter below).<br />
rSt Reset resettable counters: cYc and Lit<br />
To reset put 1 this parameter, switch off and then on again: cYc and Lit<br />
will show zero. Note that cYc is used to count cycles for CAll message<br />
(see next parameter, nCY).<br />
nCY Store thousand of cycles after that CAll message appears on display.<br />
Ex. If this parameter is settled to 20, CAll message appears when cYc<br />
drn<br />
rCY<br />
NRE<br />
reach 20.000 cycles.<br />
Drain/Cleaning cycles performed.<br />
Similar to CYC but counts Cleaning Cycles.<br />
Numbers of cycles that can be made after a regeneration cycle (only for<br />
dishwashers with non-continuous water softener) [See paragraph 9.1 resin<br />
regeneration cycle.].<br />
Regeneration cycle counter (only for water softener dishwasher)<br />
[See paragraph 9.1 resin regeneration cycle / paragraph 9.4 Dishwashers with<br />
incorporated continuous water softener].<br />
-<br />
-<br />
[m 3 ]<br />
[l]<br />
[l]<br />
-<br />
-<br />
-<br />
Factory<br />
Default<br />
- 20<br />
-<br />
<br />
GEn<br />
<br />
Fig.4.1<br />
USER setting mode<br />
(press for 5s)<br />
GEn<br />
<br />
Fig.4.2<br />
Next Family<br />
Cnt<br />
<br />
Fig. 4.3<br />
Counters Fam.: ENTER<br />
CYC<br />
010<br />
042<br />
cYc<br />
Fig. 4.4<br />
CYCLES<br />
Fig. 4.5<br />
Thousand.<br />
Fig. 4.6<br />
Units.<br />
<br />
<br />
Fig. 4.7<br />
Next counter.<br />
DOC. NO. 5956.446.06 ©Copyright 2005 by <strong>Electrolux</strong> Professional P.8/88
<strong>Electrolux</strong><br />
EFS – Dishwashing Systems Platform<br />
<strong>Electrolux</strong> Professional<br />
Electronic Dishwasher<br />
SERVICE MANUAL<br />
6. TEMPERATURE SETTING<br />
In this paragraph is explained how to change temperature thresholds and all parameters related to boiler and tank.<br />
FAC<br />
Factory Parameters<br />
Sym. Parameter Description Unit Min Max<br />
bt°C<br />
Boiler Temperature: THRESHOLD.<br />
btH<br />
bHi<br />
bLo<br />
bFL<br />
When boiler temperature reaches this value, heaters switch off.<br />
Boiler Temperature HISTERESIS, (represent dead band).<br />
Heater switch on if boiler temperature is below: bt°C - btH<br />
Boiler Temperature: HIGH LIMIT.<br />
When boiler temperature reaches this value C 2 alarm appears.<br />
Put 0 to disable C 2 alarm.<br />
Boiler Temperature: LOW LIMIT.<br />
During boiler warm-up, temperature must increase at least bLo °C otherwise<br />
E 3 warning appears.<br />
Put 0 to disable E 3 warning.<br />
Boiler Filling Timeout.<br />
If filling time is longer than bFL, A 1 alarm appears.<br />
Put 0 to disable A 1 alarm.<br />
Factory<br />
Default<br />
[°C] 45 95 78<br />
[°C] 2 10 2<br />
[°C] 0 98 96<br />
[°C] 0 10 1<br />
[min] 0 42 5<br />
bAJ Boiler Temperature Adjust. [°C] 0 7 4<br />
bP<br />
Boiler Priority (enable boiler wait function)<br />
0=disabled<br />
- 0 1 1<br />
1=enabled<br />
bSt<br />
Booster Function<br />
Overheat gap over Boiler Temperature Threshold<br />
[°C] 0 15 2<br />
btd<br />
tt°C<br />
ttH<br />
tHi<br />
tLo<br />
tFL<br />
Boiler temperature negative differential: when the dishwasher is in standby,<br />
boiler threshold becomes: bt°C - btd<br />
(Used to save energy during machine inactivity by keeping boiler water at a<br />
lower temperature).<br />
Tub Temperature: THRESHOLD<br />
When tank temperature reaches this value, heater switch off.<br />
Tub Temperature: HISTERESIS, (represent dead band).<br />
Heater switch on if tank temperature is below: tt°C - ttH<br />
Tank Temperature: HIGH LIMIT.<br />
When tank temperature reaches this value C 3 alarm appears.<br />
Put 0 to disable C 3 alarm.<br />
Tank Temperature: LOW LIMIT.<br />
During tank warm-up, temperature must increase at least bLo °C otherwise<br />
E 2 warning appears.<br />
Put 0 to disable E 2 warning.<br />
Tank Filling Timeout.<br />
If filling time is longer than tFL, A 1 alarm appears.<br />
Put 0 to disable A 1 alarm.<br />
[°C] 0 20 0<br />
[°C] 40 85 63<br />
[°C] 2 30 5<br />
[°C] 0 95 75<br />
[°C] 0 10 1<br />
[min] 0 42 20<br />
DOC. NO. 5956.446.06 ©Copyright 2005 by <strong>Electrolux</strong> Professional P.9/88
<strong>Electrolux</strong><br />
EFS – Dishwashing Systems Platform<br />
<strong>Electrolux</strong> Professional<br />
Electronic Dishwasher<br />
SERVICE MANUAL<br />
To modify thresholds do the following:<br />
• Switch OFF and switch ON the dishwasher;<br />
• Enter into the FACTORY SETTING mode by pressing and hold down ON/OFF and CYCLE_2 keys for at least five seconds (Fig.5.1);<br />
• Press CYCLE INFINITE. The display shows alternatively the symbol bt°C (Fig.5.2) and the corresponding value 76 (Fig.5.3);<br />
• Use CYCLE_1 key to decrease the value and CYCLE_2 key to increase (Fig.4.3);<br />
• Press CYCLE INFITE key to confirm. The display shows the next parameter (Fig.4.4) and the corresponding value (Fig.4.5);<br />
• In the same way is possible to change the other parameters; when finished switch OFF and switch ON.<br />
<br />
FAC<br />
bt°C<br />
76<br />
btH<br />
<br />
<br />
Fig. 5.1<br />
Factory setting mode<br />
Fig. 5.2<br />
Boiler temp. threshold<br />
<br />
<br />
<br />
Fig. 5.3<br />
Change value & Store<br />
Fig. 5.4<br />
Boiler Temp Hysteresis<br />
<br />
2<br />
<br />
<br />
Fig. 5.5<br />
Change value & Store<br />
bHi<br />
Fig. 5.6<br />
Tank temp. High limit.<br />
<br />
96 bLo<br />
<br />
<br />
Fig. 5.7<br />
Change value & Store<br />
At the end the display will show again ‘FAC’ and by pressing CYCLE_2 key (Fig.4.9) is possible to change cycle duration (see next<br />
paragraph).<br />
<br />
FAC<br />
<br />
Fig. 5.9<br />
Factory setting mode<br />
FAC<br />
<br />
Fig. 5.10<br />
Next Family<br />
CY1<br />
<br />
Fig. 5.11<br />
Cycle 1 Family: ENTER<br />
DOC. NO. 5956.446.06 ©Copyright 2005 by <strong>Electrolux</strong> Professional P.10/88
<strong>Electrolux</strong><br />
EFS – Dishwashing Systems Platform<br />
<strong>Electrolux</strong> Professional<br />
Electronic Dishwasher<br />
SERVICE MANUAL<br />
7. CYCLE SETTING<br />
In this paragraph is explained how to change cycle phases duration (see Tab.1 next page).<br />
• Switch on the dishwasher;<br />
• Enter into the FACTORY SETTING mode: press and hold down ON/OFF and CYCLE_2 keys for at least 5 seconds (Fig.5.1);<br />
• Press CYCLE_2 key to select CYCLE_1 parameters.<br />
• Press CYCLE_INFINITE. The display shows alternatively the symbol (Fig.5.2) and the corresponding value (Fig.5.3);<br />
• Use CYCLE_1 key to increase the value and CYCLE_2 key to decrease (Fig.5.3);<br />
• Press CYCLE_INFINITE key to confirm. The display shows the next parameter (Fig.5.4) and the corresponding value (Fig.5.5);<br />
• In the same way is possible to change the other parameters;<br />
<br />
FAC<br />
<br />
Fig. 6.1<br />
Factory setting mode.<br />
FAC<br />
<br />
Fig. 6.2<br />
Select next class.<br />
CY1<br />
<br />
Fig. 6.3<br />
Cycle 1 Family: ENTER<br />
Ln1<br />
<br />
Fig. 6.4<br />
Wash duration [min].<br />
<br />
0<br />
<br />
<br />
Fig. 6.5<br />
Change value & Store.<br />
Sh1<br />
Fig. 6.6<br />
Wash duration [sec].<br />
<br />
35<br />
<br />
<br />
Fig. 6.7<br />
Change value & Store.<br />
After settled all parameters referring Cycle 1, by pressing CYCLE_2 key is possible to change the Cycle 2 parameters (Fig.5.8, 5.9) and so<br />
on.<br />
CY1<br />
<br />
Fig. 6.8<br />
Cycle 1 Parameters.<br />
CY2<br />
<br />
Fig. 6.9<br />
Cycle 2 Parameters: ENTER<br />
Ln2<br />
<br />
Fig. 6.10<br />
Wash duration [min].<br />
…<br />
CY2<br />
<br />
Fig. 6.11<br />
Cycle 2 Parameters:<br />
next Family<br />
Cy3<br />
<br />
Fig. 6.12<br />
Cycle 3 Parameters:<br />
ENTER<br />
Ln3<br />
<br />
<br />
<br />
Fig. 6.13<br />
Wash duration [min].<br />
…<br />
DOC. NO. 5956.446.06 ©Copyright 2005 by <strong>Electrolux</strong> Professional P.11/88
<strong>Electrolux</strong><br />
EFS – Dishwashing Systems Platform<br />
<strong>Electrolux</strong> Professional<br />
Electronic Dishwasher<br />
SERVICE MANUAL<br />
CYCLE DIAGRAM<br />
CYCLE TYME<br />
WASH<br />
IPA<br />
Ln Sh<br />
PA<br />
PRE RINSE<br />
Pr<br />
RINSE<br />
ri<br />
COLD RINSE<br />
cr<br />
DRAIN<br />
dr<br />
RINSE PAUSE<br />
rPA<br />
FINAL<br />
PAUSE<br />
FP<br />
DETERGENT<br />
DEt<br />
RINSE AID<br />
RAi<br />
DOC. NO. 5956.446.06 ©Copyright 2005 by <strong>Electrolux</strong> Professional P.12/88
<strong>Electrolux</strong><br />
EFS – Dishwashing Systems Platform<br />
<strong>Electrolux</strong> Professional<br />
Electronic Dishwasher<br />
SERVICE MANUAL<br />
CY1<br />
Cycle 1 Parameters<br />
Sym. Parameter Description Unit Min Max<br />
Factory<br />
Default<br />
Ln1 Wash Phase Long [min] 0 20 0<br />
Sh1 Wash Phase Short [s] 1 60 35<br />
PA1 Pause [s] 0 20 4<br />
Pr1 Pre-rinse Duration [s] 0 30 0<br />
ri1 Rinse Phase Duration [s] 10 45 16<br />
cr1 Cold Rinse Phase Duration [s] 0 50 0<br />
dr1 Drain [s] 0 40 16<br />
FP1 Final Pause at End of Cycle [s] 0 60 0<br />
CY2<br />
Cycle 2 Parameters<br />
Sym. Parameter Description Unit Min Max<br />
Factory<br />
Default<br />
Ln2 Wash Phase Long [min] 0 20 0<br />
Sh2 Wash Phase Short [s] 1 60 45<br />
PA2 Pause [s] 0 20 4<br />
Pr2 Pre-rinse Duration [s] 0 30 0<br />
ri2 Rinse Phase Duration [s] 10 45 16<br />
cr2 Cold Rinse Phase Duration [s] 0 50 0<br />
dr2 Drain [s] 0 40 16<br />
FP2 Final Pause at End of Cycle [s] 0 60 0<br />
CY3<br />
Cycle 3 Parameters<br />
Sym. Parameter Description Unit Min Max<br />
Factory<br />
Default<br />
Ln3 Wash Phase Long [min] 0 20 1<br />
Sh3 Wash Phase Short [s] 1 60 40<br />
PA3 Pause [s] 0 20 4<br />
Pr3 Pre-rinse Duration [s] 0 30 0<br />
ri3 Rinse Phase Duration [s] 10 45 16<br />
cr3 Cold Rinse Phase Duration [s] 0 50 0<br />
dr3 Drain [s] 0 40 16<br />
FP3 Final Pause at End of Cycle [s] 0 60 0<br />
bt3<br />
Boiler Temperature Threshold: only for Cycle 3.<br />
This parameter allows having a different rinsing temperature for the [°C] 0 95 0<br />
third cycle. Only values above 45°C are allowed.<br />
drn<br />
Drain/Cleaning Cycle Parameters<br />
Sym. Parameter Description Unit Min Max<br />
Factory<br />
Default<br />
Idr Initial Drain Phase Duration [s] 0 240 40<br />
Fdr Final Drain Phase Duration [s] 0 240 60<br />
DOC. NO. 5956.446.06 ©Copyright 2005 by <strong>Electrolux</strong> Professional P.13/88
<strong>Electrolux</strong><br />
EFS – Dishwashing Systems Platform<br />
<strong>Electrolux</strong> Professional<br />
Electronic Dishwasher<br />
SERVICE MANUAL<br />
8. OTHER PARAMETERS<br />
dPA<br />
Dishwashing Parameters<br />
Sym. Parameter Description Unit Min Max<br />
IPA Initial Pause before start washing (for ALL cycles) [s] 0 10 0<br />
dLY Delay for the 2 nd wash pump (PW only) [s] 0 10 3<br />
Pdr Active a drain phase at the end of washing phase. [s] 0 40 0<br />
RPA<br />
Duration of pause after rinse cycle (valid for dishwashers with door/hood<br />
lock device) [See par. 9.2 Medical line dishwasher with door/hood lock [s] 0 60 0<br />
device].<br />
C F<br />
rit<br />
PPL<br />
CdE<br />
Celsius/Fahrenheit selection<br />
0 = Celsius<br />
1 = Fahrenheit<br />
Rinse Temperature Display.<br />
Enable rinse temperature probe (if installed).<br />
0 = during rinse phase the display shows boiler temperature;<br />
1 = during rinse phase the display shows rinse temperature;<br />
Pulse Per Litre.<br />
This parameter must be settled in according to flow meter installed.<br />
Number of wash cycles performable without detergent (only for<br />
dishwashers with external detergent level sensor – par. 9.2.1 Detergent<br />
and rinse aid level sensors activation) [LES=1]<br />
Factory<br />
Default<br />
- 0 1 0<br />
- 0 1 0<br />
[p/l] 0 255 0<br />
- 0 5 5<br />
1LE Pressure sensor threshold 1 [present up to software version 2.11]. - 0 255 140<br />
1HS Pressure sensor histeresis 1 [present up to software version 2.11]. - 0 255 50<br />
2LE Pressure sensor threshold 2 [present up to software version 2.11]. - 0 255 140<br />
2Hs Pressure sensor histeresis 2 [present up to software version 2.11]. - 0 255 50<br />
Note: 1LE, 1HS, 2LE, 2HS parameters emulates a two levels pressure switch, keep in mind that value doesn’t correspond to a<br />
physical quantity.<br />
ron<br />
Read Only Parameters<br />
Sym. Parameter Description Unit Min Max<br />
Factory<br />
Default<br />
rEL Main Board Firmware Release - - - -<br />
rLs Water softener board software version. - - - -<br />
CAll When CAll message appears, the parameter value becomes 1.<br />
After maintenance, to clear CAll message, insert 0.<br />
C 8 When C 8 alarm appears, the machine is frozen and this parameter is 1.<br />
After maintenance (see alarm codes document), insert 0 to enable the<br />
F21<br />
HCP<br />
machine.<br />
This alarm appears in case of malfunctioning in the continuous water<br />
softener. To facilitate fault-finding, see par. E "Alarm codes that stop the<br />
machine for models with incorporated continuous water softener".<br />
Communication and HACCP Parameters<br />
- - - -<br />
- - - -<br />
- - - -<br />
Sym. Parameter Description Unit Min Max<br />
SEr<br />
Serial Device<br />
0 = 8N1<br />
1 = PC connection (DAAS 8E1)<br />
7 = HACCP network (ECAP 8E1+LK485)<br />
(LK485 board is necessary)<br />
9 = Dishwashers with incorporated continuous<br />
water softener<br />
16 = HACCP printer (8N1)<br />
32 = MODEM GSM (DAAS 8N1)<br />
33 = MODEM GSM (DAAS 8E1)<br />
48 = Hyper Terminal (8N1)<br />
Adr Address.<br />
This parameter specifies the address of the appliance into the<br />
‘HACCP_network’.<br />
Works only if ‘HACCP network’ is selected (see above parameter).<br />
Factory<br />
Default<br />
- 0 63 1<br />
- 0 255 1<br />
DOC. NO. 5956.446.06 ©Copyright 2005 by <strong>Electrolux</strong> Professional P.14/88
<strong>Electrolux</strong><br />
EFS – Dishwashing Systems Platform<br />
<strong>Electrolux</strong> Professional<br />
Electronic Dishwasher<br />
SERVICE MANUAL<br />
Prn Print parameter table. - 0 1 1<br />
bt<br />
HACCP ‘Basic’ (printer)<br />
Boiler temperature: high limit.<br />
[°C] 45 95 90<br />
bH<br />
HACCP ‘Basic’ (printer)<br />
Boiler temperature: gap below high limit.<br />
[°C] 0 20 10<br />
tt<br />
HACCP ‘Basic’ (printer)<br />
Tank temperature: high limit.<br />
[°C] 35 75 68<br />
tH<br />
HACCP ‘Basic’ (printer)<br />
Tank temperature: gap below high limit.<br />
[°C] 0 20 10<br />
CFG<br />
Configuration Parameters<br />
Sym. Parameter Description Unit Min Max<br />
tYP<br />
boi<br />
doo<br />
dFL<br />
trc<br />
b_t<br />
btF<br />
LES<br />
UI<br />
rE<br />
ALr<br />
Dishwasher Model:<br />
0 = HOOD TYPE & UNDERCOUNTER<br />
1 = POT WASHER<br />
2 = AUTOMATIC POT WASHER<br />
3 = MEDICAL LINE DISHWASHER WITH LOCK DOOR/HOOD<br />
DEVICE<br />
Boiler type:<br />
0 = ATMOSPHERIC BOILER<br />
1 = PRESSURE BOILER<br />
2 = EXTERNAL BOILER<br />
Door type:<br />
0 = AUTOMATIC HOOD<br />
1 = MANUAL HOOD<br />
2 = FRONT LOADING<br />
3 = POT WASHER<br />
Default model (see Default tables):<br />
1 = HOOD TYPE<br />
2 = POT WASHER<br />
3 = UNDERCOUNTER<br />
Solid State Relay (TRIAC).<br />
0 = not enabled;<br />
1 = SOFT START enabled;<br />
3 = SLOW SOFT START enabled<br />
(works only on boards with Solid State Relay).<br />
Boiler/Tank heating swap:<br />
0 = boiler heaters and tank heater can work simultaneously;<br />
1 = swap enabled: tank heating starts only boiler temperature is<br />
reached;<br />
(Note: disabling this function changes the global electrical power of<br />
appliance; before enabling this function check available power, supply cable<br />
section, fuses in according to User Manual).<br />
Tank Filling Mode<br />
Enable filling tank by means of rinsing cycles.<br />
Ex: btF = 75 means that boiler water is heated at 75°C, then follows a<br />
rinse phase and so on until tank is full.<br />
If btF = 0 the tank is filled by solenoid valve in the traditional way.<br />
Detergent Level Switches<br />
0 = level switches not enabled;<br />
1 = enable detergent level switches;<br />
USER INTERFACE MODEL<br />
8 = ACTIVE function disabled (up to version 3.11 [up to serial nr.<br />
42100099] set to 0)<br />
9 = hood type, under counter (up to version 3.11 [up to serial nr.<br />
42100099] set to 1)<br />
13 = LS5 with atmospheric boiler(up to version 3.11 [up to serial nr.<br />
42100099] set to 5)<br />
15 = LS5 with pressure boiler (user interface without display); (up to<br />
version 3.11 [up to serial nr. 42100099] set to 7)<br />
See parameter rEL(family ron) to check the software version<br />
installed in the board.<br />
Enable “regeneration cycle” key (only for dishwashers with non-continuous<br />
water softener) [See paragraph 9.1 resin regeneration cycle].<br />
ALARMS ENABLE<br />
0 = alarms disabled (to disable also warnings see bLo and tLo);<br />
1 = alarms enabled;<br />
If this function is disabled, faults can be detected so display do not shows<br />
any alarm code.<br />
Factory<br />
Default<br />
- 0 3 0<br />
- 0 2 0<br />
0 3 1<br />
- 0 3 -<br />
- 0 3 0<br />
- 0 1 1<br />
[°C] 0 85 75<br />
- 0 1 0<br />
- 0 15 9<br />
- 0 1 0<br />
- 0 1 1<br />
DOC. NO. 5956.446.06 ©Copyright 2005 by <strong>Electrolux</strong> Professional P.15/88
<strong>Electrolux</strong><br />
EFS – Dishwashing Systems Platform<br />
<strong>Electrolux</strong> Professional<br />
Electronic Dishwasher<br />
SERVICE MANUAL<br />
AAG Air gap with float level sensor. - 0 1 0<br />
dbG Parameters for automatic hood type dishwashers<br />
Sym. Parameter Description Unit Min Max<br />
t 1 DELAY_K1<br />
Time (during hood lifting) within which S3” must return to the rest position.<br />
t 2 HOOD_TOUT<br />
TIMEOUT – max. time allowed for complete hood opening/closing.<br />
t 3 DELAY_K1_S3<br />
During hood lowering, firstly S3” must cut in and then after a time<br />
t3 .the bottom limit switch S3.<br />
t 4 DELAY_K<br />
Time within which K and K’ must be both closed or both open.<br />
t 5 DELAY_S3<br />
Time during hood lifting within which the bottom limit switch must return<br />
to the rest position..<br />
t 6 DELAY_S5<br />
Time during hood lowering within which the top limit switch must return to<br />
the rest position.<br />
Factory<br />
Default<br />
0.1 s 0.0 s. 20.0 s 15<br />
0.1 s 0.0 s. 20.0 s 200<br />
0.1 s 0.0 s. 20.0 s 15<br />
0.1 s 0.0 s. 20.0 s 10<br />
0.1 s 0.0 s. 20.0 s 20<br />
0.1 s 0.0 s. 20.0 s 20<br />
AL_ Displays the last alarm code relative to automatic hood type dishwashers. - - - -<br />
Ith<br />
Parameter only valid for hood type models.<br />
Hood lifting motor absorption threshold.<br />
- 0 250 100<br />
(50 units correspond to a current of approx. 1 ampere).<br />
sEN<br />
Parameter for the implementation of new characteristics [present up to<br />
software version 3.12].<br />
- 0 1 0<br />
DOC. NO. 5956.446.06 ©Copyright 2005 by <strong>Electrolux</strong> Professional P.16/88
<strong>Electrolux</strong><br />
EFS – Dishwashing Systems Platform<br />
<strong>Electrolux</strong> Professional<br />
Electronic Dishwasher<br />
SERVICE MANUAL<br />
9. SPECIAL FEATURES<br />
9.1 RESIN REGENERATION CYCLE<br />
<br />
TANK<br />
BOILER<br />
The regeneration cycle is activated by pressing the button shown in the figure, for at least 5 seconds.<br />
For this key to be enabled parameter rE (in family CFG) must be set to 1.<br />
At this point you can enter the number of wash cycles that can be performed after each regeneration: parameter rCY in the<br />
counters family Cnt. If rCY is set to zero the counter is disabled, otherwise after the preset number of cycles the<br />
message rEG is displayed to confirm that regeneration is possible (this is an information-only message with no effect on<br />
operation of the appliance, so you can continue to use the dishwasher). The message is cleared when the regeneration cycle is<br />
terminated.<br />
The number of regeneration cycles performed can be checked by consulting the parameter nrE in the Cnt family of<br />
counters.<br />
When there are just 15 cycles remaining before the next regeneration cycle, at the end of the wash cycle the display shows the<br />
message End followed by 15, at the end of the next wash cycle the display shows End and 14, and so forth, i.e. the<br />
display informs the user of the number of wash cycles still available before resin regeneration is required.<br />
Before starting the regeneration cycle remove the siphon spillway.<br />
CAUTION: if the regeneration cycle is accidentally started, it can be switched off by pressing the button shown in the figure, for<br />
at least 5 seconds.<br />
The hardness of the water exiting the softener can vary between 3°fH - 10 °fH / 1.7 °dH - 5.6 °dH / 2.1 °cH - 7 °cH.<br />
9.2 MEDICAL LINE DISHWASHER WITH DOOR/HOOD LOCK DEVICE<br />
The medical line dishwasher with door/hood lock device has a device that prevents door/hood opening for the entire duration of<br />
the work cycle.<br />
For the door/hood lock to be active, the parameter tYP (in the CFG family) must be set to 3.<br />
The dishwasher door/hood is locked at the start of a wash cycle and is released at the end of the final pause after rinse. The<br />
wash compartment can be accessed by stopping the work cycle in progress, as the locking device is thus disabled.<br />
A pause at the end of rinse can be set by means of the parameter rPA (in thedPA family). This parameter is common to all<br />
3 wash cycles. The rinse water temperature is displayed during this pause. Another final pause in the cycle can be set by setting<br />
the parameters FP1, FP2, FP3. During the final pause the display shows the time remaining for completion of the cycle.<br />
The door/hood lock device will be deactivated at the end of the final pause (FP1, FP2, FP3).<br />
For correct performance of the wash cycle the pause at the end of rinse and the final pause must assume the default values<br />
(see Prog 032 – 034 - 035).<br />
9.3 DETERGENT AND RINSE AID LEVEL SENSORS ACTIVATION<br />
By setting the parameter LES (in the CFG family) to 1, management of the level sensors located inside the external<br />
detergent and rinse aid tanks is enabled. During the rinse phase, when the rinse aid inside the tank has finished, the message<br />
rAi 0 appears on the display.<br />
When the detergent inside the tank is finished, the message dEt 0 is displayed and after a number of wash cycles equal<br />
to CdE (in the dPA family) the dishwasher inhibits the activation of other wash cycles. Therefore the detergent level in the<br />
tank must be restored.<br />
DOC. NO. 5956.446.06 ©Copyright 2005 by <strong>Electrolux</strong> Professional P.17/88
<strong>Electrolux</strong><br />
EFS – Dishwashing Systems Platform<br />
<strong>Electrolux</strong> Professional<br />
Electronic Dishwasher<br />
SERVICE MANUAL<br />
9.4 DISHWASHER WITH INCORPORATED CONTINUOUS WATER SOFTENER<br />
Dishwashers with incorporated continuous water softener have a continuous softener in the water circuit. By means of special<br />
resins, this device removes the calcareous substances from the feed water, supplying decalcified water for washing.<br />
To activate the continuous water softener set the parameter SER (in the HCP family) to the value 9.<br />
For the continuous softener to work properly the resins must be regenerated periodically, with frequency depending on the<br />
hardness of the water and the number of wash cycles carried out. Unlike conventional water softeners, this continuous softener<br />
does not require machine stops for regenerating the resins.<br />
To regenerate the resins it is necessary to put kitchen salt in the special container located in the dishwasher.<br />
In particular, the salt container must be filled when the dishwasher is used for the first time and whenever the message<br />
SAL 0 is displayed at the start of a wash cycle. The salt container holds up to 1.5 kg of salt.<br />
IMPORTANT: The message SAL 0 may appear for several wash cycles even after topping-up the salt, as the salt must<br />
circulate in the entire system. Correct operation of the dishwasher is not, however, affected.<br />
The number of regeneration cycles performed can be checked by consulting the parameter nrE in the Cnt family of<br />
counters.<br />
The hardness of the water exiting the softener can vary between 3°fH - 10 °fH / 1.7 °dH - 5.6 °dH / 2.1 °cH - 7 °cH.<br />
DOC. NO. 5956.446.06 ©Copyright 2005 by <strong>Electrolux</strong> Professional P.18/88
<strong>Electrolux</strong><br />
EFS – Dishwashing Systems Platform<br />
<strong>Electrolux</strong> Professional<br />
Electronic Dishwasher<br />
SERVICE MANUAL<br />
10. MAIN BOARD CONFIGURATION<br />
When receiving an electronic board (spare part) may be necessary to configure it in according to the machine where has to be replaced.<br />
1. With the machine CODE enter into the following table and read the corresponding Prog. number;<br />
2. Follow the instructions reported into the corresponding Prog.XXX sheet (next pages).<br />
3. With the machine CODE find the Layout number in Par. 12.2 – Connectors layout.<br />
10.1. CODEProg. TABLE<br />
MODEL CODE Prog. Layout<br />
WT4 400007 021 11<br />
WT4B 400008 020 8<br />
WT4D 400009 021 11<br />
WT4DB 400015 020 8<br />
WT46 400016 020 8<br />
WT4G 400017 022 8<br />
WT4DG 400018 022 8<br />
WT4WS1 400019 024 11<br />
WT4BWS 400027 012 8<br />
WT4DWS1 400028 024 11<br />
WT4BDWS 400029 012 8<br />
WT4D60 400042 021 11<br />
LS5/1 400100 021 11<br />
LS5/1 DP 400102 021 11<br />
LS5/1WS 400103 024 11<br />
LS5/1WSDP 400110 024 11<br />
LS5/3 400112 020 8<br />
LS5/3 DP 400113 020 8<br />
LS5/3WS 400114 012 8<br />
LS5/3WSDP 400115 012 8<br />
LS5/3WSDPD 400117 012 8<br />
LB5G 400118 022 8<br />
LB5GDP 400119 022 8<br />
LS5/1DP60 400124 021 11<br />
LS5/1DPAUS 400125 036 11<br />
LS6EP 502003 013 8<br />
LS6EP/DD 502004 013 8<br />
LS6EA/DD 502005 011 8<br />
LS6EA/DD/DP 502006 011 8<br />
WT38TDE 502007 032 10<br />
WT38/M50 502008 015 9<br />
LS6EADPWS 502014 044 8<br />
LS6EADPWSG 502015 044 8<br />
WT38WS 502016 048 8<br />
WT38WSG 502017 048 8<br />
WT38MEDWS 502018 045 8<br />
WT38PM50 502019 039 9<br />
WT37LEV/9 502020 033 8<br />
WT38M50/4 502029 015 9<br />
LS6EA/UK 502030 011 8<br />
LS6EA/UKDP 502031 011 8<br />
MODEL CODE Prog. Layout<br />
LS6EA/60 502041 011 8<br />
WT 38DD 502110 046 8<br />
WT 37 502111 046 8<br />
WT 38 502112 046 8<br />
WT 37/4.5 502117 046 8<br />
WT 38/4.5 502118 046 8<br />
WT 37/UK 502122 046 8<br />
WT38C 502125 033 8<br />
WT38C60 502126 033 8<br />
WT38CUK 502127 033 8<br />
WT 38/UK 502217 046 8<br />
WT37J60 502218 046 8<br />
WT37J50 502219 046 8<br />
LS6AH240U 502312 027 9<br />
WT30H208U 502313 031 9<br />
WT30H240U 502314 031 9<br />
WT30H208DU 502315 031 9<br />
WT30H240DU 502316 031 9<br />
WT30H208RU 502317 031 9<br />
WT30H240RU 502318 031 9<br />
LS6H208DU 502319 027 9<br />
LS6AH208U 502320 027 9<br />
WT 38/60 502321 046 8<br />
WT 38/M60 502322 015 9<br />
WT 38MED 502323 014 8<br />
LS6H240DU 502325 027 9<br />
LS6H208RU 502326 027 9<br />
LS6H240RU 502327 027 9<br />
WT30M208U 502328 034 10<br />
WT30M240U 502329 034 10<br />
WT30M208DU 502339 034 10<br />
WT30M240DU 502341 034 10<br />
WT30M208RU 502342 034 10<br />
WT30M240RU 502343 034 10<br />
WT30C208DU 502344 038 9<br />
WT30C240DU 502345 038 9<br />
WT38PM60 502346 039 9<br />
WT38M60/4 502347 015 9<br />
LS6EA 502520 011 8<br />
LS6EA/DP 502521 011 8<br />
LS6EAH 502523 011 8<br />
DOC. NO. 5956.446.06 ©Copyright 2005 by <strong>Electrolux</strong> Professional P.19/88
<strong>Electrolux</strong><br />
EFS – Dishwashing Systems Platform<br />
<strong>Electrolux</strong> Professional<br />
Electronic Dishwasher<br />
SERVICE MANUAL<br />
MODEL CODE Prog. Layout<br />
LS6MCD 502524 033 8<br />
LU7PDP 503020 040 9<br />
LU7ADP 503021 041 9<br />
WTU40PDP 503023 040 9<br />
WTU40ADP 503024 047 9<br />
LS 10 504100 002 1<br />
LS14EA 504101 001 4<br />
LS 10 UK DP 504102 002 1<br />
ET12E 504104 003 1<br />
LS 10/60Hz 504105 002 1<br />
LS 10 CW 504107 002 1<br />
LS 10 INS 504108 002 1<br />
HT 1200 ins DEK 504109 001 1<br />
LS14EA/INS 504110 001 4<br />
LS 10 N 504111 002 1<br />
LS 10 DP 504114 002 1<br />
LS 10 HD 504115 008 1<br />
LS14EA/AU 504116 004 4<br />
LS14EA/60 504117 001 4<br />
LS 10 UK1 504118 002 1<br />
LS 10 UK3 504119 002 1<br />
LS 12 INS 504120 001 1<br />
LS 12 504121 001 1<br />
LS 12 DP 504122 001 1<br />
LS 12 60Hz 504125 001 1<br />
LS 12 CW 504128 001 1<br />
HT 1200 DEK 504129 001 1<br />
LS14EA/ASIA 504131 009 4<br />
LS14EA/G 504133 001 4<br />
WT 60 DP 504134 001 1<br />
WT 60 504135 001 1<br />
WT 60 CW 504136 001 1<br />
WT 60 UK DP CW INS 504137 001 1<br />
WT 60 INS 504138 001 1<br />
WT 60 CW INS 504139 001 1<br />
WT 60 AU CW 504140 004 1<br />
WT 60 AU N 504141 004 1<br />
LS10EA 504142 002 4<br />
WT 60/60HZ 504145 001 1<br />
WT 60/60HZ CW 504146 001 1<br />
WT 60 N 504151 001 1<br />
WT 60 N INS 504152 001 1<br />
LS 12 HD 504153 007 1<br />
LS14EA/DD 504155 001 4<br />
WT65E 504156 001 1<br />
WT65EB 504157 001 4<br />
WT65EI 504158 001 1<br />
WT 60 AU DP 504159 004 1<br />
LS 12 UK/3 CW 504161 001 1<br />
WT 60 UK CW 504162 001<br />
MODEL CODE Prog. Layout<br />
LS 12 AU 504163 004 1<br />
LS 12 UK DP CW 504164 001 1<br />
ECOTEMP 12 SW 504165 001 1<br />
WT65EBI 504166 001 4<br />
WT65EBIA 504167 004 4<br />
WT65EIA 504168 004 1<br />
WT65E60 504169 001 1<br />
WT65EB60 504170 001 4<br />
WT 60 U/400 504171 006<br />
WT 60 U/440 504172 006<br />
WT65EBIDG 504173 001 4<br />
WT65EBASIA 504174 009 4<br />
WT65EIM50 504175 006 2<br />
WT65EIM60 504176 006 2<br />
WT 60 MX 220/60 504177 001 1<br />
LS 12 CW INS 504178 001 1<br />
LS14ADP/G 504179 001 4<br />
WT65MED 504180 010 4<br />
WT65EJ50 504183 001 1<br />
WT65EJ60 504186 001 1<br />
LS14AH240U 504187 028 3<br />
WT65H208U 504188 028 3<br />
WT65H240U 504189 028 3<br />
LS 12 ASIACW 504190 009 1<br />
WT 60 ASIACW 504191 009 1<br />
LS 12 ASIANB 504192 009<br />
WT60ASIANB 504193 009<br />
LS14H208DU 504194 028 3<br />
LS14AH208U 504195 028 3<br />
LS14H240DU 504196 028 3<br />
LS14H208RU 504197 028 3<br />
LS14H240RU 504198 028 3<br />
WT65H208DU 504199 028 3<br />
WT65H240DU 504200 028 3<br />
WT65H208RU 504201 028 3<br />
WT65H240RU 504202 028 3<br />
WT65M208U 504203 035 12<br />
WT65M240U 504204 035 12<br />
WT65M208DU 504205 035 12<br />
WT65M240DU 504206 035 12<br />
WT65M208RU 504207 035 12<br />
WT65M240RU 504208 035 12<br />
LS14EAWS 504209 042 4<br />
LS14ADPWSG 504210 042 4<br />
LS14EAIWS 504211 042 4<br />
WT65EBWS 504212 042 4<br />
WT65BIDWSG 504213 042 4<br />
WT65EBIWS 504214 042 4<br />
WT65MEDWS 504215 043 4<br />
LS9P 505022 019 6<br />
DOC. NO. 5956.446.06 ©Copyright 2005 by <strong>Electrolux</strong> Professional P.20/88
<strong>Electrolux</strong><br />
EFS – Dishwashing Systems Platform<br />
<strong>Electrolux</strong> Professional<br />
Electronic Dishwasher<br />
SERVICE MANUAL<br />
MODEL CODE Prog. Layout<br />
LS9P DD 505033 019 6<br />
LS9A UK 505034 018 6<br />
LS9P60 505035 019 6<br />
WT55P 505038 019 6<br />
WT55P6 505039 019 6<br />
LS9ADG1 505041 018 6<br />
WT55ADG1 505042 018 6<br />
LS9PAUS 505043 019 6<br />
WT55PM50 505044 019 13<br />
WT55PM60 505045 019 13<br />
PPW1 M 506010 005 7<br />
PPW1 M UK 506011 005 7<br />
PPW1 60 Hz 506012 005 7<br />
PPW1 MH 506013 005 7<br />
PPW2 M 506014 005 7<br />
PPW2 M UK 506015 005 7<br />
PPW2 60 Hz 506016 005 7<br />
PPW2 V 506017 005<br />
WT830 M 506018 005 7<br />
WT830 M UK 506019 005 7<br />
WT830 60 Hz 506020 005 7<br />
WT850 M 506022 005 7<br />
WT850 M UK 506023 005 7<br />
WT850 60 Hz 506024 005 7<br />
WT850 V 506025 005<br />
WT830 MH 506026 005 7<br />
WT830EA 506215 017 5<br />
WT850EA 506216 017 5<br />
WT830EAG 506217 017 5<br />
WT850EAG 506218 017 5<br />
WT830M208U 506029 037 3<br />
WT830M240U 506030 037 3<br />
WT830H208U 506031 037 3<br />
WT830H240U 506032 037 3<br />
WT850M208U 506033 037 3<br />
WT850M240U 506034 037 3<br />
PW1M208U 506035 037 3<br />
PW1M240U 506036 037 3<br />
PW1MH208U 506037 037 3<br />
PW1MH240U 506038 037 3<br />
PW2M208U 506039 037 3<br />
PW2M240U 506042 037 3<br />
FL5 690004 020 8<br />
FL5DP 690005 020 8<br />
LV5 690006 020 8<br />
LV5DP 690007 020 8<br />
LV5/3WSDP 690008 012 8<br />
FL5/3WSDP 690009 012 8<br />
UC5/1DP 690010 021 11<br />
UC5/1WSDP 690011 024 11<br />
LD5DP 690013 020 8<br />
MODEL CODE Prog. Layout<br />
LD5 690014 020 8<br />
FL 620EP 698003 013 8<br />
ET5EDG 698004 023 8<br />
LV6EP 698006 013 8<br />
H3300 698007 029 8<br />
H2500 698008 019 6<br />
H3500 698009 001 4<br />
ET5EDCW 698010 016 8<br />
LV6EADPWS 698011 048 8<br />
HT1200WS 698012 042 4<br />
HT1200IWS 698013 042 4<br />
FL620ADPWS 698014 048 8<br />
H1310SANA 698016 030 8<br />
H1510SANA 698017 010 4<br />
LV1200IWS 698018 042 4<br />
HT900P 698022 019 6<br />
LV900P 698023 019 6<br />
LD900 698024 019 6<br />
LU700PDP 698033 040 9<br />
LU700ADP 698034 047 9<br />
PW100 M 698040 005 7<br />
PW200 M 698041 005 7<br />
PW200 V 698042 005 7<br />
PW100 MH 698043 005 7<br />
LV100M 698044 005 7<br />
LV200M 698045 005 7<br />
HT 1200 698050 001 4<br />
HT 1000 698051 002 4<br />
HT 1000 INS 698052 002 1<br />
HT 1200 INS 698053 001 4<br />
HT 1200 DP 698055 001 1<br />
ET12EIG 698056 026 3<br />
ET12EI 698057 025 1<br />
LV1000 698059 002 4<br />
LV1200INS 698060 001 4<br />
ET12EICWG 698061 001 3<br />
ET12EICW 698062 025 3<br />
FL 620EA 698070 046 8<br />
FL 620EADP 698071 046 8<br />
ET5E 698076 016 8<br />
ET5ED 698077 016 8<br />
FL 620EP/DD 698078 013 8<br />
FL 620EA/DD 698079 046 8<br />
FL 620EADP/DD 698080 046 8<br />
LV6EA 698081 046 8<br />
LV6EADP 698082 046 8<br />
LS10 INS DP S36220 002<br />
LS 10 INS S37858 002<br />
LS 10 S39968 002<br />
LS 10/fiera S42549 002<br />
DOC. NO. 5956.446.06 ©Copyright 2005 by <strong>Electrolux</strong> Professional P.21/88
<strong>Electrolux</strong><br />
EFS – Dishwashing Systems Platform<br />
<strong>Electrolux</strong> Professional<br />
Electronic Dishwasher<br />
SERVICE MANUAL<br />
MODEL CODE Prog. Layout MODEL CODE Prog Layout<br />
LS 10 INS S43062 002<br />
WT 60 S47CCY 001<br />
LS 10 S43327 002<br />
WT 60 CW S47CEA 001<br />
HT 1000 S475CH 002<br />
WT 60/9 S47CEH 001<br />
LS 10 CW S47APN 002<br />
WT 60/9 S47CEI 001<br />
LS 10 CW S47CF5 002<br />
WT 60 S47CKD 001<br />
LS 10 CW S47DU4 002<br />
LS 12 CW D04713 001<br />
LS 10 CW S47DU7 002<br />
LS 12 CW S34369 001<br />
LS 10 CW S47DUA 002<br />
WT 60 giappone S34377 001<br />
LS 10 CW S47DUF 002<br />
WT 60 giappone S34378 001<br />
LS 10 CW S47E17 002<br />
WT 60 giappone S35178 001<br />
LS 10 CW S47E2C 002<br />
WT 60 giappone S35179 001<br />
LS 10 CW S47E2H 002<br />
LS 12 CW S35246 001<br />
LS 10 CW S47E2M 002<br />
HT1200 S35330 001<br />
LS 10 CW S47E2R 002<br />
WT 60 giappone S36384 001<br />
LS 10 UK1 S47E50 002<br />
WT 60 giappone S36385 001<br />
LS 10 CW S47E6M 002<br />
LS 12 CW S36846 001<br />
HT1200 S46002 001<br />
LS 12 CW S36847 001<br />
WT 60 CW INS S46880 001<br />
HT1200 S39964 001<br />
HT 1000 S4734M 002<br />
HT1200 S40472 001<br />
WT 60/9 S47539 001<br />
ECOTEMP 12 S40785 003<br />
WT 60/9 S4756O 001<br />
WT 60/9 INS S41170 001<br />
WT 60/9 S4756P 001<br />
HT1200 S41185 001<br />
WT60 INS S475GJ 001<br />
LS 12 INS S42032 001<br />
WT60 INS S475GY 001<br />
WT 60/60HZ S42170 001<br />
WT 60 CW S476HA 001<br />
LS 12/fiera S42550 001<br />
LS 12 HD S4775E 007<br />
WT 60/60HZ S42617 001<br />
HT1200 S4777U 001<br />
WT 60 N S43119 001<br />
LS 12 CW INS S477BM 001<br />
LS12 CW S43488 001<br />
WT 60 AU CW S477JR 004<br />
LS 12 INS S43563 001<br />
WT 60 INS S477M1 001<br />
LS 12 DP CW S43734 001<br />
WT 60 INS S477M1 001<br />
LS 12 CW S43806 001<br />
WT 60 N INS S477MB 001<br />
LS 12 CW S43830 001<br />
WT 60/60HZ DP S477QB 001<br />
WT 60 CW INS S44421 001<br />
LS 12 CW INS S477V7 001<br />
LS6EA S477BL 011<br />
WT 60 DP S47811 001<br />
WT 37 S4784U 011<br />
WT 60/9 S4781D 001<br />
LS6EA S4787B 011<br />
WT 60/60HZ DP S4781I 001<br />
FL 620EA S478BN 011<br />
WT 60/9 INS S4786P 001<br />
WT830 MH S46881 005<br />
WT 60 U/230 S478KF 006<br />
PPW1 M S4758V 005<br />
LS 12 CW INS S478LV 001<br />
WT830 MH S476YZ 005<br />
WT 60 CW INS S478SP 001<br />
PPW1 MH S477IT 005<br />
LS 12 CW INS S479VE 001<br />
WT830 M S479QS 005<br />
WT 60 S479Z3 001<br />
PPW1 M UK S47BKQ 005<br />
WT 60 S479Z9 001<br />
WT 60 CW INS S47CPB 001<br />
WT 60 AU CW S47AP80 004<br />
WT 60 CW INS S47CQS 001<br />
LS 12 CW S47APP 001<br />
ECOTEMP 12 SW S47CVG 001<br />
HT 1200 S47B9I 001<br />
ECOTEMP 12 SW S47CVH 001<br />
LS 12 UK/3 CW S47BJI 001<br />
WT 60 CW INS S47D9Y 001<br />
LS 12 CW S47C1Z 001<br />
WT 60 S47DCA 001<br />
WT 60 CW S47C6B 001<br />
LS 12 CW S47DE0 001<br />
LS 12 CW S47CCS 001<br />
DOC. NO. 5956.446.06 ©Copyright 2005 by <strong>Electrolux</strong> Professional P.22/88
<strong>Electrolux</strong><br />
EFS – Dishwashing Systems Platform<br />
<strong>Electrolux</strong> Professional<br />
Electronic Dishwasher<br />
SERVICE MANUAL<br />
MODEL CODE Prog Layout<br />
LS 12 CW S47DMM 001<br />
WT 60 S47DSK 001<br />
WT 60 S47DWC 001<br />
WT 60 S47DWD 001<br />
PPW1 MH S47C37 005<br />
PPW1 MH S47DE1 005<br />
WT850 M S43016 005<br />
PPW2 M S44099 005<br />
PPW2 M S44399 005<br />
PPW2 M S45958 005<br />
PPW2 M S47BW4 005<br />
WT850 M S47CFG 005<br />
PPW2 M S47CZ1 005<br />
DOC. NO. 5956.446.06 ©Copyright 2005 by <strong>Electrolux</strong> Professional P.23/88
<strong>Electrolux</strong><br />
EFS – Dishwashing Systems Platform<br />
<strong>Electrolux</strong> Professional<br />
Electronic Dishwasher<br />
SERVICE MANUAL<br />
10.2. PROGRAMMING SHEETS<br />
LS12 – LS14 / WT60 - 65 Prog. 001<br />
1. Switch OFF and then switch ON the machine.<br />
2. CFG Enter into CFG parameter family and set the following parameters.<br />
tYP 0 Hood Type like working cycles.<br />
boi 0 Atmospheric boiler.<br />
doo 1 Manual Hood.<br />
dFL 1 Default values for Hood Type models.<br />
trc 0 (for this appliance SOFT START is NOT possible).<br />
b_t 1 Tank heater works only if boiler temperature reached.<br />
btF 75 Enable filling tank by means of rinsing cycles.<br />
LES 0 Detergent level switches not enabled.<br />
UI 9 Select user interface hood type model (up to version 3.11 set to 1).<br />
rE 0 Regeneration cycle disabled.<br />
ALr 1 Alarms enabled.<br />
3. Switch OFF and then switch ON the machine.<br />
4. Modify Factory parameters:<br />
FAC Factory parameters family<br />
bt°C 78 Boiler Temperature Threshold.<br />
5. Switch OFF and then switch ON the machine.<br />
DOC. NO. 5956.446.06 ©Copyright 2005 by <strong>Electrolux</strong> Professional P.24/88
<strong>Electrolux</strong><br />
EFS – Dishwashing Systems Platform<br />
<strong>Electrolux</strong> Professional<br />
Electronic Dishwasher<br />
SERVICE MANUAL<br />
LS10 Prog. 002<br />
1. Switch OFF and then switch ON the machine.<br />
2. CFG Enter into CFG parameter family and set the following parameters:<br />
tYP 0 Hood Type like working cycles.<br />
boi 0 Atmospheric boiler.<br />
doo 1 Manual Hood.<br />
dFL 1 Default values for Hood Type models.<br />
trc 0 (for this appliance SOFT START is NOT possible).<br />
b_t 1 Tank heater works only if boiler temperature reached.<br />
btF 75 Enable filling tank by means of rinsing cycles.<br />
LES 0 Detergent level switches not enabled.<br />
UI 9 Select user interface hood type model (up to version 3.11 set to 1).<br />
rE 0 Regeneration cycle disabled.<br />
ALr 1 Alarms enabled.<br />
3. Switch OFF and then switch ON the machine.<br />
4. Modify Factory parameters:<br />
FAC Factory parameters family<br />
bt°C 78 Boiler Temperature Threshold.<br />
5. Modify Cycle parameters:<br />
CY1 Cycle 1<br />
Sh1 45 Short Wash Phase [s]<br />
CY2 Cycle 2<br />
Ln2 1 Long Wash Phase [min]<br />
Sh2 40 Short Wash Phase [s]<br />
6. Switch OFF and then switch ON the machine.<br />
DOC. NO. 5956.446.06 ©Copyright 2005 by <strong>Electrolux</strong> Professional P.25/88
<strong>Electrolux</strong><br />
EFS – Dishwashing Systems Platform<br />
<strong>Electrolux</strong> Professional<br />
Electronic Dishwasher<br />
SERVICE MANUAL<br />
ECOTEMP12 Prog. 003<br />
1. Switch OFF and then switch ON the machine.<br />
2. CFG Enter into CFG parameter family and set the following parameters:<br />
tYP 0 Hood Type like working cycles.<br />
boi 0 Atmospheric boiler.<br />
doo 1 Manual Hood.<br />
dFL 1 Default values for Hood Type models.<br />
trc 0 (for this appliance SOFT START is NOT possible).<br />
b_t 0 Boiler heaters and tank heater work simultaneously. .<br />
btF 0 The tank is filled into the traditional way.<br />
LES 0 Detergent level switches not enabled.<br />
UI 9 Select user interface hood type model (up to version 3.11 set to 1).<br />
rE 0 Regeneration cycle disabled.<br />
ALr 1 Alarms enabled.<br />
3. Switch OFF and then switch ON the machine.<br />
4. Modify Factory parameters:<br />
FAC Factory parameters family<br />
bt°C 65 Boiler Temperature Threshold.<br />
bAJ 2 Boiler Temperature Adjust.<br />
5. Switch OFF and then switch ON the machine.<br />
DOC. NO. 5956.446.06 ©Copyright 2005 by <strong>Electrolux</strong> Professional P.26/88
<strong>Electrolux</strong><br />
EFS – Dishwashing Systems Platform<br />
<strong>Electrolux</strong> Professional<br />
Electronic Dishwasher<br />
SERVICE MANUAL<br />
LS12 AU / WT60 - 65 AU Prog. 004<br />
1. Switch OFF and then switch ON the machine.<br />
2. CFG Enter into CFG parameter family and set the following parameters:<br />
tYP 0 Hood Type like working cycles.<br />
boi 0 Atmospheric boiler.<br />
doo 0 Automatic Hood.<br />
dFL 1 Default values for Hood Type models.<br />
trc 0 (for this appliance SOFT START is NOT possible).<br />
b_t 1 Tank heater works only if boiler temperature reached.<br />
btF 75 Enable filling tank by means of rinsing cycles.<br />
LES 0 Detergent level switches not enabled.<br />
UI 9 Select user interface hood type model (up to version 3.11 set to 1).<br />
rE 0 Regeneration cycle disabled.<br />
ALr 1 Alarms enabled.<br />
3. Switch OFF and then switch ON the machine.<br />
4. Modify Factory parameters:<br />
FAC Factory parameters family<br />
bt°C<br />
5. Modify the other parameters:<br />
CY1 Cycle 1<br />
FP1 2 Final Pause [s]<br />
CY2 Cycle 2<br />
FP2 2 Final Pause [s]<br />
CY3 Cycle 3<br />
FP3 2 Final Pause [s]<br />
dPA Dishwashing parameters family.<br />
IPA 2 Initial Pause<br />
78 Boiler Temperature Threshold.<br />
6. Switch OFF and then switch ON the machine.<br />
DOC. NO. 5956.446.06 ©Copyright 2005 by <strong>Electrolux</strong> Professional P.27/88
<strong>Electrolux</strong><br />
EFS – Dishwashing Systems Platform<br />
<strong>Electrolux</strong> Professional<br />
Electronic Dishwasher<br />
SERVICE MANUAL<br />
PW 1 - 2 / WT830 - 850 Prog. 005<br />
1. Switch OFF and then switch ON the machine.<br />
2. CFG Enter into CFG parameter family and set the following parameters:<br />
tYP 1 Pot Washer.<br />
boi 0 Atmospheric boiler.<br />
doo 2 Front loading function.<br />
dFL 2 Default values for Pot Washer models.<br />
trc 0 (for this appliance SOFT START is NOT possible).<br />
b_t 1 Tank heater works only if boiler temperature reached.<br />
btF 0 The tank is filled into the traditional way.<br />
LES 0 Detergent level switches not enabled.<br />
UI 9 Select user interface hood type model (up to version 3.11 set to 1).<br />
rE 0 Regeneration cycle disabled.<br />
ALr 1 Alarms enabled.<br />
3. Switch OFF and then switch ON the machine.<br />
4. Modify Factory parameters:<br />
FAC Factory parameters family<br />
bt°C 78 Boiler Temperature Threshold.<br />
5. Switch OFF and then switch ON the machine.<br />
DOC. NO. 5956.446.06 ©Copyright 2005 by <strong>Electrolux</strong> Professional P.28/88
<strong>Electrolux</strong><br />
EFS – Dishwashing Systems Platform<br />
<strong>Electrolux</strong> Professional<br />
Electronic Dishwasher<br />
SERVICE MANUAL<br />
WT60 - 65 USPH Prog. 006<br />
1. Switch OFF and then switch ON the machine.<br />
2. CFG Enter into CFG parameter family and set the following parameters:<br />
tYP 0 Hood Type like working cycles.<br />
boi 0 Atmospheric boiler.<br />
doo 1 Manual Hood.<br />
dFL 1 Default values for Hood Type models.<br />
trc 0 (for this appliance SOFT START is NOT possible).<br />
b_t 1 Tank heater works only if boiler temperature reached.<br />
btF 75 Enable filling tank by means of rinsing cycles.<br />
LES 0 Detergent level switches not enabled.<br />
UI 9 Select user interface hood type model (up to version 3.11 set to 1).<br />
rE 0 Regeneration cycle disabled.<br />
ALr 1 Alarms enabled.<br />
3. Switch OFF and then switch ON the machine.<br />
4. Modify Factory parameters:<br />
FAC Factory parameters family<br />
bt°C 78 Boiler Temperature Threshold.<br />
5. Modify the cycle parameters:<br />
CY1 Enter into Cycle 1 parameters family.<br />
ri1 25 Rinse Phase Duration [s]<br />
dr1 25 Drain [s]<br />
CY2 Enter into Cycle 2 parameters family.<br />
ri2 25 Rinse Phase Duration [s]<br />
dr2 25 Drain [s]<br />
CY3 Enter into Cycle 3 parameters family.<br />
ri3 25 Rinse Phase Duration [s]<br />
dr3 25 Drain [s]<br />
6. Select Fahrenheit :<br />
dPA Enter into Dishwashing parameter family.<br />
C F 1 Select Fahrenheit degrees.<br />
6. Switch OFF and then switch ON the machine.<br />
DOC. NO. 5956.446.06 ©Copyright 2005 by <strong>Electrolux</strong> Professional P.29/88
<strong>Electrolux</strong><br />
EFS – Dishwashing Systems Platform<br />
<strong>Electrolux</strong> Professional<br />
Electronic Dishwasher<br />
SERVICE MANUAL<br />
LS12HD Prog. 007<br />
1. Switch OFF and then switch ON the machine.<br />
2. CFG Enter into CFG parameter family and set the following parameters:<br />
tYP 0 Hood Type like working cycles.<br />
boi 0 Atmospheric boiler.<br />
doo 1 Manual Hood.<br />
dFL 1 Default values for Hood Type models.<br />
trc 0 (for this appliance SOFT START is NOT possible).<br />
b_t 1 Tank heater works only if boiler temperature reached.<br />
btF 75 Enable filling tank by means of rinsing cycles.<br />
LES 0 Detergent level switches not enabled.<br />
UI 9 Select user interface hood type model (up to version 3.11 set to 1).<br />
rE 0 Regeneration cycle disabled.<br />
ALr 1 Alarms enabled.<br />
3. Switch OFF and then switch ON the machine.<br />
4. Modify the cycle parameters:<br />
CY1 Enter into Cycle 1 parameters family.<br />
Pr1 20 Pre-rinse Duration [s]<br />
dr1 36 Drain [s]<br />
CY2 Enter into Cycle 2 parameters family.<br />
Pr2 20 Pre-rinse Duration [s]<br />
dr2 36 Drain [s]<br />
CY3 Enter into Cycle 3 parameters family.<br />
Pr3 20 Pre-rinse Duration [s]<br />
dr3 36 Drain [s]<br />
5. Switch OFF and then switch ON the machine.<br />
DOC. NO. 5956.446.06 ©Copyright 2005 by <strong>Electrolux</strong> Professional P.30/88
<strong>Electrolux</strong><br />
EFS – Dishwashing Systems Platform<br />
<strong>Electrolux</strong> Professional<br />
Electronic Dishwasher<br />
SERVICE MANUAL<br />
LS10HD Prog. 008<br />
1. Switch OFF and then switch ON the machine.<br />
2. CFG Enter into CFG parameter family and set the following parameters:<br />
tYP 0 Hood Type like working cycles.<br />
boi 0 Atmospheric boiler.<br />
doo 1 Manual Hood.<br />
dFL 1 Default values for Hood Type models.<br />
trc 0 (for this appliance SOFT START is NOT possible).<br />
b_t 1 Tank heater works only if boiler temperature reached.<br />
btF 75 Enable filling tank by means of rinsing cycles.<br />
LES 0 Detergent level switches not enabled.<br />
UI 9 Select user interface hood type model (up to version 3.11 set to 1).<br />
rE 0 Regeneration cycle disabled.<br />
ALr 1 Alarms enabled.<br />
3. Switch OFF and then switch ON the machine.<br />
4. Modify the cycle parameters:<br />
CY1 Enter into Cycle 1 parameters family.<br />
Sh1 45 Short Wash Phase [s]<br />
Pr1 20 Pre-rinse Duration [s]<br />
dr1 36 Drain [s]<br />
CY2 Enter into Cycle 2 parameters family.<br />
Ln1 1 Long Wash Phase [min]<br />
Sh2 40 Short Wash Phase [s]<br />
Pr2 20 Pre-rinse Duration [s]<br />
dr2 36 Drain [s]<br />
5. Switch OFF and then switch ON the machine.<br />
DOC. NO. 5956.446.06 ©Copyright 2005 by <strong>Electrolux</strong> Professional P.31/88
<strong>Electrolux</strong><br />
EFS – Dishwashing Systems Platform<br />
<strong>Electrolux</strong> Professional<br />
Electronic Dishwasher<br />
SERVICE MANUAL<br />
LS12 - 14 / WT60 - 65 ASIA Prog. 009<br />
1. Switch OFF and then switch ON the machine.<br />
2. CFG Enter into CFG parameter family and set the following parameters.<br />
tYP 0 Hood Type like working cycles.<br />
boi 0 Atmospheric boiler.<br />
doo 1 Manual Hood.<br />
dFL 1 Default values for Hood Type models.<br />
trc 0 (for this appliance SOFT START is NOT possible).<br />
b_t 1 Tank heater works only if boiler temperature reached.<br />
btF 75 Enable filling tank by means of rinsing cycles.<br />
LES 0 Detergent level switches not enabled.<br />
UI 9 Select user interface hood type model (up to version 3.11 set to 1).<br />
rE 0 Regeneration cycle disabled.<br />
ALr 1 Alarms enabled.<br />
3. Switch OFF and then switch ON the machine.<br />
4. Modify Factory parameters:<br />
FAC Factory parameters family<br />
bt°C 78 Boiler Temperature Threshold.<br />
bp 0 Boiler Priority Disabled<br />
5. Switch OFF and then switch ON the machine.<br />
DOC. NO. 5956.446.06 ©Copyright 2005 by <strong>Electrolux</strong> Professional P.32/88
<strong>Electrolux</strong><br />
EFS – Dishwashing Systems Platform<br />
<strong>Electrolux</strong> Professional<br />
Electronic Dishwasher<br />
SERVICE MANUAL<br />
WT65MED Prog. 010<br />
1. Switch OFF and then switch ON the machine.<br />
2. CFG Enter into CFG parameter family and set the following parameters:<br />
tYP 0 Hood Type like working cycles.<br />
boi 0 Atmospheric boiler.<br />
doo 0 Automatic Hood.<br />
dFL 1 Default values for Hood Type models.<br />
trc 0 (for this appliance SOFT START is NOT possible).<br />
b_t 1 Tank heater works only if boiler temperature reached.<br />
btF 75 Enable filling tank by means of rinsing cycles.<br />
LES 0 Detergent level switches not enabled.<br />
UI 9 Select user interface hood type model (up to version 3.11 set to 1).<br />
rE 0 Regeneration cycle disabled.<br />
ALr 1 Alarms enabled.<br />
3. Switch OFF and then switch ON the machine.<br />
4. Modify Factory parameters:<br />
FAC Factory parameters family<br />
bt°C 90 Boiler Temperature Threshold.<br />
bHi 0 Disable boiler high Temperature alarm ( C 2 ).<br />
bAJ 0 Boiler Temperature Adjust.<br />
bSt 0 Booster Function.<br />
tHi 85 Tank high Temperature limit.<br />
5. Modify the cycle parameters:<br />
CY1 Cycle 1 parameters family.<br />
Ln1 2 Long Wash Phase [min]<br />
Sh1 32 Short Wash Phase [s]<br />
ri1 35 Rinse Phase Duration [s]<br />
dr1 40 Drain [s]<br />
FP1 15 Final Pause [s]<br />
CY2 Cycle 2 parameters family.<br />
Ln2 3 Long Wash Phase [min]<br />
Sh2 32 Short Wash Phase [s]<br />
ri2 35 Rinse Phase Duration [s]<br />
dr2 40 Drain [s]<br />
FP2 15 Final Pause [s]<br />
CY3 Cycle 3 parameters family.<br />
Ln3 5 Long Wash Phase [min]<br />
Sh3 32 Short Wash Phase [s]<br />
ri3 35 Rinse Phase Duration [s]<br />
dr3 40 Drain [s]<br />
FP3 15 Final Pause [s]<br />
DOC. NO. 5956.446.06 ©Copyright 2005 by <strong>Electrolux</strong> Professional P.33/88
<strong>Electrolux</strong><br />
EFS – Dishwashing Systems Platform<br />
<strong>Electrolux</strong> Professional<br />
Electronic Dishwasher<br />
SERVICE MANUAL<br />
WT65MED Prog. 010<br />
dPA Set other parameters.<br />
IPA 4 Initial Pause [s]<br />
6. Switch OFF and then switch ON the machine.<br />
LS6 6000W ATM Prog. 011<br />
1. Switch OFF and then switch ON the machine.<br />
2. CFG Enter into CFG parameter family and set the following parameters.<br />
tYP 0 Hood Type like working cycles.<br />
boi 0 Atmospheric boiler.<br />
doo 2 Front loading.<br />
dFL 3 Default values for Undercounter models.<br />
trc 1 SOFT START ENABLED.<br />
b_t 1 Tank heater works only if boiler temperature reached.<br />
btF 75 Enable filling tank by means of rinsing cycles.<br />
LES 0 Detergent level switches not enabled.<br />
UI 9 Select user interface hood type model (up to version 3.11 set to 1).<br />
rE 0 Regeneration cycle disabled.<br />
ALr 1 Alarms enabled.<br />
3. Switch OFF and then switch ON the machine.<br />
DOC. NO. 5956.446.06 ©Copyright 2005 by <strong>Electrolux</strong> Professional P.34/88
<strong>Electrolux</strong><br />
EFS – Dishwashing Systems Platform<br />
<strong>Electrolux</strong> Professional<br />
Electronic Dishwasher<br />
SERVICE MANUAL<br />
LS5WS / WT4WS TRIPHASE Prog. 012<br />
1. Switch OFF and then switch ON the machine.<br />
2. CFG Enter into CFG parameter family and set the following parameters.<br />
tYP 0 Hood Type like working cycles.<br />
boi 0 Atmospheric boiler.<br />
doo 2 Front loading door type.<br />
dFL 3 Default values for Undercounter models.<br />
trc 1 SOFT START ENABLED.<br />
b_t 1 Tank heater works only if boiler temperature reached.<br />
btF 75 Enable filling tank by means of rinsing cycles.<br />
LES 0 Detergent level switches not enabled.<br />
UI 13 Select user interface for LS5 (up to version 3.11 set to 5).<br />
rE 1 Regeneration cycle enabled.<br />
ALr 1 ALARMS ENABLED.<br />
3. Switch OFF and then switch ON the machine.<br />
4. Modify Factory parameters:<br />
FAC Enter into FAC parameter family.<br />
bt°C 83 Boiler Temperature Threshold.<br />
bAJ 2 Boiler Temperature Adjust.<br />
bSt 2 Booster Function.<br />
5. Modify the cycle parameters:<br />
CY3 Cycle 3 parameters family.<br />
Ln3 1 Long Wash Phase [min]<br />
Sh3 40 Short Wash Phase [s]<br />
6. Switch OFF and then switch ON the machine.<br />
7. Modify Detergent dosage:<br />
GEn Enter into GEn parameter family.<br />
dIn 70 Initial Detergent Dosage [s].<br />
rIn 5 Initial Rinse Aid Dosage [s].<br />
8. Cnt Counters<br />
rCy 20 Number of cycles allowed before regeneration.<br />
9. Switch OFF and then switch ON the machine.<br />
DOC. NO. 5956.446.06 ©Copyright 2005 by <strong>Electrolux</strong> Professional P.35/88
<strong>Electrolux</strong><br />
EFS – Dishwashing Systems Platform<br />
<strong>Electrolux</strong> Professional<br />
Electronic Dishwasher<br />
SERVICE MANUAL<br />
LS6 PRESS Prog. 013<br />
1. Switch OFF and then switch ON the machine.<br />
2. CFG Enter into CFG parameter family and set the following parameters.<br />
tYP 0 Hood Type like working cycles.<br />
boi 1 Pressure boiler.<br />
doo 2 Front loading.<br />
dFL 3 Default values for Undercounter models.<br />
trc 1 SOFT START ENABLED.<br />
b_t 1 Tank heater works only if boiler temperature reached.<br />
btF 0 The tank is filled into the traditional way.<br />
LES 0 Detergent level switches not enabled.<br />
UI 8 ACTIVE function disabled (up to version 3.11 set to 0).<br />
rE 0 Regeneration cycle disabled.<br />
ALr 1 Alarms enabled.<br />
3. Switch OFF and then switch ON the machine.<br />
4. Modify Factory parameters:<br />
FAC Enter into FAC parameter family and change boiler threshold.<br />
bt°C 86 Boiler Temperature Threshold.<br />
5. Switch OFF and then switch ON the machine.<br />
DOC. NO. 5956.446.06 ©Copyright 2005 by <strong>Electrolux</strong> Professional P.36/88
<strong>Electrolux</strong><br />
EFS – Dishwashing Systems Platform<br />
<strong>Electrolux</strong> Professional<br />
Electronic Dishwasher<br />
SERVICE MANUAL<br />
WT38 MED Prog. 014<br />
1. Switch OFF and then switch ON the machine.<br />
2. CFG Enter into CFG parameter family and set the following parameters.<br />
tYP 0 Hood Type like working cycles.<br />
boi 0 Atmospheric boiler.<br />
doo 2 Front loading.<br />
dFL 3 Default values for Undercounter models.<br />
trc 1 SOFT START ENABLED.<br />
b_t 1 Tank heater works only if boiler temperature reached.<br />
btF 75 Enable filling tank by means of rinsing cycles.<br />
LES 0 Detergent level switches not enabled.<br />
UI 8 ACTIVE function disabled (up to version 3.11 set to 0).<br />
rE 0 Regeneration cycle disabled.<br />
ALr 1 Alarms enabled.<br />
3. Switch OFF and then switch ON the machine.<br />
4. Modify Factory parameters:<br />
FAC Enter into FAC parameter family and change boiler threshold.<br />
bt°C 90 Boiler Temperature Threshold.<br />
bHi 0 Disable boiler high Temperature alarm ( C 2 ).<br />
bAJ 0 Boiler Temperature Adjust.<br />
bSt 0 Booster function not needed.<br />
btd 10 During stand-by boiler is kept at lower temperature than Temperature Threshold.<br />
tt°C 65 Tub Temperature Threshold.<br />
tHi 85 Tank high Temperature limit.<br />
5. Modify the cycle parameters:<br />
CY1 Cycle 1 parameters family.<br />
Ln1 4 Long Wash Phase [min]<br />
Sh1 10 Short Wash Phase [s]<br />
ri1 35 Rinse Phase Duration [s]<br />
dr1 40 Drain [s]<br />
FP1 15 Final Pause at End of Cycle<br />
CY2 Cycle 2 parameters family.<br />
Ln2 6 Long Wash Phase [min]<br />
Sh2 10 Short Wash Phase [s]<br />
ri2 35 Rinse Phase Duration [s]<br />
dr2 40 Drain [s]<br />
FP2 15 Final Pause at End of Cycle<br />
CY3 Cycle 3 parameters family.<br />
Ln3 9 Long Wash Phase [min]<br />
Sh3 10 Short Wash Phase [s]<br />
ri3 35 Rinse Phase Duration [s]<br />
dr3 40 Drain [s]<br />
FP3 15 Final Pause at End of Cycle<br />
6. Switch OFF and then switch ON the machine.<br />
DOC. NO. 5956.446.06 ©Copyright 2005 by <strong>Electrolux</strong> Professional P.37/88
<strong>Electrolux</strong><br />
EFS – Dishwashing Systems Platform<br />
<strong>Electrolux</strong> Professional<br />
Electronic Dishwasher<br />
SERVICE MANUAL<br />
WT30 USPH Prog. 015<br />
1. Switch OFF and then switch ON the machine.<br />
2. CFG Enter into CFG parameter family and set the following parameters.<br />
tYP 0 Hood Type like working cycles.<br />
boi 0 Atmospheric boiler.<br />
doo 2 Front loading.<br />
dFL 3 Default values for Undercounter models.<br />
trc 0 (for this appliance SOFT START is NOT possible).<br />
b_t 1 Tank heater works only if boiler temperature reached.<br />
btF 75 Enable filling tank by means of rinsing cycles.<br />
LES 0 Detergent level switches not enabled.<br />
UI 8 ACTIVE function disabled (up to version 3.11 set to 0).<br />
rE 0 Regeneration cycle disabled.<br />
ALr 1 Alarms enabled.<br />
3. Switch OFF and then switch ON the machine.<br />
4. Modify Factory parameters:<br />
FAC Enter into FAC parameter family and change boiler threshold.<br />
bt°C 82 Boiler Temperature Threshold.<br />
btd<br />
3 During stand-by boiler is kept at lower temperature than Temperature Threshold.<br />
0 Booster Function not necessary.<br />
bSt<br />
tt°C 66 Tank Temperature Threshold.<br />
tHi 80 High limit for tank temperature.<br />
5. Modify the cycle parameters:<br />
CY1 Cycle 1 parameters family.<br />
Ln1 1<br />
Sh1 22<br />
ri1 25<br />
dr1 40 Drain [s]<br />
FP1 4 Final Pause [s]<br />
CY2 Cycle 2 parameters family.<br />
Ln2 2<br />
Sh2 22<br />
ri2 25<br />
dr2 40 Drain [s]<br />
FP2 4 Final Pause [s]<br />
CY3 Cycle 3 parameters family.<br />
Ln3 4<br />
Sh3 22<br />
ri3 25<br />
dr3 40 Drain [s]<br />
FP3 4 Final Pause [s]<br />
Long Wash Phase [min]<br />
Short Wash Phase [s]<br />
Rinse Phase Duration [s]<br />
Long Wash Phase [min]<br />
Short Wash Phase [s]<br />
Rinse Phase Duration [s]<br />
Long Wash Phase [min]<br />
Short Wash Phase [s]<br />
Rinse Phase Duration [s]<br />
DOC. NO. 5956.446.06 ©Copyright 2005 by <strong>Electrolux</strong> Professional P.38/88
<strong>Electrolux</strong><br />
EFS – Dishwashing Systems Platform<br />
<strong>Electrolux</strong> Professional<br />
Electronic Dishwasher<br />
SERVICE MANUAL<br />
WT30 USPH Prog. 015<br />
drn Drain parameters family.<br />
Idr 30<br />
dPA Set other parameters.<br />
IPA 5<br />
C F 1 Fahrenheit.<br />
Initial Drain Phase Duration [s]<br />
Initial Pause [s]<br />
6. Switch OFF and then switch ON the machine.<br />
DOC. NO. 5956.446.06 ©Copyright 2005 by <strong>Electrolux</strong> Professional P.39/88
<strong>Electrolux</strong><br />
EFS – Dishwashing Systems Platform<br />
<strong>Electrolux</strong> Professional<br />
Electronic Dishwasher<br />
SERVICE MANUAL<br />
ECOTEMP 5 Prog. 016<br />
1. Switch OFF and then switch ON the machine.<br />
2. CFG Enter into CFG parameter family and set the following parameters.<br />
tYP 0 Hood Type like working cycles.<br />
boi 0 Atmospheric boiler.<br />
doo 2 Front loading.<br />
dFL 3 Default values for Undercounter models.<br />
trc 1 SOFT START ENABLED.<br />
b_t 0 Tank and boiler heaters work simultaneously.<br />
btF 75 Enable filling tank by means of rinsing cycles.<br />
LES 0 Detergent level switches not enabled.<br />
UI 8 ACTIVE function disabled (up to version 3.11 set to 0).<br />
rE 0 Regeneration cycle disabled.<br />
ALr 1 Alarms enabled.<br />
3. Switch OFF and then switch ON the machine.<br />
4. Modify Factory parameters:<br />
FAC Enter into FAC parameter family and change boiler threshold.<br />
bt°C 77 Boiler Temperature Threshold.<br />
btd<br />
3 During stand-by boiler is kept at lower temperature than Temperature Threshold.<br />
5. Modify the cycle parameters:<br />
CY1 Cycle 1 parameters family.<br />
Ln1 1 Long Wash Phase [min]<br />
Sh1 10 Short Wash Phase [s]<br />
ri1 25 Rinse Phase Duration [s]<br />
dr1 40 Drain [s]<br />
FP1 4 Final Pause [s]<br />
CY2 Cycle 2 parameters family.<br />
Ln2 2 Long Wash Phase [min]<br />
Sh2 22 Short Wash Phase [s]<br />
ri2 25 Rinse Phase Duration [s]<br />
dr2 40 Drain [s]<br />
FP2 4 Final Pause [s]<br />
CY3 Cycle 3 parameters family.<br />
Ln3 4 Long Wash Phase [min]<br />
Sh3 22 Short Wash Phase [s]<br />
ri3 25 Rinse Phase Duration [s]<br />
dr3 40 Drain [s]<br />
FP3 4 Final Pause [s]<br />
drn Drain parameters family.<br />
Idr 30 Initial Drain Phase Duration [s]<br />
dPA Set other parameters.<br />
IPA 5 Initial Pause [s]<br />
6. Switch OFF and then switch ON the machine.<br />
DOC. NO. 5956.446.06 ©Copyright 2005 by <strong>Electrolux</strong> Professional P.40/88
<strong>Electrolux</strong><br />
EFS – Dishwashing Systems Platform<br />
<strong>Electrolux</strong> Professional<br />
Electronic Dishwasher<br />
SERVICE MANUAL<br />
WT830EA / WT850EA Prog. 017<br />
1. Switch OFF and then switch ON the machine.<br />
2. CFG Enter into CFG parameter family and set the following parameters.<br />
tYP 2 Automatic Pot Washer.<br />
boi 0 Atmospheric boiler.<br />
doo 3 Automatic Pot Washer<br />
dFL 2 Default values for Hood Type models.<br />
trc 0 (for this appliance SOFT START is NOT possible).<br />
b_t 1 Tank heater works only if boiler temperature reached.<br />
btF 0 The tank is filled into the traditional way.<br />
LES 0 Detergent level switches not enabled.<br />
UI 9 Select user interface hood type model (up to version 3.11 set to 1).<br />
rE 0 Regeneration cycle disabled.<br />
ALr 1 Alarms enabled.<br />
3. Switch OFF and then switch ON the machine.<br />
4. Modify the cycle parameters:<br />
CY1 Cycle 1 parameters family.<br />
Ln1 2 Long Wash Phase [min]<br />
Sh1 29 Short Wash Phase [s]<br />
FP1 5 Final Pause [s]<br />
CY2 Cycle 2 parameters family.<br />
Ln2 5 Long Wash Phase [min]<br />
Sh2 29 Short Wash Phase [s]<br />
FP2 5 Final Pause [s]<br />
CY3 Cycle 3 parameters family.<br />
Ln3 8 Long Wash Phase [min]<br />
Sh3 29 Short Wash Phase [s]<br />
FP3 5 Final Pause [s]<br />
5. Switch OFF and then switch ON the machine.<br />
DOC. NO. 5956.446.06 ©Copyright 2005 by <strong>Electrolux</strong> Professional P.41/88
<strong>Electrolux</strong><br />
EFS – Dishwashing Systems Platform<br />
<strong>Electrolux</strong> Professional<br />
Electronic Dishwasher<br />
SERVICE MANUAL<br />
LS9 / WT 55 ATM Prog. 018<br />
1. Switch OFF and then switch ON the machine.<br />
2. CFG Enter into CFG parameter family and set the following parameters.<br />
tYP 0 Hood Type like working cycles.<br />
boi 0 Atmospheric boiler.<br />
doo 1 Manual Hood.<br />
dFL 1 Default values for Hood Type models.<br />
trc 0 (for this appliance SOFT START is NOT possible).<br />
b_t 1 Tank heater works only if boiler temperature reached.<br />
btF 75 Enable filling tank by means of rinsing cycles.<br />
LES 0 Detergent level switches not enabled.<br />
UI 9 Select user interface hood type model (up to version 3.11 set to 1).<br />
rE 0 Regeneration cycle disabled.<br />
ALr 1 Alarms enabled.<br />
3. Switch OFF and then switch ON the machine.<br />
4. Modify Factory parameters:<br />
FAC Enter into FAC parameter family and change boiler threshold.<br />
bt°C 82 Boiler Temperature Threshold.<br />
bAJ 0 Boiler Temperature Adjust.<br />
bSt 1 Booster Function.<br />
5. Modify the cycle parameters:<br />
CY2 Cycle 2 parameters family.<br />
Sh2 55 Short Wash Phase [s]<br />
CY3 Cycle 3 parameters family.<br />
Ln3 4 Long Wash Phase [min]<br />
dPA Set other parameters.<br />
IPA 5 Initial Pause [s]<br />
6. Switch OFF and then switch ON the machine.<br />
DOC. NO. 5956.446.06 ©Copyright 2005 by <strong>Electrolux</strong> Professional P.42/88
<strong>Electrolux</strong><br />
EFS – Dishwashing Systems Platform<br />
<strong>Electrolux</strong> Professional<br />
Electronic Dishwasher<br />
SERVICE MANUAL<br />
LS9 / WT55 PRESS Prog. 019<br />
1. Switch OFF and then switch ON the machine.<br />
2. CFG Enter into CFG parameter family and set the following parameters.<br />
tYP 0 Hood Type like working cycles.<br />
boi 1 Pressure boiler.<br />
doo 1 Manual Hood.<br />
dFL 1 Default values for Hood Type models.<br />
trc 0 (for this appliance SOFT START is NOT possible).<br />
b_t 1 Tank heater works only if boiler temperature reached.<br />
btF 0 The tank is filled into the traditional way.<br />
LES 0 Detergent level switches not enabled.<br />
UI 9 Select user interface hood type model (up to version 3.11 set to 1).<br />
rE 0 Regeneration cycle disabled.<br />
ALr 1 Alarms enabled.<br />
3. Switch OFF and then switch ON the machine.<br />
4. Modify Factory parameters:<br />
FAC Enter into FAC parameter family and change boiler threshold.<br />
bt°C 84 Boiler Temperature Threshold.<br />
bAJ 0 Boiler Temperature Adjust.<br />
bSt 1 Booster Function.<br />
5. Modify the cycle parameters:<br />
CY2 Cycle 2 parameters family.<br />
Sh2 55 Short Wash Phase [s]<br />
CY3 Cycle 3 parameters family.<br />
Ln3 4 Long Wash Phase [min]<br />
6. Switch OFF and then switch ON the machine.<br />
DOC. NO. 5956.446.06 ©Copyright 2005 by <strong>Electrolux</strong> Professional P.43/88
<strong>Electrolux</strong><br />
EFS – Dishwashing Systems Platform<br />
<strong>Electrolux</strong> Professional<br />
Electronic Dishwasher<br />
SERVICE MANUAL<br />
LS5 / WT 4 PRES Prog. 020<br />
1. Switch OFF and then switch ON the machine.<br />
2. CFG Enter into CFG parameter family and set the following parameters.<br />
tYP 0 Hood Type like working cycles.<br />
boi 1 Pressure boiler.<br />
doo 2 Front loading door type.<br />
dFL 3 Default values for Undercounter models.<br />
trc 1 SOFT START ENABLED.<br />
b_t 1 Tank heater works only if boiler temperature reached.<br />
btF 0 The tank is filled into the traditional way.<br />
LES 0 Detergent level switches not enabled.<br />
UI 15 Select user interface without display (up to version 3.11 set to 7).<br />
rE 0 Regeneration cycle enabled.<br />
ALr 0 ALARMS NOT ENABLED.<br />
3. Switch OFF and then switch ON the machine.<br />
4. Modify Factory parameters:<br />
FAC Enter into FAC parameter family.<br />
bt°C 84 Boiler Temperature Threshold.<br />
bAJ 3 Boiler Temperature Adjust.<br />
bSt 2 Booster Function.<br />
5. Modify the cycle parameters:<br />
CY3 Cycle 3 parameters family.<br />
Ln3 1 Long Wash Phase [min]<br />
Sh3 40 Short Wash Phase [s]<br />
6. Switch OFF and then switch ON the machine.<br />
7. Modify Detergent dosage:<br />
GEn Enter into GEn parameter family.<br />
dIn 165 Initial Detergent Dosage.<br />
rIn 0 Initial Rinse Aid Dosage.<br />
dEt 182 Detergent dispenser works when LOAD SOLENOID VALVE in activated.<br />
rAi 61 Rinse Aid dispenser works when LOAD SOLENOID VALVE in activated.<br />
8. Switch OFF and then switch ON the machine.<br />
DOC. NO. 5956.446.06 ©Copyright 2005 by <strong>Electrolux</strong> Professional P.44/88
<strong>Electrolux</strong><br />
EFS – Dishwashing Systems Platform<br />
<strong>Electrolux</strong> Professional<br />
Electronic Dishwasher<br />
SERVICE MANUAL<br />
LS5 / WT 4 PRES MONO Prog. 021<br />
1. Switch OFF and then switch ON the machine.<br />
2. CFG Enter into CFG parameter family and set the following parameters.<br />
tYP 0 Hood Type like working cycles.<br />
boi 1 Pressure boiler.<br />
doo 2 Front loading door type.<br />
dFL 3 Default values for Undercounter models.<br />
trc 0 (for this appliance SOFT START is NOT possible).<br />
b_t 1 Tank heater works only if boiler temperature reached.<br />
btF 0 The tank is filled into the traditional way.<br />
LES 0 Detergent level switches not enabled.<br />
UI 15 Select user interface without display (up to version 3.11 set to 7).<br />
rE 0 Regeneration cycle disabled.<br />
ALr 0 ALARMS NOT ENABLED.<br />
3. Switch OFF and then switch ON the machine.<br />
4. Modify Factory parameters:<br />
FAC Enter into FAC parameter family.<br />
bt°C 82 Boiler Temperature Threshold.<br />
bAJ 3 Boiler Temperature Adjust.<br />
bSt 2 Booster Function.<br />
5. Modify the cycle parameters:<br />
CY3 Cycle 3 parameters family.<br />
Ln3 1 Long Wash Phase [min]<br />
Sh3 40 Short Wash Phase [s]<br />
6. Switch OFF and then switch ON the machine.<br />
7. Modify Detergent dosage:<br />
GEn Enter into GEn parameter family.<br />
dIn 165 Initial Detergent Dosage.<br />
rIn 0 Initial Rinse Aid Dosage.<br />
dEt 182 Detergent dispenser works when LOAD SOLENOID VALVE in activated.<br />
rAi 61 Rinse Aid dispenser works when LOAD SOLENOID VALVE in activated.<br />
8. Switch OFF and then switch ON the machine.<br />
DOC. NO. 5956.446.06 ©Copyright 2005 by <strong>Electrolux</strong> Professional P.45/88
<strong>Electrolux</strong><br />
EFS – Dishwashing Systems Platform<br />
<strong>Electrolux</strong> Professional<br />
Electronic Dishwasher<br />
SERVICE MANUAL<br />
LB5G/WT4G Prog. 022<br />
1. Switch OFF and then switch ON the machine.<br />
2. CFG Enter into CFG parameter family and set the following parameters.<br />
tYP 0 Hood Type like working cycles.<br />
boi 0 Atmospheric boiler.<br />
doo 2 Front loading door type.<br />
dFL 3 Default values for Undercounter models.<br />
trc 0 (for this appliance SOFT START is NOT possible).<br />
b_t 1 Tank heater works only if boiler temperature reached.<br />
btF 0 The tank is filled into the traditional way.<br />
LES 0 Detergent level switches not enabled.<br />
UI 15 Select user interface for LS5 (up to version 3.11 set to 7).<br />
rE 0 Regeneration cycle disabled.<br />
ALr 1 ALARMS ENABLED.<br />
3. Switch OFF and then switch ON the machine.<br />
4. Modify Factory parameters:<br />
FAC Enter into FAC parameter family.<br />
bt°C 85 Boiler Temperature Threshold.<br />
bAJ 0 Boiler Temperature Adjust.<br />
bSt 2 Booster Function.<br />
5. Modify the cycle parameters:<br />
CY3 Cycle 3 parameters family.<br />
Ln3 1 Long Wash Phase [min]<br />
Sh3 40 Short Wash Phase [s]<br />
6. Switch OFF and then switch ON the machine.<br />
7. Modify Detergent dosage:<br />
GEn Enter into GEn parameter family.<br />
dIn 70 Initial Detergent Dosage [s].<br />
rIn 5 Initial Rinse Aid Dosage [s].<br />
8. Switch OFF and then switch ON the machine.<br />
ECOTEMP5 EAG Prog. 023<br />
1. Switch OFF and then switch ON the machine.<br />
2. CFG Enter into CFG parameter family and set the following parameters.<br />
tYP 0 Hood Type like working cycles.<br />
boi 0 Atmospheric boiler.<br />
doo 2 Front loading door type.<br />
dFL 3 Default values for Undercounter models.<br />
trc 1 SOFT START ENABLED.<br />
b_t 1 Tank heater works only if boiler temperature reached.<br />
btF 75 Enable filling tank by means of rinsing cycles.<br />
DOC. NO. 5956.446.06 ©Copyright 2005 by <strong>Electrolux</strong> Professional P.46/88
<strong>Electrolux</strong><br />
EFS – Dishwashing Systems Platform<br />
<strong>Electrolux</strong> Professional<br />
Electronic Dishwasher<br />
SERVICE MANUAL<br />
LES 0 Detergent level switches not enabled.<br />
UI 8 ACTIVE function disabled (up to version 3.11 set to 0).<br />
rE 0 Regeneration cycle disabled.<br />
ALr 1 ALARMS ENABLED.<br />
3. Switch OFF and then switch ON the machine.<br />
LS5WS / WT4WS MONO Prog. 024<br />
1. Switch OFF and then switch ON the machine.<br />
2. CFG Enter into CFG parameter family and set the following parameters.<br />
tYP 0 Hood Type like working cycles.<br />
boi 0 Atmospheric boiler.<br />
doo 2 Front loading door type.<br />
dFL 3 Default values for Undercounter models.<br />
trc 0 (for this appliance SOFT START is NOT possible).<br />
b_t 1 Tank heater works only if boiler temperature reached.<br />
btF 75 Enable filling tank by means of rinsing cycles.<br />
LES 0 Detergent level switches not enabled.<br />
UI 13 Select user interface for LS5 (up to version 3.11 set to 5).<br />
rE 1 Regeneration cycle enabled.<br />
ALr 1 ALARMS ENABLED.<br />
3. Switch OFF and then switch ON the machine.<br />
4. Modify Factory parameters:<br />
FAC Enter into FAC parameter family.<br />
bt°C<br />
bAJ<br />
bSt 2 Booster Function.<br />
83 Boiler Temperature Threshold.<br />
2 Boiler Temperature Adjust.<br />
5. Modify the cycle parameters:<br />
CY3 Cycle 3 parameters family.<br />
Ln3 1 Long Wash Phase [min]<br />
Sh3 40 Short Wash Phase [s]<br />
6. Switch OFF and then switch ON the machine.<br />
7. Modify Detergent dosage:<br />
GEn Enter into GEn parameter family.<br />
dIn<br />
rIn<br />
8. Cnt Counters<br />
rCy<br />
70 Initial Detergent Dosage [s].<br />
5 Initial Rinse Aid Dosage [s].<br />
20 Number of cycles allowed before regeneration.<br />
9. Switch OFF and then switch ON the machine.<br />
DOC. NO. 5956.446.06 ©Copyright 2005 by <strong>Electrolux</strong> Professional P.47/88
<strong>Electrolux</strong><br />
EFS – Dishwashing Systems Platform<br />
<strong>Electrolux</strong> Professional<br />
Electronic Dishwasher<br />
SERVICE MANUAL<br />
LS12 ECOTEMP (EUROPE) Prog. 025<br />
1. Switch OFF and then switch ON the machine.<br />
2. CFG Enter into CFG parameter family and set the following parameters.<br />
tYP 0 Hood Type like working cycles.<br />
boi 0 Atmospheric boiler.<br />
doo 1 Manual Hood.<br />
dFL 1 Default values for Hood Type models.<br />
trc 0 (for this appliance SOFT START is NOT possible).<br />
b_t 0 Tank and boiler heaters work simultaneously.<br />
btF 0 The tank is filled into the traditional way.<br />
LES 0 Detergent level switches not enabled.<br />
UI 9 Select user interface hood type model (up to version 3.11 set to 1).<br />
RE 0 Regeneration cycle disabled.<br />
ALr 1 ALARMS ENABLED.<br />
3. Switch OFF and then switch ON the machine.<br />
4. Modify Factory parameters:<br />
FAC Enter into FAC parameter family.<br />
bt°C 82 Boiler Temperature Threshold.<br />
bAJ 0 Boiler Temperature Adjust.<br />
5. Switch OFF and then switch ON the machine.<br />
DOC. NO. 5956.446.06 ©Copyright 2005 by <strong>Electrolux</strong> Professional P.48/88
<strong>Electrolux</strong><br />
EFS – Dishwashing Systems Platform<br />
<strong>Electrolux</strong> Professional<br />
Electronic Dishwasher<br />
SERVICE MANUAL<br />
LS12 ECOTEMP UK Prog. 026<br />
1. Switch OFF and then switch ON the machine.<br />
2. CFG Enter into CFG parameter family and set the following parameters.<br />
tYP 0 Hood Type like working cycles.<br />
boi 0 Atmospheric boiler.<br />
doo 1 Manual Hood.<br />
dFL 1 Default values for Hood Type models.<br />
trc 0 (for this appliance SOFT START is NOT possible).<br />
b_t 1 Tank heater works only if boiler temperature reached.<br />
btF 0 The tank is filled into the traditional way.<br />
LES 0 Detergent level switches not enabled.<br />
UI 9 Select user interface hood type model (up to version 3.11 set to 1).<br />
RE 0 Regeneration cycle disabled.<br />
ALr 1 ALARMS ENABLED.<br />
3. Switch OFF and then switch ON the machine.<br />
4. Modify Factory parameters:<br />
FAC Enter into FAC parameter family.<br />
bt°C 82 Boiler Temperature Threshold.<br />
bAJ 0 Boiler Temperature Adjust.<br />
5. Modify the cycle parameters:<br />
CY1 Cycle 1 parameters family.<br />
DR1 0 Drain [s]<br />
CY2 Cycle 2 parameters family.<br />
DR2 0 Drain [s]<br />
CY3 Cycle 3 parameters family.<br />
DR3 0 Drain [s]<br />
drn Drain parameters family.<br />
Idr 30 Initial Drain Phase Duration [s]<br />
dPA Set other parameters.<br />
Pdr 30 Drain Phase Duration at the end of washing phase. [s]<br />
6. Switch OFF and then switch ON the machine.<br />
DOC. NO. 5956.446.06 ©Copyright 2005 by <strong>Electrolux</strong> Professional P.49/88
<strong>Electrolux</strong><br />
EFS – Dishwashing Systems Platform<br />
<strong>Electrolux</strong> Professional<br />
Electronic Dishwasher<br />
SERVICE MANUAL<br />
LS6AH Prog. 027<br />
1. Switch OFF and then switch ON the machine.<br />
2. CFG Enter into CFG parameter family and set the following parameters.<br />
tYP 0 Hood Type like working cycles.<br />
boi 0 Atmospheric boiler.<br />
doo 2 Front loading door type.<br />
dFL 3 Default values for Undercounter models.<br />
trc 1 SOFT START ENABLED.<br />
b_t 1 Tank heater works only if boiler temperature reached.<br />
btF 75 Enable filling tank by means of rinsing cycles.<br />
LES 0 Detergent level switches not enabled.<br />
UI 9 Select user interface hood type model (up to version 3.11 set to 1).<br />
RE 0 Regeneration cycle disabled.<br />
ALr 1 ALARMS ENABLED.<br />
3. Switch OFF and then switch ON the machine.<br />
4. Modify Factory parameters:<br />
FAC Enter into FAC parameter family.<br />
bt°C 84 Boiler Temperature Threshold.<br />
bAJ 0 Boiler Temperature Adjust.<br />
btd 3 During stand-by boiler is kept at lower temperature than Temperature Threshold.<br />
tt°C 68 Tank Temperature Threshold.<br />
ttH 2 HISTERESIS of Tank Temperature.<br />
5. Modify the cycle parameters:<br />
CY1 Cycle 1 parameters family.<br />
Ln1 1 Long Wash Phase [min]<br />
Sh1 36 Short Wash Phase [s]<br />
FP1 4 Final Pause [s]<br />
CY2 Cycle 2 parameters family.<br />
Ln2 2 Long Wash Phase [min]<br />
Sh2 36 Short Wash Phase [s]<br />
FP2 4 Final Pause [s]<br />
CY3 Cycle 3 parameters family.<br />
Ln3 3 Long Wash Phase [min]<br />
Sh3 36 Short Wash Phase [s]<br />
FP3 4 Final Pause [s]<br />
dPA Set other parameters.<br />
C F 1 Fahrenheit.<br />
6. Switch OFF and then switch ON the machine.<br />
DOC. NO. 5956.446.06 ©Copyright 2005 by <strong>Electrolux</strong> Professional P.50/88
<strong>Electrolux</strong><br />
EFS – Dishwashing Systems Platform<br />
<strong>Electrolux</strong> Professional<br />
Electronic Dishwasher<br />
SERVICE MANUAL<br />
LS14AH / WT65H Prog. 028<br />
1. Switch OFF and then switch ON the machine.<br />
2. CFG Enter into CFG parameter family and set the following parameters.<br />
tYP 0 Hood Type like working cycles.<br />
boi 0 Atmospheric boiler.<br />
doo 1 Manual Hood.<br />
dFL 1 Default values for Hood Type models.<br />
trc 0 (for this appliance SOFT START is NOT possible).<br />
b_t 1 Tank heater works only if boiler temperature reached.<br />
btF 75 Enable filling tank by means of rinsing cycles.<br />
LES 0 Detergent level switches not enabled.<br />
UI 9 Select user interface hood type model (up to version 3.11 set to 1).<br />
RE 0 Regeneration cycle disabled.<br />
ALr 1 ALARMS ENABLED.<br />
3. Switch OFF and then switch ON the machine.<br />
4. Modify Factory parameters:<br />
FAC Enter into FAC parameter family.<br />
bt°C<br />
bAJ<br />
tt°C<br />
ttH<br />
84 Boiler Temperature Threshold.<br />
0 Boiler Temperature Adjust.<br />
68 Tank Temperature Threshold.<br />
2 HISTERESIS of Tank Temperature.<br />
5. Modify the cycle parameters:<br />
CY1 Cycle 1 parameters family.<br />
Sh1 37 Short Wash Phase [s]<br />
PA1 3 Pause [s]<br />
FP1 4 Final Pause [s]<br />
CY2 Cycle 2 parameters family.<br />
Sh2 46 Short Wash Phase [s]<br />
FP2 4 Final Pause [s]<br />
CY3 Cycle 3 parameters family.<br />
Sh3 36 Short Wash Phase [s]<br />
FP3 4 Final Pause [s]<br />
dPA Set other parameters.<br />
C F 1 Fahrenheit.<br />
6. Switch OFF and then switch ON the machine.<br />
DOC. NO. 5956.446.06 ©Copyright 2005 by <strong>Electrolux</strong> Professional P.51/88
<strong>Electrolux</strong><br />
EFS – Dishwashing Systems Platform<br />
<strong>Electrolux</strong> Professional<br />
Electronic Dishwasher<br />
SERVICE MANUAL<br />
H3300 Prog. 029<br />
1. Switch OFF and then switch ON the machine.<br />
2. CFG Enter into CFG parameter family and set the following parameters.<br />
tYP 0 Hood Type like working cycles.<br />
boi 0 Atmospheric boiler.<br />
doo 2 Front loading.<br />
dFL 3 Default values for Undercounter models.<br />
trc 1 SOFT START ENABLED.<br />
b_t 1 Tank heater works only if boiler temperature reached.<br />
btF 75 Enable filling tank by means of rinsing cycles.<br />
LES 0 Detergent level switches not enabled.<br />
UI 8 ACTIVE function disabled (up to version 3.11 set to 0).<br />
rE 0 Regeneration cycle disabled.<br />
ALr 1 Alarms enabled.<br />
3. Switch OFF and then switch ON the machine.<br />
DOC. NO. 5956.446.06 ©Copyright 2005 by <strong>Electrolux</strong> Professional P.52/88
<strong>Electrolux</strong><br />
EFS – Dishwashing Systems Platform<br />
<strong>Electrolux</strong> Professional<br />
Electronic Dishwasher<br />
SERVICE MANUAL<br />
H1310SANA Prog. 030<br />
1. Switch OFF and then switch ON the machine.<br />
2. CFG Enter into CFG parameter family and set the following parameters.<br />
tYP 0 Hood Type like working cycles.<br />
boi 0 Atmospheric boiler.<br />
doo 2 Front loading.<br />
dFL 3 Default values for Undercounter models.<br />
trc 1 SOFT START ENABLED.<br />
b_t 1 Tank heater works only if boiler temperature reached.<br />
btF 75 Enable filling tank by means of rinsing cycles.<br />
LES 0 Detergent level switches not enabled.<br />
UI 8 ACTIVE function disabled (up to version 3.11 set to 0).<br />
rE 0 Regeneration cycle disabled.<br />
ALr 1 Alarms enabled.<br />
3. Switch OFF and then switch ON the machine.<br />
4. Modify Factory parameters:<br />
FAC Enter into FAC parameter family and change boiler threshold.<br />
bt°C 90 Boiler Temperature Threshold.<br />
bHi 0 Disable boiler high Temperature alarm ( C 2 ).<br />
bAJ 0 Boiler Temperature Adjust.<br />
bSt 0 Booster function not needed.<br />
btd 10 During stand-by boiler is kept at lower temperature than Temperature Threshold.<br />
tt°C 65 Tub Temperature Threshold.<br />
tHi 85 Tank high Temperature limit.<br />
5. Modify the cycle parameters:<br />
CY1 Cycle 1 parameters family.<br />
Ln1 4 Long Wash Phase [min]<br />
Sh1 10 Short Wash Phase [s]<br />
ri1 35 Rinse Phase Duration [s]<br />
dr1 40 Drain [s]<br />
FP1 15 Final Pause at End of Cycle<br />
CY2 Cycle 2 parameters family.<br />
Ln2 6 Long Wash Phase [min]<br />
Sh2 10 Short Wash Phase [s]<br />
ri2 35 Rinse Phase Duration [s]<br />
dr2 40 Drain [s]<br />
FP2 15 Final Pause at End of Cycle<br />
CY3 Cycle 3 parameters family.<br />
Ln3 9 Long Wash Phase [min]<br />
Sh3 10 Short Wash Phase [s]<br />
ri3 35 Rinse Phase Duration [s]<br />
dr3 40 Drain [s]<br />
FP3 15 Final Pause at End of Cycle<br />
6. Switch OFF and then switch ON the machine.<br />
DOC. NO. 5956.446.06 ©Copyright 2005 by <strong>Electrolux</strong> Professional P.53/88
<strong>Electrolux</strong><br />
EFS – Dishwashing Systems Platform<br />
<strong>Electrolux</strong> Professional<br />
Electronic Dishwasher<br />
SERVICE MANUAL<br />
WT30H Prog. 031<br />
1. Switch OFF and then switch ON the machine.<br />
2. CFG Enter into CFG parameter family and set the following parameters.<br />
tYP 0 Hood Type like working cycles.<br />
boi 0 Atmospheric boiler.<br />
doo 2 Front loading door type.<br />
dFL 3 Default values for Undercounter models.<br />
trc 1 SOFT START ENABLED.<br />
b_t 1 Tank heater works only if boiler temperature reached.<br />
btF 75 Enable filling tank by means of rinsing cycles.<br />
LES 0 Detergent level switches not enabled.<br />
UI 8 ACTIVE function disabled (up to version 3.11 set to 0).<br />
RE 0 Regeneration cycle disabled.<br />
ALr 1 ALARMS ENABLED.<br />
3. Switch OFF and then switch ON the machine.<br />
4. Modify Factory parameters:<br />
FAC Enter into FAC parameter family.<br />
bt°C 84 Boiler Temperature Threshold.<br />
bAJ 0 Boiler Temperature Adjust.<br />
btd 3 During stand-by boiler is kept at lower temperature than Temperature Threshold.<br />
tt°C 68 Tank Temperature Threshold.<br />
ttH 2 HISTERESIS of Tank Temperature.<br />
5. Modify the cycle parameters:<br />
CY1 Cycle 1 parameters family.<br />
Ln1 1 Long Wash Phase [min]<br />
Sh1 36 Short Wash Phase [s]<br />
FP1 4 Final Pause [s]<br />
CY2 Cycle 2 parameters family.<br />
Ln2 2 Long Wash Phase [min]<br />
Sh2 36 Short Wash Phase [s]<br />
FP2 4 Final Pause [s]<br />
CY3 Cycle 3 parameters family.<br />
Ln3 3 Long Wash Phase [min]<br />
Sh3 36 Short Wash Phase [s]<br />
FP3 4 Final Pause [s]<br />
dPA Set other parameters.<br />
C F 1 Fahrenheit.<br />
6. Switch OFF and then switch ON the machine.<br />
DOC. NO. 5956.446.06 ©Copyright 2005 by <strong>Electrolux</strong> Professional P.54/88
<strong>Electrolux</strong><br />
EFS – Dishwashing Systems Platform<br />
<strong>Electrolux</strong> Professional<br />
Electronic Dishwasher<br />
SERVICE MANUAL<br />
WT38 MED Prog. 032<br />
1. Switch OFF and then switch ON the machine.<br />
2. CFG Enter into CFG parameter family and set the following parameters.<br />
tYP 3 Medical line dishwasher with lock door/hood device.<br />
boi 0 Atmospheric boiler.<br />
doo 2 Front loading.<br />
dFL 3 Default values for Undercounter models.<br />
trc 1 SOFT START ENABLED.<br />
b_t 1 Tank heater works only if boiler temperature reached.<br />
btF 75 Enable filling tank by means of rinsing cycles.<br />
LES 0 Detergent level switches not enabled.<br />
UI 8 ACTIVE function disabled (up to version 3.11 set to 0).<br />
rE 0 Regeneration cycle disabled.<br />
ALr 1 Alarms enabled.<br />
3. Switch OFF and then switch ON the machine.<br />
4. Modify Factory parameters:<br />
FAC Enter into FAC parameter family and change boiler threshold.<br />
bt°C 92 Boiler Temperature Threshold.<br />
bHi 0 Disable boiler high Temperature alarm ( C 2 ).<br />
bAJ 0 Boiler Temperature Adjust.<br />
bSt 0 Booster function not needed.<br />
btd<br />
tt°C 65 Tub Temperature Threshold.<br />
tHi 85 Tank high Temperature limit.<br />
5. Modify the cycle parameters:<br />
CY1 Cycle 1 parameters family.<br />
Ln1 3 Long Wash Phase [min]<br />
Sh1 35 Short Wash Phase [s]<br />
pAI 5 Pause [s]<br />
ri1 35 Rinse Phase Duration [s]<br />
dr1 40 Drain [s]<br />
FP1 60 Final Pause at End of Cycle [s].<br />
CY2 Cycle 2 parameters family.<br />
Ln2 6 Long Wash Phase [min]<br />
Sh2 35 Short Wash Phase [s]<br />
pA2 5 Pause [s]<br />
ri2 35 Rinse Phase Duration [s]<br />
dr2 40 Drain [s]<br />
FP2 60 Final Pause at End of Cycle[s].<br />
10 During stand-by boiler is kept at lower temperature than Temperature Threshold.<br />
DOC. NO. 5956.446.06 ©Copyright 2005 by <strong>Electrolux</strong> Professional P.55/88
<strong>Electrolux</strong><br />
EFS – Dishwashing Systems Platform<br />
<strong>Electrolux</strong> Professional<br />
Electronic Dishwasher<br />
SERVICE MANUAL<br />
WT38 MED Prog. 032<br />
CY3 Cycle 3 parameters family.<br />
Ln3 8 Long Wash Phase [min]<br />
Sh3 35 Short Wash Phase [s]<br />
pA3 5 Pause [s]<br />
ri3 35 Rinse Phase Duration [s]<br />
dr3 40 Drain [s]<br />
FP3<br />
dPA Set other parameters.<br />
rPA<br />
6. Switch OFF and then switch ON the machine.<br />
60 Final Pause at End of Cycle [s].<br />
45 Duration of pause after the rinse cycle [s].<br />
LS6MCD Prog. 033<br />
1. Switch OFF and then switch ON the machine.<br />
2. CFG Enter into CFG parameter family and set the following parameters.<br />
tYP 0 Hood Type like working cycles.<br />
boi 0 Atmospheric boiler.<br />
doo 2 Front loading.<br />
dFL 3 Default values for Undercounter models.<br />
trc 1 SOFT START ENABLED.<br />
b_t 1 Tank heater works only if boiler temperature reached.<br />
btF 75 Enable filling tank by means of rinsing cycles.<br />
LES 1 Detergent level switches enabled.<br />
UI 9 Select user interface hood type model (up to version 3.11 set to 1).<br />
rE 0 Regeneration cycle disabled.<br />
ALr 1 Alarms enabled.<br />
3. Switch OFF and then switch ON the machine.<br />
DOC. NO. 5956.446.06 ©Copyright 2005 by <strong>Electrolux</strong> Professional P.56/88
<strong>Electrolux</strong><br />
EFS – Dishwashing Systems Platform<br />
<strong>Electrolux</strong> Professional<br />
Electronic Dishwasher<br />
SERVICE MANUAL<br />
WT30M Prog. 034<br />
1. Switch OFF and then switch ON the machine.<br />
2. CFG Enter into CFG parameter family and set the following parameters.<br />
tYP 3 Medical line dishwasher with lock door/hood device.<br />
boi 0 Atmospheric boiler.<br />
doo 1 Manual Hood.<br />
dFL 1 Default values for Hood Type models.<br />
trc 0 (for this appliance SOFT START is NOT possible).<br />
b_t 1 Tank heater works only if boiler temperature reached.<br />
btF 75 Enable filling tank by means of rinsing cycles.<br />
LES 0 Detergent level switches not enabled.<br />
UI 8 ACTIVE function disabled (up to version 3.11 set to 0).<br />
rE 0 Regeneration cycle disabled.<br />
ALr 1 Alarms enabled.<br />
3. Switch OFF and then switch ON the machine.<br />
4. Modify Factory parameters:<br />
FAC Enter into FAC parameter family and change boiler threshold.<br />
bt°C 92 Boiler Temperature Threshold.<br />
bHi 0 Disable boiler high Temperature alarm ( C 2 ).<br />
bAJ 0 Boiler Temperature Adjust.<br />
bSt 0 Booster function not needed.<br />
btd<br />
tt°C 65 Tub Temperature Threshold.<br />
tHi 85 Tank high Temperature limit.<br />
5. Modify the cycle parameters:<br />
CY1 Cycle 1 parameters family.<br />
Ln1 3 Long Wash Phase [min]<br />
Sh1 35 Short Wash Phase [s]<br />
pAI 5 Pause [s]<br />
ri1 35 Rinse Phase Duration [s]<br />
dr1 40 Drain [s]<br />
FP1 60 Final Pause at End of Cycle [s].<br />
CY2 Cycle 2 parameters family.<br />
Ln2 6 Long Wash Phase [min]<br />
Sh2 35 Short Wash Phase [s]<br />
pA2 5 Pause [s]<br />
ri2 35 Rinse Phase Duration [s]<br />
dr2 40 Drain [s]<br />
FP2 60 Final Pause at End of Cycle[s].<br />
10 During stand-by boiler is kept at lower temperature than Temperature Threshold.<br />
DOC. NO. 5956.446.06 ©Copyright 2005 by <strong>Electrolux</strong> Professional P.57/88
<strong>Electrolux</strong><br />
EFS – Dishwashing Systems Platform<br />
<strong>Electrolux</strong> Professional<br />
Electronic Dishwasher<br />
SERVICE MANUAL<br />
WT30M Prog. 034<br />
CY3<br />
dPA<br />
Cycle 3 parameters family.<br />
Ln3<br />
Sh3<br />
pA3 5 Pause [s]<br />
ri3<br />
dr3 40 Drain [s]<br />
FP3<br />
8 Long Wash Phase [min]<br />
35 Short Wash Phase [s]<br />
35 Rinse Phase Duration [s]<br />
60 Final Pause at End of Cycle [s].<br />
Set other parameters.<br />
rPA<br />
C F<br />
45 Duration of pause after the rinse cycle [s].<br />
1 Fahrenheit.<br />
6. Switch OFF and then switch ON the machine.<br />
WT65M Prog. 035<br />
1. Switch OFF and then switch ON the machine.<br />
2. CFG Enter into CFG parameter family and set the following parameters.<br />
tYP 3 Medical line dishwasher with lock door/hood device.<br />
boi 0 Atmospheric boiler.<br />
doo 1 Front loading.<br />
dFL 3 Default values for Undercounter models.<br />
trc 1 SOFT START ENABLED.<br />
b_t 1 Tank heater works only if boiler temperature reached.<br />
btF 75 Enable filling tank by means of rinsing cycles.<br />
LES 0 Detergent level switches not enabled.<br />
UI 9 Select user interface hood type model (up to version 3.11 set to 1).<br />
rE 0 Regeneration cycle disabled.<br />
ALr 1 Alarms enabled.<br />
3. Switch OFF and then switch ON the machine.<br />
4. Modify Factory parameters:<br />
FAC Enter into FAC parameter family and change boiler threshold.<br />
bt°C 92 Boiler Temperature Threshold.<br />
bHi 0 Disable boiler high Temperature alarm ( C 2 ).<br />
bAJ 0 Boiler Temperature Adjust.<br />
bSt 0 Booster function not needed.<br />
btd<br />
tt°C 65 Tub Temperature Threshold.<br />
tHi 85 Tank high Temperature limit.<br />
10 During stand-by boiler is kept at lower temperature than Temperature Threshold.<br />
DOC. NO. 5956.446.06 ©Copyright 2005 by <strong>Electrolux</strong> Professional P.58/88
<strong>Electrolux</strong><br />
EFS – Dishwashing Systems Platform<br />
<strong>Electrolux</strong> Professional<br />
Electronic Dishwasher<br />
SERVICE MANUAL<br />
WT65M Prog. 035<br />
5. Modify the cycle parameters:<br />
CY1 Cycle 1 parameters family.<br />
Ln1 3 Long Wash Phase [min]<br />
Sh1 35 Short Wash Phase [s]<br />
pAI 5 Pause [s]<br />
ri1 35 Rinse Phase Duration [s]<br />
dr1 40 Drain [s]<br />
FP1<br />
CY2 Cycle 2 parameters family.<br />
Ln2 6 Long Wash Phase [min]<br />
Sh2 35 Short Wash Phase [s]<br />
pA2 5 Pause [s]<br />
ri2 35 Rinse Phase Duration [s]<br />
dr2 40 Drain [s]<br />
FP2<br />
CY3 Cycle 3 parameters family.<br />
Ln3 8 Long Wash Phase [min]<br />
Sh3 35 Short Wash Phase [s]<br />
pA3 5 Pause [s]<br />
ri3 35 Rinse Phase Duration [s]<br />
dr3 40 Drain [s]<br />
FP3<br />
dPA Set other parameters.<br />
rPA<br />
C F 1 Fahrenheit.<br />
6. Switch OFF and then switch ON the machine.<br />
60 Final Pause at End of Cycle [s].<br />
60 Final Pause at End of Cycle[s].<br />
60 Final Pause at End of Cycle [s].<br />
45 Duration of pause after the rinse cycle [s].<br />
DOC. NO. 5956.446.06 ©Copyright 2005 by <strong>Electrolux</strong> Professional P.59/88
<strong>Electrolux</strong><br />
EFS – Dishwashing Systems Platform<br />
<strong>Electrolux</strong> Professional<br />
Electronic Dishwasher<br />
SERVICE MANUAL<br />
LS5/1DPAUS Prog. 036<br />
1. Switch OFF and then switch ON the machine.<br />
2. CFG Enter into CFG parameter family and set the following parameters.<br />
tYP 0 Hood Type like working cycles.<br />
boi 1 Pressure boiler.<br />
doo 2 Front loading door type.<br />
dFL 3 Default values for Undercounter models.<br />
trc 0 (for this appliance SOFT START is NOT possible).<br />
b_t 1 Tank heater works only if boiler temperature reached.<br />
btF 0 The tank is filled into the traditional way.<br />
LES 0 Detergent level switches not enabled.<br />
UI 13 Select user interface for LS5 (up to version 3.11 set to 5).<br />
rE 0 Regeneration cycle disabled.<br />
ALr 0 ALARMS NOT ENABLED.<br />
3. Switch OFF and then switch ON the machine.<br />
4. Modify Factory parameters:<br />
FAC Enter into FAC parameter family.<br />
bt°C<br />
bAJ<br />
bSt 2 Booster Function.<br />
82 Boiler Temperature Threshold.<br />
3 Boiler Temperature Adjust.<br />
5. Modify the cycle parameters:<br />
CY3 Cycle 3 parameters family.<br />
Ln3 1 Long Wash Phase [min]<br />
Sh3 40 Short Wash Phase [s]<br />
6. Switch OFF and then switch ON the machine.<br />
7. Modify Detergent dosage:<br />
GEn Enter into GEn parameter family.<br />
dIn 165 Initial Detergent Dosage.<br />
rIn 0 Initial Rinse Aid Dosage.<br />
dEt 182 Detergent dispenser works when LOAD SOLENOID VALVE in activated.<br />
rAi 61 Rinse Aid dispenser works when LOAD SOLENOID VALVE in activated.<br />
8. Switch OFF and then switch ON the machine.<br />
DOC. NO. 5956.446.06 ©Copyright 2005 by <strong>Electrolux</strong> Professional P.60/88
<strong>Electrolux</strong><br />
EFS – Dishwashing Systems Platform<br />
<strong>Electrolux</strong> Professional<br />
Electronic Dishwasher<br />
SERVICE MANUAL<br />
PW1-PW2 / WT830 -WT850 USA Prog. 037<br />
1. Switch OFF and then switch ON the machine.<br />
2. CFG Enter into CFG parameter family and set the following parameters.<br />
tYP 1 Pot Washer.<br />
boi 0 Atmospheric boiler.<br />
doo 2 Front loading function.<br />
dFL 2 Default values for Pot Washer models.<br />
trc 0 (for this appliance SOFT START is NOT possible).<br />
b_t 1 Tank heater works only if boiler temperature reached.<br />
btF 0 The tank is filled into the traditional way.<br />
LES 0 Detergent level switches not enabled.<br />
UI 9 Select user interface hood type model (up to version 3.11 set to 1).<br />
rE 0 Regeneration cycle disabled.<br />
ALr 1 Alarms enabled.<br />
3. Switch OFF and then switch ON the machine.<br />
4. Modify Factory parameters:<br />
FAC Enter into FAC parameter family.<br />
bt°C<br />
bHi<br />
bAJ 0 Boiler Temperature Adjust.<br />
tt°C<br />
ttH<br />
tHi<br />
84 Boiler Temperature threshold.<br />
98 Boiler Temperature high limit.<br />
70 Tub Temperature Threshold.<br />
2 HISTERESIS of Tank Temperature.<br />
80 Tank high Temperature limit.<br />
5. Modify the cycle parameters:<br />
CY1 Cycle 1 parameters family.<br />
Ln1 5 Long Wash Phase [min]<br />
Sh1 11 Short Wash Phase [s]<br />
ri1 23 Rinse Phase Duration [s]<br />
FP1 20 Final Pause at End of Cycle [s].<br />
CY2 Cycle 2 parameters family.<br />
Ln2 9 Long Wash Phase [min]<br />
Sh2 11 Short Wash Phase [s]<br />
ri2 23 Rinse Phase Duration [s]<br />
FP2 20 Final Pause at End of Cycle [s].<br />
CY3 Cycle 3 parameters family.<br />
Ln3 14 Long Wash Phase [min]<br />
Sh3 11 Short Wash Phase [s]<br />
ri3 23 Rinse Phase Duration [s]<br />
FP3 20 Final Pause at End of Cycle [s].<br />
dPA Set other parameters.<br />
C F 1 Fahrenheit.<br />
6. Switch OFF and then switch ON the machine.<br />
DOC. NO. 5956.446.06 ©Copyright 2005 by <strong>Electrolux</strong> Professional P.61/88
<strong>Electrolux</strong><br />
EFS – Dishwashing Systems Platform<br />
<strong>Electrolux</strong> Professional<br />
Electronic Dishwasher<br />
SERVICE MANUAL<br />
WT30C (Café Line) Prog. 038<br />
1. Switch OFF and then switch ON the machine.<br />
2. CFG Enter into CFG parameter family and set the following parameters.<br />
tYP 0 Hood Type like working cycles.<br />
boi 0 Atmospheric boiler.<br />
doo 2 Front loading door type.<br />
dFL 3 Default values for Undercounter models.<br />
trc 1 SOFT START ENABLED.<br />
b_t 1 Tank heater works only if boiler temperature reached.<br />
btF 75 Enable filling tank by means of rinsing cycles.<br />
LES 1 Detergent level switches enabled.<br />
UI 9 Select user interface hood type model (up to version 3.11 set to 1).<br />
RE 0 Regeneration cycle disabled.<br />
ALr 1 ALARMS ENABLED.<br />
3. Switch OFF and then switch ON the machine.<br />
4. Modify Factory parameters:<br />
FAC Enter into FAC parameter family.<br />
bt°C 84 Boiler Temperature Threshold.<br />
bAJ 0 Boiler Temperature Adjust.<br />
btd 3 During stand-by boiler is kept at lower temperature than Temperature Threshold.<br />
tt°C 68 Tank Temperature Threshold.<br />
ttH 2 HISTERESIS of Tank Temperature.<br />
5. Modify the cycle parameters:<br />
CY1 Cycle 1 parameters family.<br />
Ln1 1 Long Wash Phase [min]<br />
Sh1 36 Short Wash Phase [s]<br />
FP1 4 Final Pause [s]<br />
CY2 Cycle 2 parameters family.<br />
Ln2 2 Long Wash Phase [min]<br />
Sh2 36 Short Wash Phase [s]<br />
FP2 4 Final Pause [s]<br />
CY3 Cycle 3 parameters family.<br />
Ln3 3 Long Wash Phase [min]<br />
Sh3 36 Short Wash Phase [s]<br />
FP3 4 Final Pause [s]<br />
dPA Set other parameters.<br />
C F 1 Fahrenheit.<br />
6. Switch OFF and then switch ON the machine.<br />
DOC. NO. 5956.446.06 ©Copyright 2005 by <strong>Electrolux</strong> Professional P.62/88
<strong>Electrolux</strong><br />
EFS – Dishwashing Systems Platform<br />
<strong>Electrolux</strong> Professional<br />
Electronic Dishwasher<br />
SERVICE MANUAL<br />
WT38PM50 / WT38PM60 Prog. 039<br />
1. Switch OFF and then switch ON the machine.<br />
2. CFG Enter into CFG parameter family and set the following parameters.<br />
tYP 0 Hood Type like working cycles.<br />
boi 1 Pressure boiler.<br />
doo 2 Front loading.<br />
dFL 3 Default values for Undercounter models.<br />
trc 0 (for this appliance SOFT START is NOT possible).<br />
b_t 1 Tank heater works only if boiler temperature reached.<br />
btF 75 Enable filling tank by means of rinsing cycles.<br />
LES 0 Detergent level switches not enabled.<br />
UI 8 ACTIVE function disabled (up to version 3.11 set to 0).<br />
rE 0 Regeneration cycle disabled.<br />
ALr 1 Alarms enabled.<br />
3. Switch OFF and then switch ON the machine.<br />
4. Modify Factory parameters:<br />
FAC Enter into FAC parameter family and change boiler threshold.<br />
bt°C 90 Boiler Temperature Threshold.<br />
btd 10 During stand-by boiler is kept at lower temperature than Temperature Threshold.<br />
bSt 0 Booster Function not necessary.<br />
tt°C 66 Tank Temperature Threshold.<br />
tHi 85 High limit for tank temperature.<br />
5. Modify the cycle parameters:<br />
CY1 Cycle 1 parameters family.<br />
Ln1 1<br />
Sh1 22<br />
ri1 25<br />
dr1 40 Drain [s]<br />
FP1 4 Final Pause [s]<br />
CY2 Cycle 2 parameters family.<br />
Ln2 2<br />
Sh2 22<br />
ri2 25<br />
dr2 40 Drain [s]<br />
FP2 4 Final Pause [s]<br />
CY3 Cycle 3 parameters family.<br />
Ln3 4<br />
Sh3 22<br />
ri3 25<br />
dr3 40 Drain [s]<br />
FP3 4 Final Pause [s]<br />
Long Wash Phase [min]<br />
Short Wash Phase [s]<br />
Rinse Phase Duration [s]<br />
Long Wash Phase [min]<br />
Short Wash Phase [s]<br />
Rinse Phase Duration [s]<br />
Long Wash Phase [min]<br />
Short Wash Phase [s]<br />
Rinse Phase Duration [s]<br />
DOC. NO. 5956.446.06 ©Copyright 2005 by <strong>Electrolux</strong> Professional P.63/88
<strong>Electrolux</strong><br />
EFS – Dishwashing Systems Platform<br />
<strong>Electrolux</strong> Professional<br />
Electronic Dishwasher<br />
SERVICE MANUAL<br />
WT38PM50 / WT38PM60 Prog. 039<br />
drn Drain parameters family.<br />
Idr 30<br />
dPA Set other parameters.<br />
IPA 5 Initial Pause [s]<br />
6. Switch OFF and then switch ON the machine.<br />
Initial Drain Phase Duration [s]<br />
LU7P / LU700P / WTU40P Prog. 040<br />
1. Switch OFF and then switch ON the machine.<br />
2. CFG Enter into CFG parameter family and set the following parameters.<br />
tYP 0 Hood Type like working cycles.<br />
boi 1 Pressure boiler.<br />
doo 2 Front loading.<br />
dFL 1 Default values for Hood Type models.<br />
trc 3 SLOW SOFT START ENABLED<br />
b_t 1 Tank heater works only if boiler temperature reached.<br />
btF 0 The tank is filled into the traditional way.<br />
LES 0 Detergent level switches not enabled.<br />
UI 8 ACTIVE function disabled (up to version 3.11 set to 0).<br />
rE 0 Regeneration cycle disabled.<br />
ALr 1 Alarms enabled.<br />
3. Switch OFF and then switch ON the machine.<br />
4. Modify Factory parameters:<br />
FAC Enter into FAC parameter family and change boiler threshold.<br />
bt°C 84 Boiler Temperature Threshold.<br />
bAJ 0 Boiler Temperature Adjust.<br />
bSt 1 Booster Function.<br />
5. Modify the cycle parameters:<br />
CY2 Cycle 2 parameters family.<br />
Ln2 1 Long Wash Phase [min]<br />
Sh2 10 Short Wash Phase [s]<br />
CY3 Cycle 3 parameters family.<br />
Ln3 4 Long Wash Phase [min]<br />
6. Switch OFF and then switch ON the machine.<br />
DOC. NO. 5956.446.06 ©Copyright 2005 by <strong>Electrolux</strong> Professional P.64/88
<strong>Electrolux</strong><br />
EFS – Dishwashing Systems Platform<br />
<strong>Electrolux</strong> Professional<br />
Electronic Dishwasher<br />
SERVICE MANUAL<br />
LU7A Prog. 041<br />
1. Switch OFF and then switch ON the machine.<br />
2. CFG Enter into CFG parameter family and set the following parameters.<br />
tYP 0 Hood Type like working cycles.<br />
boi 0 Atmospheric boiler.<br />
doo 2 Front loading.<br />
dFL 1 Default values for Hood Type models.<br />
trc 3 SLOW SOFT START ENABLED<br />
b_t 1 Tank heater works only if boiler temperature reached.<br />
btF 75 Enable filling tank by means of rinsing cycles.<br />
LES 0 Detergent level switches not enabled.<br />
UI 9 Select user interface hood type model (up to version 3.11 set to 1).<br />
rE 0 Regeneration cycle disabled.<br />
ALr 1 Alarms enabled.<br />
3. Switch OFF and then switch ON the machine.<br />
4. Modify Factory parameters:<br />
FAC Enter into FAC parameter family and change boiler threshold.<br />
bt°C 82 Boiler Temperature Threshold.<br />
bAJ 0 Boiler Temperature Adjust.<br />
bSt 1 Booster Function.<br />
5. Modify the cycle parameters:<br />
CY2 Cycle 2 parameters family.<br />
Ln2 1 Long Wash Phase [min]<br />
Sh2 10 Short Wash Phase [s]<br />
CY3 Cycle 3 parameters family.<br />
Ln3 4 Long Wash Phase [min]<br />
6. Switch OFF and then switch ON the machine.<br />
DOC. NO. 5956.446.06 ©Copyright 2005 by <strong>Electrolux</strong> Professional P.65/88
<strong>Electrolux</strong><br />
EFS – Dishwashing Systems Platform<br />
<strong>Electrolux</strong> Professional<br />
Electronic Dishwasher<br />
SERVICE MANUAL<br />
LS14WS / WT65WS Prog. 042<br />
1. Switch OFF and then switch ON the machine.<br />
2. CFG Enter into CFG parameter family and set the following parameters.<br />
tYP 0 Hood Type like working cycles.<br />
boi 0 Atmospheric boiler.<br />
doo 1 Manual Hood.<br />
dFL 1 Default values for Hood Type models.<br />
trc 0 (for this appliance SOFT START is NOT possible).<br />
b_t 1 Tank heater works only if boiler temperature reached.<br />
btF 75 Enable filling tank by means of rinsing cycles.<br />
LES 0 Detergent level switches not enabled.<br />
UI 9 Select user interface hood type model (up to version 3.11 set to 1).<br />
rE<br />
ALr 1 Alarms enabled.<br />
0 Regeneration cycle disabled (only for dishwashers with non-continuous water softener).<br />
3. Switch OFF and then switch ON the machine.<br />
4. Modify Factory parameters:<br />
FAC Factory parameters family<br />
bt°C 78 Boiler Temperature Threshold.<br />
5. Modify Communication and HACCP parameters:<br />
HCP Enter into HCP parameter family and set the following parameters.<br />
sEr 9 Dishwasher with incorporated continuous water softener.<br />
6. Switch OFF and then switch ON the machine.<br />
WT65MEDWS Prog. 043<br />
1. Switch OFF and then switch ON the machine.<br />
2. CFG Enter into CFG parameter family and set the following parameters:<br />
tYP 0 Hood Type like working cycles.<br />
boi 0 Atmospheric boiler.<br />
doo 0 Automatic Hood.<br />
dFL 1 Default values for Hood Type models.<br />
trc 0 (for this appliance SOFT START is NOT possible).<br />
b_t 1 Tank heater works only if boiler temperature reached.<br />
btF 75 Enable filling tank by means of rinsing cycles.<br />
LES 0 Detergent level switches not enabled.<br />
UI 9 Select user interface hood type model (up to version 3.11 set to 1).<br />
rE 0 Regeneration cycle disabled (only for dishwashers with non-continuous water softener).<br />
ALr 1 Alarms enabled.<br />
3. Switch OFF and then switch ON the machine.<br />
DOC. NO. 5956.446.06 ©Copyright 2005 by <strong>Electrolux</strong> Professional P.66/88
<strong>Electrolux</strong><br />
EFS – Dishwashing Systems Platform<br />
<strong>Electrolux</strong> Professional<br />
Electronic Dishwasher<br />
SERVICE MANUAL<br />
WT65MEDWS Prog. 043<br />
4. Modify Factory parameters:<br />
FAC Factory parameters family<br />
bt°C 90 Boiler Temperature Threshold.<br />
bHi 0 Disable boiler high Temperature alarm ( C 2 ).<br />
bAJ 0 Boiler Temperature Adjust.<br />
bSt 0 Booster Function.<br />
tHi 85 Tank high Temperature limit.<br />
5. Modify the cycle parameters:<br />
CY1 Cycle 1 parameters family.<br />
Ln1 2 Long Wash Phase [min]<br />
Sh1 32 Short Wash Phase [s]<br />
ri1 35 Rinse Phase Duration [s]<br />
dr1 40 Drain [s]<br />
FP1 15 Final Pause [s]<br />
CY2 Cycle 2 parameters family.<br />
Ln2 3 Long Wash Phase [min]<br />
Sh2 32 Short Wash Phase [s]<br />
ri2 35 Rinse Phase Duration [s]<br />
dr2 40 Drain [s]<br />
FP2 15 Final Pause [s]<br />
CY3 Cycle 3 parameters family.<br />
Ln3 5 Long Wash Phase [min]<br />
Sh3 32 Short Wash Phase [s]<br />
ri3 35 Rinse Phase Duration [s]<br />
dr3 40 Drain [s]<br />
FP3 15 Final Pause [s]<br />
dPA Set other parameters.<br />
IPA 4 Initial Pause [s]<br />
6. Modify Communication and HACCP parameters:<br />
HCP Enter into HCP parameter family and set the following parameters.<br />
sEr 9 Dishwasher with incorporated continuous water softener.<br />
7. Switch OFF and then switch ON the machine.<br />
DOC. NO. 5956.446.06 ©Copyright 2005 by <strong>Electrolux</strong> Professional P.67/88
<strong>Electrolux</strong><br />
EFS – Dishwashing Systems Platform<br />
<strong>Electrolux</strong> Professional<br />
Electronic Dishwasher<br />
SERVICE MANUAL<br />
LS6WS Prog. 044<br />
1. Switch OFF and then switch ON the machine.<br />
2. CFG Enter into CFG parameter family and set the following parameters.<br />
tYP 0 Undercounter like working cycles.<br />
boi 0 Atmospheric boiler.<br />
doo 2 Front loading.<br />
dFL 3 Default values for Undercounter models.<br />
trc 1 SOFT START ENABLED.<br />
b_t 1 Tank heater works only if boiler temperature reached.<br />
btF 75 Enable filling tank by means of rinsing cycles.<br />
LES 0 Detergent level switches not enabled.<br />
UI 9 Select user interface hood type model (up to version 3.11 set to 1).<br />
rE<br />
ALr 1 Alarms enabled.<br />
0 Regeneration cycle disabled (only for dishwashers with non-continuous water softener).<br />
3. Modify Communication and HACCP parameters:<br />
HCP Enter into HCP parameter family and set the following parameters.<br />
sEr 9 Dishwasher with incorporated continuous water softener.<br />
4. Switch OFF and then switch ON the machine.<br />
WT38MEDWS Prog. 045<br />
1. Switch OFF and then switch ON the machine.<br />
2. CFG Enter into CFG parameter family and set the following parameters.<br />
tYP 0 Under counter like working cycles.<br />
boi 0 Atmospheric boiler.<br />
doo 2 Front loading.<br />
dFL 3 Default values for Undercounter models.<br />
trc 1 SOFT START ENABLED.<br />
b_t 1 Tank heater works only if boiler temperature reached.<br />
btF 75 Enable filling tank by means of rinsing cycles.<br />
LES 0 Detergent level switches not enabled.<br />
UI 8 ACTIVE function disabled (up to version 3.11 set to 0).<br />
rE<br />
ALr 1 Alarms enabled.<br />
3. Switch OFF and then switch ON the machine.<br />
0 Regeneration cycle disabled (only for dishwashers with non-continuous water softener).<br />
DOC. NO. 5956.446.06 ©Copyright 2005 by <strong>Electrolux</strong> Professional P.68/88
<strong>Electrolux</strong><br />
EFS – Dishwashing Systems Platform<br />
<strong>Electrolux</strong> Professional<br />
Electronic Dishwasher<br />
SERVICE MANUAL<br />
WT38MEDWS Prog. 045<br />
4. Modify Factory parameters:<br />
FAC Enter into FAC parameter family and change boiler threshold.<br />
bt°C 90 Boiler Temperature Threshold.<br />
bHi 0 Disable boiler high Temperature alarm ( C 2 ).<br />
bAJ 0 Boiler Temperature Adjust.<br />
bSt 0 Booster function not needed.<br />
btd<br />
tt°C 65 Tub Temperature Threshold.<br />
tHi 85 Tank high Temperature limit.<br />
5. Modify the cycle parameters:<br />
CY1 Cycle 1 parameters family.<br />
Ln1 4 Long Wash Phase [min]<br />
Sh1 10 Short Wash Phase [s]<br />
ri1 35 Rinse Phase Duration [s]<br />
dr1 40 Drain [s]<br />
FP1 15 Final Pause at End of Cycle<br />
CY2 Cycle 2 parameters family.<br />
Ln2 6 Long Wash Phase [min]<br />
Sh2 10 Short Wash Phase [s]<br />
ri2 35 Rinse Phase Duration [s]<br />
dr2 40 Drain [s]<br />
FP2 15 Final Pause at End of Cycle<br />
CY3 Cycle 3 parameters family.<br />
Ln3 9 Long Wash Phase [min]<br />
Sh3 10 Short Wash Phase [s]<br />
ri3 35 Rinse Phase Duration [s]<br />
dr3 40 Drain [s]<br />
FP3 15 Final Pause at End of Cycle<br />
10 During stand-by boiler is kept at lower temperature than Temperature Threshold.<br />
6. Modify Communication and HACCP parameters:<br />
HCP Enter into HCP parameter family and set the following parameters.<br />
sEr 9 Dishwasher with incorporated continuous water softener.<br />
7. Switch OFF and then switch ON the machine.<br />
DOC. NO. 5956.446.06 ©Copyright 2005 by <strong>Electrolux</strong> Professional P.69/88
<strong>Electrolux</strong><br />
EFS – Dishwashing Systems Platform<br />
<strong>Electrolux</strong> Professional<br />
Electronic Dishwasher<br />
SERVICE MANUAL<br />
FL620 / LV6 / WT30 6000W ATM Prog. 046<br />
1. Switch OFF and then switch ON the machine.<br />
2. CFG Enter into CFG parameter family and set the following parameters.<br />
tYP 0 Hood Type like working cycles.<br />
boi 0 Atmospheric boiler.<br />
doo 2 Front loading.<br />
dFL 3 Default values for Undercounter models.<br />
trc 1 SOFT START ENABLED.<br />
b_t 1 Tank heater works only if boiler temperature reached.<br />
btF 75 Enable filling tank by means of rinsing cycles.<br />
LES 0 Detergent level switches not enabled.<br />
UI 8 ACTIVE function disabled (up to version 3.11 set to 0).<br />
rE 0 Regeneration cycle disabled.<br />
ALr 1 Alarms enabled.<br />
3. Switch OFF and then switch ON the machine.<br />
LU700A / WTU40A Prog. 047<br />
1. Switch OFF and then switch ON the machine.<br />
2. CFG Enter into CFG parameter family and set the following parameters.<br />
tYP 0 Hood Type like working cycles.<br />
boi 0 Atmospheric boiler.<br />
doo 2 Front loading.<br />
dFL 1 Default values for Hood Type models.<br />
trc 3 SLOW SOFT START ENABLED<br />
b_t 1 Tank heater works only if boiler temperature reached.<br />
btF 75 Enable filling tank by means of rinsing cycles.<br />
LES 0 Detergent level switches not enabled.<br />
UI 8 ACTIVE function disabled (up to version 3.11 set to 0).<br />
rE 0 Regeneration cycle disabled.<br />
ALr 1 Alarms enabled.<br />
3. Switch OFF and then switch ON the machine.<br />
4. Modify Factory parameters:<br />
FAC Enter into FAC parameter family and change boiler threshold.<br />
bt°C 82 Boiler Temperature Threshold.<br />
bAJ 0 Boiler Temperature Adjust.<br />
bSt 1 Booster Function.<br />
5. Modify the cycle parameters:<br />
DOC. NO. 5956.446.06 ©Copyright 2005 by <strong>Electrolux</strong> Professional P.70/88
<strong>Electrolux</strong><br />
EFS – Dishwashing Systems Platform<br />
<strong>Electrolux</strong> Professional<br />
Electronic Dishwasher<br />
SERVICE MANUAL<br />
LU700A / WTU40A Prog. 047<br />
CY2 Cycle 2 parameters family.<br />
Ln2 1 Long Wash Phase [min]<br />
Sh2 10 Short Wash Phase [s]<br />
CY3 Cycle 3 parameters family.<br />
Ln3 4 Long Wash Phase [min]<br />
6. Switch OFF and then switch ON the machine.<br />
FL620WS / LV6WS / WT38WS Prog. 048<br />
1. Switch OFF and then switch ON the machine.<br />
2. CFG Enter into CFG parameter family and set the following parameters.<br />
tYP 0 Undercounter like working cycles.<br />
boi 0 Atmospheric boiler.<br />
doo 2 Front loading.<br />
dFL 3 Default values for Undercounter models.<br />
trc 1 SOFT START ENABLED.<br />
b_t 1 Tank heater works only if boiler temperature reached.<br />
btF 75 Enable filling tank by means of rinsing cycles.<br />
LES 0 Detergent level switches not enabled.<br />
UI 8 ACTIVE function disabled (up to version 3.11 set to 0).<br />
rE<br />
ALr 1 Alarms enabled.<br />
0 Regeneration cycle disabled (only for dishwashers with non-continuous water softener).<br />
3. Modify Communication and HACCP parameters:<br />
HCP Enter into HCP parameter family and set the following parameters.<br />
sEr 9 Dishwasher with incorporated continuous water softener.<br />
4. Switch OFF and then switch ON the machine.<br />
DOC. NO. 5956.446.06 ©Copyright 2005 by <strong>Electrolux</strong> Professional P.71/88
<strong>Electrolux</strong><br />
EFS - Dishwashing Systems Platform<br />
<strong>Electrolux</strong> Professional<br />
Electronic Dishwasher<br />
SERVICE MANUAL<br />
11. DEFAULT VALUES<br />
Default 1 – Hood Type<br />
ON/OFF +<br />
CYCLE1 keys<br />
ON/OFF +<br />
CYCLE2 keys<br />
↓ ↓<br />
GEn → Cnt FAC → CY1 → CY2 → CY3 → Drn → DPA → Ron → HCP → CFG dbG<br />
↓ ↓ ↓ ↓ ↓ ↓ ↓ ↓ ↓ ↓ ↓ ↓<br />
DIn= 90 CYC Bt°C= 78 Ln1= 0 Ln2= 0 Ln3= 1 Idr= 40 IpA= 0 REL SEr= 1 tYP= 0 t 1= 15<br />
RIn= 10 cyc BtH= 2 Sh1= 35 Sh2= 45 Sh3= 40 Fdr= 60 DLY= 3 rLs Adr= 1 Boi= 0 t 2= 200<br />
DEt= 8 RSt BHi= 96 PA1= 4 PA2= 4 PA3= 4 Pdr= 0 CA\\ Prn= 1 Doo= 1 t 3= 15<br />
RAi= 4 NCY BLo= 1 Pr1= 0 Pr2= 0 Pr3= 0 rPA= 0 C 8 Bt = 90 DFL= - t 4= 10<br />
drn BFL= 5 Ri1= 16 Ri2= 16 Ri3= 16 C F= 0 F21 BH = 10 trc= 0 t 5= 20<br />
rCY BAJ= 4 cr1= 0 cr2= 0 cr3= 0 Rit= 0 tt = 68 B_t= 1 t 6= 20<br />
nrE BP = 1 Dr1= 16 Dr2= 16 Dr3= 16 PPL= 0 tH = 10 BtF= 75 AL_= 0<br />
BSt= 2 FP1= 0 FP2= 0 FP3= 0 CDE= 5 LES= 0 Ith= 100<br />
Btd= 0 Bt3= 0 UI = 9<br />
tt°C= 63 rE = 0<br />
ttH= 5 ALr= 1<br />
tHi= 75 AAG= 0<br />
tLo= 1<br />
tFL= 20<br />
DOC. NO. 5956.446.06 ©Copyright 2005 by <strong>Electrolux</strong> Professional P.72/88
<strong>Electrolux</strong><br />
EFS - Dishwashing Systems Platform<br />
<strong>Electrolux</strong> Professional<br />
Electronic Dishwasher<br />
SERVICE MANUAL<br />
Default 2 - POT WASHER<br />
ON/OFF +<br />
CYCLE1 keys<br />
ON/OFF +<br />
CYCLE2 keys<br />
↓ ↓<br />
GEn → Cnt FAC → CY1 → CY2 → CY3 → Drn → DPA → Ron → HCP → CFG dbG<br />
↓ ↓ ↓ ↓ ↓ ↓ ↓ ↓ ↓ ↓ ↓ ↓<br />
DIn=240 CYC Bt°C= 78 Ln1= 2 Ln2= 5 Ln3= 8 Idr= 40 IpA= 2 REL SEr= 1 tYP= 1 t 1= 15<br />
RIn= 18 cyc BtH= 2 Sh1= 34 Sh2= 34 Sh3= 34 Fdr= 60 DLY= 3 rLS Adr= 1 Boi= 0 t 2= 200<br />
DEt= 16 RSt BHi= 96 PA1= 4 PA2= 4 PA3= 4 Pdr= 0 CA\\ Prn= 1 Doo= 2 t 3= 15<br />
RAi= 7 NCY BLo= 1 Pr1= 0 Pr2= 0 Pr3= 0 rPA= 0 C 8 Bt = 90 DFL= - t 4= 10<br />
drn BFL= 5 Ri1= 20 Ri2= 20 Ri3= 20 C F= 0 F21 BH = 10 trc= 0 t 5= 20<br />
rCY BAJ= 4 cr1= 0 cr2= 0 cr3= 0 Rit= 0 tt = 68 B_t= 1 t 6= 20<br />
nrE BP = 1 Dr1= 20 Dr2= 20 Dr3= 20 PPL= 0 tH = 10 BtF= 75 AL_= 0<br />
BSt= 4 FP1= 0 FP2= 0 FP3= 0 CdE= 5 LES= 0 Ith= 100<br />
Btd= 0 Bt3= 0 UI = 9<br />
tt°C= 63 rE = 0<br />
ttH= 5 ALr= 1<br />
tHi= 75 AAG= 0<br />
tLo= 1<br />
tFL= 40<br />
DOC. NO. 5956.446.06 ©Copyright 2005 by <strong>Electrolux</strong> Professional P.73/88
<strong>Electrolux</strong><br />
EFS - Dishwashing Systems Platform<br />
<strong>Electrolux</strong> Professional<br />
Electronic Dishwasher<br />
SERVICE MANUAL<br />
Default 3 - UNDERCOUNTER<br />
ON/OFF +<br />
CYCLE1 keys<br />
ON/OFF +<br />
CYCLE2 keys<br />
↓ ↓<br />
GEn → Cnt FAC → CY1 → CY2 → CY3 → Drn → DPA → Ron → HCP → CFG dbG<br />
↓ ↓ ↓ ↓ ↓ ↓ ↓ ↓ ↓ ↓ ↓ ↓<br />
DIn= 50 CYC Bt°C= 80 Ln1= 1 Ln2= 1 Ln3= 3 Idr= 30 IpA= 0 REL SEr= 1 tYP= 0 t 1= 15<br />
RIn= 10 cyc BtH= 2 Sh1= 10 Sh2= 40 Sh3= 40 Fdr= 60 DLY= 3 rLS Adr= 1 Boi= 0 t 2= 200<br />
DEt= 8 RSt BHi= 96 PA1= 4 PA2= 4 PA3= 4 Pdr= 0 CA\\ Prn= 1 Doo= 2 t 3= 15<br />
RAi= 4 NCY BLo= 1 Pr1= 0 Pr2= 0 Pr3= 0 rPA= 0 C 8 Bt = 90 DFL= - t 4= 10<br />
drn BFL= 5 Ri1= 16 Ri2= 16 Ri3= 16 C F= 0 F21 BH = 10 trc= 1 t 5= 20<br />
rCY BAJ= 0 cr1= 0 cr2= 0 cr3= 0 Rit= 0 tt = 68 B_t= 1 t 6= 20<br />
nrE BP = 1 Dr1= 30 Dr2= 30 Dr3= 30 PPL= 0 tH = 10 BtF= 75 AL_= 0<br />
BSt= 2 FP1= 0 FP2= 0 FP3= 0 CdE= 5 LES= 0 Ith= 100<br />
Btd= 3 Bt3= 0 UI = 9<br />
tt°C= 63 rE = 0<br />
ttH= 5 ALr= 1<br />
tHi= 75 AAG= 0<br />
tLo= 1<br />
tFL= 20<br />
DOC. NO. 5956.446.06 ©Copyright 2005 by <strong>Electrolux</strong> Professional P.74/88
<strong>Electrolux</strong><br />
EFS – Dishwashing Systems Platform<br />
<strong>Electrolux</strong> Professional<br />
Electronic Dishwasher<br />
SERVICE MANUAL<br />
12. USER INTERFACE AND MAIN BOARD CONNECTORS<br />
12.1 MAIN MALFUNCTIONS NOT DUE TO THE MAIN BOARD<br />
The display shows CLOSEwith door/hood closed<br />
No cycle starts<br />
A cycle fails to start<br />
After replacing the main board only the 3 rd cycle starts<br />
Cycle time longer than that foreseen<br />
Noisy wash pump (only on HT and PP versions)<br />
Check door/hood micro/sensor<br />
Check the user interface buttons (have they remained<br />
pressed etc.)<br />
Is a user interface button extension missing<br />
The main board is still configured for LS5/WT4.<br />
Does the boiler work<br />
Is the feed water at 50°C<br />
Check the current for single phase during operation.<br />
12.2 CONNECTORS LAYOUT<br />
KEY<br />
CN1<br />
CN2<br />
CN3<br />
CN5<br />
CN8<br />
CN10<br />
CN11<br />
CN12<br />
CN15<br />
CN16<br />
Rinse pump/wash pump/solenoid valve outputs<br />
Pressure/atmospheric dishwasher solenoid valve connection<br />
ECOTEMP transformer and detergent/rinse aid dispenser outputs<br />
Tank/boiler temperature sensor inputs<br />
Energy peak controller input<br />
Safety and upper/lower limit switch input<br />
Gear unit current control input - Gear unit polarity inversion/connection<br />
User interface inputs/outputs<br />
Overflow/tank level/board feed input<br />
User interface inputs/outputs and hood/door sensor input<br />
DOC. NO. 5956.446.06 ©Copyright 2005 by <strong>Electrolux</strong> Professional P.75/88
<strong>Electrolux</strong><br />
EFS – Dishwashing Systems Platform<br />
<strong>Electrolux</strong> Professional<br />
Electronic Dishwasher<br />
SERVICE MANUAL<br />
KEY<br />
CN1<br />
CN2<br />
CN3<br />
CN5<br />
CN8<br />
CN12<br />
CN15<br />
CN16<br />
Rinse pump/wash pump/solenoid valve outputs<br />
Pressure/atmospheric dishwasher solenoid valve connection<br />
ECOTEMP transformer and detergent/rinse aid dispenser outputs<br />
Tank/boiler temperature sensor inputs<br />
Energy peak controller input<br />
User interface inputs/outputs<br />
Overflow/tank level/board feed input<br />
User interface inputs/outputs and hood/door sensor input<br />
DOC. NO. 5956.446.06 ©Copyright 2005 by <strong>Electrolux</strong> Professional P.76/88
<strong>Electrolux</strong><br />
EFS – Dishwashing Systems Platform<br />
<strong>Electrolux</strong> Professional<br />
Electronic Dishwasher<br />
SERVICE MANUAL<br />
KEY<br />
CN1<br />
CN2<br />
CN3<br />
CN5<br />
CN7<br />
CN8<br />
CN10<br />
CN11<br />
CN12<br />
CN15<br />
CN16<br />
Rinse pump/wash pump/solenoid valve outputs<br />
Pressure/atmospheric dishwasher solenoid valve connection<br />
ECOTEMP transformer and detergent/rinse aid dispenser outputs<br />
Tank/boiler temperature sensor inputs<br />
Hand safety system microswitch input<br />
Energy peak controller input<br />
Safety and upper/lower limit switch input<br />
Hand safety system input - Gear motor current control input - Gear motor polarity inversion connection<br />
User interface inputs/outputs<br />
Overflow/tank level/board feed input<br />
User interface inputs/outputs and hood/door sensor input<br />
DOC. NO. 5956.446.06 ©Copyright 2005 by <strong>Electrolux</strong> Professional P.77/88
<strong>Electrolux</strong><br />
EFS – Dishwashing Systems Platform<br />
<strong>Electrolux</strong> Professional<br />
Electronic Dishwasher<br />
SERVICE MANUAL<br />
KEY<br />
CN1<br />
CN2<br />
CN3<br />
CN5<br />
CN8<br />
CN11<br />
CN12<br />
CN15<br />
CN16<br />
Rinse pump/wash pump/solenoid valve outputs<br />
Pressure/atmospheric dishwasher solenoid valve connection<br />
Detergent/rinse aid dispenser outputs<br />
Tank/boiler temperature sensor inputs<br />
Energy peak controller input<br />
Water feed solenoid valve output<br />
User interface inputs/outputs<br />
Overflow/tank level/board feed input<br />
User interface inputs/outputs and hood/door sensor input<br />
DOC. NO. 5956.446.06 ©Copyright 2005 by <strong>Electrolux</strong> Professional P.78/88
<strong>Electrolux</strong><br />
EFS – Dishwashing Systems Platform<br />
<strong>Electrolux</strong> Professional<br />
Electronic Dishwasher<br />
SERVICE MANUAL<br />
KEY<br />
CN1<br />
CN2<br />
CN3<br />
CN5<br />
CN7<br />
CN8<br />
CN9<br />
CN11<br />
CN12<br />
CN15<br />
CN16<br />
CN17<br />
Rinse pump/wash pump/solenoid valve outputs<br />
Pressure/atmospheric dishwasher solenoid valve connection<br />
Detergent/rinse aid dispenser outputs<br />
Tank/boiler temperature sensor inputs<br />
Detergent/rinse aid level sensors input<br />
Energy peak controller input<br />
Salt receptacle drain pump and low pressure solenoid valve outputs<br />
Brine solenoid valve output<br />
User interface inputs/outputs<br />
Overflow/tank level/board feed input<br />
User interface inputs/outputs and hood/door sensor input<br />
Door microswitch connection<br />
DOC. NO. 5956.446.06 ©Copyright 2005 by <strong>Electrolux</strong> Professional P.79/88
<strong>Electrolux</strong><br />
EFS – Dishwashing Systems Platform<br />
<strong>Electrolux</strong> Professional<br />
Electronic Dishwasher<br />
SERVICE MANUAL<br />
KEY<br />
CN1<br />
CN2<br />
CN3<br />
CN5<br />
CN7<br />
CN8<br />
CN9<br />
CN11<br />
CN12<br />
CN15<br />
CN16<br />
CN17<br />
Rinse pump/wash pump/solenoid valve outputs<br />
Pressure/atmospheric dishwasher solenoid valve connection<br />
ECOTEMP transformer and detergent/rinse aid dispenser outputs<br />
Tank/boiler temperature sensor inputs<br />
Detergent/rinse aid level sensors input<br />
Energy peak controller input<br />
Salt receptacle drain pump and low pressure solenoid valve outputs<br />
Door lock electromagnet and brine solenoid valve output<br />
User interface inputs/outputs<br />
Overflow/tank level/board feed input<br />
User interface inputs/outputs and hood/door sensor input<br />
Door microswitch connector<br />
DOC. NO. 5956.446.06 ©Copyright 2005 by <strong>Electrolux</strong> Professional P.80/88
<strong>Electrolux</strong><br />
EFS – Dishwashing Systems Platform<br />
<strong>Electrolux</strong> Professional<br />
Electronic Dishwasher<br />
SERVICE MANUAL<br />
KEY<br />
CN1<br />
CN2<br />
CN3<br />
CN5<br />
CN8<br />
CN11<br />
CN12<br />
CN15<br />
CN16<br />
Rinse pump/wash pump/solenoid valve outputs<br />
Pressure/atmospheric dishwasher solenoid valve connection<br />
ECOTEMP transformer and detergent/rinse aid dispenser outputs<br />
Tank/boiler temperature sensor inputs<br />
Energy peak controller input<br />
Hood lock electromagnet output<br />
User interface inputs/outputs<br />
Overflow/tank level/board feed input<br />
User interface inputs/outputs and hood/door sensor input<br />
DOC. NO. 5956.446.06 ©Copyright 2005 by <strong>Electrolux</strong> Professional P.81/88
<strong>Electrolux</strong><br />
EFS – Dishwashing Systems Platform<br />
<strong>Electrolux</strong> Professional<br />
Electronic Dishwasher<br />
SERVICE MANUAL<br />
13. ALARM MESSAGES AND TROUBLESHOOTING<br />
A Alarms that stop the dishwasher<br />
A 1 Want of water<br />
Is the water cock open<br />
Does the water load solenoid valve work<br />
Is the water feed flow a min. of 5 l/min<br />
Is the water inlet filter clean<br />
Is the load solenoid valve filter clean<br />
Is the overflow inserted<br />
Is the main board (ATM-PRES) CN2 connector correctly positioned<br />
Do the tank/boiler pressure switches work properly<br />
B Alarms that don't stop the dishwasher<br />
B 1 Drain not efficient<br />
Has the overflow been removed<br />
Is the water drain blocked<br />
Is the drain pump blocked<br />
Are the air trap and tank pressure switch clean<br />
Is there a constriction in the drain tube<br />
Is the pump breather pipe returning to the tank clogged or constricted<br />
Does the tank pressure switch work properly<br />
Is there a hole in the drain tube (only for versions with drain pump)<br />
B 2 Overflow alarm<br />
Is the water drain blocked<br />
Are the air trap and tank pressure switch clean<br />
Does the tank pressure switch work properly<br />
Is the load solenoid valve blocked (E1 - LOAD_EV)<br />
Is the load solenoid valve relay stuck (RL8 - LOAD_EV)<br />
DOC. NO. 5956.446.06 ©Copyright 2005 by <strong>Electrolux</strong> Professional P.82/88
<strong>Electrolux</strong><br />
EFS – Dishwashing Systems Platform<br />
<strong>Electrolux</strong> Professional<br />
Electronic Dishwasher<br />
SERVICE MANUAL<br />
C Alarms that stop the functioning and suggest to call the service<br />
C 1 Boiler temperature rise too fast<br />
Does the boiler level sensor work properly The boiler could be empty.<br />
Are non-original power resistances installed<br />
C 2 Boiler temperature too high<br />
Has the boiler temperature been changed (btC - increased above 90°C)<br />
Has the software alarm value been modified (bHi)<br />
Does the boiler level sensor work properly<br />
Is the boiler relay stuck (see RL2, RL3, RL4)<br />
C 3 Tank temperature too high<br />
Is the feed water above 60°C<br />
Has the software alarm value been modified (bHi)<br />
Is the rinse water temperature too high<br />
Is the tank relay stuck (RL5 - TUB_HEAT)<br />
C 4 Tank temperature sensor out of order<br />
Is the temperature sensor broken or disconnected (NT1)<br />
Is the temperature sensor connector correctly inserted<br />
C 5 Tank temperature sensor out of order<br />
Is the temperature sensor short-circuited (NT1)<br />
C 6 Boiler temperature sensor out of order<br />
Is the temperature sensor broken or disconnected (NT2)<br />
Is the temperature sensor connector correctly inserted<br />
C 7 Boiler temperature sensor out of order<br />
Is the temperature sensor short-circuited (NT2)<br />
C 8 During rinse phase boiler doesn't empty<br />
Are the rinse arms clogged<br />
Does the rinse pump work correctly<br />
Is there water in the level sensor tube<br />
Is there scale in the boiler<br />
Does the boiler level sensor work properly<br />
CAUTION: RESETTING THIS ALARM WITHOUT FIRST ELIMINATING THE CAUSE IS<br />
DANGEROUS; THE BOILER HEATING ELEMENTS COULD WORK DRY, FURTHER DAMAGING<br />
THE INTERNAL PARTS OF THE DISHWASHER.<br />
CAUTION: C8 IT MUST BE MANUALLY RESET AFTER ELIMINATING THE CAUSE OF THE<br />
MALFUNCTION.<br />
C 9 Automatic hood out of order<br />
See par. C1 - Alarm codes for automatic hood type dishwashers.<br />
DOC. NO. 5956.446.06 ©Copyright 2005 by <strong>Electrolux</strong> Professional P.83/88
<strong>Electrolux</strong><br />
EFS – Dishwashing Systems Platform<br />
<strong>Electrolux</strong> Professional<br />
Electronic Dishwasher<br />
SERVICE MANUAL<br />
C.1 – Alarm codes for automatic hood type dishwashers<br />
When the alarm C9 appears, to facilitate fault-finding another parameter providing a more detailed indication has been<br />
introduced.<br />
The parameter is AL and is found in the DBG family.<br />
The possible cause of the anomaly can be found (see table below) according to the value of the parameter AL.<br />
With pot washers the cause that generated a b3 type alarm can also be found.<br />
E.g.: With an automatic hood type the alarm C 9 appears.<br />
Access the parameter AL in the DBG family.<br />
AL_8 ⇒ the top limit switch could be disconnected or interrupted.<br />
Hood<br />
Pot Washer<br />
S3: FC_DW<br />
(hood CLOSE)<br />
S5: FC_UP<br />
(hood OPEN)<br />
S1: DOOR_CLOSE<br />
AL_1<br />
AL_2<br />
Appears with hood closed if the top<br />
limit switch (FC_UP) cuts in.<br />
During lifting, the bottom limit switch (FC_DW)<br />
has not returned to the rest position.<br />
The limit switch must return to the rest position<br />
within a time given by the parameter t_5 :<br />
a) check that the motor works.<br />
Appears with hood closed, if:<br />
- the bottom limit switch (S3) returns to the rest<br />
position;<br />
- the top limit switch (S5) cuts in;<br />
- S3’’ does not cut in.<br />
b 3<br />
During the initial lifting phase the bottom limit switch<br />
(S3) must return to the rest position within a time given<br />
by the parameter t_5 otherwise the alarm b 3<br />
appears.<br />
- S3 could be stuck.<br />
- S5’ could be disconnected.<br />
On installation this alarm can occur due to incorrect<br />
sequence of the phases: invert the two phases on the<br />
power supply terminal board.<br />
AL_3 - Appears if during lifting S3’’ does not return to the rest<br />
position within a time t 1.<br />
AL_4<br />
Appears if the bottom limit switch (FC_DW)<br />
cuts in during lifting.<br />
b 3<br />
DOC. NO. 5956.446.06 ©Copyright 2005 by <strong>Electrolux</strong> Professional P.84/88
<strong>Electrolux</strong><br />
EFS – Dishwashing Systems Platform<br />
<strong>Electrolux</strong> Professional<br />
Electronic Dishwasher<br />
SERVICE MANUAL<br />
(Polarity/motor rotation direction inverted!).<br />
Appears if the bottom limit switch (S3) cuts in during<br />
lifting.<br />
AL_5<br />
AL_6<br />
AL_7<br />
AL_8<br />
TIMEOUT- The time taken for hood lifting was<br />
more than the time fixed by parameter t_2 :<br />
a) check that the motor works.<br />
The hood is open but the bottom limit switch<br />
(FC_DW) has cut in.<br />
Appears if with hood fully open the "door<br />
closed" microswitch cuts in.<br />
During lowering, the top limit switch (FC_UP)<br />
has not returned to the rest position.<br />
The limit switch must return to the rest position<br />
within a time given by parameter t_6:<br />
a) check that the motor works;<br />
b) (Polarity/motor rotation direction inverted!).<br />
On installation this alarm can occur due to incorrect<br />
sequence of the phases: invert the two phases on the<br />
power supply terminal board.<br />
TIMEOUT- The time taken for lifting was more than the<br />
time fixed by parameter t 2.<br />
Check correct operation of the:<br />
a) motor (thermal protection N7);<br />
b) top limit switch (S5 and S5’).<br />
Appears with hood fully open, if:<br />
- the limit switch (S5) returns to the rest position;<br />
- the bottom limit switch (S3) cuts in;<br />
- S3’’ cuts in.<br />
Appears if with hood fully open the "door closed"<br />
microswitch cuts in.<br />
- S5 could be disconnected.<br />
b 3<br />
During the initial lowering phase the top limit switch<br />
(S5) must return to the rest position within a time given<br />
by the parameter t_6 otherwise the alarm b 3<br />
appears.<br />
- S5 could be stuck.<br />
- S3’ could be disconnected.<br />
On installation, this alarm can occur due to incorrect<br />
sequence of the phases: invert the two phases on the<br />
power supply terminal board.<br />
AL_9 - Appears if the bottom limit switch S3 cuts in before S3"<br />
during lowering.<br />
AL_10 Appears if the top limit switch (FC_UP) cuts in<br />
during lowering.<br />
(Polarity/motor rotation direction inverted!).<br />
b 3<br />
Appears if the top limit switch (S5) cuts in during<br />
lowering.<br />
On installation, this alarm can occur due to incorrect<br />
sequence of the phases: invert the two phases on the<br />
power supply terminal board.<br />
AL_11 TIMEOUT- The time taken for hood closing<br />
was more than the time fixed by parameter<br />
t_2 :<br />
a) check that the motor works.<br />
AL_12 -<br />
AL_13 -<br />
TIMEOUT- The time taken for lowering was more than<br />
the time fixed by parameter t_2.<br />
- S3’ could be disconnected.<br />
Appears during hood lowering if, after S3’’ cuts in, the<br />
bottom limit switch S3 does not cut in within the time<br />
fixed by parameter t 3.<br />
The two hand safety contacts K and K'<br />
must be both closed or both open. If this<br />
does not occur the alarm appears.<br />
- One of the two relays (K or K’) could be stuck or<br />
disconnected. (See parameter t 4)<br />
DOC. NO. 5956.446.06 ©Copyright 2005 by <strong>Electrolux</strong> Professional P.85/88
<strong>Electrolux</strong><br />
EFS – Dishwashing Systems Platform<br />
<strong>Electrolux</strong> Professional<br />
Electronic Dishwasher<br />
SERVICE MANUAL<br />
AL_14 Limit switch combination not allowed:<br />
top limit switch (FC_UP) and bottom limit<br />
switch (FC_DW) activated at the same time!<br />
AL_20 During lifting, the current absorbed by the<br />
lifting motor has exceeded the threshold (see<br />
parameter Ith):<br />
a) excessive mechanical force during lifting.<br />
AL_21 During lowering, the current absorbed by the<br />
lifting motor has exceeded the threshold (see<br />
parameter Ith):<br />
a) excessive mechanical force during<br />
lowering.<br />
Limit switch combination not allowed.<br />
Appears if one of the following<br />
combinations occurs:<br />
- top limit switch (S5) and bottom limit switch (S3) both<br />
activated (S3 and S5 could be disconnected);<br />
- top limit switch S5 and S3’’ both cut in;<br />
- bottom limit switch (S3) cut in but not S3’’.<br />
-<br />
-<br />
AL_22<br />
AL_23<br />
AL_24<br />
AL_25<br />
The hood should be stopped but the card<br />
detects a high current absorption by the lifting<br />
motor:<br />
a) the relay RL18/RL19 could be stuck;<br />
b) feeder connector CN32 could be<br />
disconnected.<br />
-<br />
DOC. NO. 5956.446.06 ©Copyright 2005 by <strong>Electrolux</strong> Professional P.86/88
<strong>Electrolux</strong><br />
EFS – Dishwashing Systems Platform<br />
<strong>Electrolux</strong> Professional<br />
Electronic Dishwasher<br />
SERVICE MANUAL<br />
D Alarms that don't stop the functioning, but suggest to call the service<br />
E 1 Communication error<br />
Is the connection between main board and control panel correct Are the connectors correctly<br />
connected<br />
Are connector contacts clean<br />
E 2 Tank temperature low<br />
Does the tank heating element work properly<br />
Are the connectors correctly connected<br />
Are the dishwasher feed voltage and current correct<br />
Is the relay RL5 on the board disconnected or faulty<br />
E 3 Boiler temperature low<br />
Does/do the boiler heating element/s work properly<br />
Are the connectors correctly connected<br />
Does the possible remote control switch connected to the heating element work correctly<br />
Is there power at the remote control switch input terminals<br />
Does relay RL2 on the board work properly<br />
CAUTION: IF THERE IS A MALFUNCTION ON RELAY RL2 AND THE BOILER HEATING<br />
ELEMENTS ARE FED BY MEANS OF A REMOTE CONTROL SWITCH, THE BOARD DOES<br />
NOT HAVE TO BE REPLACED; JUST MOVE THE BOILER HEATING ELEMENT CONNECTOR<br />
TO ONE OF THE TWO FREE POSITIONS ON THE BOARD.<br />
CAUTION: WHEN ONE BRANCH OF THE HEATING ELEMENT DOES NOT WORK AND THE<br />
OTHER TWO CONTINUE TO FUNCTION, ON REACHING THE SET TEMPERATURE VALUE,<br />
ALARM 3 DISAPPEARS AND REAPPEARS IN THE SUBSEQUENT RINSE PHASE. THIS ALSO<br />
OCCURS WHEN A PHASE IS MISSING.<br />
DOC. NO. 5956.446.06 ©Copyright 2005 by <strong>Electrolux</strong> Professional P.87/88
<strong>Electrolux</strong><br />
EFS – Dishwashing Systems Platform<br />
<strong>Electrolux</strong> Professional<br />
Electronic Dishwasher<br />
SERVICE MANUAL<br />
E Alarms that stop the dishwasher for models with incorporated<br />
continuous water softener<br />
f21<br />
Water softener operation errors<br />
This alarm appears in case of malfunctioning in the continuous water softener.<br />
F22<br />
Communication errors between the mother board and<br />
softener board<br />
This alarm appears in case of problems in communication between the mother board and water softener<br />
board; check the connection between mother board connector J1 and water softener connector ST8.<br />
To facilitate the finding of faults signalled by alarm F21, another parameter providing a more detailed indication of the possible cause of<br />
malfunction has been introduced in the RoN family (see table below).<br />
f21 1<br />
f21 2<br />
f21 3<br />
f21 4<br />
f21 6<br />
f21 7<br />
Water softener conductivity sensor short-circuit<br />
Two or more water softener conductivity sensors are short-circuited. Check the connections between the<br />
water softener board and sensors, replacing the connection wiring if necessary.<br />
Water softener conductivity sensors open<br />
One or more water softener conductivity sensors are disconnected. Check the connections between the<br />
water softener board and sensors, replacing the connection wiring if necessary.<br />
Resin temperature sensor malfunction<br />
Replace the water softener electronic board.<br />
Water softener electronic board malfunction<br />
Replace the water softener electronic board.<br />
Salt water filling malfunction<br />
The salt water container in the water softener was not completely filled within the set max. filling time.<br />
Make sure:<br />
− the water cock is open<br />
− the water filling solenoid valve works correctly<br />
− the salt container solenoid valve works correctly<br />
− the feed water pressure is at least 50 kPa / 0.5 bar<br />
− the water inlet filter is clean<br />
− the filling solenoid valve filter is clean<br />
− the salt container cap is properly closed<br />
− the mother board (ATM-PRES) connector CN2 is correctly positioned<br />
− the water softener board connector ST5 is correctly positioned.<br />
Inefficient resin washing<br />
After carrying out the maximum permissible number of resin washes, the resins are not sufficiently cleaned<br />
by the salt water used to regenerate them.<br />
Make sure:<br />
− the water filling solenoid valve works correctly<br />
− the feed water pressure is at least 50 kPa / 0.5 bar<br />
− the water inlet filter is clean<br />
− the filling solenoid valve filter is clean<br />
− the mother board (ATM-PRES) connector CN2 is correctly positioned.<br />
DOC. NO. 5956.446.06 ©Copyright 2005 by <strong>Electrolux</strong> Professional P.88/88