HP BladeSystem Onboard Administrator ... - Hewlett Packard
HP BladeSystem Onboard Administrator ... - Hewlett Packard
HP BladeSystem Onboard Administrator ... - Hewlett Packard

Create successful ePaper yourself
Turn your PDF publications into a flip-book with our unique Google optimized e-Paper software.
<strong>HP</strong> <strong>BladeSystem</strong> <strong>Onboard</strong> <strong>Administrator</strong><br />
Command Line Interface<br />
User Guide<br />
Abstract<br />
This guide details using the command-line interface for configuration, operation, and management of the <strong>HP</strong> <strong>BladeSystem</strong> <strong>Onboard</strong> <strong>Administrator</strong><br />
and enclosure Insight Display.<br />
Part Number: 695523-002<br />
October 2012<br />
Edition: 19
© Copyright 2006, 2012 <strong>Hewlett</strong>-<strong>Packard</strong> Development Company, L.P.<br />
The information contained herein is subject to change without notice. The only warranties for <strong>HP</strong> products and services are set forth in the express<br />
warranty statements accompanying such products and services. Nothing herein should be construed as constituting an additional warranty. <strong>HP</strong> shall<br />
not be liable for technical or editorial errors or omissions contained herein.<br />
Confidential computer software. Valid license from <strong>HP</strong> required for possession, use or copying. Consistent with FAR 12.211 and 12.212,<br />
Commercial Computer Software, Computer Software Documentation, and Technical Data for Commercial Items are licensed to the U.S. Government<br />
under vendor’s standard commercial license.
Contents<br />
Introduction ................................................................................................................................ 11<br />
What's new ............................................................................................................................................ 11<br />
Accessing the command line interface ........................................................................................... 13<br />
Remote access to the <strong>Onboard</strong> <strong>Administrator</strong> .............................................................................................. 13<br />
Local access to the <strong>Onboard</strong> <strong>Administrator</strong> ................................................................................................. 13<br />
Command line ............................................................................................................................ 15<br />
Command line overview ........................................................................................................................... 15<br />
Command line conventions ....................................................................................................................... 15<br />
Reserved words ............................................................................................................................. 15<br />
<strong>HP</strong> Integrity server blade restrictions ........................................................................................................... 16<br />
Access level and privileges ....................................................................................................................... 16<br />
Account authentication ................................................................................................................... 18<br />
AutoLogin to iLO ........................................................................................................................... 18<br />
General commands ..................................................................................................................... 20<br />
CLEAR SCREEN ...................................................................................................................................... 20<br />
EXIT ....................................................................................................................................................... 20<br />
HELP ...................................................................................................................................................... 20<br />
LOGOUT ............................................................................................................................................... 21<br />
QUIT ..................................................................................................................................................... 21<br />
Rack commands ......................................................................................................................... 22<br />
SET RACK NAME .................................................................................................................................... 22<br />
SHOW RACK INFO ................................................................................................................................ 22<br />
SHOW RACK NAME .............................................................................................................................. 23<br />
SHOW TOPOLOGY ................................................................................................................................ 23<br />
User account commands .............................................................................................................. 24<br />
ADD USER ............................................................................................................................................. 24<br />
ASSIGN ................................................................................................................................................. 24<br />
ASSIGN OA ........................................................................................................................................... 25<br />
DISABLE USER ........................................................................................................................................ 25<br />
DISABLE STRONG PASSWORDS .............................................................................................................. 25<br />
ENABLE STRONG PASSWORDS .............................................................................................................. 25<br />
ENABLE USER ......................................................................................................................................... 26<br />
HISTORY ................................................................................................................................................ 26<br />
REMOVE USER ....................................................................................................................................... 27<br />
SET MINIMUM PASSWORD LENGTH ........................................................................................................ 27<br />
SET PASSWORD ..................................................................................................................................... 27<br />
SET SESSION TIMEOUT ........................................................................................................................... 28<br />
SET USER ACCESS .................................................................................................................................. 28<br />
SET USER CONTACT ............................................................................................................................... 28<br />
SET USER FULLNAME .............................................................................................................................. 29<br />
SET USER PASSWORD ............................................................................................................................ 29<br />
SHOW PASSWORD SETTINGS ................................................................................................................ 29<br />
SHOW SESSION TIMEOUT ..................................................................................................................... 30<br />
Contents 3
SHOW USER .......................................................................................................................................... 30<br />
SLEEP .................................................................................................................................................... 31<br />
UNASSIGN ............................................................................................................................................ 31<br />
UNASSIGN OA ...................................................................................................................................... 31<br />
Two-Factor Authentication commands ............................................................................................ 33<br />
DISABLE CRL........................................................................................................................................... 33<br />
DISABLE TWOFACTOR ............................................................................................................................ 33<br />
DOWNLOAD CA CERTIFICATE ................................................................................................................ 33<br />
DOWNLOAD USER CERTIFICATE ............................................................................................................. 34<br />
REMOVE CA CERTIFICATE ....................................................................................................................... 34<br />
REMOVE USER CERTIFICATE .................................................................................................................... 34<br />
SHOW CA CERTIFICATES ........................................................................................................................ 34<br />
SHOW TWOFACTOR INFO .................................................................................................................... 35<br />
Directory commands ................................................................................................................... 36<br />
ADD LDAP CERTIFICATE .......................................................................................................................... 36<br />
ADD LDAP GROUP .................................................................................................................................. 36<br />
ASSIGN for LDAP .................................................................................................................................... 36<br />
ASSIGN OA LDAP GROUP ...................................................................................................................... 37<br />
DISABLE LDAP......................................................................................................................................... 37<br />
DOWNLOAD LDAP CERTIFICATE ............................................................................................................. 37<br />
ENABLE LDAP ......................................................................................................................................... 38<br />
REMOVE LDAP CERTIFICATE .................................................................................................................... 38<br />
REMOVE LDAP GROUP ........................................................................................................................... 38<br />
SET LDAP GROUP ACCESS ...................................................................................................................... 39<br />
SET LDAP GROUP DESCRIPTION .............................................................................................................. 39<br />
SET LDAP NAME MAP ............................................................................................................................. 39<br />
SET LDAP PORT ....................................................................................................................................... 40<br />
SET LDAP SEARCH .................................................................................................................................. 40<br />
SET LDAP SERVER ................................................................................................................................... 40<br />
SHOW LDAP CERTIFICATE ....................................................................................................................... 40<br />
SHOW LDAP GROUP .............................................................................................................................. 41<br />
SHOW LDAP INFO ................................................................................................................................. 41<br />
TEST LDAP .............................................................................................................................................. 42<br />
UNASSIGN for LDAP ............................................................................................................................... 42<br />
UNASSIGN OA LDAP GROUP ................................................................................................................. 42<br />
<strong>HP</strong> SIM commands ...................................................................................................................... 44<br />
ADD <strong>HP</strong>SIM CERTIFICATE ........................................................................................................................ 44<br />
DOWNLOAD <strong>HP</strong>SIM CERTIFICATE ........................................................................................................... 44<br />
REMOVE <strong>HP</strong>SIM CERTIFICATE .................................................................................................................. 44<br />
SET <strong>HP</strong>SIM TRUST MODE ......................................................................................................................... 45<br />
SHOW <strong>HP</strong>SIM INFO ............................................................................................................................... 45<br />
General management commands ................................................................................................. 46<br />
DOWNLOAD OA CERTIFICATE ................................................................................................................ 46<br />
FORCE TAKEOVER .................................................................................................................................. 46<br />
GENERATE CERTIFICATE ......................................................................................................................... 46<br />
Generate certificate prompts ........................................................................................................... 47<br />
GENERATE KEY ...................................................................................................................................... 48<br />
PING ..................................................................................................................................................... 49<br />
SET DEVICE SERIAL_NUMBER BLADE ........................................................................................................ 49<br />
SET FACTORY ........................................................................................................................................ 49<br />
SET SCRIPT MODE .................................................................................................................................. 50<br />
Contents 4
SHOW ALL ............................................................................................................................................ 50<br />
SHOW DEVICE SERIAL_NUMBER BLADE ................................................................................................... 52<br />
Enclosure Bay IP Addressing commands ........................................................................................ 53<br />
ADD EBIPA ............................................................................................................................................. 53<br />
DISABLE EBIPA ........................................................................................................................................ 53<br />
ENABLE EBIPA ........................................................................................................................................ 53<br />
REMOVE EBIPA ...................................................................................................................................... 54<br />
SET EBIPA .............................................................................................................................................. 54<br />
SET EBIPA SERVER ......................................................................................................................... 55<br />
SET EBIPA INTERCONNECT ........................................................................................................... 55<br />
SHOW EBIPA ......................................................................................................................................... 55<br />
Enclosure network configuration commands ................................................................................... 58<br />
ADD OA ADDRESS IPV6 .......................................................................................................................... 58<br />
ADD OA DNS ........................................................................................................................................ 58<br />
ADD OA DNS IPV6 ................................................................................................................................. 59<br />
ADD SNMP TRAPRECEIVER ...................................................................................................................... 59<br />
ADD SSHKEY ......................................................................................................................................... 60<br />
ADD TRUSTED HOST ............................................................................................................................... 60<br />
CLEAR LOGIN_BANNER_TEXT ................................................................................................................. 60<br />
CLEAR NTP ............................................................................................................................................ 61<br />
CLEAR SSHKEY ....................................................................................................................................... 61<br />
CLEAR VCMODE .................................................................................................................................... 61<br />
DISABLE ALERTMAIL ................................................................................................................................ 62<br />
DISABLE DHCPV6 ................................................................................................................................... 62<br />
DISABLE ENCLOSURE_IP_MODE .............................................................................................................. 62<br />
DISABLE HTTPS ....................................................................................................................................... 63<br />
DISABLE IPV6 ......................................................................................................................................... 63<br />
DISABLE LOGIN_BANNER ....................................................................................................................... 63<br />
DISABLE NTP .......................................................................................................................................... 63<br />
DISABLE ROUTER ADVERTISEMENTS ......................................................................................................... 64<br />
DISABLE SECURESH ................................................................................................................................ 64<br />
DISABLE SNMP ....................................................................................................................................... 64<br />
DISABLE TELNET ..................................................................................................................................... 65<br />
DISABLE TRUSTED HOST .......................................................................................................................... 65<br />
DISABLE XMLREPLY .................................................................................................................................. 65<br />
DOWNLOAD CONFIG ........................................................................................................................... 66<br />
DOWNLOAD SSHKEY ............................................................................................................................ 66<br />
ENABLE ALERTMAIL ................................................................................................................................. 66<br />
ENABLE DHCPV6 .................................................................................................................................... 67<br />
ENABLE ENCLOSURE_IP_MODE ............................................................................................................... 67<br />
ENABLE HTTPS ....................................................................................................................................... 67<br />
ENABLE LOGIN_BANNER ....................................................................................................................... 67<br />
ENABLE IPV6 .......................................................................................................................................... 68<br />
ENABLE NTP .......................................................................................................................................... 68<br />
ENABLE ROUTER ADVERTISEMENTS ......................................................................................................... 68<br />
ENABLE SECURESH ................................................................................................................................ 69<br />
ENABLE SNMP ....................................................................................................................................... 69<br />
ENABLE TELNET ...................................................................................................................................... 69<br />
ENABLE TRUSTED HOST .......................................................................................................................... 69<br />
ENABLE XMLREPLY .................................................................................................................................. 70<br />
REMOVE OA ADDRESS IPV6.................................................................................................................... 70<br />
REMOVE OA DNS .................................................................................................................................. 70<br />
Contents 5
REMOVE OA DNS IPV6 ........................................................................................................................... 71<br />
REMOVE SNMP TRAPRECEIVER ................................................................................................................ 71<br />
REMOVE TRUSTED HOST ......................................................................................................................... 71<br />
SET ALERTMAIL MAILBOX ........................................................................................................................ 72<br />
SET ALERTMAIL SENDERDOMAIN ............................................................................................................ 72<br />
SET ALERTMAIL SMTPSERVER ................................................................................................................... 72<br />
SET FIPS MODE ...................................................................................................................................... 73<br />
SET LOGIN_BANNER_TEXT ...................................................................................................................... 73<br />
SET OA GATEWAY ................................................................................................................................. 74<br />
SET OA NAME ....................................................................................................................................... 74<br />
SET OA UID ........................................................................................................................................... 74<br />
SET IPCONFIG ....................................................................................................................................... 75<br />
SET NTP POLL ......................................................................................................................................... 75<br />
SET NTP PRIMARY ................................................................................................................................... 75<br />
SET NTP SECONDARY ............................................................................................................................ 76<br />
SET SERIAL BAUD.................................................................................................................................... 76<br />
SET SNMP CONTACT ............................................................................................................................. 76<br />
SET SNMP COMMUNITY......................................................................................................................... 77<br />
SET SNMP LOCATION ............................................................................................................................ 77<br />
SHOW FIPS MODE ................................................................................................................................. 77<br />
SHOW HEALTH ...................................................................................................................................... 78<br />
SHOW LOGIN_BANNER ........................................................................................................................ 80<br />
SHOW NETWORK ................................................................................................................................. 80<br />
SHOW SNMP ........................................................................................................................................ 82<br />
SHOW SSHFINGERPRINT ........................................................................................................................ 83<br />
SHOW SSHKEY ...................................................................................................................................... 83<br />
TEST ALERTMAIL ..................................................................................................................................... 83<br />
TEST SNMP ............................................................................................................................................ 84<br />
Enclosure management commands ............................................................................................... 85<br />
CLEAR SYSLOG ...................................................................................................................................... 85<br />
DISABLE GUI_LOGIN_DETAIL ................................................................................................................... 85<br />
DISABLE LLF ............................................................................................................................................ 85<br />
ENABLE GUI_LOGIN_DETAIL ................................................................................................................... 86<br />
ENABLE LLF ............................................................................................................................................ 86<br />
RESTART OA .......................................................................................................................................... 86<br />
SET DATE ............................................................................................................................................... 86<br />
SET DISPLAY EVENTS .............................................................................................................................. 87<br />
SET ENCLOSURE ASSET .......................................................................................................................... 87<br />
SET ENCLOSURE NAME .......................................................................................................................... 88<br />
SET ENCLOSURE PART_ NUMBER ............................................................................................................ 88<br />
SET ENCLOSURE PDU_TYPE ..................................................................................................................... 88<br />
SET ENCLOSURE SERIAL_NUMBER ........................................................................................................... 89<br />
SET ENCLOSURE UID .............................................................................................................................. 89<br />
SET LLF INTERVAL .................................................................................................................................... 89<br />
SET OA USB ........................................................................................................................................... 90<br />
SET POWER MODE ................................................................................................................................. 90<br />
SET POWER LIMIT ................................................................................................................................... 90<br />
SET POWER SAVINGS ............................................................................................................................ 91<br />
SET TIMEZONE ....................................................................................................................................... 91<br />
SHOW CONFIG .................................................................................................................................... 91<br />
SHOW DATE ......................................................................................................................................... 92<br />
SHOW DISPLAY EVENTS ......................................................................................................................... 93<br />
SHOW ENCLOSURE FAN ....................................................................................................................... 93<br />
Contents 6
SHOW ENCLOSURE INFO ...................................................................................................................... 94<br />
SHOW ENCLOSURE LCD ........................................................................................................................ 94<br />
SHOW ENCLOSURE POWER_SUMMARY ................................................................................................. 95<br />
SHOW ENCLOSURE POWERSUPPLY ........................................................................................................ 96<br />
SHOW ENCLOSURE STATUS ................................................................................................................... 97<br />
SHOW ENCLOSURE TEMP ...................................................................................................................... 97<br />
SHOW FRU ............................................................................................................................................ 98<br />
SHOW OA .......................................................................................................................................... 100<br />
SHOW OA CERTIFICATE ....................................................................................................................... 100<br />
SHOW OA INFO ................................................................................................................................. 101<br />
SHOW OA NETWORK ......................................................................................................................... 101<br />
SHOW OA STATUS .............................................................................................................................. 102<br />
SHOW OA UPTIME .............................................................................................................................. 103<br />
SHOW OA USB ................................................................................................................................... 103<br />
SHOW POWER .................................................................................................................................... 104<br />
SHOW SYSLOG ................................................................................................................................... 104<br />
SHOW SYSLOG OA ............................................................................................................................. 105<br />
SHOW SYSLOG HISTORY ..................................................................................................................... 106<br />
UPLOAD SYSLOG ................................................................................................................................. 106<br />
SHOW VCMODE ................................................................................................................................. 107<br />
UPDATE ............................................................................................................................................... 107<br />
UPDATE ILO ......................................................................................................................................... 108<br />
UPDATE IMAGE FW_ISO ....................................................................................................................... 109<br />
UPLOAD CONFIG ................................................................................................................................. 109<br />
UPLOAD SUPPORTDUMP ....................................................................................................................... 110<br />
Enclosure Firmware Management commands ............................................................................... 111<br />
DISCOVER FIRMWARE SERVER .............................................................................................................. 111<br />
SET FIRMWARE MANAGEMENT ............................................................................................................ 111<br />
SET FIRMWARE MANAGEMENT URL ...................................................................................................... 111<br />
SET FIRMWARE MANAGEMENT POLICY ................................................................................................ 112<br />
SET FIRMWARE MANAGEMENT POWER ................................................................................................ 112<br />
SET FIRMWARE MANAGEMENT SCHEDULE ........................................................................................... 112<br />
SET FIRMWARE MANAGEMENT BAYS_TO_INCLUDE SERVER ................................................................... 113<br />
SET FIRMWARE MANAGEMENT FORCE DOWNGRADE .......................................................................... 113<br />
SHOW FIRMWARE ............................................................................................................................... 113<br />
SHOW FIRMWARE MANAGEMENT ....................................................................................................... 114<br />
SHOW FIRMWARE MANAGEMENT LOG ............................................................................................... 114<br />
SHOW FIRMWARE SUMMARY .............................................................................................................. 115<br />
SHOW FIRMWARE SUMMARY CSV ....................................................................................................... 116<br />
SHOW FIRMWARE LOG SERVER............................................................................................................ 117<br />
SHOW FIRMWARE LOG SESSION ......................................................................................................... 118<br />
SHOW SERVER FIRMWARE ................................................................................................................... 118<br />
ENABLE FIRMWARE MANAGEMENT ...................................................................................................... 119<br />
DISABLE FIRMWARE MANAGEMENT ..................................................................................................... 119<br />
UPDATE FIRMWARE SERVER .................................................................................................................. 120<br />
Blade management commands ................................................................................................... 121<br />
CONNECT SERVER ............................................................................................................................... 121<br />
DISABLE URB ........................................................................................................................................ 121<br />
ENABLE URB ........................................................................................................................................ 121<br />
<strong>HP</strong>ONCFG ........................................................................................................................................... 122<br />
POWEROFF SERVER .............................................................................................................................. 122<br />
POWERON SERVER .............................................................................................................................. 123<br />
Contents 7
REBOOT SERVER .................................................................................................................................. 123<br />
SET NIC ............................................................................................................................................... 124<br />
SET SERVER BOOT ONCE ..................................................................................................................... 124<br />
SET SERVER BOOT ................................................................................................................................ 124<br />
SET SERVER POWERDELAY .................................................................................................................... 125<br />
SET SERVER UID .................................................................................................................................... 125<br />
SET URB ............................................................................................................................................... 126<br />
SHOW SERVER BOOT .......................................................................................................................... 126<br />
SHOW SERVER INFO ............................................................................................................................ 127<br />
SHOW SERVER LIST .............................................................................................................................. 128<br />
SHOW SERVER NAMES ........................................................................................................................ 129<br />
SHOW SERVER PORT MAP .................................................................................................................... 129<br />
SHOW SERVER POWERDELAY ............................................................................................................... 131<br />
SHOW SERVER STATUS ........................................................................................................................ 132<br />
SHOW SERVER TEMP ............................................................................................................................ 134<br />
SHOW SYSLOG SERVER ....................................................................................................................... 135<br />
Substitute ............................................................................................................................................. 136<br />
UNASSIGN SERVER .............................................................................................................................. 137<br />
Interconnect management commands .......................................................................................... 138<br />
ASSIGN INTERCONNECT ..................................................................................................................... 138<br />
CLEAR INTERCONNECT SESSION ......................................................................................................... 138<br />
SHOW URB ......................................................................................................................................... 138<br />
TEST URB ............................................................................................................................................. 139<br />
CONNECT INTERCONNECT ................................................................................................................. 139<br />
POWEROFF INTERCONNECT ................................................................................................................ 139<br />
POWERON INTERCONNECT ................................................................................................................ 140<br />
RESTART INTERCONNECT ..................................................................................................................... 140<br />
SET INTERCONNECT POWERDELAY ...................................................................................................... 140<br />
SET INTERCONNECT UID ...................................................................................................................... 141<br />
SHOW INTERCONNECT INFO .............................................................................................................. 141<br />
SHOW INTERCONNECT LIST ................................................................................................................ 143<br />
SHOW INTERCONNECT PORT MAP ...................................................................................................... 143<br />
SHOW INTERCONNECT POWERDELAY ................................................................................................. 144<br />
SHOW INTERCONNECT SESSIONS ...................................................................................................... 144<br />
SHOW INTERCONNECT STATUS ........................................................................................................... 144<br />
Active Health System commands................................................................................................. 146<br />
ENABLE ACTIVE HEALTH SYSTEM ........................................................................................................... 146<br />
DISABLE ACTIVE HEALTH SYSTEM .......................................................................................................... 146<br />
Enclosure DVD commands ......................................................................................................... 147<br />
SET SERVER DVD .................................................................................................................................. 147<br />
SHOW SERVER DVD ............................................................................................................................. 147<br />
Remote syslog commands .......................................................................................................... 149<br />
DISABLE SYSLOG REMOTE .................................................................................................................... 149<br />
ENABLE SYSLOG REMOTE ..................................................................................................................... 149<br />
SET REMOTE SYSLOG PORT .................................................................................................................. 149<br />
SET REMOTE SYSLOG SERVER ............................................................................................................... 150<br />
SHOW SYSLOG SETTINGS ................................................................................................................... 150<br />
TEST SYSLOG ....................................................................................................................................... 150<br />
Remote syslog example .......................................................................................................................... 151<br />
USB support commands ............................................................................................................. 152<br />
Contents 8
DOWNLOAD CONFIG using USB key .................................................................................................... 152<br />
SET SERVER DVD for USB key ................................................................................................................. 152<br />
SHOW USBKEY .................................................................................................................................... 152<br />
UPDATE IMAGE using USB key ............................................................................................................... 153<br />
UPLOAD CONFIG using USB key............................................................................................................ 154<br />
VLAN commands ...................................................................................................................... 155<br />
ADD VLAN ........................................................................................................................................... 155<br />
DISABLE VLAN ...................................................................................................................................... 155<br />
EDIT VLAN ........................................................................................................................................... 155<br />
ENABLE VLAN ...................................................................................................................................... 156<br />
REMOVE VLAN..................................................................................................................................... 156<br />
SAVE VLAN .......................................................................................................................................... 156<br />
SET VLAN DEFAULT ............................................................................................................................... 156<br />
SET VLAN FACTORY ............................................................................................................................. 157<br />
SET VLAN INTERCONNECT ................................................................................................................... 157<br />
SET VLAN IPCONFIG ............................................................................................................................ 157<br />
SET VLAN IPCONFIG DHCP ................................................................................................................... 158<br />
SET VLAN IPCONFIG SAVE ................................................................................................................... 158<br />
SET VLAN IPCONFIG STATIC ................................................................................................................. 158<br />
SET VLAN OA ...................................................................................................................................... 159<br />
SET VLAN REVERT ................................................................................................................................. 159<br />
SET VLAN SERVER ................................................................................................................................. 159<br />
SHOW VLAN ....................................................................................................................................... 159<br />
<strong>HP</strong> Insight Remote Support commands ......................................................................................... 161<br />
ENABLE REMOTE_SUPPORT IRS ............................................................................................................ 161<br />
ENABLE REMOTE_SUPPORT MAINTENANCE .......................................................................................... 161<br />
DISABLE REMOTE_SUPPORT .................................................................................................................. 161<br />
DISABLE REMOTE_SUPPORT MAINTENANCE .......................................................................................... 161<br />
SEND REMOTE_SUPPORT DATACOLLECTION ......................................................................................... 162<br />
TEST REMOTE_SUPPORT ........................................................................................................................ 162<br />
SHOW REMOTE_SUPPORT .................................................................................................................... 162<br />
SHOW REMOTE_SUPPORT EVENTS ....................................................................................................... 163<br />
Enclosure Dynamic Power Cap commands .................................................................................. 164<br />
SET ENCLOSURE POWER_CAP .............................................................................................................. 164<br />
SET ENCLOSURE POWER_CAP_BAYS_TO_EXCLUDE ................................................................................ 164<br />
SHOW ENCLOSURE POWER_CAP ......................................................................................................... 165<br />
SHOW ENCLOSURE POWER_CAP_BAYS_TO_EXCLUDE ........................................................................... 165<br />
Event notifications ..................................................................................................................... 167<br />
Enclosure event notifications ................................................................................................................... 167<br />
Command line event notifications ............................................................................................................ 167<br />
Support and other resources ...................................................................................................... 170<br />
Before you contact <strong>HP</strong> ............................................................................................................................ 170<br />
<strong>HP</strong> contact information ........................................................................................................................... 170<br />
Time zone settings .................................................................................................................... 171<br />
Universal time zone settings .................................................................................................................... 171<br />
Africa time zone settings ........................................................................................................................ 171<br />
Americas time zone settings .................................................................................................................... 172<br />
Asia time zone settings .......................................................................................................................... 173<br />
Oceanic time zone settings ..................................................................................................................... 174<br />
Contents 9
Europe time zone settings ....................................................................................................................... 174<br />
Polar time zone settings .......................................................................................................................... 175<br />
Acronyms and abbreviations ...................................................................................................... 176<br />
Documentation feedback ........................................................................................................... 178<br />
Index ....................................................................................................................................... 179<br />
Contents 10
Introduction<br />
What's new<br />
The command line interface user guide contains the following changes with <strong>Onboard</strong> <strong>Administrator</strong> firmware<br />
version 3.70:<br />
• The HELP command example has been updated.<br />
• The SHOW RACK INFO command has been added.<br />
• The SHOW TOPOLOGY command description and example have been updated.<br />
• The ADD USER command restrictions have been updated.<br />
• The DISABLE STRONG PASSWORDS command restrictions have been updated.<br />
• The ENABLE STRONG PASSWORDS command restrictions have been updated.<br />
• The SET MINIMUM PASSWORD LENGTH command restrictions have been updated.<br />
• The GENERATE CERTIFICATE command restrictions have been updated.<br />
• The SET FACTORY command restrictions have been updated.<br />
• The GENERATE KEY command and description have been updated.<br />
• The SHOW ALL command example has been updated.<br />
• The ENABLE ENCLOSURE_IP_MODE command restrictions have been updated.<br />
• The ENABLE SNMP command restrictions have been updated.<br />
• The ENABLE TELNET command restrictions have been updated.<br />
• The ENCRYPTION MODE commands have been removed.<br />
• The SET FIPS MODE command has been added.<br />
• The SHOW FIPS MODE command has been added.<br />
• The SHOW LOGIN_BANNER command access level has been updated.<br />
• The SHOW NETWORK command description and example have been updated.<br />
• The SHOW SSHFINGERPRINT command access level has been updated.<br />
• The SHOW ENCLOSURE INFO command description has been updated.<br />
• The SHOW OA NETWORK command access level has been updated.<br />
• The SHOW SYSLOG command example has been updated.<br />
• The UPDATE command has been updated.<br />
• The UPDATE IMAGE FW_ISO command restrictions have been updated.<br />
• The UPLOAD SUPPORTDUMP command restrictions have been updated.<br />
• The UPDATE IMAGE USING USB KEY command restrictions have been updated.<br />
Introduction 11
• The SHOW INTERCONNECT POWERDELAY command restrictions have been updated.<br />
• The <strong>HP</strong> Insight Remote Support commands have been added.<br />
Introduction 12
Accessing the command line interface<br />
Remote access to the <strong>Onboard</strong> <strong>Administrator</strong><br />
The <strong>Onboard</strong> <strong>Administrator</strong> CLI can be accessed remotely through any Telnet or SSH session.<br />
Telnet session<br />
1. Open a command-line window from a network-connected client.<br />
2. At the prompt, telnet to the IP address of the <strong>Onboard</strong> <strong>Administrator</strong> and press Enter.<br />
For example, telnet 192.168.100.130, where the IP address is the address of your <strong>Onboard</strong><br />
<strong>Administrator</strong>.<br />
3. Enter a valid user name and press Enter.<br />
4. Enter a valid password and press Enter. The CLI command prompt displays.<br />
5. Enter commands for the <strong>Onboard</strong> <strong>Administrator</strong>.<br />
6. To terminate the remote access telnet session, enter Exit, Logout, or Quit at the CLI command<br />
prompt.<br />
SSH session<br />
1. Start a SSH session to the <strong>Onboard</strong> <strong>Administrator</strong> using any SSH client application.<br />
2. When prompted, enter the assigned IP address or DNS name of the <strong>Onboard</strong> <strong>Administrator</strong> and press<br />
Enter.<br />
3. Enter a valid user name and press Enter.<br />
4. Enter a valid password and press Enter. The CLI command prompt displays.<br />
5. Enter commands for the <strong>Onboard</strong> <strong>Administrator</strong>.<br />
6. To terminate the remote access SSH session, close the communication software or enter Exit,<br />
Logout, or Quit at the CLI command prompt.<br />
Local access to the <strong>Onboard</strong> <strong>Administrator</strong><br />
The <strong>Onboard</strong> <strong>Administrator</strong> can be accessed locally through a serial port connector on the rear of the<br />
<strong>Onboard</strong> <strong>Administrator</strong> module. Use a laptop or another computer as a serial console to communicate with<br />
the <strong>Onboard</strong> <strong>Administrator</strong>. A laptop or PC connected to the <strong>Onboard</strong> <strong>Administrator</strong> serial port requires a<br />
null-modem cable. The minimum connection to an external console is pins 2, 3, and 5.<br />
1. Connect a serial cable between the serial port on the computer and the corresponding serial port on the<br />
<strong>Onboard</strong> <strong>Administrator</strong> module. The following table is for the DB9 serial (RS232) port and shows the<br />
pinout and signals for the RS232 connector. The signal direction is DTE (computer) relative to the DCE<br />
(modem).<br />
Pin Name Signal direction Description<br />
1 CD
Pin Name Signal direction Description<br />
4 DTR -->> Data terminal ready<br />
5 GND System ground<br />
6 DSR Request to send<br />
8 CTS
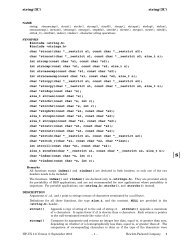
Command line<br />
Command line overview<br />
The CLI can be used as an alternative method for managing the <strong>Onboard</strong> <strong>Administrator</strong>. Using the CLI can<br />
be useful in the following scenarios:<br />
• <strong>HP</strong> Management Applications (for example: Systems Insight Manager, Insight Control tools, and so on)<br />
can query the <strong>Onboard</strong> <strong>Administrator</strong> for information these tools need to present a complete<br />
management view of <strong>HP</strong> <strong>BladeSystem</strong> enclosures and the devices contained within. This interface is<br />
also used by the Management tools to execute provisioning and configuration tasks to devices within<br />
the enclosure.<br />
• Users can develop tools that utilize <strong>Onboard</strong> <strong>Administrator</strong> functions for data collection and for<br />
executing provisioning and configuration tasks.<br />
• When no browser is available or you prefer to use a Linux command line interface to access<br />
management data and perform configuration tasks.<br />
Command line conventions<br />
CLI input is case-insensitive except when otherwise noted. Commands are organized into a tree, with<br />
approximately 30 base commands. Each of these commands can have any number of subcommands.<br />
Subcommands can also have further subcommands.<br />
Each command used in this guide follows the conventions listed in the following table.<br />
Symbol Description<br />
Denotes the variable within the symbols that must be substituted with a value, such as<br />
a user name. Symbols must be removed.<br />
UPPER CASE Denotes input to be entered as shown.<br />
Unless noted, symbols are not case-sensitive.<br />
| Used to separate input options.<br />
{ } Denotes a list of mandatory choices that must be made.<br />
For example, SET ENCLOSURE UID {ON | OFF} must be in the form of either of the<br />
following:<br />
• SET ENCLOSURE UID ON<br />
• SET ENCLOSURE UID OFF<br />
[ ] Denotes an optional argument or set of characters.<br />
" " Used to enclose command arguments that contain spaces and special characters.<br />
Reserved words<br />
The following words can only be used in specific situations with the <strong>Onboard</strong> <strong>Administrator</strong> CLI:<br />
• PASSWORD<br />
Command line 15
• TEST<br />
Because these words indicate specific functions within the <strong>Onboard</strong> <strong>Administrator</strong> firmware, they are only<br />
allowed where explicitly defined in the help documentation for a command. Attempts to use reserved words<br />
in a command where not allowed results in an Invalid Arguments error.<br />
A local user account can be created by using these reserved words.<br />
<strong>HP</strong> Integrity server blade restrictions<br />
<strong>HP</strong> Integrity server blades do not support all commands. See specific commands for restrictions on <strong>HP</strong><br />
Integrity server blades.<br />
The following commands are not applicable to <strong>HP</strong> Integrity server blades<br />
• Hponcfg<br />
• Set Server Boot<br />
• Set Server Boot Once<br />
• Show Server Boot<br />
• Show Syslog Server<br />
• Update iLO<br />
Access level and privileges<br />
<strong>Onboard</strong> <strong>Administrator</strong> accounts are created with a username, password, privilege level, and permissions to<br />
Device bays and Interconnect bays on the <strong>Onboard</strong> <strong>Administrator</strong>. You cannot delete or modify the<br />
privileges of the default <strong>Administrator</strong> account on the <strong>Onboard</strong> <strong>Administrator</strong>. You can only change the<br />
password for the <strong>Administrator</strong> account. The following table indicates the capabilities of the user based on<br />
their privileges and permitted bays.<br />
Account classification Capabilities Account name /<br />
Privilege level<br />
<strong>Administrator</strong> • All commands<br />
• Local account, not<br />
LDAP<br />
• Only account<br />
remaining after a<br />
reset <strong>Onboard</strong><br />
<strong>Administrator</strong> to<br />
factory defaults<br />
(account retains<br />
configured<br />
<strong>Administrator</strong><br />
password)<br />
• <strong>Administrator</strong><br />
account password<br />
can be reset to<br />
factory default<br />
through the <strong>Onboard</strong><br />
<strong>Administrator</strong> serial<br />
port using L lost<br />
<strong>Administrator</strong> /<br />
administrator<br />
Bays selected for this<br />
account<br />
All<br />
Command line 16
Account classification Capabilities<br />
password recovery<br />
option<br />
Account name /<br />
Privilege level<br />
• Can download, add,<br />
and clear SSHKey.<br />
This key only works<br />
with the<br />
<strong>Administrator</strong><br />
account.<br />
OA administrator • All commands<br />
• Allows access to all<br />
aspects of the <strong>HP</strong><br />
<strong>BladeSystem</strong><br />
Enclosure and<br />
<strong>Onboard</strong><br />
<strong>Administrator</strong><br />
including<br />
configuration,<br />
firmware updates,<br />
user management,<br />
and resetting default<br />
settings.<br />
administrator • Can perform all<br />
operations to<br />
permitted device<br />
bays and<br />
interconnect bays<br />
including virtual<br />
power and console<br />
access<br />
• administrator<br />
permission on device<br />
iLO<br />
OA operator • Allows access to all<br />
aspects of the <strong>HP</strong><br />
<strong>BladeSystem</strong><br />
Enclosure and<br />
<strong>Onboard</strong><br />
<strong>Administrator</strong>, with<br />
the exception of user<br />
management<br />
operator • Can perform all<br />
operations to<br />
permitted device<br />
bays and<br />
interconnect bays<br />
including virtual<br />
power and console<br />
access<br />
• operator permission<br />
on device iLO<br />
Bays selected for this<br />
account<br />
username / administrator OA bays (all bays<br />
automatically selected)<br />
username / administrator No OA bays and only<br />
selected device bays and<br />
interconnect bays<br />
username / operator<br />
username / operator<br />
OA bays and can have other<br />
bays selected, but the<br />
capabilities for the other bays<br />
are defined in operator*<br />
Selected device bays and<br />
interconnect bays<br />
OA user • Can view status and username / user OA bays and can have other<br />
Command line 17
Account classification Capabilities<br />
information of<br />
enclosure<br />
Account name /<br />
Privilege level<br />
• Can view CLI history<br />
user • Can view status and<br />
information of<br />
selected bays<br />
• Can view CLI history<br />
• Can set password for<br />
own account<br />
• Can set user contact<br />
information for own<br />
account<br />
• Can show CLI<br />
commands<br />
*EBIPA and VLAN features allow access to all bays for an OA operator.<br />
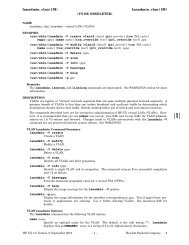
Account authentication<br />
username / user<br />
Bays selected for this<br />
account<br />
bays selected, but the<br />
capabilities for the other bays<br />
are defined in user<br />
No OA bays and some<br />
device bays and interconnect<br />
bays<br />
Local users<br />
• This is the default setting. Local user accounts are directly authenticated against a password for each<br />
account stored on the active <strong>Onboard</strong> <strong>Administrator</strong>.<br />
• Account modifications are automatically synchronized between both <strong>Onboard</strong> <strong>Administrator</strong> modules<br />
if two are present.<br />
• Local users may be disabled if LDAP is enabled, leaving the <strong>Administrator</strong> account as the only local<br />
account that cannot be disabled.<br />
LDAP users<br />
• The Enable/Disable LDAP is an optional setting. LDAP enabled can be used with local users enabled or<br />
disabled.<br />
• The <strong>Onboard</strong> <strong>Administrator</strong> will use configured LDAP server and search context to request account<br />
authentication.<br />
• Configuration of the LDAP group will determine the privileges instead of the username.<br />
• If a user is configured for multiple groups with different privileges and bay permissions, then the user will<br />
have the highest privileges and the combination of all permitted bays.<br />
• In version 2.10 or higher, if the user logged into the <strong>Onboard</strong> <strong>Administrator</strong> is an LDAP user then the<br />
<strong>Onboard</strong> <strong>Administrator</strong> enforces the iLO license and requires that the iLO have a Select license before<br />
allowing the AutoLogin to iLO.<br />
AutoLogin to iLO<br />
The following table indicates <strong>Onboard</strong> <strong>Administrator</strong> account privileges mapped to iLO privileges when<br />
using <strong>Onboard</strong> <strong>Administrator</strong> AutoLogin.<br />
iLO privileges administrator operator user<br />
Administer user accounts X<br />
Command line 18
iLO privileges administrator operator user<br />
Remote console access X X<br />
Virtual power and reset X X<br />
Virtual media X X<br />
Configure iLO settings X<br />
Login to iLO X X X<br />
Command line 19
General commands<br />
CLEAR SCREEN<br />
• Command:<br />
CLEAR SCREEN<br />
• Description:<br />
Clears the terminal screen<br />
• Access level:<br />
EXIT • Command:<br />
<strong>Administrator</strong>, Operator, User<br />
EXIT<br />
• Description:<br />
Exits the command line interpreter<br />
• Access level:<br />
HELP • Command:<br />
<strong>Administrator</strong>, Operator, User<br />
HELP <br />
• Description:<br />
If you supply a command, the usage and help text for the command appears. If no argument is given,<br />
all base commands appear.<br />
• Access level:<br />
<strong>Administrator</strong>, Operator, User<br />
Example OA-0018FE27577F> HELP<br />
ADD | ASSIGN | CLEAR | CONNECT | DISABLE | DISCOVER | DOWNLOAD | EDIT | ENABLE<br />
| EXIT | FORCE | GENERATE | HELP | HISTORY | <strong>HP</strong>ONCFG | LOGOUT | PING | POWEROFF<br />
| POWERON | QUIT | REBOOT | REMOVE | RESTART | SAVE | SEND | SET | SHOW |<br />
SLEEP | TEST | UNASSIGN | UPDATE | UPLOAD<br />
General commands 20
LOGOUT<br />
QUIT<br />
• Command:<br />
LOGOUT<br />
• Description:<br />
Exits the command line interpreter<br />
• Access level:<br />
<strong>Administrator</strong>, Operator, User<br />
• Command:<br />
QUIT<br />
• Description:<br />
Exits the command line interpreter<br />
• Access level:<br />
<strong>Administrator</strong>, Operator, User<br />
General commands 21
Rack commands<br />
SET RACK NAME<br />
• Command:<br />
SET RACK NAME <br />
• Description:<br />
Sets the rack name<br />
• Access level/Bay level:<br />
OA administrator, OA operator<br />
• Restrictions:<br />
The must be a maximum of 32 characters long and includes all alphanumeric, the dash,<br />
and the underscore characters.<br />
UnnamedRack is the default rack name.<br />
SHOW RACK INFO<br />
• Command:<br />
SHOW RACK INFO<br />
• Description:<br />
Displays the rack information for the enclosure<br />
• Access level/Bay level:<br />
All<br />
• Restrictions:<br />
None<br />
• Example:<br />
OA-0018FE27577F> SHOW RACK INFO<br />
Rack Information:<br />
Or<br />
Product Description: ASSY, RACK 10642 G2<br />
Part Number: 383573-001<br />
Rack Identifier: 2UJ848000H<br />
Rack U Height: 42<br />
Location hardware not found (No hardware support)<br />
Or<br />
Location data error (Hardware support available – invalid data)<br />
Rack commands 22
SHOW RACK NAME<br />
• Command:<br />
SHOW RACK NAME<br />
• Description:<br />
Displays the user defined rack name setting for the enclosure<br />
• Access level/Bay level:<br />
All<br />
• Restrictions:<br />
None<br />
• Example:<br />
OA-0018FE27577F> SHOW RACK NAME<br />
Rack Name: UnnamedRack<br />
SHOW TOPOLOGY<br />
• Command:<br />
SHOW TOPOLOGY<br />
• Description:<br />
o Displays the enclosures connected by the enclosure link<br />
o Displays a table with the enclosure name, UUID, Enclosure Rack U Position, overall health of the<br />
enclosure, and the IP address<br />
• Access level/Bay level<br />
All<br />
• Restrictions:<br />
None<br />
Example SHOW TOPOLOGY<br />
Detecting linked enclosures ....<br />
Rack Topology (top-down)<br />
Rack UUID: 090987654321<br />
Enclosure Rack U Position: 11<br />
Rack Name: UnnamedRack<br />
Enclosure Name Status Local IP Address UUID<br />
-------------------------------- -------- ----- ---------------<br />
-------------<br />
Shorty OK Yes 16.84.190.253<br />
090987654321<br />
OA-0018FE2F998B OK No 172.16.211.101<br />
09USE644285C<br />
Rack commands 23
User account commands<br />
ADD USER<br />
• Command:<br />
ADD USER "" [""]<br />
• Description:<br />
ASSIGN<br />
Adds a user to the system. If you do not provide a password, you are prompted for one. If SCRIPT<br />
MODE is enabled and the password is not provided, the password is assigned an unmatched string.<br />
This unmatched string requires an enclosure administrator to change the password to allow the new<br />
user to access the system.<br />
• Access level/Bay level:<br />
OA administrator<br />
• Restrictions:<br />
o You can add a maximum of 30 users, including the reserved accounts.<br />
o The is case sensitive and must be unique to all other user names and group names. The<br />
must be 1 to 40 characters long and can include all alphanumeric characters, the<br />
dash, and the underscore.<br />
o The must begin with a letter.<br />
o The must be three to eight characters long for firmware 1.00 through 1.30 and 3 to 40<br />
characters long for firmware 2.00 and later. The character set includes all printable characters. If<br />
you do not enter a password, you are prompted to enter one.<br />
o Reserved user names are: ALL (case insensitive) ADMINISTRATOR (case insensitive), switch1,<br />
switch2, switch3, switch4, switch5, switch6, switch7, switch8, ldapuser, and nobody.<br />
• Command:<br />
• ASSIGN {SERVER | INTERCONNECT} { | ALL | -} {"" | LDAP GROUP ""} *OR* ASSIGN OA<br />
{"" | LDAP GROUP ""}<br />
Assigns one or more bays to a user or group<br />
• Access level/Bay level:<br />
OA administrator<br />
• Restrictions:<br />
The is case sensitive. If a bay is presently assigned to a user, you must unassign the bay<br />
first.<br />
User account commands 24
ASSIGN OA<br />
• Command:<br />
ASSIGN OA {"" | LDAP GROUP ""}<br />
• Description:<br />
Assigns the <strong>Onboard</strong> <strong>Administrator</strong>s specified to an existing user or group<br />
• Access level/Bay level:<br />
OA administrator<br />
• Restrictions:<br />
The is case sensitive.<br />
DISABLE USER<br />
• Command:<br />
DISABLE USER ""<br />
• Description:<br />
Disables a user account. The system immediately logs out the user and prevents the user from logging<br />
in until the account is enabled. CLI sessions are terminated and all future SOAP web accesses fail.<br />
• Access level/Bay level:<br />
OA administrator<br />
• Restrictions:<br />
o The is case sensitive.<br />
o You cannot disable the built-in <strong>Administrator</strong> account<br />
DISABLE STRONG PASSWORDS<br />
• Command:<br />
DISABLE STRONG PASSWORDS<br />
• Description:<br />
Removes strong password requirements for user passwords<br />
• Access level/Bay level:<br />
OA administrator<br />
• Restrictions:<br />
o Only <strong>Administrator</strong>s with <strong>Onboard</strong> <strong>Administrator</strong> permission are allowed to manage strong<br />
passwords.<br />
o You cannot disable strong passwords when in FIPS Mode ON/DEBUG.<br />
ENABLE STRONG PASSWORDS<br />
• Command:<br />
User account commands 25
ENABLE STRONG PASSWORDS<br />
• Description:<br />
When enabled, this command requires that a user's password contain at least one character from three<br />
of the four categories.<br />
The four categories include:<br />
o Uppercase<br />
o Lowercase<br />
o Numeric<br />
o Nonalphanumeric<br />
• Access level/Bay level:<br />
OA administrator<br />
• Restrictions:<br />
o Only <strong>Administrator</strong>s with <strong>Onboard</strong> <strong>Administrator</strong> permission are allowed to manage strong<br />
passwords.<br />
o Strong passwords are enabled by default in FIPS Mode ON/DEBUG.<br />
ENABLE USER<br />
• Command:<br />
ENABLE USER ""<br />
• Description:<br />
Enables a user account that was previously disabled by the DISABLE USER command<br />
• Access level/Bay level:<br />
OA administrator<br />
• Restrictions:<br />
HISTORY<br />
The is case sensitive.<br />
• Command:<br />
HISTORY<br />
• Description:<br />
Shows the history of commands for the current session<br />
• Access level/Bay level:<br />
All<br />
• Restrictions:<br />
None<br />
User account commands 26
REMOVE USER<br />
• Command:<br />
REMOVE USER {ALL | "" | CERTIFICATE ""}<br />
• Description:<br />
Removes a user from the system and/or any certificate mapped to the user. If you specify ALL, then the<br />
command is run for all users except the default system accounts.<br />
• Access level/Bay level:<br />
OA administrator<br />
• Restrictions:<br />
o The is case sensitive.<br />
o You cannot remove the <strong>Administrator</strong> account.<br />
SET MINIMUM PASSWORD LENGTH<br />
• Command:<br />
SET MINIMUM PASSWORD LENGTH <br />
• Description:<br />
Sets a minimum length for passwords. When set, a user's password must contain at least the number of<br />
characters specified.<br />
• Access level/Bay level:<br />
OA administrator<br />
• Restrictions:<br />
o The minimum password length can be set between 3 and 40 characters.<br />
o In FIPS Mode ON/DEBUG, the minimum password length can be set between 8 and 40 characters.<br />
SET PASSWORD<br />
• Command:<br />
SET PASSWORD [""]<br />
• Description:<br />
Sets the password of the user that executed the command. If you do not provide a password on the<br />
command line, you are prompted for one.<br />
• Access level/Bay level:<br />
All<br />
• Restrictions:<br />
The must be three to eight characters long for firmware 1.00 through 1.30 and 3 to 40<br />
characters long for firmware 2.00 and later. The character set includes all printable characters.<br />
User account commands 27
SET SESSION TIMEOUT<br />
• Command:<br />
SET SESSION TIMEOUT <br />
• Description:<br />
Sets the number of minutes before inactive sessions are removed. The default setting is 1440.<br />
• Access level/ Bay level:<br />
OA administrator<br />
• Restriction:<br />
Valid session timeout values range from 10 to 1440 minutes (24 hours).<br />
SET USER ACCESS<br />
• Command:<br />
SET USER ACCESS "" {ADMINISTRATOR | OPERATOR | USER}<br />
• Description:<br />
Sets the user access level. Additionally, use the ASSIGN command to give the user access rights to the<br />
<strong>Onboard</strong> <strong>Administrator</strong>, server bays, and interconnect bays.<br />
• Access level/Bay level:<br />
OA administrator<br />
• Restrictions:<br />
None<br />
SET USER CONTACT<br />
• Command:<br />
SET USER CONTACT [""] ""<br />
• Description:<br />
Sets the contact information field for the user. If there is no , the command modifies the<br />
contact information of the user who executed the command.<br />
• Access level/Bay level:<br />
o All users can modify their own contact information.<br />
o The OA administrator can modify all users.<br />
• Restrictions:<br />
o The is case sensitive. The must be a maximum of 20 characters long<br />
and includes all alphanumeric characters, the dash, the underscore, and spaces.<br />
o The default contact information is blank.<br />
o You must use double quotes if the contact information contains any spaces.<br />
User account commands 28
SET USER FULLNAME<br />
• Command:<br />
SET USER FULLNAME [""] ""<br />
• Description:<br />
Sets a user's full name. If you do not specify a , then the command modifies the full name<br />
of the user who is currently logged in.<br />
• Access level/Bay level:<br />
o OA administrator<br />
o All users can modify their own full name.<br />
• Restrictions:<br />
o The is case sensitive. The must be a maximum of 20 characters long and<br />
includes all alphanumeric, the dash, the underscore, and the space characters.<br />
o The default full name is blank.<br />
SET USER PASSWORD<br />
• Command:<br />
SET USER PASSWORD "" [""]<br />
• Description:<br />
Sets a user's password. If you do not supply a password on the command line, you are prompted for<br />
one.<br />
• Access level/Bay level<br />
OA administrator<br />
OA operator and User access level users can change their own passwords.<br />
• Restrictions:<br />
o Only OA administrators can modify another user's password. Only the <strong>Administrator</strong> account can<br />
modify the password of the <strong>Administrator</strong> account.<br />
o The is case sensitive.<br />
o The must be three to eight characters long for firmware 1.00 through 1.30 and 3<br />
to 40 characters long for firmware 2.00 and higher.<br />
o The character set includes all printable characters.<br />
SHOW PASSWORD SETTINGS<br />
• Command:<br />
SHOW PASSWORD SETTINGS<br />
• Description:<br />
Displays the current minimum password length and strong password settings<br />
• Access level/Bay level:<br />
User account commands 29
All users<br />
• Restrictions:<br />
None<br />
Example<br />
OA-0018FE27577F>SHOW PASSWORD SETTINGS<br />
Strong Passwords: Disabled<br />
Minimum Password Length: 3<br />
SHOW SESSION TIMEOUT<br />
• Command:<br />
SHOW SESSION TIMEOUT<br />
• Description:<br />
Displays the current <strong>Onboard</strong> <strong>Administrator</strong> user session timeout. The session timeout is the number of<br />
minutes before inactive sessions are removed.<br />
• Access level/Bay level:<br />
All<br />
• Restriction:<br />
None<br />
Example<br />
>SHOW SESSION TIMEOUT<br />
Session Timeout: 1440 minutes<br />
SHOW USER<br />
• Command:<br />
SHOW USER [LIST | ""]<br />
• Description:<br />
o Displays the user's full name, contact information, access rights, account status, and bays that the<br />
user can access.<br />
o If you enter LIST and you are an OA administrator, the information for every user is listed. An<br />
asterisk before a user name denotes the current user.<br />
o If a user name or LIST are not entered, information for the current user is displayed.<br />
• Access level/Bay level:<br />
All<br />
• Restrictions:<br />
o The is case sensitive.<br />
o Users who do not have OA administrator access levels can only view their user information.<br />
Example<br />
OA-0018FE27577F> SHOW USER<br />
User account commands 30
Local User "<strong>Administrator</strong>" Information:<br />
Full name: System <strong>Administrator</strong><br />
Contact Info:<br />
User Rights: Admin<br />
Account Status: Enabled<br />
Server Bay Access List: 1 1A 1B 2 2A 2B 3 3A 3B 4 4A 4B 5 5A 5B 6 6A 6B<br />
7 7A 7B 8 8A 8B<br />
Interconnect Bay Access List: 1 2 3 4<br />
OA Access: Yes<br />
SLEEP<br />
• Command:<br />
SLEEP <br />
• Description:<br />
Pauses the sessions for a fixed period of time. This command is useful for adding delays to scripts.<br />
After the pause has started, you cannot continue the session before time runs out. However, you can<br />
terminate the session and start another session.<br />
• Access level/Bay level:<br />
All<br />
• Restrictions:<br />
The field must be a whole number from 1 to 86400.<br />
UNASSIGN<br />
• Command:<br />
UNASSIGN {SERVER | INTERCONNECT} { | ALL | -} {"" | LDAP GROUP ""} *OR* UNASSIGN OA<br />
{"" | LDAP GROUP ""}<br />
• Description:<br />
Removes a bay from the user<br />
• Access level/Bay level:<br />
OA administrator<br />
• Restrictions:<br />
The is case sensitive.<br />
UNASSIGN OA<br />
• Command:<br />
UNASSIGN {SERVER | INTERCONNECT} { | ALL | -} {"" | LDAP GROUP ""} *OR* UNASSIGN OA<br />
{"" | LDAP GROUP ""}<br />
• Description:<br />
Removes the <strong>Onboard</strong> <strong>Administrator</strong> from the control of the user that it is currently assigned<br />
• Access level/Bay level:<br />
User account commands 31
OA administrator<br />
• Restrictions:<br />
The is case sensitive.<br />
User account commands 32
Two-Factor Authentication commands<br />
DISABLE CRL<br />
• Command:<br />
DISABLE CRL<br />
• Description:<br />
Disables certificate revocation checks<br />
• Access level/Bay level:<br />
OA administrator<br />
• Restrictions:<br />
None<br />
DISABLE TWOFACTOR<br />
• Command:<br />
DISABLE TWOFACTOR<br />
• Description:<br />
Disables Two-Factor Authentication<br />
• Access level/Bay level:<br />
OA administrator<br />
• Restrictions:<br />
None<br />
DOWNLOAD CA CERTIFICATE<br />
• Command:<br />
DOWNLOAD CA CERTIFICATE ""<br />
• Description:<br />
Downloads a CA certificate to act as the trusted certification authority to validate user certificates when<br />
using Two-Factor Authentication.<br />
• Access level/Bay level:<br />
OA administrator<br />
• Restrictions:<br />
Allows the download of up to five different certificates<br />
Two-Factor Authentication commands 33
DOWNLOAD USER CERTIFICATE<br />
• Command:<br />
DOWNLOAD USER CERTIFICATE "" <br />
• Description:<br />
o Downloads an x.509 certificate for the user from . The file at must be a Base64 PEM<br />
encoded file.<br />
o Downloads a CA certificate used in Two-Factor Authentication<br />
• Access level/Bay level:<br />
OA administrator<br />
• Restrictions:<br />
None<br />
REMOVE CA CERTIFICATE<br />
• Command:<br />
REMOVE CA CERTIFICATE ""<br />
• Description:<br />
• Removes the trust certificate corresponding to the SHA1 . Any users having their<br />
certificates issued by this CA can no longer login if Two-Factor Authentication is enabled.<br />
• Access level/Bay level:<br />
OA administrator<br />
• Restrictions:<br />
None<br />
REMOVE USER CERTIFICATE<br />
• Command:<br />
REMOVE USER CERTIFICATE ""<br />
• Description:<br />
Removes the user certificate. If Two-Factor Authentication is enabled, this user no longer has access<br />
through HTTPS.<br />
• Access level/Bay level:<br />
OA administrator<br />
• Restrictions:<br />
None<br />
SHOW CA CERTIFICATES<br />
• Command:<br />
Two-Factor Authentication commands 34
SHOW CA CERTIFICATES<br />
• Description:<br />
Displays a list of installed CA certificates<br />
• Access level/Bay level:<br />
OA <strong>Administrator</strong><br />
• Restrictions:<br />
None<br />
Example<br />
OA-0016355E560A> SHOW CA CERTIFICATE<br />
Details for ca certificate 1<br />
certificateVersion = 3<br />
issuerOrganization = ca.com<br />
issuerOrganizationalUnit = IT Infrastructure<br />
issuerCommonName = <strong>Hewlett</strong>-<strong>Packard</strong> Primary Class 2 Certification Authority<br />
subjectOrganization = hp.com<br />
subjectOrganizationalUnit = IT Infrastructure<br />
subjectCommonName = <strong>Hewlett</strong>-<strong>Packard</strong> Primary Class 2 Certification Authority<br />
validFrom = 1997-12-30T00:00:00Z<br />
validTo = 2012-12-29T23:59:59Z<br />
serialNumber =83:B7:1B:E9:27:AB:5C:61:F8:8F:90:30:E:0D:17:DE:C6<br />
extensionCount = 7<br />
md5Fingerprint = B6:22:5B:B8:43:CD:1A:66:64:19:33:B:3:C1:80:BF:B6<br />
sha1Fingerprint = CF:5C:89:7B:84:7B:73:C4:C5:3E:3F:E:7:93:09:53:EB:C4:28:BE:CF<br />
SHOW TWOFACTOR INFO<br />
• Command:<br />
SHOW TWOFACTOR INFO<br />
• Description:<br />
Displays the configuration details for Two-Factor Authentication<br />
• Access level/Bay level:<br />
All<br />
• Restrictions:<br />
None<br />
Example<br />
OA-0018FE27577F> SHOW TWOFACTOR INFO<br />
Two Factor Authentication:<br />
Enabled : Disabled<br />
Certificate Revocation : Disabled<br />
Certificate Owner Field : Subject<br />
Two-Factor Authentication commands 35
Directory commands<br />
ADD LDAP CERTIFICATE<br />
• Command:<br />
ADD LDAP CERTIFICATE <br />
• Description:<br />
Adds an LDAP certificate on the command line. To add the certificate:<br />
1. Start with a string that does not appear within the certificate (the end marker)<br />
2. Paste in the certificate<br />
3. Terminate the command with the end marker<br />
• Access level/Bay level:<br />
OA administrator<br />
• Restrictions:<br />
The certificate text cannot exceed 3071 characters.<br />
ADD LDAP GROUP<br />
• Command:<br />
ADD LDAP GROUP ""<br />
• Description:<br />
Adds an LDAP group to the group. This group must match a group in the directory server.<br />
• Access level/Bay level:<br />
OA administrator<br />
• Restrictions:<br />
o The maximum number of LDAP groups is 30.<br />
o Group name must be 1 to 255 characters in length.<br />
o Character set includes all printable characters, except quotation marks and new lines.<br />
o The group name must start with an alpha character.<br />
ASSIGN for LDAP<br />
• Command:<br />
ASSIGN {SERVER | INTERCONNECT} { | ALL | -} {"" | LDAP GROUP ""} *OR* ASSIGN OA<br />
{"" | LDAP GROUP ""}<br />
• Description:<br />
Directory commands 36
Assigns the bay to a specified LDAP group, providing access to the bay at the access level of the group<br />
• Access level/Bay level:<br />
OA administrator<br />
• Restrictions:<br />
None<br />
ASSIGN OA LDAP GROUP<br />
• Command:<br />
ASSIGN OA {"" | LDAP GROUP ""}<br />
• Description:<br />
Assigns access to the <strong>Onboard</strong> <strong>Administrator</strong> to the specified group<br />
• Access level/Bay level:<br />
OA administrator<br />
• Restrictions:<br />
None<br />
DISABLE LDAP<br />
NOTE: If LDAP is enabled, local accounts are disabled, and the LDAP server becomes<br />
unavailable, you can recover by booting into Lost Password mode.<br />
When booting in Lost Password mode, the local <strong>Administrator</strong> password will be reset, LDAP is<br />
disabled, and Local Logins are re-enabled<br />
• Command:<br />
DISABLE LDAP<br />
• Description:<br />
• Disables directory authentication<br />
• Access level/Bay level:<br />
OA administrator<br />
• Restrictions:<br />
None<br />
DOWNLOAD LDAP CERTIFICATE<br />
• Command:<br />
DOWNLOAD LDAP CERTIFICATE ""<br />
• Description:<br />
Downloads an LDAP certificate to establish a trusted relationship with the LDAP server. Specify the <br />
where the certificate is located.<br />
• Access level/Bay level:<br />
Directory commands 37
OA administrator<br />
• Restrictions:<br />
None<br />
ENABLE LDAP<br />
NOTE: If LDAP is enabled, local accounts are disabled, and the LDAP server becomes<br />
unavailable, you can recover by booting into Lost Password mode.<br />
When booting in Lost Password mode, the local <strong>Administrator</strong> password will be reset, LDAP is<br />
disabled, and Local Logins are re-enabled<br />
• Command:<br />
ENABLE LDAP [NOLOCAL]<br />
• Description:<br />
Enables directory authentication. If you use the NOLOCAL option, local users are not enabled.<br />
• Access level/Bay level:<br />
OA administrator<br />
• Restrictions:<br />
Before you can enable LDAP, configuration must be complete.<br />
REMOVE LDAP CERTIFICATE<br />
• Command:<br />
REMOVE LDAP CERTIFICATE ""<br />
• Description:<br />
o Removes the trust certificate corresponding to the MD5 .<br />
o This command revokes trust in the LDAP server associated with the certificate.<br />
• Access level/Bay level:<br />
OA administrator<br />
• Restrictions:<br />
None<br />
REMOVE LDAP GROUP<br />
• Command:<br />
REMOVE LDAP GROUP {ALL | ""}<br />
• Description:<br />
Removes the LDAP group from the system. If you specify ALL, then all LDAP groups are removed from<br />
the system.<br />
• Access level/Bay level:<br />
OA administrator<br />
Directory commands 38
• Restrictions:<br />
Before you can enable the LDAP group, configuration must be complete.<br />
SET LDAP GROUP ACCESS<br />
• Command<br />
SET LDAP GROUP ACCESS "" {ADMINISTRATOR | OPERATOR | USER}<br />
• Description:<br />
o Sets the LDAP group access level.<br />
o Additionally, use the ASSIGN OA command to give a user or group rights to the <strong>Onboard</strong><br />
<strong>Administrator</strong>.<br />
• Access level/Bay level:<br />
OA administrator<br />
• Restrictions:<br />
None<br />
SET LDAP GROUP DESCRIPTION<br />
• Command:<br />
SET LDAP GROUP DESCRIPTION "" ""<br />
• Description:<br />
Sets the LDAP group description field<br />
• Access level/Bay level:<br />
OA administrator<br />
• Restrictions:<br />
o Must be 0 to 58 characters in length.<br />
o Valid characters are all alphanumeric, the underscore (_), the dash (-), and spaces.<br />
o If the group name or description field contains spaces or zero characters, use double quotes.<br />
SET LDAP NAME MAP<br />
• Command:<br />
SET LDAP NAME MAP {ON|OFF}<br />
• Description:<br />
Turns on NT name mapping to enable the user to enter their NT domain\username<br />
• Access level/Bay level:<br />
OA administrator<br />
• Restrictions:<br />
None<br />
Directory commands 39
SET LDAP PORT<br />
• Command:<br />
SET LDAP PORT <br />
• Description:<br />
Sets the TCP port number of the LDAP SSL service. Port 636 is the standard value.<br />
• Access level/Bay level:<br />
OA administrator<br />
• Restrictions:<br />
The valid port number range is 1 to 65535<br />
SET LDAP SEARCH<br />
• Command:<br />
SET LDAP SEARCH {1-6 } ""<br />
• Description:<br />
Sets up to six search contexts in priority order<br />
• Access level/Bay level:<br />
OA administrator<br />
• Restrictions:<br />
None<br />
SET LDAP SERVER<br />
• Command:<br />
SET LDAP SERVER { | }<br />
• Description:<br />
Sets the or the of the directory server<br />
• Access level/Bay level:<br />
OA administrator<br />
• Restrictions:<br />
The is in the form ###.###.###.###, where each ### is in the range 0 to 255.<br />
SHOW LDAP CERTIFICATE<br />
• Command:<br />
SHOW LDAP CERTIFICATE<br />
• Description:<br />
Displays all LDAP certificates that are in effect on the <strong>Onboard</strong> <strong>Administrator</strong><br />
• Access level/Bay level:<br />
Directory commands 40
OA administrator<br />
• Restrictions:<br />
None<br />
Example<br />
OA-0016355E560A> SHOW LDAP CERTIFICATE<br />
1 Certificate name: 17D6A5ECBF51A1A47D44C1CDD29D19EE.pem<br />
-----BEGIN CERTIFICATE-----<br />
MIIHIzCCBgugAwIBAgIKFTKZbQAAAFx1EDANBgkqhkiG9w0BAQUFADB4MRMwEQYK<br />
CZImiZPyLGQBGRYDbmV0MRcwFQYKCZImiZPyLGQBGRYHY3BxY29ycDEbMBkGCgmS<br />
JomT8ixkARkWC2FzaWFwYWNpZmljMSswKQYDVQQDEyJIUFEgSXNzdWluZyBDQSBB<br />
c2lhLVBhY2lmaWMgUmVnaW9uMB4XDTA3MTAyMDIyMzU0M1oXDTA5MTAxOTIyMzU0<br />
M1owKTEnMCUGA1UEAxMeY2NlZ2NhbTAxLmFtZXJpY2FzLmhwcWNvcnAubmV0MIGf<br />
MA0GCSqGSIb3DQEBAQUAA4GNADCBiQKBgQDNYsB8T6rJhJQXbKvM5JLi6EXNAtFL<br />
ayV11QVyrtjRtOjRGySwFCk9KNzRS7PIP/p9gH20Ic+ZvgX0fRPnnU/2imMeTGr2<br />
raIYGRSFBJ4sCpAP87m/7Hzk0kiyZ+7KJq92Q61Pipkea...................<br />
-----END CERTIFICATE-----<br />
SHOW LDAP GROUP<br />
• Command:<br />
SHOW LDAP GROUP {LIST | ""}<br />
• Description:<br />
This command displays the LDAP group information. If you specify LIST, then a list of all the LDAP<br />
groups appears.<br />
• Access level/Bay level:<br />
OA administrator, OA operator, OA user<br />
• Restrictions:<br />
None<br />
Example<br />
OA-0018FE27577F> SHOW LDAP GROUP LIST<br />
Privilege LDAP Group /<br />
Level Description<br />
----------- ----------------<br />
Operator Widget.OPS.Team@hp.com<br />
Widget operators<br />
SHOW LDAP INFO<br />
• Command:<br />
SHOW LDAP INFO<br />
• Description:<br />
Displays the LDAP settings, including enabled or disabled status, LDAP server, LDAP port, search<br />
contexts, and NT mapping state<br />
• Access level/Bay level:<br />
All<br />
Directory commands 41
• Restrictions:<br />
None<br />
Example<br />
OA-0018FE27577F> show ldap info<br />
Directory Services (LDAP)<br />
Enabled : Disabled<br />
Local Users Enabled : Enabled<br />
NT Name Mapping : Disabled<br />
Directory Server :<br />
Directory Server SSL Port : 0<br />
Search Context #1 :<br />
Search Context #2 :<br />
Search Context #3 :<br />
Search Context #4 :<br />
Search Context #5 :<br />
Search Context #6 :<br />
TEST LDAP<br />
• Command:<br />
TEST LDAP "" ""<br />
• Description:<br />
Run LDAP tests and optionally attempt to login to the LDAP server using the username and password.<br />
• Access level/Bay level:<br />
OA administrator<br />
• Restrictions:<br />
None<br />
UNASSIGN for LDAP<br />
• Command:<br />
UNASSIGN {SERVER | INTERCONNECT} { | ALL | -} {"" | LDAP GROUP ""} *OR* UNASSIGN OA<br />
{"" | LDAP GROUP ""}<br />
• Description:<br />
Disables access to the bays for the group specified<br />
• Access level/Bay level:<br />
OA administrator<br />
• Restrictions:<br />
None<br />
UNASSIGN OA LDAP GROUP<br />
• Command:<br />
UNASSIGN OA {"" | LDAP GROUP ""}<br />
Directory commands 42
• Description:<br />
Disables access to the <strong>Onboard</strong> <strong>Administrator</strong> for the group specified<br />
• Access level/Bay level:<br />
OA administrator<br />
• Restrictions:<br />
None<br />
Directory commands 43
<strong>HP</strong> SIM commands<br />
ADD <strong>HP</strong>SIM CERTIFICATE<br />
• Command:<br />
ADD <strong>HP</strong>SIM CERTIFICATE <br />
• Description:<br />
Adds an <strong>HP</strong> SIM certificate on the command line.<br />
1. Start with a string that does not appear within the certificate (the end marker).<br />
2. Paste in the certificate.<br />
3. Terminate the command with the end marker.<br />
• Access level/Bay level:<br />
OA administrator<br />
• Restrictions:<br />
o This command is only available in script mode.<br />
o The certificate text cannot exceed 3071 characters.<br />
DOWNLOAD <strong>HP</strong>SIM CERTIFICATE<br />
• Command:<br />
DOWNLOAD <strong>HP</strong>SIM CERTIFICATE { }<br />
• Description:<br />
Downloads an <strong>HP</strong> SIM certificate from the specified IP address or fully-qualified DNS system name, such<br />
as <strong>HP</strong>-SIM system. The value can be an IPv4 address, an IPv6 address, or a DNS name.<br />
• Access level/Bay level:<br />
OA administrator<br />
• Restrictions:<br />
o The must be in the form ###.###.###.###, where each ### ranges from 0 to 255.<br />
o For IPv6 the must be in the form ####:####:####:####:####:####:####:####<br />
where each #### ranges from 0 to FFFF.<br />
o IPv6 addresses must be informed without the network prefix length.<br />
REMOVE <strong>HP</strong>SIM CERTIFICATE<br />
• Command:<br />
REMOVE <strong>HP</strong>SIM CERTIFICATE ""<br />
• Description:<br />
<strong>HP</strong> SIM commands 44
Removes the trust certificate corresponding to the . Disables <strong>HP</strong> SIM SSO through the<br />
application (for example <strong>HP</strong> SIM) that provided the certificate without disabling other <strong>HP</strong> SIM<br />
applications.<br />
The can be obtained using the SHOW <strong>HP</strong>SIM INFO command.<br />
• Access level/Bay level:<br />
OA administrator<br />
• Restrictions:<br />
None<br />
SET <strong>HP</strong>SIM TRUST MODE<br />
• Command:<br />
SET <strong>HP</strong>SIM TRUST MODE {CERTIFICATE [ON] | DISABLED [OFF]}<br />
• Description:<br />
Enables or disables the <strong>HP</strong> SIM SSO mode. When enabled, the trusted applications can access the<br />
<strong>Onboard</strong> <strong>Administrator</strong> GUI data without requiring additional authentication.<br />
• Access level/Bay level:<br />
OA administrator<br />
• Restrictions:<br />
The CERTIFICATE (On) mode trusts only applications with certificates that have been uploaded to the<br />
<strong>Onboard</strong> <strong>Administrator</strong>.<br />
SHOW <strong>HP</strong>SIM INFO<br />
• Command:<br />
SHOW <strong>HP</strong>SIM INFO<br />
• Description:<br />
Displays the current <strong>HP</strong> SIM SSO configuration for the <strong>Onboard</strong> <strong>Administrator</strong>.<br />
The data includes the current <strong>HP</strong> SIM SSO Trust Mode (see SET <strong>HP</strong>SIM TRUST MODE) and a list of<br />
names that the <strong>Onboard</strong> <strong>Administrator</strong> is configured to trust using a trust certificate.<br />
• Access level/Bay level:<br />
OA administrator<br />
• Restrictions:<br />
None<br />
Example<br />
OA-0018FE27577F> SHOW <strong>HP</strong>SIM INFO<br />
<strong>HP</strong>SIM Trust Mode: Disabled<br />
Trusted Server Certificates<br />
No certificates were found.<br />
<strong>HP</strong> SIM commands 45
General management commands<br />
DOWNLOAD OA CERTIFICATE<br />
• Command:<br />
DOWNLOAD OA CERTIFICATE [ | ACTIVE | STANDBY] <br />
• Description:<br />
Downloads a CA supplied pkcs#7 file to replace the current security certificate on the system.<br />
Supported protocols are HTTP, FTP, and TFTP. Format the URL as protocol://host/path/file. The URL<br />
syntax for IPv6 addresses is protocol://[]/path/file.<br />
• Access level/Bay level:<br />
OA administrator<br />
• Restrictions:<br />
o You must format the URL as protocol://host/path/file. If your FTP server does not support<br />
anonymous connections, then you can specify a user name and password by replacing host in the<br />
previous format with username:password@host.<br />
o If the bay number is not specified, the certificate is generated for the current <strong>Onboard</strong> <strong>Administrator</strong><br />
FORCE TAKEOVER<br />
• Command:<br />
FORCE TAKEOVER<br />
• Description:<br />
Forces the redundant <strong>Onboard</strong> <strong>Administrator</strong> to become the active <strong>Onboard</strong> <strong>Administrator</strong>. The active<br />
becomes the standby and the standby becomes the active.<br />
• Access level/Bay level:<br />
OA administrator<br />
• Restrictions:<br />
None<br />
GENERATE CERTIFICATE<br />
• Command:<br />
GENERATE CERTIFICATE [REQUEST | SELFSIGNED]<br />
• Description:<br />
Generates a pkcs#10 certificate request or a self-signed certificate. You are prompted for the following<br />
fields to generate a certificate:<br />
o OA Host Name (CN)<br />
General management commands 46
o Organization Name (O)<br />
o City or Locality (L)<br />
o State or Province (ST)<br />
o Country (C)<br />
o Organizational Unit<br />
o Contact Person<br />
o Email Address<br />
o Surname<br />
o Given Name<br />
o Alternative Name<br />
o Initials<br />
o DN Qualifier<br />
o Challenge Password<br />
o Unstructured Name<br />
• Access level/Bay level:<br />
OA administrator<br />
• Restrictions:<br />
o This command is not valid in SCRIPT MODE.<br />
o (Optional) Must be 0 to 30 characters long<br />
Generate certificate prompts<br />
Prompt Description Restrictions<br />
OA Host Name (CN)<br />
Organization Name (O)<br />
City or Locality (L)<br />
This is the most important field.<br />
This is the <strong>Onboard</strong><br />
<strong>Administrator</strong> name that<br />
appears in the browser web<br />
address field. This certificate<br />
attribute is generally referred to<br />
as the common name.<br />
The company or organization<br />
that owns this <strong>Onboard</strong><br />
<strong>Administrator</strong>. When this<br />
information is used to generate<br />
a certificate signing request,<br />
the issuing certificate authority<br />
can verify that the organization<br />
requesting the certificate is<br />
legally entitled to claim<br />
ownership of the given<br />
company name or<br />
organization name.<br />
The city or locality where the<br />
<strong>Onboard</strong> <strong>Administrator</strong> is<br />
Must be 1 to 60 characters long. To prevent<br />
security alerts, the value of this field must match<br />
the host name exactly as it is known by the web<br />
browser. The browser compares the host name<br />
in the resolved web address to the name that<br />
appears in the certificate. For example, if the<br />
web address in the address field is<br />
https://oa-001635.xyz.com, then the value<br />
must be oa-001635.xyz.com<br />
Must be 1 to 60 characters long<br />
Must be 1 to 50 characters long<br />
General management commands 47
Prompt Description<br />
located.<br />
Restrictions<br />
State or Province (ST) The state or province where the Must be 1 to 30 characters long<br />
<strong>Onboard</strong> <strong>Administrator</strong> is<br />
located.<br />
Country (C)<br />
The two-character country code Must be a two-character country code<br />
that identifies the country<br />
where the <strong>Onboard</strong><br />
<strong>Administrator</strong> is located.<br />
Organizational Unit The unit within the company or (Optional) Must be 0 to 60 characters long<br />
organization that owns the<br />
<strong>Onboard</strong> <strong>Administrator</strong>.<br />
Contact Person<br />
The person responsible for the<br />
<strong>Onboard</strong> <strong>Administrator</strong>.<br />
(Optional) Must be 0 to 60 characters in length<br />
Email Address<br />
The email address of the<br />
contact person responsible for<br />
the <strong>Onboard</strong> <strong>Administrator</strong>.<br />
(Optional) Must be 0 to 60 characters long<br />
Surname<br />
The surname of the person<br />
responsible for the <strong>Onboard</strong><br />
<strong>Administrator</strong>.<br />
(Optional) Must be 0 to 60 characters long<br />
Given Name<br />
The given name of the person<br />
responsible for the <strong>Onboard</strong><br />
<strong>Administrator</strong>.<br />
(Optional) Must be 0 to 60 characters long<br />
Alternative Name<br />
An alternative name of the<br />
person responsible for the<br />
<strong>Onboard</strong> <strong>Administrator</strong><br />
(Optional) Must be 0 to 60 characters long<br />
Initials<br />
The initials of the person<br />
responsible for the <strong>Onboard</strong><br />
<strong>Administrator</strong>.<br />
(Optional) Must be 0 to 20 characters long<br />
DN Qualifier<br />
The distinguished name<br />
qualifier of the <strong>Onboard</strong><br />
<strong>Administrator</strong>.<br />
(Optional) Must be 0 to 60 characters long<br />
Challenge Password The password to the<br />
certificate-signing request.<br />
(Optional) Must be 0 to 20 characters long<br />
Unstructured Name<br />
This is for additional<br />
information, for example, an<br />
unstructured name that is<br />
assigned to the <strong>Onboard</strong><br />
<strong>Administrator</strong>.<br />
(Optional) Must be 0 to 60 characters long<br />
GENERATE KEY<br />
• Command:<br />
GENERATE KEY { ALL | SECURESH | SSL } [ 1024 | 2048 ][HASH_ALGORITHM {SHA1<br />
| SHA-224 | SHA-256 | SHA-384 | SHA-512}]<br />
• Description:<br />
Generates new private keys associated with the <strong>Onboard</strong> <strong>Administrator</strong> SecureSH service and/or SSL<br />
web services with optionally specified key size. If the key size is not specified, 2048 is used by default.<br />
If the hash algorithm is not set, SHA-256 is used by default for SSL keys. Any self-signed or uploaded<br />
web service certificates generated using existing keys will be reset. <strong>Administrator</strong> account privileges are<br />
required. DSA hash is always SHA1 (160 bits). When running in FIPS mode, the SSH DSA default key<br />
size is 1024.<br />
General management commands 48
PING<br />
• Access level/Bay level:<br />
OA administrator<br />
• Restrictions:<br />
None.<br />
• Command:<br />
PING [IPv6] [] {ip address> | ""}<br />
• Description:<br />
Sends ICMP echo messages to a remote IP[v6] device. If is omitted or between 9999 and<br />
99999, then only four packets are sent. Packets are sent out at one-second intervals to prevent strain on<br />
the network.<br />
• Access level/Bay level:<br />
All<br />
• Restrictions:<br />
o The value cannot be greater than 99999 or negative.<br />
o The value must be in the form ###.###.###.###, where each ### ranges from 0 to<br />
255.<br />
o For IPv6 the must be in the form ####:####:####:####:####:####:####:####<br />
where each #### ranges from 0 to FFFF.<br />
SET DEVICE SERIAL_NUMBER BLADE<br />
• Command:<br />
SET DEVICE SERIAL_NUMBER BLADE ""<br />
• Description:<br />
Sets the serial number of the specified Storage, Tape, or I/O expansion blade.<br />
• Access level/Bay level:<br />
OA administrator<br />
• Restrictions:<br />
o Length must be 10 characters. All printable characters are allowed.<br />
o This operation cannot be performed on server blades.<br />
SET FACTORY<br />
• Command:<br />
SET FACTORY<br />
• Description:<br />
General management commands 49
o Restores the <strong>Onboard</strong> <strong>Administrator</strong> to its factory defaults. The <strong>Administrator</strong> account password<br />
does not change.<br />
o The <strong>Onboard</strong> <strong>Administrator</strong> restarts after all changes are made.<br />
o All existing settings will be lost when this operation is run.<br />
• Access level/Bay level:<br />
OA administrator<br />
• Restrictions:<br />
You cannot run SET FACTORY in FIPS Mode ON/DEBUG.<br />
SET SCRIPT MODE<br />
• Command:<br />
SET SCRIPT [MODE] {ON | OFF}<br />
• Description:<br />
o This command ceases all prompting and verifying of entries when SCRIPT MODE is on.<br />
o The ADD USER command must have a password argument if executed in SCRIPT MODE.<br />
o Default values are used for any parameters that would normally require user interaction.<br />
o This setting is only effective for the current CLI session.<br />
• Access level/Bay level:<br />
All<br />
• Restrictions:<br />
None<br />
SHOW ALL<br />
• Command:<br />
SHOW ALL<br />
• Description:<br />
Executes all SHOW commands in succession<br />
• Access level/Bay level:<br />
All<br />
• Restrictions:<br />
o This command only displays the bays for which you have privileges.<br />
o To save the output, you must configure your Telnet software to log the session to a file or increase the<br />
history buffer size so that the output can be copied and pasted into another file.<br />
o The SHOW ALL command is a series of the following individual CLI commands. For specific<br />
command output examples, see the individual commands in this document.<br />
General management commands 50
Example The SHOW ALL command is a series of the following individual CLI commands.<br />
For specific command output examples, see the individual commands in this<br />
document.<br />
C3000-OA2> show all<br />
>SHOW HEALTH<br />
>SHOW CONFIG<br />
>SHOW DATE<br />
>SHOW DISPLAY EVENT<br />
>SHOW EBIPA<br />
>SHOW ENCLOSURE FAN ALL<br />
>SHOW ENCLOSURE INFO<br />
>SHOW ENCLOSURE LCD<br />
>SHOW ENCLOSURE POWER_CAP<br />
>SHOW ENCLOSURE POWER_CAP_BAYS_TO_EXCLUDE<br />
>SHOW ENCLOSURE POWERSUPPLY ALL<br />
>SHOW ENCLOSURE POWER_SUMMARY<br />
>SHOW ENCLOSURE STATUS<br />
>SHOW ENCLOSURE TEMP<br />
>SHOW FIPS MODE<br />
>SHOW OA INFO<br />
>SHOW OA NETWORK<br />
>SHOW OA STATUS ALL<br />
>SHOW OA UPTIME ALL<br />
>SHOW OA CERTIFICATE<br />
>SHOW SYSLOG OA 1<br />
>SHOW SYSLOG OA 2<br />
>SHOW NETWORK<br />
>SHOW POWER<br />
>SHOW RACK NAME<br />
>SHOW RACK INFO<br />
>SHOW SNMP<br />
>SHOW SSHFINGERPRINT<br />
>SHOW SSHKEY<br />
>SHOW <strong>HP</strong>SIM INFO<br />
>SHOW INTERCONNECT INFO ALL<br />
>SHOW INTERCONNECT LIST<br />
>SHOW INTERCONNECT SESSION<br />
>SHOW INTERCONNECT STATUS ALL<br />
>SHOW INTERCONNECT PORT MAP ALL<br />
>SHOW INTERCONNECT POWERDELAY ALL<br />
>SHOW SERVER LIST<br />
>SHOW SERVER NAMES<br />
>SHOW FRU<br />
>SHOW SERVER INFO ALL<br />
>SHOW SERVER PORT MAP ALL<br />
>SHOW SERVER STATUS ALL<br />
>SHOW SERVER TEMP ALL<br />
>SHOW SERVER DVD ALL<br />
>SHOW SERVER POWERDELAY ALL<br />
>SHOW SERVER BOOT ALL<br />
>SHOW SYSLOG SERVER ALL<br />
>SHOW SYSLOG ILO ALL<br />
>SHOW TOPOLOGY<br />
>SHOW USBKEY<br />
>SHOW USER (current user)<br />
General management commands 51
SHOW USER LIST<br />
>SHOW LDAP INFO<br />
>SHOW LDAP CERTIFICATE<br />
>SHOW LDAP GROUP LIST<br />
>SHOW CA CERTIFICATE<br />
>SHOW TWOFACTOR INFO<br />
>SHOW PASSWORD SETTINGS<br />
>SHOW UPDATE<br />
>SHOW SYSLOG SETTINGS<br />
>SHOW VCMODE<br />
>SHOW SESSION TIMEOUT<br />
>SHOW VLAN<br />
>SHOW URB<br />
>SHOW FIRMWARE SUMMARY<br />
>SHOW FIRMWARE SUMMARY CSV<br />
>SHOW FIRMWARE MANAGEMENT<br />
>SHOW FIRMWARE MANAGEMENT LOG<br />
>SHOW FIRMWARE LOG SERVER ALL<br />
>SHOW SERVER FIRMWARE ALL<br />
>SHOW REMOTE_SUPPORT<br />
>SHOW REMOTE_SUPPORT EVENT<br />
>SHOW DEVICE SERIAL_NUMBER BLADE ALL<br />
>SHOW SOLUTIONSID<br />
>SHOW LOGIN_BANNER<br />
SHOW DEVICE SERIAL_NUMBER BLADE<br />
• Command:<br />
SHOW DEVICE SERIAL_NUMBER BLADE <br />
• Description:<br />
Shows the specified direct attached blade device serial number<br />
• Access level/Bay level:<br />
o All<br />
o Bay specific<br />
• Restrictions:<br />
Dependent on bay privileges<br />
Example<br />
OA-0016355E560A> SHOW DEVICE SERIAL_NUMBER BLADE 1<br />
Serial Number: USM81500RP<br />
General management commands 52
Enclosure Bay IP Addressing commands<br />
ADD EBIPA<br />
• Command:<br />
ADD EBIPA {SERVER | INTERCONNECT} DNS [{ , | - } ]<br />
• Description:<br />
Adds a DNS server IP address to the list of DNS servers for either SERVER bays or INTERCONNECT<br />
bays<br />
• Access Level/Bay level:<br />
<strong>Administrator</strong>, Operator<br />
• Restrictions:<br />
o A maximum of three DNS servers can be added for EBIPA.<br />
o The must be in the form ###.###.###.###, where each ### ranges from 0 to 255.<br />
DISABLE EBIPA<br />
CAUTION: : This command cycles power to the interconnect and causes a loss of connectivity.<br />
• Command:<br />
DISABLE EBIPA {SERVER|INTERCONNECT} [ALL | [{ , | - } ]]<br />
• Description:<br />
Disables the ability of the <strong>Onboard</strong> <strong>Administrator</strong> to give devices in the bays IP addresses using DHCP.<br />
If no bay numbers are specified, then EBIPA is disabled for all bays. Devices in bays receive IP<br />
addresses from an external server.<br />
This causes a reset of the iLO, which causes it to attempt to get an IP address from an external DHCP<br />
server. The interconnect is power-cycled.<br />
• Access level/Bay level:<br />
<strong>Administrator</strong>, Operator<br />
• Restrictions:<br />
None<br />
ENABLE EBIPA<br />
CAUTION: This command cycles power to the interconnect and causes a loss of connectivity.<br />
Enclosure Bay IP Addressing commands 53
• Command:<br />
ENABLE EBIPA {SERVER|INTERCONNECT} [ALL | [{ , | - } ]]<br />
• Description:<br />
Enables the <strong>Onboard</strong> <strong>Administrator</strong> to provide IP addresses to the devices in the bays using DHCP.<br />
If you do not specify any bay numbers, then EBIPA is enabled for all bays.<br />
DHCP traffic from iLO and the switch modules can no longer go outside the enclosure.<br />
This causes a reset of the iLO, which causes it to attempt to get an IP address. The interconnect is<br />
power-cycled.<br />
• Access level/Bay level:<br />
<strong>Administrator</strong>, Operator<br />
• Restrictions:<br />
Before using this command you must set up the EBIPA settings. This includes setting the initial IP address,<br />
the netmask, and the default gateway.<br />
REMOVE EBIPA<br />
• Command:<br />
REMOVE EBIPA {SERVER|INTERCONNECT} DNS [{ , | - } ]<br />
• Description:<br />
Removes the DNS server specified by the from the list of DNS servers for either SERVER<br />
bays or INTERCONNECT bays<br />
• Access level/Bay level:<br />
<strong>Administrator</strong>, Operator<br />
• Restrictions:<br />
The and must be in the form ###.###.###.###, where each ### ranges from 0 to 255.<br />
SET EBIPA<br />
• Command:<br />
SET EBIPA { SERVER | INTERCONNECT }<br />
• Description:<br />
Sets EBIPA settings for device or interconnect bays.<br />
• Access level/Bay level:<br />
<strong>Administrator</strong>, Operator<br />
• Restrictions:<br />
o The and must be in the form ###.###.###.###, where each ### ranges<br />
from 0 to 255.<br />
o The is a string containing letters (a–z, A–Z), digits (0–9), or a dash (-).<br />
Enclosure Bay IP Addressing commands 54
SET EBIPA SERVER<br />
• Command:<br />
SET EBIPA SERVER { } | { NETMASK } | { GATEWAY<br />
} | { DOMAIN } [ ALL | [{- | ,} ]<br />
• Description:<br />
Sets EBIPA settings for device (server) bays. If the bay number parameter is not specified, the settings<br />
will be applied to all device bays. To clear the IP address and netmask values, use keywords NONE<br />
NONE. Use the bay number to clear a specific bay.<br />
• Access level/Bay level:<br />
<strong>Administrator</strong>, Operator<br />
• Restrictions:<br />
o The and must be in the form ###.###.###.###, where each ### ranges<br />
from 0 to 255.<br />
o The is a string containing letters (a–z, A–Z), digits (0–9), or a dash (-).<br />
SET EBIPA INTERCONNECT<br />
• Command:<br />
SET EBIPA INTERCONNECT { } | { NETMASK }<br />
| { GATEWAY } | { DOMAIN } | { NTP PRIMARY | SECONDARY<br />
} [ ALL | [{- | ,} ]<br />
• Description:<br />
Sets EBIPA settings for interconnect bays. If the bay number parameter is not specified, the settings are<br />
applied to all interconnect bays. To clear the IP address and netmask values, use keywords NONE<br />
NONE. Use the bay number to clear a specific bay.<br />
• Access level/Bay level:<br />
<strong>Administrator</strong>, Operator<br />
• Restrictions:<br />
o The and must be in the form ###.###.###.###, where each ### ranges<br />
from 0 to 255.<br />
o The is a string containing letters (a–z, A–Z), digits (0–9), or a dash (-).<br />
SHOW EBIPA<br />
• Command:<br />
SHOW EBIPA<br />
• Description:<br />
Displays EBIPA information<br />
• Access level/Bay level:<br />
<strong>Administrator</strong>, Operator, user<br />
• Restrictions:<br />
Enclosure Bay IP Addressing commands 55
None<br />
Example<br />
OA-0018FE27577F> SHOW EBIPA<br />
EBIPA Device Server Settings<br />
Bay Enabled EBIPA/Current Netmask Gateway DNS Domain<br />
--- ------- --------------- --------------- --------------- --------------- ------<br />
1 Yes 172.16.211.111 255.255.0.0 172.16.0.1 172.16.0.1 test.com<br />
172.16.211.111 172.16.0.2<br />
172.16.0.3<br />
1A Yes 172.16.211.119 255.255.0.0 172.16.0.1 172.16.0.1 test.com<br />
172.16.0.2<br />
172.16.0.3<br />
1B Yes 172.16.211.127 255.255.0.0 172.16.0.1 172.16.0.1 test.com<br />
172.16.0.2<br />
172.16.0.3<br />
2 Yes 172.16.211.112 255.255.0.0 172.16.0.1 172.16.0.1 test.com<br />
172.16.211.112 172.16.0.2<br />
172.16.0.3<br />
2A Yes 172.16.211.120 255.255.0.0 172.16.0.1 172.16.0.1 test.com<br />
172.16.0.2<br />
172.16.0.3<br />
2B Yes 172.16.211.128 255.255.0.0 172.16.0.1 172.16.0.1 test.com<br />
172.16.0.2<br />
172.16.0.3<br />
3 Yes 172.16.211.113 255.255.0.0 172.16.0.1 172.16.0.1 test.com<br />
172.16.0.2<br />
172.16.0.3<br />
3A Yes 172.16.211.121 255.255.0.0 172.16.0.1 172.16.0.1 test.com<br />
172.16.0.2<br />
172.16.0.3<br />
3B Yes 172.16.211.129 255.255.0.0 172.16.0.1 172.16.0.1 test.com<br />
172.16.0.2<br />
172.16.0.3<br />
4 Yes 172.16.211.114 255.255.0.0 172.16.0.1 172.16.0.1 test.com<br />
172.16.211.114 172.16.0.2<br />
172.16.0.3<br />
4A Yes 172.16.211.122 255.255.0.0 172.16.0.1 172.16.0.1 test.com<br />
172.16.0.2<br />
172.16.0.3<br />
4B Yes 172.16.211.130 255.255.0.0 172.16.0.1 172.16.0.1 test.com<br />
172.16.0.2<br />
172.16.0.3<br />
5 Yes 172.16.211.115 255.255.0.0 172.16.0.1 172.16.0.1 test.com<br />
172.16.0.2<br />
172.16.0.3<br />
5A Yes 172.16.211.123 255.255.0.0 172.16.0.1 172.16.0.1 test.com<br />
172.16.0.2<br />
172.16.0.3<br />
5B Yes 172.16.211.131 255.255.0.0 172.16.0.1 172.16.0.1 test.com<br />
172.16.0.2<br />
172.16.0.3<br />
6 Yes 172.16.211.116 255.255.0.0 172.16.0.1 172.16.0.1 test.com<br />
172.16.0.2<br />
172.16.0.3<br />
6A Yes 172.16.211.124 255.255.0.0 172.16.0.1 172.16.0.1 test.com<br />
172.16.0.2<br />
172.16.0.3<br />
6B Yes 172.16.211.132 255.255.0.0 172.16.0.1 172.16.0.1 test.com<br />
172.16.0.2<br />
172.16.0.3<br />
7 Yes 172.16.211.117 255.255.0.0 172.16.0.1 172.16.0.1 test.com<br />
172.16.0.2<br />
Enclosure Bay IP Addressing commands 56
172.16.0.3<br />
7A Yes 172.16.211.125 255.255.0.0 172.16.0.1 172.16.0.1 test.com<br />
172.16.0.2<br />
172.16.0.3<br />
7B Yes 172.16.211.133 255.255.0.0 172.16.0.1 172.16.0.1 test.com<br />
172.16.0.2<br />
172.16.0.3<br />
8 Yes 172.16.211.118 255.255.0.0 172.16.0.1 172.16.0.1 test.com<br />
172.16.0.2<br />
172.16.0.3<br />
8A Yes 172.16.211.126 255.255.0.0 172.16.0.1 172.16.0.1 test.com<br />
172.16.0.2<br />
172.16.0.3<br />
8B Yes 172.16.211.134 255.255.0.0 172.16.0.1 172.16.0.1 test.com<br />
172.16.0.2<br />
172.16.0.3<br />
EBIPA Device Interconnect Settings<br />
Bay Enabled EBIPA/Current Netmask Gateway DNS NTP<br />
Domain<br />
--- ------- --------------- --------------- --------------- --------------- ---------------<br />
------<br />
1 Yes 172.16.211.183 255.255.0.0 172.16.0.1 172.16.0.1 2.3.4.5<br />
testIO.com<br />
0.0.0.0<br />
2 Yes 172.16.211.184 255.255.0.0 172.16.0.1 172.16.0.1 2.3.4.5<br />
testIO.com<br />
0.0.0.0<br />
3 Yes 172.16.211.185 255.255.0.0 172.16.0.1 172.16.0.1 2.3.4.5<br />
testIO.com<br />
4 Yes 172.16.211.186 255.255.0.0 172.16.0.1 172.16.0.1 2.3.4.5<br />
testIO.com<br />
Enclosure Bay IP Addressing commands 57
Enclosure network configuration commands<br />
ADD OA ADDRESS IPV6<br />
• Command:<br />
ADD OA ADDRESS IPV6 {} <br />
• Description:<br />
Adds an IPv6 static address for the <strong>Onboard</strong> <strong>Administrator</strong>. If IPv6 is enabled, this setting takes effect<br />
immediately. If no <strong>Onboard</strong> <strong>Administrator</strong> number is provided, the command defaults to the active<br />
<strong>Onboard</strong> <strong>Administrator</strong>.<br />
• Access level/Bay level:<br />
OA administrator, OA operator<br />
• Restrictions:<br />
o The prefix length is mandatory.<br />
o The must be in the form ####:####:####:####:####:####:####:####/###,<br />
where each #### ranges from 0 to FFFF and the prefix /### ranges from 0 to 128.<br />
ADD OA DNS<br />
• Command:<br />
ADD OA DNS [] | IPV6 [] <br />
• Description:<br />
Adds an IP address of a DNS server to the list. DNS servers are used if the system is configured to use<br />
a static IP address. When the <strong>Onboard</strong> <strong>Administrator</strong> is configured for both IPv4 and IPv6, the <strong>Onboard</strong><br />
<strong>Administrator</strong> uses the first three valid DNS servers from those configured for the supported network<br />
configuration modes in the following order:<br />
a. Static IPv4<br />
b. Static IPv6<br />
c. DHCPv4<br />
d. DHCPv6<br />
If a bay number is not specified, then the command defaults to the active <strong>Onboard</strong> <strong>Administrator</strong>.<br />
• Access level/Bay level:<br />
OA administrator, OA operator<br />
• Restrictions:<br />
A maximum of two DNS servers can be added.<br />
The must be in the form ###.###.###.###, where each ### ranges from 0 to 255.<br />
Enclosure network configuration commands 58
ADD OA DNS IPV6<br />
• Command:<br />
ADD OA DNS IPV6 {} <br />
• Description:<br />
Adds an IPv6 address to the list of DNS servers. The network prefix length is optional. When the<br />
<strong>Onboard</strong> <strong>Administrator</strong> is configured for both IPv4 and IPv6, the <strong>Onboard</strong> <strong>Administrator</strong> uses the first<br />
three valid DNS servers from those configured for the supported network configuration modes in the<br />
following order:<br />
a. Static IPv4<br />
b. Static IPv6<br />
c. DHCPv4<br />
d. DHCPv6<br />
If a bay number is not specified, then the command defaults to the active <strong>Onboard</strong> <strong>Administrator</strong>.<br />
• Access level/Bay level:<br />
OA administrator, OA operator<br />
• Restrictions:<br />
o A maximum of two DNS servers can be added.<br />
o The must be in the form ####:####:####:####:####:####:####:#### or<br />
####:####:####:####:####:####:####:####/### (with a prefix), where each #### ranges<br />
from 0 to FFFF and the prefix /### ranges from 0 to 128.<br />
ADD SNMP TRAPRECEIVER<br />
• Command:<br />
ADD SNMP TRAPRECEIVER [""]<br />
• Description:<br />
Adds a new trap receiver address to the SNMP configuration. Defaults for the traps are version v1 and<br />
port 162. The SNMP Trap community string is set to public or the optional "". The<br />
"" string, if specified, must be 1 to 20 characters in length. Acceptable characters<br />
include any printable character excluding quotes and newlines.<br />
• Access level/Bay level:<br />
OA administrator, OA operator<br />
• Restrictions:<br />
o A maximum of eight IP addresses can be added to receive SNMP traps.<br />
o Only v1 traps are supported.<br />
o The value can be an IPv4 address, an IPv6 address, or a DNS name (maximum of 64<br />
characters).<br />
o IPv6 addresses must be typed without the network prefix length.<br />
Enclosure network configuration commands 59
ADD SSHKEY<br />
• Command:<br />
ADD SSHKEY <br />
• Description:<br />
Adds an SSH key or keys to the <strong>Administrator</strong> local account. Multiple SSHKEYs can be concatenated in<br />
the string.<br />
a. Locate a string that does not appear in the key to use as the end marker.<br />
b. Paste in the certificate.<br />
c. Finish the command with the end marker.<br />
Failure to give a proper end marker before and after the certificate might cause the interface to wait for<br />
the appropriate end marker indefinitely.<br />
• Access level/Bay level:<br />
<strong>Administrator</strong><br />
• Restrictions:<br />
o SSHKEY is only available for the <strong>Administrator</strong> local account.<br />
o SSHKEY works only in script mode.<br />
o SSHKEY string is limited to 4KB on <strong>Onboard</strong> <strong>Administrator</strong> versions prior to 2.30.<br />
o SSHKEY string is limited to 8KB on <strong>Onboard</strong> <strong>Administrator</strong> version 2.30 and later.<br />
o This command is only valid in script mode.<br />
ADD TRUSTED HOST<br />
• Command:<br />
ADD TRUSTED HOST <br />
• Description:<br />
Adds a new IPv4 or IPv6 address to the list of addresses being handled by the IP Security feature.<br />
• Access level /Bay level:<br />
OA administrator, OA operator<br />
• Restrictions:<br />
You can add a maximum of five IP addresses to the IP Manager.<br />
CLEAR LOGIN_BANNER_TEXT<br />
• Command:<br />
CLEAR LOGIN_BANNER_TEXT<br />
• Description:<br />
Clears the currently configured login banner text.<br />
• Access level /Bay level:<br />
Enclosure network configuration commands 60
OA administrator<br />
• Restrictions:<br />
CLEAR NTP<br />
Clearing the login banner text disables the login banner option.<br />
• Command:<br />
CLEAR NTP {PRIMARY | SECONDARY}<br />
• Description:<br />
Disables access to the Primary or Secondary NTP server<br />
• Access level/Bay level:<br />
OA administrator, OA operator<br />
• Restrictions:<br />
Clearing the Primary NTP server disables NTP.<br />
CLEAR SSHKEY<br />
• Command:<br />
CLEAR SSHKEY<br />
• Description:<br />
Removes the authorized key file used for SSH login<br />
• Access level/Bay level:<br />
<strong>Administrator</strong><br />
• Restrictions:<br />
None<br />
CLEAR VCMODE<br />
• Command:<br />
CLEAR VCMODE<br />
• Description:<br />
Clears Virtual Connect Mode settings.<br />
• Access level/Bay level:<br />
OA <strong>Administrator</strong><br />
OA Bays<br />
• Restrictions:<br />
o All servers in the enclosure should be powered off before clearing the VCMODE.<br />
o The enclosure will no longer be managed by Virtual Connect, and servers will revert to default<br />
Ethernet MAC and Fibre Channel WWN assignments. Virtual Connect might disconnect the servers<br />
from Ethernet networks and Fibre Channel fabrics.<br />
Enclosure network configuration commands 61
DISABLE ALERTMAIL<br />
• Command:<br />
DISABLE ALERTMAIL<br />
• Description:<br />
Disables the sending of emails when events occur<br />
• Access level/Bay level:<br />
OA administrator, OA operator<br />
• Restrictions:<br />
None<br />
DISABLE DHCPV6<br />
• Command:<br />
DISABLE DHCPV6<br />
• Description:<br />
Disable DHCPv6 mode for management interfaces of all devices in the enclosure. With DHCPv6<br />
disabled, the IPv6 and DNS addresses are not obtained from the DHCPv6 Server. This setting takes<br />
effect immediately.<br />
• Access level/Bay level:<br />
OA administrator, OA operator<br />
• Restrictions:<br />
None<br />
DISABLE ENCLOSURE_IP_MODE<br />
• Command:<br />
DISABLE ENCLOSURE_IP_MODE<br />
• Description:<br />
Disables Enclosure IP Mode.<br />
Active and Standby <strong>Onboard</strong> <strong>Administrator</strong>s retain their current IP addresses.<br />
After disabling Enclosure IP Mode and a takeover occurs, there will no longer be a single IP address for<br />
the enclosure.<br />
• Access level/Bay level:<br />
OA administrator, Operator<br />
• Restrictions:<br />
None<br />
Enclosure network configuration commands 62
DISABLE HTTPS<br />
• Command:<br />
DISABLE HTTPS<br />
• Description:<br />
Disables HTTPS access to the <strong>Onboard</strong> <strong>Administrator</strong>, which prevents access to the web-based user<br />
interface<br />
• Access level/Bay level:<br />
OA administrator, OA operator<br />
• Restrictions:<br />
None<br />
DISABLE IPV6<br />
• Command:<br />
DISABLE IPV6<br />
• Description:<br />
Disables IPv6 protocol for management interfaces of all devices in the enclosure.<br />
• Access level/Bay level:<br />
OA administrator, OA operator<br />
• Restrictions:<br />
None<br />
DISABLE LOGIN_BANNER<br />
• Command:<br />
DISABLE LOGIN_BANNER<br />
• Description:<br />
Disables the login banner from appearing when the user attempts to log in to <strong>Onboard</strong> <strong>Administrator</strong>.<br />
• Access level /Bay level:<br />
OA administrator<br />
• Restrictions:<br />
None<br />
DISABLE NTP<br />
• Command:<br />
DISABLE NTP<br />
Enclosure network configuration commands 63
• Description:<br />
Disables the synchronizing of time and date with a remote server using the NTP protocol. Does not clear<br />
any NTP servers that have been configured.<br />
• Access level/Bay level:<br />
OA administrator, OA operator<br />
• Restrictions:<br />
None<br />
DISABLE ROUTER ADVERTISEMENTS<br />
• Command:<br />
DISABLE ROUTER ADVERTISEMENTS<br />
• Description:<br />
Disables auto-configuration of IPv6 addresses from Router Advertisement messages for management<br />
interfaces of all devices in the enclosure.<br />
• Access level/Bay level:<br />
OA administrator, OA operator<br />
• Restrictions:<br />
None<br />
DISABLE SECURESH<br />
• Command:<br />
DISABLE SECURESH<br />
• Description:<br />
Disables SSH access to the <strong>Onboard</strong> <strong>Administrator</strong>.<br />
Disabling SSH prevents access to the web-based user interface and the SSH terminal interface until a<br />
terminal session re-enables the SSH protocol.<br />
• Access level/Bay level:<br />
OA administrator, OA operator<br />
• Restrictions:<br />
None<br />
DISABLE SNMP<br />
• Command:<br />
DISABLE SNMP<br />
• Description:<br />
Disables SNMP support for the <strong>Onboard</strong> <strong>Administrator</strong>.<br />
Does not clear the SNMP trap receivers that have been configured.<br />
Enclosure network configuration commands 64
SNMP trap receivers can still be added and removed.<br />
If you disable SNMP, then Insight Manager Agents do not work properly.<br />
• Access level/Bay level:<br />
OA administrator, OA operator<br />
• Restrictions:<br />
None<br />
DISABLE TELNET<br />
• Command:<br />
DISABLE TELNET<br />
• Description:<br />
Disables telnet access to the <strong>Onboard</strong> <strong>Administrator</strong><br />
• Access level/Bay level:<br />
OA administrator, OA operator<br />
• Restrictions:<br />
None<br />
DISABLE TRUSTED HOST<br />
• Command:<br />
DISABLE TRUSTED HOST<br />
• Description:<br />
Disables the host-based access to the <strong>Onboard</strong> <strong>Administrator</strong>. Disabling TRUSTED HOSTS allows all<br />
hosts to connect to the <strong>Onboard</strong> <strong>Administrator</strong>.<br />
• Access level/Bay level:<br />
OA administrator, Operator<br />
• Restrictions:<br />
None<br />
DISABLE XMLREPLY<br />
• Command:<br />
DISABLE XMLREPLY<br />
• Description:<br />
Disables XML reply data return over the HTTP port<br />
• Access level/Bay level:<br />
OA administrator, OA operator<br />
• Restrictions:<br />
None<br />
Enclosure network configuration commands 65
DOWNLOAD CONFIG<br />
• Command:<br />
DOWNLOAD CONFIG <br />
• Description:<br />
Downloads a previously saved configuration script file from a specific IP host, and then executes it.<br />
Supported protocols are HTTP, FTP, TFTP, and USB. Format the as protocol://host/path/file.<br />
The URL syntax for IPv6 addresses is protocol://[]/path/file. If your FTP server does not<br />
support anonymous connections, then specify a user name and password by replacing the host part in<br />
the above format with username:password@host.<br />
• Access level/Bay level:<br />
OA administrator<br />
• Restrictions:<br />
o The file cannot change the <strong>Administrator</strong> account password.<br />
o The user password is not saved or restored by the DOWNLOAD CONFIG command.<br />
DOWNLOAD SSHKEY<br />
• Command:<br />
DOWNLOAD SSHKEY <br />
• Description:<br />
Downloads an authorized key file to use for SSH logins. The file contains the public keys for users.<br />
Supported protocols are HTTP, FTP, and TFTP.<br />
Format the as protocol://host/path/file.<br />
• Access level/Bay level:<br />
<strong>Administrator</strong><br />
• Restrictions:<br />
None<br />
ENABLE ALERTMAIL<br />
• Command:<br />
ENABLE ALERTMAIL<br />
• Description:<br />
Enables the sending of alert emails when an event occurs<br />
• Access level/Bay level:<br />
OA administrator, OA operator<br />
• Restrictions:<br />
You can only issue this command if the configuration has been set up.<br />
Enclosure network configuration commands 66
ENABLE DHCPV6<br />
• Command:<br />
ENABLE DHCPV6<br />
• Description:<br />
Enables DHCPv6 mode for management interfaces of all devices in the enclosure. In DHCPv6 mode,<br />
IPv6 and DNS addresses are obtained from the DHCPv6 Server. This setting takes effect immediately.<br />
• Access level/Bay level:<br />
OA administrator, OA operator<br />
• Restrictions:<br />
None<br />
ENABLE ENCLOSURE_IP_MODE<br />
• Command:<br />
ENABLE ENCLOSURE_IP_MODE<br />
• Description:<br />
Enables Enclosure IP Mode<br />
• Access level/Bay level:<br />
OA administrator, Operator<br />
• Restrictions:<br />
o When using enclosure IP mode only replace the standby OA module while the enclosure is powered<br />
on to ensure persistence of Enclosure IP Mode settings.<br />
o You cannot ENABLE ENCLOSURE_IP_MODE in FIPS Mode ON/DEBUG.<br />
ENABLE HTTPS<br />
• Command:<br />
ENABLE HTTPS<br />
• Description:<br />
Enables HTTPS access to the <strong>Onboard</strong> <strong>Administrator</strong><br />
• Access level/Bay level:<br />
OA administrator, OA operator<br />
• Restrictions:<br />
None<br />
ENABLE LOGIN_BANNER<br />
• Command:<br />
ENABLE LOGIN_BANNER<br />
Enclosure network configuration commands 67
• Description:<br />
Enables the display of the configured login banner when the user attempts to log in to the <strong>Onboard</strong><br />
<strong>Administrator</strong>.<br />
• Access level /Bay level:<br />
OA administrator<br />
• Restrictions:<br />
None<br />
ENABLE IPV6<br />
• Command:<br />
ENABLE IPV6<br />
• Description:<br />
Enables IPv6 protocol for management interfaces of all devices in the enclosure.<br />
• Access level/Bay level:<br />
OA administrator, OA operator<br />
• Restrictions:<br />
None<br />
ENABLE NTP<br />
• Command:<br />
ENABLE NTP<br />
• Description:<br />
Enables NTP support for the <strong>Onboard</strong> <strong>Administrator</strong><br />
• Access level/Bay level:<br />
OA administrator, OA operator<br />
• Restrictions:<br />
None<br />
ENABLE ROUTER ADVERTISEMENTS<br />
• Command:<br />
ENABLE ROUTER ADVERTISEMENTS<br />
• Description:<br />
Enables auto-configuration of IPv6 addresses from Router Advertisement messages for management<br />
interfaces of all devices in the enclosure.<br />
• Access level/Bay level:<br />
OA administrator, OA operator<br />
• Restrictions:<br />
Enclosure network configuration commands 68
None<br />
ENABLE SECURESH<br />
• Command:<br />
ENABLE SECURESH<br />
• Description:<br />
Enables SSH support for the <strong>Onboard</strong> <strong>Administrator</strong><br />
• Access level/Bay level:<br />
OA administrator, OA operator<br />
• Restrictions:<br />
None<br />
ENABLE SNMP<br />
• Command:<br />
ENABLE SNMP<br />
• Description:<br />
Enables SNMP Trap support for the <strong>Onboard</strong> <strong>Administrator</strong><br />
• Access level/Bay level:<br />
OA administrator, OA operator<br />
• Restrictions:<br />
You cannot enable SNMP in FIPS Mode ON/DEBUG.<br />
ENABLE TELNET<br />
• Command:<br />
ENABLE TELNET<br />
• Description:<br />
Enables telnet access to the <strong>Onboard</strong> <strong>Administrator</strong><br />
• Access level/Bay level:<br />
OA administrator, OA operator<br />
• Restrictions:<br />
You cannot enable TELNET in FIPS Mode ON/DEBUG.<br />
ENABLE TRUSTED HOST<br />
• Command:<br />
ENABLE TRUSTED HOST<br />
• Description:<br />
Enclosure network configuration commands 69
Enables IP security for the <strong>Onboard</strong> <strong>Administrator</strong><br />
• Access level/Bay level:<br />
OA administrator<br />
• Restrictions:<br />
None<br />
ENABLE XMLREPLY<br />
• Command:<br />
ENABLE XMLREPLY<br />
• Description:<br />
Enables XML reply data over an HTTP connection<br />
• Access Level/Bay Level:<br />
OA administrator, OA operator<br />
• Restrictions:<br />
None<br />
REMOVE OA ADDRESS IPV6<br />
• Command:<br />
REMOVE OA ADDRESS IPV6 {} <br />
• Description:<br />
Removes the IPv6 static address for the <strong>Onboard</strong> <strong>Administrator</strong>. If IPv6 is enabled, then this command<br />
takes effect immediately. If no <strong>Onboard</strong> <strong>Administrator</strong> number is provided, the command defaults to the<br />
active <strong>Onboard</strong> <strong>Administrator</strong>.<br />
• Access level/Bay level:<br />
OA administrator, OA operator<br />
• Restrictions:<br />
o The prefix length is mandatory.<br />
o The value must be in the form<br />
####:####:####:####:####:####:####:####/###, where each #### ranges from 0 to FFFF<br />
and the prefix /### ranges from 0 to 128.<br />
REMOVE OA DNS<br />
• Command:<br />
REMOVE OA DNS [] <br />
• Description:<br />
Removes the IP address of a DNS server from the list for the specified <strong>Onboard</strong> <strong>Administrator</strong>.<br />
The DNS servers are used only if the system is configured to use a static IP address.<br />
If no bay number is provided, the command default to the active <strong>Onboard</strong> <strong>Administrator</strong>.<br />
Enclosure network configuration commands 70
• Access level/Bay level:<br />
OA administrator, OA operator<br />
• Restrictions:<br />
The must be in the form ###.###.###.###, where each ### ranges from 0 to 255.<br />
REMOVE OA DNS IPV6<br />
• Command:<br />
REMOVE OA DNS IPV6 {} <br />
• Description:<br />
Removes the specified DNS IPv6 address from the list of DNS addresses for the specified <strong>Onboard</strong><br />
<strong>Administrator</strong>. If a bay number is not specified, then the command defaults to the active <strong>Onboard</strong><br />
<strong>Administrator</strong>.<br />
• Access level/Bay level:<br />
OA administrator, OA operator<br />
• Restrictions:<br />
o A maximum of two DNS servers can be added.<br />
o The must be in the form ####:####:####:####:####:####:####:#### or<br />
####:####:####:####:####:####:####:####/### (with a prefix), where each #### ranges<br />
from 0 to FFFF and the prefix /### ranges from 0 to 128.<br />
REMOVE SNMP TRAPRECEIVER<br />
• Command:<br />
REMOVE SNMP TRAPRECEIVER {""}<br />
• Description:<br />
o Removes an IP address from the list of systems that receive SNMP traps. If the same IP address is<br />
listed multiple times with different communities, all instances of the IP address disappear unless<br />
specifies which one is to be removed.<br />
o Removes an existing trap receiver from the SNMP configuration. If the same is listed multiple<br />
times with different communities, all instances of the disappears unless <br />
specifies which one is to be removed.<br />
o The value can be either an IPv4 address, an IPv6 address, or a DNS name.<br />
• Access level/Bay level:<br />
OA administrator, OA operator<br />
• Restrictions:<br />
IPv6 addresses cannot specify the network prefix length.<br />
REMOVE TRUSTED HOST<br />
• Command:<br />
REMOVE TRUSTED HOST <br />
Enclosure network configuration commands 71
• Description:<br />
Removes an IPv4 or IPv6 address from the list of addresses being handled by the IP Security feature.<br />
• Access level/Bay level:<br />
OA administrator, OA operator<br />
• Restrictions:<br />
None<br />
SET ALERTMAIL MAILBOX<br />
• Command:<br />
SET ALERTMAIL MAILBOX ""<br />
• Description:<br />
Sets the email address where events are sent<br />
• Access level/Bay level:<br />
OA administrator, OA operator<br />
• Restrictions:<br />
None<br />
SET ALERTMAIL SENDERDOMAIN<br />
• Command:<br />
SET ALERTMAIL SENDERDOMAIN ""<br />
• Description:<br />
Sets the AlertMail domain. This is the DNS domain where the <strong>Onboard</strong> <strong>Administrator</strong> is located (for<br />
example, AB.com).<br />
• Access level/Bay level:<br />
OA administrator, OA operator<br />
• Restrictions:<br />
None<br />
SET ALERTMAIL SMTPSERVER<br />
• Command:<br />
SET ALERTMAIL SMTPSERVER [ ]<br />
• Description:<br />
Sets the SMTP server. This is the mail server where the <strong>Onboard</strong> <strong>Administrator</strong> delivers its e-mail based<br />
events.<br />
The value can be either an IPv4 address, an IPv6 address, or a DNS name.<br />
• Access level/Bay level<br />
<strong>Administrator</strong>, OA operator<br />
Enclosure network configuration commands 72
• Restrictions:<br />
IPv6 addresses cannot specify the network prefix length.<br />
SET FIPS MODE<br />
• Command:<br />
SET FIPS MODE {ON [“”] | DEBUG [“”] | OFF }<br />
• Description:<br />
o Using FIPS MODE ON enforces use of the <strong>Onboard</strong> <strong>Administrator</strong> in a FIPS 140-2-compliant mode.<br />
This includes the use of approved algorithms like AES, 3DES, and SHA and other security<br />
restrictions. Setting this option to OFF also enables other SSLv3 algorithms such as RSA, RC4, and<br />
MD5. Using the DEBUG option sets the <strong>Onboard</strong> <strong>Administrator</strong> to a FIPS MODE ON similar<br />
environment, but with the possibility of debug support from <strong>HP</strong> (FIPS MODE DEBUG has the<br />
functionalities of FIPS MODE ON but is not considered FIPS-compliant due to the debug option).<br />
o The <strong>Onboard</strong> <strong>Administrator</strong> restarts after all changes are made.<br />
o All existing settings is lost when this operation is run. Any change to the FIPS MODE setting perform<br />
a Restore to Factory Default operation.<br />
o If the change is to FIPS MODE ON or FIPS MODE DEBUG, strong passwords are enabled, minimum<br />
password length is set to eight characters and a new <strong>Administrator</strong> account password is requested.<br />
• Access level/Bay level:<br />
OA administrator<br />
• Restrictions:<br />
None<br />
SET LOGIN_BANNER_TEXT<br />
• Command:<br />
SET LOGIN_BANNER_TEXT <br />
<br />
• Description:<br />
Sets the login banner text to be displayed when the user attempts to log in to the <strong>Onboard</strong><br />
<strong>Administrator</strong>.<br />
To enter the login banner text:<br />
a. Type a string that does not appear within the banner text (the end marker), and press Enter.<br />
b. Type or paste the banner text, and press Enter.<br />
c. Type the end marker string, and press Enter.<br />
• Access level /Bay level:<br />
OA administrator<br />
• Restrictions:<br />
o This command is only available in script mode.<br />
o The end marker must not consist of all numeric characters (for example, 1245, 85213, and so on).<br />
Enclosure network configuration commands 73
o The minimum length of the banner text must be 1 character and the banner text cannot exceed 1500<br />
characters.<br />
o The command accepts English (ASCII) characters only.<br />
o The characters ‘%’ and ‘\’ are not permitted as part of the banner text itself, but you can use them<br />
as characters in the end marker to make a unique string.<br />
o The banner text must contain at least one visible character.<br />
SET OA GATEWAY<br />
• Command:<br />
SET OA GATEWAY [ | ACTIVE | STANDBY] <br />
• Description:<br />
o Sets the network default gateway.<br />
o This command is used if the system is configured to use a static IP address.<br />
o If you do not specify a bay number, the command defaults to the active <strong>Onboard</strong> <strong>Administrator</strong>.<br />
• Access level/Bay level:<br />
OA administrator, OA operator<br />
• Restrictions:<br />
The must be in the form ###.###.###.###, where each ### ranges from 0 to 255.<br />
SET OA NAME<br />
• Command:<br />
SET OA NAME [ | ACTIVE | STANDBY] ""<br />
• Description:<br />
Sets the <strong>Onboard</strong> <strong>Administrator</strong> name. If a bay number is not specified, the command defaults to the<br />
active <strong>Onboard</strong> <strong>Administrator</strong>.<br />
• Access level/Bay level:<br />
OA administrator, OA operator<br />
• Restrictions:<br />
The <strong>Onboard</strong> <strong>Administrator</strong> name is 1 to 32 characters long including all alphanumeric characters and<br />
the dash (-).<br />
SET OA UID<br />
• Command:<br />
SET OA UID [ | ACTIVE | STANDBY] {ON | OFF}<br />
• Description:<br />
Sets the <strong>Onboard</strong> <strong>Administrator</strong> UID on or off.<br />
If you do not specify a bay number, the command defaults to the active <strong>Onboard</strong> <strong>Administrator</strong>.<br />
• Access level/Bay level:<br />
Enclosure network configuration commands 74
All<br />
• Restrictions:<br />
None<br />
SET IPCONFIG<br />
• Command:<br />
SET IPCONFIG {DHCP | STATIC} [] [DYNAMICDNS] <br />
[ [ []]]<br />
• Description:<br />
o Configures IP settings for the <strong>Onboard</strong> <strong>Administrator</strong> to DHCP mode or static mode.<br />
o In STATIC mode, the IP address and Netmask are set to and respectively.<br />
These settings take affect immediately. If the Gateway address and/or DNS addresses are cleared,<br />
they are omitted. The Gateway and DNS address can also be set by using the SET OA GATEWAY<br />
and ADD OA DNS commands.<br />
o SET IPCONFIG STATIC [] [<br />
[ []]]<br />
o In DHCP mode, the IP address, Netmask, Gateway address, and DNS addresses are obtained from<br />
the DHCP. This setting immediately takes affect. If DYNAMICDNS is specified, then the DNS server<br />
is notified of the new IP address of the system when it is received from the DHCP server.<br />
o SET IPCONFIG DHCP [] [DYNAMICDNS]<br />
• Access level/Bay level:<br />
OA administrator, OA operator<br />
• Restrictions:<br />
None<br />
SET NTP POLL<br />
• Command:<br />
SET NTP POLL <br />
• Description:<br />
Sets the polling interval of the NTP servers<br />
• Access level/Bay level:<br />
OA administrator, OA operator<br />
• Restrictions:<br />
Poll time should be between 60 and 86,400 seconds.<br />
SET NTP PRIMARY<br />
• Command:<br />
SET NTP PRIMARY <br />
• Description:<br />
Enclosure network configuration commands 75
Sets the primary server used for synchronizing time and date using the NTP. The value can be<br />
an IPv4 address, an IPv6 address, or a DNS name.<br />
• Access level/Bay level:<br />
OA administrator, OA operator<br />
• Restrictions:<br />
IPv6 addresses cannot specify the network prefix length.<br />
SET NTP SECONDARY<br />
• Command:<br />
SET NTP SECONDARY <br />
• Description:<br />
Sets the secondary server used for synchronizing time and date using the NTP. The value can be<br />
either an IPv4 address, an IPv6 address, or a DNS name.<br />
• Access level/Bay level:<br />
OA administrator, OA operator<br />
• Restrictions:<br />
IPv6 addresses cannot specify the network prefix length.<br />
SET SERIAL BAUD<br />
• Command:<br />
SET SERIAL BAUD [ 9600 | 19200 | 38400 | 57600 | 115200]<br />
• Description:<br />
Configures the baud rate settings for the OA serial console port.<br />
• Access level/Bay level:<br />
OA administrator (only allowed from Active OA)<br />
• Restrictions:<br />
None<br />
SET SNMP CONTACT<br />
• Command:<br />
SET SNMP CONTACT ""<br />
• Description:<br />
Configures the name of the system contact. The default contact is blank.<br />
• Access level/Bay level:<br />
OA administrator, OA operator<br />
Enclosure network configuration commands 76
• Restrictions:<br />
The must be no more than 20 characters long. Valid characters are all alphanumeric, the<br />
underscore (_), the dash (-), and spaces.<br />
SET SNMP COMMUNITY<br />
• Command:<br />
SET SNMP COMMUNITY {READ | WRITE} ""<br />
• Description:<br />
Sets the community name for the read or write SNMP community. If a blank write community name is<br />
given, then SNMP set commands are disabled until a non-empty community name is given.<br />
• Access level/Bay level:<br />
OA administrator, OA operator<br />
• Restrictions:<br />
o The write must be no more than 20 characters long, and the read must be 1 to 20 characters long.<br />
o All printable characters are valid.<br />
o The default read community name is public.<br />
o The default write community name is public.<br />
SET SNMP LOCATION<br />
• Command:<br />
SET SNMP LOCATION ""<br />
• Description:<br />
Configures the SNMP location of the enclosure. The default location is blank.<br />
• Access level/Bay level:<br />
OA administrator, OA operator<br />
• Restrictions:<br />
The must be no more than 20 characters long. Valid characters are all alphanumeric, the<br />
underscore (_), the dash (-), and spaces.<br />
SHOW FIPS MODE<br />
• Command:<br />
SHOW FIPS MODE<br />
• Description:<br />
Displays the FIPS mode setting.<br />
• Access level/Bay level:<br />
OA administrator, OA user<br />
• Restrictions:<br />
Enclosure network configuration commands 77
o In ON mode, <strong>Onboard</strong> <strong>Administrator</strong> is in a FIPS 140-2-compliant mode. This includes the use of<br />
approved algorithms including AES, 3DES, SHA, and other security restrictions.<br />
o In DEBUG mode, <strong>Onboard</strong> <strong>Administrator</strong> is in a similar state as ON but with option for <strong>HP</strong> debug<br />
support.<br />
SHOW HEALTH<br />
Example<br />
• Command:<br />
SHOW HEALTH<br />
• Description:<br />
Displays current health of all components in the enclosure. If a component is degraded or failed, a<br />
cause and corrective action are provided.<br />
• Access level/Bay level:<br />
All<br />
• Restrictions:<br />
None<br />
Enclosure Health:<br />
Blade Health:<br />
Enclosure: OK<br />
Power Subsystem: OK<br />
Cooling Subsystem: OK<br />
Bay Status Problem Corrective Action<br />
--- -------------------- ----------------------<br />
--------------------------------<br />
1 OK<br />
2 Absent<br />
3a Error Management Processor An iLO failure has been<br />
detected. Make sure you<br />
have a<br />
suitable iLO firmware<br />
loaded.<br />
Reseating the blade or<br />
resetting<br />
iLO may also help.<br />
Other iLO Network The network connectivity<br />
of iLO<br />
is impaired. This could be<br />
due<br />
to bad gateway, DNS or<br />
netmask<br />
info. It could take up to<br />
3<br />
minutes for devices to<br />
gain<br />
Enclosure network configuration commands 78
insertion.<br />
3b OK<br />
4 Absent<br />
5a OK<br />
5b OK<br />
6 Absent<br />
7 Absent<br />
8a OK<br />
8b OK<br />
9 Subsumed<br />
10 OK<br />
11a OK<br />
11b OK<br />
12a OK<br />
12b OK<br />
13 Absent<br />
14 Absent<br />
15 Absent<br />
16 Absent<br />
Interconnect Health:<br />
connectivity after<br />
Bay Status Problem Corrective Action<br />
--- -------------------- ----------------------<br />
--------------------------------<br />
1 OK<br />
2 Absent<br />
3 OK<br />
4 OK<br />
5 OK<br />
6 Subsumed<br />
7 OK<br />
8 Subsumed<br />
Power Supply Health:<br />
Bay Status Problem Corrective Action<br />
--- -------------------- ----------------------<br />
--------------------------------<br />
1 OK<br />
2 OK<br />
3 OK<br />
4 OK<br />
5 OK<br />
6 OK<br />
Fan Health:<br />
Bay Status Problem Corrective Action<br />
--- -------------------- ----------------------<br />
--------------------------------<br />
1 OK<br />
2 OK<br />
3 OK<br />
4 OK<br />
5 OK<br />
6 OK<br />
7 OK<br />
Enclosure network configuration commands 79
8 OK<br />
9 OK<br />
10 OK<br />
<strong>Onboard</strong> <strong>Administrator</strong> Health:<br />
Bay Status Problem Corrective Action<br />
--- -------------------- ----------------------<br />
--------------------------------<br />
1 Absent<br />
2 OK<br />
SHOW LOGIN_BANNER<br />
• Command:<br />
SHOW LOGIN_BANNER<br />
• Description:<br />
Displays the login banner settings including:<br />
o Login banner display on user login enabled/disabled<br />
o Currently configured login banner text (if any)<br />
• Access level /Bay level:<br />
OA administrator, OA operator, OA user<br />
• Restrictions:<br />
None<br />
Example OA-0018FE2757AD> show login_banner<br />
Login Banner:<br />
Status : Enabled<br />
Login Banner Text : This is sample login banner text.<br />
Do not attempt to access this system without proper authorization.<br />
Using this system without proper authorization can result in serious<br />
penalties.<br />
SHOW NETWORK<br />
• Command:<br />
SHOW NETWORK<br />
• Description:<br />
Displays network settings of <strong>Onboard</strong> <strong>Administrator</strong>, including:<br />
o Enclosure<br />
o IPv4 information<br />
o IPv6 information<br />
Enclosure network configuration commands 80
o DHCP state<br />
o Dynamic DNS state<br />
o IP address subnet mask<br />
o Gateway address<br />
o Primary and secondary DNS addresses<br />
o MAC address<br />
o HTTP and HTTPS server status<br />
o SNMP status<br />
o SSH status<br />
o FIPS Mode<br />
o Trusted Host status<br />
o <strong>HP</strong>SIM trust mode status<br />
o Telnet status<br />
o AlertMail status<br />
o NTP status<br />
o Network link settings<br />
o Enclosure IP mode<br />
o GUI login status<br />
o Active Health System status<br />
o VLAN status<br />
• Access level/Bay level:<br />
All<br />
• Restrictions:<br />
VLAN ID information displays only when VLAN is enabled.<br />
Example<br />
OA-00215AB1A51F> show network<br />
<strong>Onboard</strong> <strong>Administrator</strong> Network Settings:<br />
- - - - - IPv4 Information - - - - -<br />
DHCP: Enabled - Dynamic DNS<br />
IPv4 Address: 16.84.194.171<br />
Netmask: 255.255.252.0<br />
Gateway Address: 16.84.192.1<br />
- - - - - IPv6 Information - - - - -<br />
IPv6: Disabled<br />
Static Address: Not Set<br />
DHCPv6: Disabled<br />
Router Advertisement: Disabled<br />
Static IPv6 DNS 1: Not Set<br />
Static IPv6 DNS 2: Not Set<br />
- - - - - General Information - - - - -<br />
Active DNS Addresses:<br />
Primary: 16.110.135.52<br />
Enclosure network configuration commands 81
Secondary: 16.110.135.51<br />
Tertiary: Not Set<br />
MAC Address: 00:21:5A:B1:A5:1F<br />
Network Link Settings: Link Auto-negotiation<br />
<strong>Onboard</strong> <strong>Administrator</strong> Protocol Status:<br />
Web (HTTP/HTTPS): Enabled<br />
SNMP: Disabled<br />
SecureSH: Enabled<br />
FIPS Mode: Off<br />
Trusted Hosts: Disabled<br />
<strong>HP</strong>SIM Trust Mode: Certificate<br />
Telnet: Enabled<br />
AlertMail: Disabled<br />
Mailbox: Not Set<br />
SMTP Server: Not Set<br />
Sender Domain: Not Set<br />
XML Reply: Enabled<br />
NTP: Disabled<br />
Primary NTP server: Not Set<br />
Secondary NTP server: Not Set<br />
Server Poll-Interval: 720 seconds<br />
Link Loss Failover: Disabled<br />
Link Loss Interval: 60 seconds<br />
Enclosure IP Mode: Disabled<br />
GUI Login Detail: Enabled<br />
Active Health System: Enabled<br />
VLAN: Disabled<br />
SHOW SNMP<br />
• Command:<br />
SHOW SNMP<br />
• Description:<br />
Displays:<br />
o SNMP system name<br />
o Location<br />
o Contact<br />
o Read community name<br />
o Write community name<br />
o List of the trap destinations<br />
• Access level/Bay level:<br />
All<br />
• Restrictions:<br />
None<br />
Example<br />
OA-0018FE27577F> SHOW SNMP<br />
SNMP Configuration:<br />
Status: Disabled<br />
System Name: Shorty<br />
System Location:<br />
Enclosure network configuration commands 82
System Contact:<br />
Read Community Name: public<br />
Write Community Name:<br />
No trap receivers specified.<br />
SHOW SSHFINGERPRINT<br />
• Command:<br />
SHOW SSHFINGERPRINT<br />
• Description:<br />
Displays the key fingerprint of the <strong>Onboard</strong> <strong>Administrator</strong> host public key.<br />
• Access level/Bay level:<br />
OA administrator, OA operator, OA user<br />
• Restrictions:<br />
None<br />
Example OA-0018FE27577F> SHOW SSHFINGERPRINT<br />
1024 3f:5c:33:0a:a1:2e:9b:2c:da:eb:fe:90:87:34:13:b7 /etc/ssh/id_dsa.pub<br />
SHOW SSHKEY<br />
• Command:<br />
SHOW SSHKEY<br />
• Description:<br />
Displays the contents of the existing SSH authorized key files.<br />
• Access level/Bay level:<br />
<strong>Administrator</strong><br />
• Restrictions:<br />
None<br />
TEST ALERTMAIL<br />
• Command:<br />
TEST ALERTMAIL<br />
• Description:<br />
Sends a test AlertMail message to the configured email address<br />
• Access level/Bay level:<br />
<strong>Administrator</strong>, operator<br />
Restrictions:<br />
You must have OA permission to perform this command.<br />
Enclosure network configuration commands 83
TEST SNMP<br />
• Command:<br />
TEST SNMP<br />
• Description:<br />
Sends a test SNMP trap to all of the configured trap destinations<br />
• Access level/Bay level:<br />
OA administrator, OA operator<br />
• Restrictions:<br />
To use this function, you must enable SNMP.<br />
Enclosure network configuration commands 84
Enclosure management commands<br />
CLEAR SYSLOG<br />
• Command:<br />
CAUTION: You cannot restore this information after you delete it.<br />
CLEAR SYSLOG {ENCLOSURE | OA }<br />
• Description:<br />
Clears the <strong>Onboard</strong> <strong>Administrator</strong> system log. If you do not specify a bay number, the Active <strong>Onboard</strong><br />
<strong>Administrator</strong> system log is cleared.<br />
• Access level/Bay level:<br />
OA administrator, OA operator<br />
• Restrictions:<br />
None<br />
DISABLE GUI_LOGIN_DETAIL<br />
• Command:<br />
DISABLE GUI_LOGIN_DETAIL<br />
• Description:<br />
Disables extended enclosure information available in the GUI on the login page<br />
• Access level/Bay level:<br />
OA administrator, OA operator<br />
• Restriction:<br />
None<br />
DISABLE LLF<br />
• Command:<br />
DISABLE LLF<br />
• Description:<br />
Disables Link Loss Failover for <strong>Onboard</strong> <strong>Administrator</strong> Redundancy.<br />
• Access level/Bay level::<br />
Operator, <strong>Administrator</strong><br />
• Restrictions:<br />
Enclosure management commands 85
You must have <strong>Onboard</strong> <strong>Administrator</strong> permission to perform this command.<br />
ENABLE GUI_LOGIN_DETAIL<br />
• Command:<br />
ENABLE GUI_LOGIN_DETAIL<br />
• Description:<br />
Enables extended enclosure information available in the GUI on the login page<br />
• Access level/Bay level:<br />
OA administrator, OA operator<br />
• Restriction:<br />
None<br />
ENABLE LLF<br />
• Command:<br />
ENABLE LLF<br />
• Description:<br />
Enables Link Loss Failover for <strong>Onboard</strong> <strong>Administrator</strong> Redundancy.<br />
• Access level/Bay level:<br />
Operator, <strong>Administrator</strong><br />
• Restrictions:<br />
RESTART OA<br />
You must have OA permission to perform this command<br />
• Command:<br />
RESTART OA []<br />
• Description:<br />
Resets the <strong>Onboard</strong> <strong>Administrator</strong> module specified by . If no bay number is given, then<br />
the <strong>Onboard</strong> <strong>Administrator</strong> the user is logged in to is restarted.<br />
• Access level/Bay level:<br />
OA administrator, OA operator<br />
• Restrictions:<br />
None<br />
SET DATE<br />
• Command:<br />
SET DATE MMDDhhmm [[CC]YY][TZ]<br />
Enclosure management commands 86
• Description:<br />
Sets the date of the enclosure with the following definitions:<br />
o MM: Month<br />
o DD: Day<br />
o hh: Hour (24-hour time)<br />
o mm: Minute<br />
o CC: Century<br />
o YY: Year<br />
o TZ: Time zone<br />
If you leave the time zone variable blank, then the current time zone is left in effect.<br />
• Access level/Bay level:<br />
OA administrator, OA operator<br />
• Restrictions:<br />
Date and time can only be set if NTP is disabled.<br />
MM is an integer from 01 to 12.<br />
DD is an integer from 01 to 31.<br />
hh is an integer from 00 to 24.<br />
mm is an integer from 00 to 60.<br />
For valid time zones, see "Time Zone settings (on page 171)".<br />
SET DISPLAY EVENTS<br />
• Command:<br />
SET DISPLAY EVENTS {ON | OFF}<br />
• Description:<br />
o Turns the displaying of events that are triggered by status changes in the system on or off.<br />
o This command is specific to the CLI session, and must be issued for every CLI session to display<br />
events in that session.<br />
• Access level/Bay level:<br />
All<br />
• Restrictions:<br />
Only for bays for which you have privileges<br />
SET ENCLOSURE ASSET<br />
• Command:<br />
SET ENCLOSURE ASSET [TAG] ""<br />
• Description:<br />
o Sets the enclosure asset tag<br />
o The default enclosure asset tag is blank<br />
Enclosure management commands 87
• Access level/Bay level:<br />
OA administrator, OA operator<br />
• Restrictions:<br />
The must be 1 to 32 characters long and includes all alphanumeric, underscore (_), and<br />
dash (-) characters.<br />
SET ENCLOSURE NAME<br />
• Command:<br />
SET ENCLOSURE NAME ""<br />
• Description:<br />
o Changes the enclosure name<br />
o The default enclosure name is the mid-plane serial number<br />
• Access level/Bay level:<br />
OA administrator, OA operator<br />
• Restrictions:<br />
The must be 1 to 32 characters long and includes all alphanumeric, underscore (_),<br />
and dash (-) characters.<br />
SET ENCLOSURE PART_ NUMBER<br />
• Command:<br />
SET ENCLOSURE PART_NUMBER ""<br />
• Description:<br />
Sets the part number of the enclosure<br />
• Access level/Bay level:<br />
OA administrator<br />
• Restrictions:<br />
Must be 10 characters in length and the first character must be a digit. Acceptable characters are all<br />
alphanumeric and the dash (-).<br />
SET ENCLOSURE PDU_TYPE<br />
• Command:<br />
SET ENCLOSURE PDU_TYPE {1|2|3|4|5}<br />
• Description:<br />
Sets the enclosure PDU type to:<br />
o 1=Single-phase<br />
o 2=Three-phase<br />
o 3=Three-phase, international<br />
Enclosure management commands 88
o 4=DC Power Input Module<br />
o 5=Single phase IPD<br />
• Access level/Bay level:<br />
OA administrator<br />
• Restrictions:<br />
1, 2, 3, 4, 5<br />
SET ENCLOSURE SERIAL_NUMBER<br />
• Command:<br />
SET ENCLOSURE SERIAL_NUMBER ""<br />
• Description:<br />
Sets the enclosure serial number.<br />
• Access level/Bay level:<br />
OA administrator<br />
• Restrictions:<br />
Must be 10 characters in length. Acceptable characters are all printable characters.<br />
SET ENCLOSURE UID<br />
• Command:<br />
SET ENCLOSURE UID {ON | OFF}<br />
• Description:<br />
Turns the UID LED of the enclosure on or off.<br />
• Access level/Bay level:<br />
OA administrator, OA operator<br />
• Restrictions:<br />
None<br />
SET LLF INTERVAL<br />
• Command:<br />
SET LLF INTERVAL <br />
• Description:<br />
Set the Link Loss Failure Interval<br />
• Access level/Bay level:<br />
Operator, <strong>Administrator</strong><br />
Restrictions:<br />
Must have OA permission to perform this command.<br />
Enclosure management commands 89
SET OA USB<br />
• Command:<br />
SET OA USB {FRONT | BACK}<br />
• Description:<br />
Allows the <strong>Onboard</strong> <strong>Administrator</strong> to select which USB controller to enable.<br />
The FRONT controller enables the internal DVD drive and the front USB connector.<br />
The BACK controller enables the two USB ports on the rear of the KVM Option Module.<br />
This command has no effect on c3000 <strong>Onboard</strong> <strong>Administrator</strong> boards that are hardware revision level<br />
'CO' and later as displayed with SHOW OA INFO.<br />
• Access level/Bay level:<br />
OA <strong>Administrator</strong><br />
• Restrictions:<br />
A small number of c3000 <strong>Onboard</strong> <strong>Administrator</strong> boards can use only one USB controller at a time.<br />
SET POWER MODE<br />
• Command:<br />
SET POWER MODE {NOTREDUNDANT | REDUNDANT | POWERSUPPLY}<br />
• Description:<br />
o Configures redundancy settings.<br />
o The NOTREDUNDANT setting enables all power supplies to function without regard for redundancy.<br />
o The POWERSUPPLY setting enables one power supply to fail without being over committed on<br />
power.<br />
o The REDUNDANT setting enables half of the power supplies to fail without being over committed on<br />
power.<br />
• Access level/Bay level:<br />
OA administrator, OA operator<br />
• Restrictions:<br />
None<br />
SET POWER LIMIT<br />
• Command:<br />
SET POWER LIMIT { | OFF}<br />
• Description:<br />
Sets or removes a limit on how much input power can be consumed by the enclosure. This setting is<br />
helpful if the enclosure receives power from a PDU with a limited power rating<br />
• Access level/Bay level:<br />
OA administrator, OA operator<br />
Enclosure management commands 90
• Restrictions:<br />
None<br />
SET POWER SAVINGS<br />
• Command:<br />
SET POWER SAVINGS {ON | OFF}<br />
• Description:<br />
o Turns power savings mode on or off. Power savings mode turns unneeded power supplies off.<br />
o The increased load on the remaining power supplies increases their efficiency, resulting in less<br />
power consumption.<br />
• Access level/Bay level:<br />
OA administrator, OA operator<br />
• Restrictions:<br />
The power savings mode is not supported for low voltage on the c7000 Enclosure.<br />
SET TIMEZONE<br />
• Command:<br />
SET TIMEZONE ""<br />
• Description:<br />
Sets the time zone<br />
See Time zone settings (on page 171) for appropriate time zones. Some that are commonly used<br />
include: CET, CST6CDT, EET, EST, EST5EDT, GB, GMT, HST, MET, MST, MST7MDT, NZ, PRC,<br />
PST8PDT, UCT, and UTC.<br />
• Access level/Bay level<br />
OA administrator, OA operator<br />
• Restrictions:<br />
None<br />
SHOW CONFIG<br />
• Command:<br />
SHOW CONFIG<br />
• Description:<br />
Displays the script required to recreate the settings of the enclosure. Passwords are not included for any<br />
user.<br />
• Access level/Bay level:<br />
OA administrator<br />
• Restrictions:<br />
None<br />
Enclosure management commands 91
Example<br />
OA-0018FE27577F> SHOW CONFIG<br />
#Script Generated by <strong>Administrator</strong><br />
#Generated on: Tue Apr 15 10:34:32 2008<br />
#Set Enclosure Time<br />
SET TIMEZONE CST6CDT<br />
#SET DATE MMDDhhmm{{CC}YY}<br />
#Set Enclosure Information<br />
SET ENCLOSURE ASSET TAG "ENC-0000Short"<br />
SET ENCLOSURE NAME "Shorty"<br />
SET RACK NAME "UnnamedRack"<br />
SET POWER MODE NONE<br />
SET POWER SAVINGS ON<br />
#Power limit must be within the range of 950-8750<br />
SET POWER LIMIT OFF<br />
#Set PowerDelay Information<br />
SET INTERCONNECT POWERDELAY 1 0<br />
SET INTERCONNECT POWERDELAY 2 0<br />
SET INTERCONNECT POWERDELAY 3 0<br />
SET INTERCONNECT POWERDELAY 4 0<br />
SET SERVER POWERDELAY 1 0<br />
SET SERVER POWERDELAY 2 0<br />
SET SERVER POWERDELAY 3 0<br />
SET SERVER POWERDELAY 4 0<br />
SET SERVER POWERDELAY 5 0<br />
SET SERVER POWERDELAY 6 0<br />
SET SERVER POWERDELAY 7 0<br />
SET SERVER POWERDELAY 8 0<br />
SET SERVER POWERDELAY 1A 0<br />
SET SERVER POWERDELAY 2A 0<br />
SET SERVER POWERDELAY 3A 0<br />
SET SERVER POWERDELAY 4A 0<br />
SET SERVER POWERDELAY 5A 0<br />
SET SERVER POWERDELAY 6A 0<br />
SET SERVER POWERDELAY 7A 0<br />
SET SERVER POWERDELAY 8A 0<br />
--More-- (20% of 4709 bytes)<br />
SHOW DATE<br />
• Command:<br />
SHOW DATE<br />
• Description:<br />
Displays the current date, time, and time zone of the internal clock of the enclosure<br />
• Access level/Bay level:<br />
All<br />
• Restrictions:<br />
None<br />
Example<br />
OA-0018FE27577F> SHOW DATE<br />
Date: 2008-04-15T10:36:46-05:00 Time Zone: CST6CDT<br />
Enclosure management commands 92
SHOW DISPLAY EVENTS<br />
• Command:<br />
SHOW DISPLAY EVENTS<br />
• Description:<br />
Displays whether event notification is on or off<br />
• Access level/Bay level:<br />
All<br />
• Restrictions:<br />
None<br />
Example<br />
OA-0018FE27577F> SHOW DISPLAY EVENTS<br />
Display Events is set to OFF.<br />
SHOW ENCLOSURE FAN<br />
• Command:<br />
SHOW ENCLOSURE FAN { | ALL}<br />
• Description:<br />
Displays information about, and current status of the specified enclosure fan<br />
• Access level/Bay level:<br />
All<br />
• Restrictions:<br />
None<br />
Example<br />
OA-0018FE27577F> show enclosure fan 1<br />
Fan #1 information:<br />
Status: OK<br />
Speed: 48 percent of Maximum speed<br />
Maximum speed: 18000<br />
Minimum speed: 10<br />
Power consumed: 21<br />
Product Name: Active Cool 200 Fan<br />
Part Number: 412140-B21<br />
Spare Part Number: 413996-001<br />
Version: 2.7<br />
Diagnostic Status:<br />
Internal Data OK<br />
Location OK<br />
Device Failure OK<br />
Device Degraded OK<br />
Missing Device OK<br />
Enclosure management commands 93
SHOW ENCLOSURE INFO<br />
• Command:<br />
SHOW ENCLOSURE INFO<br />
• Description:<br />
Displays:<br />
o Enclosure name<br />
o Enclosure type<br />
o <strong>Onboard</strong> <strong>Administrator</strong> hardware version<br />
o Enclosure Rack U Position<br />
o Enclosure part number<br />
o Serial number<br />
o Asset tag<br />
o <strong>Onboard</strong> <strong>Administrator</strong> MAC address<br />
• Access level/Bay level:<br />
All<br />
• Restrictions:<br />
None<br />
Example<br />
OA-0018FE27577F> SHOW ENCLOSURE INFO<br />
Enclosure Information:<br />
Enclosure Name: Shorty<br />
Enclosure Type: <strong>BladeSystem</strong> c3000 Enclosure<br />
Part Number: 123456-B21<br />
Serial Number: 0987654321<br />
UUID: 1234567891011<br />
Asset Tag: ENC-0000Short<br />
Midplane Spare Part Number: 123456-001<br />
Power Distribution Unit:<br />
[No PDU is present on c3000 enclosures]<br />
<strong>Onboard</strong> <strong>Administrator</strong> Tray Information:<br />
[No Tray Information is present on c3000 enclosures]<br />
SHOW ENCLOSURE LCD<br />
• Command:<br />
SHOW ENCLOSURE LCD<br />
• Description:<br />
Displays information about the Insight Display screen<br />
• Access level/Bay level:<br />
All<br />
• Restrictions:<br />
None<br />
Enclosure management commands 94
Example<br />
OA-0018FE27577F> SHOW ENCLOSURE LCD<br />
Status : OK<br />
Display : Off<br />
Name : <strong>BladeSystem</strong> c3000 Insight Display<br />
Spare Part# : 441831-001<br />
Manufacturer: <strong>HP</strong><br />
Fw Version : 2.0<br />
Diagnostic Status:<br />
Internal Data OK<br />
SHOW ENCLOSURE POWER_SUMMARY<br />
• Command:<br />
SHOW ENCLOSURE POWER_SUMMARY<br />
• Description:<br />
Displays a detailed summary of the enclosure's present power state.<br />
• Access level/Bay level:<br />
OA <strong>Administrator</strong><br />
• Restrictions:<br />
<strong>Administrator</strong> account privileges are required.<br />
Example<br />
OA-0018FE27577F> show enclosure power_summary<br />
Enclosure Bay Output Allocation:<br />
Bay Power Allocated (Watts DC)<br />
------------- --------------------------<br />
Devices 1314<br />
Interconnects + 25<br />
Fans + 480<br />
-------<br />
= 1819<br />
Enclosure Output Power Summary:<br />
Enclosure Watts DC<br />
---------------- --------<br />
Power Capacity 3600<br />
Power Allocation - 1819<br />
Power Available = 1781<br />
Enclosure Input Power Summary:<br />
Enclosure Watts AC<br />
----------------- --------<br />
Present Power 822<br />
Max Input Power 8500<br />
Dynamic Power Cap Not Set<br />
Power Limit 8500<br />
Device Bay Power Summary:<br />
Power Allocated<br />
Bay Name (Watts DC)<br />
--- -------------------- ---------------<br />
1 Slammer 212<br />
2 test45667 419<br />
Enclosure management commands 95
3A linux 261<br />
3B linux 265<br />
4 YOUR-EYZCGYAYBB 157<br />
-------<br />
= 1314<br />
Interconnect Bay Power Summary:<br />
Bay Name Power Allocated (Watts DC)<br />
--- -------------------------------- --------------------------<br />
1 GbE2c Ethernet Blade Switch 25<br />
2 0<br />
-------<br />
= 25<br />
Fan Power Summary:<br />
Total Fans Fan Rule Present Power Power Allocated<br />
(Number of Fans) (Number of Fans) (Watts DC) (Watts DC)<br />
---------------- ---------------- -------------- ---------------<br />
6 6 148 480<br />
SHOW ENCLOSURE POWERSUPPLY<br />
• Command:<br />
SHOW ENCLOSURE POWERSUPPLY {ALL | [{ , | - } ]}<br />
• Description:<br />
Displays:<br />
o Power supply status<br />
o AC input status<br />
o Capacity<br />
o Input voltage range #1 (measured in V)<br />
o Input voltage range #2 (if necessary; measured in V)<br />
o Input frequency range (measured in Hz)<br />
o Part number<br />
o Serial number<br />
o Hardware revision for the specified power supply (if one is specified)<br />
o Range of power supplies, or for all power supplies (if ALL is specified).<br />
• Access level/Bay level:<br />
All<br />
• Restrictions:<br />
None<br />
Example<br />
OA-0018FE27577F> show enclosure powersupply 1<br />
Power Supply #1 Information:<br />
Status: OK<br />
AC Input Status: OK<br />
Capacity: 1200 Watts<br />
Current Power Output: 590 Watts<br />
Serial Number: 531300ALL00233<br />
Enclosure management commands 96
Product Name: <strong>HP</strong> PROLIANT SERVER PS<br />
Part Number: 438203-001<br />
Spare Part Number: XXXXXX-001<br />
Product Ver:<br />
Diagnostic Status:<br />
Internal Data OK<br />
Device Failure OK<br />
Power Cord OK<br />
SHOW ENCLOSURE STATUS<br />
• Command:<br />
SHOW ENCLOSURE STATUS<br />
• Description:<br />
Displays the basic health and status of the enclosure subsystem<br />
• Access level/Bay level:<br />
All<br />
• Restrictions:<br />
None<br />
Example<br />
OA-0018FE27577F> SHOW ENCLOSURE STATUS<br />
Enclosure:<br />
Status: OK<br />
Unit Identification LED: Off<br />
Diagnostic Status:<br />
Internal Data OK<br />
<strong>Onboard</strong> <strong>Administrator</strong>:<br />
Status: OK<br />
Power Subsystem:<br />
Status: OK<br />
Power Mode: Not Redundant<br />
Power Capacity: 3600 Watts DC<br />
Power Available: 2685 Watts DC<br />
Present Power: 463 Watts AC<br />
Cooling Subsystem:<br />
Status: OK<br />
Fans Good/Wanted/Needed: 6/6/5<br />
Fan 1: 9497 RPM (53%)<br />
Fan 2: 7342 RPM (41%)<br />
Fan 3: 9493 RPM (53%)<br />
Fan 4: 9495 RPM (53%)<br />
Fan 5: 7343 RPM (41%)<br />
Fan 6: 9508 RPM (53%)<br />
SHOW ENCLOSURE TEMP<br />
• Command:<br />
SHOW ENCLOSURE TEMP<br />
• Description:<br />
Enclosure management commands 97
Displays the highest ambient temperature being reported by the installed blade devices. If no blade<br />
devices are installed, displays the temperature of the OA module as an approximation of the ambient<br />
temperature.<br />
• Access level/Bay level:<br />
All<br />
Bay specific<br />
• Restrictions:<br />
None<br />
Example<br />
OA-0018FE27577F> SHOW ENCLOSURE TEMP<br />
Locale Temp Status Temp Caution Critical<br />
-------------------------- ----------- -------- ------- --------<br />
Enclosure N/A 26C/ 78F --- ---<br />
<strong>Onboard</strong> <strong>Administrator</strong> 1 OK 26C/ 78F 75C 80C<br />
Blade Bay 7 N/A 20C/ 68F 38C 43C<br />
Blade Bay 8 N/A 25C/ 77F 45C 60C<br />
Blade Bay 2A N/A 25C/ 77F 40C 45C<br />
Blade Bay 2B N/A 27C/ 80F 40C 45C<br />
Interconnect Module 1 OK ---- --- ---<br />
SHOW FRU<br />
• Command:<br />
SHOW FRU<br />
• Description:<br />
o The FRU Summary section provides information on all field replaceable units within the enclosure.<br />
o Information provided in this section can quickly aid the administrator in contacting <strong>HP</strong> Customer<br />
Service for troubleshooting, repair, and ordering replacements.<br />
• Access level/Bay level:<br />
All<br />
Bay specific<br />
• Restrictions:<br />
You must have access to the specified bay.<br />
Example<br />
OA-0018FE27577F> show fru<br />
Enclosure<br />
Model: <strong>BladeSystem</strong> c3000 Enclosure<br />
Manufacturer: <strong>HP</strong><br />
Serial Number: 0987654321<br />
Part Number: 437506-B21<br />
Enclosure Midplane<br />
Manufacturer: <strong>HP</strong><br />
Spare Part Number: 441829-001<br />
<strong>Onboard</strong> <strong>Administrator</strong> 1<br />
Enclosure management commands 98
Model: <strong>BladeSystem</strong> c3000 <strong>Onboard</strong> <strong>Administrator</strong><br />
Manufacturer: <strong>HP</strong><br />
Serial Number: P30590A9VUQ04B<br />
Part Number: 448589-B21<br />
Spare Part Number: 441832-001<br />
Firmware Version: 2.40<br />
HwVersion: A0<br />
Blade 1<br />
Model: ProLiant BL480c G1<br />
Manufacturer: <strong>HP</strong><br />
Serial Number: USM64204B1<br />
Part Number: 416667-B21<br />
Spare Part Number: 410293-001<br />
Blade 2<br />
Model: Integrity BL860c<br />
Manufacturer: hp<br />
Serial Number: CSJ0634214<br />
Part Number: AD323A<br />
Spare Part Number: AD217-60001<br />
Blade 7<br />
Model: ProLiant BL460c G1<br />
Manufacturer: <strong>HP</strong><br />
Serial Number: USM62401EP<br />
Part Number: 404664-B21<br />
Spare Part Number: 410299-001<br />
Interconnect 1<br />
Model: GbE2c Ethernet Blade Switch<br />
Manufacturer: <strong>HP</strong><br />
Serial Number: MY36290EMT<br />
Part Number: 410917-B21<br />
Spare Part Number: 414037-001<br />
Interconnect 2<br />
Model: <strong>HP</strong> 1/10Gb VC-Enet Module<br />
Manufacturer: <strong>HP</strong><br />
Serial Number: TW2702004K<br />
Part Number: 399593-B22<br />
Spare Part Number: 399725-001<br />
Fan 1<br />
Fan 2<br />
Fan 3<br />
Fan 4<br />
Fan 5<br />
Model: Active Cool 200 Fan<br />
Part Number: 412140-B21<br />
Spare Part Number: 413996-001<br />
Model: Active Cool 200 Fan<br />
Part Number: 412140-B21<br />
Spare Part Number: 413996-001<br />
Model: Active Cool 200 Fan<br />
Part Number: 412140-B21<br />
Spare Part Number: 413996-001<br />
Model: Active Cool 200 Fan<br />
Part Number: 412140-B21<br />
Spare Part Number: 413996-001<br />
Enclosure management commands 99
Fan 6<br />
Model: Active Cool 200 Fan<br />
Part Number: 412140-B21<br />
Spare Part Number: 413996-001<br />
Model: Active Cool 200 Fan<br />
Part Number: 412140-B21<br />
Spare Part Number: 413996-001<br />
Power Supply 1<br />
Model: 438203-001<br />
Serial Number: 531300ALL00233<br />
Spare Part Number: XXXXXX-001<br />
Power Supply 2<br />
Model: 438203-001<br />
Serial Number: 531300ALL00014<br />
Spare Part Number: XXXXXX-001<br />
Power Supply 3<br />
Model: 438203-001<br />
Serial Number: 531300ALL00399<br />
Spare Part Number: XXXXXX-001<br />
Insight Display<br />
Model: <strong>BladeSystem</strong> c3000 Insight Display<br />
Manufacturer: <strong>HP</strong><br />
Spare Part Number: 441831-001<br />
Firmware Version: 2.2.2<br />
SHOW OA<br />
• Command:<br />
SHOW OA {CERTIFICATE | INFO | NETWORK | STATUS | UPTIME | USB} [ALL | [{ , | - } ] | ACTIVE | STANDBY]]<br />
• Description:<br />
Displays the certificate information, network configuration, status, uptime, or USB mode of the <strong>Onboard</strong><br />
<strong>Administrator</strong>. You can use the alias Active or Standby for the .<br />
• Access level/Bay level:<br />
All<br />
• Restrictions:<br />
None<br />
SHOW OA CERTIFICATE<br />
• Command:<br />
SHOW OA CERTIFICATE [ALL | [{ , | - } ] | ACTIVE<br />
| STANDBY]]<br />
• Description:<br />
Shows the certificate information for the <strong>Onboard</strong> <strong>Administrator</strong><br />
• Access level/Bay level:<br />
Enclosure management commands 100
All<br />
• Restrictions:<br />
None<br />
Example<br />
OA-0018FE27577F> SHOW OA CERTIFICATE<br />
<strong>Onboard</strong> <strong>Administrator</strong> #1 Certificate Information:<br />
Issued by: OA-0018FE27577F<br />
Valid from: 2007-02-01T09:54:30Z<br />
Valid until: 2017-01-29T09:54:30Z<br />
Serial Number: 1A:TT:66:77:FF:2D<br />
Version: 1<br />
MD5 Fingerprint: F08:87:33:89:D9:E1:W3:BC:6D:88:C1:77:A4:KI:DC:AA<br />
SHA1 Fingerprint: 78:B8:14:09:ED:98:66:3D:58:ED:C2:U5:80:AB:78:4L:4B:4F:12:34<br />
Subject:<br />
Common Name (CN): OA-1234FE27577F<br />
Country (C):<br />
State or Province (ST):<br />
City or Locality (L):<br />
Organization Name (0): <strong>Hewlett</strong>-<strong>Packard</strong><br />
Organizational Unit: <strong>Onboard</strong> <strong>Administrator</strong><br />
SHOW OA INFO<br />
• Command:<br />
SHOW OA INFO [ALL | [{ , | - } ] | ACTIVE | STANDBY]]<br />
• Description:<br />
Displays information about the <strong>Onboard</strong> <strong>Administrator</strong>. If the <strong>Onboard</strong> <strong>Administrator</strong> is not specified,<br />
the command defaults to the Active <strong>Onboard</strong> <strong>Administrator</strong>.<br />
• Access level/Bay level:<br />
All<br />
• Restrictions:<br />
None<br />
Example<br />
OA-0018FE27577F> SHOW OA INFO<br />
<strong>Onboard</strong> <strong>Administrator</strong> #1 information:<br />
Product Name : <strong>BladeSystem</strong> c3000 <strong>Onboard</strong> <strong>Administrator</strong><br />
Part Number : 123456-B21<br />
Spare Part No.: 123456-001<br />
Serial Number : PLO590A9FDJ8<br />
UUID : 123P4R5T6YVUQ04B<br />
Manufacturer : <strong>HP</strong><br />
Firmware Ver. : 2.20<br />
Hw Version : A0<br />
SHOW OA NETWORK<br />
• Command:<br />
SHOW OA NETWORK [ALL | [{ , | - } ] | ACTIVE | STANDBY]]<br />
Enclosure management commands 101
• Description:<br />
Displays the network configuration for the specified <strong>Onboard</strong> <strong>Administrator</strong>. If you do not specify the<br />
<strong>Onboard</strong> <strong>Administrator</strong>, then the command defaults to the active <strong>Onboard</strong> <strong>Administrator</strong>.<br />
• Access level/Bay level:<br />
OA administrator, OA operator, OA user<br />
• Restrictions:<br />
VLAN ID information appears only when VLAN is enabled.<br />
Example<br />
OA-0018FE27577F> show oa network<br />
show oa network<br />
<strong>Onboard</strong> <strong>Administrator</strong> #1 Network Information:<br />
Name: OA-0018FE27577F<br />
- - - - - IPv4 Information - - - - -<br />
DHCP: Enabled - Dynamic DNS<br />
IPv4 Address: 16.84.189.190<br />
Netmask: 255.255.252.0<br />
Gateway Address: 16.84.188.1<br />
- - - - - IPv6 Information - - - - -<br />
IPv6: Enabled<br />
Link-local Address: fe80::218:feff:fe27:577f/64<br />
Static Address [1]: 2001::10/64<br />
DHCPv6: Disabled<br />
Router Advertisement: Disabled<br />
- - - - - General Information - - - - -<br />
Primary DNS: 16.110.135.51<br />
Secondary DNS: 16.110.135.52<br />
Tertiary DNS: Not Set<br />
VLAN ID: 1<br />
MAC Address: 00:18:FE:27:57:7F<br />
Link Settings: Auto-Negotiation, 100 Mbit, Full Duplex<br />
Link Status: Active<br />
Enclosure IP Mode: Not Supported<br />
SHOW OA STATUS<br />
• Command:<br />
SHOW OA STATUS [ALL | [{ , | - } ] | ACTIVE | STANDBY]]<br />
• Description:<br />
Displays health status for the <strong>Onboard</strong> <strong>Administrator</strong>. If you do not specify the <strong>Onboard</strong> <strong>Administrator</strong>,<br />
the command defaults to the Active <strong>Onboard</strong> <strong>Administrator</strong>.<br />
• Access level/Bay level:<br />
All<br />
• Restrictions:<br />
None<br />
Example<br />
OA-0018FE27577F> SHOW OA STATUS<br />
<strong>Onboard</strong> <strong>Administrator</strong> #1 Status:<br />
Enclosure management commands 102
Name: OA-0018FE27577F<br />
Role: Active<br />
UID: Off<br />
Status: OK<br />
SHOW OA UPTIME<br />
• Command:<br />
SHOW OA UPTIME [ALL | [{ , | - } ] | ACTIVE | STANDBY]]<br />
• Description:<br />
Displays uptime for the <strong>Onboard</strong> <strong>Administrator</strong>. If you do not specify the <strong>Onboard</strong> <strong>Administrator</strong>, the<br />
command defaults to the Active <strong>Onboard</strong> <strong>Administrator</strong>.<br />
• Access level/Bay level:<br />
All<br />
• Restrictions:<br />
None<br />
Example<br />
OA-0018FE27577F> SHOW OA UPTIME<br />
uptime active uptime all uptime standby<br />
OA-0018FE27577F> SHOW OA UPTIME ACTIVE<br />
<strong>Onboard</strong> <strong>Administrator</strong> #1:<br />
Role: Active<br />
Uptime: 0 days, 0 hours, 43 min<br />
CPU Load: 0.00, 0.02, 0.06<br />
SHOW OA USB<br />
• Command:<br />
SHOW OA USB<br />
• Description:<br />
o Displays which USB controller is currently enabled.<br />
o The FRONT controller enables the internal DVD drive and the front USB connector.<br />
o The BACK controller enables the two USB ports on the near KVM Option Module.<br />
o This command has no effect on <strong>HP</strong> c3000 OA boards that are hardware revision level C0 and later.<br />
Hardware revision is found using the SHOW OA INFO command.<br />
• Access level/Bay level:<br />
OA <strong>Administrator</strong><br />
• Restrictions:<br />
None<br />
Example<br />
OA-0018FE27577F> SHOW OA USB<br />
<strong>Onboard</strong> <strong>Administrator</strong> USB setting = FRONT<br />
Enclosure management commands 103
SHOW POWER<br />
• Command:<br />
SHOW POWER<br />
• Description:<br />
Displays the current power configuration<br />
• Access level/Bay level:<br />
All<br />
• Restrictions:<br />
None<br />
Example<br />
OA-0018FE27577F> SHOW POWER<br />
Power Mode: Not Redundant<br />
Dynamic Power: Enabled<br />
Set Power Limit: Not Set<br />
Power Capacity: 3600 Watts DC<br />
Power Available: 2685 Watts DC<br />
Power Allocated: 915 Watts DC<br />
Present Power: 476 Watts AC<br />
Power Limit: 4378 Watts AC<br />
SHOW SYSLOG<br />
• Command:<br />
SHOW SYSLOG {SERVER | ILO | ENCLOSURE | OA | HISTORY | SETTINGS}<br />
• Description:<br />
Displays the syslog of the enclosure with 22 lines per screen. To quit the command, enter q. Any other<br />
key shows the next screen, if there is more information to display.<br />
• Access level/Bay level:<br />
Bay specific<br />
All<br />
• Restrictions:<br />
You must have access to the specified bay.<br />
Example OA-0016355E560A> SHOW SYSLOG SERVER<br />
Retrieving Server syslog(s) ...<br />
Server 1 Syslog:<br />
<br />
DESCRIPTION="IML Cleared (iLO user:<strong>Administrator</strong>)"<br />
OA-0016355E560A> SHOW SYSLOG ENCLOSURE<br />
Apr 23 12:25:03 OA: Authentication failure for user larry from 18.84.33.55,<br />
requesting authenticate_user<br />
Apr 23 12:25:13 OA: Authentication failure for user larry from 18.84.33.55,<br />
requesting authenticate_user<br />
Apr 23 12:25:33 OA: Authentication failure for user larry from 18.84.33.55,<br />
requesting authenticate_user<br />
Apr 23 12:26:36 OA: Authentication failure for user larry from 18.84.33.55,<br />
requesting authenticate_user<br />
Apr 23 12:26:50 OA: demo logged into the <strong>Onboard</strong> <strong>Administrator</strong><br />
Apr 23 13:18:43 OA: Tim.r.bowlers@hp.com logged into the <strong>Onboard</strong><br />
<strong>Administrator</strong><br />
OA-0018FE27577F> SHOW SYSLOG SETTINGS<br />
Remote log: Disabled<br />
Address:<br />
Port: 514<br />
SHOW SYSLOG OA<br />
• Command:<br />
SHOW SYSLOG OA []<br />
• Description:<br />
Displays the syslog for the <strong>Onboard</strong> <strong>Administrator</strong>. If no bay number is given, then the Active <strong>Onboard</strong><br />
<strong>Administrator</strong> syslog appears.<br />
• Access level/Bay level:<br />
OA administrator, OA operator, OA user<br />
• Restrictions:<br />
None<br />
Example<br />
OA-0018FE27577F> SHOW SYSLOG OA<br />
Apr 2 16:21:22 in.ftpd[25446]: connection from 12.34.567.890<br />
Apr 2 16:21:24 in.ftpd[25446]: exiting due to EOF from client<br />
Apr 2 16:21:35 in.ftpd[25451]: connection from 12.34.567.890<br />
Apr 2 16:21:36 in.ftpd[25451]: exiting due to EOF from client<br />
Apr 2 16:24:29 in.ftpd[25222]: exiting due to EOF from client<br />
Apr 2 16:25:01 in.ftpd[25558]: connection from 12.34.567.890<br />
Apr 2 16:25:02 in.ftpd[25558]: user logged in<br />
Apr 2 16:25:03 in.ftpd[25559]: connection from 12.34.567.890<br />
Apr 2 16:25:05 in.ftpd[25559]: userlogged in<br />
Apr 2 16:25:13 in.ftpd[25559]: //ramdisk/www/js/global.js uploaded<br />
Apr 2 16:31:44 in.ftpd[25559]: //ramdisk/www/js/global.js uploaded<br />
Apr 2 16:32:58 OA: <strong>Administrator</strong> logged into the <strong>Onboard</strong> <strong>Administrator</strong><br />
Apr 2 16:34:27 in.ftpd[25559]: exiting due to EOF from client<br />
Apr 2 16:55:02 in.ftpd[25558]: exiting due to timeout (idle time 1800)<br />
Apr 2 16:59:12 OA: <strong>Administrator</strong> logged out of the <strong>Onboard</strong> <strong>Administrator</strong><br />
Apr 2 19:30:05 in.ftpd[31241]: connection from 12.34.567.890<br />
Apr 2 19:30:07 in.ftpd[31241]: guest logged in<br />
Apr 2 19:30:12 in.ftpd[31245]: connection from 12.34.567.890<br />
Apr 2 19:30:13 in.ftpd[31245]: user logged in<br />
Apr 2 19:30:27 in.ftpd[31245]: Can't change directory to standby.xml: No such<br />
file or directory<br />
Enclosure management commands 105
Apr 2 19:30:29 in.ftpd[31241]: Can't change directory to standby.xml: No such<br />
file or directory<br />
Apr 2 19:31:09 in.ftpd[31245]: //ramdisk/www/js/global.js uploaded<br />
Apr 2 19:33:55 in.ftpd[31245]: //ramdisk/www/js/global.js uploaded<br />
Apr 2 19:37:40 in.ftpd[31245]: //ramdisk/www/js/global.js uploaded<br />
Apr 2 19:40:07 in.ftpd[31241]: exiting due to read error from client: Connection reset by peer<br />
SHOW SYSLOG HISTORY<br />
• Command:<br />
SHOW SYSLOG HISTORY []<br />
• Description:<br />
Displays the extended system log history for the <strong>Onboard</strong> <strong>Administrator</strong>. Use 0 to display all logged<br />
entries. The extended system log appears for the Active <strong>Onboard</strong> <strong>Administrator</strong>.<br />
• Access level/Bay level:<br />
OA administrator, OA operator, OA user<br />
• Restrictions:<br />
None<br />
Example<br />
OA-0018FE27577F> SHOW SYSLOG HISTORY 20<br />
Apr 2 16:21:22 in.ftpd[25446]: connection from 12.34.567.890<br />
Apr 2 16:21:24 in.ftpd[25446]: exiting due to EOF from client<br />
Apr 2 16:21:35 in.ftpd[25451]: connection from 12.34.567.890<br />
Apr 2 16:21:36 in.ftpd[25451]: exiting due to EOF from client<br />
Apr 2 16:24:29 in.ftpd[25222]: exiting due to EOF from client<br />
Apr 2 16:25:01 in.ftpd[25558]: connection from 12.34.567.890<br />
Apr 2 16:25:02 in.ftpd[25558]: user logged in<br />
Apr 2 16:25:03 in.ftpd[25559]: connection from 12.34.567.890<br />
Apr 2 16:25:05 in.ftpd[25559]: user logged in<br />
Apr 2 16:25:13 in.ftpd[25559]: //ramdisk/www/js/global.js uploaded<br />
Apr 2 16:31:44 in.ftpd[25559]: //ramdisk/www/js/global.js uploaded<br />
Apr 2 16:32:58 OA: <strong>Administrator</strong> logged into the <strong>Onboard</strong> <strong>Administrator</strong><br />
Apr 2 16:34:27 in.ftpd[25559]: exiting due to EOF from client<br />
Apr 2 16:55:02 in.ftpd[25558]: exiting due to timeout (idle time 1800)<br />
Apr 2 16:59:12 OA: <strong>Administrator</strong> logged out of the <strong>Onboard</strong> <strong>Administrator</strong><br />
Apr 2 19:30:05 in.ftpd[31241]: connection from 12.34.567.890<br />
Apr 2 19:30:07 in.ftpd[31241]: guest logged in<br />
Apr 2 19:30:12 in.ftpd[31245]: connection from 12.34.567.890<br />
Apr 2 19:30:13 in.ftpd[31245]: user logged in<br />
Apr 2 19:30:27 in.ftpd[31245]: Can't change directory to standby.xml: No such<br />
file or directory<br />
UPLOAD SYSLOG<br />
• Command:<br />
UPLOAD SYSLOG []<br />
• Description:<br />
o Uploads the extended system log history for the current <strong>Onboard</strong> <strong>Administrator</strong>.<br />
o Supported protocols are FTP, TFTP, and USB.<br />
— The URL must be formatted as: protocol://host/path/filename.<br />
Enclosure management commands 106
— The URL syntax for IPv6 addresses is protocol://[]/path/file.<br />
— If your FTP server does not support anonymous logins, a username and password can be<br />
specified within the URL formatted as: ftp://username:password@host/path/filename.<br />
• Access level/Bay level:<br />
OA administrator, OA operator, OA user<br />
• Restrictions:<br />
None<br />
SHOW VCMODE<br />
• Command:<br />
SHOW VCMODE<br />
• Description:<br />
Displays Virtual Connect Mode settings<br />
• Access level/Bay level:<br />
All<br />
• Restrictions:<br />
None<br />
Example<br />
OA-0018FE27577F> SHOW VCMODE<br />
Virtual Connect Mode: Disabled<br />
UPDATE<br />
• Command:<br />
UPDATE {IMAGE | ILO | SHOW | DEVICE | FIRMWARE }<br />
• Description:<br />
The UPDATE SHOW (or SHOW UPDATE) command displays enclosure devices that are available for<br />
firmware upgrade.<br />
The UPDATE DEVICE command executes the firmware upgrade process on one or more available<br />
enclosure devices.<br />
The device must be restarted after the firmware update by UPDATE command.<br />
The updated firmware version in the NewVersion column is already available in the <strong>Onboard</strong><br />
<strong>Administrator</strong> firmware code and does not have to be downloaded from the <strong>HP</strong> website.<br />
• Access level/Bay level:<br />
OA administrator<br />
• Restrictions:<br />
The UPDATE DEVICE FORCE ALL command is not allowed. You can update single devices only by<br />
using UPDATE DEVICE FORCE.<br />
• Notes:<br />
Enclosure management commands 107
Updating components using this command might interrupt server connectivity.<br />
Updating partner blade management firmware requires the corresponding server be powered off first,<br />
then the component updated, and then the server can be powered back on.<br />
Some components may require power cycling after the firmware update for the new firmware to be<br />
activated.<br />
Example >update show<br />
UPDATE ILO<br />
Device Name Location Version<br />
NewVersion<br />
-----------------------------------------------------------------------<br />
------------<br />
TRAY | <strong>BladeSystem</strong> c7000 <strong>Onboard</strong> <strong>Administrator</strong> Tray | - | 1.7 |<br />
1.7<br />
ICBAY | <strong>HP</strong> 1Gb Ethernet Pass-Thru Module for c-Class | 1A | 2.8.3 |<br />
3.0.3<br />
ICBAY | <strong>HP</strong> 1Gb Ethernet Pass-Thru Module for c-Class | 2A | 2.8.3 |<br />
3.0.3<br />
ICBAY | <strong>HP</strong> 1Gb Ethernet Pass-Thru Module for c-Class | 3A | 2.8.3 |<br />
3.0.3<br />
ICBAY | <strong>HP</strong> 1Gb Ethernet Pass-Thru Module for c-Class | 4A | 2.8.3 |<br />
3.0.3<br />
ICBAY | <strong>HP</strong> 4Gb Fibre Channel Pass-thru Module for c-C | 5A | 2.4.3 |<br />
2.10.3<br />
ICBAY | <strong>HP</strong> 4Gb Fibre Channel Pass-thru Module for c-C | 6A | 2.4.3 |<br />
2.10.3<br />
ICBAY | <strong>HP</strong> 4Gb Fibre Channel Pass-thru Module for c-C | 7A | 2.4.3 |<br />
2.10.3<br />
ICBAY | <strong>HP</strong> 4Gb Fibre Channel Pass-thru Module for c-C | 8A | 2.4.3 |<br />
2.10.3<br />
Update 1Gb Ethernet PT module 1A via command UPDATE device ICBAY 1A<br />
Update 4Gb Fibre Channel PT module 8A via command: UPDATE device ICBAY 8A<br />
• Command:<br />
UPDATE ILO {ALL | [{ , | - } ]} <br />
• Description:<br />
o The UPDATE ILO command downloads a new flash image from the network and uses it to update<br />
the firmware for iLO.<br />
o Supported protocols are HTTP, HTTPS, TFTP, and FTP.<br />
o The URL must be formatted as protocol://host/path/filename.<br />
o If your FTP server does not support anonymous logins, then a username and password can be<br />
specified within the URL that is formatted as: ftp://username/password@host/path/filename.<br />
• Access level/Bay level:<br />
<strong>Administrator</strong>, operator<br />
Blade bay<br />
Enclosure management commands 108
• Restrictions:<br />
o If maximum users exist in iLO (12), then this command fails. A user account must be available to<br />
execute this command.<br />
o This command is not applicable to <strong>HP</strong> Integrity server blades.<br />
UPDATE IMAGE FW_ISO<br />
• Command:<br />
UPDATE IMAGE {[FORCE] FW_ISO | SYNC}<br />
• Description:<br />
o The IMAGE command downloads a new flash image from the network and uses it to update the<br />
<strong>Onboard</strong> <strong>Administrator</strong> firmware. If a redundant <strong>Onboard</strong> <strong>Administrator</strong> is present in the system,<br />
then this command flashes and validates its firmware before attempting to flash the active <strong>Onboard</strong><br />
<strong>Administrator</strong>.<br />
o Updates the <strong>Onboard</strong> <strong>Administrator</strong> firmware using an image on a firmware CD. Enclosure<br />
Firmware Management must be configured with a valid ISO URL. Using the FORCE option enables<br />
firmware downgrades even if settings and passwords might are lost.<br />
o Supported protocols are HTTP, FTP, and TFTP.<br />
o The URL must be formatted as: protocol://host/path/filename.<br />
o The URL syntax for IPv6 addresses is protocol://[]/path/file.<br />
o If your FTP server does not support anonymous logins, a username and password can be specified<br />
within the URL formatted as: ftp://username:password@host/path/filename.<br />
o Use FORCE to enable downgrading firmware even if settings and passwords might be lost.<br />
o The UPDATE IMAGE SYNC command initiates a firmware sync of the Active and Standby <strong>Onboard</strong><br />
<strong>Administrator</strong>s.<br />
o For USB protocol, see SHOW USBKEY. ("SHOW USBKEY" on page 152)<br />
• Access level/Bay level:<br />
OA administrator, OA operator<br />
• Restrictions:<br />
You cannot use the FORCE option for downgrade in FIPS Mode ON/DEBUG.<br />
UPLOAD CONFIG<br />
• Command:<br />
UPLOAD CONFIG {"" | USB ""}<br />
• Description:<br />
Uploads a script to the specified URL which duplicates the current runtime configuration. Supported<br />
protocols are FTP, TFTP, and USB. The URL should be formatted as: protocol://host/path/filename. The<br />
URL syntax for IPv6 addresses is protocol://[]/path/file. If your FTP server does not<br />
support anonymous logins, you can specify a user name and password within the URL formatted as:<br />
ftp://username:password@host/path/filename. To save a configuration file to a USB key, use the USB<br />
command and provide a filename.<br />
• Access level/Bay level:<br />
Enclosure management commands 109
OA administrator<br />
• Restriction:<br />
The user password is not saved or restored by the UPLOAD CONFIG command.<br />
UPLOAD SUPPORTDUMP<br />
• Command:<br />
UPLOAD SUPPORTDUMP {""}<br />
• Description:<br />
o Uploads supportdump data to the specified URL.<br />
o Supported protocols are FTP, TFTP, and USB.<br />
o The URL must be formatted as: protocol://host/path/filename.<br />
o The URL syntax for IPv6 addresses is protocol://[]/path/file.<br />
o If your FTP server does not support anonymous logins, you can specify a user name and password<br />
within the URL formatted as: ftp://username:password@host/path/filename.<br />
• Access level/Bay level:<br />
OA administrator<br />
• Restriction:<br />
You cannot UPLOAD SUPPORTDUMP in FIPS Mode ON/DEBUG.<br />
Enclosure management commands 110
Enclosure Firmware Management commands<br />
DISCOVER FIRMWARE SERVER<br />
• Command:<br />
DISCOVER FIRMWARE SERVER { ALL | [{- | ,} ] }<br />
• Description:<br />
Manual firmware discovery. The blade is reset, which simulates a removal and insertion of the blade.<br />
• Access level/Bay level:<br />
OA administrator, server administrator<br />
• Restrictions:<br />
None<br />
SET FIRMWARE MANAGEMENT<br />
• Command:<br />
SET FIRMWARE MANAGEMENT { URL | POLICY | POWER | SCHEDULE | BAYS_TO_INCLUDE<br />
| FORCE DOWNGRADE }<br />
• Description:<br />
Configures various enclosure firmware management settings<br />
• Access level/Bay level:<br />
OA administrator<br />
• Restrictions:<br />
None<br />
SET FIRMWARE MANAGEMENT URL<br />
• Command:<br />
SET FIRMWARE MANAGEMENT URL { DVD | }<br />
• Description:<br />
Sets the location on the management network of the <strong>HP</strong> Firmware ISO image. Supported protocols are<br />
HTTP, USB, and DVD. Format the URL as: protocol://host/path/filename.<br />
• Access level/Bay level:<br />
OA administrator<br />
• Restrictions:<br />
If the image is being used, the URL cannot be changed.<br />
Enclosure Firmware Management commands 111
SET FIRMWARE MANAGEMENT POLICY<br />
• Command:<br />
SET FIRMWARE MANAGEMENT POLICY { MANUAL | AUTO DISCOVER | AUTO UPDATE }<br />
• Description:<br />
Sets the Enclosure Firmware Management policy for the enclosure. To update and discover manually,<br />
use the MANUAL option. To automatically discover server firmware on insertion, use the AUTO<br />
DISCOVER option. To automatically update server firmware on insertion, use the AUTO UPDATE option.<br />
• Access level/Bay level:<br />
OA administrator<br />
• Restrictions:<br />
None<br />
SET FIRMWARE MANAGEMENT POWER<br />
• Command:<br />
SET FIRMWARE MANAGEMENT POWER { OFF| POWEROFF | FORCE }<br />
• Description:<br />
Sets the Enclosure Firmware Management power control policy for the enclosure.<br />
• Access level/Bay level:<br />
OA administrator<br />
• Restrictions:<br />
o OFF—The server must be powered off or the <strong>Onboard</strong> <strong>Administrator</strong> cancels the operation. This<br />
setting is the default.<br />
o POWEROFF—The <strong>Onboard</strong> <strong>Administrator</strong> attempts to softly shut down the server. This is equivalent<br />
to pressing the Momentary Press virtual button for the server. If server power remains on for more<br />
than five minutes, the <strong>Onboard</strong> <strong>Administrator</strong> cancels the operation.<br />
o FORCE—The <strong>Onboard</strong> <strong>Administrator</strong> forces an immediate hard shutdown of the server. This is<br />
equivalent to pressing the Press and Hold virtual button for the server.<br />
SET FIRMWARE MANAGEMENT SCHEDULE<br />
• Command:<br />
SET FIRMWARE MANAGEMENT SCHEDULE { | NONE }<br />
• Description:<br />
Sets the date and time to run a scheduled update. Enclosure Firmware Management must be enabled<br />
and a firmware management URL must be specified. Use NONE to disable scheduled firmware updates.<br />
• Access level/Bay level:<br />
OA administrator<br />
• Restrictions:<br />
None<br />
Enclosure Firmware Management commands 112
SET FIRMWARE MANAGEMENT<br />
BAYS_TO_INCLUDE SERVER<br />
• Command:<br />
SET FIRMWARE MANAGEMENT BAYS_TO_INCLUDE SERVER { ALL | [{ , |<br />
- } ] | NONE }<br />
• Description:<br />
Configures which server bays are included in the Enclosure Firmware Management policy. If bays were<br />
included in a previous operation, then you must reselect the bays.<br />
• Access level/Bay level:<br />
OA administrator<br />
• Restrictions:<br />
o Bay ranges must be completely specified. Base bays, side a bays, and side b bays cannot be mixed<br />
in a single range. Ranges such as 1a-4b or 5-7a are not valid. For example, the following command<br />
designates base bays 1 through 5 only. Side a or side b bays are not included:<br />
set firmware management bays_to_include server 1-5<br />
Multiple ranges must be specified in the same statement, for example:<br />
set firmware management bays_to_include server 1-4, 1a-3a, 1b-2b<br />
o The bays_to_include feature only applies to ProLiant server blades. Integrity server blades do<br />
not support this feature. Partner blade support is provided through the associated server blade<br />
based on whether the firmware ISO supports the PCIe adapter card in the partner blade.<br />
SET FIRMWARE MANAGEMENT FORCE<br />
DOWNGRADE<br />
• Command:<br />
SET FIRMWARE MANAGEMENT FORCE DOWNGRADE { ENABLE| DISABLE }<br />
• Description:<br />
• Sets the firmware update force downgrade policy. Enable this option to force all devices to have<br />
firmware updated to the version supplied by the ISO, even if a newer version is currently installed on the<br />
device. This option is disabled by default.<br />
• Access level/Bay level:<br />
OA administrator<br />
• Restrictions:<br />
None<br />
SHOW FIRMWARE<br />
• Command:<br />
SHOW FIRMWARE { MANAGEMENT | SUMMARY | LOG }<br />
• Description:<br />
Enclosure Firmware Management commands 113
Displays all the firmware management settings followed by a list of all firmware in the enclosure. It<br />
includes a list of the extended server firmware information on all servers that have completed discovery<br />
or update.<br />
SHOW FIRMWARE MANAGEMENT<br />
• Command:<br />
SHOW FIRMWARE MANAGEMENT<br />
• Description:<br />
Displays enclosure firmware management configuration settings<br />
• Access level/Bay level:<br />
All<br />
• Restrictions:<br />
None<br />
Example OA-00215AB0EA21> show firmware management<br />
Enclosure Firmware Settings<br />
Enclosure: OA-984BE1601C55<br />
Firmware Management: Enabled<br />
- Force Downgrade: Enabled<br />
- Firmware ISO URL: http://16.84.188.24/mycompany.com/FW.iso<br />
- Firmware Power Policy: FORCE<br />
- Firmware Policy: Automatic Update<br />
- Firmware Date: Not Set<br />
- Bays to Include<br />
Server Bays: 1 1A 1B 2 2A 2B 3 3A 3B 4 4A 4B 5 5A 5B 6 6A 6B 7 7A<br />
7B 8 8A 8B 9 9A 9B 10 10A 10B 11 11A 11B 12 12A 12B 13 13A 13B 14 14A 14B<br />
15 15A 15B 16 16A 16B<br />
Firmware ISO Information:<br />
- ISO URL Status: Valid URL<br />
Version: 2012.02.0<br />
Name: <strong>HP</strong> Smart Update Firmware DVD<br />
- ISO OA Version: 3.60<br />
SHOW FIRMWARE MANAGEMENT LOG<br />
• Command:<br />
SHOW FIRMWARE MANAGEMENT LOG<br />
• Description:<br />
Displays the enclosure firmware management log<br />
• Access level/Bay level:<br />
All<br />
• Restrictions:<br />
Enclosure Firmware Management commands 114
None<br />
SHOW FIRMWARE SUMMARY<br />
• Command:<br />
SHOW FIRMWARE SUMMARY<br />
• Description:<br />
Displays a summary of enclosure firmware components. An exclamation mark (!) indicates firmware<br />
mismatch or missing firmware information. If the CSV keyword is used, the summary will be output in<br />
CSV format.<br />
• Access level/Bay level:<br />
o All<br />
o Bay specific<br />
• Restrictions:<br />
You must have access to the specified bay number.<br />
Example<br />
iLO2 1.81 Jan 15 2010<br />
Power Management Controller<br />
Device Bay: 12<br />
Discovered: Mon 2010-09-13 17:18:28<br />
Firmware Component Current Version Firmware ISO<br />
Version<br />
-------------------------------------- --------------------<br />
--------------------<br />
System ROM A14 2009.12.09 A14 2009.12.09<br />
ILO2 1.81 1.82<br />
Power Management Controller ERROR<br />
<strong>HP</strong> NC532i Dual Port 10GbE Multifunction Boot code: 5.2.7 Boot code: 5.2.7<br />
iSCSI: 3.1.5 iSCSI: 3.1.5<br />
Device Bay: 13<br />
Discovered: Mon 2010-09-13 17:19:08<br />
Firmware Component Current Version Firmware ISO<br />
Version<br />
-------------------------------------- --------------------<br />
--------------------<br />
System ROM I15 2009.07.10 I15 2009.07.10<br />
ILO2 1.70 1.82<br />
Power Management Controller<br />
<strong>HP</strong> NC373i Multifunction Gigabit Server Boot code: 4.4.1 Boot code: 4.4.1<br />
CLP: 1.3.6 CLP: 1.3.6<br />
<strong>HP</strong> NC373i Multifunction Gigabit Server Boot code: 4.4.1 Boot code: 4.4.1<br />
CLP: 1.3.6 CLP: 1.3.6<br />
Smart Array E200i 1.86 1.86<br />
- DG036A8B53 (Bay 0) <strong>HP</strong>D7<br />
- DG036A9BB6 (Bay 1) <strong>HP</strong>D0<br />
P700m SAS Controller 7.18 1.86<br />
- DG036A8B53 (Bay 0) <strong>HP</strong>D7<br />
Enclosure Firmware Management commands 115
- DG036A9BB6 (Bay 1) <strong>HP</strong>D0<br />
Device Bay: 14A<br />
Discovered: Mon 2010-09-13 17:27:14<br />
Firmware Component Current Version Firmware ISO<br />
Version<br />
-------------------------------------- --------------------<br />
--------------------<br />
System ROM I19 2009.07.10 I19 2009.07.10<br />
ILO2 1.82 1.82<br />
Power Management Controller ERROR<br />
<strong>HP</strong> NC326i PCIe Dual Port Gigabit Serve Boot code: 3.28 Boot code: 3.28<br />
Device Bay: 14B<br />
Discovered: No<br />
Firmware Component Current Version Firmware ISO<br />
Version<br />
-------------------------------------- --------------------<br />
--------------------<br />
System ROM I19 07/10/2009<br />
iLO2 1.79 Aug 28 2009<br />
Power Management Controller 3.4<br />
SHOW FIRMWARE SUMMARY CSV<br />
• Command:<br />
SHOW FIRMWARE SUMMARY CSV<br />
• Description:<br />
Displays a summary of enclosure firmware components in comma separated value format. An<br />
exclamation mark (!) indicates firmware mismatch or missing firmware information. If the CSV keyword<br />
is used, the summary will be output in CSV format.<br />
• Access level/Bay level:<br />
o All<br />
o Bay specific<br />
• Restrictions:<br />
You must have access to the specified bay number.<br />
Example OA-00215AB0EA21> show firmware summary csv<br />
Bay Number, Device Name, Discovered, Firmware Component, Current Version,<br />
Firmware ISO Version<br />
1, ProLiant BL495c G5, No, System ROM, A14 12/09/2009, , iLO2, 1.82 Mar 31<br />
2010, , Power Management Controller, , ,<br />
2, ProLiant BL460c G6, Tue 2010-09-14 09:33:55, System ROM, I24 2010.03.30,<br />
I24 2010.03.30, ILO2, 2.01, 1.82, Power, 3.4, 3.4, <strong>HP</strong> NC532i Dual Port 10GbE<br />
Multifunction BL-c Adapter , Boot code: 5.2.7, Boot code: 5.2.7, <strong>HP</strong> NC532i<br />
Dual Port 10GbE Multifunction BL-c Adapter , iSCSI: 3.1.5, iSCSI: 3.1.5, Smart<br />
Array P410i, 3.00, 3.00, - DG072BB975 (Bay 0), <strong>HP</strong>DD, ,<br />
3, ProLiant BL495c G5, Mon 2010-09-13 17:19:34, System ROM, A14 2009.12.09,<br />
A14 2009.12.09, ILO2, 1.81, 1.82, Power Management Controller, ERROR, ,<br />
Enclosure Firmware Management commands 116
4, ProLiant BL465c G1, Mon 2010-09-13 17:21:30, System ROM, A13 2009.12.08,<br />
A13 2009.12.08, ILO2, 1.82, 1.82, Power Management Controller, 0.5, , <strong>HP</strong><br />
NC370i Multifunction Gigabit Server Adapter , Boot code: 1.9.6, Boot code:<br />
1.9.6, <strong>HP</strong> NC370i Multifunction Gigabit Server Adapter , Boot code: 1.9.6,<br />
Boot code: 1.9.6, Smart Array E200i, 1.86, 1.86,<br />
5, ProLiant BL460c G1, Mon 2010-09-13 17:19:48, System ROM, I15 2009.07.10,<br />
I15 2009.07.10, ILO2, 1.70, 1.82, Power Management Controller, , , <strong>HP</strong> NC373i<br />
Multifunction Gigabit Server Adapter , Boot code: 4.4.1, Boot code: 4.4.1,<br />
<strong>HP</strong> NC373i Multifunction Gigabit Server Adapter , CLP: 1.3.6, CLP: 1.3.6, <strong>HP</strong><br />
NC373i Multifunction Gigabit Server Adapter , Boot code: 4.4.1, Boot code:<br />
4.4.1, <strong>HP</strong> NC373i Multifunction Gigabit Server Adapter , CLP: 1.3.6, CLP:<br />
1.3.6, Smart Array E200i, 1.86, 1.86, - DG036A9BB6 (Bay 0), <strong>HP</strong>D0, ,<br />
6A, ProLiant BL2x220c G5, Mon 2010-09-13 17:20:10, System ROM, I19<br />
2009.07.10, I19 2009.07.10, ILO2, 1.79, 1.82, Power Management Controller,<br />
0.5, ,<br />
6B, ProLiant BL2x220c G5, Mon 2010-09-13 17:24:17, System ROM, I19<br />
2009.07.10, I19 2009.07.10, ILO2, 1.79, 1.82, Power Management Controller,<br />
0.5, ,<br />
9, ProLiant BL460c G1, No, System ROM, I15 11/13/2007, , iLO2, 1.79 Aug 28<br />
2009, , Power Management Controller, , ,<br />
11, ProLiant BL460c G1, No, System ROM, I15 07/10/2009, , iLO2, 1.81 Jan 15<br />
2010, , Power Management Controller, , ,<br />
12, ProLiant BL495c G6, Mon 2010-09-13 17:18:28, System ROM, A14 2009.12.09,<br />
A14 2009.12.09, ILO2, 1.81, 1.82, Power Management Controller, ERROR, , <strong>HP</strong><br />
NC532i Dual Port 10GbE Multifunction BL-c Adapter , Boot code: 5.2.7, Boot<br />
code: 5.2.7, <strong>HP</strong> NC532i Dual Port 10GbE Multifunction BL-c Adapter , iSCSI:<br />
3.1.5, iSCSI: 3.1.5,<br />
13, ProLiant BL460c G1, Mon 2010-09-13 17:19:08, System ROM, I15 2009.07.10,<br />
I15 2009.07.10, ILO2, 1.70, 1.82, Power Management Controller, , , <strong>HP</strong> NC373i<br />
Multifunction Gigabit Server Adapter , Boot code: 4.4.1, Boot code: 4.4.1,<br />
<strong>HP</strong> NC373i Multifunction Gigabit Server Adapter , CLP: 1.3.6, CLP: 1.3.6, <strong>HP</strong><br />
NC373i Multifunction Gigabit Server Adapter , Boot code: 4.4.1, Boot code:<br />
4.4.1, <strong>HP</strong> NC373i Multifunction Gigabit Server Adapter , CLP: 1.3.6, CLP:<br />
1.3.6, Smart Array E200i, 1.86, 1.86, - DG036A8B53 (Bay 0), <strong>HP</strong>D7, , -<br />
DG036A9BB6 (Bay 1), <strong>HP</strong>D0, , P700m SAS Controller, 7.18, 1.86, - DG036A8B53<br />
(Bay 0), <strong>HP</strong>D7, , - DG036A9BB6 (Bay 1), <strong>HP</strong>D0, ,<br />
14A, ProLiant BL2x220c G5, Mon 2010-09-13 17:27:14, System ROM, I19<br />
2009.07.10, I19 2009.07.10, ILO2, 1.82, 1.82, Power Management Controller,<br />
ERROR, , <strong>HP</strong> NC326i PCIe Dual Port Gigabit Server Adapter , Boot code: 3.28,<br />
Boot code: 3.28,<br />
14B, ProLiant BL2x220c G5, No, System ROM, I19 07/10/2009, , iLO2, 1.79 Aug<br />
28 2009, , Power Management Controller, 3.4, ,<br />
SHOW FIRMWARE LOG SERVER<br />
• Command:<br />
SHOW FIRMWARE LOG SERVER { ALL | [{ , | - } ] }<br />
• Description:<br />
Displays the firmware log for the selected server or range of servers<br />
• Access level/Bay level:<br />
o All<br />
o Bay specific<br />
• Restrictions:<br />
Enclosure Firmware Management commands 117
Example<br />
You must have access to the specified bay number.<br />
OA-00215AB0EA21> show firmware log server 5<br />
Bay 5 firmware log<br />
Sep 13 17:09:01 Started session with iLO2.<br />
Sep 13 17:09:01 Powering off blade with button press.<br />
Sep 13 17:09:11 Blade successfully powered off.<br />
Sep 13 17:09:11 Powering on blade with button press.<br />
Sep 13 17:09:21 Blade has powered on.<br />
Sep 13 17:09:24 Connected to Virtual Serial Port.<br />
Sep 13 17:09:26 Inserted http://mycompany.com/DVD.iso into virtual CD-ROM.<br />
Sep 13 17:09:26 Booting virtual CD-ROM.<br />
Sep 13 17:10:03 Loading firmware image.<br />
Sep 13 17:19:43 Update blade firmware successfully completed.<br />
Sep 13 17:19:43 Blade has been rebooted.<br />
Sep 13 17:19:45 Removed http:// mycompany.com/DVD.iso from virtual CD-ROM.<br />
Sep 13 17:19:45 Disconnect from Virtual Serial Port.<br />
Sep 13 17:19:46 Terminated iLO2 session.<br />
Sep 13 17:19:48 Firmware Management successfully completed.<br />
SHOW FIRMWARE LOG SESSION<br />
• Command:<br />
SHOW FIRMWARE LOG SESSION { ALL | [{ , | - } ] }<br />
• Description:<br />
Displays the firmware log session for the selected server or range of servers<br />
• Access level/Bay level:<br />
o All<br />
o Bay specific<br />
• Restrictions:<br />
You must have access to the specified bay number.<br />
SHOW SERVER FIRMWARE<br />
• Command:<br />
SHOW SERVER FIRMWARE { ALL | [{ , | - } ]}<br />
• Description:<br />
Enclosure Firmware Management commands 118
Displays the firmware log for the selected server or range of servers. Displays a summary of firmware<br />
components in the specified server or range of servers. An exclamation mark (!) indicates firmware<br />
mismatch or missing firmware information.<br />
• Access level/Bay level:<br />
o All<br />
o Bay specific<br />
• Restrictions:<br />
o You must have access to the specified bay number.<br />
o Different sides of the server bay cannot be designated within the same range.<br />
Example OA-00215AB0EA21> show server firmware 5<br />
Device Firmware Information<br />
Device Bay: 5<br />
Discovered: Mon 2010-09-13 17:19:48<br />
Firmware Component Current Version Firmware ISO<br />
Version<br />
-------------------------------------- --------------------<br />
--------------------<br />
System ROM I15 2009.07.10 I15 2009.07.10<br />
ILO2 1.70 1.82<br />
Power Management Controller 3.4 3.4<br />
<strong>HP</strong> NC373i Multifunction Gigabit Server Boot code: 4.4.1 Boot code: 4.4.1<br />
CLP: 1.3.6 CLP: 1.3.6<br />
<strong>HP</strong> NC373i Multifunction Gigabit Server Boot code: 4.4.1 Boot code: 4.4.1<br />
CLP: 1.3.6 CLP: 1.3.6<br />
Smart Array E200i 1.86 1.86<br />
- DG036A9BB6 (Bay 0) <strong>HP</strong>D0<br />
ENABLE FIRMWARE MANAGEMENT<br />
• Command:<br />
ENABLE FIRMWARE MANAGEMENT<br />
• Description:<br />
Enables enclosure firmware management<br />
• Access level/Bay level:<br />
OA administrator<br />
• Restrictions:<br />
None<br />
DISABLE FIRMWARE MANAGEMENT<br />
• Command:<br />
DISABLE FIRMWARE MANAGEMENT<br />
Enclosure Firmware Management commands 119
• Description:<br />
Disables enclosure firmware management<br />
• Access level/Bay level:<br />
OA administrator<br />
• Restrictions:<br />
None<br />
UPDATE FIRMWARE SERVER<br />
• Command:<br />
UPDATE FIRMWARE SERVER { ALL | [{ , | - } ]}<br />
• Description:<br />
Initiates manual update of the selected servers using the configured <strong>HP</strong> firmware ISO image URL.<br />
• Access level/Bay level:<br />
OA administrator, server administrator<br />
• Restrictions:<br />
You must have access to the specified bay number.<br />
Enclosure Firmware Management commands 120
Blade management commands<br />
CONNECT SERVER<br />
• Command:<br />
CONNECT SERVER [SERIAL] <br />
• Description:<br />
Opens a Text Console session to the iLO specified. If the optional argument SERIAL is specified, a<br />
Virtual Serial Port session is started.<br />
• Access level/Bay level:<br />
All<br />
Bay specific<br />
• Restrictions:<br />
DISABLE URB<br />
The User privilege level cannot use the CONNECT SERVER SERIAL command. User accounts don't<br />
have console privileges.<br />
• Command:<br />
DISABLE URB<br />
• Description:<br />
Disables URB reporting.<br />
• Access level/Bay level:<br />
OA <strong>Administrator</strong>, OA Operator<br />
• Restrictions:<br />
None<br />
Example<br />
OA-0018FE27577F> disable urb<br />
Utility Ready Blade (URB) reporting has been disabled.<br />
ENABLE URB<br />
• Command:<br />
ENABLE URB { HTTP | SMTP | BOTH }<br />
• Description:<br />
Enables URB reporting<br />
• Access level/Bay level:<br />
Blade management commands 121
OA <strong>Administrator</strong>, OA Operator<br />
• Restrictions:<br />
The URB URL and interval must be set before enabling URB reporting.<br />
Example OA-0018FE275723> enable urb<br />
Utility Ready Blade (URB) reporting has been enabled.<br />
<strong>HP</strong>ONCFG<br />
• Command:<br />
<strong>HP</strong>ONCFG [NOAUTOLOGIN] [SUBSTITUTE [TEST] {“variable”=”value”<br />
[,”variable”=”value”[,…]]}] {ALL | [{ , | - } ]}<br />
{
o This command returns the user to the CLI immediately but the shutdown actions can take up to 5<br />
minutes to complete.<br />
o If the FORCE argument is given, the server blade is immediately shut down and might lose data or<br />
become unstable.<br />
o If no blade is in the specified bay, you are notified that the bay is empty.<br />
• Access level/Bay level:<br />
<strong>Administrator</strong>, operator<br />
Bay specific<br />
• Restrictions:<br />
o You must have access to the specified bay number.<br />
o This command is not applicable to storage blades. The FORCE argument is only valid for server<br />
bays.<br />
POWERON SERVER<br />
• Command:<br />
POWERON SERVER {ALL | [{ - | , } ]} [{NORMAL | PXE<br />
| HDD | RBSU}]<br />
• Description:<br />
o Powers on the specified server blade or all server blades.<br />
o Adding an optional boot argument forces the server blade to abandon the regular boot order and<br />
boot using the specified method.<br />
o If no blade is in the specified bay, you are notified that the bay is empty.<br />
• Access level/Bay level:<br />
<strong>Administrator</strong>, operator<br />
Bay specific<br />
• Restrictions:<br />
o You must have access to the specified bay number.<br />
o This command is not applicable to storage blades.<br />
REBOOT SERVER<br />
• Command:<br />
REBOOT SERVER {ALL | [{ - | , } ]} [FORCE] [{NORMAL<br />
|PXE | HDD | RBSU}]<br />
• Description:<br />
o Sends a request to the blade to perform a graceful shutdown.<br />
o The blade is then powered on.<br />
o If no blade is in the specified bay, you are notified that the bay is empty.<br />
o If the FORCE option is specified, the OS might not perform a graceful shutdown before power is<br />
recycled.<br />
Blade management commands 123
SET NIC<br />
• Access level/Bay level:<br />
<strong>Administrator</strong>, operator<br />
Bay specific<br />
• Restrictions:<br />
o You must have access to the specified bay number.<br />
o This command is not applicable to storage blades.<br />
• Command:<br />
SET NIC {AUTO | FORCED}<br />
• Description:<br />
Configures the external NIC for Auto-negotiation or forced link settings.<br />
• Access level/Bay level:<br />
OA administrator, OA operator<br />
• Restrictions:<br />
None<br />
SET SERVER BOOT ONCE<br />
• Command:<br />
SET SERVER BOOT ONCE {NORMAL | HDD | FLOPPY | PXE | RBSU | CD} {ALL | [{ - | , } ]}<br />
• Description:<br />
o Stores a setting for the IPL to bypass to the servers specified at the next reboot<br />
o Sets the boot device to be used on the next boot of the bays specified<br />
• Access level/Bay level:<br />
<strong>Administrator</strong>, operator<br />
Bay specific<br />
• Restrictions:<br />
o You must have access to the specified bay number.<br />
o This command is not applicable to storage blades.<br />
o This command is not applicable to <strong>HP</strong> Integrity server blades.<br />
o The RBSU and NORMAL options are only available for SET SERVER BOOT ONCE.<br />
o This setting is valid only on present blades and is cleared if the blade is removed.<br />
SET SERVER BOOT<br />
• Command:<br />
Blade management commands 124
SET SERVER BOOT {FIRST | ONCE} {NORMAL | CD | HDD | PXE | USB | FLOPPY} {ALL<br />
| [{ - | , } ]}<br />
• Description:<br />
o Sets the server boot order to hard disk (HDD) or PXE. This stores a setting for the IPL to be passed to<br />
the servers specified at the next reboot.<br />
o SET SERVER BOOT FIRST sets the boot order of the blade.<br />
o SET SERVER BOOT ONCE sets the boot device to be used on the next boot of the bays specified;<br />
the RBSU and NORMAL options are only available for SET SERVER BOOT ONCE.<br />
• Access level/Bay level:<br />
<strong>Administrator</strong>, operator<br />
Bay specific<br />
• Restrictions:<br />
o You must have access to the specified bay number.<br />
o This command is not applicable to storage blades.<br />
o This command is not applicable to <strong>HP</strong> Integrity server blades.<br />
o The RBSU and NORMAL options are only available for SET SERVER BOOT ONCE.<br />
o The USB option is only available for SET SERVER BOOT FIRST.<br />
o This setting is only valid on present blades and cleared if the blade is removed.<br />
SET SERVER POWERDELAY<br />
• Command:<br />
SET SERVER POWERDELAY {ALL | [{ - | , } ]} {number<br />
of seconds to delay power | NOPOWERON}<br />
• Description:<br />
Set the PowerDelay status for the specified server or range of servers. If the delay is zero, the delay has<br />
no effect on the device. If the delay is NOPOWERON, the device cannot poweron until all devices have<br />
completed their delays.<br />
• Access level/Bay level:<br />
<strong>Administrator</strong><br />
Bay specific<br />
• Restrictions:<br />
You must have access to the specified bay number.<br />
SET SERVER UID<br />
• Command:<br />
SET SERVER UID {ALL | [{ - | , } ]} {ON | OFF}<br />
• Description:<br />
Turns a server blade UID LED on or off<br />
• Access level/Bay level:<br />
Blade management commands 125
All<br />
SET URB<br />
Bay specific<br />
• Restrictions:<br />
You must have access to the specified bay number.<br />
• Command:<br />
SET URB [ URL | INTERVAL | PROXY URL | SMTPSERVER | MAILBOX ]<br />
• Description:<br />
Sets settings for URB reporting<br />
SET URB URL { } sets the URB endpoint URL.<br />
SET URB PROXY URL { } sets the proxy URL to use when sending URB messages.<br />
SET URB INTERVAL { HOURLY | DAILY | WEEKLY |<br />
MONTHLY } sets the interval at which URB messages are sent.<br />
• Access level/Bay level:<br />
OA <strong>Administrator</strong>, OA Operator<br />
• Restrictions:<br />
SET URB URL { }: The URL must be either an HTTP or HTTPS URL and can be no longer than<br />
128 characters.<br />
SET URB PROXY URL { }: The URL can be no longer than 128 characters.<br />
SET URB INTERVAL { HOURLY | DAILY | WEEKLY |<br />
MONTHLY }:<br />
o The minutes parameter must be 0-59.<br />
o The DAILY hour parameter must be 0-23.<br />
o The WEEKLY day parameter must be 1-7 where 1 is Sunday and 7 is Saturday.<br />
o The MONTHLY day parameter must be 1-31.<br />
SHOW SERVER BOOT<br />
• Command:<br />
SHOW SERVER BOOT {ALL | [{ - | , } ]}<br />
• Description:<br />
Displays the boot settings for the specified servers.<br />
• Access level/Bay level:<br />
All<br />
Bay specific<br />
• Restrictions:<br />
o You must have access to the specified bay.<br />
o This command is not applicable to <strong>HP</strong> Integrity server blades.<br />
Blade management commands 126
o Different sides of the server bay cannot be designated within the same range.<br />
Example OA-0018FE27577F> SHOW SERVER BOOT 1<br />
Server Blade #1 Boot Information:<br />
One time boot from: None<br />
IPL Devices (Boot Order):<br />
CD-ROM<br />
Floppy Drive (A:)<br />
USB<br />
Hard Drive (C:)<br />
PXE NIC 1<br />
SHOW SERVER INFO<br />
• Command:<br />
SHOW SERVER INFO {ALL | [{ , | - } ]}<br />
• Description:<br />
Displays the following fields:<br />
o Type<br />
o Name<br />
o Part number<br />
o Serial number<br />
o Asset tag<br />
o BIOS version<br />
o All CPU types and associated maximum speeds<br />
o Memory<br />
o NICs name and slot number<br />
o iLO name, iLO IP address, and iLO firmware version<br />
o Power Management Controller version<br />
o VLAN ID<br />
o IPv6 information<br />
• Access level/Bay level:<br />
All<br />
Bay specific<br />
• Restrictions:<br />
o You must have access to the specified bay number.<br />
o MAC and WWN information is no longer included in the output for this command with <strong>Onboard</strong><br />
<strong>Administrator</strong> firmware version 3.60.<br />
o Different sides of the server bay cannot be designated within the same range.<br />
Example OA-984BE179846D> show server info 11<br />
Blade management commands 127
Server Blade #11 Information:<br />
Type: Server Blade<br />
Manufacturer: <strong>HP</strong><br />
Product Name: ProLiant BL460c G7<br />
Part Number: 603591-B21<br />
System Board Spare Part Number: 605659-001<br />
Serial Number: MXQ1281CFX<br />
UUID: 35333036-3139-584D-5131-323831434658<br />
Server Name: host is unnamed<br />
Asset Tag: [Unknown]<br />
ROM Version: I27 05/05/2011<br />
CPU 1: Intel(R) Xeon(R) CPU E5506 @ 2.13GHz (4 cores)<br />
CPU 2: Not present<br />
Memory: 6144 MB<br />
FlexFabric Embedded Ethernet<br />
Ethernet LOM:1-a 9C:8E:99:1F:CA:30<br />
iSCSI HBA LOM:1-b 9C:8E:99:1F:CA:31<br />
FCoE HBA LOM:1-b 10:00:9C:8E:99:1F:CA:<br />
Ethernet LOM:2-a 9C:8E:99:1F:CA:34<br />
iSCSI HBA LOM:2-b 9C:8E:99:1F:CA:35<br />
FCoE HBA LOM:2-b 10:00:9C:8E:99:1F:CA:<br />
This server does not contain any mezzanine cards<br />
Management Processor Information:<br />
Type: iLO3<br />
Name: ILOMXQ1281CFX<br />
Firmware Version: 1.50 Apr 14 2012<br />
IP Address: 10.0.0.111<br />
MAC Address: 9C:8E:99:17:02:1E<br />
Power Management Controller Version: 1.6<br />
Management Processor IPv6 Information:<br />
Link Local Address: fe80::9e8e:99ff:fe17:21e/64<br />
Static Address: 4001::1/64<br />
Router Advertisement Address: 2001:1::9e8e:99ff:fe17:21e/64<br />
Router Advertisement Address: 2003:2::9e8e:99ff:fe17:21e/64<br />
SHOW SERVER LIST<br />
• Command:<br />
SHOW SERVER LIST<br />
• Description:<br />
Displays a brief description of all server blades to which the current user has access<br />
• Access level/Bay level:<br />
All<br />
Bay specific<br />
• Restrictions:<br />
You must have access to the specified bay number.<br />
Blade management commands 128
Example<br />
OA-0018FE27577F> SHOW SERVER LIST<br />
Bay iLO Name iLO IP Address Status Pwr UID Partner<br />
--- ----------------------------- --------------- -<br />
1 [Absent]<br />
2A ILOTWT75000FT 12.34.567.890 OK On Off<br />
2B ILOTWT750008U 12.34.567.890 OK On Off<br />
3 [Absent]<br />
4 [Absent]<br />
5 [Absent]<br />
6 [Absent]<br />
7 ILOUSM62401EP 12.345.67.890 OK On Off 8<br />
8 Storage Blade N/A OK On Off 7<br />
Totals: 4 server blades installed, 4 powered on.<br />
SHOW SERVER NAMES<br />
• Command:<br />
SHOW SERVER NAMES<br />
• Description:<br />
Displays a brief description of all server blades to which the current user has access<br />
• Access level/Bay level:<br />
All<br />
Bay specific<br />
• Restrictions:<br />
You must have access to the specified bay number.<br />
Example<br />
OA-0018FE27577F> show server names<br />
show server names<br />
Bay Server Name Serial Number Status Power UID Partner<br />
--- ----------------------------- --------------- -------- ------- --- -------<br />
1 First89123HostNameInILO USM64204B1 OK On Off<br />
2 Integrity BL860c CSJ0634214 OK On Off<br />
3 [Absent]<br />
4 [Absent]<br />
5 [Subsumed]<br />
6 [Subsumed]<br />
7 YOUR-EYZCGYAYBB USM62401EP OK On On<br />
8 [Absent]<br />
Totals: 3 server blades installed, 3 powered on.<br />
SHOW SERVER PORT MAP<br />
• Command:<br />
SHOW SERVER PORT MAP {ALL | [{ , | - } ]}<br />
• Description:<br />
Displays the port mapping for the server specified by the bay number<br />
• Access level/Bay level:<br />
Blade management commands 129
All<br />
Bay specific<br />
• Restrictions:<br />
o You must have access to the specified bay number.<br />
o This command is not applicable to storage blades.<br />
o Different sides of the server bay cannot be designated within the same range.<br />
Example OA-0018FE27577F> SHOW SERVER PORT MAP ALL<br />
Mezz<br />
Mezz Mezz Device Port Interconnect Interconnect<br />
Slot Device Port Status Bay Bay Port Device ID<br />
---- ------ ------ ---------- ------------ ------------ ----------------<br />
------------------------------- Blade 001 -------------------------------<br />
1 Not Present<br />
2 Not Present<br />
3 Not Present<br />
Embedded Ethernet<br />
Port 1 OK Bay 1 Port 5 00:19:BB:24:51:0C<br />
iSCSI 1 OK Bay 1 Port 5 00:19:BB:24:51:0D<br />
Port 2 OK Bay 1 Port 13 00:19:BB:24:51:24<br />
iSCSI 2 OK Bay 1 Port 13 00:19:BB:24:51:25<br />
Port 3 OK Bay 1 Port 1 00:19:BB:21:ED:EF<br />
Port 4 OK Bay 1 Port 9 00:19:BB:21:ED:F0<br />
------------------------------- Blade 002 -------------------------------<br />
1 Not Present<br />
2 Not Present<br />
3 Not Present<br />
Embedded Ethernet<br />
Port 1 OK Bay 1 Port 6 00:19:BB:34:A1:5A<br />
iSCSI 1 OK Bay 1 Port 6 00:19:BB:34:A1:5B<br />
Port 2 OK Bay 1 Port 14 00:19:BB:34:91:FE<br />
iSCSI 2 OK Bay 1 Port 14 00:19:BB:34:91:FF<br />
Port 3 OK Bay 1 Port 2 00:19:BB:29:91:33<br />
Port 4 OK Bay 1 Port 10 00:19:BB:29:91:34<br />
------------------------------- Blade 003 -------------------------------<br />
<br />
------------------------------- Blade 004 -------------------------------<br />
1 Not Present<br />
2 Not Present<br />
Embedded Ethernet<br />
Port 1 OK Bay 1 Port 4 00:16:35:C5:EF:26<br />
iSCSI 1 OK Bay 1 Port 4 00:16:35:C5:EF:27<br />
Port 2 OK Bay 1 Port 12 00:16:35:C5:EF:3A<br />
iSCSI 2 OK Bay 1 Port 12 00:16:35:C5:EF:3B<br />
------------------------------- Blade 005 -------------------------------<br />
<br />
Blade management commands 130
------------------------------- Blade 006 -------------------------------<br />
<br />
------------------------------- Blade 007 -------------------------------<br />
<br />
------------------------------- Blade 008 -------------------------------<br />
<br />
SHOW SERVER POWERDELAY<br />
• Command:<br />
SHOW SERVER POWERDELAY {ALL | [{ - | , } ]}<br />
• Description:<br />
Displays the PowerDelay status for the specified server blade or range of server blades<br />
• Access level/Bay level:<br />
All<br />
Bay specific<br />
• Restrictions:<br />
o You must have access to the specified bay number.<br />
o Different sides of the server bay cannot be designated within the same range.<br />
Example OA-0018FE27577F> SHOW SERVER POWERDELAY ALL<br />
Current PowerDelay Status: Not in Progress<br />
Bay Device PowerDelay State Delay (seconds)<br />
--- -------------------------------- ------------<br />
1 Absent Disabled 0<br />
1A Absent Disabled 0<br />
1B Absent Disabled 0<br />
2 Subsumed Disabled 0<br />
2A ProLiant BL2x220c G5 Disabled 0<br />
2B ProLiant BL2x220c G5 Disabled 0<br />
3 Absent Disabled 0<br />
3A Absent Disabled 0<br />
3B Absent Disabled 0<br />
4 Absent Disabled 0<br />
4A Absent Disabled 0<br />
4B Absent Disabled 0<br />
5 Absent Disabled 0<br />
5A Absent Disabled 0<br />
5B Absent Disabled 0<br />
6 Absent Disabled 0<br />
6A Absent Disabled 0<br />
6B Absent Disabled 0<br />
7 ProLiant BL460c G1 Disabled 0<br />
7A Absent Disabled 0<br />
7B Absent Disabled 0<br />
8 AiO SB600c Storage Disabled 0<br />
Blade management commands 131
8A Absent Disabled 0<br />
8B Absent Disabled 0<br />
SHOW SERVER STATUS<br />
• Command:<br />
SHOW SERVER STATUS {ALL | [{ , | - } ]}<br />
• Description:<br />
Displays the following settings of server blade:<br />
o Power (OK or off)<br />
o Health (OK, CPU failure, or power module failure)<br />
o Thermal (OK, warm, caution, or critical)<br />
o UID LED<br />
If the power management controller is outdated or is in a lockup condition, a power management<br />
controller error appears.<br />
• Access level/Bay level:<br />
All<br />
Bay specific<br />
• Restrictions:<br />
o You must have access to the specified bay number.<br />
o Different sides of the server bay cannot be designated within the same range.<br />
Example<br />
OA-0018FE27577F> show server status all<br />
Blade #1 Status:<br />
Power: On<br />
Current Wattage used: 212<br />
Health: OK<br />
Unit Identification LED: Off<br />
Diagnostic Status:<br />
Internal Data OK<br />
Management Processor OK<br />
I/O Configuration OK<br />
Power OK<br />
Cooling OK<br />
Location OK<br />
Device Failure OK<br />
Device Degraded OK<br />
iLO Network OK<br />
Blade #2 Status:<br />
Power: On<br />
Current Wattage used: 360<br />
Internal Health: OK<br />
System Health: Degraded<br />
Unit Identification LED: Off<br />
Diagnostic Status:<br />
Internal Data OK<br />
Management Processor OK<br />
I/O Configuration OK<br />
Blade management commands 132
Power OK<br />
Cooling OK<br />
Location OK<br />
Device Failure OK<br />
Device Degraded OK<br />
Blade #3 Status:<br />
Power: No Server Blade Installed<br />
Blade #4 Status:<br />
Power: No Server Blade Installed<br />
Blade #5 Status:<br />
Server Blade Type: Bay Subsumed<br />
Blade #6 Status:<br />
Server Blade Type: Bay Subsumed<br />
Blade #7 Status:<br />
Power: On<br />
Current Wattage used: 153<br />
Health: Degraded<br />
Unit Identification LED: On<br />
Diagnostic Status:<br />
Internal Data OK<br />
Management Processor OK<br />
I/O Configuration OK<br />
Power OK<br />
Cooling OK<br />
Location OK<br />
Device Failure OK<br />
Device Degraded Failed<br />
iLO Network OK<br />
IML Reported Main Memory Errors<br />
Uncorrectable Memory Error<br />
Processor 1, Memory Module 2<br />
Corrected Memory Error threshold exceeded<br />
Processor 1, Memory Module 2<br />
Example of Power Management Controller Error:<br />
OA-00215AB0DAF1> show server status 12<br />
Blade #12 Status:<br />
Power: On<br />
Current Wattage used: 143<br />
Health: Other Unit Identification<br />
LED: Off Virtual<br />
Fan: 27%<br />
Diagnostic Status:<br />
Internal Data OK<br />
Management Processor OK<br />
I/O Configuration OK<br />
Power OK<br />
Cooling OK<br />
Location OK<br />
Device Failure OK<br />
Device Degraded OK<br />
iLO Network OK<br />
Power Mgmt Cntlr Other<br />
Blade management commands 133
SHOW SERVER TEMP<br />
• Command:<br />
SHOW SERVER TEMP {ALL | [{ , | - } ]}<br />
• Description:<br />
Displays the temperature sensor information for a specified server blade or range of server blades<br />
• Access level/Bay level:<br />
All<br />
Bay specific<br />
• Restrictions:<br />
o You must have access to the specified bay number.<br />
o Different sides of the server bay cannot be designated within the same range.<br />
Example OA-0018FE27577F> SHOW SERVER TEMP ALL<br />
Device Bay #1 Temperature Information<br />
Locale Status Temp Caution<br />
Critical<br />
----------------------------------- ------ -------- -------<br />
--------<br />
Memory Zone OK 37C/ 98F 81C 86C<br />
CPU Zone OK 30C/ 86F 70C 75C<br />
CPU 1 OK 34C/ 93F 95C 100C<br />
CPU 1 OK 34C/ 93F 95C 100C<br />
Ambient Zone OK 20C/ 68F 38C 43C<br />
CPU 2 OK N/A<br />
CPU 2 OK N/A<br />
Virtual Fan: 37%<br />
Device Bay #2 Temperature Information<br />
Locale Status Temp Caution<br />
Critical<br />
----------------------------------- ------ -------- -------<br />
--------<br />
Memory Zone OK 44C/111F 81C 86C<br />
CPU Zone OK 39C/102F 70C 75C<br />
CPU 1 OK 58C/ 0F 95C 100C<br />
CPU 1 OK 58C/ 0F 95C 100C<br />
System Zone OK 26C/ 78F 40C 45C<br />
CPU 2 OK 58C/ 0F 95C 100C<br />
CPU 2 OK 58C/ 0F 95C 100C<br />
Ambient Zone OK 24C/ 75F 40C 45C<br />
Virtual Fan: 51%<br />
Device Bay #3 Temperature Information<br />
No Server Blade Installed<br />
Device Bay #4 Temperature Information<br />
Locale Status Temp Caution<br />
Critical<br />
Blade management commands 134
----------------------------------- ------ -------- -------<br />
--------<br />
System Zone OK 41C/105F 80C 85C<br />
CPU Zone OK 36C/ 96F 65C 70C<br />
CPU 1 OK 53C/127F 95C 100C<br />
CPU 1 OK 53C/127F 95C 100C<br />
CPU Zone OK 35C/ 95F 70C 75C<br />
CPU 2 OK N/A<br />
CPU 2 OK N/A<br />
Memory Zone OK 56C/ 0F 85C 100C<br />
Ambient Zone OK 22C/ 71F 38C 43C<br />
Virtual Fan: 25%<br />
Device Bay #5 Temperature Information<br />
Server Blade Type: Bay Subsumed<br />
Device Bay #6 Temperature Information<br />
Server Blade Type: Bay Subsumed<br />
Device Bay #7 Temperature Information<br />
No Server Blade Installed<br />
Device Bay #8 Temperature Information<br />
No Server Blade Installed<br />
SHOW SYSLOG SERVER<br />
• Command:<br />
SHOW SYSLOG SERVER <br />
• Description:<br />
Displays the syslog for the specified server blade<br />
• Access level/Bay level:<br />
All<br />
Bay specific<br />
• Restrictions:<br />
o You must have access to the specified bay number.<br />
o This command is not applicable to <strong>HP</strong> Integrity server blades.<br />
Example<br />
OA-0018FE27577F> show syslog server 7<br />
Retrieving Server syslog(s) ...<br />
Server 7 Syslog:<br />
<br />
<br />
<br />
<br />
<br />
--More--<br />
Substitute<br />
• Command:<br />
<strong>HP</strong>ONCFG [NOAUTOLOGIN] [SUBSTITUTE [TEST] {=”value”<br />
[,=”value”[,…]]}] {ALL | [{ , | - } ]}<br />
{
To manually enter a RIBCL:<br />
a. Type
Interconnect management commands<br />
ASSIGN INTERCONNECT<br />
• Command:<br />
ASSIGN INTERCONNECT {ALL | [{ , | - } ]} {"
Example<br />
OA-0018FE275723> show urb<br />
URB Reporting: Enabled<br />
URB Endpoint URL:<br />
URB Proxy URL:<br />
URB Interval: Daily at hour 0<br />
Last Attempt: None<br />
TEST URB<br />
• Command:<br />
TEST URB<br />
• Description:<br />
Manually sends the URB message to the endpoint. This command can be useful for testing the<br />
configuration or resending a message after a failure. If the test fails, executing the TEST URB command<br />
updates the last attempt status and log a syslog message.<br />
• Access level/Bay level:<br />
OA <strong>Administrator</strong>, OA Operator<br />
• Restrictions:<br />
Only works if URB reporting is enabled<br />
Example<br />
OA-0018FE27577F> test urb<br />
The OA is preparing to send a Utility Ready Blade (URB) notification. Once the message has been<br />
sent, the status will be reflected in the SHOW URB command.<br />
CONNECT INTERCONNECT<br />
• Command:<br />
CONNECT INTERCONNECT <br />
• Description:<br />
Connects the user to the serial console of the interconnect present in the interconnect module bay<br />
• Access level/Bay level:<br />
All<br />
Bay specific<br />
• Restrictions:<br />
You must have explicit access to a bay given by the ASSIGN INTERCONNECT command.<br />
POWEROFF INTERCONNECT<br />
• Command:<br />
POWEROFF INTERCONNECT {ALL | [{ - | , } ]}<br />
• Description:<br />
Interconnect management commands 139
Sends a request to power off the interconnect module<br />
• Access level/Bay level:<br />
<strong>Administrator</strong>, operator<br />
Bay specific<br />
• Restrictions:<br />
You must have explicit access to a bay given by the ASSIGN INTERCONNECT command.<br />
POWERON INTERCONNECT<br />
• Command:<br />
POWERON INTERCONNECT {ALL | [{ - | , } ]}<br />
• Description:<br />
Powers on the specified interconnect<br />
• Access level/Bay level:<br />
<strong>Administrator</strong>, operator<br />
Bay specific<br />
• Restrictions:<br />
You must have explicit access to a bay given by the ASSIGN INTERCONNECT command.<br />
RESTART INTERCONNECT<br />
• Command:<br />
RESTART INTERCONNECT <br />
• Description:<br />
Resets the interconnect tray in the specified bay<br />
• Access level/Bay level:<br />
<strong>Administrator</strong>, operator<br />
Bay specific<br />
• Restrictions:<br />
You must have explicit access to a bay given by the ASSIGN INTERCONNECT command.<br />
SET INTERCONNECT POWERDELAY<br />
• Command:<br />
SET INTERCONNECT POWERDELAY {ALL | [{ - | , } ]}<br />
{number of seconds to delay power | NOPOWERON}<br />
• Description:<br />
Sets the PowerDelay status for the specified interconnect or range of interconnects. If the delay is zero,<br />
the delay has no effect on the device. If the delay is NOPOWERON, the device cannot power on until<br />
all devices have completed their delays.<br />
Interconnect management commands 140
• Access level/Bay level:<br />
<strong>Administrator</strong><br />
Bay specific<br />
• Restrictions:<br />
You must have access to the specified bay number.<br />
SET INTERCONNECT UID<br />
• Command:<br />
SET INTERCONNECT UID {ALL | [{ , | - } ]} {ON | OFF}<br />
• Description:<br />
Turns an interconnect UID on or off<br />
• Access level/Bay level:<br />
All<br />
Bay specific<br />
• Restrictions:<br />
You must have explicit access to a bay given by the ASSIGN INTERCONNECT command.<br />
SHOW INTERCONNECT INFO<br />
• Command:<br />
SHOW INTERCONNECT INFO [ALL | | -]<br />
• Description:<br />
Displays:<br />
o Interconnect type<br />
o Manufacturer name<br />
o Product name<br />
o Product part number<br />
o Product version<br />
o Product serial number<br />
o Asset tag<br />
o VLAN ID<br />
• Access level/Bay level:<br />
All<br />
Bay specific<br />
• Restrictions:<br />
You must have explicit access to a bay given by the ASSIGN INTERCONNECT command.<br />
Example<br />
OA-0018FE27577F> show interconnect info all<br />
Interconnect management commands 141
show interconnect info all<br />
1. Ethernet<br />
Product Name: GbE2c Ethernet Blade Switch<br />
Width: Single<br />
URL to Management interface:<br />
In-Band IPv4 Address: 16.84.189.177<br />
User Assigned Name:<br />
Part Number: 410917-B21<br />
Spare Part Number: 414037-001<br />
Serial Number: MY36290EMT<br />
Temperature Sensor: Present<br />
JS2 Connector: Absent<br />
Internal Ethernet Interface to OA: Present<br />
Internal Ethernet Route to OA: Enabled<br />
Internal Serial Interface to OA: Absent<br />
Internal Serial Route to OA: Disabled<br />
External Serial Port Interface: Present<br />
External Ethernet Interface: Present<br />
VLAN ID: 1<br />
2. Ethernet<br />
Product Name: Cisco Catalyst Blade Switch 3120X for <strong>HP</strong> w/ IP Base<br />
Width: Single<br />
URL to Management interface: http://16.84.190.183<br />
In-Band IPv4 Address: 16.84.190.183<br />
User Assigned Name: Switch<br />
Part Number: WS-CBS3120X-S<br />
Spare Part Number: 451357-001<br />
Serial Number: FOC1129T0XE<br />
Temperature Sensor: Absent<br />
JS2 Connector: Absent<br />
Internal Ethernet Interface to OA: Present<br />
Internal Ethernet Route to OA: Enabled<br />
Internal Serial Interface to OA: Absent<br />
Internal Serial Route to OA: Disabled<br />
External Serial Port Interface: Present<br />
External Ethernet Interface: Absent<br />
VLAN ID: 1<br />
3. Ethernet<br />
Product Name: Cisco Catalyst Blade Switch 3120X for <strong>HP</strong> w/ IP Base<br />
Width: Single<br />
URL to Management interface: http://16.84.189.83<br />
In-Band IPv4 Address: 16.84.189.83<br />
User Assigned Name: syn1b<br />
Part Number: WS-CBS3120X-S<br />
Spare Part Number: 451357-001<br />
Serial Number: FOC1129T0RP<br />
Temperature Sensor: Absent<br />
JS2 Connector: Absent<br />
Internal Ethernet Interface to OA: Present<br />
Internal Ethernet Route to OA: Enabled<br />
Internal Serial Interface to OA: Absent<br />
Internal Serial Route to OA: Disabled<br />
External Serial Port Interface: Present<br />
External Ethernet Interface: Absent<br />
VLAN ID: 1<br />
4. <br />
Interconnect management commands 142
SHOW INTERCONNECT LIST<br />
• Command:<br />
SHOW INTERCONNECT LIST<br />
• Description:<br />
Displays the interconnect list<br />
• Access level/Bay level:<br />
All<br />
Bay specific<br />
• Restrictions:<br />
You must have explicit access to a bay given by the ASSIGN INTERCONNECT command.<br />
Example<br />
OA-0018FE27577F> SHOW INTERCONNECT LIST<br />
Bay Interconnect Type Manufacturer Power Health UID Management IP<br />
--- ----------------- -------------------- ----- --<br />
1 Ethernet Cisco Systems, Inc. On OK Off 16.84.189.31<br />
2 [Absent]<br />
3 [Absent]<br />
4 [Absent]<br />
Totals: 1 interconnect modules installed, 1 powered on.<br />
SHOW INTERCONNECT PORT MAP<br />
• Command:<br />
SHOW INTERCONNECT PORT MAP {ALL | | -}<br />
• Description:<br />
Displays the port mapping for the interconnect specified by the bay number<br />
• Access level/Bay level:<br />
All<br />
Bay specific<br />
• Restrictions:<br />
You must have explicit access to a bay given by the ASSIGN INTERCONNECT command.<br />
Example<br />
OA-0018FE27577F> SHOW INTERCONNECT PORT MAP ALL<br />
1: Cisco Catalyst Blade Switch 3120X for <strong>HP</strong> w/ IP Base<br />
Type: Ethernet<br />
Width: Single<br />
Status: OK<br />
Port 1 2 3 4 5 6 7 8 9 10 11 12 13 14 15 16<br />
Status OK OK OK OK<br />
Blade 2A 7 2B 7<br />
Mezz/Nic NI NI NI NI<br />
Port 1 1 1 2<br />
2. <br />
3. <br />
4. <br />
Interconnect management commands 143
SHOW INTERCONNECT POWERDELAY<br />
• Command:<br />
SHOW INTERCONNECT POWERDELAY {ALL | [{ - | , } ]}<br />
• Description:<br />
Displays the PowerDelay status for the specified interconnects or range of interconnects<br />
• Access level/Bay level:<br />
All<br />
Bay specific<br />
• Restrictions:<br />
You must have access to the specified bay.<br />
Example OA-0018FE27577F> SHOW INTERCONNECT POWERDELAY ALL<br />
Current PowerDelay Status: Not in Progress<br />
Bay Device PowerDelay State Delay (seconds)<br />
--- -------------------------------- ------------<br />
1 Cisco Catalyst Blade Switch 3120 Disabled<br />
2 Absent Disabled<br />
3 Absent Disabled<br />
4 Absent Disabled<br />
SHOW INTERCONNECT SESSIONS<br />
• Command:<br />
SHOW INTERCONNECT SESSIONS<br />
• Description:<br />
Displays which users have serial console sessions in progress for each interconnect<br />
• Access level/Bay level:<br />
o OA administrator, OA operator<br />
o Bay specific<br />
• Restrictions:<br />
You must have access to the specified bay.<br />
Example<br />
OA-0018FE27577F> SHOW INTERCONNECT SESSION<br />
Interconnect Bay User<br />
------------------ --------------<br />
No Interconnect remote console sessions were detected.<br />
SHOW INTERCONNECT STATUS<br />
• Command:<br />
Interconnect management commands 144
SHOW INTERCONNECT STATUS {ALL | | -}<br />
• Description:<br />
Displays interconnect status information; UID state and health state<br />
• Access level/Bay level:<br />
All<br />
Bay specific<br />
• Restrictions:<br />
You must have explicit access to a bay given by the ASSIGN INTERCONNECT command.<br />
Example<br />
OA-0018FE27577F> SHOW INTERCONNECT STATUS ALL<br />
Interconnect Module #1 Status:<br />
Status : OK<br />
Thermal: OK<br />
CPU Fault: OK<br />
Health LED: OK<br />
UID: Off<br />
Powered: On<br />
Diagnostic Status:<br />
Internal Data OK<br />
Management Processor OK<br />
Thermal Warning OK<br />
Thermal Danger OK<br />
I/O Configuration OK<br />
Device Failure OK<br />
Device Degraded OK<br />
Interconnect Module #2 Status:<br />
Interconnect Module Type: No Interconnect Module Installed<br />
Interconnect Module #3 Status:<br />
Interconnect Module Type: No Interconnect Module Installed<br />
Interconnect Module #4 Status:<br />
Interconnect Module Type: No Interconnect Module Installed<br />
Interconnect management commands 145
Active Health System commands<br />
ENABLE ACTIVE HEALTH SYSTEM<br />
• Command:<br />
ENABLE ACTIVE_HEALTH_SYSTEM<br />
• Description:<br />
• Enables logging of inventory and health status for shared infrastructure items such as fans and power<br />
supplies to the blades that depend upon them.<br />
• Access level/Bay level:<br />
OA administrator<br />
• Restrictions:<br />
None<br />
DISABLE ACTIVE HEALTH SYSTEM<br />
• Command:<br />
DISABLE ACTIVE_HEALTH_SYSTEM<br />
• Description:<br />
• Disables logging of inventory and health status for shared infrastructure items such as fans and power<br />
supplies to the blades that depend upon them.<br />
• Access level/Bay level:<br />
OA administrator<br />
• Restrictions:<br />
None<br />
Active Health System commands 146
Enclosure DVD commands<br />
SET SERVER DVD<br />
• Command:<br />
SET SERVER DVD {CONNECT | DISCONNECT} [USB://url] {ALL | [{ ,<br />
| - } ]}<br />
• Description:<br />
Connects or disconnects the specified server or range of servers from the enclosure DVD drive. The<br />
DISCONNECT argument detaches any URL in addition to the enclosure DVD. USB://url is an optional<br />
parameter that matches the URL to an .iso file displayed by the SHOW USBKEY command.<br />
• Access level/Bay level:<br />
<strong>Administrator</strong>, operator<br />
Bay specific<br />
• Restrictions:<br />
You must have access to the specified bay number.<br />
SHOW SERVER DVD<br />
• Command:<br />
SHOW SERVER DVD {ALL | [{ , | - } ]}<br />
• Description:<br />
Displays the DVD connection status for the specified server or range of servers<br />
• Access level/Bay level<br />
All<br />
Bay specific<br />
• Restrictions:<br />
o You must have access to the specified bay number.<br />
o Different sides of the server bay cannot be designated within the same range.<br />
Example<br />
OA-0018FE27577F> SHOW SERVER DVD ALL<br />
DVD Drive: Present<br />
DVD Media: Present<br />
Server DVD connections:<br />
Bay Connected Device or image URL<br />
--- --------- -------------------------------------<br />
1 - [Bay empty]<br />
2A No<br />
2B No<br />
3 - [Bay empty]<br />
Enclosure DVD commands 147
4 - [Bay empty]<br />
5 - [Bay empty]<br />
6 - [Bay empty]<br />
7 No<br />
8 - [Non-server blade]<br />
Enclosure DVD commands 148
Remote syslog commands<br />
DISABLE SYSLOG REMOTE<br />
• Command:<br />
DISABLE SYSLOG REMOTE<br />
• Description:<br />
Disables remote system logging<br />
• Access level/Bay level:<br />
OA administrator, OA operator<br />
Restrictions:<br />
To perform this command, you must be an operator or administrator with OA permission.<br />
ENABLE SYSLOG REMOTE<br />
• Command:<br />
ENABLE SYSLOG REMOTE<br />
• Description:<br />
Enables remote system logging<br />
• Access level/Bay level:<br />
OA administrator, OA operator<br />
• Restrictions:<br />
To perform this command, you must be an operator or administrator with OA permission.<br />
SET REMOTE SYSLOG PORT<br />
• Command:<br />
SET REMOTE SYSLOG PORT <br />
• Description:<br />
Sets the IP port number for remote system log. Setting the remote port is optional. If the remote port is not<br />
set, then the default UDP port 514 is used to send system log messages.<br />
• Access level/Bay level:<br />
OA administrator, OA operator<br />
• Restrictions:<br />
The remote port must be an integer between 1 and 65535 inclusive.<br />
Remote syslog commands 149
SET REMOTE SYSLOG SERVER<br />
• Command:<br />
SET REMOTE SYSLOG SERVER { | }<br />
• Description:<br />
Sets the IP address or DNS name for remote system log messages<br />
• Access level/Bay level:<br />
OA administrator, OA operator<br />
• Restrictions:<br />
None<br />
SHOW SYSLOG SETTINGS<br />
• Command:<br />
SHOW SYSLOG SETTINGS<br />
• Description:<br />
Displays the remote syslog settings for the <strong>Onboard</strong> <strong>Administrator</strong><br />
• Access level/Bay level:<br />
Operator, <strong>Administrator</strong><br />
Restrictions:<br />
You must have OA permission to perform this command.<br />
Example<br />
OA-0018FE27577F> SHOW SYSLOG SETTINGS<br />
Remote log: Disabled<br />
Address:<br />
Port: 514<br />
TEST SYSLOG<br />
• Command:<br />
TEST SYSLOG<br />
• Description:<br />
Tests the remote system log settings by logging a test message to the syslog.<br />
The test message will also appear in the local OA administrator system log<br />
• Access level/Bay level:<br />
Operator, <strong>Administrator</strong><br />
• Restriction:<br />
You must have OA permission to perform this command.<br />
Remote syslog commands 150
Remote syslog example<br />
The remote syslog consists of a date and time stamp, the <strong>Onboard</strong> <strong>Administrator</strong> IP address, text, and a<br />
priority number. The date and time stamp, and the text match the <strong>Onboard</strong> <strong>Administrator</strong> syslog entry.<br />
Sep 9 16:00:28 10.128.126.204 OA: Remote system logging enabled to server 16.83.33.81, port 514<br />
(priority 13)<br />
Remote syslog commands 151
USB support commands<br />
DOWNLOAD CONFIG using USB key<br />
• Command:<br />
DOWNLOAD CONFIG <br />
• Description:<br />
Downloads a saved configuration file from a specific IP host. The file is not checked for errors but is<br />
automatically executed in SCRIPT MODE. Supported protocols are HTTP, FTP, TFTP, and USB. Format<br />
the as protocol://host/path/file. If your FTP server does not support anonymous connections,<br />
then you can specify a username and password by replacing the host part in the previous format with<br />
username:password@host. To execute a configuration script from a USB key, use usb:///.<br />
• Access level/Bay level:<br />
OA administrator<br />
• Restrictions:<br />
o The file cannot change the <strong>Administrator</strong> account password.<br />
o The user password is not saved or restored by the DOWNLOAD CONFIG command.<br />
SET SERVER DVD for USB key<br />
• Command:<br />
SET SERVER DVD {CONNECT | DISCONNECT} [USB://url] {ALL | [{ ,<br />
| - } ]}<br />
• Description:<br />
Connects or disconnects the specified server or range of servers from the enclosure DVD drive. The<br />
DISCONNECT argument detaches any URL in addition to the enclosure DVD. USB://url is an optional<br />
parameter that matches the URL to an .iso file displayed by the SHOW USB command.<br />
• Access level/Bay level:<br />
<strong>Administrator</strong>, operator<br />
Bay specific<br />
• Restrictions:<br />
You must have access to the specified bay number.<br />
SHOW USBKEY<br />
• Command:<br />
SHOW USBKEY<br />
USB support commands 152
• Description:<br />
Displays a list of Firmware images, configuration scripts, and ISO images present on the enclosure USB<br />
media<br />
• Access level/Bay level:<br />
OA administrator, OA operator<br />
• Restriction:<br />
None<br />
Example<br />
OA-00215AB195CB> show usbkey<br />
Firmware Image Files Image Version<br />
--------------------------------------- -------------<br />
usb://d1/hpoa225.bin 2.25<br />
Configuration Script Files<br />
---------------------------------------<br />
usb://d1/USE62317RY.cfg<br />
ISO Image Files<br />
---------------------------------------<br />
usb://d1/win2003sp4.iso<br />
usb://d1/BB130.2008_0822.11.iso<br />
usb://d1/<strong>HP</strong>SUMForce.iso<br />
usb://d1/FW820.2008_0730.61.iso<br />
UPDATE IMAGE using USB key<br />
• Command:<br />
UPDATE IMAGE {[FORCE] | SYNC}<br />
• Description:<br />
o The IMAGE command downloads a new flash image from the network and uses it to update the<br />
<strong>Onboard</strong> <strong>Administrator</strong> firmware. If a redundant <strong>Onboard</strong> <strong>Administrator</strong> is present in the system,<br />
then this command flashes and validates its firmware before attempting to flash the active <strong>Onboard</strong><br />
<strong>Administrator</strong>.<br />
o Supported protocols are HTTP, FTP, and TFTP.<br />
o The URL must be formatted as: protocol://host/path/filename.<br />
o The URL syntax for IPv6 addresses is protocol://[]/path/file.<br />
o If your FTP server does not support anonymous logins, a username and password can be specified<br />
within the URL formatted as: ftp://username:password@host/path/filename.<br />
o Use FORCE to enable downgrading firmware even if settings and passwords might be lost.<br />
o The UPDATE IMAGE SYNC command initiates a firmware sync of the Active and Standby <strong>Onboard</strong><br />
<strong>Administrator</strong>s.<br />
o For USB protocol, see SHOW USBKEY. ("SHOW USBKEY" on page 152)<br />
• Access level/Bay level:<br />
OA administrator, OA operator<br />
USB support commands 153
• Restrictions:<br />
You cannot use the FORCE option for downgrade in FIPS Mode ON/DEBUG.<br />
UPLOAD CONFIG using USB key<br />
• Command:<br />
UPLOAD CONFIG {"" | USB ""}<br />
• Description:<br />
Uploads a script to the specified URL which duplicates the current runtime configuration. Supported<br />
protocols are FTP, TFTP, and USB. The URL should be formatted as: protocol://host/path/filename. The<br />
URL syntax for IPv6 addresses is protocol://[]/path/file. If your FTP server does not<br />
support anonymous logins, you can specify a user name and password within the URL formatted as:<br />
ftp://username:password@host/path/filename. To save a configuration file to a USB key, use the USB<br />
command and provide a filename.<br />
• Access level/Bay level:<br />
OA administrator<br />
• Restriction:<br />
The user password is not saved or restored by the UPLOAD CONFIG command.<br />
USB support commands 154
VLAN commands<br />
ADD VLAN<br />
• Command:<br />
ADD VLAN [""]<br />
• Description:<br />
Creates a VLAN ID and an optional VLAN NAME.<br />
• Access level/Bay level:<br />
OA administrator, OA operator<br />
• Restrictions:<br />
o The VLAN ID is an integer from 1 to 4094.<br />
o The VLAN Name is limited to 31 alphanumeric characters.<br />
DISABLE VLAN<br />
• Command:<br />
DISABLE VLAN<br />
• Description:<br />
This command disables or turns off VLAN on the enclosure.<br />
• Access level/Bay level:<br />
OA administrator, OA operator<br />
• Restrictions:<br />
None<br />
EDIT VLAN<br />
• Command:<br />
EDIT VLAN [""]<br />
• Description:<br />
Edits VLAN NAME (truncated to 31 alphanumeric characters) for the specified VLAN ID.<br />
• Access level/Bay level:<br />
OA administrator, OA operator<br />
• Restrictions:<br />
The VLAN Name is limited to 31 alphanumeric characters.<br />
VLAN commands 155
ENABLE VLAN<br />
• Command:<br />
ENABLE VLAN<br />
• Description:<br />
This command enables or turns on VLAN on the enclosure.<br />
• Access level/Bay level:<br />
OA administrator, OA operator<br />
• Restrictions:<br />
None<br />
REMOVE VLAN<br />
• Command:<br />
REMOVE VLAN <br />
• Description:<br />
Removes a VLAN ID. All devices currently using that VLAN ID are moved to the default VLAN ID.<br />
• Access level/Bay level:<br />
OA administrator, OA operator<br />
• Restrictions:<br />
SAVE VLAN<br />
The user cannot remove the default VLAN ID.<br />
• Command:<br />
SAVE VLAN<br />
• Description:<br />
Save VLAN configuration data to FLASH.<br />
• Access level/Bay level:<br />
OA administrator, OA operator<br />
• Restrictions:<br />
This command only applies to VLAN configuration data.<br />
SET VLAN DEFAULT<br />
• Command:<br />
SET VLAN DEFAULT <br />
• Description:<br />
Sets or changes the default VLAN ID for the enclosure. Devices using the current default are reassigned<br />
to the new ID.<br />
VLAN commands 156
• Access level/Bay level:<br />
OA administrator, OA operator<br />
• Restrictions:<br />
The VLAN ID is a value between 1 and 4094.<br />
SET VLAN FACTORY<br />
• Command:<br />
SET VLAN FACTORY<br />
• Description:<br />
Restores the VLAN settings to factory defaults. VLAN is disabled and all devices are grouped in VLAN<br />
ID 1. To execute the command, enter YES when asked if you are sure you want to restore VLAN settings<br />
to factory defaults.<br />
• Access level/Bay level:<br />
OA administrator, OA operator<br />
• Restrictions:<br />
None<br />
SET VLAN INTERCONNECT<br />
• Command:<br />
SET VLAN INTERCONNECT { ALL | [{ , | - } ]<br />
}<br />
• Description:<br />
Sets the VLAN ID for the specified interconnect or range of interconnects.<br />
• Access level/Bay level:<br />
OA administrator, OA operator<br />
• Restrictions:<br />
o You must create a VLAN ID using the ADD VLAN command, before using the SET VLAN<br />
INTERCONNECT command, or the command is rejected.<br />
o All Virtual Connects that belong to the same domain must be on the same VLAN.<br />
SET VLAN IPCONFIG<br />
• Command:<br />
SET VLAN IPCONFIG { DHCP | STATIC | SAVE }<br />
• Description:<br />
Temporarily sets the OA VLAN ID and IP mode to DHCP or STATIC. The IP mode setting applies to the<br />
specific OA, and the VLAN ID setting applies to both OAs. If a VLAN ID does not exist, it is created. This<br />
command (typically used to test a new network setting) will undo its changes in 5 minutes. To<br />
permanently save the changes, issue the SET VLAN IPCONFIG SAVE command.<br />
VLAN commands 157
• Access level/Bay level:<br />
OA administrator, OA operator<br />
• Restrictions:<br />
None<br />
SET VLAN IPCONFIG DHCP<br />
• Command:<br />
SET VLAN IPCONFIG DHCP [] <br />
• Description:<br />
Temporarily sets the OA to DHCP mode and the specified VLAN ID (0 to 4094). Setting the VLAN ID<br />
number to 0 disables enclosure VLAN. Any other setting enables enclosure VLAN.<br />
• Access level/Bay level:<br />
OA administrator, OA operator<br />
• Restrictions:<br />
VLAN ID must be an integer between 0 and 4094.<br />
SET VLAN IPCONFIG SAVE<br />
• Command:<br />
SET VLAN IPCONFIG SAVE<br />
• Description:<br />
Saves the VLAN IPCONFIG changes to FLASH.<br />
• Access level/Bay level:<br />
OA administrator, OA operator<br />
• Restrictions:<br />
None<br />
SET VLAN IPCONFIG STATIC<br />
• Command:<br />
SET VLAN IPCONFIG STATIC [] []<br />
<br />
• Description:<br />
Temporarily sets the OA to static IP mode and the specified VLAN ID (0 to 4094). Setting the VLAN ID<br />
number to 0 disables enclosure VLAN. Any other setting enables the enclosure VLAN.<br />
• Access level/Bay level:<br />
OA administrator, OA operator<br />
• Restrictions:<br />
VLAN ID must be an integer between 0 and 4094.<br />
VLAN commands 158
SET VLAN OA<br />
• Command:<br />
SET VLAN OA <br />
• Description:<br />
Sets or changes the VLAN ID of the <strong>Onboard</strong> <strong>Administrator</strong>. Loss of connectivity to the <strong>Onboard</strong><br />
<strong>Administrator</strong> will occur if this is improperly set.<br />
• Access level/Bay level:<br />
OA administrator, OA operator<br />
• Restrictions:<br />
None<br />
SET VLAN REVERT<br />
• Command:<br />
SET VLAN REVERT <br />
• Description:<br />
Reverts VLAN settings back to saved FLASH configuration data in seconds. Use a delay of 0<br />
to cancel the command. Any newly issued revert command takes precedence over an outstanding one.<br />
• Access level/Bay level:<br />
OA administrator, OA operator<br />
• Restrictions:<br />
None<br />
SET VLAN SERVER<br />
• Command:<br />
SET VLAN SERVER { ALL | [{ , | - } ] }<br />
• Description:<br />
Sets the VLAN ID for the specified server or range of servers.<br />
• Access level/Bay level:<br />
OA administrator, OA operator<br />
• Restrictions:<br />
o You must create a VLAN ID using the ADD VLAN command, before using the SET VLAN SERVER<br />
command, or the command is rejected.<br />
o All multi-blade servers must be on the same VLAN.<br />
SHOW VLAN<br />
• Command:<br />
VLAN commands 159
SHOW VLAN<br />
• Description:<br />
Shows VLAN settings.<br />
• Access level/Bay level:<br />
OA administrator, OA operator, OA user<br />
• Restrictions:<br />
None<br />
Example<br />
OA-0018FE27577F> show vlan<br />
show vlan<br />
VLAN is enabled. OA VLAN ID = 1. Default VLAN ID (untagged) = 1.<br />
VLAN VLAN NAME<br />
---- ---------<br />
1 Default<br />
Device Settings<br />
BAY VLAN<br />
--- ----<br />
1 1<br />
2 1<br />
3 1<br />
4 1<br />
5 1<br />
6 1<br />
7 1<br />
8 1<br />
Interconnect Settings<br />
BAY VLAN<br />
--- ----<br />
1 1<br />
2 1<br />
3 1<br />
4 1<br />
VLAN commands 160
<strong>HP</strong> Insight Remote Support commands<br />
ENABLE REMOTE_SUPPORT IRS<br />
• Command:<br />
ENABLE REMOTE_SUPPORT IRS {"" }<br />
• Description:<br />
Registers the <strong>Onboard</strong> <strong>Administrator</strong> with the IRS/aggregator<br />
• Access level/Bay level:<br />
OA administrator<br />
ENABLE REMOTE_SUPPORT MAINTENANCE<br />
• Command:<br />
ENABLE REMOTE_SUPPORT MAINTENANCE { MIN | HOUR | DAY | WEEK } <br />
• Description:<br />
Enables and starts the Remote Support maintenance window for the time interval specified<br />
• Access level/Bay level:<br />
OA administrator<br />
• Restrictions:<br />
Remote Support must be enabled before running ENABLE REMOTE_SUPPORT MAINTENANCE. This<br />
setting is not recorded when you run the SHOW CONFIG command.<br />
DISABLE REMOTE_SUPPORT<br />
• Command:<br />
DISABLE REMOTE_SUPPORT<br />
• Description:<br />
Unregisters the <strong>Onboard</strong> <strong>Administrator</strong> from the Remote Support server<br />
• Access level/Bay level:<br />
OA administrator<br />
DISABLE REMOTE_SUPPORT MAINTENANCE<br />
• Command:<br />
DISABLE REMOTE_SUPPORT MAINTENANCE<br />
• Description:<br />
<strong>HP</strong> Insight Remote Support commands 161
Disables the Remote Support maintenance window<br />
• Access level/Bay level:<br />
OA administrator<br />
SEND REMOTE_SUPPORT DATACOLLECTION<br />
• Command:<br />
SEND REMOTE_SUPPORT DATACOLLECTION<br />
• Description:<br />
Sends a data collection to the remote server<br />
• Access level/Bay level:<br />
OA administrator<br />
• Restrictions:<br />
Remote Support must be enabled before sending a data collection. If the enclosure contains a large<br />
number of blades, the test might take several minutes. After the test is complete, the status is reflected in<br />
the SHOW REMOTE_SUPPORT command output.<br />
TEST REMOTE_SUPPORT<br />
• Command:<br />
TEST REMOTE_SUPPORT<br />
• Description:<br />
Sends a test service alert<br />
• Access level/Bay level:<br />
OA administrator<br />
• Restrictions:<br />
Remote Support must be enabled before sending a test event. If the enclosure contains a large number<br />
of blades, the test might take several minutes. After the test has completed, the status is reflected in the<br />
SHOW REMOTE_SUPPORT command output.<br />
SHOW REMOTE_SUPPORT<br />
• Command:<br />
SHOW REMOTE_SUPPORT<br />
• Description:<br />
Displays Remote Support settings and information<br />
• Access level/Bay level:<br />
OA administrator<br />
<strong>HP</strong> Insight Remote Support commands 162
SHOW REMOTE_SUPPORT EVENTS<br />
• Command:<br />
SHOW REMOTE_SUPPORT EVENTS<br />
• Description:<br />
Displays Remote Support events that have been sent<br />
• Access level/Bay level:<br />
OA administrator<br />
<strong>HP</strong> Insight Remote Support commands 163
Enclosure Dynamic Power Cap commands<br />
SET ENCLOSURE POWER_CAP<br />
• Command:<br />
SET ENCLOSURE POWER_CAP { [<br />
] | OFF }<br />
• Description:<br />
Sets the Enclosure Dynamic Power Cap in watts AC. OFF disables the Enclosure Dynamic Power Cap.<br />
Average power cannot exceed cap or derated_circuit_capacity. Peak power cannot exceed<br />
rated_circuit_capacity. For example, suppose the PDU powering the enclosure has a rated capacity of<br />
30 amps. In North America and Japan, the standard de-rating ratio is 80%, so the PDU has a derated<br />
capacity of 24 amps (0.80 * 30). At 208 volts, the Rated Circuit Capacity would be entered as 6240<br />
watts (30 * 208), and the Derated Circuit Capacity would be entered as 4992 watts (24 * 208). When<br />
specifying only cap, the other values are calculated using the standard de-rating ratio for North<br />
America. Therefore derated_circuit_capacity is equal to cap and rated_circuit_capacity is equal to<br />
1.25 * cap. The Enclosure Dynamic Power Cap and Derated Circuit Capacity can be specified as any<br />
value in the allowable range. The Derated Circuit Capacity must be at least as large as the Enclosure<br />
Dynamic Power Cap and no larger than the Rated Circuit Capacity. The Enclosure Dynamic Power Cap<br />
can be used to limit enclosure power consumption based on a cooling constraint that might be lower<br />
than the Derated Circuit Capacity.<br />
• Access level/Bay level:<br />
OA administrator, OA operator<br />
• Restrictions:<br />
o A redundant <strong>Onboard</strong> <strong>Administrator</strong> is required.<br />
o The Power Cap must be in the range displayed by the command SHOW ENCLOSURE POWER_CAP.<br />
o In scripts, if both SET POWER LIMIT and SET ENCLOSURE POWER_CAP are set to non-zero values,<br />
whichever command is used last takes precedence.<br />
SET ENCLOSURE<br />
POWER_CAP_BAYS_TO_EXCLUDE<br />
• Command:<br />
SET ENCLOSURE POWER_CAP_BAYS_TO_EXCLUDE [NONE | {[ , | - ] }]<br />
• Description:<br />
Specifies bays to omit from Enclosure Dynamic Power Cap. Blades in omitted bays are treated as<br />
unmanaged components of the system: They receive a maximum power allocation even when the<br />
power is not being consumed, raising the minimum Enclosure Dynamic Power Cap value that can be<br />
applied to the enclosure. Any blades in bays not specified are managed.<br />
Enclosure Dynamic Power Cap commands 164
If you have previously specified bays to exclude, using this command again replaces that specification<br />
rather than augmenting it.<br />
• Access level/Bay level:<br />
OA administrator, OA operator<br />
• Restriction:<br />
You can exclude no more than one fourth of the bays.<br />
SHOW ENCLOSURE POWER_CAP<br />
• Command:<br />
SHOW ENCLOSURE POWER_CAP<br />
• Description:<br />
Displays the current Enclosure Dynamic Power Cap in watts.<br />
• Access level/Bay level:<br />
All<br />
• Restriction:<br />
None<br />
Example<br />
OA-0018FE27577> SHOW ENCLOSURE POWER_CAP<br />
Enclosure Dynamic Power Cap: Disabled<br />
Derated Circuit Capacity: Disabled<br />
Rated Circuit Capacity: Disabled<br />
Allowable Enclosure Dynamic Power Cap: 3123 - 7676 Watts AC<br />
Allowable Derated Circuit Capacity: 3123 - 7676 Watts AC<br />
Allowable Rated Circuit Capacity: 3428 - 7676 Watts AC<br />
SHOW ENCLOSURE<br />
POWER_CAP_BAYS_TO_EXCLUDE<br />
• Command:<br />
SHOW ENCLOSURE POWER_CAP_BAYS_TO_EXCLUDE<br />
• Description:<br />
Displays the bays in the enclosure that are exempt from the Enclosure Dynamic Power Cap.<br />
• Access level/Bay level:<br />
All<br />
• Restriction:<br />
None<br />
Example<br />
OA-0018FE27577F> show enclosure power_cap_bays_to_exclude<br />
Enclosure Dynamic Power Cap commands 165
Bays opted out: None<br />
Enclosure Dynamic Power Cap commands 166
Event notifications<br />
Enclosure event notifications<br />
Enclosure events produce screen messages with the show events option enabled. If you are directly<br />
affected by an event, a message is produced whether the show events option is enabled or disabled.<br />
Event messages include the device affected, the device name, and the date and time of the event. Some<br />
examples of event messages are:<br />
• The enclosure is in a degraded state.<br />
• Blade X has experienced a failure.<br />
• The temperature on Blade X has exceeded the failed threshold.<br />
• Fan X has experienced a failure.<br />
• The power supplies are no longer redundant.<br />
• Power supply X is in a degraded state.<br />
• The enclosure temperature has exceeded the degraded threshold.<br />
Command line event notifications<br />
When the SET DISPLAY EVENTS option is turned on, the terminal interface displays error, warning, and status<br />
messages, depending on the behavior of the enclosure and components.<br />
The syntax for these messages are:<br />
• —Description of error<br />
• —Description of warning<br />
• —Description of status<br />
The following table lists causes of the error, warning, or status events that appear.<br />
Event Cause<br />
Bay Event<br />
A bay was assigned or unassigned from a<br />
group.<br />
Blade Inserted<br />
A blade was inserted into the enclosure.<br />
Blade Thermal Status<br />
Changed<br />
The thermal status of a blade changed.<br />
Blade Removed<br />
A blade was removed from the enclosure.<br />
Blade Port Map Info The port mapping information of a blade was<br />
updated.<br />
Enclosure Status Change A change in status has occurred because of a<br />
change in the state of one or more hardware<br />
components or server readings.<br />
Enclosure Name Change The name of the enclosure was changed.<br />
Event notifications 167
Event Cause<br />
Fan Status Change<br />
Fan Inserted<br />
Fan Removed<br />
Interconnect Inserted<br />
Interconnect Thermal Status<br />
Changed<br />
Interconnect Removed<br />
Interconnect Power Reset<br />
Interconnect Port Map Info<br />
LDAP Group Removed<br />
OA System Log Cleared<br />
OA Name Changed<br />
OA Inserted<br />
OA Removed<br />
OA Takeover<br />
The status of a fan has changed.<br />
A fan has been inserted.<br />
A fan has been removed.<br />
An interconnect module was inserted into the<br />
enclosure.<br />
The thermal status of an interconnect module<br />
changed.<br />
An interconnect module was removed from the<br />
enclosure.<br />
The power of an interconnect module was reset.<br />
The port mapping information of an<br />
interconnect module was updated.<br />
A LDAP group was removed from the <strong>Onboard</strong><br />
<strong>Administrator</strong>. If you are logged into the<br />
<strong>Onboard</strong> <strong>Administrator</strong> under this LDAP group,<br />
you are disconnected.<br />
The <strong>Onboard</strong> <strong>Administrator</strong> system log was<br />
cleared.<br />
The <strong>Onboard</strong> <strong>Administrator</strong> DNS name was<br />
changed.<br />
A redundant <strong>Onboard</strong> <strong>Administrator</strong> was<br />
inserted into the enclosure.<br />
The redundant <strong>Onboard</strong> <strong>Administrator</strong> was<br />
removed from the enclosure.<br />
The redundant and active <strong>Onboard</strong><br />
<strong>Administrator</strong>s are switching roles. The Active<br />
<strong>Onboard</strong> <strong>Administrator</strong> reboots into Standby<br />
Mode and the redundant <strong>Onboard</strong><br />
<strong>Administrator</strong> transitions to Active Mode.<br />
Power Supply Status Change The status of a power supply has changed.<br />
Power Supply Inserted A power supply has been inserted.<br />
Power Supply Removed A power supply has been removed.<br />
Power Supply Redundancy The power supplies are either now redundant or<br />
Change<br />
are no longer redundant.<br />
Power Supply Overload The power supplies are being asked to draw<br />
more current than they are able.<br />
Restart Event<br />
The <strong>Onboard</strong> <strong>Administrator</strong> is about to start.<br />
Rack Name Change The rack name stored on the enclosure was<br />
changed.<br />
Rack Topology<br />
Enclosures were connected or disconnected<br />
from the enclosure link.<br />
Thermal Status Change A thermal sensor has changed state.<br />
User Removed<br />
A user was removed from the <strong>Onboard</strong><br />
<strong>Administrator</strong>. If you are logged in as this user,<br />
you are disconnected from the <strong>Onboard</strong><br />
<strong>Administrator</strong>.<br />
User Disabled<br />
A user was disabled. If you are logged in as this<br />
user, you are disconnected from the <strong>Onboard</strong><br />
<strong>Administrator</strong>.<br />
Event notifications 168
Event Cause<br />
User Rights<br />
The privilege level of a user on the <strong>Onboard</strong><br />
<strong>Administrator</strong> was changed. If you are logged<br />
in as this user, you are disconnected from the<br />
<strong>Onboard</strong> <strong>Administrator</strong>. You can log in again<br />
with your new privilege level.<br />
Event notifications 169
Support and other resources<br />
Before you contact <strong>HP</strong><br />
Be sure to have the following information available before you call <strong>HP</strong>:<br />
• Active Health System log<br />
Download and have available an Active Health System log for 3 days before the failure was detected.<br />
For more information, see the <strong>HP</strong> iLO 4 User Guide or <strong>HP</strong> Intelligent Provisioning User Guide on the <strong>HP</strong><br />
website (http://www.hp.com/go/ilo/docs).<br />
• <strong>Onboard</strong> <strong>Administrator</strong> SHOW ALL report (for <strong>HP</strong> <strong>BladeSystem</strong> products only)<br />
For more information on obtaining the <strong>Onboard</strong> <strong>Administrator</strong> SHOW ALL report, see the <strong>HP</strong> website<br />
(http://h20000.www2.hp.com/bizsupport/TechSupport/Document.jsp?lang=en&cc=us&objectID=c<br />
02843807).<br />
• Technical support registration number (if applicable)<br />
• Product serial number<br />
• Product model name and number<br />
• Product identification number<br />
• Applicable error messages<br />
• Add-on boards or hardware<br />
• Third-party hardware or software<br />
• Operating system type and revision level<br />
<strong>HP</strong> contact information<br />
For United States and worldwide contact information, see the Contact <strong>HP</strong> website<br />
(http://www.hp.com/go/assistance).<br />
In the United States:<br />
• To contact <strong>HP</strong> by phone, call 1-800-334-5144. For continuous quality improvement, calls may be<br />
recorded or monitored.<br />
• If you have purchased a Care Pack (service upgrade), see the Support & Drivers website<br />
(http://www8.hp.com/us/en/support-drivers.html). If the problem cannot be resolved at the website,<br />
call 1-800-633-3600. For more information about Care Packs, see the <strong>HP</strong> website<br />
(http://pro-aq-sama.houston.hp.com/services/cache/10950-0-0-225-121.html).<br />
Support and other resources 170
Time zone settings<br />
Universal time zone settings<br />
IMPORTANT: Time zones must be entered exactly as they appear.<br />
The following table provides the Universal time zone settings that are supported by the <strong>Onboard</strong><br />
<strong>Administrator</strong>.<br />
CET Etc/GMT-2 Etc/GMT+7 Etc/GMT-13 MST<br />
CST6CDT Etc/GMT+2 Etc/GMT-8 Etc/GMT-14 MST7MDT<br />
EET Etc/GMT-3 Etc/GMT+8 Etc/Greenwich Navajo<br />
EST Etc/GMT+3 Etc/GMT-9 Etc/UCT PST8PDT<br />
EST5EDT Etc/GMT-4 Etc/GMT+9 Etc/Universal UCT<br />
Etc/GMT Etc/GMT+4 Etc/GMT-10 Etc/UTC Universal<br />
Etc/GMT0 Etc/GMT-5 Etc/GMT+10 Etc/Zulu UTC<br />
Etc/GMT-0 Etc/GMT+5 Etc/GMT-11 GMT WET<br />
Etc/GMT+0 Etc/GMT-6 Etc/GMT+11 Greenwich W-SU<br />
Etc/GMT-1 Etc/GMT+6 Etc/GMT-12 HST Zulu<br />
Etc/GMT+1 Etc/GMT-7 Etc/GMT+12 MET —<br />
Africa time zone settings<br />
IMPORTANT: Time zones must be entered exactly as they appear.<br />
The following table provides the African time zone settings that are supported by the <strong>Onboard</strong> <strong>Administrator</strong>.<br />
Africa/Abidjan Africa/Ceuta Africa/Kinshasa Africa/Ndjamena<br />
Africa/Accra Africa/Conakry Africa/Lagos Africa/Niamey<br />
Africa/Addis_Ababa Africa/Dakar Africa/Libreville Africa/Nouakchott<br />
Africa/Algiers Africa/Dar_es_Salaam Africa/Lome Africa/Ouagadougou<br />
Africa/Asmera Africa/Djibouti Africa/Luanda Africa/Porto-Novo<br />
Africa/Bamako Africa/Douala Africa/Lubumbashi Africa/Sao_Tome<br />
Africa/Bangui Africa/El_Aaiun Africa/Lusaka Africa/Timbuktu<br />
Africa/Banjul Africa/Freetown Africa/Malabo Africa/Tripoli<br />
Africa/Bissau Africa/Gaborone Africa/Maputo Africa/Tunis<br />
Africa/Blantyre Africa/Harare Africa/Maseru Africa/Wjndhoek<br />
AfricaBrazzaville Africa/Johannesburg Africa/Mbabane Egypt<br />
Africa/Bujumbura Africa/Kampala Africa/Mogadishu Libya<br />
Africa/Cairo Africa/Khartoum Africa/Monrovia —<br />
Africa/Casablanca Africa/Kigali Africa/Nairobi —<br />
Time zone settings 171
Americas time zone settings<br />
IMPORTANT: Time zones must be entered exactly as they appear.<br />
The following table provides the Americas time zone settings that are supported by the <strong>Onboard</strong><br />
<strong>Administrator</strong>.<br />
America/Adak America/Indianapolis America/Santiago<br />
America/Anchorage America/Indiana/Vevay America/Santo_Domingo<br />
America/Argentina/Salta America/Inuvik America/Sao_Paulo<br />
America/Anguilla America/Iqaluit America/Scoresbysund<br />
America/Antigua America/Jamaica America/Shiprock<br />
America/Araguaina America/Jujuy America/Sitka<br />
America/Aruba America/Juneau America/St_Johns<br />
America/Asuncion America/Kentucky/Louisville America/St_Kitts<br />
America/Atka America/Kentucky/Monticello America/St_Lucia<br />
America/Bahia_Banderas America/Knox_IN America/St_Thomas<br />
America/Barbados America/Kralendijk America/St_Vincent<br />
America/Belem America/La_Paz America/Swift_Current<br />
America/Belize America/Lima America/Tegucigalpa<br />
America/Boa_Vista America/Los_Angeles America/Thule<br />
America/Bogota America/Louisville America/Thunder_Bay<br />
America/Boise America/Lower_Princes America/Tijuana<br />
America/Buenos_Aires America/Maceio America/Tortola<br />
America/Cambridge_Bay America/Managua America/Vancouver<br />
America/Cancun America/Manaus America/Virgin<br />
America/Caracas America/Martinique America/Whitehorse<br />
America/Catamarca America/Matamoros America/Winnipeg<br />
America/Cayenne America/Mazatlan America/Yakutat<br />
America/Cayman America/Mendoza America/Yellowknife<br />
America/Chicago America/Menominee Brazil/Acre<br />
America/Chihuahua America/Merida Brazil/DeNoronha<br />
America/Cordoba America/Metlakatla Brazil/East<br />
America/Costa_Rica America/Mexico_City Brazil/West<br />
America/Cuiaba America/Miquelon Canada/Atlantic<br />
America/Curacao America/Monterrey Canada/Central<br />
America/Dawson America/Montevideo Canada/Eastern<br />
America/Dawson_Creek America/Montreal Canada/East-Saskatchewan<br />
America/Denver America/Montserrat Canada/Mountain<br />
America/Detroit America/Nassau Canada/Newfoundland<br />
America/Dominica America/New_York Canada/Pacific<br />
America/Edmonton America/Nipigon Canada/Saskatchewan<br />
America/Eirunepe America/Nome Canada/Yukon<br />
Time zone settings 172
America/El_Salvador America/Noronha Chile/Continenta<br />
America/Ensenada America/North_Dakota/Beulah Chile/EasterIsland<br />
America/Fortaleza America/Ojinaga Cuba<br />
America/Fort_Wayne America/Panama Jamaica<br />
America/Glace_Bay America/Pangnirtung Mexico/BajaNorte<br />
America/Godthab America/Paramaribo Mexico/BajaSur<br />
America/Goose_Bay America/Phoenix Mexico/General<br />
America/Grand_Turk America/Port-au-Prince US/Alaska<br />
America/Grenada America/Porto_Acre US/Aleutian<br />
America/Guadeloupe America/Port_of_Spain US/Arizona<br />
America/Guatemala America/Porto_Velho US/Central<br />
America/Guayaquil America/Puerto_Rico US/Eastern<br />
America/Guyana America/Rainy_River US/East-Indiana<br />
America/Halifax America/Rankin_Inlet US/Indiana-Starke<br />
America/Havana America/Recife US/Michigan<br />
America/Hermosillo America/Regina US/Mountain<br />
America/Indiana/Indianapolis America/Rio_Branco US/Pacific<br />
America/Indiana/Knox America/Rosario<br />
America/Indiana/Marengo America/Santa_Isabel<br />
Asia time zone settings<br />
IMPORTANT: Time zones must be entered exactly as they appear.<br />
The following table provides the Asian time zone settings that are supported by the <strong>Onboard</strong> <strong>Administrator</strong>.<br />
Asia/Aden Asia/Damascus Asia/Krasnoyarsk Asia/Riyadh89 Asia/Vladivostok<br />
Asia/Almaty Asia/Dhaka Asia/Kuala_Lumpur Asia/Saigon Asia/Yakutsk<br />
Asia/Amman Asia/Dili Asia/Kuching Asia/Samarkand Asia/Yekaterinburg<br />
Asia/Anadyr Asia/Dubai Asia/Kuwait Asia/Seoul Asia/Yerevan<br />
Asia/Aqtau Asia/Dushanbe Asia/Macao Asia/Shanghai Hongkong<br />
Asia/Aqtobe Asia/Gaza Asia/Magadan Asia/Singapore Iran<br />
Asia/Ashgabat Asia/Harbin Asia/Manila Asia/Taipei Israel<br />
Asia/Ashkhabad Asia/Hong_Kong Asia/Muscat Asia/Tashkent Japan<br />
Asia/Baghdad Asia/Hovd Asia/Nicosia Asia/Tbilisi Mideast/Riyadh87<br />
Asia/Bahrain Asia/Irkutsk Asia\Novokuznetsk Asia/Tehran Mideast/Riyadh88<br />
Asia/Baku Asia/Istanbul Asia/Novosibirsk Asia/Tel_Aviv Mideast/Riyadh89<br />
Asia/Bangkok Asia/Jakarta Asia/Omsk Asia/Thimbu PRC<br />
Asia/Beirut Asia/Jayapura Asia/Phom_Penh Asia/Thimphu ROC<br />
Asia/Bishkek Asia/Jerusalem Asia/Pyongyang Asia/Toyoko ROK<br />
Asia/Brunei Asia/Kabul Asia/Qatar Asia/Ujung_Pandan<br />
g<br />
Singapore<br />
Asia/Kolkata Asia/Kamchatka Asia/Rangoon Asia/Ulaanbaatar Turkey<br />
Asia/Chungking Asia/Karachi Asia/Riyadh Asia/Ulan_Bator —<br />
Time zone settings 173
Asia/Colombo Asia/Kashgar Asia/Riyadh87 Asia/Urumqi —<br />
Asia/Dacca Asia/Katmandu Asia/Riyadh88 Asia/Vientiane —<br />
Oceanic time zone settings<br />
IMPORTANT: Time zones must be entered exactly as they appear.<br />
The following table provides the Oceanic time zone settings that are supported by the <strong>Onboard</strong><br />
<strong>Administrator</strong>.<br />
Atlantic/Azores Australia/NSW NZ-CHAT Pacific/Nauru<br />
Atlantic/Bermuda Australia/Perth Pacific/Apia Pacific/Niue<br />
Atlantic/Canary Australia/Queensland Pacific/Auckland Pacific/Norfolk<br />
Atlantic/Cape_Verde Australia/South Pacific/Chatham Pacific/Noumea<br />
Atlantic/Faeroe Australia/Sydney Pacific/Chuuk Pacific/Pago_Pago<br />
Atlantic/Jan_Mayen Australia/Tasmania Pacific/Easter Pacific/Palau<br />
Atlantic/Madeira Australia/Victoria Pacific/Efate Pacific/Pitcairn<br />
Atlantic/Reykjavik Australia/West Pacific/Enderbury Pacific/Pohnpei<br />
Atlantic/South_Georgia Australia/Yancowina Pacific/Fakaofo Pacific/Ponape<br />
Atlantic/Stanley Iceland Pacific/Fiji Pacific/Port_Moresby<br />
Atlantic/St_Helena Indian/Antananarivo Pacific/Funafuti Pacific/Rarotonga<br />
Australia/ACT Indian/Chagos Pacific/Galapagos Pacific/Saipan<br />
Australia/Adelaide Indian/Christmas Pacific/Gambier Pacific/Samoa<br />
Australia/Brisbane Indian/Cocos Pacific/Guadalcanal Pacific/Tahiti<br />
Australia/Broken_Hill Indian/Comoro Pacific/Guam Pacific/Tarawa<br />
Australia/Canberra Indian/Kerguelen Pacific/Honolulu Pacific/Tongatapu<br />
Australia/Darwin Indian/Mahe Pacific/Johnston Pacific/Truk<br />
Australia/Hobart Indian/Maldives Pacific/Kiritimati Pacific/Wake<br />
Australia/LHI Indian/Mauritius Pacific/Kosrae Pacific/Wallis<br />
Australia/Lindeman Indian/Mayotte Pacific/Kwajalein Pacific/Yap<br />
Australia/Lord_Howe Indian/Reunion Pacific/Majuro US/Hawaii<br />
Australia/Melbourne Kwajalein Pacific/Marquesas US/Samoa<br />
Australia/North NZ Pacific/Midway —<br />
Europe time zone settings<br />
IMPORTANT: Time zones must be entered exactly as they appear.<br />
The following table provides the European time zone settings that are supported by the <strong>Onboard</strong><br />
<strong>Administrator</strong>.<br />
Eire Europe/Helsinki Europe/Paris Europe/Vaduz<br />
Europe/Amsterdam Europe/Istanbul Europe/Prague Europe/Vatican<br />
Europe/Andorra Europe/Kaliningrad Europe/Riga Europe/Vienna<br />
Time zone settings 174
Europe/Athens Europe/Kiev Europe/Rome Europe/Vilnius<br />
Europe/Belfast Europe/Lisbon Europe/Samara Europe/Warsaw<br />
Europe/Belgrade Europe/Ljubljana Europe/San_Marino Europe/Zagreb<br />
Europe/Berlin Europe/London Europe/Sarajevo Europe/Zaporozhye<br />
Europe/Bratislava Europe/Luxembourg Europe/Simferopol Europe/Zurich<br />
Europe/Brussels Europe/Madrid Europe/Skopje GB<br />
Europe/Bucharest Europe/Malta Europe/Sofia GB-Eire<br />
Europe/Budapest Europe/Minsk Europe/Stockholm Poland<br />
Europe/Chisinau Europe/Monaco Europe/Tallinn Portugal<br />
Europe/Copenhagen Europe/Moscow Europe/Tirane —<br />
Europe/Dublin Europe/Nicosia Europe/Tiraspol —<br />
Europe/Gibraltar Europe/Oslo Europe/Uzhgorod —<br />
Polar time zone settings<br />
IMPORTANT: Time zones must be entered exactly as they appear.<br />
The following table provides the Polar time zone settings that are supported by the <strong>Onboard</strong> <strong>Administrator</strong>.<br />
Antarctica/Casey Antarctica/Mawson Antarctica/Syowa<br />
Antarctica/Davis Antarctica/McMurdo Antarctica/Vostok<br />
Antarctica/DumontDUrville Antarctica/Palmer Arctic/Longyearbyen<br />
Antarctica\Macquarie Antarctica/South_Pole —<br />
Time zone settings 175
Acronyms and abbreviations<br />
CA<br />
certificate authority<br />
DDNS<br />
Dynamic Domain Name System<br />
DHCP<br />
Dynamic Host Configuration Protocol<br />
DNS<br />
domain name system<br />
EBIPA<br />
Enclosure Bay IP Addressing<br />
EFM<br />
Enclosure Firmware Management<br />
FRU<br />
field replaceable unit<br />
<strong>HP</strong> SIM<br />
<strong>HP</strong> Systems Insight Manager<br />
HTTPS<br />
hypertext transfer protocol secure sockets<br />
ICMP<br />
Internet Control Message Protocol<br />
iLO<br />
Integrated Lights-Out<br />
IPD<br />
intelligent power discovery<br />
Acronyms and abbreviations 176
LDAP<br />
Lightweight Directory Access Protocol<br />
MAC<br />
Media Access Control<br />
NTP<br />
network time protocol<br />
PDU<br />
power distribution unit<br />
PKCS<br />
Public-Key Cryptography Standards<br />
PXE<br />
preboot execution environment<br />
RBSU<br />
ROM-Based Setup Utility<br />
RIBCL<br />
Remote Insight Board Command Language<br />
SOAP<br />
Simple Object Access Protocol<br />
SSH<br />
Secure Shell<br />
SSO<br />
single sign-on<br />
TFTP<br />
Trivial File Transfer Protocol<br />
UID<br />
unit identification<br />
URB<br />
utility ready blade<br />
Acronyms and abbreviations 177
Documentation feedback<br />
<strong>HP</strong> is committed to providing documentation that meets your needs. To help us improve the documentation,<br />
send any errors, suggestions, or comments to Documentation Feedback (mailto:docsfeedback@hp.com).<br />
Include the document title and part number, version number, or the URL when submitting your feedback.<br />
Documentation feedback 178
Index<br />
A<br />
accessing the CLI 13<br />
account authentication 18<br />
account level 16<br />
ADD EBIPA 53<br />
ADD <strong>HP</strong>SIM CERTIFICATE 44<br />
ADD LDAP CERTIFICATE 36<br />
ADD LDAP GROUP 36<br />
ADD OA ADDRESS IPV6 58<br />
ADD OA DNS 58<br />
ADD OA DNS IPV6 59<br />
ADD SNMP TRAPRECEIVER 59<br />
ADD SSHKEY 60<br />
ADD TRUSTED HOST 60<br />
ADD USER 24<br />
ADD VLAN 155<br />
adding a user account 24<br />
Africa time zone 171<br />
Americas time zone 172<br />
Asia time zone 173<br />
ASSIGN 24<br />
ASSIGN FOR LDAP 36<br />
ASSIGN INTERCONNECT 138<br />
ASSIGN OA 25<br />
ASSIGN OA LDAP GROUP 37<br />
authorized reseller 170<br />
B<br />
Blade management commands 121<br />
C<br />
CLEAR INTERCONNECT SESSION 138<br />
CLEAR LOGIN_BANNER_TEXT 60<br />
CLEAR NTP 61<br />
CLEAR SCREEN 20<br />
CLEAR SSHKEY 61<br />
CLEAR SYSLOG 85<br />
CLEAR VC MODE 61<br />
CLI (Command Line Interface) 15<br />
command line, Event messages 167<br />
command, 140, 158<br />
command, ADD EBIPA 53<br />
command, ADD <strong>HP</strong>SIM CERTIFICATE 44<br />
command, ADD LDAP CERTIFICATE 36<br />
command, ADD LDAP GROUP 36<br />
command, ADD OA ADDRESS IPV6 58<br />
command, ADD OA DNS 58<br />
command, ADD OA DNS IPV6 59<br />
command, ADD SNMP TRAPRECIEVER 59<br />
command, ADD SSHKEY 60<br />
command, ADD TRUSTED HOST 60<br />
command, ADD USER 24<br />
command, ADD VLAN 155<br />
command, ASSIGN 24<br />
command, ASSIGN for LDAP 36<br />
command, ASSIGN INTERCONNECT 138<br />
command, ASSIGN OA 25<br />
command, ASSIGN OA LDAP GROUP 37<br />
command, CLEAR INTERCONNECT SESSION 138<br />
command, CLEAR LOGIN_BANNER_TEXT 60<br />
command, CLEAR NTP 61<br />
command, CLEAR SCREEN 20<br />
command, CLEAR SSHKEY 61<br />
command, CLEAR SYSLOG 85<br />
command, CLEAR VCMODE 61<br />
command, CONNECT INTERCONNECT 139<br />
command, CONNECT SERVER 121<br />
command, DISABLE ACTIVE HEALTH SYSTEM 146<br />
command, DISABLE ALERTMAIL 62<br />
command, DISABLE CRL 33<br />
command, DISABLE DHCPV6 62<br />
command, DISABLE ENCLOSURE_IP_MODE 62<br />
command, DISABLE FIRMWARE<br />
MANAGEMENT 119<br />
command, DISABLE GUI_LOGIN_DETAIL 85<br />
command, DISABLE HTTPS 63<br />
command, DISABLE IPV6 63<br />
command, DISABLE LDAP 37<br />
command, DISABLE LLF 85<br />
command, DISABLE LOGIN_BANNER 63<br />
command, DISABLE NTP 63<br />
command, DISABLE REMOTE SUPPORT 161<br />
command, DISABLE REMOTE SUPPORT<br />
MAINTENANCE 161<br />
command, DISABLE ROUTER ADVERTISEMENTS 64<br />
command, DISABLE SECURESH 64<br />
Index 179
command, DISABLE SNMP 64<br />
command, DISABLE STRONG PASSWORDS 25<br />
command, DISABLE SYSLOG REMOTE 149<br />
command, DISABLE TELNET 65<br />
command, DISABLE TRUSTED HOST 65<br />
command, DISABLE TWOFACTOR 33<br />
command, DISABLE URB 121<br />
command, DISABLE USER 25<br />
command, DISABLE VLAN 155<br />
command, DISABLE XMLREPLY 65<br />
command, DISCOVER FIRMWARE SERVER 111<br />
command, DOWNLOAD CA CERTIFICATE 33<br />
command, DOWNLOAD CONFIG 66<br />
command, DOWNLOAD CONFIG using USB<br />
key 152<br />
command, DOWNLOAD <strong>HP</strong>SIM CERTIFICATE 44<br />
command, DOWNLOAD LDAP CERTIFICATE 37<br />
command, DOWNLOAD OA CERTIFICATE 46<br />
command, DOWNLOAD SSHKEY 66<br />
command, DOWNLOAD USER CERTIFICATE 34<br />
command, EDIT VLAN 155<br />
command, ENABLE ACTIVE HEALTH SYSTEM 146<br />
command, ENABLE ALERTMAIL 66<br />
command, ENABLE DHCPV6 67<br />
command, ENABLE ENCLOSURE_IP_MODE 67<br />
command, ENABLE FIRMWARE<br />
MANAGEMENT 119<br />
command, ENABLE GUI_LOGIN_DETAIL 86<br />
command, ENABLE HTTPS 67<br />
command, ENABLE IPV6 68<br />
command, ENABLE LDAP 38<br />
command, ENABLE LLF 86<br />
command, ENABLE NTP 68<br />
command, ENABLE REMOTE SUPPORT IRS 161<br />
command, ENABLE REMOTE SUPPORT<br />
MAINTENANCE 161<br />
command, ENABLE ROUTER ADVERTISEMENTS 68<br />
command, ENABLE SECURESH 69<br />
command, ENABLE SNMP 69<br />
command, ENABLE STRONG PASSWORDS 25<br />
command, ENABLE SYSLOG REMOTE 149<br />
command, ENABLE TELNET 69<br />
command, ENABLE TRUSTED HOST 69<br />
command, ENABLE URB 121<br />
command, ENABLE USER 26<br />
command, ENABLE VLAN 156<br />
command, ENABLE XMLREPLY 70<br />
command, EXIT 20<br />
command, FORCE TAKEOVER 46<br />
command, GENERATE CERTIFICATE 46<br />
command, GENERATE KEY 48<br />
command, HELP 20<br />
command, HISTORY 26<br />
command, <strong>HP</strong>ONCFG 122<br />
command, LOGOUT 21<br />
command, PING 49<br />
command, POWEROFF INTERCONNECT 139<br />
command, POWEROFF SERVER 122<br />
command, POWERON INTERCONNECT 140<br />
command, POWERON SERVER 123<br />
command, QUIT 21<br />
command, REBOOT SERVER 123<br />
command, REMOVE CA CERTIFICATE 34<br />
command, REMOVE EBIPA 54<br />
command, REMOVE <strong>HP</strong>SIM CERTFICATE 44<br />
command, REMOVE LDAP CERTIFICATE 38<br />
command, REMOVE LDAP GROUP 38<br />
command, REMOVE OA ADDRESS IPV6 70<br />
command, REMOVE OA DNS 70<br />
command, REMOVE OA DNS IPV6 71<br />
command, REMOVE SNMP TRAPRECEIVER 71<br />
command, REMOVE TRUSTED HOST 71<br />
command, REMOVE USER 27<br />
command, REMOVE USER CERTIFICATE 34<br />
command, REMOVE VLAN 156<br />
command, RESTART OA 86<br />
command, SAVE VLAN 156<br />
command, SEND REMOTE SUPPORT<br />
DATACOLLECTION 162<br />
command, SET ALERTMAIL MAILBOX 72<br />
command, SET ALERTMAIL SENDERDOMAIN 72<br />
command, SET ALERTMAIL SMTP SERVER 72<br />
command, SET DATE 86<br />
command, SET<br />
DEVICE_SERIAL_NUMBER_BLADE 49<br />
command, SET DISPLAY EVENTS 87<br />
command, SET EBIPA 54<br />
command, SET EBIPA INTERCONNECT 55<br />
command, SET EBIPA SERVER 55<br />
command, SET ENCLOSURE ASSET 87<br />
command, SET ENCLOSURE NAME 88<br />
command, SET ENCLOSURE PART_NUMBER 88<br />
command, SET ENCLOSURE PDU TYPE 88<br />
command, SET ENCLOSURE POWER_CAP 164<br />
command, SET ENCLOSURE<br />
POWER_CAP_BAYS_TO_EXCLUDE 164<br />
command, SET ENCLOSURE SERIAL_NUMBER 89<br />
command, SET ENCLOSURE UID 89<br />
command, SET FACTORY 49<br />
command, SET FIPS MODE 73<br />
command, SET FIRMWARE MANAGEMENT 111<br />
Index 180
command, SET FIRMWARE MANAGEMENT<br />
BAYS_TO_INCLUDE SERVER 113<br />
command, SET FIRMWARE MANAGEMENT FORCE<br />
DOWNGRADE 113<br />
command, SET FIRMWARE MANAGEMENT<br />
POLICY 112<br />
command, SET FIRMWARE MANAGEMENT<br />
POWER 112<br />
command, SET FIRMWARE MANAGEMENT<br />
SCHEDULE 112<br />
command, SET FIRMWARE MANAGEMENT<br />
URL 111<br />
command, SET <strong>HP</strong>SIM TRUST MODE 45<br />
command, SET INTERCONNECT<br />
POWERDELAY 140<br />
command, SET INTERCONNECT UID 141<br />
command, SET IPCONFIG 75<br />
command, SET LDAP GROUP ACCESS 39<br />
command, SET LDAP GROUP DESCRIPTION 39<br />
command, SET LDAP NAME 39<br />
command, SET LDAP PORT 40<br />
command, SET LDAP SERVER 40<br />
command, SET LLF INTERVAL 89<br />
command, SET LOGIN_BANNER_TEXT 73<br />
SET LOGIN_BANNER_TEXT 73<br />
command, SET MINIMUM PASSWORD LENGTH 27<br />
command, SET NIC 124<br />
command, SET NTP POLL 75<br />
command, SET NTP PRIMARY 75<br />
command, SET NTP SECONDARY 76<br />
command, SET OA GATEWAY 74<br />
command, SET OA NAME 74<br />
command, SET OA UID 74<br />
command, SET OA USB 90<br />
command, SET PASSWORD 27<br />
command, SET POWER LIMIT 90<br />
command, SET POWER MODE 90<br />
command, SET POWER SAVINGS 91<br />
command, SET RACK NAME 22<br />
command, SET REMOTE SYSLOG PORT 149<br />
command, SET REMOTE SYSLOG SERVER 150<br />
command, SET SCRIPT MODE 50<br />
command, SET SERIAL BAUD 76<br />
command, SET SERVER BOOT 124<br />
command, SET SERVER BOOT ONCE 124<br />
command, SET SERVER DVD for USB key 152<br />
command, SET SERVER POWERDELAY 125<br />
command, SET SERVER UID 125<br />
command, SET SESSION TIMEOUT 28<br />
command, SET SNMP COMMUNITY 77<br />
command, SET SNMP CONTACT 76<br />
command, SET SNMP LOCATION 77<br />
command, SET TIME ZONE 91<br />
command, SET URB 126<br />
command, SET USER ACCESS 28<br />
command, SET USER CONTACT 28<br />
command, SET USER FULLNAME 29<br />
command, SET USER PASSWORD 29<br />
command, SET VLAN DEFAULT 156<br />
command, SET VLAN FACTORY 157<br />
command, SET VLAN INTERCONNECT 157<br />
command, SET VLAN IPCONFIG SAVE 158<br />
command, SET VLAN IPCONFIG STATIC 158<br />
command, SET VLAN OA 159<br />
command, SET VLAN REVERT 159<br />
command, SET VLAN SERVER 159<br />
command, SHOW ALL 50<br />
command, SHOW CA CERTIFICATE 34<br />
command, SHOW CONFIG 91<br />
command, SHOW DATE 92<br />
command, SHOW DEVICE SERIAL NUMBER<br />
BLADE 52<br />
command, SHOW DISPLAY EVENTS 93<br />
command, SHOW EBIPA 55<br />
command, SHOW ENCLOSURE FAN 93<br />
command, SHOW ENCLOSURE INFO 94<br />
command, SHOW ENCLOSURE LCD 94<br />
command, SHOW ENCLOSURE POWER_CAP 165<br />
command, SHOW ENCLOSURE<br />
POWER_CAP_BAYS_TO_EXCLUDE 165<br />
command, SHOW ENCLOSURE<br />
POWER_SUMMARY 95<br />
command, SHOW ENCLOSURE POWERSUPPLY 96<br />
command, SHOW ENCLOSURE STATUS 97<br />
command, SHOW ENCLOSURE TEMP 97<br />
command, SHOW FINGERPRINT 83<br />
command, SHOW FIPS MODE 77<br />
command, SHOW FIRMWARE 113<br />
command, SHOW FIRMWARE LOG SERVER 117<br />
command, SHOW FIRMWARE LOG SESSION 118<br />
command, SHOW FIRMWARE<br />
MANAGEMENT 114<br />
command, SHOW FIRMWARE MANAGEMENT<br />
LOG 114<br />
command, SHOW FIRMWARE SUMMARY 115<br />
command, SHOW FIRMWARE SUMMARY CSV 116<br />
command, SHOW FRU 98<br />
command, SHOW HEALTH 78<br />
command, SHOW <strong>HP</strong>SIM INFO 45<br />
command, SHOW INTERCONNECT INFO 141<br />
command, SHOW INTERCONNECT LIST 143<br />
Index 181
command, SHOW INTERCONNECT PORT<br />
MAP 143<br />
command, SHOW INTERCONNECT<br />
POWERDELAY 144<br />
command, SHOW INTERCONNECT SESSION 144<br />
command, SHOW INTERCONNECT STATUS 144<br />
command, SHOW LDAP CERTIFICATE 40<br />
command, SHOW LDAP GROUP 41<br />
command, SHOW LDAP INFO 41<br />
command, SHOW LOGIN_BANNER 80<br />
command, SHOW NETWORK 80<br />
command, SHOW OA 100<br />
command, SHOW OA CERTIFICATE 100<br />
command, SHOW OA INFO 101<br />
command, SHOW OA NETWORK 101<br />
command, SHOW OA STATUS 102<br />
command, SHOW OA UPTIME 103<br />
command, SHOW OA USB 103<br />
command, SHOW PASSWORD SETTINGS 29<br />
command, SHOW RACK INFO 22<br />
command, SHOW RACK NAME 23<br />
command, SHOW REMOTE SUPPORT 162<br />
command, SHOW REMOTE SUPPORT EVENTS 163<br />
command, SHOW SERVER BOOT 126<br />
command, SHOW SERVER DVD 147<br />
command, SHOW SERVER FIRMWARE 118<br />
command, SHOW SERVER INFO 127<br />
command, SHOW SERVER LIST 128<br />
command, SHOW SERVER NAMES 129<br />
command, SHOW SERVER PORT MAP 129<br />
command, SHOW SERVER POWERDELAY 131<br />
command, SHOW SERVER STATUS 132<br />
command, SHOW SERVER TEMP 134<br />
command, SHOW SESSION TIMEOUT 30<br />
command, SHOW SNMP 82<br />
command, SHOW SSHKEY 83<br />
command, SHOW SYSLOG 104<br />
command, SHOW SYSLOG HISTORY 106<br />
command, SHOW SYSLOG OA 105<br />
command, SHOW SYSLOG SERVER 135<br />
command, SHOW SYSLOG SETTINGS 150<br />
command, SHOW TOPOLOGY 23<br />
command, SHOW TWOFACTOR INFO 35<br />
command, SHOW URB 138<br />
command, SHOW USBKEY 152<br />
command, SHOW USER 30<br />
command, SHOW VCMODE 107<br />
command, SHOW VLAN 159<br />
command, SLEEP 31<br />
command, SUBSTITUTE 136<br />
command, TEST ALERTMAIL 83<br />
command, TEST LDAP 42<br />
command, TEST REMOTE_SUPPORT 162<br />
command, TEST SNMP 84<br />
command, TEST SYSLOG 150<br />
command, TEST URB 139<br />
command, UNASSIGN 31<br />
command, UNASSIGN FOR LDAP 42<br />
command, UNASSIGN OA 31<br />
command, UNASSIGN OA LDAP GROUP 42<br />
command, UNASSIGN SERVER 137<br />
command, UPDATE 107<br />
command, UPDATE FIRMWARE SERVER 120<br />
command, UPDATE ILO 108<br />
command, UPDATE IMAGE using USB key 153<br />
command, UPLOAD CONFIG 109<br />
command, UPLOAD CONFIG using USB key 154<br />
command, UPLOAD SUPPORTDUMP 110<br />
command, UPLOAD SYSLOG 106<br />
commands, directory 36<br />
commands, remote support 161<br />
CONNECT INTERCONNECT 139<br />
CONNECT SERVER 121<br />
D<br />
DHCP (Dynamic Host Configuration Protocol) 15<br />
DHCP addresses 15<br />
directory (LDAP) commands 36<br />
DISABLE ACTIVE HEALTH SYSTEM 146<br />
DISABLE ALERTMAIL 62<br />
DISABLE CRL 33<br />
DISABLE DHCPv6 62<br />
DISABLE EBIPA 53<br />
DISABLE ENCLOSURE_IP_MODE 62<br />
DISABLE FIRMWARE MANAGEMENT 119<br />
DISABLE GUI_LOGIN_DETAIL 85<br />
DISABLE HTTPS 63<br />
DISABLE IPV6 63<br />
DISABLE LDAP 37<br />
DISABLE LLF 85<br />
DISABLE LOGIN_BANNER 63<br />
command, ENABLE LOGIN_BANNER 67<br />
DISABLE NTP 63<br />
DISABLE REMOTE SUPPORT 161<br />
DISABLE REMOTE SUPPORT MAINTENANCE 161<br />
DISABLE REMOTE_SUPPORT 161<br />
DISABLE ROUTER ADVERTISEMENTS 64<br />
DISABLE SECURESH 64<br />
DISABLE SNMP 64<br />
DISABLE STRONG PASSWORDS 25<br />
DISABLE SYSLOG REMOTE 149<br />
Index 182
disable telnet 65<br />
DISABLE TRUSTED HOST 65<br />
DISABLE TWOFACTOR 33<br />
DISABLE URB 121<br />
DISABLE USER 25<br />
DISABLE VLAN 155<br />
DISABLE XMLREPLY 65<br />
DISCOVER FIRMWARE SERVER 111<br />
DOWNLOAD CA CERTIFICATE 33<br />
DOWNLOAD CONFIG 66<br />
DOWNLOAD CONFIG using USB key 152<br />
DOWNLOAD <strong>HP</strong>SIM CERTIFICATE 44<br />
DOWNLOAD LDAP CERTIFICATE 37<br />
DOWNLOAD OA CERTIFICATE 46<br />
DOWNLOAD SSHKEY 66<br />
DOWNLOAD USER CERTIFICATE 34<br />
E<br />
EDIT VLAN 155<br />
ENABLE ACTIVE HEALTH SYSTEM 146<br />
ENABLE ALERTMAIL 66<br />
ENABLE DHCPV6 67<br />
ENABLE EBIPA 53<br />
ENABLE ENCLOSURE_IP_MODE 67<br />
ENABLE FIRMWARE MANAGEMENT 119<br />
ENABLE GUI_LOGIN_DETAIL 86<br />
ENABLE HTTPS 67<br />
ENABLE IPV6 68<br />
ENABLE LDAP 38<br />
ENABLE LLF 86<br />
ENABLE LOGIN_BANNER 67<br />
command, SET LOGIN_BANNER_TEXT 73<br />
ENABLE NTP 68<br />
ENABLE REMOTE SUPPORT IRS 161<br />
ENABLE REMOTE SUPPORT MAINTENANCE 161<br />
ENABLE ROUTER ADVERTISEMENTS 68<br />
ENABLE SECURESH 69<br />
ENABLE SNMP 69<br />
ENABLE STRONG PASSWORDS 25<br />
ENABLE SYSLOG REMOTE 149<br />
ENABLE TELNET 69<br />
ENABLE TRUSTED HOST 69<br />
ENABLE URB 121<br />
ENABLE USER 26<br />
ENABLE VLAN 156<br />
ENABLE XMLPREPLY 70<br />
Enclosure Bay IP Addressing (EBIPA) commands 53<br />
enclosure DVD commands 147<br />
Enclosure Firmware Management commands 111<br />
enclosure management commands 85<br />
Enclosure network configuration commands 58<br />
Europe time zone 174<br />
event notifications, defining 167<br />
EXIT 20<br />
F<br />
force downgrades 109<br />
FORCE TAKEOVER 46<br />
G<br />
general commands 20<br />
general management commands 46<br />
Generat certificate prompts 47<br />
GENERATE CERTIFICATE 46<br />
GENERATE KEY 48<br />
H<br />
HELP 20<br />
help resources 170<br />
HISTORY 26<br />
<strong>HP</strong> SIM commands 44<br />
<strong>HP</strong>ONCFG 122<br />
I<br />
iLO AutoLogin 18<br />
Integrity blade restrictions 16<br />
Interconnect management commands 138<br />
IP addresses, setting up 15<br />
L<br />
Linux support 15<br />
local access 13<br />
LOGOUT 21<br />
P<br />
PING 49<br />
polar time zone 175<br />
POWEROFF INTERCONNECT 139<br />
POWEROFF SERVER 122<br />
POWERON INTERCONNECT 140<br />
POWERON SERVER 123<br />
privilege levels 16, 18<br />
Q<br />
QUIT 21<br />
Index 183
R<br />
rack commands 22<br />
rack settings 22<br />
REBOOT SERVER 123<br />
remote access 13<br />
Remote support commands 161<br />
remote syslog commands 149<br />
remote system logging 151<br />
REMOVE CA CERTIFICATE 34<br />
REMOVE EBIPA 54<br />
REMOVE <strong>HP</strong>SIM CERTIFICATE 44<br />
REMOVE LDAP CERTIFICATE 38<br />
REMOVE LDAP GROUP 38<br />
REMOVE OA ADDRESS IPV6 70<br />
REMOVE OA DNS 70<br />
REMOVE OA DNS IPV6 71<br />
REMOVE SNMP TRAPRECEIVER 71<br />
REMOVE TRUSTED HOST 71<br />
REMOVE USER 27<br />
REMOVE USER CERTIFICATE 34<br />
REMOVE VLAN 156<br />
reserved words 15<br />
RESTART INTERCONNECT 140<br />
RESTART OA 86<br />
restrictions, Integrity blade 16<br />
S<br />
SAVE VLAN 156<br />
SEND REMOTE SUPPORT DATACOLLECTION 162<br />
serial port 13<br />
SET ALERTMAIL MAILBOX 72<br />
SET ALERTMAIL SENDERDOMAIN 72<br />
SET ALERTMAIL SM 72<br />
SET DATE 86<br />
SET DEVICE SERIAL_NUMBER BLADE 49<br />
SET DISPLAY 87<br />
SET EBIPA 54<br />
SET EBIPA INTERCONNECT 55<br />
SET EBIPA SERVER 55<br />
SET ENCLOSURE ASSET 87<br />
SET ENCLOSURE NAME 88<br />
SET ENCLOSURE PART NUMBER 88<br />
SET ENCLOSURE PDU TYPE 88<br />
SET ENCLOSURE POWER_CAP 164<br />
SET ENCLOSURE<br />
POWER_CAP_BAYS_TO_EXCLUDE 164<br />
SET ENCLOSURE SERIAL_NUMBER 89<br />
SET ENCLOSURE UID 89<br />
SET FACTORY 49<br />
SET FIPS MODE 73<br />
SET FIRMWARE MANAGEMENT 111<br />
SET FIRMWARE MANAGEMENT BAYS_TO_INCLUDE<br />
SERVER 113<br />
SET FIRMWARE MANAGEMENT FORCE<br />
DOWNGRADE 113<br />
SET FIRMWARE MANAGEMENT POLICY 112<br />
SET FIRMWARE MANAGEMENT POWER 112<br />
SET FIRMWARE MANAGEMENT SCHEDULE 112<br />
SET FIRMWARE MANAGEMENT URL 111<br />
SET <strong>HP</strong>SIM TRUST MODE 45<br />
SET INTERCONNECT POWERDELAY 140<br />
SET INTERCONNECT UID 141<br />
SET IPCONFIG 75<br />
SET LDAP GROUP ACCESS 39<br />
SET LDAP GROUP DESCRIPTION 39<br />
SET LDAP NAME MAP 39<br />
SET LDAP PORT 40<br />
SET LDAP SERVER 40<br />
SET LLF INTERVAL 89<br />
SET LOGIN_BANNER_TEXT 73<br />
SET MINIMUM PASSWORD LENGTH 27<br />
SET NIC 124<br />
SET NTP POLL 75<br />
SET NTP PRIMARY 75<br />
SET NTP SECONDARY 76<br />
SET OA GATEWAY 74<br />
SET OA NAME 74<br />
SET OA UID 74<br />
SET OA USB 90<br />
SET PASSWORD 27<br />
SET POWER LIMIT 90<br />
SET POWER MODE 90<br />
SET POWER SAVINGS 91<br />
SET RACK NAME 22<br />
SET REMOTE SYSLOG PORT 149<br />
SET REMOTE SYSLOG SERVER 150<br />
SET SCRIPT MODE 50<br />
SET SERIAL BAUD 76<br />
SET SERVER BOOT 124<br />
SET SERVER BOOT ONCE 124<br />
SET SERVER DVD for USB key 152<br />
SET SERVER POWERDELAY 125<br />
SET SERVER UID 125<br />
SET SESSION TIMEOUT 28<br />
SET SNMP COMMUNITY 77<br />
SET SNMP CONTACT 76<br />
SET SNMP LOCATION 77<br />
SET TIME ZONE 91<br />
SET URB 126<br />
SET USER ACCESS 28<br />
Index 184
SET USER CONTACT 28<br />
SET USER FULLNAME 29<br />
SET USER PASSWORD 29<br />
SET VLAN DEFAULT 156<br />
SET VLAN FACTORY 157<br />
SET VLAN INTERCONNECT 157<br />
SET VLAN IPCONFIG DHCP 158<br />
SET VLAN IPCONFIG SAVE 158<br />
SET VLAN IPCONFIG STATIC 158<br />
SET VLAN OA 159<br />
SET VLAN REVERT 159<br />
SET VLAN SERVER 159<br />
SHOW ALL 50<br />
SHOW CA CERTIFICATE 34<br />
SHOW CONFIG 91<br />
SHOW DATE 92<br />
SHOW DEVICE SERIAL_NUMBER BLADE 52<br />
SHOW DISPLAY EVENTS 93<br />
SHOW EBIPA 55<br />
SHOW ENCLOSURE FAN 93<br />
SHOW ENCLOSURE INFO 94<br />
SHOW ENCLOSURE LCD 94<br />
SHOW ENCLOSURE POWER_CAP 165<br />
SHOW ENCLOSURE<br />
POWER_CAP_BAYS_TO_EXCLUDE 165<br />
SHOW ENCLOSURE POWER_SUMMARY 95<br />
SHOW ENCLOSURE POWERSUPPLY 96<br />
SHOW ENCLOSURE STATUS 97<br />
SHOW ENCLOSURE TEMP 97<br />
SHOW FIPS MODE 77<br />
SHOW FIRMWARE 113<br />
SHOW FIRMWARE LOG SERVER 117<br />
SHOW FIRMWARE LOG SESSSION 118<br />
SHOW FIRMWARE MANAGEMENT 114<br />
SHOW FIRMWARE MANAGEMENT LOG 114<br />
SHOW FIRMWARE SUMMARY 115<br />
SHOW FIRMWARE SUMMARY CSV 116<br />
SHOW FRU 98<br />
SHOW HEALTH 78<br />
SHOW <strong>HP</strong>SIM INFO 45<br />
SHOW INTERCONNECT INFO 141<br />
SHOW INTERCONNECT LIST 143<br />
SHOW INTERCONNECT PORT MAP 143<br />
SHOW INTERCONNECT POWERDELAY 144<br />
SHOW INTERCONNECT SESSION 144<br />
SHOW INTERCONNECT STATUS 144<br />
SHOW LDAP CERTIFICATE 40<br />
SHOW LDAP GROUP 41<br />
SHOW LDAP INFO 41<br />
SHOW LOGIN_BANNER 80<br />
SHOW NETWORK 80<br />
SHOW OA 100<br />
SHOW OA CERTIFICATE 100<br />
SHOW OA INFO 101<br />
SHOW OA NETWORK 101<br />
SHOW OA STATUS 102<br />
SHOW OA UPTIME 103<br />
SHOW OA USB 103<br />
SHOW PASSWORD SETTINGS 29<br />
SHOW RACK INFO 22<br />
command, SET FIPS MODE 73<br />
SHOW RACK NAME 23<br />
SHOW REMOTE SUPPORT 162<br />
SHOW REMOTE SUPPORT EVENTS 163<br />
SHOW SERVER BOOT 126<br />
SHOW SERVER DVD 147<br />
SHOW SERVER FIRMWARE 118<br />
SHOW SERVER INFO 127<br />
SHOW SERVER LIST 128<br />
SHOW SERVER NAMES 129<br />
SHOW SERVER PORT MAP 129<br />
SHOW SERVER POWERDELAY 131<br />
SHOW SERVER STATUS 132<br />
SHOW SERVER TEMP 134<br />
SHOW SESSION TIMEOUT 30<br />
SHOW SNMP 82<br />
SHOW SSHFINGERPRINT 83<br />
SHOW SSHKEY 83<br />
SHOW SYSLOG 104<br />
SHOW SYSLOG HISTORY 106<br />
SHOW SYSLOG OA 105<br />
SHOW SYSLOG SERVER 135<br />
SHOW SYSLOG SETTINGS 150<br />
SHOW TOPOLOGY 23<br />
SHOW TWOFACTOR INFO 35<br />
SHOW URB 138<br />
SHOW USBKEY 152<br />
SHOW USER 30<br />
SHOW VCMODE 107<br />
SHOW VLAN 159<br />
SLEEP 31<br />
SSH session 13<br />
SUBSTITUTE 136<br />
T<br />
technical support 170<br />
telnet session 13<br />
terminal emulator session 13<br />
TEST ALERTMAIL 83<br />
TEST LDAP 42<br />
TEST REMOTE_SUPPORT 162<br />
Index 185
TEST SNMP 84<br />
TEST SYSLOG 150<br />
TEST URB 139<br />
time zones 171<br />
Two-Factor Authentication commands 33<br />
U<br />
UNASSIGN 31<br />
UNASSIGN FOR LDAP 42<br />
UNASSIGN OA 31<br />
UNASSIGN OA LDAP GROUP 42<br />
UNASSIGN SERVER 137<br />
universal time zone 171<br />
UPDATE 107<br />
UPDATE FIRMWARE SERVER 120<br />
UPDATE ILO 108<br />
UPDATE IMAGE 109<br />
UPDATE IMAGE using USB key 153<br />
UPLOAD CONFIG 109<br />
UPLOAD CONFIG using USB key 154<br />
UPLOAD SUPPORTDUMP 110<br />
UPLOAD SYSLOG 106<br />
USB key command 152, 154<br />
User account commands 24<br />
V<br />
VLAN commands 155<br />
W<br />
what's new 11<br />
Index 186