MOBOTIX
MOBOTIX
MOBOTIX

You also want an ePaper? Increase the reach of your titles
YUMPU automatically turns print PDFs into web optimized ePapers that Google loves.
EN<br />
MxCC 2.0: Manual<br />
The HiRes Video Company<br />
EN<br />
Professional Professionelles IP Video-Management<br />
IP HiRes<br />
3 Megapixel<br />
2048 x 1536<br />
Software zoom<br />
Skyline<br />
Format free<br />
Each image format<br />
freely definable<br />
30 Frames/s<br />
VGA (640 x 480)<br />
30 F/s Mega<br />
Virtual PTZ<br />
Digital pan, tilt,<br />
zoom<br />
Backlight<br />
Safe using CMOS<br />
without mechanical iris<br />
Internal DVR<br />
Internal via SD card,<br />
external via Network<br />
Win/Lin/Mac<br />
Recording<br />
via Network on PC<br />
up to 1 Terabyte<br />
Microphone & speaker<br />
Audio<br />
bi-directional via IP,<br />
variable framerates<br />
SIP-Client with video<br />
IP Telephony<br />
Alarm notify,<br />
cam remote control<br />
V 2.0- 09/2009<br />
www.mobotix.com<br />
<strong>MOBOTIX</strong>: Control Center.<br />
Free software download: www.mobotix.de > Support > Software-Downloads<br />
Current PDF File: www.mobotix.de > Support > Manuals<br />
Version: 2.0, Last updated: June 15, 2009<br />
HiRes Video Innovations<br />
The German company <strong>MOBOTIX</strong> AG is known as the leading pioneer in network camera technology and its<br />
decentralized concept has made high-resolution video systems cost effi cient.<br />
<strong>MOBOTIX</strong> AG • D-67722 Langmeil • Tel: +49-6302-9816-103 • Fax: +49-6302-9816-190 • sales@mobotix.com<br />
VideoMotion<br />
Multiple windows<br />
precision pixel-based<br />
-22°F ... +140°F<br />
Weatherproof<br />
- 30° ... +60°C, IP65,<br />
no heating necessary<br />
IEEE 802.3af<br />
PoE<br />
Network power<br />
even in winter<br />
Robust<br />
No moving parts<br />
fiber glass housing<br />
MxCC/MxEasy<br />
Licence free<br />
Video-Management-<br />
Software
MxControlCenter Manual<br />
Notes<br />
© <strong>MOBOTIX</strong> AG • Security-Vision-Systems • Made in Germany<br />
www.mobotix.com • sales@mobotix.com
Contents<br />
3/152<br />
Contents<br />
1 Concept 7<br />
1.1 What Is MxControlCenter 7<br />
1.2 Application Examples 8<br />
1.2.1 Example: Installing And Starting Up A Small Video Monitoring System 8<br />
1.2.2 Example: Live Monitoring Of A Parking Garage 8<br />
1.2.3 Example: Live Monitoring Of Spectators In A Soccer Stadium 9<br />
1.2.4 Example: Live Monitoring Inside A Train Station 9<br />
1.2.5 Example: Monitoring An Isolated Parking Lot With An Alarm System Linked To<br />
The Main Office Of A Security Company 10<br />
1.2.6 Example: Review Of Images And Alarms After A Burglary Occurred In An Office<br />
Building 10<br />
2 Getting Started 13<br />
2.1 Installation 13<br />
2.2 Finding And Configuring Video Sources 14<br />
2.2.1 Connecting <strong>MOBOTIX</strong> Cameras 14<br />
2.2.2 Finding <strong>MOBOTIX</strong> Cameras 15<br />
2.2.3 Adding Video Sources Manually 18<br />
2.2.4 Using Video Sources In MxControlCenter 18<br />
2.3 User Interface And Operation 20<br />
2.3.1 Elements Of The Main Window 20<br />
2.3.2 Layout Manager 22<br />
2.3.3 Alarm List 23<br />
2.3.4 Camera Configuration 24<br />
2.3.5 Update Assistant 25<br />
2.3.6 Program Settings 26<br />
2.4 Live Monitoring With Numerous Cameras 27<br />
2.4.1 Monitoring In Predefined Layouts 27<br />
2.4.2 Monitoring The Camera Connection 29<br />
2.4.3 Creating Layouts 30<br />
2.4.4 Procedure 30<br />
2.4.5 Using The Sequencer Features 31<br />
2.4.6 Using The vPTZ Features 32<br />
2.5 Alarm Management 34<br />
2.5.1 Preparing MxControlCenter 34<br />
2.5.2 Preparing The Cameras 36<br />
2.5.3 Alarm Display 37<br />
2.5.4 Alarm Acknowledgement 38<br />
2.6 Video Searches And Export Features 39<br />
2.6.1 Switching Display Windows In Player Mode 39<br />
© <strong>MOBOTIX</strong> AG • Security-Vision-Systems • Made in Germany<br />
www.mobotix.com • sales@mobotix.com
4/152 MxControlCenter Manual: Contents<br />
2.6.2 Defining Player Windows 41<br />
2.6.3 Using Video Search 43<br />
2.6.4 Export List And Data Export 44<br />
2.7 Video Processing 47<br />
2.7.1 Image Post-Processing 47<br />
2.7.2 Image Distortion Correction 47<br />
2.8 Control Center And Management Features 48<br />
2.8.1 Integrating Third-Party Digital/Analog Cameras 48<br />
2.8.2 Controlling PTZ Cameras And Mechanical Pan/Tilt Heads 50<br />
2.9 Configuring MxControlCenter 51<br />
2.9.1 Modifying, Saving And Loading Program Options 51<br />
2.9.2 Customizing The User Interface 51<br />
2.9.3 Managing MxControlCenter Configurations 52<br />
2.9.4 Editing Camera Configurations 53<br />
2.9.5 Managing Camera Configurations 53<br />
3 Advanced Features 57<br />
3.1 MxControlCenter Controls 57<br />
3.1.1 Buttons On The Toolbar 57<br />
3.1.2 The "Layouts" Sidebar Panel 60<br />
3.1.3 The "Player" Sidebar Panel 61<br />
3.1.4 The "PTZ Controls" Sidebar Panel 64<br />
3.2 Editing Layouts 72<br />
3.2.1 Grid Layouts 72<br />
3.2.2 Background Layouts 78<br />
3.2.3 Additional Options For Editing Layouts 82<br />
3.3 Alarm Processing 83<br />
3.3.1 Alarm List 85<br />
3.3.2 Displaying Stored Alarms 86<br />
3.4 Video Searches And Export Features 88<br />
3.5 Remote Control Using Network Messages 91<br />
3.6 Saving The Configuration Of MxControlCenter Cameras 94<br />
3.6.1 Global And Local Folders 94<br />
3.6.2 Storing The Program Settings 94<br />
3.7 Users And Passwords 95<br />
3.7.1 Access Levels Of MxControlCenter 95<br />
3.7.2 Activating Password Protection In MxControlCenter 96<br />
3.8 Security Considerations 97<br />
3.8.1 General Thoughts On Network Security 97<br />
3.8.2 Restricting Public Access 97<br />
3.8.3 Camera Settings (In The Browser) 97<br />
3.8.4 Settings In MxControlCenter 97<br />
© <strong>MOBOTIX</strong> AG • Security-Vision-Systems • Made in Germany<br />
www.mobotix.com • sales@mobotix.com
Contents<br />
5/152<br />
3.9 Image Post-Processing 99<br />
3.9.1 Overview 99<br />
3.9.2 Configuring Image Post-Processing 100<br />
3.9.3 Activating/Deactivating Image Post-Processing 100<br />
3.10 Third-Party Cameras With PTZ Controls And Pan/Tilt Heads 101<br />
3.10.1 Overview 101<br />
3.10.2 Connecting Third-Party IP And Analog Cameras 101<br />
3.10.3 Activating Integrated PTZ Units And Pan/Tilt Heads 102<br />
3.10.4 Using <strong>MOBOTIX</strong> Cameras With Pan/Tilt Heads 102<br />
3.10.5 Using Analog Cameras In MxServer 106<br />
4 Configuring <strong>MOBOTIX</strong> Cameras 111<br />
4.1 The "Camera Configuration" Dialog Box 111<br />
4.2 The "Overview" Tab 113<br />
4.3 The "Image Settings" Tab 114<br />
4.4 The "Exposure" Tab 116<br />
4.5 The "Recording" Tab 117<br />
4.6 Updating The Camera Software 120<br />
4.6.1 Preparing The Software Update 120<br />
4.6.2 Updating System Software 121<br />
4.7 Saving And Importing Camera Configurations 122<br />
5 MxControlCenter Options 123<br />
5.1 Overview 123<br />
5.2 The "General" Tab 124<br />
5.3 The "Alarm List" Tab 130<br />
5.4 The "Remote Control" Tab 132<br />
5.4.1 General Remote Control And Camera IP Notify 132<br />
5.4.2 Camera IP Notify Only Port 134<br />
5.4.3 Camera IP Notify Options 135<br />
5.5 Camera Tabs 136<br />
5.5.1 Camera Access 136<br />
5.5.2 Layout And Display Options 137<br />
5.5.3 PTZ/Rotor Control 139<br />
A <strong>MOBOTIX</strong> Glossary 141<br />
Index 147<br />
© <strong>MOBOTIX</strong> AG • Security-Vision-Systems • Made in Germany<br />
www.mobotix.com • sales@mobotix.com
6/152 MxControlCenter Manual: Contents<br />
Typographic Conventions<br />
We use the following formatting to indicate special elements in this manual:<br />
• User Interface Elements: This formatting is used for all user interface elements of<br />
MxControlCenter: Click on the PTZ Views button.<br />
• Values in Selection Boxes: If you are expected to select values in selection boxes,<br />
these values are formatted as in this example: ... and highlight Unlimited in the<br />
selection box.<br />
• User Input: Input in text entry boxes is formatted as in this example: Double-click<br />
the camera name and enter the desired name (for example, Back Entrance).<br />
• Keys on the Computer Keyboard: The following format is used if you are expected<br />
to press any keys on the keyboard: Press the Hash key (#) to reset the zoom settings.<br />
• File Names: If the text refers to file and folder (directory) names, they are formatted<br />
as in this example: Double-click the MxControlCenter.msi file to install it.<br />
• Cross References: The following formatting is used when referring to other sections<br />
in this manual: For more information on this topic, see Section 3.2 Backing Up And<br />
Restoring Settings.<br />
• Web Links: Hyperlinks in the text are formatted as follows: For additional information,<br />
see our www.mobotix.com website.<br />
• Explanations: They are presented as follows:<br />
An image series includes all the images (or the entire video sequence) that have<br />
been saved for an event (alarm). In addition, ...<br />
• Examples: They are presented as follows:<br />
http://192.168.1.182:8001/fullscreen=1<br />
(minimizes MxControlCenter to the taskbar)<br />
Manuals For <strong>MOBOTIX</strong> Products<br />
All <strong>MOBOTIX</strong> products have corresponding manuals that you can download as *.pdf files<br />
at www.mobotix.com under Support > Manuals:<br />
• Camera Manual Part 1: This camera manual is different for each camera model<br />
and describes the specific features for mounting and operating the camera model<br />
in question.<br />
• Camera Software Manual Part 2: This software manual describes the software<br />
features of the browser-based user interface for all <strong>MOBOTIX</strong> cameras.<br />
© <strong>MOBOTIX</strong> AG • Security-Vision-Systems • Made in Germany<br />
www.mobotix.com • sales@mobotix.com
Contents<br />
7/152<br />
Notes On <strong>MOBOTIX</strong> Hardware Products<br />
• RoHS Declaration: The products of <strong>MOBOTIX</strong> AG are in full compliance with Art. 5 of<br />
the German Electrical and Electronic Equipment Act and the E.U. Directive 2002/95/<br />
EC on the Restriction of the Use of Certain Hazardous Substances in Electrical and<br />
Electronic Equipment (RoHS) as far as they are subject to these regulations. (You<br />
can fi nd the RoHS Declaration of www.mobotix.com under www.mobotix.com/<br />
eng_US/Support/Spec-Sheets.)<br />
• Disposal: Electrical and electronic products contain many reusable materials. For<br />
this reason, we would ask that you dispose of <strong>MOBOTIX</strong> products at the end of their<br />
service life in accordance with all legal requirements and regulations (or deposit<br />
these products at a municipal collection center).<br />
<strong>MOBOTIX</strong> products may not be disposed of with household waste!<br />
If the product contains a battery, please dispose of the battery separately (the corresponding<br />
product manuals contain specifi c directions if the product contains a battery).<br />
Disclaimer<br />
<strong>MOBOTIX</strong> AG does not assume any responsibility for damage resulting from improper use<br />
or failure to comply with the manuals or the applicable rules and regulations. Our General<br />
Terms and Conditions apply. You can download the current version of the General Terms<br />
and Conditions on our website at www.mobotix.com.<br />
Copyright<br />
All rights reserved. <strong>MOBOTIX</strong>, MxControlCenter, MxEasy, ExtIO and CamIO are internationally<br />
protected trademarks of <strong>MOBOTIX</strong> AG. Microsoft, Windows, Windows Server and<br />
the Windows logo are registered trademarks of Microsoft Corporation. Apple, the Apple<br />
logo, Macintosh, OS X and Bonjour are trademarks of Apple Inc. Linux is a trademark of<br />
Linus Torvalds. All other brand names mentioned herein may be trademarks or registered<br />
trademarks of the respective owners.<br />
Copyright © 1999-2009 <strong>MOBOTIX</strong> AG, Langmeil, Germany.<br />
Information subject to change without notice!<br />
© <strong>MOBOTIX</strong> AG • Security-Vision-Systems • Made in Germany<br />
www.mobotix.com • sales@mobotix.com
8/152 MxControlCenter Manual: Concept<br />
1 CONCEPT<br />
1.1 What Is MxControlCenter<br />
<strong>MOBOTIX</strong> MxControlCenter is a free application that provides the ideal multifunctional<br />
solution for all your security needs. MxControlCenter allows you to easily connect <strong>MOBOTIX</strong><br />
cameras and third-party cameras to a video security system. It provides a very simple<br />
method for adding new cameras to a system and viewing the live images they capture.<br />
A wide variety of viewing options is also available for displaying images from one or<br />
more cameras.<br />
As a professional video management system, MxControlCenter also acts as a tool for<br />
handling video and audio data in IP networks. It not only lets you view the images from<br />
a connected camera in real time, you can also edi them. Note that editing in this context<br />
means that both the camera and MxControlCenter are capable of manipulating displayed<br />
images using a number of functions. For example, you can zoom in on one of the images<br />
supplied by the camera to get a closer look at an area of possible interest or adjust the<br />
brightness of an image without changing the image settings of the camera.<br />
Furthermore MxControlCenter provides you with the ability to subsequently view and<br />
search alarm images that have been recorded externally on a fi le server or internally in<br />
the cameras. A camera alarm, for example, triggered by the camera's motion detection,<br />
can initiate a specifi c action at the control center. Such actions may include bringing the<br />
© <strong>MOBOTIX</strong> AG • Security-Vision-Systems • Made in Germany<br />
www.mobotix.com • sales@mobotix.com
Application examples<br />
9/152<br />
current live images from the alarm-triggering camera to the foreground and having an<br />
acoustic signal emitted over the viewer's computer.<br />
In addition to these features, MxControlCenter also allows you to independently display<br />
and store the alarms of all monitoring cameras. The program can therefore be used<br />
to perform a subsequent analysis of events that have been recorded within the visual<br />
range of multiple cameras. Sequencing these image recordings can help you trace the<br />
events surrounding a burglary, for example. Using the integrated export list, you can then<br />
combine the video and audio data recorded by one or more cameras into a clip that can<br />
be exported as an *.avi fi le for further analysis.<br />
This is just one of the many MxControlCenter features that are explained in this manual<br />
in a clear and concise manner. The following section contains examples of how to use<br />
<strong>MOBOTIX</strong> cameras in conjunction with MxControlCenter.<br />
1.2 Application examples<br />
Examples of how to use MxControlCenter are provided in the following sections.<br />
1.2.1 example: Installing And Starting Up A Small Video Monitoring System<br />
The director of a small automobile museum asks an in-house technician to install a surveillance<br />
camera to monitor an area of valuable exhibits during opening hours. The in-house<br />
technician has very little experience with confi guring computers and networks. Yet once<br />
the technician connects the camera to the existing Ethernet network, and installs and<br />
runs MxControlCenter on the director's computer, they are able to carry out the necessary<br />
confi gurations without any diffi culty. The camera is detected automatically on the network<br />
under its own name and is quickly confi gured in a few easy steps. Even the director's wish<br />
for after-hours surveillance of the exhibit rooms and notifi cation of the night watchman<br />
in the event of any irregularities now appears as a manageable task to the technician.<br />
1.2.2 example: Live Monitoring Of A Parking Garage<br />
<strong>MOBOTIX</strong> cameras are used to monitor a three-level parking garage. During opening<br />
hours, a security guard in the parking garage's control room uses MxControlCenter to<br />
monitor the parking levels in real time. The live monitoring feature is set up to include a<br />
predefi ned view (a layout) of each parking level based on all the camera images of that<br />
parking level. MxControlCenter automatically cycles through the parking level views at<br />
preset intervals (the layout sequencer feature).<br />
© <strong>MOBOTIX</strong> AG • Security-Vision-Systems • Made in Germany<br />
www.mobotix.com • sales@mobotix.com
10/152 MxControlCenter Manual: Concept<br />
1.2.3 example: Live Monitoring Of Spectators In A Soccer Stadium<br />
To obtain the best images from the <strong>MOBOTIX</strong> cameras installed at the various ticket<br />
counters, entrances, and exits of the soccer stadium, the system administrator creates a<br />
layout beforehand that is specifi cally adapted to the situation at hand. To that end the<br />
system administrator positions the individual cameras on a layout of the stadium according<br />
to their location. Before a game begins, MxControlCenter is launched by security<br />
personnel in the control center and it automatically displays the right layout for each<br />
workstation. The head of security can watch live images of the ticket counters and entrances<br />
before the game, switch to the cameras inside the stadium during the game, and then<br />
monitor the exits after the game. In critical situations, the security personnel can open an<br />
alarm plan specifi cally set up for each camera, which lists the radio call frequencies for<br />
the responsible guard in the area of the camera.<br />
1.2.4 example: Live Monitoring Inside A Train Station<br />
The platforms of a train station are to be monitored with <strong>MOBOTIX</strong> cameras. Four cameras<br />
are installed on each platform for that purpose. Life monitoring is carried out using<br />
MxControlCenter. A grid layout for each platform is created in the program based on<br />
the live camera images of that platform (see Section 3.2.1, Grid Layouts). The program<br />
interface is confi gured so that security personnel can only access the buttons for switching<br />
layout views (see Section 2.9.2, Customizing The User Interface). It is also confi gured to<br />
provide visual notifi cation in the image when a connection error occurs or the maximum<br />
permitted latency time between image creation and display is exceeded (see Section 5.4,<br />
The “Remote Control” Tab).<br />
© <strong>MOBOTIX</strong> AG • Security-Vision-Systems • Made in Germany<br />
www.mobotix.com • sales@mobotix.com
Application examples<br />
11/152<br />
1.2.5 example: Monitoring An Isolated Parking Lot With An Alarm System<br />
Linked To The Main Office Of A Security Company<br />
An auto dealership installs <strong>MOBOTIX</strong> cameras in isolated parking lots where vehicles<br />
have been damaged repeatedly in the past. A technician defi nes a display layout for each<br />
parking lot with the cameras that are installed there. Each camera is confi gured to detect<br />
any movement near the fence surrounding the parking lots.<br />
The infrared sensors of the night cameras also trigger an alarm when heat is detected. If a<br />
camera detects a movement, a network message sent from the camera to MxControlCenter<br />
automatically opens the layout of the relevant parking lot in the main offi ce of the employed<br />
security company. An alarm sound is simultaneously emitted until it is acknowledged<br />
by a staff member. After acknowledging the alarm, the staff member can initiate the<br />
necessary measures.<br />
1.2.6 example: Review Of Images And Alarms After A Burglary Occurred In An<br />
Office Building<br />
In addition to live monitoring of the main entrance by the receptionist during regular offi ce<br />
hours, the <strong>MOBOTIX</strong> cameras installed on the fl oors, the staircases, and the parking lots<br />
in front of and behind the building are confi gured to detect and alert of any movement<br />
or changes in brightness at night. Furthermore, the manager will receive an e-mail every<br />
time a camera triggers an alarm.<br />
© <strong>MOBOTIX</strong> AG • Security-Vision-Systems • Made in Germany<br />
www.mobotix.com • sales@mobotix.com
12/152 MxControlCenter Manual: Concept<br />
Once notifi ed, the manager can search through the video recordings of the cameras in<br />
the morning without exposing himself or herself to any danger. The route taken by the<br />
burglar from the parking lot to the actual break-in in the server room can be plotted. A<br />
"video" can be compiled using these recordings and show the entire burglary up to the<br />
point when, for example, a stolen computer and printer are loaded into the trunk, including<br />
the license plate number of that vehicle. It can thus provide valuable evidence for<br />
further criminal investigation.<br />
© <strong>MOBOTIX</strong> AG • Security-Vision-Systems • Made in Germany<br />
www.mobotix.com • sales@mobotix.com
Installation<br />
13/152<br />
2 GeTTInG STARTeD<br />
This chapter describes the main tasks of MxControlCenter and how to perform them.<br />
Chapter 3, Advanced Features off ers a more detailed description of the individual features<br />
while also discussing advanced features that go beyond "normal" installations.<br />
2.1 Installation<br />
If you have an MxControlCenter installation CD, insert it into the DVD drive of your computer.<br />
If you do not have the installation CD or would just like to install an update, you can download<br />
the latest Windows installer from the <strong>MOBOTIX</strong> website as an *.msi fi le and install<br />
it manually. The latest versions are available at www.mobotix.com under Support ><br />
Software Downloads > MxControlCenter.<br />
If you insert the installation CD, the installation process will start automatically and you<br />
will be guided through the necessary steps. If you have downloaded the latest Windows<br />
installer, double-click the *.msi fi le to initiate the installation process.<br />
The Installer (currently only available in English) copies the application fi les to your computer<br />
and then creates the designated shortcuts (Desktop, Start Menu, etc.) during the installation<br />
process. If you have any older program versions installed, the Installer will automatically<br />
update them without changing your existing confi gurations.<br />
© <strong>MOBOTIX</strong> AG • Security-Vision-Systems • Made in Germany<br />
www.mobotix.com • sales@mobotix.com
14/152 MxControlCenter Manual: Getting Started<br />
Caution<br />
MxControlCenter will attempt to fi nd all <strong>MOBOTIX</strong> cameras in the physically connected<br />
network (i.e., every <strong>MOBOTIX</strong> cameras with a factory IP address of 10.x.x.x). Make<br />
sure that the fi rewall settings on your computer do not block network traffi c with<br />
MxControlCenter. If <strong>MOBOTIX</strong> cameras are found, MxControlCenter. can automatically<br />
reconfi gure them so that they are available on your computer.<br />
If you do not have permission to modify these settings on your computer, contact<br />
your system administrator for assistance.<br />
For detailed information on the automatic camera search feature and manual confi<br />
guration, refer to Section 2.2.2, Finding <strong>MOBOTIX</strong> Cameras.<br />
2.2 Finding And Configuring Video Sources<br />
Video sources not only refer to <strong>MOBOTIX</strong> cameras, but also to third-party IP cameras, fi le<br />
server paths, MxPEG clips and analog cameras connected via MxServer (for example,<br />
analog dome cameras). Video sources unrelated to <strong>MOBOTIX</strong> cameras are not found<br />
automatically and need to be added manually.<br />
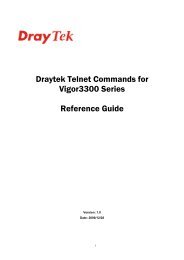
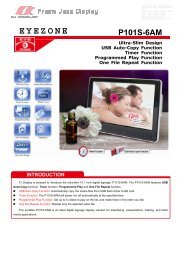
2.2.1 Connecting <strong>MOBOTIX</strong> Cameras<br />
MxControlCenter provides you with a convenient tool for starting up and confi guring new<br />
<strong>MOBOTIX</strong> cameras. You do not need extensive network knowledge to properly connect<br />
your camera. Simply connect the camera to either the Poe switch or the network Power<br />
Adapter as shown in the fi gures below.<br />
PoE Switch<br />
10/100 MBps<br />
Network (TCP/IP)<br />
10.3.0.199<br />
Installation with PoE switch<br />
© <strong>MOBOTIX</strong> AG • Security-Vision-Systems • Made in Germany<br />
www.mobotix.com • sales@mobotix.com
Finding And Configuring Video Sources<br />
15/152<br />
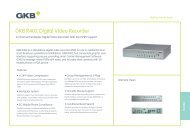
A PoE switch or the <strong>MOBOTIX</strong> Network Power Adapter provides the power supply and<br />
network connection to your <strong>MOBOTIX</strong> camera over an Ethernet cable:<br />
10.3.0.200<br />
Switch<br />
10/100 Mbps<br />
Network (TCP/IP)<br />
Installation with <strong>MOBOTIX</strong><br />
Network Power Adapter<br />
Now make sure that your computer is connected to the same PoE switch or the Network<br />
Power Adapter (the computer/power connection). When the camera is ready for use, the<br />
top LeD glows and the two red LeDs blink for the M12 and D12 models and the green<br />
LeD glows and the red LeD blinks for the M22M and D22M models.<br />
More information on starting up your camera can be found in the respective camera manual.<br />
2.2.2 Finding <strong>MOBOTIX</strong> Cameras<br />
Launch MxControlCenter after successful installation (see Section 2.1, Installation) by doubleclicking<br />
the shortcut that was created by the Installer on your Desktop or the executable<br />
MxCC.exe fi le in the installation directory.<br />
When MxControlCenter is launched for the fi rst time, the Add Cameras - Search and<br />
Select dialog box opens and the application automatically searches for <strong>MOBOTIX</strong> cameras<br />
in the local network. To perform a camera search at a later stage, select Camera ><br />
Add from the menu.<br />
© <strong>MOBOTIX</strong> AG • Security-Vision-Systems • Made in Germany<br />
www.mobotix.com • sales@mobotix.com
16/152 MxControlCenter Manual: Getting Started<br />
If your <strong>MOBOTIX</strong> camera is properly connected, it should appear together with the existing<br />
video sources in the following list:<br />
Detected Cameras Are Located In A Different Subnet<br />
The symbols in the fi rst column and the legend in the dialog box indicate whether you<br />
can access a particular camera directly from MxControlCenter. Note that you can access<br />
any camera designated by the green OK symbol. Cameras designated by the yellow<br />
Different Subnet symbol are located in a diff erent subnet. This usually applies to new<br />
cameras or cameras that have been reset to their factory settings.<br />
Note<br />
MxControlCenter fi nds all <strong>MOBOTIX</strong> cameras provided that both your computer and<br />
the cameras are located in the same physical network .<br />
A physical network includes all devices that access a shared Ethernet network (for<br />
example, using switches) without having routers that segment the individual portions of<br />
the network. The actual transmission method (cable, wi-fi , etc.) is irrelevant in this regard.<br />
Select the cameras that you would like to display in a Layout (a view with cameras) and<br />
click Add selected cameras.<br />
© <strong>MOBOTIX</strong> AG • Security-Vision-Systems • Made in Germany<br />
www.mobotix.com • sales@mobotix.com
Finding And Configuring Video Sources<br />
17/152<br />
The Add cameras dialog box now appears. You can choose to either create a new layout<br />
with the cameras that have been found or simply add those cameras to MxControlCenter.<br />
If some of the selected cameras are in diff erent subnets, MxControlCenter displays the<br />
following dialog box:<br />
Click Yes to reconfi gure the cameras for the subnet of your computer.<br />
Reconfiguring Cameras In A Different Subnet<br />
In most networks, a DHCP server will automatically assign the IP addresses for network<br />
devices so that you can apply the default settings in the Configure camera dialog box<br />
(Get IP address automatically). If you would like all cameras to obtain IP addresses<br />
automatically, select the Apply to all selected cameras checkbox.<br />
If the IP addresses for devices on the<br />
network are permanently assigned,<br />
ask your network administrator<br />
for the appropriate IP addresses<br />
for the cameras. Once you have<br />
that information, enter the correct<br />
IP address and subnet mask for<br />
each camera in the Use this IP<br />
address group.<br />
Make sure that the Save configuration<br />
permanently on camera checkbox<br />
is selected so that the cameras<br />
can be found at the designated<br />
IP address when you restart your<br />
computer. Then click OK.<br />
Now wait until MxControlCenter has modifi ed the network settings of the cameras and<br />
restarted the computer. The status of the reconfi gured cameras changes from Different<br />
© <strong>MOBOTIX</strong> AG • Security-Vision-Systems • Made in Germany<br />
www.mobotix.com • sales@mobotix.com
18/152 MxControlCenter Manual: Getting Started<br />
subnet (blue symbol) to OK. Close the Add Cameras- Search and Select dialog box by<br />
clicking OK.<br />
Note<br />
You can open the Configure Camera dialog box for any video source by right-clicking<br />
the specifi c video source you want to confi gure in the Add Cameras - Search and<br />
Select dialog box and selecting Configure network from the pop-up menu.<br />
2.2.3 Adding Video Sources Manually<br />
In addition to <strong>MOBOTIX</strong> cameras that are found automatically, you can also manually add<br />
video sources to the list of video sources in MxControlCenter.<br />
• Camera: Here, you can enter the known IP address or DNS name of a <strong>MOBOTIX</strong><br />
camera or a third-party IP camera if it was not found by the automatic search feature.<br />
• MxPeG Clip: Adds an MxPEG video clip previously recorded by a <strong>MOBOTIX</strong> camera<br />
as a video source.<br />
• Recording Path: Adds the path of an external fi le server where a <strong>MOBOTIX</strong> camera<br />
has recorded audio/video data. The videos or snapshots recorded at that location<br />
can now be played back using the Player or Video Search in MxControlCenter.<br />
2.2.4 Using Video Sources In MxControlCenter<br />
You can now use the list to select the video sources that you would like to display and<br />
manage in MxControlCenter..<br />
Camera Preview<br />
If you select one camera with the status OK, MxControlCenter<br />
automatically displays the live images from that camera in<br />
the preview window. If you are using CTrL-click to select<br />
several cameras, the image from the camera selected last is<br />
shown in the preview window. This feature makes it easier<br />
for you to identify the cameras that you would like to use.<br />
Entrance<br />
© <strong>MOBOTIX</strong> AG • Security-Vision-Systems • Made in Germany<br />
www.mobotix.com • sales@mobotix.com
Finding And Configuring Video Sources<br />
19/152<br />
editing The Video Source List<br />
Right-click this list to open a pop-up menu from which you<br />
can select all video sources or cancel the selection. You<br />
can also use this method to remove from the list some or<br />
all of the video sources that you would not like to display<br />
or manage in MxControlCenter.<br />
If you have cancelled the camera confi guration process<br />
or need a password that diff ers from the camera's factory<br />
default password, you can also confi gure the camera from the pop-up menu at a later<br />
date and enter the user name and password required for reconfi guration at that time.<br />
Adding Selected Video Sources In A new Layout<br />
Click OK to add the selected cameras in MxControlCenter.<br />
If you select the Generate new grid for selected cameras<br />
option in the Add Cameras dialog box, MxControlCenter<br />
will automatically create a grid layout that displays all<br />
selected video sources in equal-sized windows.<br />
Otherwise the selected video sources will only be added to<br />
MxControlCenter and can later be used to create layouts.<br />
A layout can show multiple video sources (cameras, fi le server paths, MxPEG clips,<br />
etc.) either in a grid or in front of a background. A video source can be displayed in a<br />
background layout as a video window or a symbol. Layouts can be saved, renamed<br />
and arranged hierarchically.<br />
© <strong>MOBOTIX</strong> AG • Security-Vision-Systems • Made in Germany<br />
www.mobotix.com • sales@mobotix.com
20/152 MxControlCenter Manual: Getting Started<br />
2.3 User Interface And Operation<br />
The main window of MxControlCenter appears after you select the fi rst video sources<br />
(<strong>MOBOTIX</strong> cameras, recording paths, MxPEG clips, etc.). This section introduces you to<br />
the basic elements of the application.<br />
2.3.1 elements Of The Main Window<br />
After the video sources have been automatically defi ned during initial installation,<br />
MxControlCenter opens the main window, which is divided into the following sections:<br />
Menu bar Alarm list Toolbar<br />
Display panel with a layout for<br />
displaying the cameras<br />
“Layouts” panel<br />
“Player” panel<br />
“PTZ” panel<br />
Status bar Sidebar Date/time of the<br />
current camera<br />
The standard view of MxControlCenter is primarily intended for users who work with the<br />
features set up for camera viewing and alarms.<br />
Sections Of The Main Window<br />
• Menu Bar: From the menu bar you can switch between views, open additional<br />
dialog boxes and even execute all the features assigned to the various toolbar<br />
buttons described below.<br />
• Alarm List: This panel shows the alarm images of the cameras that the user normally<br />
needs to acknowledge by clicking the appropriate title bar (red). Double-clicking an<br />
© <strong>MOBOTIX</strong> AG • Security-Vision-Systems • Made in Germany<br />
www.mobotix.com • sales@mobotix.com
Finding And Configuring Video Sources<br />
21/152<br />
alarm image opens the Video Search dialog box where you can view the alarms and<br />
then compile them for later analysis (also for a camera-wide analysis).<br />
• Toolbar: The toolbar contains buttons for important features. To see what a particular<br />
button does, simply place your mouse pointer over it and read the tooltip that appears.<br />
The toolbar can be confi gured to quickly switch between layouts (the Layout buttons<br />
in toolbar checkbox) or appear at the bottom of the main window (the Show toolbar<br />
at bottom checkbox) in Tools > Settings > General.<br />
• Display Panel: This panel shows the cameras of the currently selected layout. The<br />
current camera appears with a yellow frame and is the "active camera" whose time<br />
and date are indicated in the status bar in the bottom right-hand corner. Besides the<br />
standard camera windows, which contain the live images of a specifi c camera, you<br />
can also defi ne player and focus windows in a layout for displaying the recorded<br />
images of one or more cameras.<br />
• Status Bar: MxControlCenter uses the status bar to display specifi c runtime information.<br />
• Sidebar: The sidebar contains diff erent information depending on the context. Normally<br />
it displays the information relating to available layouts or the controls for the active<br />
camera in the current layout. If the Layout Manager is active, only the panels you<br />
need to use will be shown (see Section 2.3.2, Layout Manager).<br />
Sidebar Panels<br />
• Layouts: This sidebar panel contains a hierarchical list of all the existing layouts of<br />
an MxControlCenter installation. With the Layout Sequencer (see Section 2.4.5, Using<br />
The Sequencer Features), you can set MxControlCenter to automatically cycle through<br />
the displayed layouts at a defi ned interval. For each layout you can defi ne separate<br />
video sources that can be displayed in either a grid or background layout:<br />
Grid layout<br />
Background layout with camera icons<br />
• Player: This sidebar panel controls the playback of recorded video sequences or<br />
images. Synchronized playback based on the time of the recording is available for<br />
either the current camera only or all the cameras of a grid layout.<br />
• PTZ Control: This panel is used to control the pan/tilt features (PTZ = Pan/Tilt/Zoom)<br />
of a camera and is visible at all times. It may also contain other features depending<br />
on which camera and lens you are using. If the current camera can use vPTZ features<br />
© <strong>MOBOTIX</strong> AG • Security-Vision-Systems • Made in Germany<br />
www.mobotix.com • sales@mobotix.com
22/152 MxControlCenter Manual: Getting Started<br />
(the virtual pan, tilt and zoom features of a <strong>MOBOTIX</strong> Q22M, for example), then this<br />
panel will be expanded accordingly<br />
For more information on the various elements of the main window, see Section 3.1,<br />
MxControlCenter Controls.<br />
2.3.2 Layout Manager<br />
The Layout Manager provides features for creating and managing layouts in the sidebar.<br />
These features, however, are typically only used to set up an MxControlCenter installation.<br />
To activate or deactivate the Layout Manager, click the adjacent button in the toolbar.<br />
Caution<br />
Activating the Layout Manager does not open an extra window. Instead, the main<br />
window of MxControlCenter switches to a special view that contains all the features<br />
necessary for creating and editing layouts.<br />
A layout can show multiple video sources (cameras, fi le server paths, MxPEG clips,<br />
etc.) either in a grid or in front of a background. A video source can be displayed in a<br />
background layout as a video window or a symbol. Layouts can be saved, renamed<br />
and arranged hierarchically.<br />
© <strong>MOBOTIX</strong> AG • Security-Vision-Systems • Made in Germany<br />
www.mobotix.com • sales@mobotix.com
Finding And Configuring Video Sources<br />
23/152<br />
When activated, the Layout Manager off ers three other panels for creating and editing<br />
layouts:<br />
• Layouts: Here, you can create, rename and move new<br />
layouts to form hierarchical structures. This panel shows<br />
grid and background layouts with diff erent symbols.<br />
• Cameras and Devices: This panel displays the video<br />
sources that have already been added to MxControlCenter.<br />
You can drag and drop the video sources into a grid<br />
box or onto a background image.<br />
• Grid/Background Images: In this panel you can select<br />
or add grid or background images for the current layout,<br />
depending on the layout type. These images will then be<br />
used to display the video sources. You can also create<br />
your own grids (the edit grid button) in addition to the<br />
predefi ned grids and the Auto grid (see below).<br />
Auto grid is a special grid where the display panel is automatically split into smaller<br />
sections to show the various video sources.<br />
More information on editing layouts is available in Section 2.4.3, Creating Layouts.<br />
2.3.3 Alarm List<br />
The alarm list contains the alarms of the <strong>MOBOTIX</strong> cameras defi ned<br />
in a layout, provided that alarm recording has been enabled on those<br />
cameras and the alarm list has been activated in MxControlCenter<br />
(Tools > Options > Alarm List).<br />
If new alarms are detected, MxControlCenter adds the alarm image<br />
of the triggering camera to the top of the alarm list and changes<br />
the title bar to red. This alarm can now be acknowledged by clicking<br />
the title bar of the alarm window (title bar changes to blue).<br />
Unacknowledged alarm<br />
Unacknowledged alarm from selected camera<br />
Acknowledged alarm<br />
Acknowledged alarm from selected camera<br />
© <strong>MOBOTIX</strong> AG • Security-Vision-Systems • Made in Germany<br />
www.mobotix.com • sales@mobotix.com
24/152 MxControlCenter Manual: Getting Started<br />
If the alarm list contains unacknowledged alarms, the alarm box in the upper right-hand<br />
corner will remain red. If all the alarms are acknowledged, the alarm box changes to<br />
green as depicted in the fi gure.<br />
Besides the cameras in the current layout, other cameras can also send alarm messages<br />
to MxControlCenter by transmitting a network message to the computer running<br />
MxControlCenter.<br />
More information on this and other alarm list features can be found in Section 2.5, Alarm<br />
Management.<br />
2.3.4 Camera Configuration<br />
To change the confi guration of the connected cameras, open the Camera Configuration<br />
dialog box in MxControlCenter by clicking Change the camera settings from MxCC or<br />
choosing Video Source > Properties > Configure from the menu.<br />
The Camera Configuration dialog box contains the following sections:<br />
• Overview: This section of the dialog box lists all <strong>MOBOTIX</strong> cameras along with their<br />
most important settings and also includes an additional preview window for the currently<br />
selected camera. If login data that diff ers from the default login data (admin<br />
user, meinsm password) is required, you can use the pop-up menu (right-click) to<br />
authenticate yourself for the selected camera. From the same pop-up menu you can<br />
also open a dialog box with additional information on this camera.<br />
• Image Settings: You can view and modify the main image settings for the selected<br />
camera in this section.<br />
© <strong>MOBOTIX</strong> AG • Security-Vision-Systems • Made in Germany<br />
www.mobotix.com • sales@mobotix.com
Finding And Configuring Video Sources<br />
25/152<br />
• exposure: The exposure windows are one of the most important camera tools for<br />
creating properly exposed images. In this section you can select diff erent exposure<br />
windows or customize them based on your requirements (move, change size, etc.).<br />
• Recording: You can control the camera's recording features in this section of the<br />
dialog box by activating the recording feature and the camera sensors that are set<br />
to trigger an alarm. You can also use this panel to defi ne which fi les the camera will<br />
save (full or live image) and where the alarms will be saved (internally, on an SD/<br />
CF card, or on a fi le server).<br />
Note<br />
All changes made in the Camera Configuration dialog box will take eff ect immediately<br />
and can be checked in the preview image. When leaving this section, this<br />
dialog box will prompt you to save any unsaved changes to the permanent fl ash<br />
memory of the camera.<br />
For more information on working with the Camera Configuration dialog box, see Section 4,<br />
Confi guring <strong>MOBOTIX</strong> Cameras.<br />
2.3.5 Update Assistant<br />
<strong>MOBOTIX</strong> off ers software updates that contain new features and enhancements for its<br />
cameras on a regular basis. You can easily transfer new software to all selected cameras<br />
with the Update Assistant.<br />
© <strong>MOBOTIX</strong> AG • Security-Vision-Systems • Made in Germany<br />
www.mobotix.com • sales@mobotix.com
26/152 MxControlCenter Manual: Getting Started<br />
Besides automatically updating the camera software, the Update Assistant also saves the<br />
current confi guration of the cameras so that it can be restored on some or all of the cameras.<br />
Furthermore the automatic search feature for new cameras and the way detected cameras<br />
are organized into various camera lists also provide a number of additional options for<br />
managing large-scale installations.<br />
To launch the Update Assistant, open the Tools > Assistants > Update camera software<br />
menu.<br />
For more information on the update assistant, see Section 4.6, Updating The Camera<br />
Software.<br />
2.3.6 Program Settings<br />
You can edit the program options of MxControlCenter and the options of the cameras<br />
connected to MxControlCenter in the Tools > Options dialog box.<br />
The dialog box contains the following tabs:<br />
• General: You can defi ne the various program options that aff ect the display and<br />
operation of MxControlCenter on this tab. In addition to the security settings for<br />
MxControlCenter (administrator and user passwords), you can also defi ne a global<br />
camera user and corresponding password to simplify access to the cameras.<br />
© <strong>MOBOTIX</strong> AG • Security-Vision-Systems • Made in Germany<br />
www.mobotix.com • sales@mobotix.com
Live Monitoring With numerous Cameras<br />
27/152<br />
• Alarm List: Here, you can defi ne the alarm list options that aff ect the alarm list itself<br />
(size, save as a separate fi le, auto acknowledge). You can also use this tab to specify<br />
the sounds that can be used to signal new alarms.<br />
• Remote Control: The options on this tab determine whether and how MxControlCenter<br />
responds to network messages that are sent to the designated port of the MxControlCenter<br />
computer.<br />
• : Each of these tabs shows the name and IP address of a specifi c<br />
camera and allows you to defi ne options of that camera. Besides a special user<br />
name and password, you can also defi ne how MxControlCenter can access the<br />
images recorded by the camera, which instruction fi le is linked to this camera, and<br />
which preferred layout the camera will use.<br />
For more information on this dialog box and the various program options, refer to Chapter 5,<br />
MxControlCenter Options.<br />
2.4 Live Monitoring With Numerous Cameras<br />
2.4.1 Monitoring In Predefined Layouts<br />
Your monitoring requirements can be met using only a few cameras in a single layout.<br />
However for more complex monitoring tasks, a single layout will not suffi ce.<br />
If you are using a large number of cameras, you would ideally have a customized view of<br />
the currently displayed camera images in diff erent sizes (CIF, VGA, etc.) and an option to<br />
toggle between various views so that the numerous cameras can be assigned to various<br />
views depending on their location.<br />
© <strong>MOBOTIX</strong> AG • Security-Vision-Systems • Made in Germany<br />
www.mobotix.com • sales@mobotix.com
28/152 MxControlCenter Manual: Getting Started<br />
Predefi ned grid layouts are available for this purpose and can be generated and edited<br />
provided you have enabled the Layout Manager (see Section 2.4.3, Creating Layouts<br />
and the following sections).<br />
Display Windows For Layouts<br />
For live monitoring, diff erent types of display<br />
windows that can be used in a grid or<br />
background layout are available. The size of<br />
all windows used to display a live stream is<br />
limited to 2560 x 960 pixels (double MEGA)<br />
for grid layouts and 640 x 480 pixels (VGA)<br />
for background layouts.<br />
• Live: These "standard windows" show<br />
the current live video stream of a camera,-<br />
normally at the full frame rate. In<br />
grid layouts, these windows can have a maximum size of 2560 x 960 pixels (double<br />
MEGA resolution). For display purposes, the single images from the live stream are<br />
scaled to match the size of the display window.<br />
Note<br />
A high camera resolution increases both the bandwidth required to retrieve<br />
the live stream as well as the load imposed on the MxControlCenter computer<br />
for decoding and displaying the data.<br />
The live windows are typically used in monitoring scenarios such as the ones described<br />
in Example: Live Monitoring of a Parking Garage given in Section 1.2.2, Example: Live<br />
Monitoring Of A Parking Garage.<br />
• Preview: A "reduced" live stream with low resolution and frame rate can be retrieved<br />
from the camera with this display window. This is particularly well-suited for remote<br />
applications with low network bandwidth.<br />
• Sequencer Window: This window is not assigned to one specifi c camera, but rather<br />
switches between the cameras at preset time intervals. The sequencer window is<br />
very eff ective when used in conjunction with status icons, particularly in background<br />
layouts. For example, you can create an overview layout using the building fl oor<br />
plan and status icons as "placeholders" for the individual cameras together with a<br />
sequencer window in the middle of the layout.<br />
• Focus Window: This window is not tied to a specifi c camera and only displays the<br />
live video stream of the camera whose status icon is selected using the mouse.<br />
The layouts and display windows that are best suited for live monitoring depend on a<br />
variety of factors such as the:<br />
• Number of monitoring cameras<br />
© <strong>MOBOTIX</strong> AG • Security-Vision-Systems • Made in Germany<br />
www.mobotix.com • sales@mobotix.com
Live Monitoring With numerous Cameras<br />
29/152<br />
• Bandwidth of the monitoring network<br />
• Number and workfl ow of the security personnel<br />
2.4.2 Monitoring The Camera Connection<br />
While running, MxControlCenter automatically checks whether the cameras integrated<br />
into the system are accessible. If the connection to a camera is lost, MxControlCenter will<br />
display an error message in the relevant camera window.<br />
The options for this feature can be found in both sections of the General tab in the Tools<br />
> Options dialog box:<br />
• Sound for errors/Connection errors: MxControlCenter can play back either a standard<br />
sound or an audio fi le of your choosing (*.wav) if a connection error occurs.<br />
• error Display for Connection errors: This option displays an error message or a<br />
graphics fi le you specify in the image of the missing video source.<br />
• error Display on Latency Timeout: If the latency between image capture and the<br />
camera display exceeds the value specifi ed here, MxControlCenter can display an<br />
appropriate error message or a graphics fi le you choose in the image of the video<br />
source in question.<br />
More information on this topic can be found in Section 5.2, The “General” Tab.<br />
© <strong>MOBOTIX</strong> AG • Security-Vision-Systems • Made in Germany<br />
www.mobotix.com • sales@mobotix.com
30/152 MxControlCenter Manual: Getting Started<br />
2.4.3 Creating Layouts<br />
You can proceed as described in Section 2.2, Finding And<br />
Confi guring Video Sources to automatically create layouts<br />
for diff erent video sources (<strong>MOBOTIX</strong> cameras, fi le server<br />
paths, MxPEG clips and third-party network cameras). If<br />
you want more customized layouts, you will need to use<br />
the Layout Manager.<br />
Click the Layout Manager button on the MxControlCenter<br />
control panel. The sidebar now contains the three panels,<br />
Layouts, Video sources and Grid or Background images,<br />
that were described in Section 2.3.2, Layout Manager.<br />
2.4.4 Procedure<br />
• Right-click the empty space in the Layout panel and<br />
select new Layout from the pop-up menu.<br />
• Choose whether you would like to create a background<br />
layout (for site plans, fl oor plans, etc.) or a grid layout<br />
(display window only).<br />
• Select an image (*.jpg, *.bmp or *.gif) for a background layout or a grid for a<br />
grid layout:<br />
Auto grid is a special grid where the display panel is automatically split into smaller<br />
sections to show the various video sources.<br />
The auto grid has a square or rectangular structure: Display windows are automatically<br />
added until the next larger square or rectangle of windows appears when<br />
adding cameras. In the case of rectangles, the rows always contain more display<br />
windows than the columns.<br />
• Click OK to close the dialog box. MxControlCenter creates the new layout and labels<br />
it with the appropriate symbol.<br />
• You can now rename the new layout by double-clicking the name or right-clicking<br />
the relevant command from the pop-up menu.<br />
© <strong>MOBOTIX</strong> AG • Security-Vision-Systems • Made in Germany<br />
www.mobotix.com • sales@mobotix.com
Live Monitoring With numerous Cameras<br />
31/152<br />
• If you would like to create a hierarchical layout structure, move and reorder the<br />
layouts based on your requirements.<br />
Additional editing Options For Grid Layouts<br />
• Moving Display Windows: You can switch display window locations by simply moving<br />
one window to another one.<br />
• Adding Video Sources: These video sources are moved from the Video Sources<br />
panel of the sidebar to the display fi eld you choose. They will replace any video<br />
sources that may already exist in that fi eld.<br />
• Right-Clicking a Display Window: Opens a pop-up menu with additional commands<br />
for editing or deleting video sources, for example.<br />
Additional editing Options For Background Layouts<br />
Camera OK,<br />
detected<br />
Camera OK,<br />
not detected<br />
No connection to<br />
camera<br />
• Moving Display Windows: Display windows can be arranged any way you want. If<br />
you want to switch display window locations, simply move one window to another<br />
one. Note that the windows will automatically be resized if they are near the window<br />
frame or other display windows.<br />
• Adding Video Sources: These video sources are moved from the Cameras and<br />
Devices panel of the sidebar to any location you choose.<br />
• Displaying as Icons: Video sources can be displayed for overview plans as icons<br />
that indicate the viewing direction, number of objects, their bandwidth and the status<br />
of the cameras:<br />
Double-clicking an icon shows the corresponding camera in a separate display window.<br />
• Right-Clicking a Display Window or Icon: Opens a pop-up menu with additional<br />
commands for, among other things, editing or deleting video sources.<br />
• Right-Clicking an empty Space: Opens a pop-up menu that allows you to insert<br />
an additional element.<br />
For more information on working with layouts, see Section 3.2, Editing Layouts.<br />
2.4.5 Using The Sequencer Features<br />
Since <strong>MOBOTIX</strong> cameras are also able to use low-bandwidth connections to transfer<br />
low-quality preview images, MxControlCenter off ers the ideal means for establishing a<br />
remote control center.<br />
© <strong>MOBOTIX</strong> AG • Security-Vision-Systems • Made in Germany<br />
www.mobotix.com • sales@mobotix.com
32/152 MxControlCenter Manual: Getting Started<br />
Sequencer Of MxControlCenter<br />
The functions of the integrated sequencers for automatically cycling through the defi ned<br />
cameras or layouts and the hierarchically structured layouts support these features since<br />
they allow for the eff ective display of connected video sources.<br />
Some network connections do not have suffi cient bandwidth to display the live stream<br />
from multiple cameras at the same time. Nevertheless, you would still like to see, at least<br />
sequentially, the images of all cameras. The sequencer features are provided for this<br />
purpose and work on two levels:<br />
• The layout sequencer switches between the layouts of the current confi guration at<br />
specifi ed intervals.<br />
• The camera sequencer switches between the specifi ed cameras within a grid layout<br />
and displays the images they capture at their maximum size in the display panel.<br />
• You can defi ne a sequencer window inside a layout that cycles through the individual<br />
cameras of the layout.<br />
2.4.6 Using The vPTZ Features<br />
The M12D, D12, V12, M22M, D22M and Q22M models<br />
of <strong>MOBOTIX</strong> cameras and software versions 3.4.5 or<br />
higher now include enhanced virtual PTZ features.<br />
These features allow you to use a mouse or joystick to<br />
zoom in on images from the selected video source and<br />
"virtually" move the enlarged image section within the<br />
entire image sensor area.<br />
© <strong>MOBOTIX</strong> AG • Security-Vision-Systems • Made in Germany<br />
www.mobotix.com • sales@mobotix.com
Live Monitoring With numerous Cameras<br />
33/152<br />
The Q22M camera merits special attention in this regard: A spherical image of the environment<br />
is captured by the 180° lens of the camera. By selecting the appropriate live image<br />
mode of the camera (see below), this image can be corrected for distortion by the camera<br />
itself and then saved and displayed in MxControlCenter in its corrected form. Alternatively,<br />
the camera can simply save the complete distorted image and send it to MxControlCenter.<br />
In this case MxControlCenter can subsequently correct the images for distortion. For more<br />
information on this topic, see Section 3.1.4, The “PTZ Controls” Sidebar Panel.<br />
Note that the views and features available for use will vary depending on where the Q22M<br />
is installed (on the wall or the ceiling). If this particular camera<br />
model is selected in the layout, the PTZ Controls panel<br />
will be expanded so that you can specify the installation<br />
type and set the North direction of Q22M.<br />
Using The Virtual PTZ Features<br />
To control the vPTZ features, the sidebar contains a number of control elements that you<br />
can operate with a mouse and that function just like a joystick:<br />
• Turning the Joystick or Using the Slider Bar +/-: Adjusts the<br />
zoom setting of the selected video source.<br />
• Tilting the Joystick: Rotates or pans the image in the direction<br />
you choose until you return the joystick to its home position.<br />
Make sure that the lock icon in the PTZ features sidebar panel is<br />
unlocked or else the features of the virtual joystick will be blocked.<br />
You can use the mouse the execute certain vPTZ features by simply clicking the position<br />
you would like in the image and scrolling the mouse wheel to zoom in and out.<br />
The numeric fi eld at the bottom of the sidebar is used to save frequently used positions<br />
(a longer click saves a position, while a<br />
shorter click opens it). The 1x Zoom and<br />
Center pan buttons are used to reset<br />
the image position while the buttons in<br />
the Auto mode panel control the automatic<br />
camera movements as if you were controlling<br />
a PTZ camera mechanically.<br />
© <strong>MOBOTIX</strong> AG • Security-Vision-Systems • Made in Germany<br />
www.mobotix.com • sales@mobotix.com
34/152 MxControlCenter Manual: Getting Started<br />
Correct Distortion In MxControlCenter Or The <strong>MOBOTIX</strong> Camera<br />
These two drop-down lists defi ne how work is allocated between<br />
the camera and MxControlCenter when processing images:<br />
• Camera Live Image: Controls image generation on the<br />
camera itself (the display modes off ered by this camera<br />
model are always available for selection).<br />
• MxCC Display: Allows you to set MxControlCenter to<br />
either accept the images in their original form or apply<br />
distortion correction to the images.<br />
These two settings are all you need to have the camera deliver and save full images while<br />
MxControlCenter displays the distortion-corrected area and adds the zoom feature in the<br />
live image. This feature can be set separately for each camera in the layout.<br />
2.5 Alarm Management<br />
2.5.1 Preparing MxControlCenter<br />
If an event occurs (a <strong>MOBOTIX</strong> camera detects movement or any changes), the camera<br />
can notify you by triggering an alarm. The type of event detection and the method of the<br />
resulting alarm can be confi gured in a number of diff erent ways. For example, you can<br />
confi gure a <strong>MOBOTIX</strong> camera to send an e-mail if the ambient temperature falls below<br />
a specifi c value. A detailed description of all the alarm methods can be found in the<br />
<strong>MOBOTIX</strong> Software Manual.<br />
Once armed, a <strong>MOBOTIX</strong> camera in its default confi guration will detect any motion within<br />
a defi ned area of the displayed image and highlight such motion by adding a red border<br />
around the image.<br />
© <strong>MOBOTIX</strong> AG • Security-Vision-Systems • Made in Germany<br />
www.mobotix.com • sales@mobotix.com
Alarm Management<br />
35/152<br />
This alarm can be sent to MxControlCenter in multiple ways:<br />
• Camera Alarm Messages: Alarms are "streamed" together with the relevant live<br />
images to MxControlCenter, which can then use this image data to obtain the necessary<br />
information about the triggering event.<br />
• Remote Control by Cameras: A <strong>MOBOTIX</strong> camera can also send this alarm to<br />
MxControlCenter as a network message (notifi cation in the network based on the<br />
IP protocol).<br />
The fi rst type of alarm can only be transferred if the live image in the current view or layout<br />
is also displayed. A network message, however, can be received at any time, even if the<br />
sending IP camera is defi ned in a layout that is not currently being displayed.<br />
Configuring How network Messages Are Received<br />
To be able to receive these messages, the Camera IP notify only port needs to be enabled<br />
in the Remote Control tab of the Options dialog box and needs to match the port when<br />
confi gured for the MxCC Alarm transfer profi le on the camera (Admin Menu > Transfer<br />
Profiles > IP notify Profiles in the browser interface of the camera).<br />
Now a specifi c view will be activated whenever this camera sends an alarm that needs<br />
to be defi ned. To do so, open the Layout editor and specify the last defi ned preferred<br />
layout. Alternatively, you can specify the preferred layout in the camera tab of the Options<br />
dialog box.<br />
The preferred layout of a camera determines which layout will be used to display this<br />
camera when a network message is sent to the MxControlCenter computer. You can<br />
thus have cameras displayed immediately ("connected") if they are not currently being<br />
displayed.<br />
Activating The Alarm List<br />
First activate the alarm list in the Options dialog box<br />
(the Alarm list tab). MxControlCenter will now archive all<br />
incoming alarms in a list in chronological order. When an<br />
IP camera sends a network message, MxControlCenter<br />
can now switch to the preferred layout defi ned for this<br />
specifi c camera, if necessary.<br />
More visualization options are off ered by the Alarm window<br />
(described in the previous section as a special grid element of a layout) and Player window.<br />
Ultimately, however, having an alarm visualized by a computer program like MxControlCenter<br />
is not enough. There is usually a human being present at the end of the alarm chain and<br />
© <strong>MOBOTIX</strong> AG • Security-Vision-Systems • Made in Germany<br />
www.mobotix.com • sales@mobotix.com
36/152 MxControlCenter Manual: Getting Started<br />
they should respond appropriately when an alarm goes off . Once proper measures have<br />
been initiated, the user can then acknowledge the alarm so that the "alarm" visualization<br />
can be cancelled.<br />
2.5.2 Preparing The Cameras<br />
A <strong>MOBOTIX</strong> camera needs to be properly confi gured before it is able to detect an event,<br />
trigger an alarm and then send that alarm to MxControlCenter where it is visualized.<br />
Launch your browser and enter the IP address of the camera, or select the camera you<br />
would like to confi gure in the current view of MxControlCenter and then click the Open<br />
browser button. Follow the paths through the menu structure of the page for the individual<br />
items.<br />
Showing An Alarm Message In The Data Stream Of A Displayed Live Image<br />
• General Activation (Setup Menu > event Control > General event Settings): Check<br />
whether camera activation is enabled .<br />
• Video Motion Window (Setup Menu > event Control > event Settings > events):<br />
The video motion window (VM) needs to be activated and its coordinates defi ned.<br />
Proceed as follows to send an alarm to MxControlCenter as a network message:<br />
• Transfer Profile (Admin Menu > Transfer Profiles > IP notify Profiles): Use a profi le<br />
called MxCC Alarm: simple. The target address of this profi le needs to contain<br />
the IP address of your local computer and the port number used by MxControlCenter to<br />
receive network messages (see Section 3.5, Remote Control Using Network Messages).<br />
• Activate Messages (Setup Menu > event Control > Messaging > General Settings):<br />
The message profi le should be activated.<br />
• IP notify (Setup Menu > event Control > Messaging > Actions): The selection for<br />
a network message (IP) needs to be set to MxCC Alarm.<br />
To grant the required permissions for MxControlCenter:<br />
• Assign Permissions (Admin Menu > Group Access Control Lists and Admin Menu ><br />
Users and Passwords): The MxCC permission should be enabled for the group who<br />
are authenticated by MxControlCenter as their members.<br />
© <strong>MOBOTIX</strong> AG • Security-Vision-Systems • Made in Germany<br />
www.mobotix.com • sales@mobotix.com
Alarm Management<br />
37/152<br />
2.5.3 Alarm Display<br />
As previously mentioned, there are a number of ways<br />
to respond to an alarm message. The easiest form of<br />
visualization is provided by the camera itself when it<br />
displays the current live image with a red border. This<br />
"momentary" visualization does not last very long, which<br />
is why MxControlCenter can save all alarms in the alarm<br />
list for subsequent viewing.<br />
Choose Tools > Options from the menu and then activate<br />
the list in the Alarm List tab to activate the alarm list. If<br />
you have confi gured everything properly, any motion in<br />
front of the camera in the current view should cause the<br />
fi rst alarm image to appear in the alarm list. Additional<br />
options for sending visual or audio alarms can be found<br />
in Section 3.3, Alarm Processing.<br />
In addition to the alarm list, special window elements in a view can be defi ned to display<br />
alarms:<br />
• An alarm window within a view displays the live image from the camera that actually<br />
reported the last alarm (graphic).<br />
• A player window is not tied to one specifi c camera. It shows the saved alarms from<br />
any camera that you select from the alarm list. The saved alarms are not displayed<br />
in a list, but rather as a video from a video recorder. You therefore have the option<br />
to fast forward or rewind through the alarms and the recorded image sequences of<br />
each alarm (graphic). For more information on these search options, see Section 2.6,<br />
Video Searches And Export Features.<br />
To defi ne an alarm or player window in a view, you fi rst need to activate the Layout<br />
Manager and then defi ne the element you want to use in the Define Grid element dialog<br />
box (for more information, see Section 3.2.1, Grid Layouts).<br />
If the alarm-triggering camera is not shown in the current view, note that we have already<br />
confi gured the camera to send a network message to MxControlCenter (see Section 2.5.2,<br />
Preparing The Cameras).<br />
© <strong>MOBOTIX</strong> AG • Security-Vision-Systems • Made in Germany<br />
www.mobotix.com • sales@mobotix.com
38/152 MxControlCenter Manual: Getting Started<br />
2.5.4 Alarm Acknowledgement<br />
MxControlCenter is able to record and display alarms from an IP camera, the next step is<br />
to determine how these alarms can be acknowledged by security personnel or, in other<br />
words, human beings who are actually sitting in front of the computer and are required<br />
to respond appropriately.<br />
The easiest way to acknowledge an alarm is to just<br />
click the red bar above the alarm image. This also<br />
stops the acoustic signals, which can be confi gured, if<br />
necessary. For example, you can set the alarms to be<br />
acknowledged automatically if displaying them is no<br />
longer relevant after a preset time elapses.<br />
In critical situations, you can use an instruction fi le to give security personnel instructions<br />
on how to respond to an alarm. This instruction fi le, which can be a text message, an<br />
image or a video clip, can be defi ned in the relevant camera tab of the Options dialog<br />
box. You can open this fi le by selecting the Show alarm instructions of selected camera<br />
icon.<br />
© <strong>MOBOTIX</strong> AG • Security-Vision-Systems • Made in Germany<br />
www.mobotix.com • sales@mobotix.com
Alarm Management<br />
39/152<br />
2.6 Video Searches And export Features<br />
As you have already seen, there are a number of ways to archive live images from an IP<br />
camera. You can use these recordings in a comprehensive video search whether this occurs<br />
as a continuous recording or as an event-controlled recording - with MxControlCenter.<br />
Image Recording, event Recording, Continuous Recording<br />
<strong>MOBOTIX</strong> cameras provide three modes for recording video data. These modes can be<br />
set for each camera on the Recording tab of the Camera Configuration dialog box:<br />
• Snapshot Recording: Saves the individual *.jpg images without audio as an image<br />
series based on pre-alarm images, the alarm image itself and post-alarm images.<br />
• event Recording: Saves an alarm as an MxPEG clip with the audio channel of the<br />
camera (optional).<br />
• Continuous Recording: Saves continuous video and audio data as MxPEG clips where<br />
the recording frame rate is reduced and can be increased automatically when an<br />
event occurs. This continuous recording mode is only available if you have a suffi cient<br />
amount of storage capacity (on an SD/CF card or fi le server).<br />
More information on the recording modes off ered by <strong>MOBOTIX</strong> cameras can be found in<br />
Chapter 8 Recording of the Software Manual.<br />
2.6.1 Switching Display Windows In Player Mode<br />
Displaying the event images recorded by a camera in<br />
Player mode off ers the easiest way to search through<br />
video data. To do so, fi rst click the live image of a<br />
specifi c camera and then select the Toggle Player<br />
mode button or right-click the relevant command<br />
from the pop-up menu.<br />
If any alarms from this camera are present, the buttons<br />
in the Player panel of the sidebar become available<br />
and you can view the recorded video sequences<br />
using the playback, fast forward and rewind buttons.<br />
In addition to these controls, you can also access the buttons that appear at the bottom<br />
edge of the display window when you place your mouse pointer over this sidebar panel.<br />
An image series includes all the images (or the entire video sequence) that have been<br />
saved for an event (alarm). This normally includes the video data including any audio data<br />
that has been recorded before, during (the "event image") and after the event occurs.<br />
You can play back either the entire image series or only the event images:<br />
• Play Back entire Image Series: These Player buttons allow you to play back all<br />
recorded images either individually or consecutively.<br />
• Play Back event Images Only: These Player buttons are used to show the event<br />
image only and are indicated by a red lightning bolt.<br />
© <strong>MOBOTIX</strong> AG • Security-Vision-Systems • Made in Germany<br />
www.mobotix.com • sales@mobotix.com
40/152 MxControlCenter Manual: Getting Started<br />
Simultaneous Playback Of All Cameras<br />
The All button in the Player sidebar panel switches all display windows to Player mode<br />
and activates the Player buttons. Playback starts simultaneously for all video sources<br />
regardless of when the recording was made.<br />
Time Synchronized Playback Of All Cameras<br />
You can access the options off ered by the Synch. Mode list in the Player sidebar panel for<br />
the time-synchronized playback of recorded sequences from all displayed video sources.<br />
Playback can be started at the specifi ed time if this list is compiled in Real Time or at<br />
Reduced Speed.<br />
Enter the date and time and then click the Goto button to set all cameras to the correct<br />
time. Now click the Playback button and all the images will be played back according to<br />
the setting in the Synch. Mode drop-down list:<br />
• Real Time: All video sequences are played back in real time. If the images cannot<br />
be transferred fast enough, MxControlCenter will skip individual images.<br />
• Reduced Speed: Playback is performed at a slightly reduced speed, if necessary,<br />
and even image synchronization is somewhat more fl exible. This method also allows<br />
for smooth playback of all recorded images if the data for a real-time display cannot<br />
be read fast enough (for example, due to low network bandwidth).<br />
Quick event Search<br />
Select a display window in Player mode. The slider<br />
bar in the Player sidebar panel provides a quick<br />
and intuitive way to search through events.<br />
You can specify any date within the recorded video<br />
sequences to fi nd sequences as quickly as possible.<br />
Click Search to jump to the next event based on<br />
the specifi ed time.<br />
© <strong>MOBOTIX</strong> AG • Security-Vision-Systems • Made in Germany<br />
www.mobotix.com • sales@mobotix.com
Alarm Management<br />
41/152<br />
exporting Video Sequences<br />
Right-click the Player sidebar panel and<br />
enter the start and end positions to defi ne<br />
an export range. The range you selected<br />
now appears in green.<br />
If you click the export button, the export<br />
list will open and the selected time range will be added as a new entry at the end of the<br />
list. This procedure can be repeated as often as needed to add other interesting video<br />
sequences to the export list.<br />
More information on this topic can be found in Section 2.6.4, Export List And Data Export.<br />
2.6.2 Defining Player Windows<br />
In contrast to a display window in Player mode, a player window is a special layout<br />
element that displays the last event image of any video source that was selected from<br />
the alarm list.<br />
You fi rst need to activate the Layout Manager to defi ne a player window.<br />
Defining Player Windows In A Grid Layout<br />
• If there is no empty display fi eld available, select a diff erent grid that can display<br />
more fi elds on the existing display area.<br />
• Right-click an empty fi eld and select Edit from the pop-up menu.<br />
• Select the Player window item from the element type list and click OK.<br />
Defining Player Windows In A Background Layout<br />
• Right-click an empty area and select Insert from the pop-up menu.<br />
• Select the Player window item from the element type list and specify the particular<br />
size you would like to use.<br />
• Click OK to close the dialog box.<br />
• Move the new window to a suitable position.<br />
© <strong>MOBOTIX</strong> AG • Security-Vision-Systems • Made in Germany<br />
www.mobotix.com • sales@mobotix.com
42/152 MxControlCenter Manual: Getting Started<br />
Right-click the element in question while the Layout Manager is enabled and select Edit<br />
from the pop-up menu to modify the properties of a player window at a later time.<br />
Deactivate the Layout Manager to save the settings of the current layout.<br />
© <strong>MOBOTIX</strong> AG • Security-Vision-Systems • Made in Germany<br />
www.mobotix.com • sales@mobotix.com
Alarm Management<br />
43/152<br />
2.6.3 Using Video Search<br />
If you have defi ned an external recording target (fi le server) for the relevant video source<br />
or the <strong>MOBOTIX</strong> camera has an SD/CF card, large amounts of data will be saved for an<br />
extended period depending on the memory storage capacity.<br />
A more comprehensive search option that is not limited to a single camera like the basic<br />
player window is provided by the Video Search dialog box, which appears when you click<br />
Open event Search.<br />
The Search dialog box can be used to browse through the recordings from all the cameras<br />
defi ned in the current view. In the Cameras tab, select the camera whose recordings you<br />
would like to browse through. MxControlCenter now shows you all recorded events in<br />
chronological order in the Events tab.<br />
The vertical slider bar next to the events list provides a visual indication of the time range<br />
during the entire recording period in which events are displayed in the list. By selecting<br />
an event in the list, the image associated with that event is displayed in the area of the<br />
player window that was described in the previous section.<br />
© <strong>MOBOTIX</strong> AG • Security-Vision-Systems • Made in Germany<br />
www.mobotix.com • sales@mobotix.com
44/152 MxControlCenter Manual: Getting Started<br />
If you have identifi ed an event as relevant, the time of the event can be defi ned as the<br />
Reference time , which is used to automatically display the time diff erence from the other<br />
events during the search.<br />
Filtering events<br />
If you would like to search for special event types<br />
(for example, motion detection only), you can<br />
defi ne an event filter. To do so, click Set event<br />
filter and activate the events you would like to<br />
fi lter.<br />
This button is only relevant for searching and<br />
playing back continuous recordings:<br />
• If the button is enabled (yellow), the<br />
event list will only show "real events"<br />
(VM, UC, IR, etc.).<br />
• If the button is disabled (crossed out), the<br />
events list will also include the "pseudo<br />
events" of the continuous recording, which means the images that are generated<br />
every minute at the beginning of a new recording sequence will be displayed.<br />
More information on the video search options can be found in Section 3.4, Video Searches<br />
And Export Features.<br />
Printing event Images<br />
Click Print current and post-processed image to print the currently displayed event image.<br />
MxControlCenter now shows a print preview of the currently displayed image. If this image<br />
has been corrected by post-processing, the original, non-processed image will be added<br />
as well.<br />
You can also print event images as *.pdf fi les using the integrated PDF export feature for<br />
easy sending and archiving of printouts.<br />
2.6.4 export List And Data export<br />
Click export or Add to export list to open the export dialog box or add previously selected<br />
events or time ranges to the export list. Select an event from the events list and click Add<br />
to export list to add the individual event. To defi ne a time range, set the Player to the exact<br />
time you would like and then specify the start time by selecting Set start position from<br />
the pop-up menu for the Player panel. After searching for the last scene to be exported,<br />
select Set end position from the pop-up menu to defi ne the end time.<br />
© <strong>MOBOTIX</strong> AG • Security-Vision-Systems • Made in Germany<br />
www.mobotix.com • sales@mobotix.com
Alarm Management<br />
45/152<br />
Note<br />
The time range defi ned in this manner can include any number of events. If an explicit<br />
time range for the export has not been defi ned, the entire time range is automatically<br />
added to the export list dialog box here as well.<br />
export List<br />
You can compile all the video sequences that you would like to export in the export list.<br />
These particular sequences are added by defi ning a time range (right-click > Set start<br />
position/end position) and then incorporating this range into the export list.<br />
Adding Video Sequences To The export List<br />
The following options are available for this purpose:<br />
• The "Player" Sidebar Panel: Defi ne an export range (right-click > Set start position/<br />
end position) and then click export.<br />
• The "Video Search" Dialog Box: Defi ne an export range (right-click the slider bar ><br />
Set start position/end position) and then click Add to export list.<br />
Video sequences can be added multiple<br />
times and even if the export list is closed.<br />
Click export in the Video Search dialog<br />
box or select Recording > export from<br />
the menu to display the list.<br />
© <strong>MOBOTIX</strong> AG • Security-Vision-Systems • Made in Germany<br />
www.mobotix.com • sales@mobotix.com
46/152 MxControlCenter Manual: Getting Started<br />
editing The export List<br />
If the export list is open, you can select items individually or in groups (sHIFT-CLICk) and<br />
then move them with the mouse or delete them with the DeLeTe key<br />
Data export<br />
MxControlCenter provides a number of diff erent formats for exporting recorded video and<br />
audio data. Choose a format from the export as selection box in the export list:<br />
• AVI File: This format can be displayed on all standard video players and not only<br />
contains the video data, but also the audio data of the video source (if included in<br />
the recording).<br />
• MxPeG Clip: This format can be integrated and played back in MxControlCenter as<br />
a video source. This format also includes the audio data of the video sources in the<br />
export (if included in the recording).<br />
• File Server Structure: This format can also be integrated and played back in<br />
MxControlCenter as a video source. It also contains the audio channel of the video<br />
sources (if it was included in the recording).<br />
Exporting as an *.avi fi le or an MxPEG clip activates the<br />
Settings button, which can be used to open the export<br />
Format Options dialog box. From this dialog you can<br />
defi ne the options for the export (for example, maximum<br />
fi le size).<br />
© <strong>MOBOTIX</strong> AG • Security-Vision-Systems • Made in Germany<br />
www.mobotix.com • sales@mobotix.com
Alarm Management<br />
47/152<br />
2.7 Video Processing<br />
2.7.1 Image Post-Processing<br />
MxControlCenter normally displays all live video images and the images of an archived<br />
recording in their original unedited form. This also applies to live images from integrated<br />
third-party cameras and analog cameras in particular (see Section 2.8.2, Controlling PTZ<br />
Cameras And Mechanical Pan/Tilt Heads).<br />
You are certainly familiar with the term "post-processing" in<br />
digital photography, which in this case refers to the softwarebased<br />
methods off ered by MxControlCenter for the subsequent<br />
"improvement" of images. In the standard camera view, select<br />
the camera whose image display you would like to optimize<br />
and then click the arrow to the right of the Switch image postprocessing<br />
on/off > Options button.<br />
You can adjust the settings for saturation, brightness, backlight and<br />
sharpness in the Post-processing panel of the Image Processing<br />
dialog box. By clicking the Switch image post-processing on/<br />
off button in the main view, you can quickly switch back and<br />
forth between viewing the original image from the camera and<br />
the improved, post-processed image.<br />
This type of post-processing also off ers a useful tool for viewing<br />
low-quality archived images at a later date for search purposes,<br />
for example. This is why you will fi nd the same controls for adjusting saturation, brightness,<br />
backlight and sharpness in the Video Search dialog box (see Section 2.6, Video<br />
Searches And Export Features).<br />
More information on this topic can be found in Section 3.9, Image Post-Processing.<br />
2.7.2 Image Distortion Correction<br />
In addition to the options described in Section 2.4.6, Using The vPTZ Features for correcting<br />
the distortion of currently displayed images in the PTZ Control sidebar panel, the<br />
Image Processing dialog box can also be used to control how image distortion is corrected.<br />
To open this dialog box, click Switch image processing on/off.<br />
The automatic distortion correction features of MxControlCenter are used to fi x the distorted<br />
view caused by the wide-angle lenses of the cameras. Although the lens is specifi ed for<br />
some camera models (Q22M, for example), for older camera<br />
models you need to clearly indicate which lens is being used<br />
and how the camera is installed in the Image Processing<br />
dialog box. The results of distortion correction are immediately<br />
visible as it straightens any vanishing lines that were crooked<br />
due to distortion.<br />
© <strong>MOBOTIX</strong> AG • Security-Vision-Systems • Made in Germany<br />
www.mobotix.com • sales@mobotix.com
48/152 MxControlCenter Manual: Getting Started<br />
A perfect example of where this distortion correction feature can be used is in a ceilingmounted<br />
Q22M camera whose 180° lens captures "spherical" images.<br />
2.8 Control Center And Management Features<br />
2.8.1 Integrating Third-Party Digital/Analog Cameras<br />
MxControlCenter is the ideal solution when used in conjunction with <strong>MOBOTIX</strong> cameras.<br />
Note, however, that you can easily connect the network cameras or even analog cameras<br />
of third-party manufacturers to a MxControlCenter video management system also.<br />
Displaying Live Images<br />
Adding third-party IP cameras to the system is extremely easy and is done using the<br />
previously described Add Cameras: Search and Select dialog box. Select the manufacturer<br />
type and enter the IP address and access data as usual.<br />
Third party<br />
IP PTZ camera<br />
<strong>MOBOTIX</strong><br />
IP camera<br />
<strong>MOBOTIX</strong><br />
IP camera<br />
Integrating analog cameras requires an intermediary step in which the analog video data<br />
is converted to a digital format that is compatible with MxControlCenter (MxPEG or M-JPEG).<br />
© <strong>MOBOTIX</strong> AG • Security-Vision-Systems • Made in Germany<br />
www.mobotix.com • sales@mobotix.com
Control Center And Management Features<br />
49/152<br />
Analog Camera<br />
This task is performed by <strong>MOBOTIX</strong> MxServer, a dedicated Windows computer that has a<br />
frame grabber card connected to the analog cameras and provides the digitalized analog<br />
signals as an M-JPeG data stream just like an IP camera in an IP network. This means the<br />
analog camera is integrated in MxControlCenter via the IP address of <strong>MOBOTIX</strong> MxServer.<br />
The cameras connected to the frame grabber card, which accepts up to four cameras,<br />
are normally accessed via port numbers 81 to 84. Analog cameras are integrated accordingly<br />
using the Add Camera dialog box (see Section 3.10.5, Using Analog Cameras In ).<br />
© <strong>MOBOTIX</strong> AG • Security-Vision-Systems • Made in Germany<br />
www.mobotix.com • sales@mobotix.com
50/152 MxControlCenter Manual: Getting Started<br />
Archiving Live Images<br />
Section 2.3.4, Camera Confi guration explained how <strong>MOBOTIX</strong> cameras can archive your<br />
image data not only in their internal memory, but also on a computer (fi le server). The<br />
task of archiving image data in the same format as <strong>MOBOTIX</strong> IP cameras is performed<br />
by <strong>MOBOTIX</strong> MxServer on its local hard drive. MxServer does this for both the image<br />
data of third-party digital IP cameras and the digitalized image data of analog cameras.<br />
You now need to open the Options dialog box (Camera tab, Camera access) of MxControlCenter<br />
and select the fi le server path where <strong>MOBOTIX</strong> MxServer will save the digitized data of<br />
analog cameras. This integrated system of third-party digital/analog cameras and <strong>MOBOTIX</strong><br />
cameras can now access the same archiving system for subsequent video analysis. The<br />
result is the seamless integration of older analog technology into the IP-based digital system.<br />
More information on how to start up and confi gure <strong>MOBOTIX</strong> MxServer can be found in<br />
the documentation at www.mobotix.com (Support > Manuals).<br />
2.8.2 Controlling PTZ Cameras And Mechanical Pan/Tilt Heads<br />
The fi xed lenses of <strong>MOBOTIX</strong> cameras are unrivaled in situations where robustness and<br />
weather resistance are essential due to the intentional elimination of mechanical parts.<br />
If camera mobility is required, a mechanical pan/tilt head can be used in conjunction with<br />
a suitable <strong>MOBOTIX</strong> outdoor camera. This camera is mounted on the pan/tilt head and<br />
controls it via the serial interface. The type of pan/tilt head for this particular camera needs<br />
to be selected in MxControlCenter so that you can control the camera using your mouse<br />
or joystick (Tools > Options > ).<br />
If a third-party IP camera with a mechanical PTZ feature is integrated into the system, the<br />
pan, tilt and zoom features are automatically enabled. No further settings are necessary.<br />
Even analog cameras with pan/tilt heads can be controlled through integration with <strong>MOBOTIX</strong><br />
MxServer. To do so, the camera needs to be connected to the frame grabber card and its<br />
control cable needs to be connected to the serial interface of <strong>MOBOTIX</strong> MxServer. <strong>MOBOTIX</strong><br />
MxServer translates the control commands for the analog camera type you are using.<br />
The mechanical PTZ actions for both pan/tilt heads, as well as connected PTZ dome<br />
cameras, are controlled in the same manner as the virtual (digital) PTZ actions of <strong>MOBOTIX</strong><br />
cameras are controlled. For the control features, you can use either a Megatron joystick<br />
© <strong>MOBOTIX</strong> AG • Security-Vision-Systems • Made in Germany<br />
www.mobotix.com • sales@mobotix.com
Configuring MxControlCenter<br />
51/152<br />
or the control elements located in the PTZ Control sidebar panel (see Section 2.4.6, Using<br />
The vPTZ Features).<br />
2.9 Configuring MxControlCenter<br />
The issue of software support is critical if you are using MxControlCenter in an environment<br />
with a large number of cameras. This section shows how you can run MxControlCenter on<br />
diff erent computers using the same confi guration, for example. It also explains how to unify<br />
the confi guration of the cameras and how the camera software is updated automatically.<br />
2.9.1 Modifying, Saving And Loading Program Options<br />
The program options can be set in the Tools > Options dialog box as described in Section 2.3.6,<br />
Program Settings. You can save MxControlCenter settings, save them under a diff erent<br />
name and reload them with the Tools > Program Settings command.<br />
The Tools > Program Settings > export environment command allows you to save a<br />
complete work environment and all included program fi les (the Complete ... option) for<br />
transfer to another computer.<br />
2.9.2 Customizing The User Interface<br />
Since the requirements of an MxControlCenter installation can vary widely, there are<br />
many options available for customizing the user interface. They will be briefl y described<br />
in this section.<br />
Caution<br />
These settings are selected from the View menu. Note that if one of these options<br />
removes all the menu and toolbars in the application, you can always return to<br />
the "normal" view by disabling the View > Display area only command from the<br />
pop-up menu (right-click).<br />
Hiding Program Bars<br />
The commands provided in the View menu allow you to selectively hide the menu bar,<br />
toolbar, status bar, alarm list and sidebar and hence increase the size of the display area.<br />
Hiding Controls In The Display Area<br />
If you would like to hide all the controls of MxControlCenter, select View > Display area<br />
only. This maximizes the display area of the video sources within the application window.<br />
Press the esC key or disable View > Display area only from the pop-up menu (right-click)<br />
to leave this view mode.<br />
© <strong>MOBOTIX</strong> AG • Security-Vision-Systems • Made in Germany<br />
www.mobotix.com • sales@mobotix.com
52/152 MxControlCenter Manual: Getting Started<br />
Switching Layouts In The Toolbar<br />
Perform the following steps to create this view:<br />
• Tools > Options > General: Set Layout buttons in toolbar to 7.<br />
• View: Select Display area only.<br />
• Pop-up menu: Enable View > Alarm List.<br />
• Pop-up menu: Enable View > Toolbar.<br />
You can now switch the layouts using the buttons at the top of the application while the<br />
alarm list shows the triggered alarms.<br />
If you prefer to have the toolbar appear at the bottom of the display area, select the Show<br />
toolbar at bottom option in the Tools > Options > General dialog box.<br />
2.9.3 Managing MxControlCenter Configurations<br />
Carrying out the same confi guration on all systems represents a signifi cant time and cost<br />
factor for any administrator who is responsible for installing software on numerous workstation<br />
systems. Usually this task requires performing a large number of identical and recurring<br />
steps for each workstation. This task is now handled by MxControlCenter, which is able to<br />
save the complete confi guration along with all executable fi les to a single folder, without<br />
having the default settings and activation keys hidden in some system folder. The entire<br />
environment can now be "transported" without any installation or confi guration hassles.<br />
You no longer even have to copy this folder if a global folder is specifi ed for MxControlCenter.<br />
If this confi guration folder is saved on a fi le server and linked to the individual MxControlCenter<br />
installations, it will defi ne all settings (available views, alarm list settings, etc.) on each<br />
workstation.<br />
To create the confi guration folder, the administrator simply needs to confi gure MxControlCenter<br />
based on his or her wishes and then save the confi guration to a shared folder on the<br />
server. All you need to do is link to the global folder (Tools > Options > General > Set<br />
© <strong>MOBOTIX</strong> AG • Security-Vision-Systems • Made in Germany<br />
www.mobotix.com • sales@mobotix.com
Configuring MxControlCenter<br />
53/152<br />
global order) on the workstation where MxControlCenter is launched. Additional confi<br />
guration steps such as searching and connecting video sources or creating layouts are<br />
no longer necessary. Now restart the application and MxControlCenter will automatically<br />
apply the settings that the administrator defi ned on his or her personal workstation.<br />
However the global settings may not be modifi ed on the individual workstations for this<br />
particular feature of the global folder to be eff ective. This is done by setting up the user and<br />
rights management (see Section 3.7, Users And Passwords) so that only the administrator<br />
is allowed to modify password-protected settings such creating and editing layouts while<br />
the user is only allowed to access the various views.<br />
2.9.4 editing Camera Configurations<br />
The Camera Configuration dialog box in MxControlCenter is used to confi gure <strong>MOBOTIX</strong><br />
cameras and other IP cameras, it allows you to adjust the most common camera settings<br />
in just a few steps. This includes, for example, enabling general arming, confi guring video<br />
recording, changing image settings, etc. Chapter 4, Confi guring <strong>MOBOTIX</strong> Cameras provides<br />
a detailed description of the various options for confi guring cameras.<br />
2.9.5 Managing Camera Configurations<br />
MxControlCenter provides the Update Assistant to help you manage camera confi gurations<br />
and fi rmware updates. To access the Assistant, click Tools > Assistants > Update<br />
camera software.<br />
As you may have noticed, <strong>MOBOTIX</strong> cameras off er a variety of features that, in some<br />
cases, require a signifi cant amount of confi guration work. For example, setting up a<br />
detailed time schedule to activate a camera outside of regular business hours may not<br />
be very diffi cult. However, if you have to do this for many diff erent cameras, it becomes<br />
a very time-consuming task.<br />
© <strong>MOBOTIX</strong> AG • Security-Vision-Systems • Made in Germany<br />
www.mobotix.com • sales@mobotix.com
54/152 MxControlCenter Manual: Getting Started<br />
Such tasks are greatly simplifi ed by the Update Assistant since it can save camera confi<br />
gurations and then distribute them to other cameras.<br />
To do so, select your "pre-confi gured" camera from the camera list and click Save Settings.<br />
The saved confi guration fi le now contains all the information you need to confi gure one<br />
or more cameras with the same settings.<br />
Select the cameras you want to confi gure and then click Upload Settings. In the following<br />
dialog box you can select a previously saved confi guration fi le and then specify which<br />
settings you want to upload to the fi rst camera.<br />
© <strong>MOBOTIX</strong> AG • Security-Vision-Systems • Made in Germany<br />
www.mobotix.com • sales@mobotix.com
Configuring MxControlCenter<br />
55/152<br />
In our example, you would save all confi guration sections with the exception of network<br />
settings. These settings were selected, which means they are protected and not replaced.<br />
If you replace a camera with a diff erent model or add one or more new cameras to the<br />
installation, then these cameras can be confi gured just as easily.<br />
© <strong>MOBOTIX</strong> AG • Security-Vision-Systems • Made in Germany<br />
www.mobotix.com • sales@mobotix.com
56/152 MxControlCenter Manual: Getting Started<br />
Notes<br />
© <strong>MOBOTIX</strong> AG • Security-Vision-Systems • Made in Germany<br />
www.mobotix.com • sales@mobotix.com
MxControlCenter Controls<br />
57/152<br />
3 Advanced Features<br />
3.1 MxControlCenter Controls<br />
3.1.1 Buttons On The Toolbar<br />
• Toggle Layout Manager: The Layout Manager allows you to create new grid layouts<br />
and background layouts or modify and expand your existing layouts.<br />
If the Layout Manager is active, video sources can be selected from the sidebar and<br />
added to a layout. The grid of a layout or the background image can also be modified.<br />
For more information on the Layout Manager, see Section 3.1.2, The “Layouts” Sidebar<br />
Panel.<br />
• Activate layout or camera sequencer: The drop-marker menu button here allows<br />
you to activate either the Layout sequencer or the Camera sequencer.<br />
If the Layout sequencer is activated, MxControlCenter will automatically switch to<br />
the next layout in the Layouts list in the sidebar of MxControlCenter after a specified<br />
time interval.<br />
If the Camera sequencer is activated, MxControlCenter will automatically switch to<br />
the next camera in the active grid layout after a specified time interval. The Camera<br />
sequencer is only available for grid layouts.<br />
Notes<br />
• You can preset the global sequencer time for all cameras by clicking Tools<br />
> Options > General > Sequencer time.<br />
• You can specify the sequencer time for each individual camera by clicking<br />
Tools > Options > > Camera time.<br />
• Toggle Player Mode: Click this button to switch the active display window of a<br />
camera (shown by a yellow frame) from live image mode to Player mode. The Player<br />
mode allows you to view and play back the recorded image and event sequences<br />
of a specific camera. When the sidebar is visible, the Player panel is displayed.<br />
For more information on the Player panel, see Section 3.1.3, The “Player” Sidebar Panel.<br />
• Open Event Search: This button opens the Video Search dialog box, which allows<br />
you to view event sequences from all of the cameras. In addition, this allows you to<br />
visually edit the images and to correct any distortion (Post-processing).<br />
For more information on the event search, see Section 3.4, Video Searches And<br />
Export Features. For more information on image post-processing (for live or recorded<br />
images), see Section 3.9, Image Post-Processing.<br />
• Show/Hide Alarm List: Click this button to show or hide the alarm list that contains<br />
the event images of all of the cameras in a particular layout and the cameras that<br />
© <strong>MOBOTIX</strong> AG • Security-Vision-Systems • Made in Germany<br />
www.mobotix.com • sales@mobotix.com
58/152 MxControlCenter Manual: Advanced Features<br />
are switched on by network messages. To activate the alarm list feature, click Tools<br />
> Options > Alarm List. For more information, see Section 3.3, Alarm Processing.<br />
• Create a Grid Layout from all Cameras in the Layout: Click this button and all the<br />
window areas contained in a background layout will automatically be displayed in<br />
a grid layout. It will not cause the background layout to change.<br />
• Open Extra Window: This button shows the live image of the active camera in a<br />
separate window. This is useful in instances where, for example, the active window<br />
is in Player mode, yet you would like to view the camera simultaneously in real time.<br />
• Change the Scaling of the Camera Windows: The drop-marker menu button here<br />
allows you to specify the scaling of a layout window. The following options are available:<br />
• Layout decides<br />
• Full screen: Maximizes the current camera image<br />
• Fit display area: Increases the size of current camera image<br />
• All windows half size<br />
• All windows double size<br />
Note<br />
The All windows half size and All windows double size options are not available<br />
for background layouts.<br />
• Toggle Full Live Image Mode: The Full live image mode makes the entire sensor<br />
image of a camera visible at all times. This applies in particular to <strong>MOBOTIX</strong> hemispherical<br />
Q cameras, which usually show a portion of the entire sensor image with<br />
distortion correction enabled. You can view the entire image without distortion correction<br />
with this button. In other camera models, the Full live image mode button<br />
is always active unless you zoom in on the image.<br />
• Switch Image Post-Processing On/Off: Image post-processing can be used to subsequently<br />
enhance how live images or event sequences are displayed. You can<br />
adjust the settings for saturation, brightness, backlight and sharpness. Click this<br />
button to activate or deactivate the post-processing features. With the drop-marker<br />
menu button here, you can open the dialog box that contains the settings for image<br />
processing.<br />
• Copy Current Image to the Desktop: Click this button to immediately save the image<br />
that is currently displayed in the active window of a layout (yellow frame) to the<br />
Desktop (as a *.bmp file).<br />
• Copy Current Image to Alarm List: Click this button to save the image that is currently<br />
displayed in the active window of a layout to the alarm list. If the Open list on new<br />
alarm option in Tools > Options > Alarm List is active, the alarm list will be displayed<br />
automatically.<br />
© <strong>MOBOTIX</strong> AG • Security-Vision-Systems • Made in Germany<br />
www.mobotix.com • sales@mobotix.com
MxControlCenter Controls<br />
59/152<br />
• Print Current Image: This button displays a print preview of the image that is currently<br />
visible (the original image is also printed if the image has been changed using the<br />
post-processing functions). You can print the image or save it as a *.pdf file from this<br />
dialog box.<br />
• Show Alarm Instructions of Selected Camera: Use this button to show the alarm<br />
instructions for the selected camera in a separate window. You can assign the alarm<br />
instruction file in Tools > Options > > Layout and display options.<br />
• Activate the Preferred Layout of the Selected Camera: Use this button to show the<br />
preferred layout for the selected camera. You can assign the preferred layout in Tools<br />
> Options > > Layout and display options.<br />
• Show/Hide a Reference Image of the Selected Camera: Select this button to view<br />
the reference image assigned to a camera. You can also do this by clicking the M<br />
icon (memory) in the title bar of the image window. A background layout needs to<br />
be active for the Reference image button to work.<br />
• Enable Audio for the Selected Camera: This button activates the selected camera's<br />
audio that is transmitted from its microphone to the computer. Note that the camera<br />
microphone needs to be activated in Admin Menu > Loudspeaker and Microphone.<br />
• Activate Announcement to Camera: Click this button to activate the announcement<br />
feature of the active camera. You can now make an announcement over the camera<br />
loudspeaker using the microphone that is connected to the MxControlCenter computer.<br />
Note that the camera loudspeaker needs to be activated in Admin Menu ><br />
Loudspeaker and Microphone.<br />
• Turn Light On/Off via Camera: Click this button to permanently activate switching<br />
output 1 of the selected camera. Click this button to switch the light on or off (using<br />
<strong>MOBOTIX</strong> ExtIO, CamIO or a relay).<br />
• Open the Door via the Selected Camera: This button also activates switching output<br />
1 of the selected camera, but only for a preset time. A door opener can be<br />
activated in this manner, for example.<br />
• Cancel/Restart the Connection to the Selected Camera: You can either cancel or<br />
restart the connection to the active camera with this button. This is useful when, for<br />
example, a camera occasionally causes a lot of network traffic but is not needed at<br />
the moment. The message Offline appears in the display window of the active<br />
camera.<br />
• Change the Camera Settings from MxCC: Click this button to open the Camera<br />
Configuration dialog box where you can change the selected settings of one or<br />
more <strong>MOBOTIX</strong> cameras or synchronize them with each other. This applies, for<br />
example, to enabling features ranging from arming and recording, to image and<br />
exposure settings, and recording, recording path (external server, SD/CF card, etc.)<br />
and events.<br />
• Open the Camera in a Web Browser: This button opens the active camera in a<br />
window of your default web browser.<br />
• Show Camera Information in the Web Browser: This button opens the information<br />
(Admin Menu > Camera Status) of the active camera in your default web browser.<br />
© <strong>MOBOTIX</strong> AG • Security-Vision-Systems • Made in Germany<br />
www.mobotix.com • sales@mobotix.com
60/152 MxControlCenter Manual: Advanced Features<br />
3.1.2 The "Layouts" Sidebar Panel<br />
In the Layouts sidebar panel you can select, create, modify, delete or rename grid layouts<br />
and background layouts. To access these features, you first need to activate the Layout<br />
Manager by clicking the Toggle Layout Manager button in the toolbar or the Layout ><br />
Edit... command from the pop-up menu). Use the mouse to click on the desired layout or<br />
use the arrow keys on the keyboard. To view the Layout panel, the sidebar needs to be<br />
visible (Right-click > View > Side bar > Show).<br />
• Back/Forward: These buttons and the corresponding lists work like Internet browser<br />
buttons, enabling you to navigate through established layouts.<br />
• New Layout: The New Layout command opens the Create New Layout dialog box.<br />
In this dialog box you can select the type of layout you would like to create (background<br />
or grid layout). You can also select the background image for a background<br />
layout or the grid type for a grid layout. For additional information on this topic, see<br />
Section 3.2Editing Layouts.<br />
• Quit Layout Manager: You can deactivate the Layout Manager by selecting this<br />
command or the Toggle Layout Manager button in the toolbar. MxControlCenter<br />
will then return to its normal display mode.<br />
• Add Cameras: This command opens the Add Cameras dialog box in which all<br />
available <strong>MOBOTIX</strong> cameras and other video sources can be viewed, added to<br />
the camera list in the sidebar and used in MxControlCenter layouts. For additional<br />
information on this topic, see Section 3.2, Editing Layouts.<br />
• Define as Start Layout: You can define any layout as the start layout with this command.<br />
A start layout is represented by green text in the layout list. MxControlCenter always<br />
displays this layout when you launch the program. Note that the Start Layout option<br />
in Tools > Options > General > On startup needs to be activated for this to occur.<br />
If the Return to Start Layout after ... sec. option is activated (Tools > Options ><br />
General), this start layout will also be activated automatically after the specified<br />
time period. For additional information on this topic, see Section 3.2.3Additional<br />
Options for Editing Layouts.<br />
• Cut, copy, paste, duplicate, delete or rename layout: You can use the the associated<br />
copy and paste features with layouts using these commands.<br />
© <strong>MOBOTIX</strong> AG • Security-Vision-Systems • Made in Germany<br />
www.mobotix.com • sales@mobotix.com
MxControlCenter Controls<br />
61/152<br />
Hierarchical Features<br />
Layouts can be grouped hierarchically in the layout list. This can be done by moving an<br />
item in the list with your mouse or using the commands from the pop-up menu.<br />
• Up, Down: These menu commands move the selected layout up or down. You can<br />
also perform these functions directly by moving the items in the list with your mouse.<br />
• Up One Folder: This menu command moves the selected layout up one folder in<br />
the hierarchy (to the left in the list display).<br />
Section 3.2 describes how to edit a layout and the content it displays.<br />
3.1.3 The "Player" Sidebar Panel<br />
You can view and play back the recorded<br />
image and event sequences of a camera<br />
in Player mode. To activate the Player<br />
mode, either click the Toggle Player mode<br />
button from the toolbar, right-click the<br />
Player mode command from the popup<br />
menu of an image window or click<br />
the Player title bar in the sidebar panel.<br />
Note<br />
To view the Player panel, the sidebar needs to be visible (Right-click > View ><br />
Sidebar > Show). The Player panel will be disabled if no camera window is active,<br />
i.e., the active camera window is not in Player mode.<br />
Buttons for Playing Back Event Sequences<br />
• Play Events Only - Backwards: Plays back the images of all event sequences quickly<br />
and in reverse order. Click the button again to stop playback.<br />
• Previous Frame: Click this button to show the previous image of an event sequence.<br />
• Play: Plays back the event sequences including all images. Click the button again<br />
to stop playback.<br />
• Next Frame: Click this button to show the next image of an event sequence.<br />
© <strong>MOBOTIX</strong> AG • Security-Vision-Systems • Made in Germany<br />
www.mobotix.com • sales@mobotix.com
62/152 MxControlCenter Manual: Advanced Features<br />
• Fast Forward: Fast-forwards through the images of all event sequences. Click the<br />
button again to stop playback.<br />
Buttons for Playing Back Event Images<br />
• Jump to Beginning: Click this button to display the first saved image.<br />
• Rewind: Plays back the event images in reverse order. Click the button again to stop<br />
playback.<br />
• Previous Event: Click this button to display the previous event image.<br />
• Next Event: Click this button to show the next event image.<br />
• Play Events Only - Forwards: Plays back the event images in chronological order.<br />
Click the button again to stop playback.<br />
• Jump to End: Click this button to display the last saved image.<br />
Time-Synchronized Playback<br />
The Player panel in the sidebar also<br />
allows you to play back synchronized<br />
video from several cameras in a layout<br />
simultaneously. Synchronous playback<br />
applies to all the display windows of<br />
a layout that are currently in Player<br />
mode. You can switch the display<br />
windows to Player mode by clicking<br />
the Toggle Player mode button in the toolbar for individual windows or the All button in<br />
the Player panel for all the windows of a layout at once.<br />
Making a selection from the Synch. Mode drop-down list opens a dialog box for setting<br />
the start time. Enter a start time and click Goto to set all Player windows to that time.<br />
Note<br />
If one of the selected cameras did not make any recordings at that time, the time<br />
of the closest available recording will appear in the image.<br />
© <strong>MOBOTIX</strong> AG • Security-Vision-Systems • Made in Germany<br />
www.mobotix.com • sales@mobotix.com
MxControlCenter Controls<br />
63/152<br />
Now use the buttons in the Player panel to control playback.<br />
The two selectable synchronization modes work as follows:<br />
• Real time: Click this option to enable real-time synchronized playback in all display<br />
windows selected for this purpose. Note that MxControlCenter needs to be able to<br />
load all necessary data fast enough to allow real-time synchronized playback. If,<br />
for example, a large number of recordings are loaded from the same file server<br />
or via the individual cameras and played back synchronously, this option may not<br />
function properly.<br />
Caution<br />
If the data cannot be read fast enough to ensure real-time playback, some of<br />
the images will be ignored in the display. This may cause "jumps" in scenes<br />
involving motion. In this case, selecting the option Reduced Speed will dramatically<br />
improve performance (see next point).<br />
• Reduced speed: In this mode, synchronized playback is performed at a slightly<br />
reduced speed for instances where ‐ data cannot be read fast enough ‐ to allow<br />
real-time playback. Moreover, instead of forcing synchronicity, this mode allows a lag<br />
time of up to 600 milliseconds between the cameras. Thanks to these two features,<br />
you can perform "near-synchronized" playback of substantially more cameras with<br />
zero image loss. Given a standard system configuration, for example, you are now<br />
able to synchronously play back the data recorded by 16 cameras in a layout over<br />
a period of ten minutes and with a lag time of less than two seconds.<br />
© <strong>MOBOTIX</strong> AG • Security-Vision-Systems • Made in Germany<br />
www.mobotix.com • sales@mobotix.com
64/152 MxControlCenter Manual: Advanced Features<br />
Display, Time Selection and Search elements<br />
• The Date and Time of the First,<br />
Last and Currently Displayed<br />
Image: This section displays the<br />
time of the fi rst and last recorded<br />
images and the time of the currently<br />
displayed image.<br />
• Slider Bar: The slider bar allows you to quickly navigate to a specifi c time in the<br />
recorded video sequence.<br />
• Search Fields for Date and Time and the Search Button: Enter a date and time and<br />
click the Search button to display the next available video sequence.<br />
export Feature<br />
• export Button: You can set<br />
the current time as the start<br />
or end position from the<br />
pop-up menu of the slider<br />
bar. Clicking the export button<br />
opens the "Export" dialog<br />
box and adds the selected time range to the export list automatically.<br />
More information on the export features is available in Section 2.6.4 Export List and<br />
Data Export.<br />
© <strong>MOBOTIX</strong> AG • Security-Vision-Systems • Made in Germany<br />
www.mobotix.com • sales@mobotix.com
MxControlCenter Controls<br />
65/152<br />
3.1.4 The "PTZ Controls" Sidebar Panel<br />
PTZ Controls allow you to zoom and select an<br />
area from a camera live image or recorded event<br />
sequences. They only include features used either<br />
directly by the camera in the live image or subsequently<br />
by MxControlCenter. The subsequent<br />
use of these features by MxControlCenter can<br />
also apply to both the live image as well as the<br />
recorded images or video sequences.<br />
The existing features are especially relevant for<br />
Q24M camera models that have a 180° lens. These<br />
cameras produce extremely distorted spherical<br />
"full images" that are capable of depicting the<br />
entire interior of a room, for example.<br />
© <strong>MOBOTIX</strong> AG • Security-Vision-Systems • Made in Germany<br />
www.mobotix.com • sales@mobotix.com
66/152 MxControlCenter Manual: Advanced Features<br />
A number of options are now available for processing these kinds of images:<br />
• Full - Camera provides full image for live streaming and recording: The camera<br />
sends the full image to MxControlCenter in a video stream. Here, it is saved in its<br />
original unedited form.<br />
In MxControlCenter you also have the option to correct the spherical image for display<br />
purposes, which involves removing all distortion and applying vPTZ actions (virtual<br />
pan/tilt/zoom actions). This can be done for both the live display and recorded data.<br />
Since all image information is available in the recorded full image itself, you can<br />
subsequently access any specific area of the image when performing a search.<br />
Full image of the camera(live<br />
streaming and recording)<br />
Area of the live image subsequently corrected<br />
by MxControlCenter<br />
© <strong>MOBOTIX</strong> AG • Security-Vision-Systems • Made in Germany<br />
www.mobotix.com • sales@mobotix.com
MxControlCenter Controls<br />
67/152<br />
• Area Corrected - In-Camera Distortion Correction for Live Streaming and Recording:<br />
The camera is also capable of correcting the full image for distortion on its own and<br />
sending the corrected image to MxControlCenter in a video stream. Either a zoomed-in<br />
area or a specific summary view (Surround, Panorama, Double Panorama, Panorama/<br />
Focus) generated from the full image can be sent to MxControlCenter from here. The<br />
corrected image of the live view will also be saved accordingly.<br />
In this case MxControlCenter displays both the live stream and the recorded data<br />
“Surround” view with<br />
north/east/south/west<br />
views as generated by the<br />
camera(live streaming and<br />
recording)<br />
without changes.<br />
The Surround view displays the full image of the entire image sensor of Q24M as a<br />
quad view with four virtual cameras (North, East, South, West-abbreviated NESW). You<br />
must set the North direction. The directions of the other virtual cameras (East, South<br />
and West) are set automatically (they are determined by rotating an additional 90°<br />
clockwise for each direction).<br />
© <strong>MOBOTIX</strong> AG • Security-Vision-Systems • Made in Germany<br />
www.mobotix.com • sales@mobotix.com
68/152 MxControlCenter Manual: Advanced Features<br />
• In-Camera Distortion Correction for Live Streaming and Recording as a Full Image:<br />
In this case, MxControlCenter displays the live stream without changes, but automatically<br />
performs distortion correction when displaying the recorded data.<br />
Here, you can also subsequently access any specific area of the image when performing<br />
a search.<br />
Corrected area of the camera live<br />
image (zoomed and panned)<br />
Corrected area of the recording<br />
(zoomed and panned)<br />
Recorded full image<br />
© <strong>MOBOTIX</strong> AG • Security-Vision-Systems • Made in Germany<br />
www.mobotix.com • sales@mobotix.com
MxControlCenter Controls<br />
69/152<br />
Important<br />
1. The underlying full image needs to at least have a MEGA resolution (1280 x 960)<br />
or, better yet, a QXGA resolution (2048 x 1536) for subsequent image distortion<br />
correction by MxControlCenter. Otherwise subsequent distortion correction will<br />
not result in satisfactory image quality. This applies both to the live display and<br />
the recorded data.<br />
2. The same views are supported as with in-camera distortion correction if<br />
subsequent distortion correction is performed by MxControlCenter:<br />
• Area corrected<br />
• Surround view<br />
• Panorama view<br />
• Double Panorama view<br />
• Panorama/Focus view<br />
Advantages and Disadvantages of Each Method<br />
1. Camera Provides Full Image and Distortion Correction in MxControlCenter<br />
Advantages:<br />
• Higher frame rate since no additional load is imposed on the camera's processor<br />
by complex image distortion correction.<br />
• All image information is included in the recording and then available for subsequent<br />
searches<br />
Disadvantages:<br />
• High data rate is required for live streaming since the camera needs to send at<br />
least MEGA images to MxControlCenter<br />
• High data rate when reading recorded videos in MEGA/QXGA resolution.<br />
• Higher load on the MxControlCenter computer due to image distortion correction<br />
2. In-Camera Distortion Correction (Live Streaming and Recording)<br />
Advantages:<br />
• Lower data rate for live streaming and reading the recordings since they can be<br />
saved in smaller formats (VGA, SVGA).<br />
• Subsequent distortion correction means no additional load on the MxControlCenter<br />
computer<br />
© <strong>MOBOTIX</strong> AG • Security-Vision-Systems • Made in Germany<br />
www.mobotix.com • sales@mobotix.com
70/152 MxControlCenter Manual: Advanced Features<br />
Disadvantages:<br />
• Image distortion correction imposes additional load on the camera's processor<br />
and leads to a lower frame rate.<br />
• Important segments of the recording where an event occurs may be missing in<br />
the case of live PTZ actions.<br />
• The complete set of image information is no longer available for the Video Search<br />
feature.<br />
3. In-Camera Distortion Correction for Live Streaming and Recording as a Full Image<br />
Advantages:<br />
• Subsequent distortion correction means no additional load on the computer<br />
running MxControlCenter for the live display<br />
• All image information is included in the recording and then available for subsequent<br />
searches.<br />
• High data rate not required to run the live display.<br />
Disadvantages:<br />
• Image distortion correction and full image storage impose an additional load on<br />
the camera's processor and lead to a lower frame rate<br />
• High data rate when reading recorded videos in MEGA/QXGA resolution.<br />
The best method for you depends on your specific needs and circumstances.<br />
You can activate the virtual pan/tilt function<br />
controller by right-clicking the PTZ<br />
Controls command from the pop-up<br />
menu or clicking the PTZ Controls title<br />
bar in the sidebar.<br />
© <strong>MOBOTIX</strong> AG • Security-Vision-Systems • Made in Germany<br />
www.mobotix.com • sales@mobotix.com
MxControlCenter Controls<br />
71/152<br />
Note<br />
To view the PTZ Controls panel, the sidebar needs to be visible (Right-click > View<br />
> Sidebar > Show). Whether the camera window is set to live image display or<br />
Player mode determines which sections of PTZ Controls are active. Whether or not<br />
a particular section is activated also depends on which <strong>MOBOTIX</strong> camera is being<br />
used. For example, the Left, Right and NESW Auto Move features are only available<br />
for the <strong>MOBOTIX</strong> Q models.<br />
• Camera Live Image: You can use this drop-down list to choose the display mode of a<br />
<strong>MOBOTIX</strong> camera in the selected display window. The display modes you can choose<br />
from are the same as the display mode options provided in the quick control of the<br />
camera live view in a browser window (for more information, refer to the <strong>MOBOTIX</strong><br />
software manual and the <strong>MOBOTIX</strong> Q24M camera manual).<br />
• MxCC Display: The PTZ features of MxControlCenter can be selected from this dropdown<br />
list. They have the same appearance as the display modes of the camera live<br />
image, but differ from the PTZ features applied directly to the camera insofar that<br />
MxControlCenter PTZ features can always be applied to a complete camera full<br />
image (with all the information of the 180° hemispheric image) after being recorded.<br />
Live image modes<br />
for Q24M models<br />
PTZ features of<br />
MxControlCenter<br />
Note<br />
You should set the camera to its maximum resolution (a QXGA resolution of<br />
2048 x 1536 pixels in the case of a <strong>MOBOTIX</strong> Q camera, for example) to obtain<br />
the best image quality when using MxControlCenter PTZ features. Note, however,<br />
that this will reduce the frame rate.<br />
• Virtual Joystick, Zoom: This control simulates the behavior of a real joystick. Moving<br />
the virtual joystick to the left or right pans the image horizontally in the display window,<br />
while moving it up or down tilts the image. You can either turn the ring or drag<br />
the slider bar to zoom in or out of the image in the display window.<br />
• 1x Zoom: This button resets the zoom factor of PTZ Controls to a factor of 1, which<br />
returns the display to its normal setting.<br />
• Center Pan: This button centers an image area that has been modified using PTZ<br />
features. This will not affect any zoom factor that may have been set.<br />
• Auto Move: The Auto Move buttons can be used to move a <strong>MOBOTIX</strong> camera to the<br />
next saved position/zoom level (the Views 1-15 and Jump NESW buttons) or automatically<br />
pan the image area to the left or right (the Pan Left and Pan Right buttons).<br />
Only Q24M models support this feature.<br />
© <strong>MOBOTIX</strong> AG • Security-Vision-Systems • Made in Germany<br />
www.mobotix.com • sales@mobotix.com
72/152 MxControlCenter Manual: Advanced Features<br />
• Positions: Each of the 16 position buttons can be used to save and open a specific<br />
position, image area and zoom level of a camera view. Click the corresponding<br />
button for three seconds to save a specified camera view. Click the corresponding<br />
button briefly to access a saved position.<br />
Positions can be defined and then accessed in the following cases:<br />
• Live PTZ in <strong>MOBOTIX</strong> cameras<br />
• Pan/tilt heads that can be controlled via <strong>MOBOTIX</strong> cameras<br />
• Lock icon: <strong>MOBOTIX</strong> Q24M cameras support special "MultiViews" such as Surround,<br />
Panorama, Double Panorama, and Panorama/Focus. These views are automatically<br />
defined after camera installation based on the "North direction" setting and can no<br />
longer be modified by vPTZ actions. The "vPTZ lock" on these views is indicated by<br />
the lock icon. However, you can also unlock these views by clicking the icon and then<br />
adjusting them according to the current scene using vPTZ commands. Click the icon<br />
again to re-lock the views to prevent any inadvertent changes by vPTZ commands.<br />
Note<br />
The lock status applies separately for the individual multi-views mentioned above.<br />
© <strong>MOBOTIX</strong> AG • Security-Vision-Systems • Made in Germany<br />
www.mobotix.com • sales@mobotix.com
MxControlCenter Controls<br />
73/152<br />
3.2 Editing Layouts<br />
This section describes the advanced features for creating and managing grid and background<br />
layouts. The basic procedure for creating a layout has already been described in<br />
Section 2.4.3 Creating Layouts.<br />
3.2.1 Grid Layouts<br />
Display windows are shown without a background for grid layouts. This layout type<br />
is specifically suited to display systems in which the the display of the video sources is<br />
located in the foreground.<br />
Positioning Video Sources<br />
1. Activate the Layout Manager by clicking<br />
its icon in the toolbar.<br />
2. Select the layout that you would like to<br />
edit (for example, Main entrance) or<br />
create a new grid layout (see Section<br />
2.4.3 Creating Layouts).<br />
3. Select a grid type in the bottom section<br />
of the Layout Manager (for example,<br />
CIF/CIF/CIF/CIF as listed in the panel).<br />
4. Confirm the system prompt. The display<br />
panel of MxControlCenter displays<br />
the selected grid.<br />
5. Drag a camera or video source from<br />
the sidebar to a grid display window<br />
in the display panel. Cameras or video<br />
sources already placed in the layout can<br />
be moved to another display window<br />
using the drag and drop feature. The<br />
two fields will switch their positions<br />
as soon as you release the mouse<br />
button.<br />
6. Double-click the name of the layout<br />
in the sidebar and enter a name for<br />
the layout.<br />
7. Quit the Layout Manager by clicking<br />
Toggle Layout Manager in the toolbar<br />
or the Quit Layout Manager command from the pop-up menu. The layout will<br />
be saved automatically.<br />
© <strong>MOBOTIX</strong> AG • Security-Vision-Systems • Made in Germany<br />
www.mobotix.com • sales@mobotix.com
74/152 MxControlCenter Manual: Advanced Features<br />
Removing Grid Elements<br />
The content of a grid display window can be removed<br />
by clicking Empty from the pop-up menu (right-click the<br />
display window). You can assign a video source (or a different<br />
element type) to the now empty display window. If<br />
you click Delete, the entire display window will be deleted<br />
and the next grid elements will move up.<br />
Configuring The Display Window In A Grid Layout<br />
You can configure the element type of a display window in the Configure element dialog<br />
box (Right-click > Edit or Configure). Additional configuration options are provided depending<br />
on which element type you select. The maximum size of a display window is 2560 x 960<br />
pixels (see the section Creating New Grids below).<br />
• Empty: Select this option to delete an element that has already been assigned<br />
to the display window. The window itself will remain in the layout and will not be<br />
deleted permanently. The element type you would like to use can now be assigned<br />
at a later date.<br />
This option is also useful if a window's position is already defined in a layout even if<br />
the <strong>MOBOTIX</strong> camera (or other video source) to be displayed will only be available<br />
in the network at a later time.<br />
© <strong>MOBOTIX</strong> AG • Security-Vision-Systems • Made in Germany<br />
www.mobotix.com • sales@mobotix.com
MxControlCenter Controls<br />
75/152<br />
Display Window - Elements With Permanently Assigned Video Sources<br />
• Live: Choose this element type and the live image of the camera or video source<br />
selected from the drop-down list will appear in the display window. In addition, you<br />
can select the size of the display window.<br />
• Preview: Choose this element type and the preview image of the camera or video<br />
source selected from the drop-down list will appear in the display window. In addition,<br />
you can select the size of the display window.<br />
A preview window requires significantly fewer resources and causes less network<br />
traffic compared to a live window. This element type is particularly effective when<br />
your network has limited bandwidth and you are displaying many different video<br />
sources in the layout.<br />
You also have the option to select the image sensor, the maximum frame rate and<br />
the resolution of the preview image of the <strong>MOBOTIX</strong> camera.<br />
• Video Clip: This element type can be used to load a previously recorded MxPEG<br />
video clip in the display window where it is automatically set to continuous playback.<br />
It can also be used for alarm list files. In addition, you can select the size of the<br />
display window.<br />
• Player: Select this element type to display the camera or video source of the display<br />
window selected from the drop-down list in Player mode. You can now play back<br />
the recorded image and event sequences of the selected camera or video source in<br />
the Player sidebar panel. In addition, you can select the size of the display window.<br />
• File Server Path: This element type can be used to display video sequences that<br />
have been recorded on an external file server by a camera. You can also play back<br />
the sequences in the Playersidebar panel. In addition, you can select the size of<br />
the display window.<br />
Blasting of bank in Hagen, Germany<br />
Display Windows - Elements With Variable Video Sources<br />
• Player Window: Select this element type and the event sequences of the camera<br />
or video source for which an alarm was triggered most recently will be displayed<br />
automatically. Only one player window can be defined for each layout. A player<br />
window will show the relevant event by clicking an image from the alarm list. Player<br />
windows in background layouts are indicated by a gray title bar.<br />
• Alarm Window: Select this element type and the live image of the camera or video<br />
source for which an alarm was triggered most recently will be displayed automatically.<br />
By clicking the display window (or acknowledging the alarm if the alarm list is<br />
active), the alarm window will be cleared until a new alarm occurs. Note that you<br />
also need to activate the Alarm List feature under Tools > Options > Alarm List. Only<br />
© <strong>MOBOTIX</strong> AG • Security-Vision-Systems • Made in Germany<br />
www.mobotix.com • sales@mobotix.com
76/152 MxControlCenter Manual: Advanced Features<br />
one alarm window can be defined for each layout. Alarm windows in background<br />
layouts are indicated by a gray title bar.<br />
• Sequencer Window: This element type is used to display the content of all the display<br />
windows contained in the layout in alternating order. For example, you can create a<br />
layout in which the display of a camera's live image alternates in a large window.<br />
You can define a global time interval for the sequencer window under Tools > Options<br />
> General > Sequencer time. You can also define a custom interval for each camera<br />
in the Sequencer time field located on the respective camera's tab in the same<br />
dialog box.<br />
Click Configuration to open the Sequencer Configuration dialog box in which you<br />
can manage the order of display and the sequencer times for all cameras or video<br />
sources contained in the layout. Sequencer windows in background layouts are<br />
indicated by a gray title bar.<br />
© <strong>MOBOTIX</strong> AG • Security-Vision-Systems • Made in Germany<br />
www.mobotix.com • sales@mobotix.com
MxControlCenter Controls<br />
77/152<br />
Creating New Grids<br />
To create a new grid, make sure the Layout Manager is activated, then click Edit Grids...<br />
in the sidebar of the Grids panel. The available space will be divided up according to the<br />
width of the display panel (the maximum width is 2560 x 960 pixels).<br />
Grid Single Elements<br />
• u 80 x 60 pixels tiny element<br />
• s 160 x 120 pixels small element<br />
• m 320 x 240 pixels medium-sized element (CIF)<br />
• l 640 x 480 pixels large element (VGA)<br />
• h 1280 x 960 pixels huge element (MEGA)<br />
Grid Double Elements<br />
• du 160 x 60 pixels tiny double element<br />
• ds 320 x 120 pixels small double element<br />
• dm 640 x 240 pixels medium-sized double element (CIF)<br />
• dl 1280 x 480 pixels large double element (VGA)<br />
• dh 2560 x 960 pixels huge double element (MEGA)<br />
© <strong>MOBOTIX</strong> AG • Security-Vision-Systems • Made in Germany<br />
www.mobotix.com • sales@mobotix.com
78/152 MxControlCenter Manual: Advanced Features<br />
Procedure<br />
1. Select a layout that you would like to modify, duplicate an existing layout (the Duplicate<br />
button), or create a new layout (the New button).<br />
2. Define the width of the layout. Layout width can be based on the available screen<br />
resolution, for example (1920, 2560, ... pixel width). The total width of the layout in<br />
pixels is determined and displayed according to the specified number of columns<br />
(layout width in pixels = x columns times 160 pixels). It is always a whole number<br />
and a multiple of 160 pixels.<br />
3. Create the layout by entering the abbreviation of the grid element you would like<br />
to use in the text box. The preview window shows the resulting layout.<br />
Note that MxControlCenter will initially place an element in the row to the right<br />
whenever possible, provided that enough space is available in the layout. If this is<br />
not the case, the element will be placed in the next row with sufficient space. This<br />
means that large elements may be placed in a new row at times, while small elements<br />
are added to any unused areas at the top of the layout.<br />
Note<br />
The grid element abbreviations can be separated from each other by a space,<br />
comma or line break.<br />
4. Make sure the resulting layout meets your specifications and save it by clicking Save.<br />
The new layout is now available in the Grids sidebar panel.<br />
© <strong>MOBOTIX</strong> AG • Security-Vision-Systems • Made in Germany<br />
www.mobotix.com • sales@mobotix.com
MxControlCenter Controls<br />
79/152<br />
3.2.2 Background Layouts<br />
Unlike grid layouts (see Section 3.2.1), background layouts allow you to freely arrange<br />
the video sources on top of a background image. You also have the option of displaying<br />
individual <strong>MOBOTIX</strong> cameras as symbols on top of the background image. These symbols<br />
display the viewing direction and lenses of the cameras as well as the camera's status:<br />
Detected, Not detected, and Connection error. Double-click the symbol to display the live<br />
image of the camera in a separate window.<br />
Positioning Video Sources<br />
1. Activate the Layout Manager by clicking<br />
the symbol in the toolbar.<br />
2. Select the layout that you would like to<br />
edit (for example, Overview) or create<br />
a new background layout (see Section<br />
2.4.3 Creating Layouts).<br />
3. Select a background image (*.jpg,<br />
*.bmp, *.gif) in the bottom panel<br />
of the Layout Manager (for example,<br />
Parking lot view). Click Add Image to add<br />
additional image files to the Background<br />
images panel.<br />
4. Confirm the system prompt. The display<br />
panel of MxControlCenter displays the<br />
selected background image.<br />
5. Using drag and drop, move a camera<br />
or video source from the sidebar to any<br />
position you like in the display window.<br />
Cameras or video sources already placed<br />
in the layout can be moved to any other<br />
position in the display area. If a display<br />
window is moved onto another display<br />
window, both windows will switch their<br />
positions as soon as you release the<br />
mouse button.<br />
6. Double-click the name of the layout in the sidebar and enter a name for the layout.<br />
7. Quit the Layout Manager by clicking Toggle Layout Manager in the toolbar or<br />
the Quit Layout Manager command from the pop-up menu. The layout will be<br />
saved automatically.<br />
© <strong>MOBOTIX</strong> AG • Security-Vision-Systems • Made in Germany<br />
www.mobotix.com • sales@mobotix.com
80/152 MxControlCenter Manual: Advanced Features<br />
Configuring The Display Window In A Background Layout<br />
You can configure the element type of a display window in the Configure element dialog<br />
box (Right-click > Edit or Add). Additional configuration options are available depending<br />
on which element type you select.<br />
© <strong>MOBOTIX</strong> AG • Security-Vision-Systems • Made in Germany<br />
www.mobotix.com • sales@mobotix.com
MxControlCenter Controls<br />
81/152<br />
Besides the elements described above in Section 3.2.1 Grid Layouts, a number of additional<br />
elements are available for background layouts:<br />
• Status Icon: You can use this element type to create an icon that visually represents<br />
the viewing directions and image angles of one or two image sensors and also<br />
indicates the surveillance status of the camera using diff erent colors, i.e. whether an<br />
MxControlCenter computer is displaying the live image of the camera or video source<br />
in question.<br />
Camera<br />
OK,detected<br />
Camera OK,not<br />
detected<br />
No connection to<br />
camera<br />
Now when you click a status icon in the layout, the live image of a camera or video<br />
source will automatically be displayed in the assigned focus window (see the Focus<br />
window element type below in this section). Status icons are only available for<br />
background layouts.<br />
Note<br />
Additional functions are also available with MxStatus, a stand-alone application<br />
that monitors the status of all cameras connected to MxControlCenter. MxStatus<br />
is included in the MxControlCenter installation and can be loaded on any<br />
computer by double-clicking the MxStatus.exe fi le in the MxControlCenter<br />
application directory. If multiple instances of MxControlCenter are running in<br />
the network and registered in MxStatus, MxStatus can also provide information<br />
on whether a camera is accessible and whether it is being monitored by<br />
an instance of MxControlCenter. This information is displayed using diff erent<br />
colors. The IP address and port of the MxStatus computer must be specifi ed<br />
in the General tab on the Tools > Options dialog box for all relevant instances<br />
of MxControlCenter. For more information, see Section 5.2 The "General" Tab,<br />
error Display for Connection errors and error Display on Latency Timeout.<br />
© <strong>MOBOTIX</strong> AG • Security-Vision-Systems • Made in Germany<br />
www.mobotix.com • sales@mobotix.com
82/152 MxControlCenter Manual: Advanced Features<br />
• Focus Window: By clicking a status icon created in the layout, the live image from the<br />
camera or video source that was specifically assigned to that icon will be displayed in<br />
the defined focus window. More than one focus window can be created per layout.<br />
Select the focus window you would like to define. Now click a status icon and it will<br />
be assigned to that focus window. Focus windows are identified by a pink title bar.<br />
• "Close Windows" Button: With this option you can add a button to the layout that,<br />
when clicked, closes all free-movable live image windows. Movable live image windows<br />
are automatically opened when you double-click any display window that has<br />
an assigned camera or video source.<br />
Right-click the button to display the pop-up menu. Here, you can select the background<br />
color of the button.<br />
• "Configure Sequencer" Button: With this option you can add a button to the layout<br />
that, when clicked, opens the Sequencer<br />
configurationdialog box. This dialog box<br />
provides a convenient way to configure<br />
the order of display and the sequencer<br />
times for all the cameras or video sources<br />
contained in the layout.<br />
Right-click the button to display the pop-up<br />
menu. Here, you can select the background<br />
color of the button.<br />
• "Layout" Button: With this option you can<br />
add a button to the layout that, when clicked,<br />
opens the layout that was last selected and<br />
defined in the drop-down list. The name<br />
of the layout is automatically written on<br />
the button.<br />
Camera Window Options in the Background View<br />
Various features are available in the title bar as icons in the display windows of the background<br />
view (for example, the Live element type):<br />
© <strong>MOBOTIX</strong> AG • Security-Vision-Systems • Made in Germany<br />
www.mobotix.com • sales@mobotix.com
MxControlCenter Controls<br />
83/152<br />
• Show Alarm Instructions of Selected Camera: An instruction file can be created for<br />
each camera. Click this button in the toolbar or the icon in the title bar to open up<br />
this file in a separate display window. The instruction file can contain floor plans or<br />
essential information for alarm procedures.<br />
• Activate the Preferred Layout of the Selected Camera: A preferred layout can be<br />
defined for each camera. Click this button in the toolbar or the icon in the title bar to<br />
activate a display window. MxControlCenter switches to this layout when the following<br />
events occur:<br />
• An alarm is detected in the live video stream of a camera, which means a<br />
camera has detected an event. The alarm list feature needs to be enabled in<br />
Tools > Options > Alarm List for this to work. For more information, see Section<br />
2.5 Alarm Management.<br />
• A network message from the camera or a video source is received. For more<br />
information, see Section 2.5 Alarm Management.<br />
• Click Activate the preferred layout of the selected camera in the toolbar or the<br />
appropriate icon in the title bar of any display window.<br />
• Show/Hide a Reference Image of the Selected Camera: You can save the current<br />
live image for each camera as a reference image. Click this button in the toolbar or<br />
the icon in the title bar of a display window to display the reference image in a<br />
separate window. This allows you to compare it with the current camera image. This<br />
provides an easy way for you to determine changes in the positions of objects,<br />
vehicles, containers, etc.<br />
3.2.3 Additional Options For Editing Layouts<br />
Defining A Start Layout<br />
You can define the layout that is selected in the list as the start layout in the pop-up menu<br />
of the Layouts sidebar panel (Right-click > Define as start layout). MxControlCenter will<br />
now display this layout automatically when the program is launched. An activated start<br />
layout can be identified by the green text. You can also define a time interval at which<br />
MxControlCenter automatically switches to the defined start layout under Tools > Options ><br />
General > Return to Start Layout after. This helps to ensure that the scene you would like to<br />
monitor is displayed automatically, even if a different layout was selected in the meantime.<br />
Defining An Instruction File<br />
In order to define an instruction file for a camera, open the Camera tab for the particular<br />
camera under Tools > Options and select the desired Instruction file.<br />
© <strong>MOBOTIX</strong> AG • Security-Vision-Systems • Made in Germany<br />
www.mobotix.com • sales@mobotix.com
84/152 MxControlCenter Manual: Advanced Features<br />
Defining A Preferred Layout<br />
In order to define a preferred layout for a camera, open the Camera tab for the particular<br />
camera under Tools > Options and select the desired Preferred/alarm layout.<br />
Defining A Reference Image<br />
In order to save the current live image as a reference image, make sure that the Layout<br />
Manager is activated, right-click the desired camera and select Define reference image<br />
for camera from the pop-up menu.<br />
3.3 Alarm Processing<br />
<strong>MOBOTIX</strong> Cameras and MxControlCenter Working Together<br />
True to the decentralized approach of<br />
<strong>MOBOTIX</strong> systems, MxControlCenter<br />
cannot trigger any primary alarms<br />
(events) on its own. This is the job of<br />
the <strong>MOBOTIX</strong> cameras. The cameras<br />
record the event internally (on<br />
an integrated SD/CF card) and, if<br />
desired, to an external file server.<br />
MxControlCenter captures the alerts,<br />
displays them, and, if necessary,<br />
calls attention to the situation using<br />
appropriate audiovisual means.<br />
<strong>MOBOTIX</strong><br />
IP camera<br />
Event recognized<br />
Processing event<br />
The full range of MxControlCenter features can only be used if the <strong>MOBOTIX</strong> cameras<br />
are properly configured and the alarm list in MxControlCenter is enabled in the Options<br />
dialog box (see Section 2.5 Alarm Management).<br />
The alarm processing features of MxControlCenter, in turn, provide various ways for displaying<br />
the alarms and alarm notifications.<br />
MxControlCenter Alarm Detection<br />
If a camera triggers an alarm (event), MxControlCenter has two methods for detecting it:<br />
• Alarm Notification via Live Stream of Camera: The camera is armed and records<br />
the alarms on its own, either in its internal or external video storage (on a file server).<br />
MxControlCenter only detects the alarms if the camera is displayed in the current<br />
layout in a live or preview window and is supplying images.<br />
• Camera Network Message: The camera communicates with MxControlCenter via a<br />
network message. MxControlCenter detects the alarms from all cameras that send<br />
network messages to the computer running MxControlCenter. This method ensures<br />
that alarms are detected from cameras, even if the corresponding camera is not<br />
© <strong>MOBOTIX</strong> AG • Security-Vision-Systems • Made in Germany<br />
www.mobotix.com • sales@mobotix.com
Alarm Processing<br />
85/152<br />
displayed in the current layout. This method of alarm detection should always be<br />
preferred when dealing with security applications.<br />
For more information on confi guring the remote control features for <strong>MOBOTIX</strong> cameras<br />
and MxControlCenter, see Section 3.5 Remote Control Using Network Messages.<br />
Refer to the table below for a summary of the options available for both alarm methods:<br />
Response<br />
Live Stream<br />
Alarm<br />
network Message<br />
Alarm<br />
Display alarm image in alarm list X X<br />
Play back audio fi le on the MxControlCenter computer<br />
X<br />
X<br />
Fill alarm window with live images of last alarm<br />
X<br />
X<br />
triggering camera<br />
Activate preferred/alarm layout - X<br />
Maximize a minimized MxControlCenter (from the - X<br />
taskbar) and display on the screen<br />
Bring all offl ine cameras in the preferred/alarm<br />
layout online and restore MxControlCenter to the<br />
top, if necessary<br />
- X<br />
Caution<br />
For installations with high security requirements, you should defi nitely set up remote<br />
control using network messages as this provides the most reliable method of alerting.<br />
© <strong>MOBOTIX</strong> AG • Security-Vision-Systems • Made in Germany<br />
www.mobotix.com • sales@mobotix.com
86/152 MxControlCenter Manual: Advanced Features<br />
3.3.1 Alarm List<br />
Activating the Alarm List<br />
The alarm list is not activated when you launch MxControlCenter<br />
for the fi rst time. To activate the alarm list, click Tools > Options<br />
> Alarm List (tab) and then click the Activated checkbox. After<br />
activating the alarm list, alarms from the recording cameras in<br />
the current layout and alarms from cameras that send network<br />
messages to the MxControlCenter computer are displayed in the<br />
alarm list. These alarms will also be saved in the alarm list, even if<br />
it is no longer visible after clicking Show/Hide Alarm List.<br />
All alarm methods use the acknowledgement feature of the alarm list, i.e. the audiovisual<br />
alarm features described below are repeated until all alarms have been acknowledged<br />
by clicking the title bars of the alarm images.<br />
Visual Alarm Methods<br />
The visual alarm methods are displayed as soon as the alarm list is activated (Options ><br />
Alarm List > Activated). Make sure that the displayed cameras are confi gured to trigger<br />
alarms.<br />
• Camera Windows: Flash on alarm<br />
• Live and Preview Windows in Grid Layout: The frame of the camera window fl ashes red.<br />
• Live and Preview Window in Background Layout: The camera title bar fl ashes red.<br />
• Alarm Window (If Defined in the Layout): Shows live images from the alarm camera<br />
inside a fl ashing red frame<br />
• Mouse-Over Images: The title bar fl ashes red.<br />
• Alarm List Icon: Flashes red<br />
• Status Bar of the Alarm List: Red if an alarm is unacknowledged, otherwise green<br />
• Title Bars of the Alarm Images or Alarm entries: Unacknowledged alarms are<br />
shown in red, acknowledged alarms in blue.<br />
Acoustic Signal Features<br />
If the alarm list has been activated, you can also choose sounds in the Options > Alarm<br />
List dialog box. These sounds will be played by MxControlCenter over the audio system of<br />
the computer in the event of an alarm. You can choose between using a standard sound<br />
(beep) or a custom audio fi le (*.wav). Likewise, you can defi ne the frequency with which the<br />
acoustic signal is repeated and when the sound will stop after acknowledging an alarm.<br />
© <strong>MOBOTIX</strong> AG • Security-Vision-Systems • Made in Germany<br />
www.mobotix.com • sales@mobotix.com
Alarm Processing<br />
87/152<br />
Display Options for the Alarm List<br />
The following display options are provided for the alarm list:<br />
• Hides the images in the alarm list<br />
• Shows the images in the alarm list (pre-set)<br />
• Enlarges the alarm list images<br />
• Enables the fi lter features of the alarm list (see next point)<br />
Alarm list filter features<br />
The buttons of the fi lter feature show the following states:<br />
• no Filter: Incoming alarms are displayed from all cameras in the layout as well as<br />
those alarms from the cameras that control MxControlCenter remotely using network<br />
messages (see Section 3.5 Remote Control Using Network Messages).<br />
• Camera Filter: Shows only alarms from cameras selected in the display panel (yellow<br />
frame); all other incoming camera alarms are stored in the alarm list, but are<br />
not displayed.<br />
• Temporary Camera Filter: Shows only images from the selected camera (yellow<br />
border). New incoming alarms from other cameras will disable the fi lter feature.<br />
3.3.2 Displaying Stored Alarms<br />
MxControlCenter displays the alarms either in the alarm list (in chronological order) or<br />
inside a player window.<br />
The Alarm List Display<br />
The alarm list always receives all alarms triggered by all live cameras in the current layout.<br />
Furthermore, the camera alarms that the MxControlCenter computer receives via network<br />
messages are also displayed. The alarm list images are recorded in a ring buff er in the<br />
computer. The maximum size of of the ring buff er can be set in the Options dialog box<br />
(see Section 5.3 The "Alarm List" Tab).<br />
Every image in the alarm list is shown with the alarm time, camera name and the elapsed<br />
time since the alarm in the title bar in the colors listed below:<br />
Unacknowledged alarm<br />
Unacknowledged alarm from selected camera<br />
Acknowledged alarm<br />
Acknowledged alarm from selected camera<br />
For additional information on this topic, see Section 2.5.4 Acknowledging Alarms.<br />
© <strong>MOBOTIX</strong> AG • Security-Vision-Systems • Made in Germany<br />
www.mobotix.com • sales@mobotix.com
88/152 MxControlCenter Manual: Advanced Features<br />
Acknowledging Alarms<br />
MxControlCenter provides an Acknowledgement Feature that can be used to ensure that<br />
all alarms are checked and processed.<br />
You can acknowledge an alarm by clicking the red title bar, which then switches to blue<br />
(yellow if it is the selected camera in the display area).<br />
Unacknowledged alarm<br />
Acknowledged alarm<br />
Once all alarms have been acknowledged, the status fi eld of the alarm list changes from<br />
red to green. If an alarm window is defi ned for this layout, the window is cleared and will<br />
only be activated again when a camera triggers a new alarm.<br />
Timed Automatic Acknowledgements<br />
In the Options > Alarm List dialog box, you can defi ne a time period after which the alarms<br />
will be automatically acknowledged.<br />
For more information on the alarm list options (for example, alarm list size, alarm list fi le,<br />
sounds, etc.), see Section 5.3 The "Alarm List" Tab.<br />
© <strong>MOBOTIX</strong> AG • Security-Vision-Systems • Made in Germany<br />
www.mobotix.com • sales@mobotix.com
Alarm Processing<br />
89/152<br />
3.4 Video Searches And Export Features<br />
MxControlCenter offers a convenient way of finding specific events to help you determine,<br />
for example, what the camera located at the rear entrance recorded last Saturday afternoon<br />
(the Open Event Search button in the toolbar).<br />
The Video Search User Interface<br />
The user interface of the Video Search dialog box is divided into the following sections:<br />
• Storyboard: Visual display for searching for events visually<br />
• "Camera" and "Events" Tabs: Quickly browse and find events during a given time period<br />
• Event Display:Shows an event in the Player and includes the option to perform<br />
subsequent image processing (virtual PTZ and distortion correction)<br />
• Image Improvement: Subsequent adjustment of saturation, brightness, backlight<br />
and sharpness of the currently displayed image<br />
• Reference Time: Determines the time difference to a specific event<br />
• Search time: Search for events beginning at a specific time<br />
Storyboard<br />
Reference time<br />
Search by time<br />
Event view<br />
Image Improvement<br />
© <strong>MOBOTIX</strong> AG • Security-Vision-Systems • Made in Germany<br />
www.mobotix.com • sales@mobotix.com
90/152 MxControlCenter Manual: Advanced Features<br />
Storyboard<br />
The storyboard shows the recorded events in chronological order<br />
from left to right, similar to the individual frames of a movie.<br />
Use the arrow keys to quickly scroll backwards or forwards.<br />
The currently selected event has a yellow frame. The current<br />
event is shown with the date, time, and the event type (yellow<br />
highlighting).<br />
The "Camera" And "Events" Tabs<br />
Use the Cameras tab to select the camera<br />
containing the event list you would like<br />
to review. The Events tab contains all<br />
stored events from this camera listed<br />
by time, date, and event type.<br />
The slider bar lets you quickly find the<br />
desired time period between the start<br />
and end times of the recording. The<br />
arrow keys allow to you scroll from<br />
event to event in one-event steps. The<br />
alarm image of the event selected here<br />
is automatically shown in the storyboard<br />
and also enlarged in the event view window.<br />
Event View<br />
The event view window displays the<br />
individual alarm images of the event<br />
selected from the storyboard or the<br />
Events tab. Use the Player buttons to<br />
scan or play back the event images (see Section 2.6.2 Defining Player Windows for more<br />
information on Player controls). Besides being able to search for a position within an<br />
alarm clip, you can also use the slider bar to view the time for the currently displayed<br />
image within the recording.<br />
Image Improvement<br />
If the quality of the alarm image is not adequate due to noise or other factors, you can<br />
use the image improvement slider bars to adjust the saturation, brightness, backlight<br />
and sharpness of images.<br />
Besides general image improvement, you can also apply the PTZ features (pan, tilt, zoom)<br />
to the camera image (see Section 2.7.1 Image Post-Processing). You need to enter the type<br />
of lens for the camera and the mounting position of the camera (ceiling or wall) for the PTZ<br />
features to work properly. These settings can be defined in the corresponding camera tab.<br />
© <strong>MOBOTIX</strong> AG • Security-Vision-Systems • Made in Germany<br />
www.mobotix.com • sales@mobotix.com
Alarm Processing<br />
91/152<br />
Reference Time<br />
An important factor to take into account<br />
when switching between cameras is<br />
the time difference between a reference<br />
event and another event. A reference<br />
time needs to be defined for this purpose<br />
by clicking Set reference time to time of the current image. A reference time can<br />
be set at a specific event in the event list or even at a single frame of an alarm clip for<br />
greater precision. If you select another event now, its time difference to the reference time<br />
will be automatically calculated and displayed. In the process, you can switch to any of<br />
the events listed for the different cameras. The event that is closest in time to the reference<br />
time is automatically highlighted.<br />
You can define a new reference time with the same button. If you select Set reference<br />
time automatically to current image time, the reference time will be synchronized with<br />
the current time of the image in the Player window. Click Unlock reference time to delete<br />
the reference time.<br />
If the reference time is no longer visible in Events, click Jump to reference event to go<br />
back to the reference event. When viewing individual alarm images in Player mode, you<br />
can adjust the reference time to match the Player time by clicking Set reference time<br />
automatically to current image time as often as you need.<br />
Search Area<br />
To search for a certain event (or all<br />
events) that occurred on or after a<br />
specific time, enter a date and time<br />
in the Search time field and click Search. MxControlCenter selects the event in Events<br />
that comes closest to the specified time.<br />
Exporting Recorded Data<br />
The options for exporting recorded data have already been described in Section 2.6.4<br />
Export List and Data Export.<br />
© <strong>MOBOTIX</strong> AG • Security-Vision-Systems • Made in Germany<br />
www.mobotix.com • sales@mobotix.com
92/152 MxControlCenter Manual: Advanced Features<br />
3.5 Remote Control Using network Messages<br />
With the remote control features (Tools > Options > Remote Control), <strong>MOBOTIX</strong> cameras<br />
(and other network devices) can cause MxControlCenter and other <strong>MOBOTIX</strong> cameras<br />
to perform certain functions. This is done using network messages (TCP/IP messages),<br />
which a <strong>MOBOTIX</strong> camera (or another network device) sends to a predefi ned port of the<br />
computer running MxControlCenter.<br />
network messages enable an alarm to be triggered if certain events occur on a camera<br />
without displaying the live video stream from that camera in MxControlCenter.<br />
This way, a <strong>MOBOTIX</strong> camera can, for example, activate the appropriate preferred layout<br />
assigned to it in MxControlCenter (Activation with Preferred Layout) and restore minimized<br />
MxControlCenter application windows (Windows toolbar). You can continue to record alarm<br />
and live images, activate cameras in a layout, open new windows with the camera live<br />
image, and even defi ne complete layouts in a camera network message and then set<br />
them up in MxControlCenter. For this to work properly, the camera that sends the network<br />
messages may not be included in the currently displayed layout in MxControlCenter.<br />
• Camera IP notify Only Port: If this option is enabled, the preferred/alarm layout<br />
selected in the camera's tab will be activated in MxControlCenter once the relevant<br />
network message has been received. In this case, this activates the IP notify profi le<br />
MxCC Alarm: simple for a <strong>MOBOTIX</strong> camera (see the section on Creating a<br />
Network Profi le on the <strong>MOBOTIX</strong> Camera below).<br />
• General Remote Control and Camera IP notify: If this option is enabled, advanced<br />
remote control commands can be sent to the computer or MxControlCenter. You<br />
can furthermore defi ne a sound or audio fi le that will be emitted when a network<br />
message is received.<br />
Section 5.4 The "Remote Control" Tab contains information on the available parameters<br />
of a network message for remote control of MxControlCenter.<br />
© <strong>MOBOTIX</strong> AG • Security-Vision-Systems • Made in Germany<br />
www.mobotix.com • sales@mobotix.com
Alarm Processing<br />
93/152<br />
Notes<br />
• Ports 31666 and 31667 are used in the following examples. Make sure the<br />
ports you are using are not also in use by other services in the network and<br />
that these ports can be accessed by your computer and, in particular, are not<br />
blocked by a firewall. Makes sure that you always use ports with numbers<br />
greater than 1023 and lower than 65535. For more information, refer to the<br />
article on "TCP and UDP port numbers" aten.wikipedia.org.<br />
• After setting up the ports, the Windows Firewall normally asks whether it should<br />
continue to block the MxControlCenter application. Click Do not block so that<br />
the necessary remote control ports can be opened. This usually requires you<br />
to have administrator privileges on the computer. If you are using a different<br />
firewall program, you may have to manually release the ports or configure<br />
the firewall accordingly.<br />
Configuration Example<br />
The following example shows you how to set up MxControlCenter and a camera so that<br />
the camera sends a network message to the MxControlCenter computer when a particular<br />
event occurs. When the computer receives this network message, it automatically loads<br />
the preferred layout assigned to the camera. This layout contains the view assigned to<br />
the camera that has triggered the alarm and sent the message.<br />
Activating The Remote Control In MxControlCenter<br />
• Activate the Camera IP Notify only port option (Tools > Options > Remote Control).<br />
Enter the desired port (for example, 31667) and the IP address of the remote controlling<br />
<strong>MOBOTIX</strong> camera (for example, 172.168.0.100).<br />
Defining The Preferred Layout For Cameras<br />
• Define the preferred layout for the remote controlling camera (Tools > Options > Camera<br />
tab; for more information, see Section 3.2.3 Additional Options for Editing Layouts).<br />
© <strong>MOBOTIX</strong> AG • Security-Vision-Systems • Made in Germany<br />
www.mobotix.com • sales@mobotix.com
94/152 MxControlCenter Manual: Advanced Features<br />
Creating A Network Profile On The <strong>MOBOTIX</strong> Camera<br />
• Enter the IP address of the computer on which MxControlCenter is activated (Windows:<br />
Start > Run > cmd, ipconfig command).<br />
• Open the remote controlling <strong>MOBOTIX</strong> camera in a browser window.<br />
• In this case, this activates the IP notify profile MxCC Alarm: simple with the settings<br />
described below (Admin Menu > IP Notify Profiles).<br />
• Save this configuration (click Set and then Close).<br />
Activating Camera Events And Configuring Messages<br />
• Open the remote controlling <strong>MOBOTIX</strong> camera in a browser window.<br />
• Create a message (Setup Menu > Messages) with the settings shown below for the<br />
desired event, for example, VM ‐ Video Motion Detection.<br />
• In order to be able to test the message later, activate the event UC‐ User Click.<br />
• Save this configuration (click Set and then Close).<br />
• Also make sure to enable Arming for the camera (Setup Menu > General Event<br />
Settings) and the User Click event (Setup Menu > Event Settings).<br />
© <strong>MOBOTIX</strong> AG • Security-Vision-Systems • Made in Germany<br />
www.mobotix.com • sales@mobotix.com
Saving The Configuration Of MxControlCenter Cameras<br />
95/152<br />
Testing The Remote Control<br />
• Minimize MxControlCenter to an icon in the Windows taskbar.<br />
• Open the live view of the <strong>MOBOTIX</strong> camera in a browser window.<br />
• Click the UC Event button on the user interface of the camera.<br />
The network message will now be sent to the MxControlCenter computerand the application<br />
window should appear on the screen on top and display the alarm-triggering camera<br />
in your preferred/alarm layout.<br />
3.6 Saving The Configuration Of MxControlCenter Cameras<br />
Changes to the configuration can generally only be made by MxControlCenter users with<br />
admin access rights (provided an admin password is assigned; see Section 3.7.1 Access<br />
Levels of MxControlCenter).<br />
The storage location of the current settings is displayed at the bottom of the Options<br />
dialog box.<br />
3.6.1 Global And Local Folders<br />
Both global and local folders are used to store the configuration data of MxControlCenter.<br />
The global folder is intended to store a shared configuration for multiple users (only<br />
administrators can change this configuration). The global folder needs to first be specified<br />
in the General tab on the Options dialog box.<br />
Local folders can be created by the administrator to store special settings. This configuration<br />
data is not stored in a central location, but in the folder of the currently running<br />
MxCC.exe application. This approach allows you to create special configurations by<br />
copying MxControlCenter to different folders (user-defined folders, for example) and then<br />
launching the application from one of these folders. After setup is complete, you can store<br />
the configuration in a local folder when quitting MxControlCenter.<br />
3.6.2 Storing The Program Settings<br />
You can store the current configuration settings by selecting one of the following menu items:<br />
• Tools > Program settings > Save (overwrites the current configuration file)<br />
• Tools > Program settings > Save as...<br />
• Tools > Program settings > Export environment...<br />
© <strong>MOBOTIX</strong> AG • Security-Vision-Systems • Made in Germany<br />
www.mobotix.com • sales@mobotix.com
96/152 MxControlCenter Manual: Advanced Features<br />
Both of these menu items open the Save Configuration dialog box.<br />
• The Configuration only (INI file) option allows you to store the current configuration<br />
in any existing or new *.ini file.<br />
• The Configuration und resources (...) option is used to save both the configuration<br />
file (MxCC.ini) and all the resources used in the configuration (background images,<br />
instruction files, audio files, MxPEG clips, etc.) to a selected target directory. In this<br />
target directory, a new *.ini file in which all the resources are linked using relative<br />
file paths and thus available in the individual layouts for display will be created.<br />
You can use this option to export the configuration and all necessary data to a new<br />
directory for later use there.<br />
• The Complete package (configuration, ...) option performs the same actions as the<br />
Configuration and resources (...) option, but adds all necessary MxControlCenter<br />
program files to the data that is copied to the target directory.<br />
With this option, for example, you can perform a complete export of MxPEG clips,<br />
including those in the program itself, to a CD or USB storage device. Because an*.<br />
ini file is also created in the target directory, you can now launch MxControlCenter<br />
directly from that location to play back the MxPEG clips.<br />
Demo installations can also be copied to other computers in this manner without<br />
any problem.<br />
Caution<br />
If you have defined a global folder, MxControlCenter only uses the configuration<br />
stored in that folder if there is no configuration (*.ini file) stored in the installation<br />
directory of MxControlCenter (the directory in which the MxCC.exe file is located.<br />
© <strong>MOBOTIX</strong> AG • Security-Vision-Systems • Made in Germany<br />
www.mobotix.com • sales@mobotix.com
Users And Passwords<br />
97/152<br />
3.7 Users And Passwords<br />
3.7.1 Access Levels Of MxControlCenter<br />
The three access levels of MxControlCenter (no login for guests, admin for administrators,<br />
user for normal users) will be activated once the appropriate passwords are set in<br />
MxControlCenter. If no passwords are specified, the administrator privileges will be<br />
applied automatically.<br />
The following table lists the individual functions that can be performed by the three access<br />
groups:<br />
Function Guest User Admin<br />
Switch layouts X X X<br />
View live videos X X X<br />
View instruction files X X X<br />
Print image X X X<br />
View reference image X X X<br />
Acknowledge alarm X X X<br />
Quit MxControlCenter - X X<br />
Play recordings - X X<br />
Event Search - X X<br />
Change camera settings - X X<br />
Edit layouts - - X<br />
Change program settings - - X<br />
Show/hide program elements - - X<br />
3.7.2 Activating Password Protection In MxControlCenter<br />
Follow the steps below if you would like to protect MxControlCenter and specific cameras<br />
from unauthorized access:<br />
• Open the Options dialog box (Tools > Program settings in the menu) and enter the<br />
Admin password in the General tab in order to prevent unauthorized access to the<br />
Admin level (table in Section 3.7.1).<br />
© <strong>MOBOTIX</strong> AG • Security-Vision-Systems • Made in Germany<br />
www.mobotix.com • sales@mobotix.com
98/152 MxControlCenter Manual: Advanced Features<br />
• In the same tab, enter the user password in order to prevent unauthorized access<br />
to the User access level (table in Section 3.7.1).<br />
There is no password assigned for users in the Guest user level. This user level is automatically<br />
activated when the program is launched. Guest users may only use the functions<br />
described in the table in Section 3.7.1 in the Guest column.<br />
Note<br />
In order to strictly limit access to the MxControlCenter installation, make sure to hide<br />
all menus, sidebars and toolbars that must be hidden via the View menu.<br />
For these settings to be applied, you need to quit the program and the changes to<br />
the program settings need to be written to the *.ini file.<br />
3.8 Security Considerations<br />
You should follow the measures outlined below to avoid security problems.<br />
3.8.1 General Thoughts On Network Security<br />
• Certain MxControlCenter features (remote control, for example) require additional<br />
ports to be open on a Windows computer. Make sure the Windows computer running<br />
MxControlCenter is behind a firewall.<br />
• Some anti-virus scanners check all data streams that enter the computer. As a result,<br />
an anti-virus scanner may identify the video/audio data received in the MxControlCenter<br />
camera as malicious code and block it accordingly. If the corresponding mechanisms<br />
of the anti-virus scanner are deactivated, the anti-virus protection of the computer<br />
is incomplete. For this reason, it should not be used to surf the Internet or to receive<br />
e-mails.<br />
3.8.2 Restricting Public Access<br />
You can improve the security of the entire system by disabling public access on all cameras<br />
and setting up a dedicated user for MxControlCenter on each camera.<br />
3.8.3 Camera Settings (In The Browser)<br />
• Always use <strong>MOBOTIX</strong> cameras with software version 2.2.2.x or higher.<br />
• Make sure the cameras cannot be accessed by unauthorized users by blocking public<br />
access in Admin Menu > Users and Passwords (in the browser).<br />
• Create a new group (for example, MxCC) with the MxControlCenter privilege in<br />
Admin Menu > Group Access Control Lists.<br />
© <strong>MOBOTIX</strong> AG • Security-Vision-Systems • Made in Germany<br />
www.mobotix.com • sales@mobotix.com
Security Considerations<br />
99/152<br />
• Create a new user (for example, MxCC) for the MxCC group in Admin Menu > Users<br />
and Passwords. Enter this user and the appropriate password to access the cameras<br />
from MxControlCenter.<br />
3.8.4 Settings In MxControlCenter<br />
• After testing the ports, you should replace the * entry in the Allowed IPs field of the<br />
Options > Remote Control dialog box in MxControlCenter with the IP addresses of<br />
cameras that are allowed to send messages to MxControlCenter (use commas to<br />
separate multiple addresses). Network messages from unlisted IP addresses will<br />
now be rejected.<br />
• In the same dialog box, make sure the Accept only valid commands option in the<br />
Camera IP Notify only port section is activated.<br />
• Do not use the same ports, user names, passwords or other entries that appear in<br />
this manual as your settings.<br />
• Create a dedicated user to access <strong>MOBOTIX</strong> cameras (see Section 3.8.3 Camera<br />
Settings (in the browser)).<br />
Caution<br />
A computer running MxControlCenter with open ports should never have a direct<br />
connection to the Internet. Make sure that the computer is adequately protected by<br />
an appropriate hardware firewall (normally in a router).<br />
The Windows firewall on this computer does not provide effective protection and<br />
cannot replace a hardware firewall.<br />
© <strong>MOBOTIX</strong> AG • Security-Vision-Systems • Made in Germany<br />
www.mobotix.com • sales@mobotix.com
100/152<br />
MxControlCenter Manual: Advanced Features<br />
3.9 Image Post-Processing<br />
3.9.1 Overview<br />
The Image Post-Processing features can be used to improve and correct images from<br />
MxControlCenter. This includes correcting the saturation, brightness, backlight and sharpness<br />
of an image.<br />
The post-processing features do not depend on the type (IP or analog) or model of the<br />
camera. Furthermore these features can be applied to any video source within an image<br />
window, which means not only live streams, but also previously recorded video data:<br />
• Camera Live Images/Live Streams<br />
• Saved MxPEG Clip Files<br />
• Recorded Video Streams from a File Server<br />
• Snapshots/Still Images<br />
Enhanced images can be printed directly from MxControlCenter and/or saved as a file.<br />
The recorded image and video sequences themselves are not changed since the postprocessing<br />
features only affect how they are displayed in MxControlCenter.<br />
The image post-processing is configured for the current display window (yellow frame).<br />
Select a <strong>MOBOTIX</strong> camera and click the arrow to the right next to the Switch image postprocessing<br />
on/off button and then click Settings (in the menu under Camera >MxCC<br />
display mode > Settings) in order to configure the image post-processing (see Section<br />
3.9.2 Configuring Image Post-Processing).<br />
Once you have configured the image post-processing, you can activate or deactivate this<br />
function using the Switch image post-processing on/off button (see Section 3.9.3 Activating/<br />
Deactivating the Image Post-Processing).<br />
© <strong>MOBOTIX</strong> AG • Security-Vision-Systems • Made in Germany<br />
www.mobotix.com • sales@mobotix.com
Image Post-Processing<br />
101/152<br />
3.9.2 Configuring Image Post-Processing<br />
Select a display window with a <strong>MOBOTIX</strong> camera (live or recorded)<br />
and click the arrow to the right next to the Switch image postprocessing<br />
on/off button and then click Settings (in the menu<br />
under Camera > MxCC display mode > Settings).<br />
The Image Processing panel has two different areas: The upper area,<br />
PTZ, controls the settings of the virtual PTZ features of MxControlCenter<br />
(Section 2.7.2 Distortion Correction) and image post-processing is<br />
configured in thePost-Processing area. Select the desired camera<br />
and activate the Post-Processing checkbox (this panel can be used<br />
for multiple cameras one after another). When you move the slider<br />
bars, the changes will be made immediately in the active display<br />
window:<br />
• Saturation: The slider bar changes the saturation (the intensity<br />
of the colors) in the active image window.<br />
• Brightness: The slider bar changes the brightness in the active<br />
display window, making the image lighter or darker as desired.<br />
• Backlight: The slider bar changes the backlight in the active display window, increasing<br />
or decreasing it.<br />
• Sharpness: This slider bar sharpens the image in the active display window. This<br />
allows you to subsequently improve the appearance of dull image sequences, for<br />
example.<br />
• Reset: This button resets all post-processing settings to their factory default values.<br />
Note<br />
Post-processing is prohibited on video or image sequences intended for use in legal<br />
proceedings. For this reason, the printouts made with active post-processing will<br />
include both the original image and the edited image.<br />
3.9.3 Activating/Deactivating Image Post-Processing<br />
Click Switch image post-processing on/off in the toolbar to activate or deactivate image<br />
post-processing for the active display window (yellow frame). In addition, this button shows<br />
the status of post-processing for the active display window (the post-processing is active<br />
when the button is clicked).<br />
© <strong>MOBOTIX</strong> AG • Security-Vision-Systems • Made in Germany<br />
www.mobotix.com • sales@mobotix.com
102/152<br />
MxControlCenter Manual: Advanced Features<br />
3.10 Third-Party Cameras With PTZ Controls And Pan/Tilt Heads<br />
3.10.1 Overview<br />
Besides <strong>MOBOTIX</strong> cameras, you can also connect third-party IP or analog cameras (for<br />
example, Axis IP cameras, Bosch AutoDome, Siemens SpeedDome) to MxControlCenter.<br />
For more information, see Section 2.8.1 Integrating Third-Party Digital/Analog Cameras.<br />
Some camera models feature motorized pan/tilt units and zoom lenses that can be controlled<br />
from within MxControlCenter using a joystick or the PTZ Controls sidebar panel.<br />
If a <strong>MOBOTIX</strong> camera is mounted on a pan/tilt head and configured accordingly, its pan<br />
and tilt features can also be controlled from an MxControlCenter computer.<br />
3.10.2 Connecting Third-Party IP And Analog Cameras<br />
To connect and display a camera in MxControlCenter, enter the IP address (or DNS name),<br />
port number and login data (user name and password).<br />
Open the menu Camera > Add and click Camera to display the Add Video Source<br />
dialog box:<br />
An additional computer is required to integrate analog cameras from third-party manufacturers<br />
on the <strong>MOBOTIX</strong> MxServer software. MxServer can digitalize up to four connected<br />
cameras using a frame grabber card and make them available for MxControlCenter<br />
(see Section 3.10.5 Using Analog Cameras with MxServer).<br />
• IP cameras can be added by specifying the type (Axis, Merit LILIN, etc.) and IP address.<br />
• Analog cameras (Bosch AutoDome, Siemens SpeedDome) can be integrated by<br />
selecting the type, the MxServer channel and entering the IP address of the MxServer<br />
computer. The port number shows which of the analog cameras connected to the<br />
MxServer are to be used.<br />
For more information on connecting analog cameras, configuring MxServer and storing the<br />
video streams of IP and analog cameras from third-party manufacturers using MxServer,<br />
© <strong>MOBOTIX</strong> AG • Security-Vision-Systems • Made in Germany<br />
www.mobotix.com • sales@mobotix.com
Third-Party Cameras With PTZ Controls And Pan/Tilt Heads<br />
103/152<br />
see the documentation regarding <strong>MOBOTIX</strong> MxServer at www.mobotix.com. For an<br />
overview of MxServer, see Section 3.10.5 Using Analog Cameras with MxServer.<br />
3.10.3 Activating Integrated PTZ Units And Pan/Tilt Heads<br />
The control options of the integrated mechanical pan, tilt and zoom features of the camera<br />
and the external pan/tilt heads can be activated and deactivated in the MxControlCenter<br />
dialog box (in the menu Tools > Options) on the tab of the individual camera in the PTZ/<br />
Rotor Control area:<br />
Defining A Type For The PTZ/Rotor Control<br />
• No Pan/Tilt Head<br />
Use this type under the following circumstances:<br />
• vPTZ control of <strong>MOBOTIX</strong> cameras<br />
• vPTZ control of Axis IP cameras with vPTZ features<br />
• PTZ control of connected IP dome cameras (Axis, Sony, Panasonic, Toshiba,<br />
Merit LILIN)<br />
• PTZ control of analog dome cameras connected to an MxServer computer<br />
• All Other Selectable Protocols<br />
These are specific protocols used to control the individual mechanical pan/tilt heads<br />
via the installed <strong>MOBOTIX</strong> camera (Videotronic, Provitek, VPT 42, etc.).<br />
3.10.4 Using <strong>MOBOTIX</strong> Cameras With Pan/Tilt Heads<br />
<strong>MOBOTIX</strong> cameras (currently M12 and D12 models only) can be connected to the motorized<br />
pan/tilt heads via the D-SUB 15HD connector. Now you can use the user interface<br />
(soft keys) of the camera to pan and tilt the camera.<br />
An overview of the necessary steps for configuring a <strong>MOBOTIX</strong> camera in conjunction with<br />
a motorized pan/tilt head is provided below. More detailed information on the connection<br />
and control commands can be found in the documentation of the respective pan/tilt head.<br />
Pan/Tilt Heads Currently Supported By <strong>MOBOTIX</strong><br />
• Provitek, Provitek PT2, Provitek PT3<br />
• Videotronic SN-15AH (modified by <strong>MOBOTIX</strong>)<br />
• VPT 42 (RS232/RS485 configuration with VT protocol)<br />
© <strong>MOBOTIX</strong> AG • Security-Vision-Systems • Made in Germany<br />
www.mobotix.com • sales@mobotix.com
104/152<br />
MxControlCenter Manual: Advanced Features<br />
Assembly And Activation Of Pan/Tilt Head<br />
• Attach the <strong>MOBOTIX</strong> camera to the mounting bracket on the pan/tilt head.<br />
• Connect the supplied control cable of the pan/tilt head to the D-SUB 15HD connector<br />
of the <strong>MOBOTIX</strong> camera.<br />
• Connect the pan/tilt head and camera to the power supply.<br />
• Configure the serial interface of the <strong>MOBOTIX</strong> camera (Admin Menu > Configure<br />
Serial Interface; see figure below).<br />
• Save the configuration to the permanent flash memory of the <strong>MOBOTIX</strong> camera<br />
(Admin Menu > Save) and reboot the <strong>MOBOTIX</strong> camera.<br />
Once you have completed these steps, the pan and tilt features of the pan/tilt head will<br />
be available for the camera in MxControlCenter .<br />
© <strong>MOBOTIX</strong> AG • Security-Vision-Systems • Made in Germany<br />
www.mobotix.com • sales@mobotix.com
Third-Party Cameras With PTZ Controls And Pan/Tilt Heads<br />
105/152<br />
Creating And Configuring Camera Soft Keys For Controlling The Pan/Tilt Head<br />
If you would like to control the pan/tilt head using the user interface of the <strong>MOBOTIX</strong><br />
camera, we recommend configuring the soft keys and the associated soft key definitions<br />
(Admin Menu > Soft Keys in the browser interface of the <strong>MOBOTIX</strong> camera). The control<br />
commands are included in the documentation of your pan/tilt head.<br />
Note<br />
These settings are not necessary if you would like to control the pan and tilt features<br />
using only MxControlCenter with a joystick.<br />
• Configure the soft key definitions for moving the pan/tilt head (Up, Down, Left, Right,<br />
Stop; Admin Menu > Soft Keys).<br />
• Configure the soft key definitions for saving and moving to individual pan/tilt head<br />
positions via soft keys (Preset X, Save Preset X; Admin Menu > Soft Keys). Because<br />
the positions are saved in the pan/tilt head itself (see Section 3.10.4 Using <strong>MOBOTIX</strong><br />
Cameras with Pan/Tilt Heads), the maximum number of available positions depends<br />
on the pan/tilt head model you are using (for example, 32 with a Provitek PT3).<br />
• Create the soft keys for moving the pan/tilt head and for saving and moving to the<br />
pan/tilt head positions. Information on creating soft keys is provided in Section 4.9<br />
Configuring Soft Keys in the software manual.<br />
© <strong>MOBOTIX</strong> AG • Security-Vision-Systems • Made in Germany<br />
www.mobotix.com • sales@mobotix.com
106/152<br />
MxControlCenter Manual: Advanced Features<br />
Configuring Time-Controlled Positioning Of The Pan/Tilt Head<br />
With the time control feature of the <strong>MOBOTIX</strong> camera, you can move to the predefined<br />
pan/tilt head positions at specific times. For this purpose the time control feature of the<br />
camera is used in conjunction with network messages, which the camera uses to send<br />
HTTP requests to itself. The <strong>MOBOTIX</strong> camera assumes remote control of its pan/tilt head<br />
independently, so to speak.<br />
The following steps are required to set up this functionality:<br />
• Define the pan/tilt head positions you would like to use and then save them (Save<br />
Preset X buttons; see previous section).<br />
• Set up a user with permission to access HTTP API commands (for example, user name:<br />
rotor, password: rotor). This is necessary because the camera uses authentication<br />
to execute HTTP requests that are sent itself for security reasons, which means the<br />
login data of an authorized user is required (user name and password) .<br />
© <strong>MOBOTIX</strong> AG • Security-Vision-Systems • Made in Germany<br />
www.mobotix.com • sales@mobotix.com
Third-Party Cameras With PTZ Controls And Pan/Tilt Heads<br />
107/152<br />
• Create a network message profile for moving to each pan/tilt head position. The<br />
camera sends an HTTP request to itself. This executes the rcontrol program with<br />
the following instruction for controlling the pan/tilt head via RS232:<br />
action=putrs232&rs232outtext=<br />
The necessary control commands are outlined in the documentation of your pan/tilt<br />
head. More information on <strong>MOBOTIX</strong> HTTP requests can be found in the camera's<br />
online help under HTTP API and in Section 11.5.4 Executing Camera Actions and<br />
Features (rcontrol) in the software manual.<br />
• Now set up time-controlled tasks that execute the relevant network message profile<br />
at the specific times you enter and move the pan/tilt head to the desired position<br />
(for example, position 1 at even-numbered minutes and position 2 at odd-numbered<br />
minutes in the figure below):<br />
• Parallel to this, images can now be recorded automatically along with the regular<br />
event (every ten seconds) or with the time control feature in combination with the<br />
time-controlled event (one image each minute, for example).<br />
3.10.5 Using Analog Cameras In MxServer<br />
<strong>MOBOTIX</strong> MxServer allows the integration of analog surveillance cameras into an IP network.<br />
MxServer consists of a Windows computer with a frame grabber card (IDS FalconQuattro<br />
PCI) and the <strong>MOBOTIX</strong> MxServer software.<br />
Integration into an IP network means that the analog cameras connected to MxServer can<br />
be accessed the same way as network cameras (using an IP address). You can display an<br />
image from the analog camera in a browser, in MxControlCenter or in any other application<br />
that can access HTTP servers and display M-JPEG streams.<br />
The video cable of the analog camera is connected to the port of the frame grabber card<br />
in the computer while the control cable of the camera is connected to the serial interface<br />
of the computer (RS232/RS485). MxServer ensures that the relevant channel of the frame<br />
grabber card is mapped to a network port (for example, 80, 81, ...).<br />
© <strong>MOBOTIX</strong> AG • Security-Vision-Systems • Made in Germany<br />
www.mobotix.com • sales@mobotix.com
108/152<br />
MxControlCenter Manual: Advanced Features<br />
You can also control the motorized pan, tilt and zoom features integrated into the analog<br />
cameras of MxControlCenter using a joystick. Live streams of the cameras can be<br />
recorded on a file server.<br />
Live video streaming is used as a bridge between the video stream supplied by the analog<br />
camera and Windows computers with MxControlCenter. MxServer reads the video frames<br />
digitalized by the frame grabber card and then converts the bitmap data into *.jpg images<br />
(or M-JPEG streams). These images are then transferred to the requesting clients over the<br />
network (computers with MxControlCenter). The resolution of the transferred images/<br />
steams can be configured with MxServer (768 x 576, 640 x 480 VGA, 320 x 240 CIF).<br />
The maximum number of simultaneously requesting clients depends on the performance<br />
of the Windows computers running MxServer and the available bandwidth of the network<br />
connection.<br />
Regardless of that, the digitalized video frames can be recorded by MxServer on the file<br />
server (continuous recording) and then searched and played back in MxControlCenter.<br />
MxControlCenter directly accesses the data recorded on the server for that purpose.<br />
Prerequisites For Use Of Analog Cameras With MxServer:<br />
• Computer (minimum: Pentium IV with 512 MB RAM)<br />
• Windows operating system: XP, 2000 or 2003 Server<br />
• Installed and configured IDS FalconQuattro PCI frame grabber card<br />
• <strong>MOBOTIX</strong> MxServer<br />
• Installed Video for Windows driver (automatically installed with MxServer)<br />
• Analog surveillance camera (Bosch AutoDome, Siemens SpeedDome) connected to<br />
the frame grabber card and a serial interface of the computer<br />
• MxControlCenter on a client computer with proper configuration for the relevant<br />
analog camera for controlling the pan, tilt and zoom features<br />
© <strong>MOBOTIX</strong> AG • Security-Vision-Systems • Made in Germany<br />
www.mobotix.com • sales@mobotix.com
Third-Party Cameras With PTZ Controls And Pan/Tilt Heads<br />
109/152<br />
Notes<br />
• The FalconQuattro frame grabber card has four inputs (channels), but only two<br />
analog cameras can be connected to it. When using two cameras with the<br />
same frame grabber card, the frame rate is limited to 12.5 frames per second<br />
for each camera.<br />
• You can also install more than one frame grabber card in a computer. However<br />
we advise against this as only low frame rates would be possible.<br />
• We recommend using multiple computers with a FalconQuattro card installed<br />
on each and two connected analog cameras at most for large installations. If<br />
a high frame rate is required (more than 12.5 fps), each analog camera should<br />
be connected to a separate computer.<br />
Detailed information on connecting analog cameras and configuring MxServer can<br />
be found in the supplied documentation at www.mobotix.com.<br />
© <strong>MOBOTIX</strong> AG • Security-Vision-Systems • Made in Germany<br />
www.mobotix.com • sales@mobotix.com
110/152 MxControlCenter Manual: Advanced Features<br />
Notes<br />
© <strong>MOBOTIX</strong> AG • Security-Vision-Systems • Made in Germany<br />
www.mobotix.com • sales@mobotix.com
The "Camera Configuration" Dialog Box<br />
111/152<br />
4 COnFIGURInG <strong>MOBOTIX</strong> CAMeRAS<br />
4.1 The "Camera Configuration" Dialog Box<br />
The Camera Configuration (the Change the camera settings from MxCC button in the<br />
toolbar or Camera > Properties > Configure...) dialog box provides an overview of selected<br />
settings of all the <strong>MOBOTIX</strong> cameras that are connected to MxControlCenter. In addition,<br />
the settings for an individual camera or for several cameras can be changed all at once.<br />
• Section 4.2, The “Overview” Tab: Displays information for all cameras defi ned in<br />
MxControlCenter in a table.<br />
• Section 4.3, The “Image Settings” Tab: Allows you to adjust the values for saturation,<br />
brightness, backlight and sharpness of selected cameras.<br />
• Section 4.4, The “exposure” Tab: This tab allows you to adjust the exposure options<br />
of the selected cameras.<br />
• Section 4.5, The „Recording“ Tab:<br />
The camera selection list is shared by all areas and includes a window for previewing<br />
the camera's live image. Further functions can be accessed using the following buttons<br />
under the live image window:<br />
• Click to Reload the Current Configuration for the Selected Video Sources: Use<br />
this button to reload the confi guration data of selected cameras. This function may<br />
be useful when, for example, the camera settings can also be changed by other<br />
users.<br />
• Click to Force a Reboot of the Selected Video Source: Use this button to reboot<br />
selected cameras.<br />
• Click to show/hide the preview image of the selected video source: Use this button<br />
to activate or deactivate the live image preview of the selected camera in the<br />
preview window. This function may be useful when, for example, displaying the live<br />
image takes up too much time due to a slow network connection.<br />
• Click to See a Snapshot/Live Image of the Selected Video Source Only: Use this<br />
button to retrieve the current live image from the selected camera once and to<br />
display it in the preview window. This allows the camera to be identifi ed, yet preventing<br />
the preview image from being constantly updated and, as a consequence, considerably<br />
reduces the network load.<br />
The settings of the selected cameras are automatically loaded and displayed in the dialog<br />
box. This dialog box will notify you if the individual settings of several selected cameras<br />
are diff erent. You can transfer the settings to a camera by clicking OK or Apply. However,<br />
this will only transfer data if the settings for the relevant camera have also changed.<br />
© <strong>MOBOTIX</strong> AG • Security-Vision-Systems • Made in Germany<br />
www.mobotix.com • sales@mobotix.com
112/152 MxControlCenter Manual: Configuring <strong>MOBOTIX</strong> Cameras<br />
The settings on the Image Settings and Recording screens can be applied to several<br />
selected cameras all at once. This allows you, for example, to conveniently confi gure an<br />
event recording for all cameras on one computer in one step.<br />
© <strong>MOBOTIX</strong> AG • Security-Vision-Systems • Made in Germany<br />
www.mobotix.com • sales@mobotix.com
The "Camera Configuration" Dialog Box<br />
113/152<br />
4.2 The "Overview" Tab<br />
This section contains a list of selected camera settings. They include the arming and<br />
recording statuses, the activated events, the type of event recording (snapshot, events or<br />
continuous recording), and the storage location (external fi le server, internal SD card,<br />
internal fl ash memory, etc.).<br />
Many settings can be modifi ed using the pop-up menu. The pop-up menu also off ers you<br />
the option of switching to the appropriate area for more detailed settings (for example,<br />
Recording).<br />
Clicking OK or Apply sends the modifi ed settings to the camera, where they are stored<br />
permanently.<br />
© <strong>MOBOTIX</strong> AG • Security-Vision-Systems • Made in Germany<br />
www.mobotix.com • sales@mobotix.com
114/152 MxControlCenter Manual: Configuring <strong>MOBOTIX</strong> Cameras<br />
For more information on the available camera settings (user interface in the browser),<br />
see the software manual:<br />
• Arming: Setup Menu > General event Settings > Arming: For more information,<br />
see Section 7.5 Arming in the software manual.<br />
• Recording: Setup Menu > Recording > Arming: For more information, see Chapter<br />
8 Recording in the software manual.<br />
• Events: Setup Menu > event Settings. For more information, see Section 7.6 Events<br />
in the software manual.<br />
• Mode: Setup Menu > Recording > Recording (ReC). For more information, see<br />
Section 8.2 Recording Modes in the software manual.<br />
• Server: Admin Menu > Storage on external File Server / Flash Device. For more<br />
information, see Section 8.3 Recording Modes in the software manual.<br />
4.3 The "Image Settings" Tab<br />
This screen allows you to adjust the settings that determine the quality of the camera<br />
image (saturation, brightness, sharpness, backlight, resolution, JPEG quality, etc.). The<br />
image settings can be applied to several selected cameras all at once.<br />
If the Apply changes immediately checkbox is activated, the changes are immediately<br />
stored in the camera, are immediately visible in the preview image of the dialog box and<br />
in the live image, and are also available after rebooting.<br />
If this checkbox is not activated, the changes are fi rst sent to the camera, where they are<br />
also stored once you have clicked the Apply button.<br />
© <strong>MOBOTIX</strong> AG • Security-Vision-Systems • Made in Germany<br />
www.mobotix.com • sales@mobotix.com
The "Image Settings" Tab<br />
115/152<br />
If the selected camera is a <strong>MOBOTIX</strong> Dual Model with two image sensors, you can confi<br />
gure the settings for each image sensor individually. The image sensor in question can<br />
be selected from the selection list.<br />
Caution<br />
Make sure that you have selected the desired image sensor again before closing<br />
the dialog box.<br />
For more information on the available camera settings (user interface in the browser),<br />
see the software manual:<br />
• S/B/B/S: Saturation, Brightness, Backlight, Sharpness.<br />
Setup Menu > Color Settings, Setup Menu > exposure Settings and Setup Menu ><br />
General Image Settings. For more information, see Section 5.5 Image Controls and<br />
Section 5.7 Exposure Settings in the software manual.<br />
• Camera Sensor: Sensor selection (only possible with dual lens models).<br />
Setup Menu > General Image Settings. For more information, see Chapter 5 Basic<br />
Camera Confi guration of the software manual.<br />
• Format: Resolution, JPEG Quality, Transfer Rate (frames per second), Mode (image<br />
quality).<br />
Setup Menu > General Image Settings and Setup Menu > Image Settings. For<br />
more information, see Section 5.5 Image Controls and Section 5.7 Exposure Settings<br />
in the software manual.<br />
• Image Settings: Night Improvement, White Balance, Noise Suppress, Automatic Contrast.<br />
Setup Menu > exposure Settings, Setup Menu > Color Settings and Setup Menu ><br />
General Image Settings. For more information, see Section 5.5 Image Controls and<br />
Section 5.7 Exposure Settings in the software manual.<br />
• exposure Settings: Exposure Program.<br />
Setup Menu > exposure Settings. For more information, see Section 5.7 Exposure<br />
Settings in the software manual.<br />
If you want to edit further settings beyond the confi guration options that are available here,<br />
<strong>MOBOTIX</strong> cameras allow you to make advanced changes directly using your browser<br />
(Setup Menu > Image Control).<br />
© <strong>MOBOTIX</strong> AG • Security-Vision-Systems • Made in Germany<br />
www.mobotix.com • sales@mobotix.com
116/152 MxControlCenter Manual: Configuring <strong>MOBOTIX</strong> Cameras<br />
4.4 The "exposure" Tab<br />
The exposure screen of the camera confi guration allows you to adjust the exposure<br />
windows of the selected <strong>MOBOTIX</strong> camera.<br />
Exposure Window “Quarter” (Default)<br />
exposure windows enable <strong>MOBOTIX</strong> cameras to determine the optimal exposure for<br />
the images. You can use the camera's pre-defi ned exposure windows or you can defi ne<br />
custom exposure windows.<br />
exclusion Windows defi ne the sections that should be excluded when determining<br />
the correct exposure (for example, bright sources of light in the camera's image area).<br />
exposure Weighting defi nes how the exposure windows are assessed in relation to the<br />
area outside of the exposure windows (100% = use exposure windows only).<br />
The exposure windows are normally displayed in a frame with a thin border. Clicking this<br />
frame causes the border to be displayed in bold ("activated") and the coordinates of the<br />
frame are displayed in the Frame Details group.<br />
editing exposure And exclusion Windows<br />
• Changing the Size of a Window: Move the mouse over the frame of the window,<br />
which can then be edited, as indicated by the cursor.<br />
• Moving a Window: If you move the mouse over a window, the cursor will change<br />
and you will be able to move the window anywhere you like.<br />
• Deleting a Window: Click the small "x" in the top right-hand corner of the frame to<br />
delete the window. Activated frames (bold) can be deleted by pressing the DeLeTe<br />
key.<br />
© <strong>MOBOTIX</strong> AG • Security-Vision-Systems • Made in Germany<br />
www.mobotix.com • sales@mobotix.com
The "Recording" Tab<br />
117/152<br />
Adding exposure And exclusion Windows<br />
• Adding an exposure Window: Use the mouse to draw a green frame within the<br />
camera's image area.<br />
• Adding an exclusion Window: Use the mouse to draw a new green frame in the<br />
image area (the new frame is automatically active) and click the Exclude checkbox<br />
in the Frame Details group. The active frame is now displayed in red.<br />
Other Options<br />
• Show Frame: These options allow you to defi ne if and when the exposure and<br />
exclusion window frames are shown in the camera's image area.<br />
4.5 The "Recording" Tab<br />
This tab allows you to confi gure the settings for Recording, which in turn determine how<br />
image data is archived.<br />
A recording can be activated with the recording switch and you can choose the recording<br />
mode. When particular events are detected by the camera, you can activate a recording<br />
with a particular frame rate and pre- and post-alarm times (Time Before and Time<br />
After). In addition to confi guring the camera for internal recordings, the camera can also<br />
be confi gured to archive image data on a local PC or another computer of your choice.<br />
notes And explanations On The Groups<br />
• Recording: Arming status for recording.<br />
© <strong>MOBOTIX</strong> AG • Security-Vision-Systems • Made in Germany<br />
www.mobotix.com • sales@mobotix.com
118/152 MxControlCenter Manual: Configuring <strong>MOBOTIX</strong> Cameras<br />
• Mode: Recording Mode, Snapshot/Events/Continuous.<br />
• Frame Rate: Frames per second for continuous recording.<br />
• Audio: You can record audio for event recording and continuous recording when<br />
recording in MxPEG format.<br />
• Full Image Recording: The cameras always store the full image using this feature,<br />
regardless of the live image stream that is being displayed. This ensures that the<br />
recording always contains the full image, even though the operator may have used<br />
the vPTZ features to zoom into the image in order to examine a specifi c detail. This<br />
applies particularly to the Q24M models, which rely strongly on the vPTZ features in<br />
the live image. This means that you can use the vPTZ features to pan, tilt and zoom<br />
the live image while the camera is recording full images at 1 fps in MEGA or QXGA<br />
resolution. Thanks to the advanced distortion correction features of MxControlCenter<br />
and MxEasy, you can still play back and examine the recorded full images of Q22M<br />
cameras normally, that is, without distortion. To use this feature, activate the Full<br />
Image Recording option under Camera Configuration > Recording. This dialog<br />
box also allows you to set the desired resolution, in addition to other parameters.<br />
Please pay attention to the following:<br />
• You should use at least MEGA format (ideally QXGA) if you are using Full Image<br />
Recording on <strong>MOBOTIX</strong> cameras in the Q series. The applications need high<br />
resolution to deliver satisfactory image quality when viewing the recorded images<br />
in MxControlCenter or MxEasy.<br />
• As the processing power of the camera is limited, full image recording reduces<br />
the attainable data rate of the live image stream, which may drop by about 10<br />
to 30 percent. It is therefore recommended to reduce the frame rate for storage<br />
as much as possible, so as to minimize the eff ects on the live image stream.<br />
• Snapshot Recording Mode: You can pack snapshots into one clip fi le to improve fi le<br />
server performance in Recording Mode. To do so, activate the Pack Story checkbox.<br />
• Start Trigger: Cameras can be set up to start a recording if an event is detected.<br />
This event can increase the frame rate of the recording for a short period of time for<br />
snapshot or continuous recording.<br />
• Frame Rate: Frames per second during the recording of the event.<br />
• Time Before: Period of time for recording before the event takes place, including<br />
the specifi ed frame rate.<br />
• Time After: Period of time for recording after the event takes place, including the<br />
specifi ed frame rate.<br />
• external Recording: The camera can be confi gured to use an external storage device<br />
for recording image data. You can make detailed settings in the external Recording<br />
dialog box. Click Setup... to display this dialog box.<br />
© <strong>MOBOTIX</strong> AG • Security-Vision-Systems • Made in Germany<br />
www.mobotix.com • sales@mobotix.com
The "Recording" Tab<br />
119/152<br />
external Recording<br />
In order to confi gure a <strong>MOBOTIX</strong> camera<br />
to record data to an external server, you<br />
need to enter the IP address of the server,<br />
the share name of the folder, and the user<br />
name and password of an authorized<br />
user. If you want to record to a local PC,<br />
you can share the folder and create an<br />
authorized user with the external Recording<br />
dialog box. MxControlCenter confi gures<br />
your computer as required.<br />
Once you have confi gured the external storage<br />
device for recordings and transferred<br />
the confi guration data to the camera (by<br />
clicking OK or Apply), the program may<br />
ask you to restart the camera in order to<br />
apply the settings.<br />
• Target Computer: In order to share a folder on your local computer, use your local IP<br />
address (it will be entered automatically). To use a diff erent server, you need to enter<br />
the fi le system and IP address for this fi le server manually. If you want the camera<br />
to record to the expansion slot on the camera itself (USB stick, CF card), you do not<br />
have to enter an IP address or authorization information.<br />
• Shared Folder: You need to enter the required information depending on the fi le<br />
server you choose. To record to a local computer, you can either select a pre-existing<br />
shared folder and user name or create a new shared folder and user name, if needed.<br />
• Quota: The external recording can be limited according to three criteria: Maximum<br />
storage size in MB (Max. storage size), maximum number of days to keep (Max.<br />
age), and maximum number of events (Max. sequences).<br />
• Details: When recording to a local computer, the Details area indicates any potential<br />
problems. For example, if you have entered an incorrect password for a user name,<br />
this is displayed in this area.<br />
© <strong>MOBOTIX</strong> AG • Security-Vision-Systems • Made in Germany<br />
www.mobotix.com • sales@mobotix.com
120/152<br />
MxControlCenter Manual: Configuring <strong>MOBOTIX</strong> Cameras<br />
<strong>MOBOTIX</strong> cameras off er advanced confi guration options for external storage devices for<br />
recordings. These options can be accessed directly using the browser:<br />
• Open your browser and enter the IP address of the camera.<br />
• Arming (Setup Menu > Recording > General Settings).<br />
• Storage on External File Server (Admin Menu > Storage on external File Server /<br />
Flash Device).<br />
4.6 Updating The Camera Software<br />
<strong>MOBOTIX</strong> cameras are always delivered with the latest version of the required software<br />
to guarantee that your camera runs stably and functions properly. Nevertheless, it may<br />
be necessary to update the camera software from time to time, as this not only corrects<br />
software bugs, but also adds new features to the camera.<br />
4.6.1 Preparing The Software Update<br />
As a <strong>MOBOTIX</strong> camera owner, you are entitled to free software updates for your camera.<br />
Go to www.mobotix.com under Support > Software Downloads to download<br />
the latest software version. Download the correct *.mpl fi le for your camera to a specifi c<br />
location on your computer's hard drive.<br />
The Update Assistant (Tools > Assistants > Update camera software) lists all cameras<br />
you defi ned in MxControlCenter. Note that you can only update cameras with the status<br />
OK in MxControlCenter.<br />
© <strong>MOBOTIX</strong> AG • Security-Vision-Systems • Made in Germany<br />
www.mobotix.com • sales@mobotix.com
Updating The Camera Software<br />
121/152<br />
Connect To Camera<br />
If a camera is listed with the status Access denied, you fi rst need to enter a valid user<br />
name with admin level access rights along with the corresponding password for proper<br />
authentication. To do this, click Connect to Camera and enter the user name and password<br />
for this camera in the next dialog box (Connection Settings).<br />
Rebooting<br />
Click Reboot at any time to restart the selected cameras for testing purposes, for example,<br />
for testing the confi guration of the camera after a power failure.<br />
4.6.2 Updating System Software<br />
Select the cameras whose software you would like to update and click Upload Software.<br />
Now open the *.mpl fi le you downloaded earlier. This fi le contains the update image<br />
for the selected cameras. Then click OK.<br />
The software update now starts automatically. MxControlCenter displays the update progress<br />
for each camera in the Progress column. After loading the update image fi le, each<br />
camera has to unpack the image to the permanent memory, after which each camera<br />
will automatically reboot.<br />
Caution<br />
Do not close MxControlCenter during the software update process. Avoid power<br />
failures or disruptions to the network connection to the cameras.<br />
© <strong>MOBOTIX</strong> AG • Security-Vision-Systems • Made in Germany<br />
www.mobotix.com • sales@mobotix.com
122/152<br />
MxControlCenter Manual: Configuring <strong>MOBOTIX</strong> Cameras<br />
4.7 Saving And Importing Camera Configurations<br />
The Update Assistant automatically saves the confi guration fi les for each camera. You<br />
can also use the Save Settings button at any time to simultaneously save the confi gurations<br />
of several selected cameras. You can reload any valid confi guration to the selected<br />
cameras using the Upload Settings button. On the one hand, you can use this feature to<br />
correct a faulty confi guration fi le of a camera and to restore it to a defi ned and tested<br />
confi guration. On the other hand, this feature provides an easy method for copying the<br />
confi guration from one camera and applying it to another, making it convenient to manage<br />
several diff erent cameras.<br />
Log Window<br />
While the camera software is being updated, the individual steps are displayed in the<br />
Update Log window, which may be helpful for <strong>MOBOTIX</strong> support in case of problems, for<br />
example. If the log is not shown at the bottom of the dialog box, it can be displayed using<br />
the View > Update Log menu command.<br />
© <strong>MOBOTIX</strong> AG • Security-Vision-Systems • Made in Germany<br />
www.mobotix.com • sales@mobotix.com
Overview<br />
123/152<br />
5 MXCOnTROLCenTeR OPTIOnS<br />
5.1 Overview<br />
You can access the MxControlCenter options under Tools > Options.... Open this dialog<br />
box to edit the basic settings of MxControlCenter and confi gure all the <strong>MOBOTIX</strong> cameras<br />
or video sources in the selected layout.<br />
• General: This tab provides the general settings for MxControlCenter such as the<br />
admin and user passwords for MxControlCenter, global user names and passwords<br />
for the <strong>MOBOTIX</strong> cameras, the default behavior when launching and minimizing the<br />
application, and the default behavior when detecting general errors and connection<br />
errors with cameras.<br />
More information on this topic can be found in Section 5.2, The “General” Tab.<br />
• Alarm List: This tab includes a checkbox for activating the alarm list and other settings<br />
for the alarm list features of MxControlCenter such as the size of the alarm list,<br />
alarm sound notifi cation, etc.<br />
More information on this topic can be found in Section 5.3, The “Alarm List” Tab.<br />
• Remote Control: This tab includes a checkbox for activating the remote control and<br />
other settings for the remote control features of MxControlCenter by <strong>MOBOTIX</strong> cameras.<br />
This tab's options also controls MxControlCenter behavior when receiving network<br />
messages (TCP/IP messages) sent by <strong>MOBOTIX</strong> cameras to the MxControlCenter<br />
computer.<br />
More information on this topic can be found inSection 5.4, The “Remote Control” Tab.<br />
• : These tabs (each assigned with the name and IP address of the<br />
camera) include specifi c settings for each <strong>MOBOTIX</strong> camera defi ned in MxControlCenter.<br />
For example, individual user data for the respective camera or the type of pan/tilt<br />
head connected to the camera can be entered here.<br />
More information on this topic can be found in Section 5.5, Camera Tabs.<br />
© <strong>MOBOTIX</strong> AG • Security-Vision-Systems • Made in Germany<br />
www.mobotix.com • sales@mobotix.com
124/152<br />
MxControlCenter Manual: MxControlCenter Options<br />
5.2 The "General" Tab<br />
• Admin password: Enter the administrator password for MxControlCenter in this<br />
field. Once a password has been set, users are prompted to enter this password to<br />
access the admin level. Enter a time in the Auto logout field to determine the length<br />
of time after which the user will need to enter the password again to open a certain<br />
feature. More information on this topic can be found in Section 3.7.1, Access Levels<br />
Of MxControlCenter.<br />
• User Password: Enter the user password for MxControlCenter in this field. Once a<br />
password has been set, users are prompted to enter this password to access the<br />
user level. More information on this topic can be found in Section 3.7.1, Access Levels<br />
Of MxControlCenter.<br />
• Auto Logout: After the time set in this field has elapsed, MxControlCenter automatically<br />
logs out any user. When this occurs, users will need to enter the password<br />
again to access the corresponding features. You can set the auto logout time from<br />
1 to 3,600 seconds (one hour).<br />
• Global Camera User Name and Global Camera Password: MxControlCenter can<br />
only access a <strong>MOBOTIX</strong> camera once a user name and password have been set for<br />
the corresponding access level for that camera (for more information, see Section<br />
5.4.1 User, User Groups, Passwords, Supervisor Mode in the software manual). This<br />
field allows standard user data to be set in MxControlCenter that are automatically<br />
used for <strong>MOBOTIX</strong> cameras where the fields Camera user name and Camera<br />
password on the corresponding tab are empty. This option is very useful if, for<br />
© <strong>MOBOTIX</strong> AG • Security-Vision-Systems • Made in Germany<br />
www.mobotix.com • sales@mobotix.com
Overview<br />
125/152<br />
example, several cameras in one MxControlCenter installation or in one layout all<br />
have the same user name and password.<br />
• Proxy: Make sure that this option is activated if a proxy server prevents direct access<br />
to the <strong>MOBOTIX</strong> camera. The IP address and the port of the proxy server need to be<br />
entered in the corresponding fields.<br />
• File Server Path: MxControlCenter can access the stored image and video sequences<br />
either via the camera or directly from the file server on which the camera has stored<br />
the data. Enter the standard path to the file server in this field. This path is automatically<br />
used for all <strong>MOBOTIX</strong> cameras, provided the File server path field on the corresponding<br />
tab is empty. Use this option if several cameras of a MxControlCenter installation<br />
or layout have been configured to use the same file server path.<br />
Note<br />
Retrieving images from a file server offers additional advantages as it is faster<br />
than retrieving images via the <strong>MOBOTIX</strong> camera and is also independent of<br />
the camera itself. This approach thus significantly reduces the network load<br />
and does not put any strain on the camera, since it is not involved in providing<br />
any files. Therefore, the performance of the <strong>MOBOTIX</strong> camera's processor<br />
is not compromised and is always available for other tasks. However, if the<br />
images are retrieved using the camera, you only need to enter the camera<br />
user name and the corresponding password to access that camera when<br />
configuring MxControlCenter.<br />
Caution<br />
When retrieving the images and video sequences from a file server, make<br />
sure that the shared folders have been properly configured (read rights for<br />
the computer and the user running MxControlCenter). For more information,<br />
see Section 8.3.4 Recording on a Windows Computer in the software manual.<br />
Make sure that the computer has access to the shared folders before MxControlCenter<br />
attempts to access the stored image and video sequences. MxControlCenter<br />
should not establish the connection itself. Note that MxControlCenter will not<br />
alert you if the connection fails for any reason.<br />
© <strong>MOBOTIX</strong> AG • Security-Vision-Systems • Made in Germany<br />
www.mobotix.com • sales@mobotix.com
126/152<br />
MxControlCenter Manual: MxControlCenter Options<br />
• During Minimize (Taskbar): This option allows you to set the behavior of MxControlCenter<br />
if the application has been minimized to the task bar:<br />
• Stop all: This option allows you to interrupt the retrieval of the image and video<br />
sequences when MxControlCenter is minimized. Once the MxControlCenter window<br />
has been restored from the taskbar, you need to click the respective button<br />
in the toolbar to manually restart each individual display window.<br />
• Pause: This option allows you to pause the retrieval of the image and video<br />
sequences when MxControlCenter is minimized. Once the MxControlCenter<br />
window has been restored from the taskbar, retrieval is automatically resumed.<br />
• Continue decoding: This option allows you to continue retrieving image and video<br />
sequences when MxControlCenter is minimized.<br />
Note<br />
Note that MxControlCenter will be restored automatically when the application<br />
receives a valid camnotify or ip command (for more information, see<br />
Section 5.4, The “Remote Control” Tab).<br />
Caution<br />
If MxControlCenter is minimized, the alarm list is only updated by the cameras<br />
that send network messages with the commands camnotify and ip to the<br />
MxControlCenter computer . While the application is minimized, incoming alarm<br />
images from cameras included in the current layout that do contain network<br />
messages are not included in the alarm list!<br />
• Sequencer Time: This field allows setting a standard interval for the Sequencer<br />
mode. This interval is automatically used for <strong>MOBOTIX</strong> cameras unless a different<br />
interval has been set in the Sequencer time field on an individual camera tab in<br />
MxControlCenter. When in Sequencer Mode, each camera will stay visible for the<br />
duration entered in this field unless ‐ a specific sequencer time has been defined for<br />
that camera. ‐ If this is the case, the individual sequencer time will be used.<br />
• On Top After: After the interval in this field has elapsed, MxControlCenter automatically<br />
restores itself on top of all other application windows.<br />
This is a convenient option to use when other applications are running alongside<br />
MxControlCenter and may be covering the MxControlCenter window.<br />
•<br />
© <strong>MOBOTIX</strong> AG • Security-Vision-Systems • Made in Germany<br />
www.mobotix.com • sales@mobotix.com
Overview<br />
127/152<br />
• Return to Start Layout after: The value entered in this field determines the duration<br />
before the layout manager automatically activates the specified start layout.<br />
This is a convenient option whenever you need to switch frequently between different<br />
layouts and would like MxControlCenter to automatically return to a certain layout.<br />
• Sound on Error: Use this option to play back an audio file over the computer speakers<br />
(or the default output device). When this option is activated, the selected device<br />
plays back either the standard system sound (Beep) or a selected audio file (*.wav)<br />
available on the computer (the File option) if an internal system error occurs.<br />
• Sound on Lost Camera: Using this option, you can select whether an acoustic signal<br />
is played back over the computer speakers (or the standard playback device). When<br />
this option is activated, the selected device plays back either the standard system<br />
sound (Beep) or a selected audio file (*.wav) (File) on the computer if a connection<br />
error occurs in one of the <strong>MOBOTIX</strong> cameras in the layout.<br />
• Error Display for Connection Errors: Using this option, you can select whether a<br />
connection error detected during the live display of a camera is visualized in the<br />
display window. You can select either a standard error message (Error message) or<br />
a graphics file (*.jpg) (Graphic). You can select the vertical percentage (in Y direction)<br />
of the display window to be covered by the graphic for graphics files.<br />
• Error Display on Latency Timeout: Use this option to select either a standard error<br />
message (Error message) or a graphics file (*.jpg) (Graphic) to be shown in the<br />
display window if the latency time of a camera is too long. In this context, "latency<br />
time" means the time difference between the point at which an image is generated<br />
by the camera and the point at which it is displayed in MxControlCenter.<br />
• You can select the vertical percentage (in Y direction) of the display window to<br />
be covered by the graphic for graphics files.<br />
• In this area, you can also set the maximum latency time to use by changing the<br />
value for Maximum latency time (in ms).<br />
• In addition, you can set the value for Maximum overdue time (in ms).<br />
This value is exceeded when the value for Maximum latency time is exceeded by<br />
the Maximum overdue time. This error is reset when the Maximum latency time<br />
returns to a value below the set parameter for the Maximum overdue time.<br />
Caution<br />
When using the latency time options, make sure that the system time of the<br />
camera and the system time of the MxControlCenter computer are precisely<br />
synchronized. You need to use a time server (and, if necessary, the corresponding<br />
Windows software) to ensure that they are synchronized.<br />
© <strong>MOBOTIX</strong> AG • Security-Vision-Systems • Made in Germany<br />
www.mobotix.com • sales@mobotix.com
128/152<br />
MxControlCenter Manual: MxControlCenter Options<br />
• Set Global Folder: Use this fi eld to preset a global folder for storing the MxControlCenter<br />
confi guration fi les. You can establish a standard confi guration for multiple users of<br />
MxControlCenter on diff erent computers when using this folder as a global folder<br />
for all MxControlCenter computers. You can also choose a shared folder on a fi le<br />
server on the network.<br />
Note<br />
For more information on which folder MxControlCenter accesses fi rst when<br />
loading a confi guration, see Section 3.6.1, Global And Local Folders.<br />
• On Startup: Use this option to change the startup behavior of MxControlCenter.<br />
For example, MxControlCenter can automatically launch with the specifi ed startup<br />
layout, the layout opened at the time the program was last closed (the Last layout<br />
option), the Layout Sequencer, or minimized to the taskbar (the Minimized option).<br />
• Mouse-Over: This option allows you to control the behavior of MxControlCenter<br />
when the mouse pointer is positioned over a camera image. For example, if you<br />
would like to show a full resolution live image from the <strong>MOBOTIX</strong> camera, select the<br />
On radio button. If you would like to see the standard MultiView layout, select the<br />
By MultiView radio button. At least one MultiView view needs to be confi gured on<br />
the camera in order to use this option. Activating the Small area checkbox will hide<br />
the mouse-over window if the mouse pointer leaves the small area in the middle<br />
of the camera window in the layout. Otherwise, the mouse-over window remains<br />
open until the mouse pointer leaves the area of the mouse-over window. Select the<br />
Off radio button to disable this feature.<br />
• Show Toolbar at Bottom: Use this option to display the toolbar at the bottom of the<br />
display area instead of at the top.<br />
• Layout Buttons in Toolbar: Instead of displaying the buttons for executing the various<br />
actions as described above, the toolbar contains only buttons with the names of the<br />
layouts in the confi guration when this feature is activated.<br />
In the next text fi eld, you can specify how many of the layout buttons you want to<br />
be displayed in the toolbar. These buttons (a maximum of 10) are automatically<br />
assigned layouts from the layout list, with the layout names being displayed on the<br />
buttons. The position in the layout list corresponds to the position of the button in<br />
the toolbar from the left to right (so the fi rst layout in the layout list can be activated<br />
via the button on the far left of the toolbar).<br />
This setting can be used, for example, for pure live surveillance applications in which<br />
the users of the system are only required to switch between layouts with diff erent<br />
live cameras without performing any additional functions.<br />
• Full Screen Mode: Enable this option to maximize MxControlCenter without displaying<br />
any title bars or window frames. Deactivate the View > Display area only option in<br />
the pop-up menu (right-click) or press esC on the computer keyboard to return to the<br />
default view. Note that no soft key bars are shown in Full screen mode.<br />
© <strong>MOBOTIX</strong> AG • Security-Vision-Systems • Made in Germany<br />
www.mobotix.com • sales@mobotix.com
Overview<br />
129/152<br />
• Use White Grid: Enable this option to display the camera windows with a thin<br />
white border in a grid layout. This provides a better overview of multiple cameras<br />
in small windows.<br />
• Synchronize Clips on Start: Use this option to synchronize all MxPEG clips by time<br />
upon playback in MxControlCenter. This option corresponds to synchronized playback<br />
in local recorder mode.<br />
• Demo Mode: This option activates the Demo mode of MxControlCenter. In Demo<br />
mode, MxControlCenter automatically displays typical actions for all cameras in<br />
the current layout.<br />
• On Double Click: This option controls the behavior of MxControlCenter when you<br />
double-click a camera image. Double-clicking can switch between the right and the<br />
left lens of the <strong>MOBOTIX</strong> camera (Change Lens) or can open a live window (Open<br />
Live Window). Select Do nothing to disable this feature.<br />
• Always on Top: Enable this option to always display the MxControlCenter window on<br />
top of all other applications. This option can be used to guarantee that MxControlCenter<br />
is never covered by other application windows.<br />
• Reduce Frame Rate (CPU Usage): If you have set a percentage value for the CPU<br />
usage in this field, MxControlCenter automatically reduces the frame rate of the<br />
live cameras if this value is exceeded in order to adjust the CPU usage accordingly.<br />
• Use Camera Layout Settings: The camera settings are saved along with the<br />
MxControlCenter settings. When MxControlCenter is launched again, the current<br />
settings of the cameras are compared to the settings stored in MxControlCenter.<br />
If the camera settings deviate from the stored settings, you can choose either the<br />
MxControlCenter settings (Always) or the camera settings (Never). The third option<br />
(Ask) displays a dialog box when the application is launched. Here, the user can<br />
select one of the two options.<br />
© <strong>MOBOTIX</strong> AG • Security-Vision-Systems • Made in Germany<br />
www.mobotix.com • sales@mobotix.com
130/152<br />
MxControlCenter Manual: MxControlCenter Options<br />
5.3 The "Alarm List" Tab<br />
Enabled<br />
• This checkbox activates the alarm list feature. When it is activated, MxControlCenter<br />
stores the alarm images and video sequences of the <strong>MOBOTIX</strong> cameras in the computer's<br />
RAM. In addition, MxControlCenter can store the alarm images in an alarm<br />
list file. This means that MxControlCenter can display the stored alarm images even<br />
after closing and restarting the application.<br />
General<br />
• Size: You can set the maximum amount of RAM reserved for the alarm list from the<br />
drop-down list here. If the value specified here is exceeded, the oldest alarms are<br />
automatically deleted to make room for new alarms.<br />
• Alarm List File: Enter a file name for the alarm list in this field. After closing MxControlCenter,<br />
the alarm list will also be available the next time MxControlCenter is launched. If<br />
this field is empty, the alarm list is deleted when MxControlCenter is closed. The<br />
maximum file size for the alarm list file is also determined by the setting from Size.<br />
• Open List on New Alarm: If this checkbox is enabled, MxControlCenter automatically<br />
shows the alarm list when detecting a new alarm.<br />
This feature is very useful in cases where alarms are rare. In these cases, the entire<br />
display area of MxControlCenter can be used to display the live camera images.<br />
When MxControlCenter detects an alarm, it will show the alarm list shown with the<br />
new alarm highlighted in red.<br />
© <strong>MOBOTIX</strong> AG • Security-Vision-Systems • Made in Germany<br />
www.mobotix.com • sales@mobotix.com
The "Alarm List" Tab<br />
131/152<br />
• Auto Acknowledge Alarms after: Enabling this option prompts MxControlCenter to<br />
automatically acknowledge the alarms after one is detected and the specified time<br />
has elapsed. You can set this time from 1 minute to 24 hours.<br />
Sound On New Alarm<br />
• Activated: Enabling this option prompts MxControlCenter to play back an acoustic<br />
signal over the computer speakers (or the default output device) when an alarm is<br />
detected.<br />
• Sound: Select either the standard system sound (the Beep radio button) or specify an<br />
audio file (*.wav) on the computer (the File radio button). MxControlCenter will play<br />
back this acoustic signal over the computer speakers (or the default output device)<br />
when an alarm is detected.<br />
• Sound Deadtime: Enabling this option prevents further acoustic signals from being<br />
played back for this period of time after a sound for this alarm is emitted for the first time.<br />
Repeat Sound<br />
• Off / Every ... Sec.: Use this option to prompt MxControlCenter to repeat the selected<br />
acoustic signal at regular intervals according to the value entered in the sec. field<br />
until the alarm is acknowledged in the alarm list.<br />
• ... Until Acknowledged by Clicking: Select one of the radio buttons (any alarm,<br />
last alarm or every alarm ) to specify which alarm image(s) need to be clicked to<br />
acknowledge and end the repetition of the acoustic signal.<br />
• Repeat Sound for Max. ... Seconds without New Alarm: Use this option to set the<br />
maximum time during which MxControlCenter repeats the acoustic signal.<br />
Example: When setting this option to twelve seconds and the sound repetition to<br />
three seconds, for example, MxControlCenter will repeat the sound every three<br />
seconds for a total of five times: once upon detecting the alarm and after that,<br />
every three seconds for the next twelve seconds.<br />
© <strong>MOBOTIX</strong> AG • Security-Vision-Systems • Made in Germany<br />
www.mobotix.com • sales@mobotix.com
132/152<br />
MxControlCenter Manual: MxControlCenter Options<br />
5.4 The "Remote Control" Tab<br />
Section 3.3, Alarm Processing described how a <strong>MOBOTIX</strong> camera can send network messages<br />
to MxControlCenter triggering certain alarm responses.<br />
In addition to receiving network messages from a camera, MxControlCenter can also receive<br />
network messages from other programs. These programs can send defined commands<br />
as network messages, with which MxControlCenter can then be "remote controlled" to<br />
a certain extent. This allows you, for example, to change the current layout from another<br />
application while MxControlCenter is running or to switch a specific camera within the<br />
current layout into the full image view. Network messages can also play back audio files<br />
on the MxControlCenter computer or reactivate a minimized MxControlCenter.<br />
The Remote Control tab includes three areas for setting the necessary parameters:<br />
© <strong>MOBOTIX</strong> AG • Security-Vision-Systems • Made in Germany<br />
www.mobotix.com • sales@mobotix.com
The "Alarm List" Tab<br />
133/152<br />
5.4.1 General Remote Control And Camera IP Notify<br />
This area allows you to configure MxControlCenter to receive any network messages.<br />
Network messages can be received both from other applications to control MxControlCenter<br />
remotely and from specific cameras for alarms.<br />
Elements Of The "General Remote Control And Camera IP Notify" Area<br />
• Port Activated (To Listen for TCP/IP Messages): Enabling this option prompts<br />
MxControlCenter to monitor the specified port for incoming network messages. The<br />
sender may use all available commands.<br />
• Port: You must enter the port to be monitored by MxControlCenter for network messages<br />
here. If this field is empty, the remote control feature will not work.<br />
• Allowed IPs: Enter the IP addresses of the cameras (or other network devices) that<br />
are allowed to send network messages to MxControlCenter. If the field is empty<br />
(or contains the entry *), MxControlCenter accepts network messages from every<br />
IP address. Therefore, for security reasons, you should always enter the relevant IP<br />
addresses immediately after completing the test or setup phase.<br />
• Sound: Use this option to select whether an acoustic signal is played back over the<br />
computer speakers. When this option is activated and MxControlCenter detects a<br />
network message, the selected device plays back either the standard system sound<br />
(Beep) or a selected audio file (*.wav) on the computer (File).<br />
Syntax Of Network Messages Sent To MxControlCenter<br />
http://:/=&=...&=<br />
Examples:<br />
http://192.168.1.182:8001/fullscreen=1(minimizes MxControlCenter to<br />
the taskbar)<br />
http://192.168.1.182:8001/fullscreen=0(restores the MxControlCenter<br />
application window and displays it on top of other applications)<br />
Note<br />
The following link in the address bar of a browser prompts the MxControlCenter<br />
computer to generate a list of the supported parameters and their functions:<br />
http://:/<br />
Example: http://192.168.1.182:8001/<br />
© <strong>MOBOTIX</strong> AG • Security-Vision-Systems • Made in Germany<br />
www.mobotix.com • sales@mobotix.com
134/152<br />
MxControlCenter Manual: MxControlCenter Options<br />
Caution<br />
Make sure that in the General remote control and Camera IP Notify group you<br />
enter a Port, otherwise the remote control feature will not work.<br />
If necessary, you can contact <strong>MOBOTIX</strong> support for more information on the supported<br />
remote control features.<br />
5.4.2 Camera IP Notify Only Port<br />
In this area, you can set MxControlCenter so that only certain network messages are<br />
processed:<br />
• Network messages from an MxCC Alarm: simple or an MxCC Alarm: acknowledge<br />
required type of <strong>MOBOTIX</strong> camera<br />
• Network messages from a <strong>MOBOTIX</strong> camera with the camnotify parameter<br />
(....camnotify=, ....camnotify=ownip)<br />
These Messages Lead To The Following Actions:<br />
• Activation of MxControlCenter, if it was minimized<br />
• Entry of the corresponding images in the alarm list (see below)<br />
• Loading of the preferred layout, if it was defined for the camera<br />
Elements Of The "Camera IP Notify Only Port" Area<br />
• Port Activated (To Listen for TCP/IP Messages): Enable this option to have MxControlCenter<br />
to monitor the specified port and the allowed IP addresses only for network messages<br />
containing the camnotify command.<br />
• Port: Enter the port to be monitored by MxControlCenter for network messages.<br />
• Allowed IPs: Enter the IP addresses of the cameras (or other network devices) that<br />
are allowed to send network messages to MxControlCenter. If the field is empty<br />
(or contains the entry *), MxControlCenter accepts network messages from every<br />
IP address. Therefore, for security reasons, you should always enter the relevant IP<br />
addresses immediately after completing the test or setup phase.<br />
• Accept Valid Commands Only: If this option is enabled,MxControlCenter only<br />
processes a network message if it contains the command camnotify=ownip,<br />
camnotify= or is sent by MxCC Alarm. If this option is disabled,<br />
MxControlCenter interprets every network message as a camnotify command,<br />
regardless of its content.<br />
© <strong>MOBOTIX</strong> AG • Security-Vision-Systems • Made in Germany<br />
www.mobotix.com • sales@mobotix.com
The "Alarm List" Tab<br />
135/152<br />
Notes<br />
• If remote control has been activated, ,MxControlCenter will automatically display<br />
the preferred alarm layout selected on the Camera tab (after confirmation) as<br />
soon as it receives a network message with the camnotify command from<br />
the corresponding <strong>MOBOTIX</strong> camera.<br />
• Makes sure that you always use ports that are greater than 1023 and lower<br />
than 65535. Avoid the use of registered ports between 1024 and 49151.<br />
For more information, refer to the article on "TCP and UDP port numbers" at<br />
en.wikipedia.org.<br />
Caution<br />
Make sure that in the Camera IP Notify only port group you enter a Port, otherwise<br />
the remote control feature will not work.<br />
5.4.3 Camera IP Notify Options<br />
The following options are available for the processing of network messages with the<br />
camnotify command:<br />
Elements Of The "Camera IP Notify Options" Area<br />
• Capture Event Image: MxControlCenter captures the last alarm image (event image)<br />
from the <strong>MOBOTIX</strong> camera and adds it to the alarm list. If none of the three options<br />
are checked (Capture event image, Capture pre and post event images, Capture<br />
live image) the alarm image (event image) will be used and automatically added<br />
to the alarm list (default setting).<br />
• Capture Pre and Post Event Images: MxControlCenter captures the first pre-alarm<br />
image and the first post-alarm image from the camera and adds them to the alarm list.<br />
• Capture Live Image: MxControlCenter captures the current live images from a <strong>MOBOTIX</strong><br />
camera and adds them to the alarm list.<br />
• Automatic Replies to Sender for ... Sec.: Enable this option to have MxControlCenter<br />
send regular network messages (one every second for the specified time period)<br />
back to the IP address of the camera that sent the message.<br />
This is a convenient option for <strong>MOBOTIX</strong> cameras that are linked via a dial-out ISDN<br />
connection, for example. After sending a network message to MxControlCenter,<br />
the <strong>MOBOTIX</strong> camera usually closes the ISDN connection it has established for this<br />
purpose. It would not be possible for MxControlCenter to contact the camera to<br />
retrieve the last camera alarm image after having received the network message.<br />
Therefore, activating this option ensures that the ISDN connection remains open for<br />
the duration of the specified time period.<br />
© <strong>MOBOTIX</strong> AG • Security-Vision-Systems • Made in Germany<br />
www.mobotix.com • sales@mobotix.com
136/152<br />
MxControlCenter Manual: MxControlCenter Options<br />
• Open Live Window: If this option is activated, MxControlCenter retrieves the current<br />
live image from a <strong>MOBOTIX</strong> camera and displays it in a new window.<br />
Last Commands Received<br />
This field lists the most recent network messages received by MxControlCenter. The list<br />
provides a mechanism for conveniently monitoring and analyzing the messages and for<br />
localizing the sources of errors.<br />
5.5 Camera Tabs<br />
5.5.1 Camera Access<br />
• Camera User Name and Camera Password: Before MxControlCenter can access a<br />
<strong>MOBOTIX</strong> camera, you need to set up a user on the camera with the corresponding<br />
access rights (Admin Menu > Users and Passwords / Access Control Lists)). These<br />
fields allow you to enter the specified user name and password.<br />
• Get Player Images: MxControlCenter can retrieve the stored images and video<br />
sequences either from the <strong>MOBOTIX</strong> camera itself (the Via camera radio button)<br />
or directly from the file server on which the camera has stored the images (the File<br />
© <strong>MOBOTIX</strong> AG • Security-Vision-Systems • Made in Germany<br />
www.mobotix.com • sales@mobotix.com
Camera Tabs<br />
137/152<br />
server path radio button). If the <strong>MOBOTIX</strong> cameras store their video data on the local<br />
computer, you can also enter the corresponding path here (Camera file server path).<br />
When retrieving the images and video sequences from a file server, make sure that<br />
the shared folders have been properly configured (read rights for the computer and<br />
the user running MxControlCenter.<br />
Caution<br />
Make sure that the computer has access to the shared folders before MxControlCenter<br />
attempts to access the images and video sequences. MxControlCenter should<br />
not establish the connection itself. Note that MxControlCenter will not alert you<br />
if the connection fails for any reason.<br />
5.5.2 Layout And Display Options<br />
• Instruction File: The file entered here (*.txt, *.html, etc.) appears with the connected<br />
program and is displayed in a separate window by clicking the Activate the<br />
preferred layout of the selected camera button in the toolbar or the appropriate<br />
icon in the title bar of any display window.<br />
• Preferred/Alarm Layout: The MxControlCenter layout in this list is automatically<br />
displayed whenever MxControlCenter receives a valid network message from the<br />
corresponding <strong>MOBOTIX</strong> camera and the camera remote control has been activated<br />
in MxControlCenter (the General remote control and Camera IP Notify group or<br />
Camera IP Notify only port group).<br />
Note<br />
The only requirement is that the camera is on the MxControlCenter camera<br />
list. It is not necessary that the camera is visible in the current MxControlCenter<br />
layout or included in the current layout at all.<br />
• Local Recorder Size: Every <strong>MOBOTIX</strong> camera in the current layout automatically<br />
writes the live images it sends to MxControlCenter to a local buffer on the computer.<br />
The buffer works like an automatic live image recorder and is called "local recorder"<br />
© <strong>MOBOTIX</strong> AG • Security-Vision-Systems • Made in Germany<br />
www.mobotix.com • sales@mobotix.com
138/152<br />
MxControlCenter Manual: MxControlCenter Options<br />
in MxControlCenter. The buffer size (i.e., the size of the local recorder) can be preset<br />
in this list. As this feature is currently being redesigned, this setting has no effect.<br />
• Sequencer Time: Enter an individual sequencer interval for the corresponding camera<br />
here. This interval has priority over a global sequencer time on the General tab. In<br />
Sequencer Mode, the camera image remains visible for the time interval entered<br />
here and cameras without an individual sequencer value are shown for the period<br />
specified in the global setting.<br />
• Display Strategy: Use this option to change the latency time between the point at<br />
which the live image is captured by the <strong>MOBOTIX</strong> camera and the point at which it is<br />
displayed in the MxControlCenter. The Minimum delay option shows the live image<br />
stream from the cameras in MxControlCenter as quickly as possible. When using the<br />
Smooth display option, MxControlCenter. always places two live image frames from<br />
the <strong>MOBOTIX</strong> camera in a temporary buffer so that the live image stream displayed<br />
in MxControlCenter is as smooth as possible (this avoids jittering due to temporary<br />
increases in the network load).<br />
• Use Better Rendering: MxControlCenter always scales the camera images as quickly<br />
as possible. Use this option if the computer's CPU has sufficient power to use optimized<br />
algorithms for scaling and displaying the images (activated). Note that this<br />
option approximately doubles the CPU load.<br />
This feature can also be automatically deactivated at high frame rates. If the only<br />
with low frame rates option is activated, the images will only be optimized at low<br />
frame rates. At high frame rates, this feature is automatically deactivated.<br />
© <strong>MOBOTIX</strong> AG • Security-Vision-Systems • Made in Germany<br />
www.mobotix.com • sales@mobotix.com
Camera Tabs<br />
139/152<br />
5.5.3 PTZ/Rotor Control<br />
If the <strong>MOBOTIX</strong> camera is installed on a pan/tilt head, the camera can be<br />
panned and tilted using the mouse or a joystick connected to the computer.<br />
• Type: The following pan/tilt heads are supported in MxControlCenter:<br />
• Videotronic SN-15AH<br />
• Provitek<br />
• Provitek PT 2<br />
• Provitek PT 3<br />
• VPT 42<br />
• MxProtocol: This proprietary <strong>MOBOTIX</strong> protocol is used for controlling analog pan/<br />
tilt cameras that are connected to a computer running MxServer.<br />
• Sensitivity: Use the settings of this list to change the behavior and the speed of a<br />
pan/tilt head in relation to the movement with a mouse or a joystick. This option is<br />
available for the Videotronic, Provitek and VPT 42 pan/tilt heads.<br />
The joystick model and the skills of each individual user have an infl uence on the<br />
ideal sensitivity. Therefore, we recommend conducting a fi eld test to determine the<br />
best setting.<br />
• Invert X / y Direction: The displayed image, or even the camera, can be moved to<br />
the right by moving the joystick to the right, depending on the operator. Use these<br />
options to invert horizontal (X direction) and vertical (Y direction) movements.<br />
• Fast patch: Use this option to control the pan/tilt head faster and more precisely.<br />
This option is only available for the Videotronic, Provitek and VPT 42 pan/tilt heads.<br />
Caution<br />
The Fast patch option requires a camera software version that has been<br />
modifi ed by a patch from <strong>MOBOTIX</strong>.<br />
Do not activate the Fast patch unless this patch has been installed on the<br />
corresponding <strong>MOBOTIX</strong> camera. The MxControlCenter controls for a pan/tilt<br />
head do not work with the normal, unmodifi ed camera software if the Fast<br />
patch option has been activated. Additional information on this feature is available<br />
from our technical support team (www.mobotix.com under Support).<br />
© <strong>MOBOTIX</strong> AG • Security-Vision-Systems • Made in Germany<br />
www.mobotix.com • sales@mobotix.com
140/152<br />
MxControlCenter Manual: MxControlCenter Options<br />
• Save Changed Images Settings Permanently in Camera: If you change the camera's<br />
settings for the live image views in MxControlCenter, this option allows you<br />
to automatically save these changes in the <strong>MOBOTIX</strong> camera (Save Always), or<br />
they are not automatically saved (Save Never). This applies above all to virtual PTZ<br />
features, which allow you to zoom in to the live image and to pan/tilt it. The third<br />
option (Ask User) displays a dialog box that asks you whether the changes should<br />
be permanently saved in the camera.<br />
© <strong>MOBOTIX</strong> AG • Security-Vision-Systems • Made in Germany<br />
www.mobotix.com • sales@mobotix.com
<br />
141/84<br />
A <strong>MOBOTIX</strong> Glossary<br />
ActiveX<br />
Control element on Windows computers which may also be used in other programs<br />
(including Windows Internet Explorer) to run special tasks. The MxPEG ActiveX control<br />
element allows video and audio data from <strong>MOBOTIX</strong> cameras to be displayed in other<br />
applications (including Internet Explorer).<br />
Arming<br />
This refers to the process of activating an alarm system so that events trigger the appropriate<br />
alarms. Traditional alarm systems can be armed using a key switch or by entering<br />
a code on a keyboard. <strong>MOBOTIX</strong> cameras can be armed using a “software switch.”<br />
Auto Grid<br />
Automatically generated grid used for displaying the live images from all cameras.<br />
Bonjour<br />
(French for “hello”) is a technology developed by Apple based on the Zeroconf protocol,<br />
which is a method to automatically recognize network services on IP networks. For<br />
example, you can find a printer or a network camera on the local network without<br />
knowing the exact IP address of the device you are looking for.<br />
CamIO<br />
<strong>MOBOTIX</strong> signal module that the camera uses to directly operate lamps, sirens and<br />
access controls, as well as external audio components (speakers and microphones).<br />
CCTV<br />
Abbreviation for Closed-Circuit Television. A television system in which the analog video<br />
signal is transmitted to monitor within one particular environment only (for example, a<br />
building). The term CCTV is often used for video surveillance systems.<br />
CF Card<br />
Abbreviation for Compact Flash Card. An ultra-compact, digital (random-access)<br />
memory medium based on flash memory modules and well-known as an image<br />
storage medium for digital cameras.<br />
CIF, 2CIF, 4CIF (in accordance with PAL TV standard)<br />
Common Intermediate Format. Corresponds to 1/4 TV image with 288 rows and 352<br />
pixels (0.1 megapixel). 2CIF (1/2 TV image) has the same small number of rows (288),<br />
but 704 pixels (0.2 megapixel). 4CIF corresponds to the image quality of a traditional<br />
TV image with 576 rows and 704 pixels (0.4 megapixel).<br />
CMOS Sensor<br />
Abbreviation for Complementary Metal-Oxide Semiconductor Sensor. Sensor for energyefficient<br />
digitalization of image information. CMOS sensors are used as image sensors<br />
in digital cameras.<br />
DevKit<br />
Camera installation kit with independent image sensors based on <strong>MOBOTIX</strong> M12 or<br />
M22 cameras, intended for concealed installation in other devices.<br />
© <strong>MOBOTIX</strong> AG • Security-Vision-Systems • Made in Germany<br />
www.mobotix.com • sales@mobotix.com
142/84 MxControlCenter User Manual: <strong>MOBOTIX</strong> Glossary<br />
DHCP<br />
Abbreviation for Dynamic Host Configuration Protocol. Allows a server to automatically<br />
assign devices in the network with the appropriate configuration (including<br />
the IP address, DNS server and gateway), as opposed to fixed IP addresses on the<br />
individual network devices.<br />
DNS<br />
Abbreviation for Domain Name Service. Allows the domain names of servers on the<br />
Internet (e.g. www.mobotix.com) to be linked (“resolved”) to their corresponding IP<br />
addresses (e.g. 212.89.150.84).<br />
Dome Camera<br />
Most often refers to cameras with a round and compact design. The lens can be freely<br />
positioned and is protected by a transparent dome-shaped plastic housing.<br />
DSL<br />
Abbreviation for Digital Subscriber Line. Denotes a fast Internet connection capable of<br />
providing bandwidth of up to 16 Mbps for a typical household.<br />
DualDome<br />
Dome camera with two lenses and image sensors such as the <strong>MOBOTIX</strong> D12D. These<br />
lenses can deliver wide-angle and telephoto images independently of one another.<br />
DVR<br />
Abbreviation for Digital Video Recorder.<br />
DynDNS<br />
Abbreviation for Dynamic DNS (or DDNS, Dynamic Domain Name Service). Similar to<br />
DNS, this links domain names (e.g. mydomain.com) with IP addresses, whereby the<br />
IP addresses may change at any time. This service provides a convenient method to<br />
access your <strong>MOBOTIX</strong> cameras from home or work if the camera internet connection<br />
is not through a router which assigns a fixed IP address, but instead over a DSL<br />
connection with a dynamically assigned IP address from the provider. A well-known<br />
provider of this (free) service is www.dyndns.org.<br />
Ethernet<br />
The most common technology for communication within a wired network. It facilitates<br />
data exchange between all devices (computers, printers, IP cameras, etc.) connected<br />
to a local area network (LAN).<br />
Events<br />
An event refers to a situation when something happens or changes. In terms of video<br />
surveillance, this means a change in the status of an area that is being monitored. This<br />
can be movement of a person, a change in brightness, a drop in ambient temperature,<br />
the detection of a noise via a microphone, an electrical signal at a signal input, the<br />
manual operation of a button, etc.<br />
© <strong>MOBOTIX</strong> AG • Security-Vision-Systems • Made in Germany<br />
www.mobotix.com • sales@mobotix.com
<br />
143/84<br />
ExtIO<br />
<strong>MOBOTIX</strong> signal module that the camera uses to directly operate lamps, sirens and<br />
door openers as well as external audio components (speakers and microphones).<br />
Fixdome<br />
Camera without moving parts in a dome-shaped housing.<br />
Flash Memory<br />
See CF Card.<br />
fps<br />
Abbreviation for frames per second. See Frame Rate.<br />
Frame Rate<br />
The frame rate specifies how many frames per second (fps) are generated and sent<br />
by the camera. The human eye perceives movement as a fluid video sequence when<br />
more than 12 images per second are produced.<br />
HDTV<br />
Abbreviation for High Definition TV.<br />
HiRes<br />
Abbreviation for High Resolution. Refers to high-resolution images (above 1 megapixel).<br />
Image Compression<br />
Image compression reduces the file size of an image. This is particularly important<br />
when transferring and saving files.<br />
Image Processing<br />
Digital image processing. The goal is to correct errors made during image generation<br />
(caused by overexposure, underexposure, blurring, weak contrast, image noise, etc.)<br />
in order to create a “better” image.<br />
IP Network<br />
Data network based on the Internet protocol (TCP/IP).<br />
IP Telephone<br />
See VoIP.<br />
JPEG<br />
Abbreviation for Joint Photographic Experts Group, responsible for the development<br />
of the JPEG standard method for image compression. JPEG is the most common lossy<br />
image format for photos on the Internet. Loss in image quality is barely noticeable at<br />
compression rates between 99% and 60%.<br />
Latency<br />
Time interval elapsed between when an image is captured by a camera and when<br />
that same image is displayed on the monitor.<br />
© <strong>MOBOTIX</strong> AG • Security-Vision-Systems • Made in Germany<br />
www.mobotix.com • sales@mobotix.com
144/84 MxControlCenter User Manual: <strong>MOBOTIX</strong> Glossary<br />
Layout<br />
Describes the layout of video sources on a screen site of the MxControlCenter. When<br />
displaying the images from network cameras, the layout determines the positions and<br />
resolutions of the images displayed on the monitor. In addition to the actual video images,<br />
you can also incorporate graphic elements such as the location of the cameras, etc.<br />
LED<br />
Abbreviation for Light Emitting Diode. An electronic semiconductor component, built<br />
in to <strong>MOBOTIX</strong> cameras and add-on modules, which emits light when current flows<br />
through the component in the correct direction.<br />
Linux<br />
Free and open source operating system; serves as the operating system for all <strong>MOBOTIX</strong><br />
cameras.<br />
Megapixel<br />
Images that are 1 million pixels. Larger formats of images can be displayed as a<br />
multiple of this, for example, 3 Megapixel is equal to 3 million pixels.<br />
MonoDome<br />
Dome camera with one lens.<br />
Motion Detection<br />
Action of sensing a movement within a particular area. <strong>MOBOTIX</strong> cameras use algorithmic<br />
methods to detect changes from image to image in predefined areas, while<br />
taking into account preset conditions. If a camera detects a movement, it signals an<br />
event and triggers an alarm.<br />
Motion JPEG, or M-JPEG,<br />
is a video compression method where each individual image is compressed separately<br />
as a JPEG image. Unlike MPEG, the quality of M-JPEG recordings is not dependent on<br />
movement within the image.<br />
MPEG<br />
Motion Pictures Expert Group. Standard for compressing and saving image and video<br />
data, resulting in quality loss. Originally created for playing entertainment content on<br />
PCs, MPEG concentrates on displaying still image material and compromises the quality<br />
of moving image material in order to increase the transmission speed.<br />
MxControlCenter<br />
<strong>MOBOTIX</strong> video management software for professional control of mid-sized and large<br />
camera networks.<br />
MxEasy<br />
<strong>MOBOTIX</strong> video management software for small and compact camera networks of<br />
up to 16 cameras.<br />
MxPEG<br />
<strong>MOBOTIX</strong>-developed protocol for compression and storage of image and video data<br />
with minimal network load and high image quality. The MxPEG ActiveX control com-<br />
© <strong>MOBOTIX</strong> AG • Security-Vision-Systems • Made in Germany<br />
www.mobotix.com • sales@mobotix.com
<br />
145/84<br />
ponent allows video and audio data from <strong>MOBOTIX</strong> cameras to be displayed in other<br />
applications (including Internet Explorer). To date, MxPEG remains the ONLY protocol<br />
specifically designed for security applications<br />
NAS<br />
Abbreviation for Network Attached Storage. A storage system connected via an Ethernet<br />
cable. All network devices (cameras) have access to this storage system.<br />
Network<br />
Group of computers that are connected via various cables and share access to data<br />
and devices such as printers and network cameras.<br />
PIR<br />
Passive Infrared Sensor for motion detection.<br />
PoE<br />
Power over Ethernet. A technology for supplying network-ready devices (such as network<br />
cameras) with power via the Ethernet data cable.<br />
PTZ<br />
Abbreviation for Pan/Tilt/Zoom. Refers to the movement of a video camera to the left<br />
and right, up and down, and to the camera’s ability to enlarge an image.<br />
Quad Display<br />
Layout in which the images from four cameras are displayed in one window.<br />
Resolution<br />
Indicates the number of pixels used to produce an image. The more pixels an image<br />
has, the greater the detail when the image is enlarged. The resolution is expressed as<br />
either the number of pixel columns times pixel rows, or as a total number of pixels. A<br />
VGA image has 640 columns and 480 rows (640 x 480 pixels), which equals 307,200<br />
pixels, or approximately 0.3 megapixel.<br />
RoHS<br />
This abbreviation stands for the Restriction of Hazardous Substances Directive and<br />
refers to EC Directive 2002/95/EC, which prohibits the use of certain hazardous substances<br />
when manufacturing products and components. The goal of this directive is<br />
to prevent these substances from harming the environment when the products are<br />
disposed of later.<br />
Router<br />
Network device that connects multiple networks with one another. The router creates<br />
the physical connection between the devices in different networks (like a hub), analyzes<br />
the relevant data packets and forwards („routes“) these packets to the correct<br />
target network.<br />
SD Card / MicroSD card<br />
SD Memory Card (Secure Digital Memory Card). A digital storage medium based on<br />
flash storage modules such as USB sticks.<br />
© <strong>MOBOTIX</strong> AG • Security-Vision-Systems • Made in Germany<br />
www.mobotix.com • sales@mobotix.com
146/84 MxControlCenter User Manual: <strong>MOBOTIX</strong> Glossary<br />
Search<br />
Monitoring of recordings, searching for a particular event.<br />
Sequencer<br />
Feature that automatically switches the camera displayed in the main window after<br />
a specific time delay.<br />
SIP<br />
Session Initiation Protocol. Network protocol for setting up, controlling and terminating<br />
a communication connection via a computer network. SIP is frequently used in<br />
conjunction with IP telephony.<br />
Signal Input/Signal Output<br />
Coupling an alarm triggering device (for example a fire alarm system or a network<br />
camera) to a control center or another type of transmitter (for example, a telephone<br />
or IP network). A typical signal input/output scenario in video surveillance progresses<br />
as follows: an event triggers an alarm that then displays, for example the video image<br />
from the network camera that triggered the alarm on the monitor at a control center.<br />
Snapshot<br />
Photograph of a situation created spontaneously and directly with a mouse click or<br />
other such event directed by the user.<br />
Switch<br />
Hardware used to connect multiple network devices (computers, cameras, printers,<br />
etc.) within a network. A PoE switch can also supply the cameras with power over<br />
an Ethernet cable.<br />
UPS<br />
Uninterruptible Power Supply. Refers to devices that continue to supply power in the<br />
event of a sudden power failure. These devices usually operate using a battery. UPS<br />
is installed on the power lines of devices and systems in order to protect them in the<br />
event of a power failure.<br />
VoIP<br />
Voice over Internet Protocol. Telephony using computer networks.<br />
Wizard<br />
Refers to a software component that helps the user install or set up a particular<br />
program and that guides the user through the configuration process by means of<br />
simple questions.<br />
WLAN<br />
Wireless Local Area Network. Used to provide Internet connections without the need<br />
for cables.<br />
© <strong>MOBOTIX</strong> AG • Security-Vision-Systems • Made in Germany<br />
www.mobotix.com • sales@mobotix.com
Index<br />
147/152<br />
Index<br />
A<br />
Access Levels<br />
MxControlCenter 95<br />
Acknowledge<br />
Alarm 38<br />
Activating<br />
Alarm List 35<br />
Image Post-Processing 100<br />
Integrated PTZ Units 102<br />
Pan/Tilt Heads 102<br />
Adding<br />
Video Sources (manually) 18<br />
Alarm<br />
Acknowledge 38<br />
Display 37<br />
Alarm list<br />
MxControlCenter 85<br />
Alarm List<br />
Activating 35<br />
Dialog Box „Options“ 130<br />
MxControlCenter 23<br />
Alarm management 34<br />
Alarm Processing 83<br />
Analog Cameras<br />
Connecting Third-Party 101<br />
MxServer 106<br />
Using in MxServer 106<br />
Assembly<br />
Pan/Tilt Head 103<br />
Auto grid. See Auto grid<br />
B<br />
Background Layouts 78<br />
C<br />
Camera<br />
Dialog Box „Options“ 136<br />
Camera configuration<br />
Dialog Box 24<br />
Camera Configuration<br />
Dialog Box 111<br />
The „Exposure“ Tab 116<br />
The „Image Settings“ Tab 114<br />
The „Overview“ Tab 113<br />
The „Recording“ Tab 117<br />
Camera Configurations<br />
Editing 53<br />
Managing 53<br />
Saving 122<br />
Camera Connection<br />
Monitoring 29<br />
Camera IP Notify<br />
Options 135<br />
Cameras<br />
Preparing 36<br />
Cameras (third-party)<br />
Integrating 48<br />
Configuring<br />
Image Post-Processing 100<br />
<strong>MOBOTIX</strong> Cameras 111<br />
MxControlCenter 51<br />
Video Sources 14<br />
Connection<br />
Monitoring 29<br />
Continuous Recording 39<br />
Control Center<br />
Features 48<br />
Correct Distortion<br />
Video images 34<br />
Creating<br />
Layout 30<br />
© <strong>MOBOTIX</strong> AG • Security-Vision-Systems • Made in Germany<br />
www.mobotix.com • sales@mobotix.com
148/152<br />
MxControlCenter Manual: Index<br />
D<br />
Data Export 44<br />
Deactivating<br />
Image Post-Processing 100<br />
Defining<br />
Instruction File 82<br />
Player Window 41<br />
Preferred Layout 83<br />
Reference Image 83<br />
Start Layout 82<br />
Dialog box<br />
Camera configuration 24<br />
Update Assistant 25<br />
Video Searches 39<br />
Dialog Box<br />
Camera Configuration 111<br />
Digitizer 107<br />
Display<br />
Alarm 37<br />
Displaying<br />
Stored Alarms 86<br />
Display windows<br />
Player Mode 39<br />
E<br />
Editing<br />
Layouts 72<br />
Layouts, Additional Options 82<br />
Event Recording 39<br />
Examples<br />
Application examples 8<br />
Remote control with network messages<br />
92<br />
Export Features 39, 88<br />
Export List 44<br />
Exposure<br />
„Camera Configuration“ Dialog Box 116<br />
F<br />
Features<br />
Control Center 48<br />
Finding<br />
<strong>MOBOTIX</strong> Cameras 15<br />
Video Sources 14<br />
Folders<br />
Global 94<br />
Local 94<br />
Frame grabber 107<br />
G<br />
General<br />
Dialog Box „Options“ 124<br />
Global Folders 94<br />
Grid Layouts 72<br />
I<br />
Image<br />
Distortion correction 47<br />
Post-processing 47<br />
Recording 39<br />
Image Post-Processing<br />
Activating 100<br />
Configuring 100<br />
Deactivating 100<br />
Overview 99<br />
Image Settings<br />
„Camera Configuration“ Dialog Box 114<br />
Importing<br />
Camera Configurations 122<br />
Installation<br />
MxControlCenter 13<br />
Instruction File<br />
Defining 82<br />
IP Cameras<br />
Connecting Third-Party 101<br />
© <strong>MOBOTIX</strong> AG • Security-Vision-Systems • Made in Germany<br />
www.mobotix.com • sales@mobotix.com
Index<br />
149/152<br />
L<br />
Layout Manager<br />
MxControlCenter 22<br />
Layouts 27<br />
Additional Options for Editing 82<br />
Background 78<br />
Creating 30<br />
Editing 72<br />
Grid 72<br />
The Sidebar Panel 60<br />
Local Folders 94<br />
M<br />
Management features. See Control<br />
center<br />
Managing<br />
Camera Configurations 53<br />
MxControlCenter Configurations 52<br />
<strong>MOBOTIX</strong> Cameras<br />
Configuring 111<br />
Define Soft Keys 104<br />
Finding 15<br />
Preparing 36<br />
Supported Pan/Tilt Heads 102<br />
Updating Software 120<br />
Using in MxControlCenter 18<br />
Monitoring<br />
Camera Connection 29<br />
Connection 29<br />
Numerous Cameras 27<br />
MxControlCenter<br />
About network messages remotely 91<br />
Access Levels 95<br />
Activating Password Protection 96<br />
Alarm list 85<br />
Alarm List 23<br />
Concept 7<br />
Configuring 51<br />
Customizing User Interface 51<br />
Elements of the main window 20<br />
Installation 13<br />
Integrating Video Sources 18<br />
Layout Manager 22<br />
Managing Configurations 52<br />
Options 123<br />
Prepare alarm 34<br />
Program settings 26, 51<br />
Program Settings 123<br />
Security Considerations 97<br />
Security Settings 97<br />
Settings 26<br />
Toolbar 57<br />
User Interface 20<br />
MxServer 106<br />
Prerequisites 107<br />
N<br />
Network Security 97<br />
O<br />
Options<br />
Camera IP Notify 135<br />
136<br />
Dialog Box 123<br />
Modifying, Saving, Loading 51<br />
MxControlCenter 26, 123<br />
The „Alarm List“ Tab 130<br />
The „General“ Tab 124<br />
The „Remote Control“ Tab 132<br />
Overview<br />
„Camera Configuration“ Dialog Box 113<br />
P<br />
Pan/Tilt Head<br />
Assembly 103<br />
Pan/Tilt Heads<br />
Activating 102<br />
Controlling 50<br />
Supported by <strong>MOBOTIX</strong> 102<br />
Third-Party Cameras 101<br />
Using 102<br />
© <strong>MOBOTIX</strong> AG • Security-Vision-Systems • Made in Germany<br />
www.mobotix.com • sales@mobotix.com
150/152<br />
MxControlCenter Manual: Index<br />
Password Protection<br />
MxControlCenter 96<br />
Passwords 95<br />
Player<br />
The Sidebar Panel 61<br />
Player Mode 39<br />
Player Window<br />
Defining 41<br />
Port<br />
Camera IP Notify 132, 134<br />
Post-Processing 99<br />
Preferred Layout<br />
Defining 83<br />
Prepare alarm<br />
MxControlCenter 34<br />
Preparing<br />
Cameras 36<br />
<strong>MOBOTIX</strong>-Cameras 36<br />
Program Settings<br />
MxControlCenter 26, 51, 123<br />
Saving in MxControlCenter 94<br />
Protecting Cameras 97<br />
PTZ Cameras<br />
Controlling 50<br />
PTZ Controls<br />
The Sidebar Panel 64<br />
Third-Party Cameras 101<br />
PTZ Units<br />
Activating 102<br />
R<br />
Recording<br />
„Camera Configuration“ Dialog Box 117<br />
Reference Image<br />
Defining 83<br />
Remote Control<br />
Dialog Box „Options“ 132<br />
Example 92<br />
MxControlCenter with Network<br />
Messages 91<br />
Restricting Access on Cameras 97<br />
S<br />
Saving<br />
Camera Configurations 122<br />
Configuration of MxControlCenter 94<br />
Security<br />
MxControlCenter 97<br />
Network Security 97<br />
Restricting Public Access on Cameras 97<br />
Sequencer<br />
Using 31<br />
Sidebar Panel<br />
The „Layouts“ 60<br />
The „Player“ 61<br />
The „PTZ Controls“ 64<br />
Soft Keys<br />
Defining On <strong>MOBOTIX</strong> Cameras 104<br />
Software Update<br />
<strong>MOBOTIX</strong> Cameras 120<br />
Perform Update 121<br />
Preparing <strong>MOBOTIX</strong> Cameras 120<br />
Start Layout<br />
Defining 82<br />
Stored Alarms<br />
Displaying 86<br />
Switching Display Windows in Player<br />
Mode 39<br />
T<br />
Tab<br />
Alarm List (Options) 130<br />
Camera 136<br />
Exposure 116<br />
General (Options) 124<br />
Image Settings 114<br />
Overview 113<br />
Recording 117<br />
© <strong>MOBOTIX</strong> AG • Security-Vision-Systems • Made in Germany<br />
www.mobotix.com • sales@mobotix.com
Index<br />
151/152<br />
Remote Control (Options) 132<br />
Third-Party Cameras<br />
Pan/Tilt Heads 101<br />
PTZ Controls 101<br />
Toolbar<br />
MxControlCenter 57<br />
Integrating in MxControlCenter 18<br />
Using in MxControlCenter 18<br />
Virtual PTZ Features<br />
Using 32<br />
vPTZ Features. See Virtual PTZ features<br />
U<br />
Update Assistant<br />
Dialog box 25<br />
Updating<br />
<strong>MOBOTIX</strong> Camera Software 120<br />
User Interface<br />
Customizing by MxControlCenter 51<br />
MxControlCenter 20<br />
Users 95<br />
Using<br />
<strong>MOBOTIX</strong>-Cameras in<br />
MxControlCenter 18<br />
<strong>MOBOTIX</strong> Cameras with Pan/Tilt<br />
Heads 102<br />
Pan/Tilt Heads 50<br />
PTZ Cameras 50<br />
Sequencer Features 31<br />
Video Search 43<br />
Video Sources in MxControlCenter 18<br />
vPTZ Features 32<br />
V<br />
Video Images<br />
Correct distortion 34<br />
Video Processing 47<br />
Video Search<br />
Dialog box 39<br />
Using 43<br />
Video Searches 88<br />
Video Sources<br />
Adding Manually 18<br />
Configuring 14<br />
Finding 14<br />
© <strong>MOBOTIX</strong> AG • Security-Vision-Systems • Made in Germany<br />
www.mobotix.com • sales@mobotix.com
152/152<br />
MxControlCenter Manual: Index<br />
Notes<br />
© <strong>MOBOTIX</strong> AG • Security-Vision-Systems • Made in Germany<br />
www.mobotix.com • sales@mobotix.com
Index<br />
153/152<br />
Notes<br />
© <strong>MOBOTIX</strong> AG • Security-Vision-Systems • Made in Germany<br />
www.mobotix.com • sales@mobotix.com
154/152<br />
MxControlCenter Manual: Index<br />
Notes<br />
© <strong>MOBOTIX</strong> AG • Security-Vision-Systems • Made in Germany<br />
www.mobotix.com • sales@mobotix.com
<strong>MOBOTIX</strong> - The HiRes Video Company<br />
To demonstrate our confidence in the quality of our products,<br />
<strong>MOBOTIX</strong> cameras were used to capture all the images that<br />
appear in this manual.<br />
Manufacturer<br />
<strong>MOBOTIX</strong> AG<br />
Executive Board<br />
Dr. Ralf Hinkel<br />
Kaiserstrasse<br />
67722 Langmeil, Germany Registration Office: Kaiserslautern Local Court<br />
Germany Registration Number: HRB 3724<br />
Tel: +49 6302 9816-0 Tax Code: 19/650/0812/1<br />
Fax: +49 6302 9816-190<br />
Tax Office: Kaiserslautern, Germany<br />
http://www.mobotix.com<br />
sales@mobotix.com<br />
VAT ID:<br />
DE202203501<br />
You can find the latest version of this document at www.mobotix.com under Support.<br />
Technical specifications subject to change without notice!<br />
© <strong>MOBOTIX</strong> AG • Security-Vision-Systems • Made in Germany<br />
www.mobotix.com • sales@mobotix.com