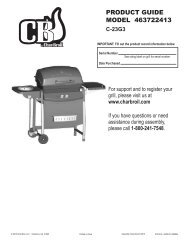
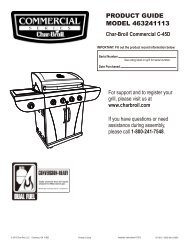
PRODUCT GUIDE MODEL 463234711 - Char-Broil Grills
PRODUCT GUIDE MODEL 463234711 - Char-Broil Grills
PRODUCT GUIDE MODEL 463234711 - Char-Broil Grills

You also want an ePaper? Increase the reach of your titles
YUMPU automatically turns print PDFs into web optimized ePapers that Google loves.
<strong>PRODUCT</strong> <strong>GUIDE</strong><br />
<strong>MODEL</strong> <strong>463234711</strong><br />
IMPORTANT: Fill out the product record information below.<br />
Serial Number<br />
See rating label on grill for serial number.<br />
Date Purchased<br />
For support and to register your<br />
grill, please visit us at<br />
www.charbroil.com<br />
If you have questions or need<br />
assistance during assembly,<br />
please call 1-800-241-7548.<br />
Estimated assembly time: 35-40 minutes<br />
The following are trademarks registered by W.C. Bradley Co. in the U.S. Patent and Trademark Office: Caldera®; <strong>Char</strong>coal2Go®; <strong>Char</strong>-<strong>Broil</strong>®; American Gourmet®;<br />
Bandera®; Brush Hawg®; CB 940®; <strong>Char</strong>-Diamonds®; <strong>Char</strong>-<strong>Broil</strong> <strong>Char</strong>coal/Gas®; Everybody <strong>Grills</strong>®; Grill 2 Go®; Grill 2 Go® Express®; Grill Lovers®; Infrared<br />
Grilling That’s All About U®; Keepers of the Flame®; Magneto®; New Braunfels Smoker Company®; Patio Bistro®; Patio Caddie®; Patio Kitchen®; Pro-Sear®;<br />
RED®; Quantum®; Santa Fe®; Sear and Grill®; Sierra®; Signature Series®; Sure2Burn®; The Big Easy®; U®; Wild West Tradition®; and the following marks:<br />
® ®<br />
The following are trademarks of W.C. Bradley Co.:America's Legendary Barbeque Company; Advantage Series; Auto-Clean;Chef Tested; Commercial<br />
Series; Designer Series;; Diamond Flame; Double Chef; Everybody Outside; FastStart; FlavorMaster; Front Avenue; Grill 2 Go® Advantage;<br />
Grill 2 Go® Ice; Hog and Yard Bird; H20 Smoker; Infrared. Grilling’s Juicy Little Secret; Incredible Taste. Infallible Results; Infrared Inside; Let’s Grill<br />
Something Together; Longhorn;; Precision Flame; Quick2Burn; QuickSet; Ready When You Are; Season, Set, And Savor; Sizzle On The Grill;<br />
SureFire; Torchfork; Trentino; Universal Grill Parts; You Bring the Party TEC is a trademark of Tec Infrared <strong>Grills</strong>.<br />
© 2010 <strong>Char</strong>-<strong>Broil</strong>, LLC Columbus, GA 31902 Printed in China<br />
Assembly instructions © 2010<br />
12/14/10 • G651-001-080801
TABLE OF CONTENTS<br />
For Your Safety . . . . . . . . . . . . . . . . . . . . . . . . . . . . . . . . . . . . 2-3<br />
Grilling Guide. . . . . . . . . . . . . . . . . . . . . . . . . . . . . . . . . . . . . . 4-7<br />
Use and Care . . . . . . . . . . . . . . . . . . . . . . . . . . . . . . . . . . . . 8-13<br />
Limited Warranty. . . . . . . . . . . . . . . . . . . . . . . . . . . . . . . . . . . . 14<br />
Parts List. . . . . . . . . . . . . . . . . . . . . . . . . . . . . . . . . . . . . . . . . . 15<br />
Parts Diagram. . . . . . . . . . . . . . . . . . . . . . . . . . . . . . . . . . . . . . 16<br />
Assembly . . . . . . . . . . . . . . . . . . . . . . . . . . . . . . . . . . . . . . . 17-26<br />
Troubleshooting. . . . . . . . . . . . . . . . . . . . . . . . . . . . . . . . . . 27-29<br />
Registration Card . . . . . . . . . . . . . . . . . . . . . . . . . . . . . . . . . . . 31<br />
Safety Symbols<br />
The symbols and boxes shown below explain what each heading<br />
means. Read and follow all of the messages found throughout<br />
the manual.<br />
WARNING<br />
WARNING: Indicates an potentially hazardous situation<br />
which, if not avoided, could result in death or serious injury.<br />
CAUTION<br />
CAUTION: Indicates a potentially hazardous situation or<br />
unsafe practice which, if not avoided, may result in minor<br />
or moderate injury.<br />
DANGER<br />
DANGER: Indicates an imminently hazardous situation<br />
which, if not avoided, will result in death or serious injury.<br />
If you smell gas:<br />
DANGER<br />
1. Shut off gas to the appliance.<br />
2. Extinguish any open flame.<br />
3. Open lid.<br />
4. If odor continues, keep away from the<br />
appliance and immediately call your gas<br />
supplier or your fire department.<br />
WARNING<br />
1. Do not store or use gasoline or other<br />
flammable liquids or vapors in the vicinity of<br />
this or any other appliance.<br />
2. An LP cylinder not connected for use shall not<br />
be stored in the vicinity of this or any other<br />
appliance.<br />
CAUTION<br />
For residential use only. Do not use for commercial<br />
cooking.<br />
THIS GRILL IS FOR OUTDOOR USE ONLY.<br />
CAUTION:<br />
Read and follow all safety statements, assembly<br />
instructions, and use and care directions before attempting<br />
to assemble and cook.<br />
INSTALLER/ASSEMBLER:<br />
Leave this manual with consumer.<br />
CONSUMER:<br />
Keep this manual for future reference.<br />
WARNING:<br />
Failure to follow all manufacturer’s instructions could result<br />
in serious personal injury and/or property damage.<br />
CAUTION:<br />
Some parts may contain sharp edges – especially as noted<br />
in the manual! Wear protective gloves if necessary.<br />
2
WARNING<br />
CALIFORNIA PROPOSITION 65<br />
1. Combustion by-products produced when using<br />
this product contain chemicals known to the State of<br />
California to cause cancer, birth defects, and other<br />
reproductive harm.<br />
2. This product contains chemicals, including lead<br />
and lead compounds, known to the State of<br />
California to cause cancer, birth defects or other<br />
reproductive harm.<br />
Wash your hands after handling this product.<br />
CAUTION<br />
Using pots larger than 6 quarts in capacity could<br />
exceed weight limit of the<br />
side burner shelf<br />
or side shelf,<br />
resulting in failure<br />
of grill cart<br />
components.<br />
Installation Safety Precautions<br />
• Use grill, as purchased, only with LP (propane) gas and the<br />
regulator/valve assembly supplied. If your grill is Dual Fuel ready,<br />
a conversion kit must be purchased for use with natural gas.<br />
• Grill installation must conform with local codes, or in their<br />
absence of local codes, with either the National Fuel Gas<br />
Code, ANSI Z223.1/ NFPA 54, Natural Gas and Propane<br />
Installation Code, CSA B149.1, or Propane Storage and<br />
Handling Code, B149.2, or the Standard for Recreational<br />
Vehicles, ANSI A 119.2/NFPA 1192, and CSA Z240 RV Series,<br />
Recreational Vehicle Code, as applicable.<br />
• All electrical accessories (such as rotisserie) must be<br />
electrically grounded in accordance with local codes, or<br />
National Electrical Code, ANSI / NFPA 70 or Canadian<br />
Electrical Code, CSA C22.1. Keep any electrical cords and/or<br />
fuel supply hoses away from any hot surfaces.<br />
• This grill is safety certified for use in the United States and/or<br />
Canada only. Do not modify for use in any other location.<br />
Modification will result in a safety hazard.<br />
WARNING<br />
Do not attempt to repair or alter the<br />
hose/valve/regulator for any “assumed” defect. Any<br />
modification to this assembly will void your warranty<br />
and create the risk of a gas leak and fire. Use only<br />
authorized replacement parts supplied by<br />
manufacturer.<br />
3
GRILLING <strong>GUIDE</strong> – Getting Started<br />
First Time Use<br />
Read your Assembly Manual and ensure the grill is put together<br />
properly. Remove all Point-of-Purchase advertising material from<br />
all grill surfaces before first use. We recommend operating your<br />
grill on its highest setting for 15-20 minutes prior to your first use.<br />
This aids in removing the oils used during manufacturing.<br />
Lava Rock / Briquettes<br />
This gas grill has been designed, engineered, and tested to be<br />
used with flame tamers or heat distribution plates to provide<br />
more even heating, improve the cleaning process, and reduce<br />
flare-ups. The addition of after market lava rocks, charcoal, or<br />
briquettes of any type will cause poor combustion and increase<br />
the likelihood of a grease fire, and is not recommended. Using<br />
briquettes, lava rock, or charcoal in this grill will void your<br />
warranty. For extra smoke flavor, we recommend using a<br />
smoker box with wood chips.<br />
Temperature<br />
The temperature gauge in the hood of your new grill measures<br />
air temperature. The air temperature inside your grill will never<br />
be as hot as the temperature at the cooking surface.<br />
Note: Since 1995, all regulators (the part that attaches to the gas<br />
tank to regulate the flow of gas) have included a safety feature<br />
that restricts gas flow in the event of a gas leak. You can<br />
inadvertently activate this safety feature without having a gas<br />
leak. This typically occurs when you turn on the gas using the<br />
grill control knob before you turn on the LP tank valve. If the gas<br />
regulator safety feature activates, the grill will only reach<br />
temperatures between 250°F and 300°F even with all burners on<br />
the high setting.<br />
Regulator<br />
Coupling Nut<br />
If your grill is not getting hotter than 250°F to 300°F these<br />
steps should be taken first to reset the gas regulator safety<br />
device:<br />
1. Open the grill lid.<br />
2. Turn off all knobs on the control panel in front.<br />
3. Turn off the tank knob.<br />
4. Disconnect the regulator from the LP tank.<br />
5. Wait 30 seconds.<br />
6. Reconnect the regulator to the LP tank.<br />
7. Slowly open the LP tank knob all the way. Do not put<br />
excessive force on the valve at the full open position to avoid<br />
damaging the valve.<br />
8. Turn on the appropriate control knob and light the grill per the<br />
instructions on the control panel.<br />
An illustration of this process is included in this Product Guide.<br />
See Troubleshooting section for additional information.<br />
Pre-Heating Your Grill<br />
Just like your home oven, your grill should be pre-heated to<br />
provide optimum performance. Pre-heat the grill on high for 10-<br />
15 minutes – longer if weather conditions require. Please refer to<br />
the lighting instructions inside the Product Guide if you have<br />
questions about how to light your grill. A match-light chain and<br />
hole is provided for your convenience.<br />
4
GRILLING <strong>GUIDE</strong> – Grilling 101<br />
Outdoor grilling is really quite simple. You'll succeed with<br />
burgers, dogs, or steaks usually on your very first try. With<br />
experience, you will learn how to work with your grill, creating<br />
more imaginative meals all the time. This knowledge makes up<br />
the art of grilling. Before you start grilling, organize your food<br />
according to cooking technique and required cooking time, and<br />
optimize the use of your grilling area.<br />
Rotisserie Cooking<br />
Rotisserie cooking is best for 'round' meat, such as large roasts,<br />
whole poultry, and pork. It generally requires an accessory motor<br />
and spit rod that allows the meat to be turned at a constant<br />
speed. Rotisserie cooking is best done in front of a special<br />
rotisserie burner, or utilizing an indirect cooking burner<br />
arrangement. A pan can be placed underneath the meat to catch<br />
grease and food drippings, and helps minimize clean-up.<br />
Direct Cooking<br />
Direct cooking involves grilling your meat directly over high heat.<br />
It is perfect for searing steaks, chops, and other smaller pieces of<br />
meat and vegetables that quickly make their way to the table.<br />
Indirect Cooking<br />
Indirect cooking utilizes select burners to circulate heat<br />
throughout the grill, without direct contact between the meat and<br />
the flame. The meat is placed over the burner that is 'off'. This<br />
method is generally used to slow cook large cuts of meat and<br />
poultry. A pan can be placed underneath the meat to catch<br />
grease and food drippings, and helps minimize clean-up.<br />
Food Safety<br />
Food safety is a very important part of enjoying the outdoor<br />
cooking experience. To keep food safe from harmful bacteria,<br />
follow these four basic steps:<br />
Clean: Wash hands, utensils, and surfaces with hot soapy water<br />
before and after handling raw meat.<br />
Separate: Separate raw meats from ready-to-eat foods to avoid<br />
cross contamination. Use a clean platter and utensils when<br />
removing cooked foods.<br />
Cook: Cook meat and poultry thoroughly to kill bacteria. Use a<br />
thermometer to ensure proper internal food temperatures.<br />
Chill: Refrigerate prepared foods and leftovers promptly.<br />
5
GRILLING <strong>GUIDE</strong> – Tips & Tricks<br />
Cooking on your new grill is a hands-on experience, and it is<br />
recommended to remain outside with your grill while cooking.<br />
Grilling can be affected by many external conditions. In cold<br />
weather, you will need more heat to reach an ideal cooking<br />
temperature, and grilling may take longer. The meat's internal<br />
temperature and thickness can also affect cooking times. Cold<br />
and thicker meats will take longer to cook.<br />
Internal Meat Temperatures<br />
Meat cooked on a grill often browns very fast on the outside.<br />
Therefore, use a meat thermometer to ensure it has reached<br />
safe internal temperatures.<br />
USDA Recommended Safe Minimum<br />
Internal Temperatures<br />
Beef, Veal, Lamb, Steaks, & Roasts 145° F<br />
Fish<br />
145° F<br />
Pork<br />
160° F<br />
Beef, Veal, Lamb Ground<br />
160° F<br />
Egg Dishes<br />
160° F<br />
Turkey, Chicken & Duck Whole,<br />
Pieces & Ground<br />
165° F<br />
Please refer to the USDA for complete, up-to-date information.<br />
Our internal temperature chart is based on USDA standards for<br />
meat doneness. Check it out at www.isitdoneyet.gov<br />
Wood Chips<br />
For extra smoke flavor when grilling, try adding wood chips.<br />
Soak the chips in water for approximately 30 minutes before<br />
adding to a smoke box or pan. Place smoke box or pan on top of<br />
the cooking grate above the flame. Turn grill on high until the<br />
wood starts to smoke. Reduce heat to desired temperature for<br />
cooking, and place food on cooking grate as desired. Close lid to<br />
retain more smoke. Hardwood varieties that work particularly<br />
well with grilled foods include Alder, Apple, Cherry, Grapevines,<br />
Hickory, Mesquite, Oak, Rosemary and Sassafras.<br />
Skewers<br />
Metal skewers should be flat, with long handles. Round skewers<br />
allow food to roll when turned, so it may not cook as evenly. Use<br />
metal skewers when cooking meat kabobs. Wooden skewers<br />
should be soaked in water for an hour before use, and are best<br />
used for quick cooking foods such as vegetables and fruits.<br />
Sauces<br />
Sauces containing sugars and fats can cause flare-ups, and your<br />
food may burn. In general, apply these sauces during the final<br />
10 minutes of cooking. Keep in mind, use of excessive sauces<br />
or glazes will also require extra cleaning afterwards.<br />
Marinades and Rubs<br />
To enhance the flavor of grilled foods, a liquid marinade or dry<br />
rub can be used prior to cooking. Meat can be either soaked or<br />
injected with liquid marinade up to 24 hours prior to grilling. Dry<br />
rubs can be applied directly to the meat immediately before<br />
grilling.<br />
Utensils<br />
Use tongs or a spatula to handle the food instead of a fork, and<br />
don't turn the food too<br />
often. Piercing the food<br />
with a fork will release<br />
juices that you want in<br />
the meat, and may<br />
cause flare-ups.<br />
6
GRILLING <strong>GUIDE</strong> – Cleaning Your Grill<br />
Why Clean<br />
We've all heard the saying, “an ounce of prevention is worth a<br />
pound of cure.” This is great advice when it comes to keeping<br />
your grill clean.<br />
Routine Care<br />
Periodic cleaning of this grill is necessary,<br />
as grill fires can occur when grease and<br />
food debris collect in the bottom of the grill.<br />
After each use, remove any remaining<br />
food particles from the cooking grate and<br />
inside of the grill using a grill brush. Do<br />
this after the grill has cooled down, yet is<br />
still warm. It is much easier to clean food<br />
particles while warmth is still present, than<br />
after the food particles have completely<br />
cooled and hardened. This grill is not<br />
designed to be 'burned off' by closing the<br />
lid and turning the burners on High for an<br />
extended time. The excessive heat<br />
generated can cause leftover grease to<br />
catch fire, and can cause permanent<br />
damage to your grill.<br />
Cooking surfaces: If a bristle brush is used to clean any of the<br />
grill cooking surfaces, ensure no loose bristles remain on cooking<br />
surfaces prior to grilling. It is not recommended to clean cooking<br />
surfaces while grill is hot.<br />
Storing Your Grill<br />
• Clean cooking grates.<br />
• Store grill in dry location.<br />
• When LP cylinder is connected to grill, store outdoors in a well<br />
ventilated space and out of reach of children.<br />
• Cover grill if stored outdoors. Choose from a variety of grill<br />
covers offered by manufacturer.<br />
• Store grill indoors ONLY if LP cylinder is turned off,<br />
disconnected, and removed from grill. Never store LP cylinder<br />
indoors.<br />
• When removing grill from storage, follow the 'Cleaning the<br />
Burner Assembly' instructions in the Use and Care section of<br />
the Product Guide.<br />
General Cleaning<br />
Plastic parts: Wash with warm soapy water and wipe dry. Do not<br />
use abrasive cleaners, degreasers or a concentrated grill cleaner<br />
on plastic parts. Damage to and failure of parts can result.<br />
Porcelain surfaces: Because of glass-like composition, most<br />
residue can be wiped away with baking soda/water solution or<br />
glass cleaner. Use non-abrasive scouring powder for stubborn<br />
stains.<br />
Painted surfaces: Wash with mild detergent or non-abrasive<br />
cleaner and warm water. Wipe dry with a soft non-abrasive cloth.<br />
Stainless steel surfaces: Stainless steel can rust under certain<br />
conditions. This can be caused by environmental conditions<br />
such as chlorine or salt water, or improper<br />
cleaning tools such as wire or steel<br />
wool. It can also discolor due to heat,<br />
chemicals, or grease build-up. To<br />
maintain your grill's high quality<br />
appearance, wash with mild detergent<br />
and warm water, or use a stainless<br />
steel grill cleaner. Baked-on grease<br />
deposits may require the use of an<br />
abrasive plastic cleaning pad. Use only<br />
in direction of brushed finish to avoid<br />
damage. Do not use abrasive pad on<br />
areas with graphics.<br />
Critters<br />
Spiders like to make their homes in the venturi tubes of grills.<br />
These must be inspected and cleaned regularly to ensure there<br />
are no blockages. Refer to the Use and Care portion of this<br />
Product Guide for complete information.<br />
7
USE AND CARE<br />
DANGER<br />
• NEVER store a spare LP cylinder under or near<br />
the appliance or in an enclosed area.<br />
• Never fill a cylinder beyond 80% full.<br />
• An over filled or improperly stored cylinder is a<br />
hazard due to possible gas release from the<br />
safety relief valve. This could cause an intense<br />
fire with risk of property damage, serious injury or<br />
death.<br />
• If you see, smell or hear gas escaping,<br />
immediately get away from the LP<br />
cylinder/appliance and call your fire department.<br />
LP Cylinder Removal, Transport and Storage<br />
•Turn OFF all control knobs and LP cylinder valve. Turn coupling<br />
nut counterclockwise by hand only - do not use tools to<br />
disconnect. Loosen cylinder screw beneath bottom shelf, then<br />
lift LP cylinder up and out of cart. Install safety cap onto LP<br />
cylinder valve. Always use cap and strap supplied with valve.<br />
Failure to use safety cap as directed may result in serious<br />
personal injury and/or property damage.<br />
•A disconnected LP cylinder in LP Cylinder Valve<br />
storage or being transported<br />
must have a safety cap installed (as shown).<br />
Do not store an LP cylinder in enclosed spaces<br />
such as a carport, garage, porch, covered<br />
patio or other building. Never leave an LP cylinder<br />
inside a vehicle which may become overheated<br />
by the sun.<br />
•Do not store an LP cylinder in an area where children play.<br />
Safety<br />
Cap<br />
Retainer Strap<br />
LP Cylinder<br />
•The LP cylinder used with your grill must meet the<br />
following requirements:<br />
•Use LP cylinders only with these required measurements: 12"<br />
(30.5cm) (diameter) x 18" (45.7 cm) (tall) with 20 lb. (9 kg.)<br />
capacity maximum.<br />
•LP cylinders must be constructed and marked in accordance<br />
with specifications for LP cylinders of the U.S. Department of<br />
Transportation (DOT) or for Canada, CAN/CSA-B339,<br />
cylinders, spheres and tubes for transportation of dangerous<br />
goods. Transport Canada (TC). See LP cylinder collar for<br />
marking.<br />
•LP cylinder valve must have:<br />
•Type 1 outlet compatible with<br />
regulator or grill.<br />
•Safety relief valve.<br />
•UL listed Overfill Protection<br />
OPD Hand Wheel<br />
Device (OPD). This OPD safety<br />
feature is identified by a unique triangular hand wheel. Use<br />
only LP cylinders equipped with this type of valve.<br />
•LP cylinder must be arranged for vapor withdrawal and include<br />
collar to protect LP cylinder valve. Always keep LP cylinders in<br />
upright position during use, transit or storage.<br />
LP cylinder in upright position for vapor withdrawal<br />
LP (Liquefied Petroleum Gas)<br />
•LP gas is nontoxic, odorless and colorless when produced. For<br />
Your Safety, LP gas has been given an odor (similar to rotten<br />
cabbage) so that it can be smelled.<br />
•LP gas is highly flammable and may ignite unexpectedly when<br />
mixed with air.<br />
LP Cylinder Filling<br />
•Use only licensed and experienced dealers.<br />
•LP dealer must purge new cylinder before filling.<br />
•Dealer should NEVER fill LP cylinder more than 80% of LP<br />
cylinder volume. Volume of propane in cylinder will vary by<br />
temperature.<br />
•A frosty regulator indicates gas overfill. Immediately close LP<br />
cylinder valve and call local LP gas dealer for assistance.<br />
•Do not release liquid propane (LP) gas into the atmosphere.<br />
This is a hazardous practice.<br />
•To remove gas from LP cylinder, contact an LP dealer or call a<br />
local fire department for assistance. Check the telephone<br />
directory under “Gas Companies” for nearest certified LP<br />
dealers.<br />
8
LP Cylinder Exchange<br />
•Many retailers that sell grills offer you the option of replacing<br />
your empty LP cylinder through an exchange service. Use only<br />
those reputable exchange companies that inspect, precision fill,<br />
test and certify their cylinders. Exchange your cylinder only<br />
for an OPD safety feature-equipped cylinder as described<br />
in the "LP Cylinder" section of this manual.<br />
•Always keep new and exchanged LP cylinders in upright<br />
position during use, transit or storage.<br />
•Leak test new and exchanged LP cylinders BEFORE<br />
connecting to grill.<br />
•Place dust cap on cylinder valve outlet whenever the cylinder is<br />
not in use. Only install the type of dust cap on the cylinder valve<br />
outlet that is provided with the cylinder valve. Other types of caps<br />
or plugs may result in leakage of propane.<br />
Connecting Regulator to the LP Cylinder<br />
1.LP cylinder must be properly secured onto grill. (Refer to<br />
assembly section.)<br />
2.Turn all control knobs to the OFF position.<br />
3.Turn LP cylinder OFF by turning hand-wheel clockwise to a<br />
full stop.<br />
4.Remove the protective cap from LP cylinder valve. Always use<br />
cap and strap supplied with valve.<br />
Off<br />
Clockwise<br />
OPD Hand Wheel<br />
LP Cylinder Leak Test<br />
For your safety<br />
•Leak test must be repeated each time LP cylinder is exchanged<br />
or refilled.<br />
•Do not smoke during leak test.<br />
•Do not use an open flame to check for gas leaks.<br />
•Grill must be leak tested outdoors in a well-ventilated area,<br />
away from ignition sources such as gas fired or electrical<br />
appliances. During leak test, keep grill away from open flames<br />
or sparks.<br />
•Use a clean paintbrush and a 50/50 mild soap and water<br />
solution. Brush soapy solution onto areas indicated by arrows<br />
in figure below.<br />
sDo not use household cleaning agents. Damage to gas<br />
train components can result.<br />
Safety Relief Valve<br />
Strap and Cap<br />
Type 1 outlet with<br />
thread on outside<br />
Do not use a POL transport plug<br />
(plastic part with external threads)!<br />
It will defeat the safety feature of<br />
the valve.<br />
5.Hold regulator and insert nipple into LP<br />
cylinder valve. Hand-tighten the<br />
coupling nut, holding regulator in a<br />
straight line with LP cylinder valve so<br />
as not to cross-thread the connection.<br />
WARNING<br />
If “growing” bubbles appear do not use or move the LP<br />
cylinder. Contact an LP gas supplier or your fire<br />
department!<br />
Nipple has to be centered<br />
into the LP cylinder valve.<br />
9
Straight<br />
Hold coupling nut and regulator<br />
as shown for proper connection<br />
to LP cylinder valve.<br />
Leak Testing Valves, Hose and Regulator<br />
1.Turn all grill control knobs to OFF.<br />
2.Be sure regulator is tightly connected to LP cylinder.<br />
3.Completely open LP cylinder valve by turning hand wheel<br />
counterclockwise. If you hear a rushing sound, turn gas off<br />
immediately. There is a major leak at the connection. Correct<br />
before proceeding.<br />
4.Brush soapy solution onto areas circled below, or other similar<br />
fittings on your grill.<br />
6.Turn the coupling nut clockwise and tighten to a full stop. The<br />
regulator will seal on the back-check feature in the LP cylinder<br />
valve, resulting in some resistance. An additional one-half to<br />
three-quarters turn is required to complete the<br />
connection. Tighten by hand only – do not use tools.<br />
NOTE:<br />
If you cannot complete the connection, disconnect regulator and<br />
repeat steps 5 and 6. If you are still unable to complete the<br />
connection, do not use this regulator!<br />
DANGER<br />
• Do not insert any tool or foreign object into the valve<br />
outlet or safety relief valve. You may damage the valve<br />
and cause a leak. Leaking propane may result in<br />
explosion, fire, severe personal injury, or death.<br />
WARNING<br />
NOTE: Sideburner<br />
shelf fascia not<br />
shown for clarity.<br />
NOTE: Your grill<br />
may NOT be<br />
equipped with a<br />
sideburner.<br />
• Outdoor gas appliance is not intended to be installed<br />
in or on a boat.<br />
• Outdoor gas appliance is not intended to be installed<br />
in or on an RV.<br />
• Never attempt to attach this grill to the self-contained<br />
LP gas system of a camper trailer or motor home.<br />
• Do not use grill until leak-tested.<br />
• If a leak is detected at any time, STOP and call the fire<br />
department.<br />
• If you cannot stop a gas leak, immediately close<br />
LPcylinder valve and call LP gas supplier or your fire<br />
department!<br />
5.If “growing” bubbles appear, there is a leak. Close LP<br />
cylinder valve immediately and retighten connections. If leaks<br />
cannot be stopped do not try to repair. Call for replacement<br />
parts.<br />
6.Always close LP cylinder valve after performing leak test by<br />
turning hand wheel clockwise.<br />
10
WARNING<br />
For Safe Use of Your Grill and to Avoid Serious<br />
Injury:<br />
• Do not let children operate or play near grill.<br />
• Keep grill area clear and free from materials that burn.<br />
• Do not block holes in sides or back of grill.<br />
• Check burner flames regularly.<br />
• Use grill only in well-ventilated space. NEVER use in<br />
enclosed space such as carport, garage, porch,<br />
covered patio, or under an overhead structure of any<br />
kind.<br />
• Do not use charcoal or ceramic briquets in a gas grill.<br />
(Unless briquets are supplied with your grill.)<br />
• Use grill at least 3 ft. from any wall or surface.<br />
Maintain 10 ft. clearance to objects that can catch fire<br />
or sources of ignition such as pilot lights on water<br />
heaters, live electrical appliances, etc.<br />
• Apartment Dwellers:<br />
Check with management to learn the requirements<br />
and fire codes for using an LP gas grill in your<br />
apartment complex. If allowed, use outside on the<br />
ground floor with a three (3) foot clearance from walls<br />
or rails. Do not use on or under balconies.<br />
• NEVER attempt to light burner with lid closed. A<br />
buildup of non-ignited gas inside a closed grill is<br />
hazardous.<br />
• Never operate grill with LP cylinder out of correct<br />
position specified in assembly instructions.<br />
• Always close LP cylinder valve and remove<br />
coupling nut before moving LP cylinder from<br />
specified operation position.<br />
Safety Tips<br />
sBefore opening LP cylinder valve, check the coupling nut for<br />
tightness.<br />
sWhen grill is not in use, turn off all control knobs and LP<br />
cylinder valve.<br />
sNever move grill while in operation or still hot.<br />
sUse long-handled barbecue utensils and oven mitts to avoid<br />
burns and splatters.<br />
sMaximum load for sideburner and side shelf is 10 lbs.<br />
sThe grease tray must be inserted into grill and emptied after<br />
each use. Do not remove grease tray until grill has<br />
completely cooled.<br />
sClean grill often, preferably after each cookout. If a bristle<br />
brush is used to clean any of the grill cooking surfaces,<br />
ensure no loose bristles remain on cooking surfaces prior to<br />
grilling. It is not recommended to clean cooking surfaces<br />
while grill is hot.<br />
sIf you notice grease or other hot material dripping from grill<br />
onto valve, hose or regulator, turn off gas supply at once.<br />
Determine the cause, correct it, then clean and inspect valve,<br />
hose and regulator before continuing. Perform a leak test.<br />
sKeep ventilation openings in cylinder enclosure (grill cart) free<br />
and clear of debris.<br />
sDo not store objects or materials inside the grill cart<br />
enclosure that would block the flow of combustion air to the<br />
underside of either the control panel or the firebox bowl.<br />
sThe regulator may make a humming or whistling noise during<br />
operation. This will not affect safety or use of grill.<br />
sIf you have a grill problem see the "Troubleshooting Section".<br />
sIf the regulator frosts, turn off grill and LP cylinder valve<br />
immediately. This indicates a problem with the cylinder and it<br />
should not be used on any product. Return to supplier!<br />
CAUTION<br />
• Putting out grease fires by closing the lid is not possible.<br />
<strong>Grills</strong> are well ventilated for safety reasons.<br />
• Do not use water on a grease fire. Personal injury may<br />
result. If a grease fire develops, turn knobs and LP<br />
cylinder off.<br />
• Do not leave grill unattended while preheating or burning<br />
off food residue on HI. If grill has not been regularly<br />
cleaned, a grease fire can occur that may damage the<br />
product.<br />
Ignitor Lighting<br />
sDo not lean over grill while lighting.<br />
1. Turn OFF gas burner control valves.<br />
2. Turn ON gas at LP cylinder.<br />
3. Open lid during lighting.<br />
4. To ignite, push and turn ignition burner knob to HI.<br />
5. P. ush and hold ELECTRONIC IGNITION button until the burner<br />
lights.<br />
6. If ignition does NOT occur in 5 seconds, turn the burner<br />
controls OFF, wait 5 minutes and repeat the lighting<br />
procedure.<br />
7. To ignite remaining burners, turn knob to the HI position<br />
starting with the burners closest to IGNITION BURNERS first.<br />
If ignitor does not work, follow match lighting instructions.<br />
Lighting instructions are continued on the next page<br />
11
Ignitor Lighting (continued)<br />
8. For grills equipped with ELECTRONIC IGNITION at<br />
each burner:<br />
Repeat steps 4 through 6 to light each burner.<br />
9. Once each burner has ignited, turn knobs to desired setting.<br />
WARNING<br />
Turn controls and gas source or tank OFF when not<br />
in use.<br />
CAUTION<br />
If ignition does NOT occur in 5 seconds, turn the<br />
burner controls OFF, wait 5 minutes and repeat the<br />
lighting procedure. If the burner does not ignite with<br />
the valve open, gas will continue to flow out of the<br />
burner and could accidently ignite with risk of injury.<br />
Match-Lighting<br />
sDo not lean over grill while lighting.<br />
1. Open lid. Turn ON gas at LP cylinder.<br />
2. Place match into match holder (hanging from side panel of<br />
grill). Light match; then light burner by placing match through<br />
the match light hole on right or left side of grill.<br />
3. Push in and turn far right or far left burner knob to the HI<br />
position, depending on match light hole selected. Be sure<br />
burner lights and stays lit.<br />
4. Light adjacent burners in sequence by pushing knobs in and<br />
turning to the HI position.<br />
Sideburner Ignitor Lighting<br />
sDo not lean over grill while lighting.<br />
1. Open sideburner lid. Turn ON gas at LP cylinder.<br />
2. Turn sideburner knob to the HI position, push and hold<br />
ELECTRONIC IGNITOR button.<br />
3. If sideburner does NOT light within 5 seconds, turn knob to OFF,<br />
wait 5 minutes, then<br />
repeat lighting procedure.<br />
Sideburner Match Lighting<br />
1. Open sideburner lid. Turn ON<br />
gas at LP cylinder.<br />
2. Place lit match near burner.<br />
3. Turn sideburner knob to the<br />
HI position.<br />
Be sure burner lights and<br />
stays lit.<br />
Burner Flame Check<br />
• Remove cooking grates and flame tamers. Light burners, rotate<br />
knobs from HI to LOW. You should see a smaller flame in<br />
LOW position than seen on HI. Perform burner flame check<br />
on sideburner, also. Always check flame prior to each use. If<br />
only low flame is seen refer to "Sudden drop or low flame" in<br />
the Troubleshooting Section.<br />
HI<br />
LOW<br />
Turning Grill Off<br />
• Turn all knobs to the OFFposition. Turn LP cylinder OFF by turning<br />
hand-wheel clockwise to a full stop.<br />
Ignitor Check<br />
• Turn gas off at LP cylinder. Press and hold electronic ignitor<br />
button. "Click" should be heard and spark seen each time<br />
between each collector box or burner and electrode. See<br />
"Troubleshooting" if no click or spark.<br />
Valve Check<br />
• Important: Make sure gas is off at LP cylinder before<br />
checking valves. Knobs lock in OFF position. To check<br />
valves, first push in knobs and release, knobs should spring<br />
back. If knobs do not spring back, replace valve assembly<br />
before using grill. Turn knobs to LOW position then turn back to<br />
OFF position. Valves should turn smoothly.<br />
Hose Check<br />
• Before each use, check to see if hoses are cut or worn.<br />
Replace damaged hoses before using grill. Use only<br />
valve/hose/regulator specified by manufacturer.<br />
General Grill Cleaning<br />
• Do not mistake brown or black accumulation of grease and<br />
smoke for paint. Interiors of gas grills are not painted at the<br />
factory (and should never be painted). Apply a strong solution<br />
of detergent and water or use a grill cleaner with scrub brush<br />
on insides of grill lid and bottom. Rinse and allow to completely<br />
air dry. Do not apply a caustic grill/oven cleaner to painted<br />
surfaces.<br />
• Plastic parts: Wash with warm soapy water and wipe dry.<br />
sDo not use citrisol, abrasive cleaners, degreasers or a<br />
concentrated grill cleaner on plastic parts. Damage to and<br />
failure of parts can result.<br />
• Porcelain surfaces: Because of glass-like composition, most<br />
residue can be wiped away with baking soda/water solution or<br />
specially formulated cleaner. Use nonabrasive scouring powder<br />
for stubborn stains.<br />
• Painted surfaces: Wash with mild detergent or nonabrasive<br />
cleaner and warm soapy water. Wipe dry with a soft<br />
nonabrasive cloth.<br />
• Stainless steel surfaces: To maintain your grill’s high quality<br />
appearance, wash with mild detergent and warm soapy water<br />
and wipe dry with a soft cloth after each use. Baked-on grease<br />
deposits may require the use of an abrasive plastic cleaning<br />
pad. Use only in direction of brushed finish to avoid damage.<br />
Do not use abrasive pad on areas with graphics.<br />
• Cooking surfaces: If a bristle brush is used to clean any of<br />
the grill cooking surfaces, ensure no loose bristles remain on<br />
cooking surfaces prior to grilling. It is not recommended to<br />
clean cooking surfaces while grill is hot.<br />
12
CAUTION<br />
SPIDER ALERT!<br />
SPIDER AND WEBS<br />
INSIDE BURNER TUBE<br />
3. Remove carryover tubes and burners.<br />
4. Detach electrode from burner.<br />
NOTE: Removal/Detachment method will depend on the<br />
burner configuration. See different configurations in<br />
illustrations below.<br />
5. Carefully lift each burner up and away from valve openings.<br />
We suggest three ways to clean the burner tubes. Use the one<br />
easiest for you.<br />
(A) Bend a stiff wire (a light weight coat hanger works well)<br />
into a small hook. Run the hook through each burner<br />
tube several times.<br />
If you notice that your grill is getting hard to light or that the<br />
flame isn’t as strong as it should be, take the time to check and<br />
clean the venturi’s.<br />
CONTROL PANEL<br />
VALVE<br />
SPIDER WEBS<br />
INSIDE VENTURI<br />
BURNER<br />
In some areas of the country, spiders or small insects have been<br />
known to create “flashback” problems. The spiders spin webs, build<br />
nests and lay eggs in the grill’s venturi tube(s) obstructing the flow of<br />
gas to the burner. The backed-up gas can ignite in the venturi behind<br />
the control panel. This is known as a flashback and it can damage<br />
your grill and even cause injury.<br />
To prevent flashbacks and ensure good performance the burner and<br />
venturi assembly should be removed from the grill and cleaned<br />
before use whenever the grill has been idle for an extended period.<br />
Storing Your Grill<br />
• Clean cooking grates.<br />
• Store in dry location.<br />
• When LP cylinder is connected to grill, store outdoors in a wellventilated<br />
space and out of reach of children.<br />
• Cover grill if stored outdoors. Choose from a variety of grill<br />
covers offered by manufacturers.<br />
• Store grill indoors ONLY if LP cylinder is turned off and<br />
disconnected, removed from grill and stored outdoors.<br />
• When removing grill from storage, follow “Cleaning the Burner<br />
Assembly” instructions before starting grill.<br />
Cleaning the Burner Assembly<br />
Follow these instructions to clean and/or replace parts of burner<br />
assembly or if you have trouble igniting grill.<br />
1. Turn gas OFF at control knobs and LP cylinder.<br />
2. Remove cooking grates and flame tamers.<br />
(B) Use a narrow bottle brush with a flexible handle (do not<br />
use a brass wire brush), run the brush through each<br />
burner tube several times.<br />
(C) Wear eye protection: Use an air hose to force air into<br />
the burner tube and out the burner ports. Check each<br />
port to make sure air comes out each hole.<br />
6. Wire brush entire outer surface of burner to remove food<br />
residue and dirt.<br />
7. Clean any blocked ports with a stiff wire such as an open<br />
paper clip.<br />
8. Check burner for damage, due to normal wear and corrosion<br />
some holes may become enlarged. If any large cracks or<br />
holes are found replace burner.<br />
VERY IMPORTANT: Burner tubes must reengage valve<br />
openings. See illustrations at right.<br />
9. Attach electrode to burner.<br />
10. Carefully replace burners.<br />
11. Attach burners to brackets on firebox.<br />
12. Reposition carryover tubes and attach<br />
to burners. Replace flame tamers and<br />
cooking grates.<br />
Firebox<br />
Firebox<br />
Carryover tube<br />
Carryover tube<br />
Firebox burner<br />
bracket<br />
Firebox<br />
burner<br />
bracket<br />
Electrode<br />
Correct<br />
burner-to-valve<br />
engagement<br />
Electrode<br />
Remove screws<br />
Pry off<br />
electrode with<br />
a flat blade<br />
screwdriver<br />
13
LIMITED WARRANTY<br />
This warranty only applies to units purchased from an authorized retailer. Manufacturer warrants to the original consumer-purchaser only that this<br />
product shall be free from defects in workmanship and materials after correct assembly and under normal and reasonable home use for the periods<br />
indicated below beginning on the date of purchase*. The manufacturer reserves the right to require that defective parts be returned, postage and or<br />
freight pre-paid by the consumer for review and examination.<br />
SCOPE OF COVERAGE PERIOD OF COVERAGE TYPE OF FAILURE COVERAGE<br />
All Parts<br />
1 year from date of purchase*<br />
PERFORATION, MANUFACTURING,<br />
AND MATERIAL DEFECTS ONLY<br />
*Note: A dated sales reciept WILL be required for warranty service.<br />
The original consumer-purchaser will be responsible for all shipping charges for parts replaced under the terms of this limited warranty.<br />
This limited warranty is applicable in the United States and Canada only, is only available to the original owner of the product and is not transferable.<br />
Manufacturer requires proof of your date of purchase. Therefore, you should retain your sales slip or invoice. Registering your product is not a<br />
substitute for proof of purchase and the manufacturer is not responsible for or required to retain proof of purchase records.<br />
This limited warranty applies to the functionality of the product ONLY and does not cover cosmetic issues such as scratches, dents, corrosions or<br />
discoloring by heat, abrasive and chemical cleaners or any tools used in the assembly or installation of the appliance, surface rust, or the<br />
discoloration of stainless steel surfaces. RUST is not considered a manufacturing or materials defect.<br />
This limited warranty will not reimburse you for the cost of any inconvenience, food, personal injury or property damage.<br />
ITEMS MANUFACTURER WILL NOT PAY FOR:<br />
1. Shipping cost, standard or expedited, for warranty and replacement parts<br />
2. Service calls to your home.<br />
3. Repairs when your product is used for other than normal, single-family household or residential use.<br />
4. Damage, failures, or operating difficulties resulting from accident, alteration, careless handling, misuse, abuse, fire, flood,<br />
acts of God, improper installation or maintenance, installation not in accordance with electrical or plumbing codes, or use<br />
of products not approved by the manufacturer.<br />
5. Any food loss due to product failures or operating difficulties.<br />
6. Replacement parts or repair labor costs for units operated outside the United States or Canada.<br />
7. Pickup and delivery of your product.<br />
8. Repairs to parts or systems resulting from unauthorized modifications made to the product.<br />
9. The removal and/or reinstallation of your product.<br />
DISCLAIMER OF IMPLIED WARRANTIES and LIMITATION OF REMEDIES<br />
Repair or replacement of defective parts is your exclusive remedy under the terms of this limited warranty. In the event of parts availability issues,<br />
the manufacturer reserves the right to substitute like or similar parts that are equally functional.<br />
Manufacturer will not be responsible for any consequential or incidental damages arising from the breach of either this limited warranty or any<br />
applicable implied warranty, or for failure or damage resulting from acts of God, improper care and maintenance, grease fire, accident, alteration,<br />
replacement of parts by anyone other than Manufacturer, misuse, transportation, commercial use, abuse, hostile environments (inclement weather,<br />
acts of nature, animal tampering), improper installation or installation not in accordance with local codes or printed manufacturer instructions.<br />
THIS LIMITED WARRANTY IS THE SOLE EXPRESS WARRANTY GIVEN BY THE MANUFACTURER. NO <strong>PRODUCT</strong> PERFORMANCE<br />
SPECIFICATION OR DESCRIPTION WHEREVER APPEARING IS WARRANTED BY MANUFACTURER EXCEPT TO THE EXTENT SET<br />
FORTH IN THIS LIMITED WARRANTY. ANY IMPLIED WARRANTY PROTECTION ARISING UNDER THE LAWS OF ANY STATE,<br />
INCLUDING IMPLIED WARRANTY OF MERCHANTABILITY OR FITNESS FOR A PARTICULAR PURPOSE OR USE, IS HEREBY<br />
LIMITED IN DURATION TO THE DURATION OF THIS LIMITED WARRANTY.<br />
Neither dealers nor the retail establishment selling this product has any authority to make any additional warranties or to promise remedies<br />
in addition to or inconsistent with those stated above. Manufacturer's maximum liability, in any event, shall not exceed the purchase price of the<br />
product paid by the original consumer.<br />
NOTE: Some states do not allow an exclusion or limitation of incidental or consequential damages, so some of the above limitations or exclusions<br />
may not apply to you. This limited warranty gives you specific legal rights as set foth herein. You may also have other rights which vary from state<br />
to state. In the state of California only, if refinishing or replacement of the product is not commercially practicable, the retailer selling this product or<br />
the Manufacturer will refund the purchase price paid for the product, less the amount directly attributable to use by the original consumer-purchaser<br />
prior to discovery of the nonconformity. In addition, in the state of California only, you may take the product to the retail establishment selling this<br />
product in order to obtain performance under this limited warranty.<br />
If you wish to obtain performance of any obligation under this limited warranty, you should<br />
write to:<br />
Consumer Relations<br />
P. O. Box 1240<br />
Columbus, GA 31902-1240<br />
Consumer returns will not be accepted unless a valid Return Authorization is first acquired. Authorized returns are clearly marked on the outside of<br />
the package with an RA number and the package is shipped freight/postage pre-paid. Consumer returns that do not meet these standards will be<br />
refused.<br />
14
PARTS LIST<br />
Key Qty Description<br />
A 1 FIREBOX<br />
B 5 MAIN BURNER-TUBE BURNER<br />
C 1 MAIN BURNER-BAR BURNER<br />
D 1 ELECTRODE, F/ TUBE BURNER<br />
E 1 ELECTRODE, F/ BAR BURNER<br />
F 4 CARRY OVER TUBE<br />
G 1 CONTROL PANEL, MAIN<br />
H 1 ELECTRONIC IGNITION MODULE<br />
I 1 BUTTON, F/ IGNITION MODULE<br />
J 1 SHIELD, F/ ELECTRONIC IGNITION MODULE<br />
K 1 HOSE VALVE REGULATOR ASSEMBLY<br />
L 7 BEZEL F/ CONTROL KNOB<br />
M 7 CONTROL KNOB<br />
N 1 TOP LID<br />
O 1 LOGO PLATE F/ LID<br />
P 1 TEMPERATURE GAUGE<br />
Q 1 BEZEL, F/ TEMPERATURE GAUGE<br />
R 2 LID BUMPER, RECTANGLE<br />
S 2 LID BUMPER, ROUND<br />
T 1 TOP LID HARDWARE<br />
U 1 HANDLE, F/ LID<br />
V 5 HEAT TENT<br />
W 4 COOKING GRATE<br />
X 1 WARMING RACK<br />
Y 1 LEFT SIDE SHELF F/ SB<br />
Z 1 DRIP PAN, F/ SB<br />
AA 1 SIDEBURNER GRATE<br />
BB 1 ELECTRODE, F/ SB<br />
CC 1 ELECTRODE WIRE, F/ SIDEBURNER<br />
DD 1 SIDEBURNER LID<br />
EE 1 SIDEBURNER<br />
FF 1 SIDEBURNER VALVE CLIP<br />
GG 1 CONTROL PANEL, F/ SB<br />
HH 1 RIGHT SIDE SHELF<br />
II 1 FASCIA, F/ RIGHT SHELF<br />
JJ 1 TOWEL BAR<br />
KK 5 TOOL HOOK<br />
LL 1 RIGHT SIDE CART PANEL<br />
Key Qty Description<br />
MM 1 LEFT SIDE CART PANEL<br />
NN 1 BOTTOM SHELF<br />
OO 1 FRONT DOOR BRACE<br />
PP 1 LEFT DOOR<br />
QQ 1 RIGHT DOOR<br />
RR 2 HANDLE, F/ DOOR<br />
SS 1 LOWER BACK PANEL<br />
TT 2 TANK EXCLUSION WIRE<br />
UU 1 GREASE TRAY<br />
VV 1 GREASE PAN<br />
WW 4 CASTER SOCKETS<br />
XX 2 CASTER, LOCKING<br />
YY 2 CASTER, FIXED<br />
ZZ 2 MATCH HOLDER<br />
AAA 1 TANK RETAINER SCREW<br />
BBB 2 MAGNET ASSEMBLY<br />
CCC 1 SHIELD, F/TANK<br />
DDD 2 DOOR PIN, SPRING<br />
EEE 1 WEIGHT BLOCK<br />
FFF 2 DOOR PIN, FIXED<br />
GGG 1 BOTTLE OPENER<br />
NOT Pictured<br />
… 1 CASTER PIN<br />
… 1 <strong>PRODUCT</strong> MANUAL, ENGLISH<br />
… 1 <strong>PRODUCT</strong> MANUAL, SPANISH<br />
… 1 HARDWARE PACK<br />
NOTE: Some grill parts shown in the assembly steps may differ slightly in appearance from<br />
those on your particular grill model. However, the method of assembly remains the same.<br />
15
PARTS DIAGRAM<br />
N<br />
X<br />
CCC<br />
W<br />
W<br />
W<br />
W<br />
V<br />
V<br />
V<br />
V<br />
V<br />
B B B B B<br />
C<br />
E<br />
P<br />
O<br />
U<br />
Q<br />
EE<br />
BB<br />
DD<br />
FF<br />
F<br />
F<br />
F<br />
F<br />
D<br />
A<br />
H<br />
J<br />
T<br />
I<br />
R<br />
S<br />
JJ<br />
G<br />
KK<br />
KK<br />
KK<br />
KK<br />
KK<br />
AA<br />
Z<br />
CC<br />
HH<br />
Y<br />
K<br />
L L L L L L<br />
M<br />
M M M M M<br />
UU<br />
II<br />
OO<br />
GG<br />
DDD<br />
BBB<br />
DDD<br />
SS<br />
LL<br />
L<br />
M<br />
RR<br />
ZZ<br />
ZZ<br />
RR<br />
VV<br />
MM<br />
PP<br />
TT<br />
TT<br />
QQ<br />
GGG<br />
WW<br />
WW<br />
NN<br />
EEE<br />
16<br />
YY<br />
AAA<br />
FFF<br />
BBB<br />
FFF<br />
XX
ASSEMBLY<br />
•<br />
1<br />
Place bottom shelf between side panels with cut out hole for LP cylinder on left. Attach to left and right side panels with (4)<br />
1/4”-20x2-3/8” machine screws and 1/4”-20 flange nuts at front, and (2) 1/4”-20x2-3/8” machine screws and 1/4”-20<br />
flange nuts at rear.<br />
For Front Door<br />
Brace Assembly<br />
Left Side Panel<br />
Right Side Panel<br />
Rear<br />
1/4"<br />
-20x2-3/8"<br />
Machine Screw<br />
Qty. 6<br />
Front<br />
1/4"<br />
-20<br />
Flange Nut<br />
Qty. 6<br />
Bottom Shelf<br />
2<br />
• Place lower back panel between side panels as shown. Attach to left and right side panels with (4) #8x3/8” sheet metal screws.<br />
Then attach to bottom shelf with (2) #8x3/8” sheet metal screws.<br />
Magnet Assembly<br />
Left Side Panel<br />
#8x3/8"<br />
Sheet Metal Screws<br />
Qty. 6<br />
Bottom Shelf<br />
Right Side Panel<br />
Lower Back Panel<br />
17
3<br />
•<br />
Hook tank exclusion wire onto the metal tabs on lower back panel, attach other ends to bottom shelf with #8x3/8” sheet metal<br />
screws.<br />
Lower Back Panel<br />
#8x3/8"<br />
Sheet Metal Screws<br />
Qty. 2<br />
Metal Tab<br />
4<br />
•<br />
Place front door brace as shown. Attach to left and right side panels with 1/4"-20x2-3/8" machine screws and 1/4”-20<br />
flange nuts.<br />
1/4"<br />
-20<br />
Flange Nut<br />
Qty. 4<br />
1/4"<br />
-20x2-3/8"<br />
Machine Screw<br />
Qty. 4<br />
Front Door Brace<br />
18
5 • Turn assembly upside down.<br />
• Insert Caster Pin into the caster mounting plate to lock it in place, shown A. Spin the caster clockwise into the threads on the legs<br />
until secure. Remove the Caster Pin and repeat for remaining casters. Make sure the two locking casters are secured to the right<br />
legs and the non-locking casters are secured to the left legs. After all 4 casters are secure remove the Caster Pin and save for<br />
future maintenance (B).<br />
• Stand cart upright.<br />
• Attach weight block to bottom shelf with (2) 1/4"-20x2" machine screws and 1/4"-20 flange nuts (C).<br />
• Attach bottle opener to right front leg with (2) #10-24x1-1/2" machine screws and # 10-24 flange nuts (C).<br />
Fixed Caster<br />
Locking Caster<br />
B<br />
Caster Pin<br />
A<br />
Caster Pin<br />
Left Side Panel<br />
Right Side Panel<br />
C<br />
#10-24<br />
Flange Nut<br />
1/4"<br />
-20x2"<br />
Machine Screw<br />
Qty. 2<br />
# 10-24x1-1/2"<br />
Machine Screw<br />
Qty. 2<br />
1/4"-20x2"<br />
Machine Screw<br />
# 10-24x1-1/2"<br />
Machine Screw<br />
Weight Block<br />
1/4"<br />
-20<br />
Flange Nut<br />
Qty. 2<br />
#10-24<br />
Flange Nut<br />
Qty. 2<br />
1/4"-20 Flange Nut<br />
19
6 • This step requires two people to lift and position grill head onto cart.<br />
• Carefully lower the grill head onto the cart. Make sure the regulator hose is hanging outside the cart. Attach with 1/4”-20x1/2”<br />
screws.<br />
Right side panel removed for clarity<br />
Grill Head<br />
1/4"<br />
-20x1/2" Screw<br />
Qty. 4<br />
20
7<br />
•<br />
Attach towel bar to right side shelf with 1/4-20x1/2” Screws , 7mm lock washers and 7mm flat washers (A).<br />
• Hook side wall of shelf over support brackets on side of firebox (B).<br />
• Inside firebox attach right side shelf with (3) 7mm fiber washers and 1/4-20x1/2” screws, as shown (C). At back of firebox, attach<br />
the right side shelf with (1) 7mm fiber washer and 1/4-20x1/2” screw, as shown (B).<br />
• Attach right side shelf with 1/4-20 flange nuts, as shown (D).<br />
A<br />
Towel Bar<br />
Right Side Shelf<br />
B<br />
Support Bracket<br />
1/4-20x1/2" Screw<br />
7mm<br />
Lock Washer<br />
7mm<br />
Flat Washer<br />
1/4-20x1/2"<br />
Screw<br />
Back of Firebox<br />
7mm<br />
Lock Washer<br />
Qty. 2<br />
C<br />
7mm<br />
Fiber Washer<br />
7mm<br />
Flat Washer<br />
Qty. 2<br />
1/4-20x1/2"<br />
Screw<br />
D<br />
1/4-20x1/2"<br />
Screw<br />
Qty. 6<br />
1/4"<br />
-20<br />
Flange Nut<br />
Qty: 4<br />
7mm<br />
Fiber Washer<br />
Qty. 4<br />
8<br />
• Attach fascia to firebox with #8x3/8” sheet metal screws.<br />
#8x3/8"<br />
Sheet Metal Screws<br />
Qty. 3<br />
Fascia,<br />
Right Side Shelf<br />
21
9<br />
• Hook side wall of sideburner shelf over support brackets on side of firebox (A).<br />
• Inside firebox attach sideburner shelf with (3) 7mm fiber washers and 1/4-20x1/2” screws, as shown (B). At back of firebox,<br />
attach the sideburner shelf with (1) 7mm fiber washer and 1/4-20x1/2” screw, as shown (A).<br />
• Attach sideburner shelf with 1/4-20 flange nuts, as shown (C).<br />
A<br />
Support Bracket<br />
Sideburner Shelf<br />
7mm<br />
Fiber Washer<br />
B<br />
1/4-20x1/2"<br />
Screw<br />
Back of<br />
Firebox<br />
1/4-20x1/2"<br />
Screw<br />
C<br />
1/4-20x1/2"<br />
Machine Screw<br />
Qty. 4<br />
1/4"<br />
-20<br />
Flange Nut<br />
Qty: 4<br />
7mm<br />
Fiber Washer<br />
Qty. 4<br />
10<br />
• Attach fascia to firebox with #8x3/8” sheet metal screws.<br />
Fascia,<br />
Sideburner Shelf<br />
#8x3/8"<br />
sheet metal screws<br />
Qty. 3<br />
22
11<br />
• Attach sideburner bezel and valve with #8-32x3/8” SS screws. (A).<br />
• Place sideburner into shelf. Make sure valve is inside sideburner tube. Attach sideburner with #8-32 wing nut (B). Hook venturi<br />
clip to sideburner tube and around manifold. Attach sideburner ignitor wire (C).<br />
• Press sideburner control knob onto valve stem (D).<br />
• Place grate onto sideburner shelf (E).<br />
Sideburner<br />
B<br />
A<br />
#8-32 wing nut<br />
Sideburner Bezel<br />
Sideburner Valve<br />
Sideburner Control Knob<br />
D<br />
C<br />
Sideburner Tube<br />
Sideburner<br />
Ignitor Wire<br />
Venturi Clip<br />
Sideburner Valve<br />
E<br />
#8-32X3/8”<br />
SS Screw<br />
Qty. 2<br />
#8-32 Wing Nut<br />
Qty. 1<br />
Sideburner Grate<br />
23
12<br />
• Attach handle to door with #10-24x1/2” machine screws, 5mm flat washers and 5mm lock washers.<br />
• Insert hinge pin on bottom shelf into hole in door. Deress upper hinge pin in front door brace, align hinge hole on top of door, and<br />
release hinge pin into door.<br />
Hinge Pin hole<br />
Hinge Pin hole<br />
#10-24x1/2"<br />
Machine Screw<br />
Qty: 4<br />
Left Handle<br />
5mm Flat Washer<br />
5mm Lock Washer<br />
#10-24x1/2"<br />
Machine Screw<br />
Right Handle<br />
5mm Flat Washer<br />
Qty: 4<br />
Right Door<br />
Left Door<br />
5mm Lock Washer<br />
Qty: 4<br />
24
13<br />
• Place heat tents over tube burners by inserting tabs into slots in front of firebox. Opposite ends of heat tents rest on pins in back of<br />
firebox.<br />
NOTE: There is no heat tent over bar burner.<br />
Back of Firebox<br />
Pin<br />
Heat Tent<br />
Heat Tent<br />
Front of Firebox<br />
Heat Tent<br />
14<br />
• Place cooking grates onto grate rests.<br />
• Insert ends of Warming Rack pivot wire into holes in sides of gril lid. Insert ends of Warming Rack leg wire into holes in sides of<br />
firebox.<br />
NOTE: Pivot and leg wires, running side-to-side, should be under wires running front-to-back. If pivot and leg wires are on top,<br />
Warming Rack is installed upside-down.<br />
• Unscrew ignitor cap and place AA battery into ignitor slot with positive end (+) facing outward. Screw ignitor cap onto ignitor.<br />
Warming Rack<br />
Leg Wire<br />
Pivot Wire<br />
Cooking Grate<br />
-<br />
+<br />
+<br />
–<br />
AA Battery<br />
25
15<br />
• Attach the heat shield to grease tray with #8x3/8” sheet metal screws (A).<br />
• Place grease pan into grease tray, then place the tray into the cart (B).<br />
A<br />
Heat Shield<br />
B<br />
#8x3/8"<br />
Sheet Metal Screws<br />
Qty. 4<br />
Grease Tray<br />
Grease Pan<br />
Grease Tray<br />
CAUTION<br />
Failure to install grease tray and<br />
grease pan will cause hot grease to<br />
drip from bottom of grill with risk of<br />
fire or property damage.<br />
16<br />
• LP tank is sold separately. Use only with an OPD (over-fill protection device) equipped LP tank. Fill and leak-check before attaching<br />
to grill and regulator. See Use and Care section to correctly Leak Test and perform the Burner Flame Check.<br />
• Place Lp tank into hole in bottom shelf with tank collar opening facing to side as shown. Finger tighten tank retainer screw to hold<br />
LP tank securely in place. Insert regulator through the large hole on left side panel.<br />
Always keep LP cylinders in<br />
upright position during use,<br />
transport, and storage.<br />
CAUTION<br />
Failure to install tank correctly may<br />
allow gas hose to be damaged in<br />
operation, resulting in the risk of fire.<br />
Cylinder screw at rear of cart<br />
Tank Retainer Screw<br />
Regulator<br />
LP Cylinder<br />
(not included)<br />
LP Tank<br />
26
EMERGENCIES: If a gas leak cannot be stopped, or a fire occurs due to gas leakage, call the fire department.<br />
Emergencies<br />
Gas leaking from<br />
cracked/cut/burned<br />
hose.<br />
Gas leaking from LP<br />
cylinder.<br />
Gas leaking from LP<br />
cylinder valve.<br />
Gas leaking between<br />
LP cylinder and<br />
regulator connection.<br />
Fire coming through<br />
control panel.<br />
Grease fire or<br />
continuous excessive<br />
flames above cooking<br />
surface.<br />
Possible Cause<br />
• Damaged hose.<br />
• Mechanical failure due to rusting or<br />
mishandling.<br />
• Failure of cylinder valve from<br />
mishandling or mechanical failure.<br />
• Improper installation, connection not<br />
tight, failure of rubber seal.<br />
• Fire in burner tube section of burner due<br />
to blockage.<br />
• Too much grease buildup in burner area.<br />
Prevention/Solution<br />
• Turn off gas at LP cylinder or at source on natural gas systems. If<br />
anything but burned, replace valve/hose/regulator. If burned,<br />
discontinue use of product until a plumber has investigated cause<br />
and corrections are made.<br />
• Replace LP cylinder.<br />
• Turn off LP cylinder valve. Return LP cylinder to gas supplier.<br />
• Turn off LP cylinder valve. Remove regulator from cylinder and<br />
visually inspect rubber seal for damage. See LP Cylinder Leak Test<br />
and Connecting Regulator to the LP Cylinder.<br />
• Turn off control knobs and LP cylinder valve. Leave lid open to<br />
allow flames to die down. After fire is out and grill is cold, remove<br />
burner and inspect for spider nests or rust. See Natural Hazard<br />
and Cleaning the Burner Assembly pages.<br />
• Turn off control knobs and LP cylinder valve. Leave lid open to<br />
allow flames to die down. After cooling, clean food particles and<br />
excess grease from inside firebox area, grease tray, and other<br />
surfaces.<br />
Troubleshooting<br />
Problem<br />
Burner(s) will not light<br />
using ignitor.<br />
(See Electronic Ignition<br />
Troubleshooting also)<br />
Continued on next<br />
page.<br />
Possible Cause<br />
GAS ISSUES:<br />
• Trying to light wrong burner.<br />
• Burner not engaged with control valve.<br />
• Obstruction in burner.<br />
• No gas flow.<br />
• Vapor lock at coupling nut to LP cylinder.<br />
• Coupling nut and LP cylinder valve not<br />
fully connected.<br />
ELECTRICAL ISSUES:<br />
• Electrode cracked or broken; “sparks at<br />
crack.”<br />
• Electrode tip not in proper position.<br />
• Wire and/or electrode covered with<br />
cooking residue.<br />
• Wires are loose or disconnected.<br />
• Wires are shorting (sparking) between<br />
ignitor and electrode.<br />
• Dead battery.<br />
Prevention/Solution<br />
• See instructions on control panel and in Use and Care section.<br />
• Make sure valves are positioned inside of burner tubes.<br />
• Ensure burner tubes are not obstructed with spider webs or other<br />
matter. See cleaning section of Use and Care.<br />
• Make sure LP cylinder is not empty. If LP cylinder is not empty,<br />
refer to “Sudden drop in gas flow.”<br />
• For a grill equipped with the AUTO-CLEAN feature, make sure<br />
the AUTO-CLEAN valve is set to “Grill”<br />
• Turn off knobs and disconnect coupling nut from LP cylinder.<br />
Reconnect and retry.<br />
• Turn the coupling nut approximately one-half to three-quarters<br />
additional turn until solid stop. Tighten by hand only - do not use<br />
tools.<br />
• Replace electrode(s).<br />
Main Burners:<br />
• Tip of electrode should be pointing toward gas port opening on<br />
burner. The distance should be 1/8” to 1/4”. Adjust if necessary.<br />
Sideburner:<br />
• Tip of electrode should be pointing toward gas port opening on<br />
burner. the distance should be 1/8” to 3/16”. Adjust if necessary.<br />
• Clean wire and/or electrode with rubbing alcohol and clean swab.<br />
• Reconnect wires or replace electrode/wire assembly.<br />
• Replace ignitor wire/electrode assembly.<br />
• Replace with a new AA-size alkaline battery.<br />
27
Troubleshooting (continued)<br />
Problem<br />
Burner(s) will not light<br />
using ignitor.<br />
(See Electronic Ignition<br />
Troubleshooting also)<br />
Burner(s) will not<br />
match light.<br />
Sudden drop in gas<br />
flow or low flame.<br />
Flames blow out.<br />
Flare-up.<br />
Persistent grease fire.<br />
Possible Cause<br />
ELECTRONIC IGNITION:<br />
• No spark, no ignition noise.<br />
• No spark, some ignition noise.<br />
• Sparks, but not at electrode or at full<br />
strength.<br />
• See “GAS ISSUES:” on previous page.<br />
• Match will not reach.<br />
• Improper method of match-lighting.<br />
• Out of gas.<br />
• Excess flow valve tripped.<br />
• Vapor lock at coupling nut/LP cylinder<br />
connection.<br />
• High or gusting winds.<br />
• Low on LP gas.<br />
• Excess flow valve tripped.<br />
• Grease buildup.<br />
• Excessive fat in meat.<br />
• Excessive cooking temperature.<br />
• Grease trapped by food buildup around<br />
burner system.<br />
Prevention/Solution<br />
• See Section I of Electronic Ignition System.<br />
• See Section II of Electronic Ignition System.<br />
• See Section III of Electronic Ignition System.<br />
• Use long-stem match (fireplace match).<br />
• See “Match-Lighting” section of Use and Care.<br />
• Check for gas in LP cylinder.<br />
• Turn off knobs, wait 30 seconds and light grill. If flames are still low,<br />
turn off knobs and LP cylinder valve. Disconnect regulator.<br />
Reconnect regulator and leak-test. Turn on LP cylinder valve, wait<br />
30 seconds and then light grill.<br />
• Turn off knobs and LP cylinder valve. Disconnect coupling nut from<br />
cylinder. Reconnect and retry.<br />
• Turn front of grill to face wind or increase flame height.<br />
• Refill LP cylinder.<br />
• Refer to “Sudden drop in gas flow” above.<br />
• Clean burners and inside of grill/firebox.<br />
• Trim fat from meat before grilling.<br />
• Adjust (lower) temperature accordingly.<br />
• Turn knobs to OFF. Turn gas off at LP cylinder. Leave lid in position<br />
and let fire burn out. After grill cools, remove and clean all parts.<br />
Flashback...<br />
(fire in burner tube(s)).<br />
Unable to fill LP<br />
cylinder.<br />
One burner does not<br />
light from other<br />
burner(s).<br />
AUTO-CLEAN<br />
(If Equipped)<br />
Timer does not work<br />
(Green light does not<br />
flash)<br />
No LED’s will illuminate<br />
• Burner and/or burner tubes are blocked.<br />
• Some dealers have older fill nozzles<br />
with worn threads.<br />
• Grease buildup or food particles in<br />
end(s) of carryover tube(s).<br />
Possible Cause<br />
Dead Battery<br />
Batteries installed incorrectly.<br />
Knob Position did not start the Clean<br />
Cycle<br />
Dead Battery<br />
• Turn knobs to OFF. Clean burner and/or burner tubes. See burner<br />
cleaning section of Use and Care.<br />
• The worn nozzles don’t have enough “bite” to engage the valve. Try<br />
a second LP dealer.<br />
• Clean carry-over tube(s) with wire brush.<br />
Prevention/Solution<br />
Replace Batteries<br />
Install batteries correctly.<br />
Push Knob in to start the clean cycle. (Green LED should begin to<br />
flash)<br />
Replace Batteries<br />
Red LED next to battery<br />
symbol is illuminated<br />
Low Battery Strength<br />
Prepare to replace batteries (NOTE: Clean cycle will operate with<br />
a weak battery.<br />
28
Troubleshooting - Electronic Ignition<br />
Problem (Ignition)<br />
Possible Cause<br />
Check Procedure<br />
Prevention/Solution<br />
SECTION I<br />
No sparks appear at<br />
any electrodes when<br />
Electronic Ignition Button<br />
is pressed; no noise can<br />
be heard from spark<br />
module.<br />
• Battery not installed<br />
properly.<br />
• Dead battery.<br />
• Button assembly not<br />
installed properly.<br />
• Faulty spark module.<br />
• Check battery orientation.<br />
• Has battery been used<br />
previously<br />
• Check to insure threads are<br />
properly engaged. Button<br />
should travel up and down<br />
without binding.<br />
• If no sparks are generated<br />
with new battery and good<br />
wire connections, module is<br />
faulty.<br />
• Install battery (make sure that “+” and “–”<br />
connectors are oriented correctly, with “+” end up<br />
and “–” end down.)<br />
• Replace battery with new AA-size alkaline battery.<br />
• Unscrew button cap assembly and reinstall, making<br />
sure threads are aligned and engaged fully.<br />
• Replace spark module assembly.<br />
SECTION II<br />
No sparks appear at<br />
any electrodes when<br />
Electronic Ignition Button<br />
is pressed; noise can<br />
be heard from spark<br />
module.<br />
• Output lead<br />
connections not<br />
connected.<br />
• Are output connections on<br />
and tight<br />
• Remove and reconnect all output connections at<br />
module and electrodes.<br />
SECTION III<br />
Sparks are present<br />
but not at all<br />
electrodes and/or not<br />
at full strength<br />
• Output lead<br />
connections not<br />
connected.<br />
• Arcing to grill away<br />
from burner(s).<br />
• Are output connections on<br />
and tight<br />
• If possible, observe grill in<br />
dark location. Operate<br />
ignition system and look for<br />
arcing between output wires<br />
and grill frame.<br />
• Remove and reconnect all output connections at<br />
module and electrodes.<br />
• If sparks are observed other than from burner(s),<br />
wire insulation may be damaged. Replace wires.<br />
• Weak battery.<br />
• All sparks present but weak<br />
or at slow rate.<br />
• Replace battery with a new AA-size alkaline battery.<br />
• Electrodes are wet.<br />
• Has moisture accumulated<br />
on electrode and/or in burner<br />
ports<br />
• Use paper towel to remove moisture.<br />
• Electrodes cracked or<br />
broken “sparks at<br />
crack”.<br />
• Inspect electrodes for<br />
cracks.<br />
• Replace cracked or broken electrodes.<br />
29
30<br />
NOTES
Warranty Registration Department<br />
P.O. Box 1240<br />
Columbus, GA 31902-1240<br />
31